


Topic: AIF - 4B - 11 LHR
Battle of Romani (Battle of Aweidia)
Sinai, August 4 to 5, 1916
11th LHR, AIF, Unit History Account
[From Hammond, between p. 40 and p. 41.]
Ernest W. Hammond, in 1984, produced the unit history for the 11th LHR called the History of the 11th Light Horse Regiment, Fourth Light Horse Brigade, Australian Imperial Forces, war 1914-1919, which included a section specifically related to Smith's Column which participated in the Battle of Bir el Aweidia as part of the the Battle of Romani and is extracted below.
Hammond, EW, History of the 11th Light Horse Regiment, Fourth Light Horse Brigade, Australian Imperial Forces, war 1914-1919, (Singapore 1984)
Chapter VII
Battles of Aweidia and Bayoud
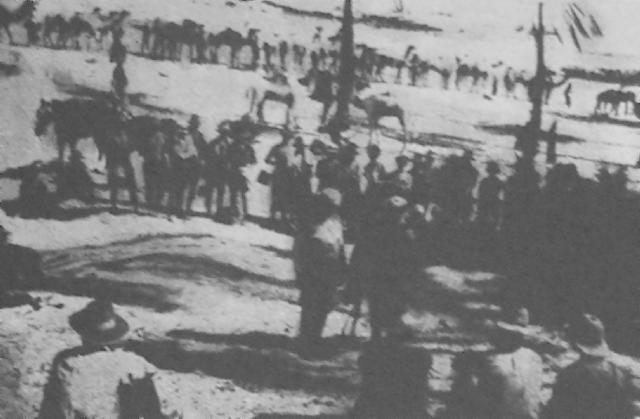
On the morning of the 7th August, the Desert Column was hastily drawn up at Mageibra and ordered to advance and attack the enemy's left flank. The column comprised the 11th Light Horse Regiment, a regiment of City of London Yeomanry, and the 4th, 6th 9th and 10th companies of the Imperial Camel Corps, all of which were under the command of Colonel CL Smith, VC. At Daybreak, we moved quietly out of the camp and advanced to Bir el Aweidia, a distance of four miles without encountering the enemy. The country here was made up of a series of small sand hills packed closely together with narrow strips of desert gorse bush filling the ravines. It was difficult country for scouting, and we realised this, a mile or so beyond Aweidia, when our advance guard, under lieutenant F Farlow, came within a hundred yards of a Turkish outpost before either party was aware of the other's presence. The Turks were too dumbfounded to offer resistance, and endeavoured to escape to their main line of defence, located on a long narrow ridge in the background. Quickly recovering from the first sharp shock of surprise, Lieutenant Farlow ordered his men to charge, and, with splendid dash, they galloped forward, capturing a number of Turks and routing the remainder.
Shortly afterwards, a time probably coincident with the arrival of the Turkish stragglers, who had escaped to their own lines, the enemy opened fire on us with shrapnel and machine guns. We estimated that he had four field batteries, twelve machine guns, and five hundred rifles, whereas we had no artillery and only four machine guns and four Lewis guns to support our rifles. We had moved very rapidly in our advance, and to such an extent, in fact, that we were out of touch with the Corps Commander's Headquarters at Jaffier. Lieutenant Colonel Grant was the senior officer in the line, and he assumed command of the column, his plan of attack being as follows:-
The 11th Regiment would make a frontal attack on the Turkish position whilst the Yeomanry, and the Imperial Camel Corps would deploy to the north and south respectively, to harass the enemy's flanks.
His position overlooked a narrow plain on which there was little cover for the purpose of an attacking force. The gullies to this plain were well covered by his artillery and machine gun fire, and it was apparent that no good purpose would be served by a direct frontal thrust. We were outnumbered when the battle commenced, and as the day wore on the enemy was heavily reinforced from the north; this information being furnished by one of our 'planes, which dropped messages at intervals throughout the day.
Communications between sections of the Regiment were maintained by flags and heliographs. In open desert country the heliograph can be used over long distances, but here, owing to the mass of small hills, observation was limited, and five or six signalling stations had to be established, where, ordinarily, two would have been sufficient. This meant a shortage of signallers, and two men were placed on stations normally occupied by three.
Stations No. 1 and No. 2, important links in the chain of communications, were controlled by Sergeant J. McElligott and Corporal G. Groundwater respectively, and both remained on duty for long periods without rest. Furthermore, by sheer ability and perseverance, they were successful in transmitting and receiving heliograph messages by moonlight, this being the first occasion when messages were transmitted in that manner with any degree of success. Next day the Corps Commander, Colonel C. L. Smith, V.C., visited both stations and congratulated Sergeant McElligott and Corporal Groundwater for their resourcefulness and devotion to duty; both were mentioned in despatches.
Our frontal attack on the enemy did not develop, and on the morning of the 8th, we withdrew and concentrated our attack on his left flank and rear left flank. We moved swiftly into the new position, and, at 10.30 a.m., the action commenced. By 12.30, the enemy began to give ground, and, shortly afterwards, retired. The Regiment had advanced a mile, fighting in dismounted order from hill to hill. Suddenly, four columns of Turks were seen retiring from high ground, near the oasis of Hod el Beheir. The horses were rushed up, and, mounting, the troopers gave chase, capturing forty prisoners.
At this time the Imperial Camel Corps arrived, taking up a position on the right of the Regiment. The combined force drove the enemy out of an entrenched position, and he retired northwards, linking up with his main force in that area. His strength was estimated at 1,500 rifles, 12 machine guns, and 6 field guns.
At 3 o'clock in the afternoon, our O.C., Lieutenant Colonel Grant, was directing operations from the brow of a sand dune, when a sniper's bullet passed through his helmet, knocking it from his head. Those who witnessed the occurrence were always eager and proud to relate how Colonel Grant stooped, without undue haste, recovered his helmet, examined the bullet hole, and, replacing his headgear, exclaimed, "My word, that was a close call."
At 5 o'clock, orders were received from Desert Column Headquarters to retire, but owing to a shortage of cacolets to convey our wounded from the scene of action, the withdrawal was not effected until nightfall. "B" Squadron, under Major Lee, covered the retirement, and the Regiment returned to Mageibra.
Our Medical Officer, Captain G. H. Vernon, worked tirelessly throughout the engagement under the most trying conditions, and frequently under fire. He was short of medical supplies, water, and transport for the wounded. On the last night of the engagement, he penetrated far beyond our lines alone, and at great personal risk bandaged a wounded man and brought him back to safety. He was awarded the Military Cross for gallantry in the field.
Captain L. S. Alexander, Adjutant of the Regiment, was severely wounded while directing an attack. Our total casualties during the engagement were one officer wounded, four other ranks killed, and four other ranks wounded.
On the 8th August the Regiment rested at Mageibra, as both men and horses were beginning to feel the strain of fighting under such fierce conditions. During the day the heat was intense; at night it was cold, while food and water were scarce. Our camp was formed in a depression at the foot of Mageibra Hill, and the only shade in the vicinity was a narrow latticed strip cast upon the sand by a -few withered date palm fronds that had been transported from an oasis fourteen miles away.
The Army Medical Corps had thoughtfully carried them along to provide a shade for the wounded. On the morning of the 9th, while the horses were being watered, an enemy 'plane bombed our camp, stampeding the horses, many of which were not recovered until several hours later. That day we left Mageibra to relieve the City of London Yeomanry, who were holding a position to the south at Hill 286, near the oasis of Hod el Bayoud. After watering our horses, we made camp with the Yeomanry, and the 4th and 10th Companies of the Imperial Camel Corps. At daybreak, three patrols under Lieutenants Koch, Gee and Stumm were sent out to reconnoitre the ground to the north-east, north, and east of our position, and shortly afterwards two companies of the Camel Corps were sent to occupy a forward position at Hod el Honoasia, the Regiment being instructed to follow when the horses were watered. In preparation for the advance, the patrols were called in, and it was found that the patrol under Lieutenant Koch had captured a Turkish sniper. The other two patrols had sighted large parties of Turks and many transport camels. There seemed to be considerable movement in and around the Turkish position. Having watered the horses, the Regiment advanced to a large dune at Hilu, and here our advance guard was attacked by the enemy. Several troops were rushed to the front• and these snipers and enemy outposts were quickly driven back. By 9.30 a.m., the Regiment occupied a position opposite the Turkish force, which held an entrenched line on the hills, south-west of Mushalfat. "A" Squadron, commanded by Major P. J. Bailey and "C" Squadron, under Major J. W. Parsons, commenced a direct frontal attack, while "B" Squadron, under Major C. A. Lee, moved to the south-east of the enemy position. The enemy had two nine-pound batteries, eight machine guns and about one thousand rifles.
The Regiment made every endeavour to come to close quarters with him, but his position was unassailable, and by 4 o'clock in the afternoon very little ground had been gained. About this time the Turk commenced a heavy counter attack, the full force being directed against our right flank, and "B" Squadron was in danger of being cut off from the rest of the line. Realising the gravity of the position, Major Bailey, by a skilful move, brought two troops of his squadron into a position which enabled them to concentrate a severe fire on the advancing Turks, thus relieving the pressure on "B" Squadron, which then withdrew.
The horses of Lieutenant Gee's troop, a troop which was fighting dismounted on the extreme right flank, were stampeded by shell fire just before the order to retire was received, and as a result this troop leader and his men were forced to escape on foot. Theirs was a narrow escape and indeed an unenviable experience. There were brief moments of doubt, when it was thought that the whole troop would either be annihilated or captured.
During the retirement, Trooper W. H. Crawford, a member of Lieut. Gee's troop, made an unsuccessful, but nevertheless praiseworthy attempt to carry a wounded comrade (Trooper McKay) from the field of action under heavy fire, delaying his own escape until the Turks were almost upon him. For this action he was awarded the Military Medal. For bravery and devotion to duty Trooper W. R. Wilson was also awarded the Military Medal.
The enemy did not follow through with his counter attack and the Regiment retired with the remainder of the column and bivouacked on high ground, south of the wells and oasis of Hod el Bayoud. During the night, Turkish reinforcements under Semi Bey marched from Maghara, a Turkish position in the north, and entrenched themselves in the high sand dunes north of the Bayoud wells.
At daybreak next morning, the Regiment prepared to water the horses. The oasis at Bayoud consisted of a small grove of palm trees nestling close under the high, steep face of a large sand dune, about four hundred yards in length and three hundred feet high. The oasis faced the enemy position, and, in order to water the horses, we were compelled to descend the sand dune in single file along a narrow camel path which struck obliquely across its steep face. One troop had reached the wells and was drawing water, when a party of Turks, who had crept unseen to a ridge two hundred yards distant, opened fire on them with machine guns and rifles. The bullets whipped up the sand, and slashed through the palm trees before our fellows were aware of the position. Prisoners, who were captured by us later that day, informed us that the Turks thought we had retired to Mageibra, and they were actually coming in to the wells to water their animals when they found us already in possession. The surprise, therefore, was mutual and complete, and it demonstrated very clearly the difficulties of the Sinai campaign, where the very nature of the country, with its sand hills packed together, prevented successful scouting and reconnaissance work.
After the first burst of enemy fire, our fellows acted quickly. Some of them raced up the narrow path to safety, whilst the remainder galloped along the foot of the hill northwards. The escape of the troop was aided by the prompt action of Lieutenant-Colonel Grant, who at once assumed command of the whole force. He despatched the Yeomanry and "B" Squadron under Major Bailey with all speed to the left flank ; the Imperial Camel Corps raced to the right flank, and the Regiment attacked with machine guns and rifles from the sand dune above the wells. The enemy replied with machine gun and rifle, curd with shrapnel from his field guns in the background. In the first few moments of the engagement the Lewis gunners of the Camel Brigade and our machine gunners picked up the enemy range, and we witnessed the utter confusion into which he was thrown. Men and animals fell side by side, and lay still. The remainder of' his force retired from their forward position in complete disorder. Dashing in pursuit, we soon covered the ground which he had lately occupied, finding 21 enemy dead, and the bodies of 37 camels and 15 mules. The pursuit was not continued beyond that point, as our horses were worn out through lack of water; and so we retired to our camp at Bayoud. Arriving there, we set about cooking our breakfast, the preparation of which had been so rudely interrupted it few hours earlier. The "fates," however, persisted in being adverse in the matter of our meal, for our bacon had hardly commenced to grow warm in the dixies when tin enemy 'plane swooped down upon our camp with machine gun and bombs. Hurriedly, the men untied heir horses from the ground lines and scattered across the desert in order to confuse the raider and offer a less conspicuous target. The raider inflicted no casualties and when he departed we were ordered to break camp and retire to Mageibra, and so we ate a meagre break fast of biscuit and jam in the saddle as we rode along. Our casualties during the engagement; were one killed, eight wounded, and one missing.
During the next two days, the Regiment rested at Mageibra, but small patrols were sent out daily to test the enemy's strength, and discover his movements.
These patrols found numerous newly-made graves, where the enemy had buried his dead. On the 13th, 14th and 15th of August enemy 'planes bombed our camp, but no direct hits were registered. On the 16th we broke camp, returning to our base at El Ferdan to reorganise, and rest both men and animals.
The light casualties suffered by us, in comparison to the heavy enemy losses, is a tribute to the brilliant field work of our commanding officer, Lieutenant Colonel Grant, and his ability as a leader of mounted troops; qualities that were to bring him fame, later, at the gates of Beersheba and beyond. He was brilliant, without being spectacular; cautious, but unafraid, and his was a steadfastness of purpose that could not be denied. Above all, he possessed an overwhelming regard for the welfare, not only of his men, but also of his horses, a characteristic that endeared him to every bushman in the "outfit."
The Aweidia and Bayoud engagements had occupied 12 days, during which our losses were five killed, 12 wounded, and one missing. The total casualties suffered by the "Flying Column" was two officers and ten other ranks killed, one officer and 37 other ranks wounded, two other ranks missing. Several horses were killed outright, or destroyed later as a result of wounds received in the field of action.
Further Reading:
Battle of Romani, Sinai, August 4 to 5, 1916
Bir el Abd, Sinai, 9 August 1916
Battles where Australians fought, 1899-1920
Citation: Battle of Romani, Sinai, August 4 to 5, 1916, 11th LHR, AIF, Unit History Account (Battle of Aweidia)
