


Topic: AIF - DMC - Scouts
Scouting or Protective and Tactical Reconnaissance, Part 4
Frederick Allan Dove
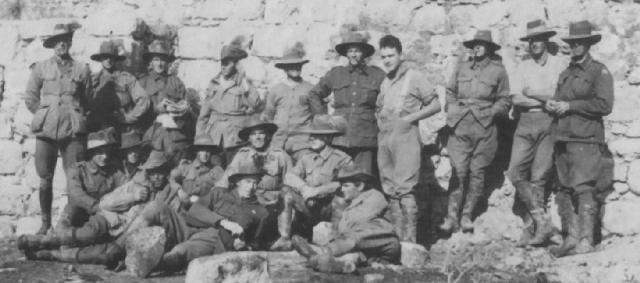
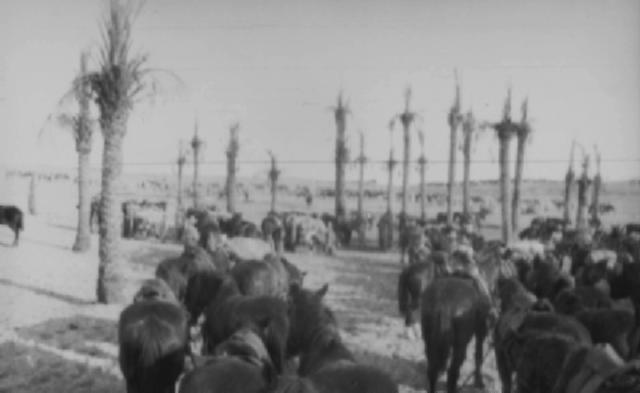
3rd Light Horse Brigade Scouts in the hills at Tripoli, December 1918
In 1910, Major Frederick Allan Dove, DSO, wrote a book on a subject he was very familiar with through practical experience called Scouting or Protective and Tactical Reconnaissance. This book set the intellectual framework for the formation of the Brigade Scouts during the Sinai and Palestine Campaigns as part of the Great War.
Dove, FA, Scouting or Protective and Tactical Reconnaissance, 1910.
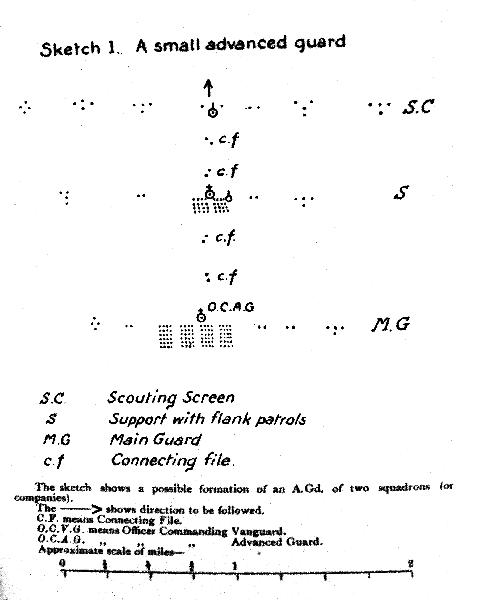
8. - The Screen Halted.
Halts are only to be ordered by the O/C. Main Body. The command will reach the Scouts through the O.C. Vanguard.
The Screen should become at once a
LINE OF OBSERVATION POSTS.
Each patrol leader selects a suitable spot, and there establishes a Cossack Post or Group with a Sentry. One or more of the remaining men may be required to watch for signals from the neighbouring groups; if not, they should rest under cover.
9. - The Supports.
The supporting troops must be kept in a formation permitting of rapid movement to any threatened point. A line of small columns is the best, because it is not very vulnerable to a sudden outburst of fire, and also permits of the utilisation of folds of the ground, &c., for purposes of concealment during the advance. When a halt is ordered the O.C. Vanguard will decide whether to close the Supports up on to the Scouts or to halt elsewhere, but in any ease he must take up a
LINE OF RESISTANCE.
The flanks should attend to the protection of their own flanks by one or two small patrols. One portion of the Supports must be named t direct. Connection maintained with the Mainguard by Connecting Files (two men each). The O.C. Vanguard would probably be with the directing portion of the Supports.
10. - The Mainguard.
The Mainguard is the fighting portion of the Advanced Guard. The Screen and Supports are there for its protection, and so that it can be kept well in hand until a true appreciation of the situation can be made. The O.C. Advanced Guard probably moves at the head of the Mainguard. Connection with the head of the Main Body is kept up by signallers or otherwise.
The Mainguard should throw out flank patrols.
11. - Patrol Formations.
Formations of patrols should be guided strictly by certain principles, and not by any fixed rules. The formation should provide forObservation,
Keeping Touch,
Communication,
Concealment,
and for the Safety of at least some of the Scouts.
It may be taken for granted that an enemy awaiting our advance will allow our Scouts to approach as close as possible to his position, in order that their capture or disablement may be ensured, and that the formed bodies in rear may be at once brought under effective fire. Every thing which tends to rigidity in the line of patrols or which restrains initiative of patrol leaders gives the enemy a distinct advantage. Therefore, normal formations, and fixed intervals and distances, must not be insisted upon.
But the possible formations in which a patrol of four men may be arranged are not many, and should be studied, practised, and adapted to the occasion as it arises.
The leader has one man near him and two flankers thrown out.
(2) T-shape thus:
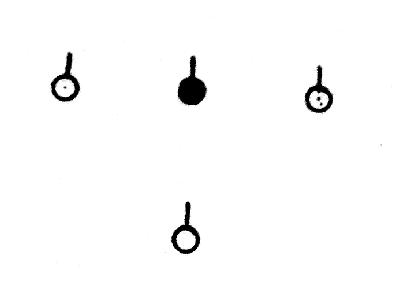
The leader has dropped one man back, but still has his flankers on either hand.
(3) V-shape thus:

The leader has one man with him and the flankers well advanced.
(4) Y-shape, thus:
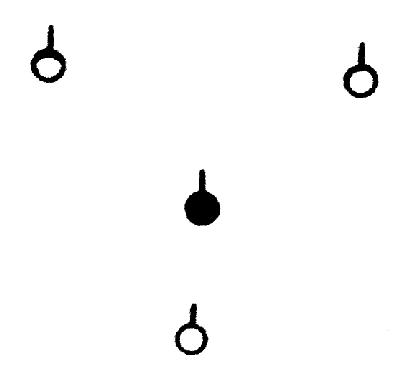
Like the V, but one man dropped back.
(5) Cross shape, thus:
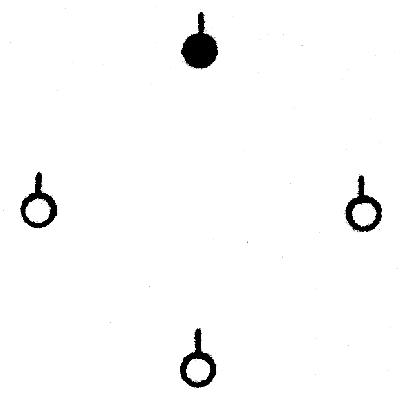
This formation the leader has gone ahead, with his flankers echeloned to the rear, and one man still further back.
(6) File, or Indian File:
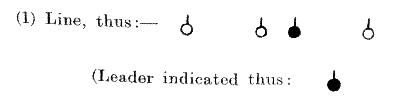
I recommend (but merely as a guide) the use of the above formations under the following circumstances:(1) Line: When a wide frontage has to be covered and the country in front can be clearly seen for some distance ; also as a preparatory formation when first extending.
(2) T and (3) V, temporary formations from line, owing to local peculiarities of ground. (2) T, places one man in reserve, as it were; (3) V, allows the leader to remain under cover observing while his flankers push ahead.
(4) Y, follows from B, or from T; it indicates suspicion of danger in from - two feelers are out, the leader is in a position of observations, anal one man is kept back out of immediate danger.
(5) Cross: This implies more danger. The leader is keeping all his men back, while he pushes on by himself to reconnoitre.
(6) File, or Indian File: For traversing hollows, gullies, etc., on a narrow front. Also to be used in thick bush or at night.
I do not wish to say anything about intervals, or distances, as these cannot be prescribed. The leader, however, should be always able to bring his men or a man up to him by a low whistle, if they are out of view, and the whole patrol must be capable of quick concentration if required. They must never concentrate in a spot exposed to view or fire from any ground which may be in the enemy's possession; cross open ground either singly or in an extended line; approach dangerous localities with one or more men kept well back.
If possible, the flankers should work round small positions affording cover before anyone approaches the front. The position of the leader should be that which gives him the best chance of doing his duty of observation.

Previous: Part 3, Communication
Next: Part 5, Co-operation of Patrols
Further Reading:
Obituary, Frederick Allan Dove
Australian Light Horse Militia
Battles where Australians fought, 1899-1920
Citation: Brigade Scouts, Scouting or Protective and Tactical Reconnaissance Part 4 Patrol Formations


