"At a mile distant their thousand hooves were stuttering thunder, coming at a rate that frightened a man - they were an awe inspiring sight, galloping through the red haze - knee to knee and horse to horse - the dying sun glinting on bayonet points..." Trooper Ion Idriess
The Australian Light Horse Studies Centre aims to present an accurate history as chroniclers of early Australian military developments from 1899 to 1920.
The Australian Light Horse Studies Centre site holds over 12,000 entries and is growing daily.
Contact:Australian Light Horse Studies CentreLet us hear your story:
You can tell your story, make a comment or ask for help on our Australian Light Horse Studies Centre Forum called:
WARNING: This site contains: names, information and images of deceased people; and, language which may be considered inappropriate today.
Sunday, 29 November 2009
The Battle of Anzac Cove, Gallipoli, 25 April 1915, New Zealand Infantry Brigade War Diary Topic: BatzG - Anzac
The Battle of Anzac Cove
Gallipoli, 25 April 1915
New Zealand Infantry Brigade War Diary
War Diary account of the New Zealand Infantry Brigade.
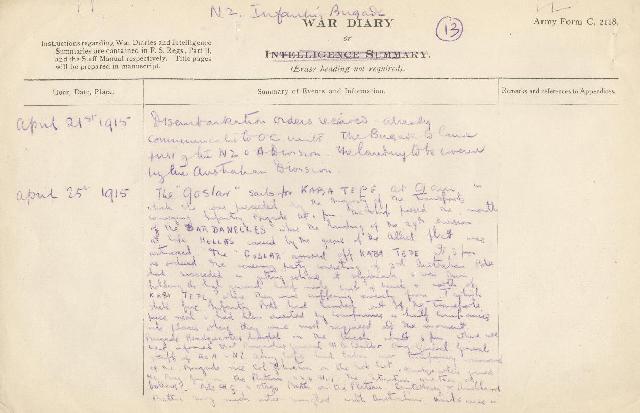
The following is a transcription of the War Diary of the 4New Zealand Infantry Brigade, of their role in the landings at Anzac on 25 April 1915.
25 April 1915
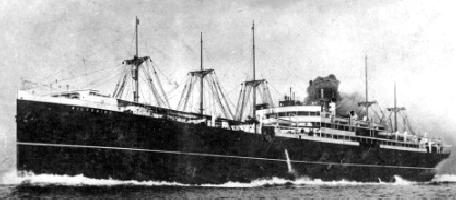
The Goslar sails for Kaba Tepe at 9 am which then was preceded by the majority of the Transport conveying Infantry Brigade at 1 pm. The ship passed the south of the Dardanelles where the landing of the 29th Division of Cape Helles covered by the guns of the Allied Fleet was witnessed. The Goslar arrived off Kaba Tepe at 3 pm had succeeded in getting ashore at daybreak and was then holding the high ground had made east of beach and north of Kaba Tepe where they are suffering severely from Turkish shell fire. Infantry Brigade had landed out of the Transports piece meal and had then directed by companies and half companies into places where they were most required. At the moment Brigade Headquarters landed on the beach about 5 pm which we were informed that Brigadier General HB Walker, Brigadier General, General Staff of the Australian and New Zealand Army Corps had taken over temporary command of the Brigade vice Colonel Fullarton on the ????, Headquarters joined the Brigadier General on the Plateau 224 H4. The situation was then as follows - Brigade Headquarters and Otago Battalion on the Plateau, Canterbury and Auckland Battalions very much intermingled with Australian units were in the front line of ?????? covering the landing. The Wellington Battalion was still on board. The troops landed were without support from any field guns. Artillery support from the Navy was first quite inadequate owing largely to the novelty of the conditions and the difficulties of observation and communication. Consequently infantry suffered severely from enemy shell fire. Between 5.45 pm and 6 pm the Otago Battalion had suffered 30 casualties on the Plateau from shell fire. Headquarters were without any information as to the disposition of the units in the front line but during the evening received several messages the general thrust of which was that the casualties were very severe everywhere that the lines had considerable gaps - then that the men had stood much punishment and were seriously disorganised. It was represented to Divisional Headquarters that the landing of field guns during the night was an absolute necessity if the position was to be maintained. During the night there was a great deal of firing and the Turks attacked in several places but the line was nowhere broken.
26 April 1915
The enemy's guns again opened with remarkable accuracy along the plateau and landing place. A Mountain Battery had been brought up to the plateau the evening before soon picked up the hostile batteries. The burst of that shrapnel gave the line to the Queen Elizabeth which succeeded in silencing the batteries for several hours.
During the night of the 25th and 26th the Wellington Battalion less half a company which was sent to extreme right of position - landed and came under the orders of Divisional Headquarters as General Reserve. Thus the whole Brigade, "A" Echelon consisting of personnel, tools, water receptacles and ammunition (200 rounds per man) were ashore. It was decided as far as possible to relieve the Auckland Battalion from the front line and concentrate it on the Plateau. Its place to be taken in the front line by ½ Otago Battalion who were to be under the orders of Colonel Maclagan.
Two companies Canterbury Battalion under Major Loach who had succeeded Lieutenant Colonel Stewart (killed in action) had gone the previous evening to reinforce 33 men of various units under Captain Salmonson who reported he was hard pressed on extreme left of line was ascertained to be holding a spur on 237 X7. The Auckland Battalion less a large number of men mixed up in other units was concentrated by the evening. The Otago Battalion less 2 Companies did not succeed in reaching the front line and entrenched in a nullah for the night. During the day it was decided to reorganise into sections. The night passed quietly on the Plateau but there was a determined attack on the Australians on the night which was repelled.
War Diaries
All War Diaries cited on this site should be read in conjunction with the Australian Light Horse Studies Centre, AIF War Diaries of the Great War, Site Transcription Policy which may be accessed at:
The Australian Light Horse, Militia and AIF, Mounted Rifle Tactics, Part 1, Preface Topic: AIF - Lighthorse
The Australian Light Horse,
Militia and AIF
Mounted Rifle Tactics, Part 1, Preface
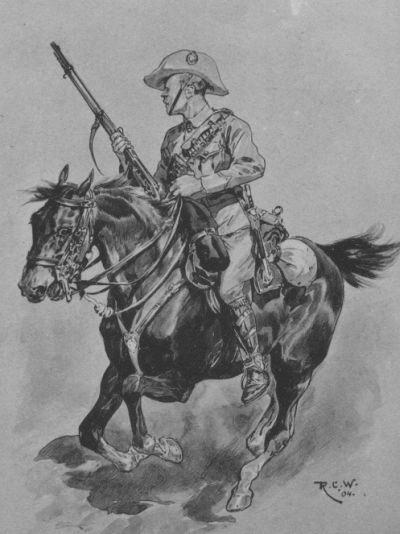
Cape Mounted Rifleman
[Drawing from 1904 by Richard Caton Woodville, 1856 - 1927.]
The following series is from an article called Mounted Rifle Tactics written in 1914 by a former regimental commander of the Cape Mounted Riflemen, Lieutenant-Colonel J. J. Collyer. His practical experience of active service within a mounted rifles formation gives strength to the theoretical work on this subject. It was the operation of the Cape Mounted Riflemen within South Africa that formed the inspiration for the theoretical foundations of the Australian Light Horse, and was especially influential in Victoria where it formed the cornerstone of mounted doctrine.
Collyer, JJ, Mounted Rifle Tactics, Military Journal, April, 1915, pp. 265 - 305:
Preface
[by Colonel Sir George Aston, K.C.B., late Brigadier General, General Staff, South Africa.]
South Africa has been called the home of the mounted rifleman.
Whilst it would obviously be inexpedient to apply purely local experiences to the conduct of the mounted arm under different conditions, and in countries not of a similar nature, it would be foolish entirely to ignore the lessons learned in South Africa. This, as we all know, is a country of vast expanses affording wide views, a country of rocky kopjes and krantzes, and of open veldt intersected by deep nullahs and sloots. M, any years of surface denudation have produced special conditions. The low ground affords good going for the horseman, while the kopjes, and even the tops of gentle undulations, are entirely denuded of soil, and consist of rocky outcrop, affording good cover for the rifleman, but uncommonly bad going for his horse. It is of fighting in such a country that this article treats.
Then, again, the course of lectures, upon which the chapters of this essay have been based, were delivered to South African officers destined to train mounted troops of a special nature; not regulars, but citizen soldiers who receive about four years' cadet training, followed by three weeks' recruit training and three subsequent annual trainings, each of about a fortnight. Under these conditions it was considered that arme blanche tactics, mounted, would be quite out of place in the course of instruction.
Colonel Collyer treats his subject under two headings. Chapters I. to V. deal with the tactics of mounted riflemen, and Chapter VI with reconnaissance. Chapter VII, on the bayonet for use by mounted riflemen [The chapter in question has already been published as a separate article in the Commonwealth Military Journal (see p. 135 of the issue for January, 1914), and is therefore omitted.] on foot, has been added in order to put before others the result of several very interesting discussions at Bloemfontein during the year 1912. These discussions were spread over several weeks, and amongst the speakers were numbered many officers who led troops successfully on both sides in the late war. British officers, Boor generals whose names figure frequently in the histories, Staats Artillerie officers, and others took part and made their points for and against the bayonet. At the close of the discussion a proposal to arm the Citizen Mounted Riflemen of South Africa with the bayonet was put to the vote, and was carried with hardly a dissentient voice.
Taken as a whole, these chapters show the lines upon which the training of the mounted branch is being conducted in South Africa, and they should be of interest in other parts of the world, as well as in South Africa itself.
4th Light Horse Regiment Colour Patch after February 1917
The 4th Light Horse Regiment was formed as Divisional Cavalry for the Australian Division. The recruits were drawn in large part from the Melbourne metropolitan area although the balance of men came from all seven Militia Regiments within the 3rd Military District which incorporated all of Victoria and part of Southern New South Wales.
One of the best sources of information available for understanding the immediate challenges facing a regiment is to be found in the Routine Orders. They are a wealth of detail. The Routine Orders provide an unvarnished history of the Regiment.
The Australian Light Horse, Militia and AIF, Mounted Rifle Tactics, Part 2, Contents Topic: AIF - Lighthorse
The Australian Light Horse,
Militia and AIF
Mounted Rifle Tactics, Part 2, Contents
Cape Mounted Rifleman
[Drawing from 1904 by Richard Caton Woodville, 1856 - 1927.]
The following series is from an article called Mounted Rifle Tactics written in 1914 by a former regimental commander of the Cape Mounted Riflemen, Lieutenant-Colonel J. J. Collyer. His practical experience of active service within a mounted rifles formation gives strength to the theoretical work on this subject. It was the operation of the Cape Mounted Riflemen within South Africa that formed the inspiration for the theoretical foundations of the Australian Light Horse, and was especially influential in Victoria where it formed the cornerstone of mounted doctrine.
Collyer, JJ, Mounted Rifle Tactics, Military Journal, April, 1915, pp. 265 - 305:
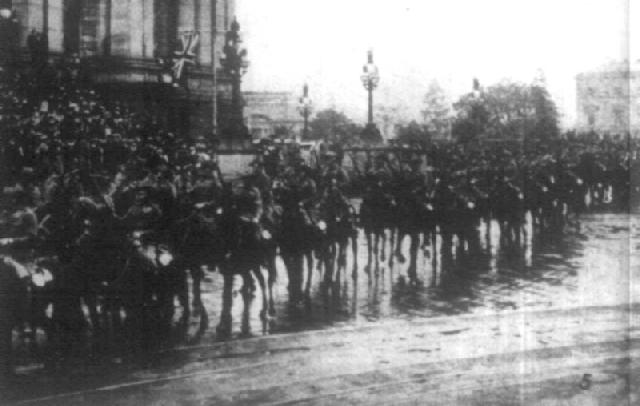
4th Light Horse taking the salute in Melbourne, September 1914
[From: The Australasian, 3 October 1914, p. 5.]
Formation
The 4th Light Horse Regiment was formed as Divisional Cavalry for the Australian Division. It was part of the 1st Contingent and raised at Broadmeadows Training Camp to the north of Melbourne, Victoria, on 11 August 1914. The recruits were drawn in large part from the Melbourne metropolitan area although the balance of men came from all seven Militia Regiments within the 3rd Military District which incorporated all of Victoria and part of Southern New South Wales. The men from New South Wales found themselves mainly in "C" Squadron. Many of the men went from the Light Horse Militia formation into the AIF Light Horse.
4th Light Horse Regiment Routine Order No 45, 1 October 1914
[Note: This is the earliest surviving 4th LHR RO. Click on page for larger version.]
Training of the 4th Light Horse Regiment occurred at Broadmeadows Training Camp from August until October 1914.
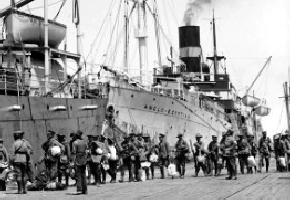
Embarkation
Embarkation of the 4th Light Horse Regiment occurred by both the HMAT A18 Wiltshire and the HMAT A25 Anglo Egyptian, departing from Melbourne, Victoria, 19 October 1914.
Twelve men selected from the Regiment were allotted to embark on the HMAT A25 Anglo Egyptian. On board the Anglo Egyptian was the Divisional Ammunition Column and the 2nd Light Horse Regiment which had embarked from Brisbane about a month before.
The 4th Light Horse Regiment sailed by convoy from Albany and passed by the action against the Emden at the Cocos Islands. The Wiltshire and Anglo Egyptian disembarked the 4th Light Horse Regiment in Egypt on 10 December 1914.
Colour Patch
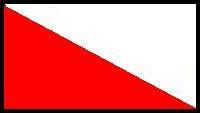
Initially, the only colour separation of the various Australian mounted troops was by use of the pennant. The marker pennants were carried on poles to mark lines troop lines in camps in Egypt. They were not lance pennants as the Australian lancers had red over white pennants on their lances.
Pennant of the 4th Light Horse Regiment
While this pennant was useful in distinguishing horse and troop lines, it failed to identify the individual with a unit. The AIF 1st Australian Division Standing Orders issued in December 1914 ordered the Australian Light Horse Regiments to wear a 4 inch wide [10.2cm] blue armband with the regiment name marked on the band in black lettering.
The earlier systems proved to be ineffective so to assist with identification of the men in the various units within the AIF, Divisional Order No 81 (A) Administration was issued at Mena on 8 March 1915 detailing the Colour Patch for the 4th Light Horse Regiment as others received their colours. The colour patch was made of cloth 1¼ inches wide and 2¾ inches long and worn on the sleeve one inch below the shoulder seam. The 4th Light Horse Regiment wore two different colour patches during the Great War.
The first colour patch for the 4th Light Horse Regiment reflected their role as Divisional Cavalry which was white over red with the triangles obverse to the brigaded regiments.
4th Light Horse Regiment Shoulder Patch for Divisional Cavalry and 3rd Camel Regiment.
After Gallipoli, the 4th Light Horse Regiment was split with "B" and "D" Squadrons going to France. These two squadrons retained the colour patch and became known as the II Anzac Corps Mounted Regiment. The 4th Light Horse Regiment remained as Divisional Cavalry until it was renamed as the 3rd Camel Regiment on 24 December 1916. It retained the colour patch as it was first awarded until allotted to the 4th Light Horse Brigade in February 1917.
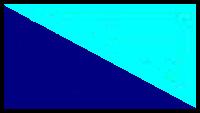
4th Light Horse Regiment Colour Patch after February 1917
The 4th Light Horse Regiment carried the dark blue Brigade colour as the lower triangle part of the colour patch, while the light blue unit colour was on the top. This is illustrated with the above presentation.
Gallipoli
As mounted troops, the Light Horse was considered to be unsuitable for work in Gallipoli. The mounted troops volunteered to operate as infantry and thus were sent to Gallipoli with the 4th Light Horse Regiment landing on 22 and 24 May. Initially the 4th Light Horse Regiment was broken up into its component squadrons which were distributed as reinforcements to the depleted infantry battalions. After 11 June 1915 the 4th Light Horse Regiment was reformed and was mainly deployed on defensive activities around Ryrie's Post. The 4th Light Horse Regiment left the peninsula on 11 December 1915.
Defence of Egypt
After the return to Egypt, the 4th Light Horse Regiment was reformed to include a forth squadron known as "D" Squadron.
Two squadrons from the 4th Light Horse Regiment, "B" and "D" Squadrons, were detailed to act as Divisional Cavalry 1st and 3rd Australian Divisions respectively and to embark with the Divisions to serve in France on the Western Front. Added to these two squadrons was a squadron from the New Zealand Regiment, the Otago Mounted Rifles. These three squadrons formed the composite regiment known as the II Anzac Corps Mounted Regiment. [See: Aus Units - 22nd Corps]
The two remaining squadrons, "A" and "C" Squadrons formed the nucleus of the 4th Light Horse Regiment which rebuilt itself with a new "B" Squadron. The 4th Light Horse Regiment moved to take part in the defence of the Suez Canal. The work was hot and monotonous. The Regiment remained in the area until after the Battle of Romani where it was involved in work related to securing the lines of communication.
On 24 December 1916, the 4th Light Horse Regiment was brigaded with the Imperial Camel Corps and received the new name of the 3rd Camel Regiment. It served in this role until the break up of the Anzac Mounted Division in February 1917. A new division was created called the Imperial Mounted Division. Included in this Division were two Australian mounted brigades, the 3rd and 4th Light Horse Brigades. The latter Brigade, the 4th Light Horse Brigade was formed with the 3rd Camel Regiment, renamed the 4th Light Horse Regiment and the 11th and 12th Light Horse Regiments. The Imperial Mounted Division was renamed the Australian Mounted Division soon after.
Palestine
The 4th Light Horse Brigade was assigned to protect the rail line and lines of communications for the first months of 1917. They missed the First Battle of Gaza but were back at the front by 6 April 1917 and took part in the Second Battle of Gaza on 19 April 1917. The 4th Light Horse Regiment took no part in this battle as they were the Brigade reserve.
In its first major battle as the 4th Light Horse Regiment, the Regiment took part in the Battle of Beersheba. Fame for the Regiment was achieved when, in conjunction with the 12th Light Horse Regiment, charged and took Beersheba, thereby sealing victory on that day for the Allied forces.
From this time onwards, for the next two months, the 4th Light Horse Regiment remained in continuous combat action until relieved for three months refit and training at Deir el Belah from early January 1918.
In early April 1918, the 4th Light Horse Regiment moved into the Jordan Valley and took part in the Es Salt Raid of 30 April – 4 May 1918 guarding the routes into Moab. This was a near disastrous situation where the Turkish forces almost cut off the Australian Mounted Division in the hills.
Megiddo
In a move that converted the Light Horse into full cavalry, the Australian Mounted Division was issued with swords during August and early September 1917. The Australian Mounted Division went to work training with swords and undertaking cavalry work.
On 19 September 1918 the Battle of Megiddo began. The infantry over ran the Turkish defensive trenches allowing the cavalry to debouch into the Turkish hinterland. The 4th Light Horse Regiment participated in the breakthrough which moved rapidly through the north of Palestine. At the end of the first week, it was obvious that the way to Damascus was open and so a second push occurred on the heels of the first assault. On 1 October 1918, Damascus was taken. There is contention as to whom was the first to reach inside the city. A 4th Light Horse Regiment patrol led by Sergeant Frank Organ claimed to be amongst the first allied troops to enter Damascus. However, while this patrol was entering, the 3rd Light Horse Brigade was receiving the surrender of the city at the Sarai.
After a rest in Damascus, the 4th Light Horse Regiment moved towards Homs when the Turks surrendered on 30 October 1918.
Return to Australia
After the conclusion of hostilities, the 4th Light Horse Regiment was awaited their return to Australia. During their wait, one of the saddest actions occurred for the Australian Lighthorsemen; they had to farewell their best friends, the horses. All the Light Horse unit horses' health was ascertained with the fit horses being transferred to the Indian Cavalry while those in poor condition were destroyed by the Veterinary units. On 8 March 1919 the 4th Light Horse Regiment embarked to Egypt. Here they remained to assist in suppressing the Egyptian Uprising. When the revolt collapsed, the 4th Light Horse Regiment embarked on the 15 June 1919 for the long voyage to Australia where the unit was disbanded.
Commanding Officers
Lieutenant Colonel John Kealty Forsyth Lieutenant Colonel Leonard Long Lieutenant Colonel Murray William James Bourchier Lieutenant Colonel George James Rankin
Decorations earned by the 4th Light Horse Regiment
4 DSO and 1 Bar - Distinguished Service Orders
1 OBE - Order of the British Empire
6 MC and 1 Bar - Military Crosses
14 DCM - Distinguished Conduct Medals
46 MM and 1 Bar - Military Medals
1 MSM - Meritorious Service Medal
31 MID - Mentioned in Despatches
4 foreign awards
Campaigns
Gallipoli
Anzac
Defence at Anzac
Suvla
Sari Bair
Gallipoli 1915-1916
Egypt
Defence of Egypt 1915-1917
Palestine
Third Battle of Gaza
Beersheba
El Mughar
Nebi Samwill
Jerusalem
Es Salt
Abu Tellul
Megiddo
Nablus
Palestine 1917-1918
France
Messines 1917
Ypres 1917
Broodseinde
Passchendaele
Lys
Kemmel
Marne 1918
Tardenois
France and Flanders 1916-1918
Casualties suffered by the 4th Light Horse Regiment
[Note: Gallipoli, Egypt, Sinai and Palestine only.]
105 killed
332 wounded
War Diary
The Australian War Memorial has put these on line and may be accessed here:
The following list details all the embarkations in support of the 4th Light Horse Regiment, AIF, during the Great War. Each entry details the individual soldier's: rank on embarkation; full name; Declared age; last occupation held; last address as a civilian; enlistment Date; and, ultimate fate. Each man is linked to a brief military biography where ever possible. One interesting point is that many of the men listed in the embarkation roll for the 4th Light Horse Regiment ended up in a different unit altogether. This list details the men's starting point in the AIF.
The Australian Light Horse Studies Centre is a not for profit and non profit group whose sole aim is to write the early history of the Australian Light Horse from 1900
- 1920. It is privately funded and the information is provided by the individuals within the group and while permission for the use of the material has been given for this
site for these items by various donors, the residual and actual copyright for these items, should there be any, resides exclusively with the donors. The information on
this site is freely available for private research use only and if used as such, should be appropriately acknowledged. To assist in this process, each item has a citation
attached at the bottom for referencing purposes.
Please Note: No express or implied permission is given for commercial use of the information contained within this site.
A note to copyright holders
The Australian Light Horse Studies Centre has made every endeavour to contact copyright holders of material digitised for this blog and website and where
appropriate, permission is still being sought for these items. Where replies were not received, or where the copyright owner has not been able to be traced, or where
the permission is still being sought, the Australian Light Horse Studies Centre has decided, in good faith, to proceed with digitisation and publication. Australian Light
Horse Studies Centre would be happy to hear from copyright owners at any time to discuss usage of this item.