« June 2004 »
S M T W T F S
1 2 3 4 5
6 7 8 9 10 11 12
13 14 15 16 17 18 19
20 21 22 23 24 25 26
27 28 29 30
You are not logged in. Log in


Search the site:


powered by FreeFind
Volunteer with us.

Entries by Topic All topics  
A Latest Site News
A - Using the Site
AAA Volunteers
AAB-Education Centre
AAC-Film Clips
AAC-Photo Albums
AIF & MEF & EEF
AIF - Lighthorse
AIF - ALH - A to Z
AIF - DMC
AIF - DMC - Or Bat
AIF - DMC - Anzac MD
AIF - DMC - Aus MD
AIF - DMC - British
AIF - DMC - BWI
AIF - DMC - French
AIF - DMC - Indian
AIF - DMC - Italian
AIF - DMC - Medical
AIF - DMC - Remounts
AIF - DMC - Scouts
AIF - DMC - Sigs
AIF - DMC - Sigs AirlnS
AIF - DMC - 1 Sig Sqn
AIF - DMC - 2 Sig Sqn
AIF - DMC - Eng
AIF - DMC - Eng 1FSE
AIF - DMC - Eng 2FSE
AIF - DMC - GSR
AIF - 1B - 1 LHB
AIF - 1B - 6 MVS
AIF - 1B - 1 LHMGS
AIF - 1B - 1 Sig Trp
AIF - 1B - 1 LHFA
AIF - 1B - 1 LHR
AIF - 1B - 2 LHR
AIF - 1B - 3 LHR
AIF - 2B - 2 LHB
AIF - 2B - 7 MVS
AIF - 2B - 2 LHFA
AIF - 2B - 2 LHMGS
AIF - 2B - 2 Sig Trp
AIF - 2B - 5 LHR
AIF - 2B - 6 LHR
AIF - 2B - 7 LHR
AIF - 3B - 3 LHB
AIF - 3B - 8 MVS
AIF - 3B - 3 LHB Sigs
AIF - 3B - 3 LHFA
AIF - 3B - 3 LHMGS
AIF - 3B - 3 Sig Trp
AIF - 3B - 8 LHR
AIF - 3B - 9 LHR
AIF - 3B - 10 LHR
AIF - 4B - 4 LHB
AIF - 4B - 4 Sig Trp
AIF - 4B - 9 MVS
AIF - 4B - 4 LHFA
AIF - 4B - 4 LHMGS
AIF - 4B - 4 LHR
AIF - 4B - 11 LHR
AIF - 4B - 12 LHR
AIF - 5B - 5 LHB
AIF - 5B - 10 MVS
AIF - 5B - 5 LHFA
AIF - 5B - 5 Sig Trp
AIF - 5B - ICC
AIF - 5B - 14 LHR
AIF - 5B - 15 LHR
AIF - 5B - 1er Regt
AIF - 5B - 2 NZMGS
AIF - AASC
AIF - Aboriginal LH
AIF - Badges
AIF - Cars
AIF - Chinese LH
AIF - Double Sqns
AIF - Engineers
AIF - Fr - 22 Corps
AIF - Fr - 13 LHR
AIF - Honour Roll
AIF - HQ - 3rd Echelon
AIF - Marching Songs
AIF - Misc Topics
AIF - NZMRB
AIF - NZMRB - AMR
AIF - NZMRB - CMR
AIF - NZMRB - EFT
AIF - NZMRB - NZMFA
AIF - NZMRB - NZMGS
AIF - NZMRB - OMR
AIF - NZMRB - Sig-Trp
AIF - NZMRB - WMR
AIF - Ships
AIF - Ships - Encountr
AIF - Ships - Una
AIF - WFF
AIF - Wireless Sqn
Battles
BatzA - Australia
BatzA - Broken Hill
BatzA - Liverpool
BatzA - Merivale
BatzB - Boer War
BatzB - Bakenlaagte
BatzB - Belmont
BatzB - Bothaville
BatzB - Buffels Hoek
BatzB - Coetzees Drift
BatzB - Diamond Hill
BatzB - Driefontein
BatzB - Elands
BatzB - Graspan
BatzB - Grobelaar
BatzB - Grootvallier
BatzB - Hartebestfontn
BatzB - Houtnek
BatzB - Karee Siding
BatzB - Kimberley
BatzB - Koster River
BatzB - Leeuw Kop
BatzB - Mafeking
BatzB - Magersfontein
BatzB - Modder River
BatzB - Onverwacht
BatzB - Paardeberg
BatzB - Palmietfontein
BatzB - Pink Hill
BatzB - Poplar Grove
BatzB - Rhenoster
BatzB - Sannahs Post
BatzB - Slingersfontn
BatzB - Stinkhoutbm
BatzB - Sunnyside
BatzB - Wilmansrust
BatzB - Wolvekuil
BatzB - Zand River
BatzG - Gallipoli
BatzG - Anzac
BatzG - Aug 1915
BatzG - Baby 700
BatzG - Evacuation
BatzG - Hill 60
BatzG - Hill 971
BatzG - Krithia
BatzG - Lone Pine
BatzG - Nek
BatzJ - Jordan Valley
BatzJ - 1st Amman
BatzJ - 2nd Amman
BatzJ - Abu Tellul
BatzJ - Es Salt
BatzJ - JV Maps
BatzJ - Ziza
BatzM - Mespot
BatzM - Baghdad
BatzM - Ctesiphon
BatzM - Daur
BatzM - Kurna
BatzM - Kut el Amara
BatzM - Ramadi
BatzN - Naval
BatzN - AE1
BatzN - Cocos Is
BatzN - Heligoland
BatzN - Marmara
BatzN - Zeebrugge
BatzN - Zeppelin L43
BatzNG - Bitapaka
BatzO - Other
BatzO - Baku
BatzO - Egypt 1919
BatzO - Emptsa
BatzO - Karawaran
BatzO - Peitang
BatzO - Wassa
BatzP - Palestine
BatzP - 1st Gaza
BatzP - 2nd Gaza
BatzP - 3rd Gaza
BatzP - Aleppo
BatzP - Amwas
BatzP - Ayun Kara
BatzP - Bald Hill
BatzP - Balin
BatzP - Beersheba
BatzP - Berkusieh
BatzP - Damascus
BatzP - El Auja
BatzP - El Buggar
BatzP - El Burj
BatzP - Haifa
BatzP - Huj
BatzP - JB Yakub
BatzP - Kaukab
BatzP - Khan Kusseir
BatzP - Khuweilfe
BatzP - Kuneitra
BatzP - Megiddo
BatzP - Nablus
BatzP - Rafa
BatzP - Sasa
BatzP - Semakh
BatzP - Sheria
BatzP - Surafend
BatzP - Wadi Fara
BatzS - Sinai
BatzS - Bir el Abd
BatzS - El Arish
BatzS - El Mazar
BatzS - El Qatiya
BatzS - Jifjafa
BatzS - Magdhaba
BatzS - Maghara
BatzS - Romani
BatzS - Suez 1915
BatzSe - Senussi
BatzWF - Westn Front
BW - Boer War
BW - NSW
BW - NSW - 1ACH
BW - NSW - 1NSWMR
BW - NSW - 2NSWMR
BW - NSW - 3ACH
BW - NSW - 3NSWIB
BW - NSW - 3NSWMR
BW - NSW - 5ACH
BW - NSW - A Bty RAA
BW - NSW - AAMC
BW - NSW - Aust H
BW - NSW - Lancers
BW - NSW - NSW Inf
BW - NSW - NSWCBC
BW - NSW - NSWIB
BW - NSW - NSWMR_A
BW - NZ
BW - Qld
BW - Qld - 1ACH
BW - Qld - 1QMI
BW - Qld - 2QMI
BW - Qld - 3ACH
BW - Qld - 3QMI
BW - Qld - 4QIB
BW - Qld - 5QIB
BW - Qld - 6QIB
BW - Qld - 7ACH
BW - QLD - AAMC
BW - SA
BW - SA - 1SAMR
BW - SA - 2ACH
BW - SA - 2SAMR
BW - SA - 3SACB
BW - SA - 4ACH
BW - SA - 4SAIB
BW - SA - 5SAIB
BW - SA - 6SAIB
BW - SA - 8ACH
BW - SA - AAMC
BW - Tas
BW - Tas - 1ACH
BW - Tas - 1TIB
BW - Tas - 1TMI
BW - Tas - 2TB
BW - Tas - 2TIB
BW - Tas - 3ACH
BW - Tas - 8ACH
BW - Vic
BW - Vic - 1VMI
BW - Vic - 2ACH
BW - Vic - 2VMR
BW - Vic - 3VB
BW - Vic - 4ACH
BW - Vic - 4VIB
BW - Vic - 5VMR
BW - Vic - 6ACH
BW - Vic - AAMC
BW - Vic - Scot H
BW - WA
BW - WA - 1WAMI
BW - WA - 2ACH
BW - WA - 2WAMI
BW - WA - 3WAB
BW - WA - 4ACH
BW - WA - 4WAMI
BW - WA - 5WAMI
BW - WA - 6WAMI
BW - WA - 8ACH
BW Gen - Campaign
BW Gen - Soldiers
BW General
Cavalry - General
Diary - Schramm
Egypt - Heliopolis
Egypt - Mena
Gen - Ataturk Pk, CNB
Gen - Australia
Gen - Legends
Gen - Query Club
Gen - St - NSW
Gen - St - Qld
Gen - St - SA
Gen - St - Tas
Gen - St - Vic
Gen - St - WA
Gm - German Items
Gm - Bk - 605 MGC
GW - 11 Nov 1918
GW - Atrocities
GW - August 1914
GW - Biographies
GW - Propaganda
GW - Spies
GW - We forgot
Militia 1899-1920
Militia - Area Officers
Militia - Inf - Infantry
Militia - Inf - 1IB
Militia - Inf - 2IB
Militia - Inf - 3IB
Militia - Inf - NSW
Militia - Inf - Qld
Militia - Inf - SA
Militia - Inf - Tas
Militia - Inf - Vic
Militia - Inf - WA
Militia - K.E.Horse
Militia - LH
Militia - LH - Regts
Militia - LH - 1LHB
Militia - LH - 2LHB
Militia - LH - 3LHB
Militia - LH - 4LHB
Militia - LH - 5LHB
Militia - LH - 6LHB
Militia - LHN - NSW
Militia - LHN - 1/7/1
Militia - LHN - 2/9/6
Militia - LHN - 3/11/7
Militia - LHN - 4/6/16
Militia - LHN - 5/4/15
Militia - LHN - 6/5/12
Militia - LHN - 28
Militia - LHQ - Qld
Militia - LHQ - 13/2
Militia - LHQ - 14/3/11
Militia - LHQ - 15/1/5
Militia - LHQ - 27/14
Militia - LHS - SA
Militia - LHS - 16/22/3
Militia - LHS - 17/23/18
Militia - LHS - 24/9
Militia - LHT - Tas
Militia - LHT - 12/26
Militia - LHV - Vic
Militia - LHV - 7/15/20
Militia - LHV - 8/16/8
Militia - LHV - 9/19
Militia - LHV - 10/13
Militia - LHV - 11/20/4
Militia - LHV - 19/17
Militia - LHV - 29
Militia - LHW - WA
Militia - LHW-18/25/10
Militia - Military Orders
Militia - Misc
MilitiaRC - Rifle Clubs
MilitiaRC - NSW
MilitiaRC - NT
MilitiaRC - Qld
MilitiaRC - SA
MilitiaRC - Tas
MilitiaRC - Vic
MilitiaRC - WA
Militiaz - New Zealand
Tk - Turkish Items
Tk - Army
Tk - Bks - Books
Tk - Bks - 1/33IR
Tk - Bks - 27th IR
Tk - Bks - Air Force
Tk - Bks - Yildirim
Tk - POWs
Wp - Weapons
Wp - Hotchkiss Cav
Wp - Hotchkiss PMG
Blog Tools
Edit your Blog
Build a Blog
RSS Feed
View Profile
Open Community
Post to this Blog
Site Index
Education Centre
LH Militia
Boer War
Transport Ships
LH Battles
ALH - Units
ALH - General
Aboriginal Light H
Weapons
Ottoman Sources

"At a mile distant their thousand hooves were stuttering thunder, coming at a rate that frightened a man - they were an awe inspiring sight, galloping through the red haze - knee to knee and horse to horse - the dying sun glinting on bayonet points..." Trooper Ion Idriess

The Australian Light Horse Studies Centre aims to present an accurate history as chroniclers of early Australian military developments from 1899 to 1920.

The Australian Light Horse Studies Centre site holds over 12,000 entries and is growing daily.

Contact: Australian Light Horse Studies Centre

Let us hear your story: You can tell your story, make a comment or ask for help on our Australian Light Horse Studies Centre Forum called:

Desert Column Forum

WARNING: This site contains: names, information and images of deceased people; and, language which may be considered inappropriate today.

Saturday, 5 June 2004
Australian Light Horse - Full Index, Embarkation Roll: PAB to PAS
Topic: AIF - ALH - A to Z

ALH, AIF

Australian Light Horse - Full Index

Embarkation Roll: PAB to PAS


The following is an alphabetical roll of all members of the Australian Light Horse, AIF who are known to have embarked overseas during the Great War.

Each man is detailed on this reference list with the following information:

First Names;

Family Name;

If applicable, any false name employed; and,

Embarkation unit.


Notes

Note 1: All soldiers’ names are linked to the specific unit and date when embarkation occurred. By utilising the link, upon the Embarkation Roll is a brief military biography of the individual. Also on the page are details and picture of the ship in which embarkation occurred for that specific soldier.

Note 2: There are duplications of some names in the following list. The reason for this is that the soldier embarked on more than one occasion. This was the simplest way of resolving the problem of multiple entries for a single individual.

Note 3: In comparing this roll with the official Embarkation Rolls published by the Department of Defence during the Great War, it will be noticed that some names are absent. The reason for this lies in the fact that when the official Embarkation Rolls were compiled, last minute absentees for one reason or another were recorded as embarking whereas in actuality, no embarkation occurred. In addition, there are other names that have been included that do not appear in the official Embarkation Rolls and yet they embarked with that particular group.


Finding more about a service person.


Embarkation Roll: PAB to PAS


Frederick William PABST, 12th Light Horse Regiment

Wesley Thomas PACE, 8th Light Horse Regiment

James Edgar PACEY, 2nd Light Horse Regiment

Herbert PACINI, Light Horse Signal Reinforcements

William Longford PACKENHAM, 1st Light Horse Regiment

Alfred Percival PACKER, 3rd Light Horse Regiment

Ernest Coombe PACKER, Imperial Camel Corps Brigade

Oliver Douglas PACKER, 3rd Light Horse Regiment

Percy Frederick PACKER, 5th Light Horse Regiment

Clive Lawrence PACKHAM, Imperial Camel Corps Brigade

James William PACKMAN, 1st Light Horse Field Ambulance

Joseph Ralph PADDICK, 9th Light Horse Regiment

Melville Henry PADDICK, 3rd Light Horse Regiment

Carl Victor PADDISON, 1st Light Horse Regiment

Percy John PADDISON, 7th Light Horse Regiment

Vernier Roy PADDOCK, Light Horse Signal Reinforcements

Lester Osborne PADMAN, 10th Light Horse Regiment

Albert Edley PAGE, 6th Light Horse Regiment

Albert James PAGE, 10th Light Horse Regiment

Albert Samuel PAGE, 6th Light Horse Regiment

Alfred PAGE, 4th Light Horse Regiment

Alwin PAGE, 4th Light Horse Field Ambulance

Charles PAGE, 5th Light Horse Regiment

Charles Donaldson PAGE, 13th Light Horse Regiment

Douglas PAGE, 11th Light Horse Regiment

Edward Fowler PAGE, Light Horse Signal Reinforcements

Edward James PAGE, 11th Light Horse Regiment

Edwin Arthur PAGE, 8th Light Horse Regiment

Francis Robert PAGE, 1st Australian Wireless Squadron

Frank Henry PAGE, Imperial Camel Corps Brigade

Frederick PAGE, General Service Reinforcements

George Raymond PAGE, 4th Light Horse Regiment

Harry PAGE, 9th Light Horse Regiment

Henry PAGE, Light Horse Signal Reinforcements

Herbert Samuel Cope PAGE, 7th Light Horse Regiment

Hugh Murray PAGE, 5th Light Horse Regiment

John Patrick PAGE, 7th Light Horse Regiment

Leslie William PAGE, 2nd Light Horse Regiment

Osman Gladstone Waldeman PAGE, 2nd Light Horse Regiment

Palmer William PAGE, 3rd Light Horse Signal Troop

Sydney George PAGE, 3rd Light Horse Regiment

Wilfred PAGE, 8th Light Horse Regiment

William PAGE, 9th Light Horse Regiment

William Menzies PAGE, 4th Light Horse Regiment

William Stanley PAGE, 3rd Light Horse Regiment

William Stewart PAGE, 7th Light Horse Regiment

Clifford Francis PAGET, 4th Light Horse Regiment

Percy George PAGET, 9th Light Horse Regiment

Albert PAGETT, 6th Light Horse Regiment

James Samuel Burnard PAGETT, 12th Light Horse Regiment

Alfred Fraser PAGNEIZ, 3rd Light Horse Signal Troop

Charles Sydney PAIGE, 9th Light Horse Regiment

Lionel Frederick PAIN, 8th Light Horse Regiment

Arthur Roy PAINE, 7th Light Horse Regiment

Frederick John PAINE, 12th Light Horse Regiment

Leslie Charles PAINE, Imperial Camel Corps Brigade

John PAINTER, 6th Light Horse Regiment

Herbert PAINTON, 2nd Light Horse Regiment

Leslie William PAISLEY, 10th Light Horse Regiment

Selwyn Addy PAISLEY, 10th Light Horse Regiment

Alexander PAKES, General Service Reinforcements

Pasquale PALAGINO, 4th Light Horse Regiment

Pasquale PALAGINO, Imperial Camel Corps Brigade

Frederick Godfrey PALFREYMAN, General Service Reinforcements

Frank Holden PALLETT, 2nd Light Horse Field Ambulance

Alan Dexter PALMER, 9th Light Horse Regiment

Albert Edward PALMER, 12th Light Horse Regiment

Alfred Clifford PALMER, 14th Light Horse Regiment

Cecil Spunner PALMER, 5th Light Horse Regiment

Claude PALMER, 3rd Light Horse Regiment

Forrest Edward PALMER, 10th Light Horse Regiment

Frederick PALMER, 2nd Light Horse Regiment

George Hodgetts PALMER, 13th Light Horse Regiment

Henry Geoffrey PALMER, 10th Light Horse Regiment

Henry Montague PALMER, 2nd Light Horse Regiment

Herbert PALMER, 9th Light Horse Regiment

Herbert Victor PALMER, 13th Light Horse Regiment

James Ernest PALMER, 5th Light Horse Regiment

John Dudley Godrich PALMER, 10th Light Horse Regiment

Keith PALMER, 12th Light Horse Regiment

Maxwell PALMER, General Service Reinforcements

Reginald Nutfield PALMER, 11th Light Horse Regiment

Roger PALMER, 8th Light Horse Regiment

Samuel George PALMER, 6th Light Horse Regiment

Solomon PALMER, 1st Light Horse Regiment

Stuart Norman PALMER, 8th Light Horse Regiment

Thomas PALMER, 3rd Light Horse Regiment

Thomas Ambrose PALMER, 7th Light Horse Regiment

Valentine Pool PALMER, 11th Light Horse Regiment

Warren Clive PALMER, 10th Light Horse Regiment

William Lindsay PALMES, 2nd Light Horse Regiment

Joseph PALMIER, 2nd Light Horse Field Ambulance

Ralph Lee PALTRIDGE, 2nd Light Horse Regiment

William George PAMPHILON, 4th Light Horse Regiment

Christopher William PANKHURST, 5th Light Horse Regiment

George Robert PANTER, 7th Light Horse Regiment

Charles Willis PAPPIN, 13th Light Horse Regiment

William Herbert PAPPIN, 8th Light Horse Regiment

George Leopold PAPPS, 3rd Light Horse Regiment

Robert Adlem PAPPS, 3rd Light Horse Regiment

Herman John PAPROTH, 8th Light Horse Regiment

William Thomas PAPWORTH, Imperial Camel Corps Brigade

Robert Leslie PARANCE, 1st Light Horse Regiment

Ray Victor PARASIERS, 9th Light Horse Regiment

Wilfred Arol PARBERY, 1st Light Horse Regiment

Rudolph Heinrick Edward PARBS, 3rd Light Horse Regiment

Charles Roger Frank PARBURY, 1st Light Horse Regiment

Ernest Lescombe PARDEY, 3rd Light Horse Regiment

George Frederick William Augustus PARDON, 13th Light Horse Regiment

Ernest Frederick PARDY, 4th Light Horse Regiment

Cecil James PARGETER, 3rd Light Horse Signal Troop

William PARGETER, 5th Light Horse Regiment

Alfred Justin PARHAM, 3rd Light Horse Regiment

Albert Cecil PARISH, 6th Light Horse Regiment

Arthur James PARISH, 9th Light Horse Regiment

Charles Burrell PARK, 11th Light Horse Regiment

Colin Gibson PARK, 1st Light Horse Regiment

James PARK, 13th Light Horse Regiment

James Shaw PARK, 11th Light Horse Regiment

Leslie Andrew PARK, 3rd Light Horse Regiment

Thomas Tait PARK, 3rd Light Horse Regiment

Tom PARK, 7th Light Horse Regiment

Jesse Lilburne PARKE, General Service Reinforcements

Stanley Ernest PARKE, 10th Light Horse Regiment

Abraham Wesley PARKER, 10th Light Horse Regiment

Alfred PARKER, 1st Light Horse Regiment

Alfred PARKER, 9th Light Horse Regiment

Charles Allen PARKER, 5th Light Horse Regiment

Charles Henry James PARKER, 6th Light Horse Regiment

Charles Joseph PARKER, 10th Light Horse Regiment

Christopher John PARKER, 7th Light Horse Regiment

Donald PARKER, 1st Light Horse Regiment

Edgar PARKER, 14th Light Horse Regiment

Edward PARKER, 9th Light Horse Regiment

Eustace Cyprian PARKER, 6th Light Horse Regiment

Frank PARKER, 7th Light Horse Regiment

Frederick William PARKER, 9th Light Horse Regiment

George Henry PARKER, 2nd Light Horse Regiment

George Washington PARKER, 9th Light Horse Regiment

Gerald Stanley PARKER, 10th Light Horse Regiment

Gilbert Alexander PARKER, 1st Australian Wireless Squadron

Harold Leslie PARKER, 11th Light Horse Regiment

Harry PARKER, 5th Light Horse Regiment

Herbert Hamilton PARKER, 1st Light Horse Regiment

Herbert Hamilton PARKER, 8th Light Horse Regiment

Herbert Lawrence PARKER, 1st Light Horse Field Ambulance

Herbert Thomas PARKER, 3rd Light Horse Regiment

Hilton Joseph PARKER, 6th Light Horse Regiment

Hilton Thomas PARKER, 7th Light Horse Regiment

Howard Ephriam PARKER, 2nd Light Horse Regiment

Jack PARKER, 4th Light Horse Regiment

James Patrick PARKER, Imperial Camel Corps Brigade

James Robert PARKER, 10th Light Horse Regiment

John PARKER, 2nd Light Horse Regiment

John PARKER, 9th Light Horse Regiment

John Hilton PARKER, 6th Light Horse Regiment

John James PARKER, 11th Light Horse Regiment

Kenneth Alexander PARKER, 2nd Light Horse Regiment

Lawrence Joseph PARKER, 7th Light Horse Regiment

Leonard George PARKER, 4th Light Horse Regiment

Leslie Herbert PARKER, 3rd Light Horse Field Ambulance

Leslie Richard PARKER, 1st Light Horse Regiment

Matthew PARKER, 2nd Light Horse Regiment

Matthew PARKER, 2nd Light Horse Regiment

Michael John PARKER, 11th Light Horse Regiment

Percy PARKER, 5th Light Horse Regiment

Reginald PARKER, 3rd Light Horse Regiment

Reginald PARKER, 9th Light Horse Regiment

Richard Austin PARKER, 11th Light Horse Regiment

Roydon Lacy PARKER, 6th Light Horse Regiment

Stanley James PARKER, 11th Light Horse Regiment

Sydney Francis PARKER, 2nd Light Horse Regiment

Trevor PARKER, 5th Light Horse Regiment

Vincent Leo PARKER, 10th Light Horse Regiment

Walter Lucas Dillon PARKER, 8th Light Horse Regiment

Walter Richard PARKER, 7th Light Horse Regiment

William Charles PARKER, 7th Light Horse Regiment

William George PARKER, General Service Reinforcements

William James PARKER, 1st Light Horse Brigade

William John James PARKER, 3rd Light Horse Field Ambulance

Albert Edward PARKES, 6th Light Horse Regiment

Alfred PARKES, 7th Light Horse Regiment

Charlie PARKES, 11th Light Horse Regiment

David PARKES, 3rd Light Horse Regiment

David PARKES, 6th Light Horse Regiment

Edmund Fraser PARKES, 8th Light Horse Regiment

Edward Alfred PARKES, 1st Light Horse Regiment

Ernest Cecil PARKES, 8th Light Horse Regiment

Frederick Vance PARKES, 7th Light Horse Regiment

John PARKES, 9th Light Horse Regiment

Joseph PARKES, 2nd Light Horse Signal Troop

Randle Guy PARKES, 12th Light Horse Regiment

Robert Scott PARKES, General Service Reinforcements

Stanley Ernest PARKES, 6th Light Horse Regiment

Stanley Thomas PARKES, 3rd Light Horse Field Ambulance

William Joseph PARKES, 2nd Light Horse Regiment

Elton James PARKHILL, 12th Light Horse Regiment

Charles Robert PARKIN, Cable Signal Section

Edward PARKIN, 1st Light Horse Regiment

Herbert PARKIN, Imperial Camel Corps Brigade

John PARKIN, 4th Light Horse Regiment

Richard Theodore PARKIN, 7th Light Horse Regiment

Alfred James PARKINS, 6th Light Horse Regiment

George James PARKINS, 10th Light Horse Regiment

Mervyn Henry PARKINS, 1st Light Horse Regiment

Milton Roy PARKINS, 1st Light Horse Regiment

Clarence Roy PARKINSON, 4th Light Horse Regiment

Ernest John PARKINSON, 4th Light Horse Regiment

George Maynard PARKINSON, 10th Light Horse Regiment

James PARKINSON, 13th Light Horse Regiment

James PARKINSON, 7th Light Horse Regiment

James PARKINSON, Imperial Camel Corps Brigade

John James PARKINSON, 1st Light Horse Regiment

Robert Roxley PARKINSON, 1st Light Horse Regiment

Edmund Alfred PARKS, 7th Light Horse Regiment

Lloyd Arnold PARKS, General Service Reinforcements

John Baptist PARLATO, 6th Light Horse Regiment

Ernest Albert PARMINTER, 1st Light Horse Regiment

Arthur Phillip PARMITER, 9th Light Horse Regiment

Herbert Edward PARNABY, 1st Light Horse Regiment

Frederick Douglas PARNELL, General Service Reinforcements

Richard Slee PARNELL, 10th Light Horse Regiment

Benjamin James PARNHAM, 11th Light Horse Regiment

Arthur Joseph Cameron PARR, 5th Light Horse Regiment

John William PARR, 7th Light Horse Regiment

Thomas John PARR, 8th Light Horse Regiment

Urban PARR, 12th Light Horse Regiment

Andrew PARRETT, 12th Light Horse Regiment

John PARRETT, 12th Light Horse Regiment

Francis Bernard PARRI, 11th Light Horse Regiment

Francis Bernard PARRI, 9th Light Horse Regiment

Oliver James Wesley PARRISH, 14th Light Horse Regiment

Roland Walter PARRISH, 2nd Light Horse Regiment

Edmund George PARROTT, 2nd Light Horse Regiment

Edmund George PARROTT, 2nd Light Horse Regiment

Ernest Alfred PARROTT, 4th Light Horse Regiment

Abiah PARRY, 10th Light Horse Regiment

Charles Allard PARRY, 13th Light Horse Regiment

Edward PARRY, 11th Light Horse Regiment

Edward Evans PARRY, 10th Light Horse Regiment

Gwydir Balford PARRY, 5th Light Horse Regiment

John William Henry PARRY, 7th Light Horse Regiment

John Williams PARRY, Imperial Camel Corps Brigade

Robert Norman PARRY, 6th Light Horse Regiment

Walter Claude PARRY, Imperial Camel Corps Brigade

Wilfred James PARRY, 3rd Light Horse Regiment

John Leo PARSELL, 8th Light Horse Regiment

Frank Thornbury PARSEY, 3rd Light Horse Regiment

Louis John PARSLOW, 1st Light Horse Regiment

Edmund PARSONAGE, General Service Reinforcements

Thomas PARSONAGE, 11th Light Horse Regiment

Warford John PARSONAGE, Imperial Camel Corps Brigade

Albert Edward PARSONS, General Service Reinforcements

Albert Edward Seymorne PARSONS, 10th Light Horse Regiment

Alfred PARSONS, 13th Light Horse Regiment

Aubrey Reginald PARSONS, 1st Australian Wireless Squadron

Charles Hartley PARSONS, 1st Light Horse Regiment

Frank William PARSONS, 11th Light Horse Regiment

George Edward PARSONS, 1st Light Horse Regiment

Hamilton PARSONS, General Service Reinforcements

Harry PARSONS, 7th Light Horse Regiment

Harry Meshach PARSONS, 9th Light Horse Regiment

Harry Meshash PARSONS, 9th Light Horse Regiment

James Luke PARSONS, 13th Light Horse Regiment

John PARSONS, 8th Light Horse Regiment

John Vincent PARSONS, 5th Light Horse Regiment

John William PARSONS, 11th Light Horse Regiment

Leslie PARSONS, 10th Light Horse Regiment

Maurice PARSONS, 12th Light Horse Regiment

Oliver Robert PARSONS, 12th Light Horse Regiment

Oliver Robert PARSONS, 1st Light Horse Regiment

Phillip PARSONS, 7th Light Horse Regiment

Rex Whaddon PARSONS, Light Horse Signal Reinforcements

Robert William PARSONS, 1st Light Horse Regiment

Russell PARSONS, 3rd Light Horse Regiment

Sidney Frederick PARSONS, 8th Light Horse Regiment

Stanley Egbert PARSONS, 3rd Light Horse Regiment

Victor Francis PARSONS, 9th Light Horse Regiment

Victor Francis PARSONS, 9th Light Horse Regiment

William Albert PARSONS, 8th Light Horse Regiment

William Clement PARSONS, 3rd Light Horse Regiment

William Stewart PARSONS, 9th Light Horse Regiment

Harry PARTINGTON, 9th Light Horse Regiment

Thomas James PARTINGTON, 8th Light Horse Regiment

Walter PARTIS, 13th Light Horse Regiment

Clarence David PARTRIDGE, 6th Light Horse Regiment

Henry PARTRIDGE, 9th Light Horse Regiment

John Edward PARTRIDGE, Light Horse Reinforcements

Jonathan Charles PARTRIDGE, 11th Light Horse Regiment

Norman Sydney PARTRIDGE, 6th Light Horse Regiment

Robert William Cyril PARTRIDGE, 1st Light Horse Brigade

William James PARTRIDGE, 9th Light Horse Regiment

Harold Richard PASCAL, 8th Light Horse Regiment

Robert Anthony PASCO, 13th Light Horse Regiment


Previous: OLL to OZA

Next:  PAS to PEE


Sources Used:

National Archives Service File.

Embarkation Roll, AWM8, Class 10, Light Horse.

Nominal Roll, AWM133, Nominal Roll of Australian Imperial Force who left Australia for service abroad, 1914-1918 War.

Collected Records of Steve Becker.


Acknowledgement: Many thanks to Steve Becker who provided much of the raw material that appears in this item.


Further Reading:

Australian Light Horse - Full Index

The Light Horse

Battles where Australians fought, 1899-1920


Citation: Australian Light Horse - Full Index, Embarkation Roll: PAB to PAS

Posted by Project Leader at 12:01 AM EADT
Updated: Friday, 8 October 2010 6:36 AM EADT
The Battle of Sunnyside, South Africa, 1 January 1900, Times Account, 3 January 1900
Topic: BatzB - Sunnyside

South African (Second Boer) War 

The Battle of Sunnyside, South Africa, 1 January 1900

Times Account, 3 January 1900


The Times, 3 January 1900, p. 3


The transcription:

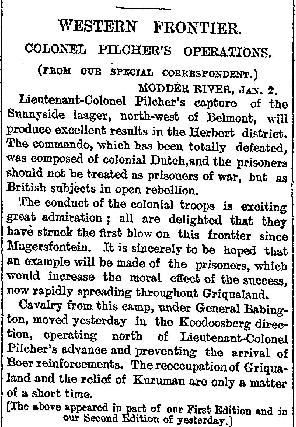
WESTERN FRONTIER.

COLONEL PILCHER'S OPERATIONS.

MODDER RIVER, JAN. 2.


Lieutenant-Colonel Pilcher's capture of the Sunnyside laager, north-west of Belmont, will produce excellent results in the Herbert district. The commando, which has been totally defeated, was composed of colonial Dutch, and the prisoners should not be treated as prisoners of war, but as British subjects in open rebellion.

The conduct of the colonial troops is exciting great admiration; all are delighted that they have struck the first blow on this frontier since Magersfontein. It is sincerely to be hoped that an example will be made of the prisoners, which would increase the moral effect of the success, now rapidly spreading throughout Griqualand.

Cavalry from this camp, under General Babington, moved yesterday in the Koodoosberg direction, operating north of Lieutenant-Colonel Pilcher's advance and preventing the arrival of Boer reinforcements. The reoccupation of Griqualand and the relief of Kuruman are only a matter of a short time.


The following is the conclusion of Reuter's despatch from Dover Farm regarding the capture of the Boer laager at Sunnyside, the first portion of which appeared in The Tunes of yesterday:


DOVER FARM, Jan. 1.

While B Company of the Queenslanders kept moving along the left among kopjes strewn with big stones, carefully using every bit of cover, A Company advanced along the ridges. The Boers kept up a sustained fire all the time, but, as they could see none of their assailants, no harm was done.

By about 2 o'clock in the afternoon B Company had completely worked round the left kopje and A had reached the backbone of the ridge. The latter were steadily advancing, when the fire of the enemy suddenly ceased and a party of 35 Boers hoisted a white flag and immediately surrendered to A Company.

The position was now taken. A portion of the Torontos moved across in front of the guns and entered the Boer laager. The bulk of the enemy's force had fled. Fourteen tents, three wagons, and a great store of rifles and ammunition, as well as saddles, forage, and camp equipment, fell into our hands. We also found numerous incriminating papers. Many of the envelopes were stamped with the words “On her Majesty's Service," and had evidently been used by the newly appointed Landdrost of Douglas in the absence of an official Free State superscription.

The loss of the Boers besides prisoners was six killed and about 12 wounded.

The affair was altogether a success. The best dispositions were made, and the Boers were beaten at their own game. The Torontos stood a galling fire with admirable patience and spent never a shot unnecessarily. Captain Bell, in charge of their Maxim, and Captain Belham, directing the Queenslanders' machine gun, did good work. Major Bayly, of the Queensland contingent, also rendered good service, and every one was full of praise of Lieutenant Ryan's
handling of the mounted infantry.


DOUGLAS, Jan. 2, 7 20 p.m.

The British flag is again flying over Douglas, and the arrival of Colonel Pilcher's column has restored confidence among the inhabitants. Yesterday's engagement resulted in the entire dispersal of the rebels, who for the past six weeks have been governing the country. Their leaps: was occupied mostly by British subjects, who, or the arrival of a Free State commando, which was probably invited, threw in their lot with the enemy, terrorizing the loyalists, who are now jubilant that the day of freedom has arrived.

Last night we encamped on Dover Farm, the proprietor of which fled. The Toronto company remained in the enemy's laager and joined the main body in the morning, bringing the whole of the Boer tents and wagon loot. Shortly afterwards the Cornwalls, under Major Ashby, marched into camp, having performed a splendid march across the veldt. At 10 o'clock the force started for Douglas, leaving the Cornwalls to garrison the farm. The Queenslanders furnished scouts and formed the advance guard. They were followed by the guns, which were escorted by mounted infantry. The Toronto company brought up the rear, riding in wagons.

At 12 o'clock natives reported that Douglas was unoccupied. Colonel Pilcher had sent a letter last night to Mr. Warner, the Landdrost, announcing his intention of marching on Douglas, and threatening all rebels bearing arms with just punishment. Those surrendering, he added, would be handed over to the civil authorities.

At 1 o'clock the force watered six miles from Douglas and, after s brief halt, continued its march. Various reports were received, chiefly from natives, that the enemy would attempt to make a stand. Consequently, Colonel Pilcher on approaching Douglas extended the Queenslanders, who gradually worked their way to the outskirts of the town, which is situated y in a hollow. Colonel Ricardo sent forward a small advance patrol, which was greeted with loud cheers on entering the place.

An extraordinary scene ensued. The inhabitants were in a frenzy of delight. They crowded round the soldiers, shaking hands with them, and their enthusiasm was increased when they learned that their deliverers were Australians and Canadians as well as Imperial troops.

All the troops were received with deafening cheers. The enthusiasm reached a climax when Colonel Pilcher appeared. Such a welcome has seldom been seen.

The inhabitants stated that the Landdrost left is at 10 o'clock last night with the whole of the mounted rebels. The unmounted men, who are described as having been in a state of extreme terror, are reported to have intrenched themselves in the vicinity.

Colonel Pilcher's column succeeded completely in its object, the rebels in this district having it been dispersed once and for all. The loyalists have now a feeling of security, while the hasty departure of all the Dutch, even the women and children, shows how great was the effect of the march.

The Union Jack was hoisted by a band of loyal natives and the State flag was pulled down immediately on the arrival of the column. A quantity of ammunition and a large number of letters showing the entire organization of the district were captured. As I write the ammunition is being burned.


A telegram has been received at the War Office from the General at Cape Town, dated January 2, which says:-

January 2.-Methuen's Cavalry Brigade in support of and in communication with Pilcher's a reconnaissance to Douglas watching Koodoos Drift.


Further Reading:

The Battle of Sunnyside, South Africa, 1 January 1900

The Battle of Sunnyside, South Africa, 1 January 1900, Roll of Honour

South African (Second Boer) War

Battles where Australians fought, 1899-1920


Citation: The Battle of Sunnyside, South Africa, 1 January 1900, Times Account, 3 January 1900

Posted by Project Leader at 12:01 AM EADT
Updated: Tuesday, 4 January 2011 1:49 PM EAST
Sunnyside, 1 January 1900, Chamberlain Account
Topic: BatzB - Sunnyside

South African (Second Boer) War 

The Battle of Sunnyside, South Africa, 1 January 1900

Chamberlain Account


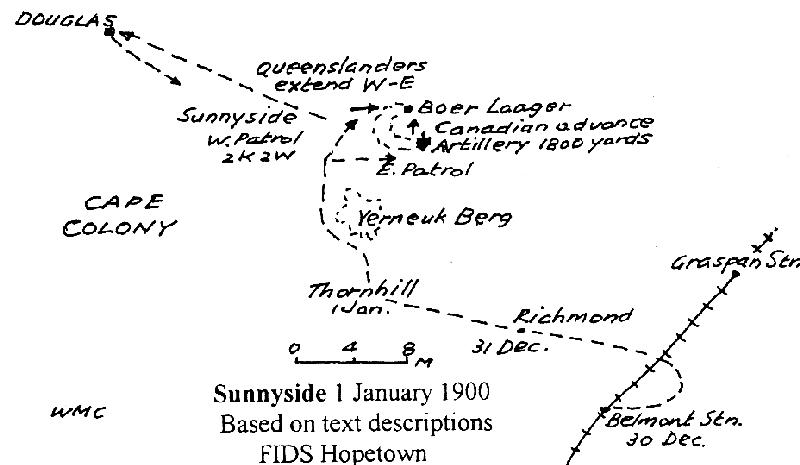
Map 54, Sunnyside, 1 January 1900.


The following account is extracted from Max Chamberlain's book called The Australians in the South African War 1899 - 1902, A Map History, published by Army history Unit in Canberra, 1999. This section is called Map 54.


SUNNYSIDE 1 JANUARY 1900

When it became known that Cape Rebels were operating in the area west of Belmont, Lt Col T Pilcher conducted a raid to remove them. To deceive the spies who reported every British move, the Flying Column of 200 QMI, 100 Canadian infantry in waggons, 40 Royal Munster Fusiliers MI, P Battery RHA and NSW AMC headed east on 29 December 1899 before crossing the railway to Richmond Farm on the 31st and marching west to Thornhill Farm. Pilcher detained all natives encountered under guard.

On 1 January 1900 the column left Thornhill before daybreak and moved north in the direction of Sunnyside Kopjes in several parallel groups which joined up at Verneukberg. A shower of rain prevented dust rising to disclose their presence. The column headed west of the chain of kopjes running north to Sunnyside from Thornhill. Two patrols of QMI headed to east and west of Sunnyside Hill to ascertain the position of the laager. The western patrol ran into Boer fire and had two men killed and two wounded. Troopers V S Jones and D C McLeod were the first Australians in this war to die in battle.

P Battery, RMFMI and the Canadians were sent to the eastern flank and took up a position suitable for the artillery to the north and east of the Boer camp. At 1,800 yards the battery fired. The QMI extended east to west and moved northward. The Canadians moved toward the laager between the guns and the main advance of the Queenslanders.

The Boer camp was at the north-east corner of a horseshoe shaped feature. One company of QMI was sent to the left and was hotly engaged, a detachment was on the higher slope of the ridge and another in support. The Canadians moved forward into the open under heavy fire from rebels being driven from west to east by the Queenslanders. The Queensland reserve was sent in from the southern spur of the horseshoe in time to assist in the capture of 40 prisoners. The enemy retreated towards Douglas and the action was over by 4pm.

Pilcher pursued to Dover Farm, 7 miles distant, leaving the Canadians in charge of the prisoners and the NSW AMC to tend the wounded. Pilcher entered Douglas, then on 3 January retired on Belmont with prisoners and a convoy after burning the enemy's ammunition. This first major operation by the Australians in this war showed the British ability to assist the loyal residents beleaguered by rebels.


Bibliography

Chamberlain, M., The Australians in the South African War 1899 - 1902, A Map History, Army history Unit, Canberra, 1999.


Further Reading:

The Battle of Sunnyside, South Africa, 1 January 1900

South African (Second Boer) War

Battles where Australians fought, 1899-1920


Citation: Sunnyside, 1 January 1900, Chamberlain Account

Posted by Project Leader at 12:01 AM EADT
Updated: Sunday, 9 May 2010 1:04 PM EADT
23rd Australian (Barossa) Light Horse, 1913
Topic: Militia - LHS - 17/23/18

23rd ALH

23rd Australian (Barossa) Light Horse

1913

Adelaide Cavalry Squadron [1841 - 1844]
Adelaide Mounted Rifles [1844 - 1899]

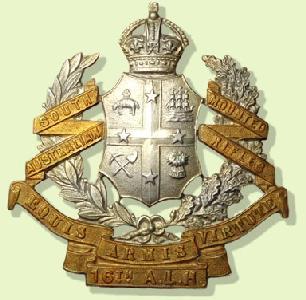
South Australian Mounted Rifles, 1899-1903
17th Australian (South Australian Mounted Rifles) Light Horse Regiment, 1903-1912
23rd (Barossa) Australian Light Horse Regiment, 1912-1919
18th Adelaide Lancers, 1919-1935
18th Light Horse Machine Gun Regiment (Adelaide Lancers), 1935-1942
18th Motor Regiment (Adelaide Lancers), 1942-1943
 

Equis Armis Virtute - By Horses, arms and Virtue

 South Africa 1899 - 1902

Allied with: King Edward's Horse (The King's Overseas Dominions Regiment).


District

Central South Australia

Brigade

8th Brigade

Headquarters

Adelaide

Honorary Colonel

The Right Honorable Algernon Hawkins Thogond Keith-Falconer Earl of Kintore, PC, GCMG.
Commanding Officer
Lieutenant Colonel Thomas Hancock,  5 October 1908, Tenure of Command from 1 July 1912 to 30 June 1917.

Second in Command

Major Reginald Robert Baldwin,  15 January 1912.

Adjutant

Lieutenant Horace George Viney, Army and Instructional Staff, 1 March 1912.

Quartermaster

Captain Diedrich Heinrich Schmidt, Honorary Major, 18 June 1904.

Medical Officer

Captain Charles Ernest Cameron Wilson, 1 December 1913.

Veterinary Officer

Captain Frederick Murray-Jones, 19 December 1913.


Area Officers 

Major David Fulton, 1 August 1913.

Captain Francis Charles Siekmann, Boer War Veteran, 12 October 1908.


Machine Gun Section

Adelaide
Second Lieutenant Walter Andrew Read, 1 July 1913.


"A" Squadron, Adelaide - Magill

Major Bentley Sievewright Connor, 17 June 1912.

Captain Horace Gilbert Willcox, 23 December 1912.

Lieutenant Roland Ellis Jacobs, 16 April 1913.

Second Lieutenant Halcombe Ferrier Brock, 30 August 1909.

Second Lieutenant Clive Bleechmore, 11 March 1912.

Second Lieutenant Algernon Sheppard Lindsay, 28 October 1912.

Second Lieutenant William Percival Allen Lapthorne, 1 September 1913.


"B" Squadron, Prospect - Tea Tree Gully - Two Wells - Smithfield - Gawler

Captain Thomas Anglesey Siekmann, 23 December 1912.

Second Lieutenant Edward Theodore Pascoe, 13 March 1911.

Second Lieutenant William Charles Kelly, 23 December 1912.

Second Lieutenant George Stafford Hayman, 31 January 1913.

Second Lieutenant Alexander John Cowan, 16 February 1913.


"C" Squadron, Burra - Hamley Bridge - Riverton - Kapunda

Second Lieutenant Lancelot Ashley Lewis, 18 November 1912.

Second Lieutenant Edmund Ross James, 31 January 1913.

Second Lieutenant Oswald Hatchard Castine, 31 January 1913.

Second Lieutenant John Cave Killicoat, Boer War Veteran, 16 February 1913.


Previous: 23rd Australian (South Australian Mounted Rifles) Light Horse, December 1912

Next:  23rd Australian (Barossa) Light Horse, 1914


Further Reading:

17th/23rd/18th Australian Light Horse

Militia Light Horse, South Australia

Australian Militia Light Horse


Citation: 23rd Australian (Barossa) Light Horse, 1913

Posted by Project Leader at 12:01 AM EADT
Updated: Friday, 4 June 2010 5:12 PM EADT
22nd Australian (South Australian Mounted Rifles) Light Horse, 1913
Topic: Militia - LHS - 16/22/3

22nd A (SAMR) LH

22nd Australian (South Australian Mounted Rifles) Light Horse Regiment

1913

Adelaide Cavalry Squadron [1841 - 1844]
Adelaide Mounted Rifles [1844 - 1899]
South Australian Mounted Rifles [1899 - 1903]
16th Australian Light Horse Regiment [1903 - 1912]
22nd Australian Light Horse Regiment [1912 - 1919]
3rd Australian Light Horse Regiment [1919 - 1942]
3rd Reconnaissance Company [1942 - 1952]
3rd/9th South Australian Mounted Rifles [1919 - 1943]
3rd/9th South Australian Mounted Rifles [1952 - ]

Equis Armis Virtute - By Horses, arms and Virtue

 South Africa 1899 - 1902

Allied with: King Edward's Horse (The King's Overseas Dominions Regiment).


District

Southern South Australia
Brigade
8th Brigade
Headquarters
Adelaide
Honorary Colonel
The Right Honorable Algernon Hawkins Thogond Keith-Falconer Earl of Kintore, PC, GCMG.
Commanding Officer 
Lieutenant Colonel Frank Milton Rowell, Boer War Veteran, 29 May 1913, Tenure of Command from 29 May 1913 to 28 May 1918.
Adjutant 
Captain Charles Philip Butler, 1 July 1913.
Quartermaster 
Honorary Lieutenant Thomas Robert Richards, 18 March 1912.
Medical Officer
Major Frederick David Jermyn, VD, Boer War Veteran, 14 February 1910.
Veterinary Officer
Vacant.
Area Officers
Lieutenant Park Alexander McEdward Laurie, 13 August 1908.

Lieutenant George King, 1 July 1912.
 
Machine Gun Section
Adelaide

Lieutenant John Gregory Prior, 15 January 1912.
 
 
"A" Squadron, Reynella - McLaren Vale - Glenelg - Mitcham.
Major Carew Reynell, 18 November 1912.

Lieutenant Frederick Henson Trott, 18 December 1911.

Lieutenant Harry Meshach Parsons, 12 February 1912.

Second Lieutenant Albert Mason, 23 November 1908.

Second Lieutenant Miles Francis DeGrave Sells, 7 August 1911.

Second Lieutenant Ira Robert Adams, 11 September 1911.

Second Lieutenant Frank Lindsay Gordon Smith, 11 December 1911.
 
 
"B" Squadron, Narracoorte - Kingston - Victor Harbor - Yankallila - Bordertown - Murray Bridge - Mount Barker.
Captain Emil Frederick Feuerheerdt, VD, 29 November 1909.

Second Lieutenant Herbert Robert Hawthorn Mattinson, 22 July 1910.

Second Lieutenant Thomas George Marshall, 25 March 1912.

Second Lieutenant Frederick John Kidman, 25 March 1912.

Second Lieutenant Charles Frederick Barnett, 9 December 1912.
 
 
"C" Squadron, Mount Gambier - Millicent.
Captain Edgar Frank Barnett, 1 July 1913.

Lieutenant Francis Michael White, 18 December 1911.

Second Lieutenant Graham Major, 9 October 1911.

Second Lieutenant William August Henry Nitschke, 19 February 1912.


Previous: 22nd Australian (South Australian Mounted Rifles) Light Horse, December 1912

Next: 22nd Australian (South Australian Mounted Rifles) Light Horse, 1914


Further Reading:

16th/22nd/3rd Australian (South Australian Mounted Rifles) Light Horse

Militia Light Horse, South Australia

Australian Militia Light Horse


Citation: 22nd Australian (South Australian Mounted Rifles) Light Horse, 1913

Posted by Project Leader at 12:01 AM EADT
Updated: Sunday, 6 June 2010 1:57 PM EADT

Newer | Latest | Older

Full Site Index


powered by FreeFind
Let us hear your story: You can tell your story, make a comment or ask for help on our forum.

Desert Column Forum

A note on copyright

The Australian Light Horse Studies Centre is a not for profit and non profit group whose sole aim is to write the early history of the Australian Light Horse from 1900 - 1920. It is privately funded and the information is provided by the individuals within the group and while permission for the use of the material has been given for this site for these items by various donors, the residual and actual copyright for these items, should there be any, resides exclusively with the donors. The information on this site is freely available for private research use only and if used as such, should be appropriately acknowledged. To assist in this process, each item has a citation attached at the bottom for referencing purposes.

Please Note: No express or implied permission is given for commercial use of the information contained within this site.

A note to copyright holders

The Australian Light Horse Studies Centre has made every endeavour to contact copyright holders of material digitised for this blog and website and where appropriate, permission is still being sought for these items. Where replies were not received, or where the copyright owner has not been able to be traced, or where the permission is still being sought, the Australian Light Horse Studies Centre has decided, in good faith, to proceed with digitisation and publication. Australian Light Horse Studies Centre would be happy to hear from copyright owners at any time to discuss usage of this item.

Contact

Australian Light Horse Studies Centre

eXTReMe Tracker