"At a mile distant their thousand hooves were stuttering thunder, coming at a rate that frightened a man - they were an awe inspiring sight, galloping through the red haze - knee to knee and horse to horse - the dying sun glinting on bayonet points..." Trooper Ion Idriess
The Australian Light Horse Studies Centre aims to present an accurate history as chroniclers of early Australian military developments from 1899 to 1920.
The Australian Light Horse Studies Centre site holds over 12,000 entries and is growing daily.
Contact:Australian Light Horse Studies CentreLet us hear your story:
You can tell your story, make a comment or ask for help on our Australian Light Horse Studies Centre Forum called:
WARNING: This site contains: names, information and images of deceased people; and, language which may be considered inappropriate today.
Wednesday, 4 June 2008
Australian Society, 1899 - 1920, General Items, William Willis Snr and William Willis Jr Topic: Gen - Australia
Australian Society, 1899 - 1920
General Items
William Willis Snr and William Willis Jr
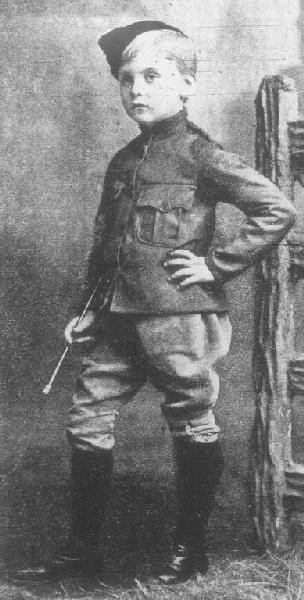
William Willis Jr
[From: Sydney Mail, 9 June 1900, p. 1358]
This little 6 year old tyke is dressed in the same uniform as his father who recently left for South Africa. It was a father son relationship that lasted through thick and thin.
The son is William Willis, born 1894.
The father was William Willis. When the picture was taken, 1613 Gunner William Willis, 'A' Battery, Royal Australian Artillery departed for South Africa.
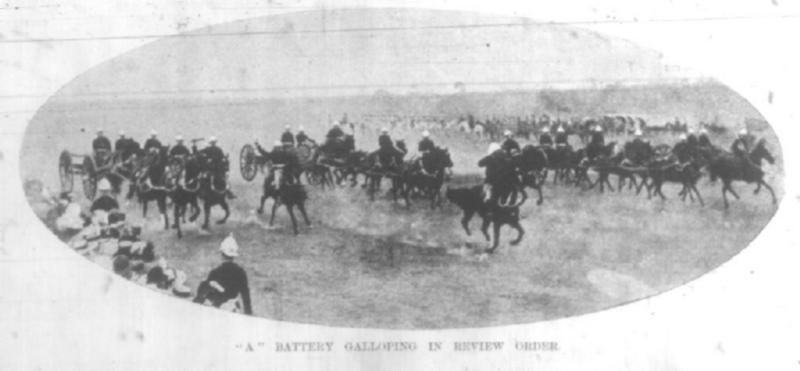
And here is a picture of A Battery - Willis is amongst this group - but unfortunately cannot be identified.
"A" Battery in Review.
[From: Sydney Mail, 30 December 1899, p. 1623.]
However, on the day, one could be sure young William could identify his father.
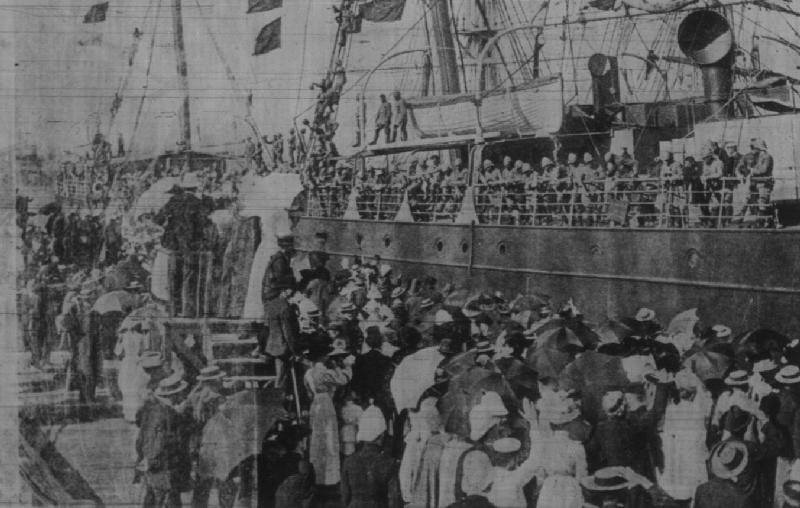
Here is the wharfside farewell at Sydney for "A" Battery. This is Central Wharf seeing the departure of HT Warrigal.
HT Warrigal departing from Central Wharf.
[From: Sydney Mail, 6 January 1900, p. 30.]
That wasn't the end of Gunner William Willis' service. He remained in the artillery as a permanent soldier. The family lived at 19 Comber Street, Paddington, just a quick walk away from Victoria Barracks. Also just a quick walk to Bent Street.
During the Great War, Willis Snr enlisted in the 7th FAB and served in Egypt, Gallipoli and France. He was invalided from the AIF in 1918.
His son, Willis Jr enlisted in the AIF in 1915 and served as a driver with the 5th DAC until his father claimed him for the 7th FAB. He reutned to Australian in 1919.
After the war, we know that Willis Snr claimed a pension in 1932 while Jnr claimed one in 1957.
Australian Society, 1899 - 1920, General Items, Dick Ponsonby from Tamworth Topic: Gen - Australia
Australian Society, 1899 - 1920
General Items
Dick Ponsonby from Tamworth
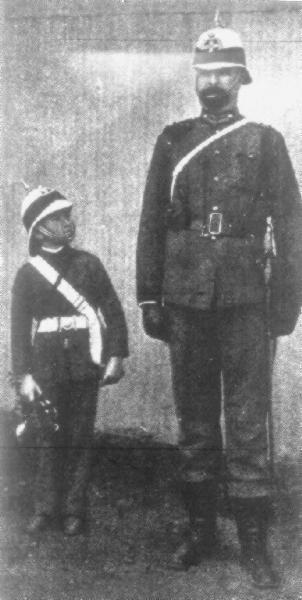
Dick Ponsonby and Captain Nankervis
[From: Sydeny Mail, 29 June 1901, p. 1632.]
While reading through the newspapers, various pictures of people and incidents occasionally appear that sparks curiosity.
For instance, it used to be the fashion to dress young lads up as soldiers - they hadn't heard of Spider Man at that time. Many of the time these young lads come onto the pages of the newspapers of the time. Looking at them leads a person to wonder whatever happened to the fellow.
One young boy featured in the Sydney Mail was Dick Ponsonby from Tamworth. Here is the standard comparative picture taken at the time. He was photographed standing next to Captain Nankervis of the 4th Infantry Regiment who is one of the tallest men around the area standing at about 2m in height.
Harold Richard Ponsonby was born at Tamworth in 1889. His parents were John and Helen Ponsonby. Dick Ponsoby's connection to the Boer War was by way of his uncle. nearby Tamworthat the town of Pillaga, William Richard Ponsonby, a policeman, enlisted as a Lieutenant with Thorneycroft's Mounted Infantry, and rode with "D" Squadron. At Colenso he was Mentioned in Despatches. This is around the time the picture was taken so one can only assume that this is Dick Ponsonby emulating his uncle's activity.
Harold Richard Ponsonby died in an accident in 1908, soon after he turned 19. The picture shows so much hope and ambition. A sad end to a promising life.
The following entries are extracted and transcribed from the 9th Light Horse Regiment War Diary, the originals of which are held by the Australian War Memorial. There are 366 entries on this site. Each day has entries as they occurred from 1914 to 1919. In addition to the 9th Light Horse Regiment War Diary, when appropriate, entries from the 3rd Light Horse Brigade War Diary and other regiments with the Brigade will also appear. Entries from the unit history, Darley, TH, With the Ninth Light Horse in the Great War, Adelaide, Hassell Press, 1924 will also appear from time to time. The aim is to give the broadest context to the story and allow the reader to follow the day to day activities of the regiment. If a relative happened to have served in the regiment during the Great War, then this provides a general framework in which the individual story may be told.
9th Light Horse Regiment War Diary - Relief of Regiment by the Auckland Mounted Rifles commenced. Completed by 1400.
Positions occupied just prior to handing over. Regiment went into rest camp in Walkers Gully.
1400 13 of 4th Reinforcements arrived from Alexandria.
16 Volunteers from the Regiment went out and bombed the Turk trenches in front of the Auckland Mounted Rifle Regiment. No Casualties. Attempt successful. Heavy rifle fire returned.
3rd Light Horse Brigade War Diary - Careful inspection of trenches before 0400 and after breakfast in view of proposed attack.
100 men of 10th Light Horse Regiment back to Brigade.
General display at 1000, King's birthday.
Lieutenant and Honorary Captain McMaster, 10th Light Horse Regiment reported with twelve men from the 8th Light Horse Regiment 13 from the 9th Light Horse Regiment and twenty from the 10th Light Horse Regiment all from 4th Reinforcements.
9th Light Horse Regiment relieved by Auckland Mounted Rifles.
Casualties: 8th Light Horse Regiment, one wounded; 9th Light Horse Regiment, one wounded.
Letter to Headquarters, Australian and New Zealand Division, Cairo regarding reinforcements.
Memo regarding "Standing to Arms".
Attack on Quinn's Post, all actions cooperating No.2 Sub Section.
Carew Reynell Diary - One is simply overwhelmed with the luxury of the last 12 hours.
After standing to arms last night from 2000 to 2100, went and had a bath and then had the luxury of a sleep with only underpants and shirt on and an undisturbed sleep. It's this way - yesterday after thirteen days in the trenches we were relieved and come down into a gully by the sea overgrown with bushes. Delightful view of the sea and seashore and a few hundred yards in front and are revelling in a quiet loaf. There is a devil of a lot of firing going on in the neighbourhood of Quinn's Post and evidently a scrap of some dimension going on - they say there was very heavy firing all night too but I never heard a sound. By the way that attack on the Turks trench in front of our late position has been put off until the saps have got up close to it - which to my mind is right and makes it quite easy.
We shall be back there in a week and if the attack isn't made by the Auckland Regiment, who relieved us, we shall have it to do when we get back. However it will only mean charging over a few yards then and communication can soon be opened with it after capture. Heard very heavy bombardment at Cape Helles yesterday.
Our casualties in the week are 28 - we had none the first six days in the trenches bar a couple of grazes that didn't go to the doctor. Of the above, one third, nine, are dead or as good as dead. General Russell was very complimentary to the regiment although he was very angry with a couple troop leaders for gross neglect of duty - not intentional but cases of ignorance and inexperience.
9th Light Horse Regiment War Diary - Routine Patrol and Training work carried out.
1917
Monday, June 4, 1917
9th Light Horse Regiment Location - Um Urgan
9th Light Horse Regiment War Diary - Until further notice the Brigade "Stands to Arms" with horses saddled and in readiness for an immediate move by 0330.
Non Commissioned Officers Hotchkiss Rifle and Specialist Parades continued.
1918
Tuesday, June 4, 1918
9th Light Horse Regiment Location - Ain Ed Duk
9th Light Horse Regiment War Diary - 0900 Officers inspecting front line works preparatory to taking over 7th Light Horse Regiment.
1830 The Regiment by squadrons proceeded to front line and relieved 7th Light Horse Regiment. Relief completed by 2030. Orders issued for “C” Squadron to hold the line by day and to be relieved at 1900 daily by A and “B” Squadrons when “C” Squadron would withdraw and remain in reserve all night taking over again at 0400 daily from A and “B” Squadrons. On relief Regimental Headquarters with A and “B” Squadrons to withdraw daily to day bivouac in Sq M33a and to leave there at 1800 daily to take over night outpost line.
The site of the day bivouac was covered with thick thorny scrub which necessitated much hard work in clearing suitable area for horse lines and bivouacs. This area was reported as being badly infested with snakes and although many snakes were seen no one was bitten during our stay here.
3rd Light Horse Brigade War Diary - On the 4th June command of No. 1 sub sector, [Auja Bridgehead defences], passed from General Officer in Command, 3rd Light Horse Brigade to General Officer in Command, 22nd Mounted Brigade and the 3rd Light Horse Brigade withdrew to No. 4 sub sector with headquarters at Ain Ed Duk.
9th Light Horse Regiment, 1st section, 3rd Machine Gun Squadron, relieved the garrison of No. 4 sub sector, [Wart, Wane, Wild, Wood, and Wasp - posts], from 7th Light Horse Regiment, 2nd Light Horse Brigade], at 2030 4th June, and 8th Light Horse Regiment with two sections 3rd Machine Gun Squadron were placed at disposal General Officer in Command No. 3 sub sector, to enable the work at centres of resistance on The Bluff to Abu Tellul line to be pushed on rapidly.
Patrols were sent out at irregular intervals throughout each day to Tel el Truny to patrol north and east from there; enemy patrols were encountered, but these ways retired to the sangars and small trenches on prominent points near Tel el Richer and Tel el Museterah, when fired on by our patrols. From Tel el Truny any enemy movement towards Wadi Auja could be seen and the enemy was kept under close observation.
The improvement and strengthening of the defences of the "W" posts was carried on by night.
1919
Wednesday, June 4, 1919
9th Light Horse Regiment Location - Tel el Kebir
9th Light Horse Regiment War Diary - 2100, Hahn, Lieutenant HJ; and, leave party returned to duty.
Diaries of AIF Servicemen, Bert Schramm, 4 June 1918 Topic: Diary - Schramm
Diaries of AIF Servicemen
Bert Schramm
4 June 1918
Bert Schramm
Bert Schramm
2823 Private Herbert Leslie SCHRAMM, a 22 year old Farmer from Whites River, South Australia. He enlisted on 17 February 1916; and at the conclusion of the war Returned to Australia, 10 July 1919.
During part of the course of his military service with the AIF, Bert Schramm kept a diary of his life. Bert was not a man of letters so this diary was produced with great effort on his behalf. Bert made a promise to his sweetheart, Lucy Solley, that he would do so after he received the blank pocket notebook wherein these entries are found. As a Brigade Scout since September 1918, he took a lead part in the September Offensive by the Allied forces in Palestine. Bert's diary entries are placed alongside those of the 9th Light Horse Regiment to which he belonged and to the 3rd Light Horse Brigade to which the 9th LHR was attached. On this basis we can follow Bert in the context of his formation.
The Diaries
The complete diary is now available on the Australian Light Horse Studies Centre Site at:
Bert Schramm's Location - Ain Ed Duk, Jordan Valley.
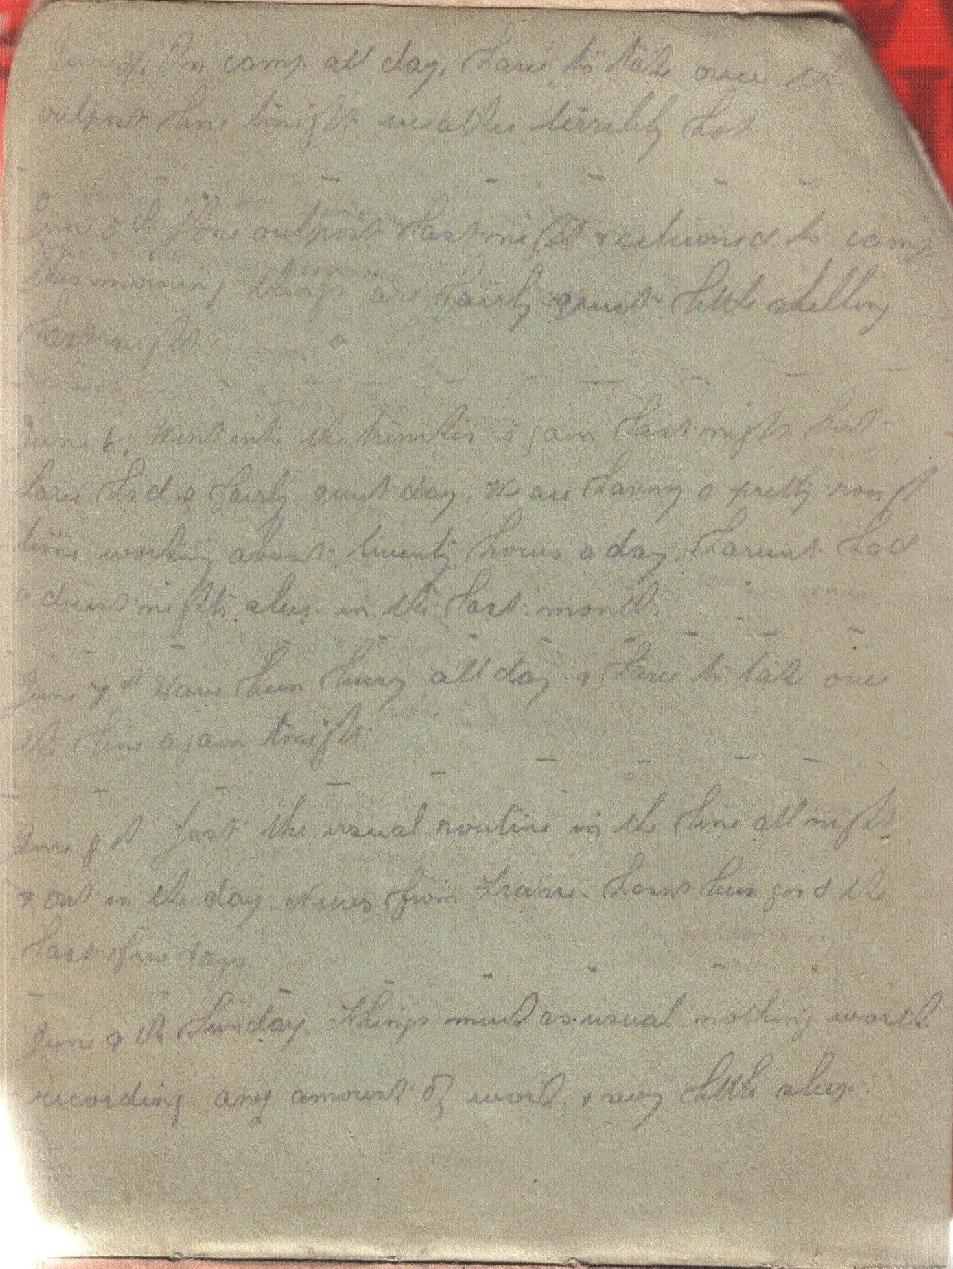
Bert Schramm's Diary - In camp all day. Have to take over the outpost line tonight. Weather terribly hot.
9th Light Horse Regiment War Diary
9th Light Horse Regiment Location - Ain Ed Duk, Jordan Valley.
9th Light Horse Regiment War Diary - 0900 Officers inspecting front line works preparatory to taking over 7th Light Horse Regiment.
1830 The Regiment by squadrons proceeded to front line and relieved 7th Light Horse Regiment. Relief completed by 2030. Orders issued for C Squadron to hold the line by day and to be relieved at 1900 daily by A and B Squadrons when C Squadron would withdraw and remain in reserve all night taking over again at 0400 daily from A and B Squadrons. On relief Regimental Headquarters with A and B Squadrons to withdraw daily to day bivouac in Sq M33a and to leave there at 1800 daily to take over night outpost line. The site of the day bivouac was covered with thick thorny scrub which necessitated much hard work in clearing suitable area for horse lines and bivouacs. This area was reported as being badly infested with snakes and although many snakes were seen no one was bitten during our stay here.
3rd Light Horse Brigade War Diary -
On the 4th June command of No. 1 sub sector, [Auja Bridgehead defences], passed from General Officer in Command, 3rd Light Horse Brigade to General Officer in Command, 22nd Mounted Brigade and the 3rd Light Horse Brigade withdrew to No. 4 sub sector with headquarters at Ain Ed Duk.
9th Light Horse Regiment, 1st section, 3rd Machine Gun Squadron, relieved the garrison of No. 4 sub sector, [Wart, Wane, Wild, Wood, and Wasp - posts], from 7th Light Horse Regiment, 2nd Light Horse Brigade], at 2030 4th June, and 8th Light Horse Regiment with two sections 3rd Machine Gun Squadron were placed at disposal General Officer in Command No. 3 sub sector, to enable the work at centres of resistance on The Bluff to Abu Tellul line to be pushed on rapidly.
Patrols were sent out at irregular intervals throughout each day to Tel el Truny to patrol north and east from there; enemy patrols were encountered, but these ways retired to the sangars and small trenches on prominent points near Tel el Richer and Tel el Museterah, when fired on by our patrols. From Tel el Truny any enemy movement towards Wadi Auja could be seen and the enemy was kept under close observation.
The improvement and strengthening of the defences of the "W" posts was carried on by night.
Nominal Roll, AWM133, Nominal Roll of Australian Imperial Force who left Australia for service abroad, 1914-1918 War.
War Diaries and Letters
All War Diaries and letters cited on this site should be read in conjunction with the Australian Light Horse Studies Centre, War Diaries and Letters, Site Transcription Policy which may be accessed at:
Diaries of AIF Servicemen, Bert Schramm, 3 June 1918 Topic: Diary - Schramm
Diaries of AIF Servicemen
Bert Schramm
3 June 1918
Bert Schramm
Bert Schramm
2823 Private Herbert Leslie SCHRAMM, a 22 year old Farmer from Whites River, South Australia. He enlisted on 17 February 1916; and at the conclusion of the war Returned to Australia, 10 July 1919.
During part of the course of his military service with the AIF, Bert Schramm kept a diary of his life. Bert was not a man of letters so this diary was produced with great effort on his behalf. Bert made a promise to his sweetheart, Lucy Solley, that he would do so after he received the blank pocket notebook wherein these entries are found. As a Brigade Scout since September 1918, he took a lead part in the September Offensive by the Allied forces in Palestine. Bert's diary entries are placed alongside those of the 9th Light Horse Regiment to which he belonged and to the 3rd Light Horse Brigade to which the 9th LHR was attached. On this basis we can follow Bert in the context of his formation.
The Diaries
The complete diary is now available on the Australian Light Horse Studies Centre Site at:
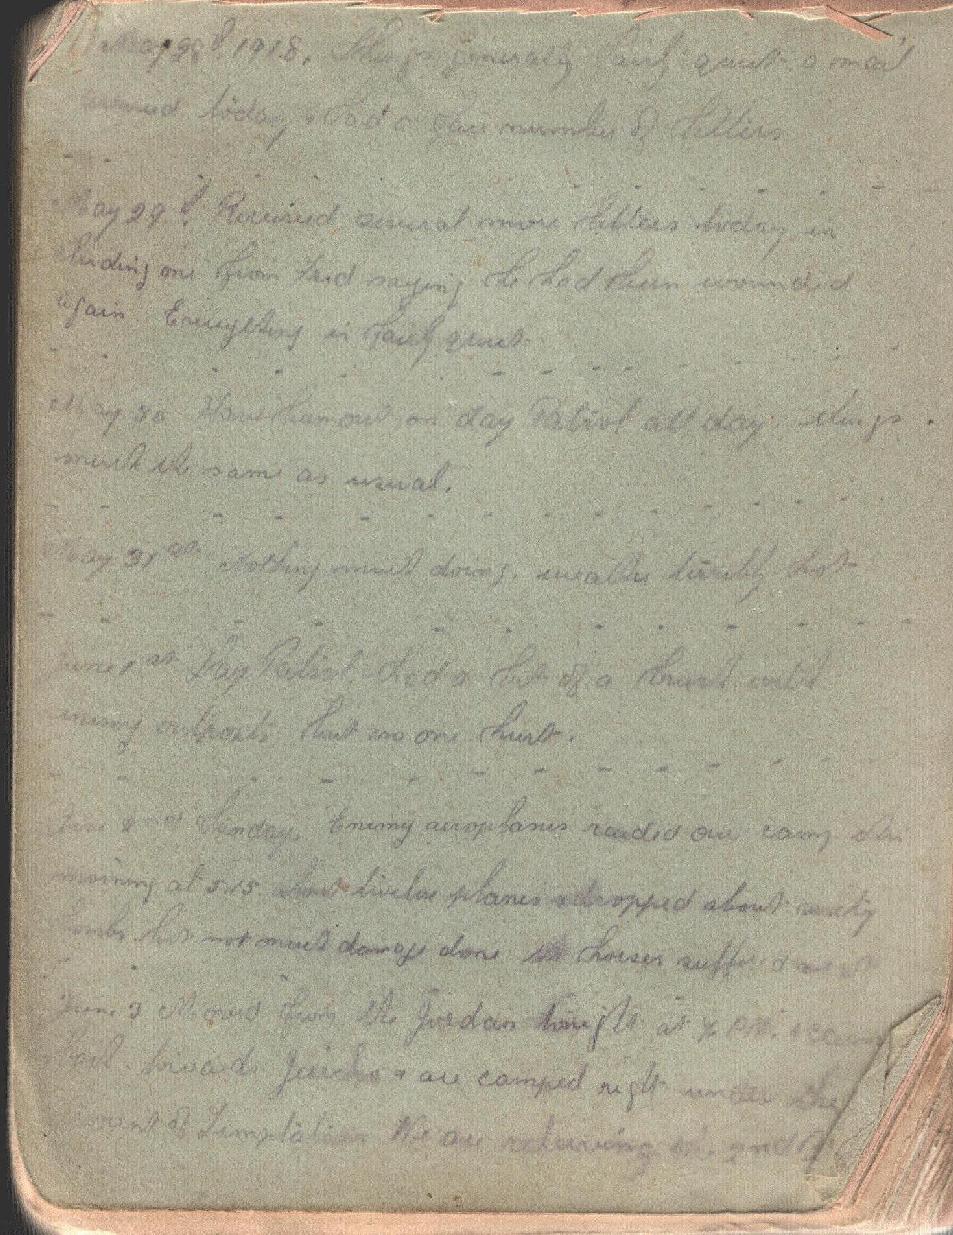
Bert Schramm's Handwritten Diary, 28 May - 3 June 1918
[Click on page for a larger print version.]
Bert Schramm's Diary
Monday, June 3, 1918
Bert Schramm's Location - Ain Ed Duk, Jordan Valley
Bert Schramm's Diary - Moved from Jordan heights at 7 pm and came back towards Jericho and all camped right under the Mount of Temptation. We are relieving 2nd Brigade
9th Light Horse Regiment War Diary
9th Light Horse Regiment Location - Ain Ed Duk, Jordan Valley
9th Light Horse Regiment War Diary - 2030 The Regiment moved to Ain Ed Duk arriving there 2245 and bivouacked for night.
Nominal Roll, AWM133, Nominal Roll of Australian Imperial Force who left Australia for service abroad, 1914-1918 War.
War Diaries and Letters
All War Diaries and letters cited on this site should be read in conjunction with the Australian Light Horse Studies Centre, War Diaries and Letters, Site Transcription Policy which may be accessed at:
The Australian Light Horse Studies Centre is a not for profit and non profit group whose sole aim is to write the early history of the Australian Light Horse from 1900
- 1920. It is privately funded and the information is provided by the individuals within the group and while permission for the use of the material has been given for this
site for these items by various donors, the residual and actual copyright for these items, should there be any, resides exclusively with the donors. The information on
this site is freely available for private research use only and if used as such, should be appropriately acknowledged. To assist in this process, each item has a citation
attached at the bottom for referencing purposes.
Please Note: No express or implied permission is given for commercial use of the information contained within this site.
A note to copyright holders
The Australian Light Horse Studies Centre has made every endeavour to contact copyright holders of material digitised for this blog and website and where
appropriate, permission is still being sought for these items. Where replies were not received, or where the copyright owner has not been able to be traced, or where
the permission is still being sought, the Australian Light Horse Studies Centre has decided, in good faith, to proceed with digitisation and publication. Australian Light
Horse Studies Centre would be happy to hear from copyright owners at any time to discuss usage of this item.