« October 2008 »
S M T W T F S
1 2 3 4
5 6 7 8 9 10 11
12 13 14 15 16 17 18
19 20 21 22 23 24 25
26 27 28 29 30 31
You are not logged in. Log in


Search the site:


powered by FreeFind
Volunteer with us.

Entries by Topic All topics  
A Latest Site News
A - Using the Site
AAA Volunteers
AAB-Education Centre
AAC-Film Clips
AAC-Photo Albums
AIF & MEF & EEF
AIF - Lighthorse
AIF - ALH - A to Z
AIF - DMC
AIF - DMC - Or Bat
AIF - DMC - Anzac MD
AIF - DMC - Aus MD
AIF - DMC - British
AIF - DMC - BWI
AIF - DMC - French
AIF - DMC - Indian
AIF - DMC - Italian
AIF - DMC - Medical
AIF - DMC - Remounts
AIF - DMC - Scouts
AIF - DMC - Sigs
AIF - DMC - Sigs AirlnS
AIF - DMC - 1 Sig Sqn
AIF - DMC - 2 Sig Sqn
AIF - DMC - Eng
AIF - DMC - Eng 1FSE
AIF - DMC - Eng 2FSE
AIF - DMC - GSR
AIF - 1B - 1 LHB
AIF - 1B - 6 MVS
AIF - 1B - 1 LHMGS
AIF - 1B - 1 Sig Trp
AIF - 1B - 1 LHFA
AIF - 1B - 1 LHR
AIF - 1B - 2 LHR
AIF - 1B - 3 LHR
AIF - 2B - 2 LHB
AIF - 2B - 7 MVS
AIF - 2B - 2 LHFA
AIF - 2B - 2 LHMGS
AIF - 2B - 2 Sig Trp
AIF - 2B - 5 LHR
AIF - 2B - 6 LHR
AIF - 2B - 7 LHR
AIF - 3B - 3 LHB
AIF - 3B - 8 MVS
AIF - 3B - 3 LHB Sigs
AIF - 3B - 3 LHFA
AIF - 3B - 3 LHMGS
AIF - 3B - 3 Sig Trp
AIF - 3B - 8 LHR
AIF - 3B - 9 LHR
AIF - 3B - 10 LHR
AIF - 4B - 4 LHB
AIF - 4B - 4 Sig Trp
AIF - 4B - 9 MVS
AIF - 4B - 4 LHFA
AIF - 4B - 4 LHMGS
AIF - 4B - 4 LHR
AIF - 4B - 11 LHR
AIF - 4B - 12 LHR
AIF - 5B - 5 LHB
AIF - 5B - 10 MVS
AIF - 5B - 5 LHFA
AIF - 5B - 5 Sig Trp
AIF - 5B - ICC
AIF - 5B - 14 LHR
AIF - 5B - 15 LHR
AIF - 5B - 1er Regt
AIF - 5B - 2 NZMGS
AIF - AASC
AIF - Aboriginal LH
AIF - Badges
AIF - Cars
AIF - Chinese LH
AIF - Double Sqns
AIF - Engineers
AIF - Fr - 22 Corps
AIF - Fr - 13 LHR
AIF - Honour Roll
AIF - HQ - 3rd Echelon
AIF - Marching Songs
AIF - Misc Topics
AIF - NZMRB
AIF - NZMRB - AMR
AIF - NZMRB - CMR
AIF - NZMRB - EFT
AIF - NZMRB - NZMFA
AIF - NZMRB - NZMGS
AIF - NZMRB - OMR
AIF - NZMRB - Sig-Trp
AIF - NZMRB - WMR
AIF - Ships
AIF - Ships - Encountr
AIF - Ships - Una
AIF - WFF
AIF - Wireless Sqn
Battles
BatzA - Australia
BatzA - Broken Hill
BatzA - Liverpool
BatzA - Merivale
BatzB - Boer War
BatzB - Bakenlaagte
BatzB - Belmont
BatzB - Bothaville
BatzB - Buffels Hoek
BatzB - Coetzees Drift
BatzB - Diamond Hill
BatzB - Driefontein
BatzB - Elands
BatzB - Graspan
BatzB - Grobelaar
BatzB - Grootvallier
BatzB - Hartebestfontn
BatzB - Houtnek
BatzB - Karee Siding
BatzB - Kimberley
BatzB - Koster River
BatzB - Leeuw Kop
BatzB - Mafeking
BatzB - Magersfontein
BatzB - Modder River
BatzB - Onverwacht
BatzB - Paardeberg
BatzB - Palmietfontein
BatzB - Pink Hill
BatzB - Poplar Grove
BatzB - Rhenoster
BatzB - Sannahs Post
BatzB - Slingersfontn
BatzB - Stinkhoutbm
BatzB - Sunnyside
BatzB - Wilmansrust
BatzB - Wolvekuil
BatzB - Zand River
BatzG - Gallipoli
BatzG - Anzac
BatzG - Aug 1915
BatzG - Baby 700
BatzG - Evacuation
BatzG - Hill 60
BatzG - Hill 971
BatzG - Krithia
BatzG - Lone Pine
BatzG - Nek
BatzJ - Jordan Valley
BatzJ - 1st Amman
BatzJ - 2nd Amman
BatzJ - Abu Tellul
BatzJ - Es Salt
BatzJ - JV Maps
BatzJ - Ziza
BatzM - Mespot
BatzM - Baghdad
BatzM - Ctesiphon
BatzM - Daur
BatzM - Kurna
BatzM - Kut el Amara
BatzM - Ramadi
BatzN - Naval
BatzN - AE1
BatzN - Cocos Is
BatzN - Heligoland
BatzN - Marmara
BatzN - Zeebrugge
BatzN - Zeppelin L43
BatzNG - Bitapaka
BatzO - Other
BatzO - Baku
BatzO - Egypt 1919
BatzO - Emptsa
BatzO - Karawaran
BatzO - Peitang
BatzO - Wassa
BatzP - Palestine
BatzP - 1st Gaza
BatzP - 2nd Gaza
BatzP - 3rd Gaza
BatzP - Aleppo
BatzP - Amwas
BatzP - Ayun Kara
BatzP - Bald Hill
BatzP - Balin
BatzP - Beersheba
BatzP - Berkusieh
BatzP - Damascus
BatzP - El Auja
BatzP - El Buggar
BatzP - El Burj
BatzP - Haifa
BatzP - Huj
BatzP - JB Yakub
BatzP - Kaukab
BatzP - Khan Kusseir
BatzP - Khuweilfe
BatzP - Kuneitra
BatzP - Megiddo
BatzP - Nablus
BatzP - Rafa
BatzP - Sasa
BatzP - Semakh
BatzP - Sheria
BatzP - Surafend
BatzP - Wadi Fara
BatzS - Sinai
BatzS - Bir el Abd
BatzS - El Arish
BatzS - El Mazar
BatzS - El Qatiya
BatzS - Jifjafa
BatzS - Magdhaba
BatzS - Maghara
BatzS - Romani
BatzS - Suez 1915
BatzSe - Senussi
BatzWF - Westn Front
BW - Boer War
BW - NSW
BW - NSW - 1ACH
BW - NSW - 1NSWMR
BW - NSW - 2NSWMR
BW - NSW - 3ACH
BW - NSW - 3NSWIB
BW - NSW - 3NSWMR
BW - NSW - 5ACH
BW - NSW - A Bty RAA
BW - NSW - AAMC
BW - NSW - Aust H
BW - NSW - Lancers
BW - NSW - NSW Inf
BW - NSW - NSWCBC
BW - NSW - NSWIB
BW - NSW - NSWMR_A
BW - NZ
BW - Qld
BW - Qld - 1ACH
BW - Qld - 1QMI
BW - Qld - 2QMI
BW - Qld - 3ACH
BW - Qld - 3QMI
BW - Qld - 4QIB
BW - Qld - 5QIB
BW - Qld - 6QIB
BW - Qld - 7ACH
BW - QLD - AAMC
BW - SA
BW - SA - 1SAMR
BW - SA - 2ACH
BW - SA - 2SAMR
BW - SA - 3SACB
BW - SA - 4ACH
BW - SA - 4SAIB
BW - SA - 5SAIB
BW - SA - 6SAIB
BW - SA - 8ACH
BW - SA - AAMC
BW - Tas
BW - Tas - 1ACH
BW - Tas - 1TIB
BW - Tas - 1TMI
BW - Tas - 2TB
BW - Tas - 2TIB
BW - Tas - 3ACH
BW - Tas - 8ACH
BW - Vic
BW - Vic - 1VMI
BW - Vic - 2ACH
BW - Vic - 2VMR
BW - Vic - 3VB
BW - Vic - 4ACH
BW - Vic - 4VIB
BW - Vic - 5VMR
BW - Vic - 6ACH
BW - Vic - AAMC
BW - Vic - Scot H
BW - WA
BW - WA - 1WAMI
BW - WA - 2ACH
BW - WA - 2WAMI
BW - WA - 3WAB
BW - WA - 4ACH
BW - WA - 4WAMI
BW - WA - 5WAMI
BW - WA - 6WAMI
BW - WA - 8ACH
BW Gen - Campaign
BW Gen - Soldiers
BW General
Cavalry - General
Diary - Schramm
Egypt - Heliopolis
Egypt - Mena
Gen - Ataturk Pk, CNB
Gen - Australia
Gen - Legends
Gen - Query Club
Gen - St - NSW
Gen - St - Qld
Gen - St - SA
Gen - St - Tas
Gen - St - Vic
Gen - St - WA
Gm - German Items
Gm - Bk - 605 MGC
GW - 11 Nov 1918
GW - Atrocities
GW - August 1914
GW - Biographies
GW - Propaganda
GW - Spies
GW - We forgot
Militia 1899-1920
Militia - Area Officers
Militia - Inf - Infantry
Militia - Inf - 1IB
Militia - Inf - 2IB
Militia - Inf - 3IB
Militia - Inf - NSW
Militia - Inf - Qld
Militia - Inf - SA
Militia - Inf - Tas
Militia - Inf - Vic
Militia - Inf - WA
Militia - K.E.Horse
Militia - LH
Militia - LH - Regts
Militia - LH - 1LHB
Militia - LH - 2LHB
Militia - LH - 3LHB
Militia - LH - 4LHB
Militia - LH - 5LHB
Militia - LH - 6LHB
Militia - LHN - NSW
Militia - LHN - 1/7/1
Militia - LHN - 2/9/6
Militia - LHN - 3/11/7
Militia - LHN - 4/6/16
Militia - LHN - 5/4/15
Militia - LHN - 6/5/12
Militia - LHN - 28
Militia - LHQ - Qld
Militia - LHQ - 13/2
Militia - LHQ - 14/3/11
Militia - LHQ - 15/1/5
Militia - LHQ - 27/14
Militia - LHS - SA
Militia - LHS - 16/22/3
Militia - LHS - 17/23/18
Militia - LHS - 24/9
Militia - LHT - Tas
Militia - LHT - 12/26
Militia - LHV - Vic
Militia - LHV - 7/15/20
Militia - LHV - 8/16/8
Militia - LHV - 9/19
Militia - LHV - 10/13
Militia - LHV - 11/20/4
Militia - LHV - 19/17
Militia - LHV - 29
Militia - LHW - WA
Militia - LHW-18/25/10
Militia - Military Orders
Militia - Misc
MilitiaRC - Rifle Clubs
MilitiaRC - NSW
MilitiaRC - NT
MilitiaRC - Qld
MilitiaRC - SA
MilitiaRC - Tas
MilitiaRC - Vic
MilitiaRC - WA
Militiaz - New Zealand
Tk - Turkish Items
Tk - Army
Tk - Bks - Books
Tk - Bks - 1/33IR
Tk - Bks - 27th IR
Tk - Bks - Air Force
Tk - Bks - Yildirim
Tk - POWs
Wp - Weapons
Wp - Hotchkiss Cav
Wp - Hotchkiss PMG
Blog Tools
Edit your Blog
Build a Blog
RSS Feed
View Profile
Open Community
Post to this Blog
Site Index
Education Centre
LH Militia
Boer War
Transport Ships
LH Battles
ALH - Units
ALH - General
Aboriginal Light H
Weapons
Ottoman Sources

"At a mile distant their thousand hooves were stuttering thunder, coming at a rate that frightened a man - they were an awe inspiring sight, galloping through the red haze - knee to knee and horse to horse - the dying sun glinting on bayonet points..." Trooper Ion Idriess

The Australian Light Horse Studies Centre aims to present an accurate history as chroniclers of early Australian military developments from 1899 to 1920.

The Australian Light Horse Studies Centre site holds over 12,000 entries and is growing daily.

Contact: Australian Light Horse Studies Centre

Let us hear your story: You can tell your story, make a comment or ask for help on our Australian Light Horse Studies Centre Forum called:

Desert Column Forum

WARNING: This site contains: names, information and images of deceased people; and, language which may be considered inappropriate today.

Monday, 13 October 2008
The Battle of Beersheba, Palestine, 31 October 1917, 10th LHR, AIF, Unit History Account
Topic: AIF - 3B - 10 LHR

The Battle of Beersheba

Palestine, 31 October 1917

10th LHR, AIF, Unit History Account


Turksh prisoners at Beersheba mosque

[From: Olden, Westralian cavalry in the war, p. 174]


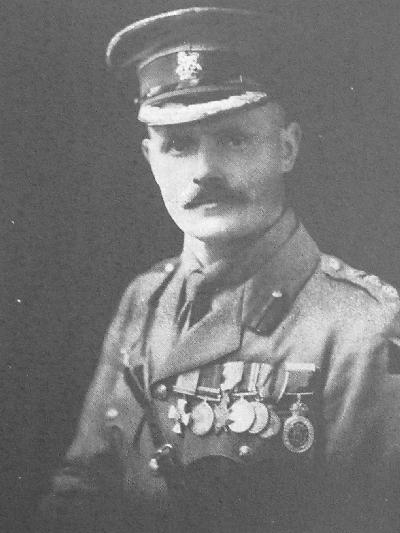
Lieutenant Colonel Arthur Charles Niquet Olden produced the unit history for the 11th LHR in 1921 called the Westralian cavalry in the war: the story of the Tenth Light Horse Regiment, A.I.F., in the Great War, 1914-1918, which included a section specifically related to the battle of Beersheba and is extracted below.

Olden, A.C.N., Westralian cavalry in the war: the story of the Tenth Light Horse Regiment, A.I.F., in the Great War, 1914-1918, (Melbourne 1921), pp.   166 - 172:


CHAPTER XXV.


THE BATTLE OF BEERSHEBA.

[166] In setting out this narrative of the doings of the 10th Light Horse Regiment in the Great War, the temptation to offer criticism and personal opinions as to the conception and conduct of operations on the part of the higher formation, has on many occasions, been well nigh irresistible.

These opinions, based for the most part, on individual observation and conjecture only, might well be exposed to the shafts of ridicule from those who were much more highly placed, and consequently in a position of vantage to become au fait with an Army, a Corps, or even a Divisional Scheme.

But it can be no breach of privilege, nevertheless, to record obvious, cold facts, patent to all of average Australian intelligence, which, at the outset of these operations, stood out clear of all other considerations. In the first place, the Army which General Allenby hurled against the Turkish left flank at Beersheba, which swung around and crumpled up the enemy centre at Abu Hareira and Tel es Sheria, which finally smashed Gaza itself to tatters and pushed the Turko-German forces back until the whole of southern Palestine - from Jaffa on the sea to Jerusalem itself - had passed into our keeping, that Army had undergone a vast change since it recoiled, dazed and bewildered, from the Gaza defenders in April.

It was now an Army trained to the minute, efficient, eager, wherein each arm knew its own specific task, and was prepared to tackle that task with confidence. It was an Army whose air service was, at last, more than holding its own. The Commander-in-Chief was a man who was ready to use his cavalry as cavalry, his infantry as infantry, and his artillery as artillery, and who neither over-estimated our own strength, nor under-estimated the tenacity of the enemy.

Secondly, the scheme itself was such a one as appealed to the fighting troops by reason of its boldness and the breadth of vision it displayed.
[167] The Turkish defences had been developed with amazing energy and care until the whole line, from the sea at Gaza to the Judean foothills beyond Beersheba, bristled with a continuous network of trenches and redoubts.

Wherever the enemy expected the blow would fall, it is certain that he did not anticipate that the foothills of Judea could be penetrated by our cavalry in an attempt to crush his left flank. General Allenby however, thought otherwise, and it was with supreme confidence that he sent the whole of his cavalry, commanded by Lieut.-General Chauvel, round by way of these self-same foothills to strike the first blow at the Beersheba flank and rear. How the Desert Mounted Corps, now consisting of three cavalry divisions - the Anzac Mounted Division, the Australian Mounted Division and the Yeomanry Mounted Division carried out its allotted task, has long since passed into history as one of the most striking achievements of the Egyptian Expeditionary Force, so that repetition in a regimental narrative would be superfluous. It is with the part played by the 10th Regiment that we have to do.

On October 28th, 1917, at 4.30 in the afternoon, the 10th Regiment moved out from bivouac at Shellal, joined the remainder of the 3 rd Light Horse Brigade -now under the command of Brigadier-General L.C. Wilson - and marched in column to the Corps rendezvous near Bir-el-Esani. The huge body of horsemen concentrated here during the night and bivouacked until the following evening.

Orders for the battle were not yet to hand, but each unit had formulated a shrewd idea as to how the first blow was to be struck, and on all sides was evidenced the utmost confidence in our success. At ten minutes past five on the following evening (October 29th), the 3rd Brigade moved on in column southeast to Khalasa, a distance of about nine miles. Khalasa was reached at 9.30 p.m., and here the horses were watered from wells which had been previously blown up by the Turks, but were repaired by a party of our Engineers, in conjunction with the Imperial Camel Brigade.

Having watered, the Regiment moved away from the wells and bivouacked for the night at a spot about one and a half miles south. On the following day (October 30th), the orders for battle arrived. The Army was to attack the Beersheba defences on October 31st. Desert Mounted Corps, with the Anzac Mounted Division leading and the Australian Mounted Division in support, would proceed via Asluj along the road running north-easterly to the Wadi Imshash, thence six and a half miles along the Wadi Imshash to cross-roads, and along the road running north-easterly to Iswaiwin. From this point the defences east and northeast of Beersheba, including Tel el Saba, would be attacked and [168] captured. The troops of 20`h Corps, meanwhile, were to attack the enemy works on the Ras Ghannam-Ras Hableim-Hill 1070 line with a view to an advance on Beersheba from the south.

During our halt at Khalasa, several air fights occurred, but on each occasion the enemy machines were shot or driven down in our own territory. Thus the enemy was kept in ignorance of our projected move.

The 10th Regiment rode out from Khalasa at 5 p.m. as advanced guard to the Australian Mounted Division, and followed in the wake of the Anzacs who had already moved ahead.

Asluj was reached at 8 p.m. Here, as at Khalasa, a water supply had been developed by the restoration of partially destroyed wells, on which task the 2nd Light Horse Brigade had been employed for the past few days, protected by covering troops. Only a limited supply however, had been made available, and this was reserved exclusively for draught animals - the riding animals remaining unwatered. A halt was made for about an hour and the march was resumed. The route lay northeast along the bank of the Wadi Sheregi, a troop of "B" Squadron under Lieut. W.C. Palmer guiding the column throughout the night.

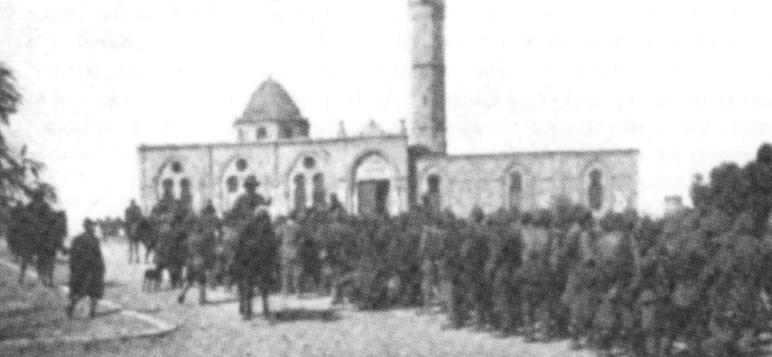
Marching continuously, with a ten-minute halt in each hour, the column crossed the Wadi Imshash - a little difficulty being experienced owing to recent rains, which left the Wadi bed heavy and muddy - and at ten minutes past five a.m. (October 31st) our advanced troops were in touch with the Anzac Mounted Division near Point 1504 on the Goz-el-Shegeib. From the high ground the first view was obtained of Beersheba, with its white mosque and buildings standing out against a rugged background of bare, brown, trench-riddled hills.

Advancing to Iswaiwin, the Regiment acting under orders from 3rd Brigade Headquarters, left the road and halted in the broken ground nearby. Here the Australian Mounted Division gradually concentrated and awaited final instructions. Already the Anzac Division was reconnoitring the enemy positions, and the 8th Light Horse Regiment had been detached to fill in a gap between that Division on the right, and 20th Corps on the left, running north-east and southwest from Point 1280 through Point 1180 to Point 1210. Vigorous reconnaissance of the enemy flank disclosed that the Turks were holding Ras Ghannam and Tel el Saba in force, and during the morning orders were received that the main cavalry attack would be delivered against the latter position.

[169] Tel-el-Saba is one of those cunningly shaped mounds of great size - known in the Near East as tels - which exist at frequent intervals throughout the country. Their origin is doubtful, opinion being divided as to whether they are natural formations or wholly or partly artificial. Colour is lent to the latter suggestion by reason of the fact that they are of almost uniform shape, and are invariably situated in strategical or tactical positions, which in the days of lighter armaments, must have rendered them of extreme value for defensive purposes.

Even against modern weapons they may by a proper system of entrenchment, be made to offer a serious obstacle, and Tel el Saba had not been neglected in this [170] direction by the Turks. It is situated in the acute angle formed by the junction of the two branches of the Wadi Saba, about three miles east of Beersheba and overlooks open, level ground for a considerable distance. It is almost surrounded by arms of the Wadi, which form a natural moat round its base.

It was well entrenched, and our patrols had reported it held by a considerable force of Turks, with several batteries of artillery in support. Towards midday the Anzac Mounted Division was moving to the attack, whilst our Division was under orders to be prepared to support the Anzacs at a moment's notice.

Meanwhile, the guns of the 20th Corps thundered on our left, and the battle had commenced in earnest. From our positions we could see the burst of heavy shells along the Turkish front, and felt supremely confident that the 60th Division, under Major-General Shea, leading the attack for 20th Corps, would ultimately reach its objective.

The Anzacs were pushing their attack on the right, and at 2 p.m. the 3rd Light Horse Brigade (less the 8th Regiment, employed elsewhere) was ordered into action in support. The 9th and 10th Regiments and the 3rd Machine Gun Squadrons mounted and moved out in that order from the Iswaiwin hills.

The formation adopted was "column of line of troop columns" with double interval and distance. On issuing into the open the whole Brigade came under intense enemy shelling, but the casualties were not heavy, although at this point the 10th Regiment lost a splendid soldier in Captain Rodsted, who was struck from his horse by shrapnel, and succumbed to his wounds a few hours later. Advancing resolutely and without increasing the pace from the walk, the Brigade reached Bir-Salim Abu Irgeig.

From here the 9th Regiment was dispatched to assist in the attack on Tel el Saba on the right of the New Zealand Mounted Rifles, who were driving hard at the Tel with their customary invincible New Zealand dash and courage.

The 9th Regiment rode gallantly across the open ground under heavy shellfire, but before the 9th had dismounted for action, the New Zealanders, by a superb assault, had captured Tel el Saba and its garrison. At 4.30 p.m. the 10t' Regiment was ordered to seize the positions 1020 and 970 - on the west side of the main Hebron road - and cut off any enemy retreat along that road. The Regiment swung out at the trot, under the fire of two batteries of enemy guns, to Point 1020 - half-way between Bir Salim and Tel-el-Saba - and from there galloped across by squadrons in open line of troop columns under salvoes of Turkish shrapnel and high
[171] explosive shells, passed Tel-el-Saba, crossed the Wadi Khalil and the Hebron road, and seized the line 1020-970 at dusk.

Many prisoners were taken, but the guns could not be located in the failing light. Patrols from the 10th Regiment entered Beersheba from the Hebron road, where touch was obtained later with troops of the 1st Light Horse Brigade. From them it was learnt that the final enemy position, which had held out stubbornly to the end, had been captured by the 4th Light Horse Brigade in a brilliant mounted charge with fixed bayonets. This charge has been described by General Allenby as having "decided the day at Beersheba, " and there is no doubt that too much importance cannot be attached to the results achieved by the 4th Brigade on this occasion.

Beersheba, though to a certain extent caught napping, was undoubtedly strong. It contained the only likely water supply for a radius of many miles, which might serve to make it a base for future operations against the Turkish line. Horses and men were already badly in need of water, and for that reason it is more than probable that, could the Turks but have stalled off our attack for another few hours, the whole of the cavalry would have been forced to retire.

The capture of this last position, however, had cleared the way to Beersheba, and the enemy fell back on Sheria, leaving many dead and 2,000 prisoners, 14 guns, and a huge quantity of material, including much rolling stock, in the hands of the Mounted troops.

The troops of the 20th Corps also had succeeded in reaching their first objectives and had taken many prisoners. The 10th Regiment held the 1020-970 positions as an outpost line throughout the night, "C" Squadron, under Major Timperley, meeting with strong opposition from an enemy rear-guard, who advanced and entrenched themselves in front of Hill 1020, but the opening up of machine gun and rifle fire at 9.30 p.m. drove the Turkish rearguard back. The remainder of the night was quiet. At daylight on November Is`, patrols from the Regiment were sent out north and northwest from the outpost line, and returned with more prisoners - stragglers from the Turkish retirement - who confirmed the report that the enemy had fallen back on Tel-el-Sheria. At 5 a.m. two enemy planes flying at low altitude carried out a bombing raid on our portion of the outpost line. Probably the German airmen suspected that we would not possess anti-aircraft guns, and, consequently flew lower than usual. But they were met by a heavy fusillade of rifle and machine gun fire from our troops, and as a result, one machine was shot down and the other driven off.

The Regiment remained in its outpost position throughout the day and night, watering the horses at pools in the Wadi Saba near the town. On the following morning (November 2nd) our troops were relieved from the outpost line, and took up a new position one-mile southeast of the town, near the torn-up railway track running in from the south.

[172] For two days this position was occupied, the principal work consisting of development of the Beersheba water supply, to which the Regiment contributed largely in the way of working parties. B2 Echelon of the transport having arrived, advantage was taken of the brief respite by the Regimental shoeing staff in commencing the clipping of horses, many of which were now heavily handicapped by their growing winter coats. Despite the energetic development, the supply of water in the Beersheba area was very heavily taxed. Terrific congestion of animals at the troughs, coupled with the scanty flow of water, was beginning to reduce the watering parades to a farce, and therefore, little or no surprise was occasioned when an order arrived to the effect that the Australian Mounted Division would march back to water at Karm, a distance of about 16 miles. The Anzac and Yeomanry Mounted Divisions were pushing northeasterly and northward from Beersheba, and, for a time, another role was assigned to our own Division.


Further Reading:

10th Australian Light Horse Regiment, AIF

10th Australian Light Horse Regiment, Roll of Honour 

The Battle of Beersheba, Palestine, 31 October 1917

Australian and New Zealand Roll of Honour

Battles where Australians fought, 1899-1920


Citation: The Battle of Beersheba, Palestine, 31 October 1917, 10th LHR, AIF, Unit History Account

Posted by Project Leader at 11:10 PM EADT
Updated: Sunday, 4 October 2009 9:39 AM EADT
The Battle of Beersheba, Palestine, 31 October 1917, 11th LHR, AIF, Unit History Account
Topic: AIF - 4B - 11 LHR

The Battle of Beersheba

Palestine, 31 October 1917

11th LHR, AIF, Unit History Account


Lieutenant Colonel John William Parsons, CO 11th LHR at Beersheba

[From: Hammond, History of the 11th Light Horse Regiment, plate facing p. 72.]


Ernest W. Hammond, in 1984, produced the unit history for the 11th LHR called the History of the 11th Light Horse Regiment, Fourth Light Horse Brigade, Australian Imperial Forces, war 1914-1919, which included a section specifically related to the battle of Beersheba and is extracted below.

Hammond, EW, History of the 11th Light Horse Regiment, Fourth Light Horse Brigade, Australian Imperial Forces, war 1914-1919, (Singapore 1984), pp. 78 - 84:

BATTLE OF BEERSHEBA.

[78] Sir Edmund Allenby, the new Commander-in-Chief, began active control of his forces on the morning of the 30th June by moving Army Headquarters from its palatial surroundings at the Savoy Hotel, in Cairo, to the village, of Kalab, a few miles north of Rafa, which was a front-line area. This move had the advantage of bringing him and his staff of assistants within a short motor drive of his front-line positions, and ere long it was a common sight to see the new G.O.C. and his staff riding or driving through his soldiers' camps along the Wadi Guzze. His plan of attack, based on the comprehensive notes of Sir Philip Chetwode, was soon formulated, and preparations to carry it into effect were begun in earnest from end to end of the British line. It was soon evident to us that the plan of battle was to be different from the previous attacks on the Gaza-Beersheba line insomuch as the main force of it would be directed against Beersheba. The ultimate success of the venture, as in all such military coups, would depend largely upon the secrecy of our plans, and, with this object in view, elaborate preparations were made to disguise our intentions and deceive the enemy into believing that the fortresses of Gaza were to be our main objective again.

Many of the Australians opposing the Turks in Palestine had taken part in the evacuation of Gallipoli, that splendid hoax of the Turkish army, and were masters in the art of deception as it applied to warfare.

Dummy camps were erected in the territory opposite Gaza, and, at night; fires were kindled and hurricane lamps were left banning in the tents. Small squads of horsemen rode back- and forth on the banks of the Guzze, deliberately raising great clouds of dust the whole scheme indicating a concentration of troops in that area. ,Nor were these sham preparations confined to the land. Naval boats slipped into the mouth of the Wadi Hesi, a few miles north of Gaza, and took soundings as though a leading from the sea was intended.

Simultaneously with these "stunts" a masterpiece of bluff was carried - out as the island of Cyprus to prevent the enemy from sending reinforcements from Syria to the Palestine front. A large camp was marked out on the island: buoys were [79] set up apparently to direct transports in the harbour, and enquiries were made through local contractors for supplies for a large body of troops, and other arrangements were carried out all intended to promote gossip amongst the inhabitants of the island. gossip which would reach the enemy agent, on the mainland- On the right flank the mounted troops carried out daily patrols reaching far into the enemy territory in front of Beersheba, but the patrols were mere passive demonstrations designed to accustom the Turks to our presence in that vicinity. That these schemes succeeded in deceiving the enemy is evidenced by a Turkish despatch captured in Jerusalem some months later. The despatch was from the Turkish Commander at Gaza to the Turkish High Command in Jeruselem, and an extract reads:

"An enemy outflanking movement on Beersheba. With about one infantry and one cavalry division is indicated but the main attack, as before, must be expected on the Gaza front."

General Allenby's battle order was issued on October 22nd, the general plan being as follows:

General Chetwode. With XX Corps, was to attack Beersheba from the south-west, while General Chauvel, with two divisions of Desert Mounted Corps, would assault the town from the east and north-east, the combined attack being scheduled to take place on October 31st. On October 28th the 11th Light Horse Regiment, 470 strong, moved from Tel el Fara with the 4th Brigade, the first stage of its ride to encircle Beersheba. That night we camped at Esani, and the following day proceeded to Khalasa, a small village which stands on the of the ancient city of Eleusa. We rested here during afternoon, and, at nightfall, moved off on the final of our movement to take up a position within striking distance of Beersheba. The ride from Khalasa that will long be remembered by the 11th Regiment. The night was hot and oppressive, and great billows of heavy dust rolled through the ranks of plodding horses clung to the column in a dense cloud as it moved across the lowlands south of Beersheba.

We filled our water-bottles at Khalasa, but, in view of the conditions ahead of us, known and unknown, we were exhorted to conserve this meagre supply at all costs and by all means in our power. By midnight both men [80] and horses were showing the need of water, and, with Khalasa far behind us, the nearest wells now lay behind the defences of Beersheba, in the heart of the town.

Soon after midnight, our O.C., Colonel Parsons, D.S.O., drew out from his position at the head of the column, exchanging a word here and there with the tired troopers as they rode along. One section of men of "C" Squadron were discussing the "shortage of water" in terms that left nothing to the imagination, when the Colonel interrupted them.

"You fellows should copy my example," he said. "For the past ten miles, I have carried a small pebble in my mouth, and I haven't felt the need of a drink of water."

For a moment, this well-meant advice from the C.O. was met by a "stony" silence, but, as he rode off into the darkness, a wag in the troop called out in a hoarse and croaky voice, "If the Colonel can travel ten miles without a drink on one small pebble, how far will he go on half a brick?" and Colonel Parsons, not yet out of earshot, joined in the general laughter that followed.

Just before daybreak, the attack developed on our left flank, and the roar of the guns reverberating through the hills and wadis was a heartening sound to our ears. During the day, we relieved the 8th Regiment on an outpost line with the 12th Regiment on our right, and the 7th Mounted Brigade on our left. We came under heavy machine gun fire on the left, and our right flank was subjected to heavy rifle fire from a Turkish redoubt cunningly placed at the convergence of two low ridges. As the afternoon wore on, the position became serious. The outer defences of Beersheba had not fallen to our attacks and the mounted troops could not endure another night without water. Occasionally, as we worked onto the high ground, we could see the town of Beersheba lying in a saucer-shaped dip at the foot of the Judean hills. A barren, treeless plain sloped easily down to the town four miles away. It was too far off to permit an organised dismounted attack before darkness set in, and with every moment that passed the position became more critical. Earlier in the day, General Chauvel had established his headquarters on a slight rise some distance in our rear, in the vicinity of Khashm Zanna, and here, as the afternoon waned, a tense military drama of tremendous importance was being enacted. General Chauvel had just made up his mind that a galloping charge was his only hope of [81] saving the day. With him were General Hodgson, Brigadier-General Grant, of the 4th Australian Brigade and Brigadier-General Fitzgerald, of the 5th Imperial Mounted Yeomanry Brigade. Generals Grant and Fitzgerald both pleaded with their leader for the honour of the charge. Those few brief moments, made tense by a desperate situation, must rightly occupy a place amongst the "memorable moments in history."

General Chauvel always tried to remain impartial in his treatment of the Australian and Imperial horsemen under his charge, and for an instant he remained silent, showing no outward sign of the conflict taking place within him. Turning quietly to General Hodgson, he settled the matter in one swift, crisp sentence, "Put Grant straight at it," he exclaimed. [See
end note, ed.]

General Grant wasted no time in formalities, but running to his horse he mounted and galloped away to assemble his Brigade. The 11th Regiment was spread over a long line of outposts, and considerable time must elapse before they could be assembled, but the 4th and 12th Regiments were already assembled near at hand and were soon drawn up in a battle formation behind the crest of a ridge looking down upon the plain of Beersheba. At 4.30, the first line of Australian horsemen went over the ridge at a trot which soon developed into a hand gallop, as the troopers, with bayonets flashing in their hands, warmed to the occasion and spurred their mounts onward. A second and third line followed at intervals of 300 yards, and, ere long, the great plain echoed to the beat of a thousand horses.

A handful of picked horsemen, acting as ground scouts, raced ahead of the main body, eyes alert for the first signs of barbed wire, but, fortunately, the Turks had thrown up no wire entanglements around the trenches in that area.

The enemy opened fire with shrapnel, which burst in white puffs over the galloping lines. As the horsemen neared the first line of trenches, they came under the fire of machine guns and rifles, but, without checking their speed, they swept across the Turkish defences. Some of the men dismounted and went to work with rifle and bayonet, while others raced on to the town, chasing the Turks into the hills beyond. In one brief, glorious hour, the Turkish left flank was shattered, and Beersheba was ours. The spectacle of Light Horsemen, with bayonets in [82] their hands, charging infantrymen in strongly entrenched positions, was something quite unique in the history of warfare in any period, and the boldness of the charge and its unparalleled success, fired the imagination of the British peoples. The newspapers in England, Australia and America flashed the news around the world in bold headlines.

For many nights "Grant's Brigade" was the toast of honour in every officers' mess along Allenby's front. Its counterpart in the troopers'. lines was an equally spontaneous cheer for "Grant's mob," wherever the 4th Brigade colours were seen.

The Commonwealth official historian relates that an intercepted wireless message sent by the Turkish Commander as he fled in the night from Beersheba, stated in effect that his troops had broken because they were "terrified of the Australian Cavalry."

The historian states further that a German Staff Officer captured in Beersheba said that, when the 4th Brigade was seen to move, its advance had been taken for a mere demonstration. "We did not believe," he said, "that the charge would be pushed home. That seemed an impossible intention. I have heard a great deal of the fighting quality of Australian soldiers. They are not soldiers at all; they are madmen."

And while the rest of the world was agog at this fearless exploit of the casual Australian and his equally imperturbable horse, these fellows were swapping yarns around their camp fires, in the streets and roads of Beersheba, or lounging around the time-honoured wells of the town where Abraham, Isaac and Joseph and the sons of Samuel watered their flocks. Other parties of them were still "mopping" up the town, collecting prisoners and booty and piling the latter into hastily formed dumps.

The 11th Regiment captured four hundred prisoners and a great quantity of booty. Some of the Germans and Turks who were rooted out of dugouts and buildings resisted, and there were a few isolated "scraps," which invariably ended in our favour. We found loaves of coarse Turkish bread, tins of poor quality coffee, and dried apricots and dates and figs. There was an almost unlimited supply of Turkish paper money, which, alas, had no intrinsic value for the British troops, but it was rumoured that a troop of one Regiment found a quantity of Turkish gold. A sergeant of the 11th Regiment [83] discovered a canvas bag tilled with Turkish war medals, including many Gallipoli Stars (a nodal struck by the Turkish War Ministry to celebrate Gallipoli), which he shared amongst, his mates. In another part of the town a liberal stock of cognac and red and white wine was unearthed, but, before an officer who heard of the discovery could place a guard over it, the find had vanished. This officer afterwards said he never saw anything disappear so quickly or so completely. He admitted that he got a bottle of cognac out of it himself, but added, somewhat ruefully, "I had to buy it front a Digger who was in the early rush. It cost me five 'bob'."

There, was the usual crop of humorous incidents which invariably followed in the wake of the Australians.

About midnight a Digger staggered into our lines, a bottle of cognac in each hand, a rollicking song on his lips, and with the front of his tunic glittering with a score or more of 'Puckish war medals pinned closely together. In a loud, thick noire, punctuated with hiccoughs, he insisted that the Sergeant-Major should come out of his bed and salute him, but, to his everlasting disgust, an unsympathetic sergeant of the guard throw him in the guard tent to keep him out of further mischief.

Later still that night, another wag rolled into our lines and wakened his companions for the purpose, as he expressed it, of declaring himself "a Turkish millionaire," and, lest anyone should doubt his assertion, he emptied a feed-bag of Turkish bank notes by the side of the fire, and, throwing himself down on his mountain of money, fell fast asleep.

It was almost daybreak before the last of the independent foragers filtered into our lines. Next morning a small party of Headquarters men, led by Sergeant Flemming, captured two Turkish soldier; who were found hiding in a cave in the bank of a wadi. They were unceremoniously pulled out of their lair, and the Sergeant marched them to Headquarters at the point of his revolver. Soon after breakfast enemy 'planes bombed our lines, scoring a hit on our Army Medical tent, killing Sergeant Carney, of the A.M.C.

That night: the Regiment occupied fill outpost line running from the Mosque in 'Beersheba north-west to Gamli Road, and the patrol:; were despatched to a distance of four miles along all roads in that sector without sighting the enemy. [84] On 2nd November the Regiment was relieved from its outpost position and moved to a bivouac area at Karm to reorganise.

Reorganisation after an engagement always meant "kit inspection," which is the official method of discovering losses of gear due to that engagement. Each man spreads his blanket on the ground and piles all the gear he has upon it as neatly as possible. The Commanding Officer, the Adjutant and the Sergeant-Major then walk slowly through the lines, when shortages are listed and requisitions issued to "stores" to replace them.

During his inspection at Karm that morning, Colonel Parsons noticed that every man in one particular Troop of "C" Squadron had conspicuously placed a large round stone on the centre of his blanket. The effect produced by a matter of forty round stones in a long, straight row on the smooth line of blankets, was inescapable and extraordinary, and failing, quite naturally, to grasp the significance of it, the Colonel addressed the nearest trooper.

"What is the purpose of the round stones?" said he, pointing along the line.

"Those stones, sir," replied the trooper, very seriously, "represent the pebble you told us about at Khalasa, and which we now carry in the kits for quenching our thirst," and, for the second time, the Colonel joined in the laughter at his own expense. The boys were satisfied. They had carried their joke to its natural conclusion, and nothing further was heard of the Colonel's thirst-quenching pebble.


[Editor's note: This is quite a contentious comment which Chauvel and Grant have different stories. For copies of their letters to Bean, see: "Put Grant straight at it."]


Further Reading:

"Put Grant straight at it."

11th Australian Light Horse Regiment, AIF

11th Australian Light Horse Regiment, Roll of Honour

The Battle of Beersheba, Palestine, 31 October 1917

Australian and New Zealand Roll of Honour

Battles where Australians fought, 1899-1920


Citation: The Battle of Beersheba, Palestine, 31 October 1917, 11th LHR, AIF, Unit History Account

Posted by Project Leader at 8:35 PM EADT
Updated: Sunday, 4 October 2009 9:47 AM EADT
9th LHR AIF War Diary, 13 October
Topic: AIF - 3B - 9 LHR

9th LHR, AIF

9th Light Horse Regiment

War Diary, 13 October

Pro Gloria et Honore - For Glory and Honour

Regimental March -  Marching Through Georgia


The following entries are extracted and transcribed from the 9th Light Horse Regiment War Diary, the originals of which are held by the Australian War Memorial. There are 366 entries on this site. Each day has entries as they occurred from 1914 to 1919. In addition to the 9th Light Horse Regiment War Diary, when appropriate, entries from the 3rd Light Horse Brigade War Diary and other regiments with the Brigade will also appear. Entries from the unit history, Darley, TH, With the Ninth Light Horse in the Great War, Adelaide, Hassell Press, 1924 will also appear from time to time. The aim is to give the broadest context to the story and allow the reader to follow the day to day activities of the regiment. If a relative happened to have served in the regiment during the Great War, then this provides a general framework in which the individual story may be told.


The Diary


1914

Tuesday, October 13, 1914

9th Light Horse Regiment Location -  Morphettville Race Course Camp and Broadmeadows Camp, Victoria. 

9th Light Horse Regiment War Diary - Formation of Regiment occurring at Morphettville Race Course Camp, Adelaide, while "C" Squadron is formed at Broadmeadows Camp, Victoria. 


1915

Wednesday, October 13, 1915

9th Light Horse Regiment Location - Rhododendron Spur

9th Light Horse Regiment War Diary - The position was heavily shelled this morning by 4.8 Howitzer. One machine gun was blown out of position and two men slightly wounded. No other damage was done. State today 15 Officers, 306 Other Ranks, total 321. Bayonet strength 199. Returned from hospital three Other Ranks.


1916

Friday, October 13, 1916

9th Light Horse Regiment Location - Bir Ganadil

9th Light Horse Regiment War Diary - Daily Patrols also sent to Bir Moseifig and  surrounding neighbourhood.

2000 Once camel shot by "A" Squadron Outpost. Bedouin rider of same got away.


1917

Saturday, October 13, 1917

9th Light Horse Regiment Location - Um Urgan

9th Light Horse Regiment War Diary - Rouse 0400. CO, Adjutant, Headquarters' Signallers, B and C Squadrons moved out 0600 to Abusha'ar for practice aeroplane contact patrol work. Ground strips for signalling used for the first time. Aeroplane observer not familiar with signals required and had to effect a landing for fuller instructions. Returned to bivouac at 1400. Barker, Lieutenant AS, returned from Port Said Rest Camp.


1918

Sunday, October 13, 1918

9th Light Horse Regiment Location - Kaukab

9th Light Horse Regiment War Diary - Hargrave, Lieutenant LMS, MC to hospital. Gallagher, 3227 Trooper W, died of illness. Morgan, 605A Trooper FR, died of wounds.


1919

Monday, October 13, 1918

9th Light Horse Regiment Location - Adelaide

9th Light Horse Regiment War Diary - Regiment disbanded.


Previous: 9th LHR AIF War Diary, 12 October

Next: 9th LHR AIF War Diary, 14 October


Sources:

See: 9th Australian Light Horse Regiment, Contents
Australian Light Horse Studies Centre, AIF War Diaries of the Great War, Site Transcription Policy


Further Reading:

9th Light Horse Regiment AIF

Bert Schramm Diary

9th Australian Light Horse Regiment, Roll of Honour 

Battles where Australians fought, 1899-1920

 
Citation: 9th LHR AIF War Diary, 13 October

Posted by Project Leader at 6:28 PM EADT
Updated: Thursday, 16 September 2010 3:31 PM EADT
Diaries of AIF Servicemen, Bert Schramm, 13 October 1918
Topic: Diary - Schramm

Diaries of AIF Servicemen

Bert Schramm

13 October 1918


Bert Schramm


2823 Private Herbert Leslie SCHRAMM, a 22 year old Farmer from Whites River, South Australia. He enlisted on 17 February 1916; and at the conclusion of the war Returned to Australia, 10 July 1919.

During part of the course of his military service with the AIF, Bert Schramm kept a diary of his life. Bert was not a man of letters so this diary was produced with great effort on his behalf. Bert made a promise to his sweetheart, Lucy Solley, that he would do so after he received the blank pocket notebook wherein these entries are found. As a Brigade Scout since September 1918, he took a lead part in the September Offensive by the Allied forces in Palestine. Bert's diary entries are placed alongside those of the 9th Light Horse Regiment to which he belonged and to the 3rd Light Horse Brigade to which the 9th LHR was attached. On this basis we can follow Bert in the context of his formation.


The Diaries

The complete diary is now available on the Australian Light Horse Studies Centre Site at:

Bert Schramm Diary


Finding more about a service person. See:

Navigating the National Archives Service File 


Bert Schramm's Handwritten Diary, 12 - 19 October 1918

[Click on page for a larger print version.]


Bert Schramm

Sunday, October 13, 1918

Bert Schramm's Location - Kaukab

Bert Schramm's Diary -  Things are in a pretty bad state through sickness and they have no facilities for dealing with the number of sick they have. In fact things are in a pretty rotten state.


9th Light Horse Regiment War Diary

9th Light Horse Regiment Location - Kaukab

9th Light Horse Regiment War Diary - Hargrave, Lieutenant LMS, MC to hospital. Gallagher, 3227 Trooper W, died of illness. Morgan, 605A Trooper FR, died of wounds.

9th LHR AIF War Diary, 13 October      


Darley

Darley, TH, With the Ninth Light Horse in the Great War, Adelaide, Hassell Press, 1924.

No Entry


Previous:  Bert Schramm's Diary, 12 October 1918

Next:  Bert Schramm's Diary, 14 October 1918


Sources Used:

Bert Schramm's Diary

National Archives Service File.

Embarkation Roll, AWM8.

Australian War Memorial Roll of Honour

Nominal Roll, AWM133, Nominal Roll of Australian Imperial Force who left Australia for service abroad, 1914-1918 War.


War Diaries and Letters

All War Diaries and letters cited on this site should be read in conjunction with the Australian Light Horse Studies Centre, War Diaries and Letters, Site Transcription Policy which may be accessed at:

Australian Light Horse Studies Centre, War Diaries and Letters, Site Transcription Policy 


Further Reading:

Bert Schramm Diary

Bert Schramm Diary, Album

Bert Schramm's Photo Album

9th Australian Light Horse Regiment, AIF

9th Australian Light Horse Regiment, War Diary, Day by Day Account

Battles where Australians fought, 1899-1920


Citation: Diaries of AIF Servicemen, Bert Schramm, 13 October 1918


Posted by Project Leader at 6:04 PM EADT
Updated: Wednesday, 8 June 2011 1:12 PM EADT
Colonel Husnu, Yildirim, Page 98
Topic: Tk - Bks - Yildirim

Another entry from the book written by Lieutenant Colonel Hüseyin Hüsnü Emir, called Yildirim. Every day, one page of the book will be posted. This is Page 98.


Colonel Hüsnü, Yildirim, Page 98.

[Click on page for a larger print version.]


Citation: Colonel Hüsnü, Yildirim, Page 98

Posted by Project Leader at 5:49 PM EADT
Updated: Monday, 13 October 2008 5:53 PM EADT

Newer | Latest | Older

Full Site Index


powered by FreeFind
Let us hear your story: You can tell your story, make a comment or ask for help on our forum.

Desert Column Forum

A note on copyright

The Australian Light Horse Studies Centre is a not for profit and non profit group whose sole aim is to write the early history of the Australian Light Horse from 1900 - 1920. It is privately funded and the information is provided by the individuals within the group and while permission for the use of the material has been given for this site for these items by various donors, the residual and actual copyright for these items, should there be any, resides exclusively with the donors. The information on this site is freely available for private research use only and if used as such, should be appropriately acknowledged. To assist in this process, each item has a citation attached at the bottom for referencing purposes.

Please Note: No express or implied permission is given for commercial use of the information contained within this site.

A note to copyright holders

The Australian Light Horse Studies Centre has made every endeavour to contact copyright holders of material digitised for this blog and website and where appropriate, permission is still being sought for these items. Where replies were not received, or where the copyright owner has not been able to be traced, or where the permission is still being sought, the Australian Light Horse Studies Centre has decided, in good faith, to proceed with digitisation and publication. Australian Light Horse Studies Centre would be happy to hear from copyright owners at any time to discuss usage of this item.

Contact

Australian Light Horse Studies Centre

eXTReMe Tracker