« August 2009 »
S M T W T F S
1
2 3 4 5 6 7 8
9 10 11 12 13 14 15
16 17 18 19 20 21 22
23 24 25 26 27 28 29
30 31
You are not logged in. Log in


Search the site:


powered by FreeFind
Volunteer with us.

Entries by Topic All topics
A Latest Site News
A - Using the Site
AAA Volunteers
AAB-Education Centre
AAC-Film Clips
AAC-Photo Albums
AIF & MEF & EEF
AIF - Lighthorse
AIF - ALH - A to Z
AIF - DMC
AIF - DMC - Or Bat
AIF - DMC - Anzac MD
AIF - DMC - Aus MD
AIF - DMC - British
AIF - DMC - BWI
AIF - DMC - French
AIF - DMC - Indian
AIF - DMC - Italian
AIF - DMC - Medical
AIF - DMC - Remounts
AIF - DMC - Scouts
AIF - DMC - Sigs
AIF - DMC - Sigs AirlnS
AIF - DMC - 1 Sig Sqn
AIF - DMC - 2 Sig Sqn
AIF - DMC - Eng
AIF - DMC - Eng 1FSE
AIF - DMC - Eng 2FSE
AIF - DMC - GSR
AIF - 1B - 1 LHB
AIF - 1B - 6 MVS
AIF - 1B - 1 LHMGS
AIF - 1B - 1 Sig Trp
AIF - 1B - 1 LHFA
AIF - 1B - 1 LHR
AIF - 1B - 2 LHR
AIF - 1B - 3 LHR
AIF - 2B - 2 LHB
AIF - 2B - 7 MVS
AIF - 2B - 2 LHFA
AIF - 2B - 2 LHMGS
AIF - 2B - 2 Sig Trp
AIF - 2B - 5 LHR
AIF - 2B - 6 LHR
AIF - 2B - 7 LHR
AIF - 3B - 3 LHB
AIF - 3B - 8 MVS
AIF - 3B - 3 LHB Sigs
AIF - 3B - 3 LHFA
AIF - 3B - 3 LHMGS
AIF - 3B - 3 Sig Trp
AIF - 3B - 8 LHR
AIF - 3B - 9 LHR
AIF - 3B - 10 LHR
AIF - 4B - 4 LHB
AIF - 4B - 4 Sig Trp
AIF - 4B - 9 MVS
AIF - 4B - 4 LHFA
AIF - 4B - 4 LHMGS
AIF - 4B - 4 LHR
AIF - 4B - 11 LHR
AIF - 4B - 12 LHR
AIF - 5B - 5 LHB
AIF - 5B - 10 MVS
AIF - 5B - 5 LHFA
AIF - 5B - 5 Sig Trp
AIF - 5B - ICC
AIF - 5B - 14 LHR
AIF - 5B - 15 LHR
AIF - 5B - 1er Regt
AIF - 5B - 2 NZMGS
AIF - AASC
AIF - Aboriginal LH
AIF - Badges
AIF - Cars
AIF - Chinese LH
AIF - Double Sqns
AIF - Engineers
AIF - Fr - 22 Corps
AIF - Fr - 13 LHR
AIF - Honour Roll
AIF - HQ - 3rd Echelon
AIF - Marching Songs
AIF - Misc Topics
AIF - NZMRB
AIF - NZMRB - AMR
AIF - NZMRB - CMR
AIF - NZMRB - EFT
AIF - NZMRB - NZMFA
AIF - NZMRB - NZMGS
AIF - NZMRB - OMR
AIF - NZMRB - Sig-Trp
AIF - NZMRB - WMR
AIF - Ships
AIF - Ships - Encountr
AIF - Ships - Una
AIF - WFF
AIF - Wireless Sqn
Battles
BatzA - Australia
BatzA - Broken Hill
BatzA - Liverpool
BatzA - Merivale
BatzB - Boer War
BatzB - Bakenlaagte
BatzB - Belmont
BatzB - Bothaville
BatzB - Buffels Hoek
BatzB - Coetzees Drift
BatzB - Diamond Hill
BatzB - Driefontein
BatzB - Elands
BatzB - Graspan
BatzB - Grobelaar
BatzB - Grootvallier
BatzB - Hartebestfontn
BatzB - Houtnek
BatzB - Karee Siding
BatzB - Kimberley
BatzB - Koster River
BatzB - Leeuw Kop
BatzB - Mafeking
BatzB - Magersfontein
BatzB - Modder River
BatzB - Onverwacht
BatzB - Paardeberg
BatzB - Palmietfontein
BatzB - Pink Hill
BatzB - Poplar Grove
BatzB - Rhenoster
BatzB - Sannahs Post
BatzB - Slingersfontn
BatzB - Stinkhoutbm
BatzB - Sunnyside
BatzB - Wilmansrust
BatzB - Wolvekuil
BatzB - Zand River
BatzG - Gallipoli
BatzG - Anzac
BatzG - Aug 1915
BatzG - Baby 700
BatzG - Evacuation
BatzG - Hill 60
BatzG - Hill 971
BatzG - Krithia
BatzG - Lone Pine
BatzG - Nek
BatzJ - Jordan Valley
BatzJ - 1st Amman
BatzJ - 2nd Amman
BatzJ - Abu Tellul
BatzJ - Es Salt
BatzJ - JV Maps
BatzJ - Ziza
BatzM - Mespot
BatzM - Baghdad
BatzM - Ctesiphon
BatzM - Daur
BatzM - Kurna
BatzM - Kut el Amara
BatzM - Ramadi
BatzN - Naval
BatzN - AE1
BatzN - Cocos Is
BatzN - Heligoland
BatzN - Marmara
BatzN - Zeebrugge
BatzN - Zeppelin L43
BatzNG - Bitapaka
BatzO - Other
BatzO - Baku
BatzO - Egypt 1919
BatzO - Emptsa
BatzO - Karawaran
BatzO - Peitang
BatzO - Wassa
BatzP - Palestine
BatzP - 1st Gaza
BatzP - 2nd Gaza
BatzP - 3rd Gaza
BatzP - Aleppo
BatzP - Amwas
BatzP - Ayun Kara
BatzP - Bald Hill
BatzP - Balin
BatzP - Beersheba
BatzP - Berkusieh
BatzP - Damascus
BatzP - El Auja
BatzP - El Buggar
BatzP - El Burj
BatzP - Haifa
BatzP - Huj
BatzP - JB Yakub
BatzP - Kaukab
BatzP - Khan Kusseir
BatzP - Khuweilfe
BatzP - Kuneitra
BatzP - Megiddo
BatzP - Nablus
BatzP - Rafa
BatzP - Sasa
BatzP - Semakh
BatzP - Sheria
BatzP - Surafend
BatzP - Wadi Fara
BatzS - Sinai
BatzS - Bir el Abd
BatzS - El Arish
BatzS - El Mazar
BatzS - El Qatiya
BatzS - Jifjafa
BatzS - Magdhaba
BatzS - Maghara
BatzS - Romani  
BatzS - Suez 1915
BatzSe - Senussi
BatzWF - Westn Front
BW - Boer War
BW - NSW
BW - NSW - 1ACH
BW - NSW - 1NSWMR
BW - NSW - 2NSWMR
BW - NSW - 3ACH
BW - NSW - 3NSWIB
BW - NSW - 3NSWMR
BW - NSW - 5ACH
BW - NSW - A Bty RAA
BW - NSW - AAMC
BW - NSW - Aust H
BW - NSW - Lancers
BW - NSW - NSW Inf
BW - NSW - NSWCBC
BW - NSW - NSWIB
BW - NSW - NSWMR_A
BW - NZ
BW - Qld
BW - Qld - 1ACH
BW - Qld - 1QMI
BW - Qld - 2QMI
BW - Qld - 3ACH
BW - Qld - 3QMI
BW - Qld - 4QIB
BW - Qld - 5QIB
BW - Qld - 6QIB
BW - Qld - 7ACH
BW - QLD - AAMC
BW - SA
BW - SA - 1SAMR
BW - SA - 2ACH
BW - SA - 2SAMR
BW - SA - 3SACB
BW - SA - 4ACH
BW - SA - 4SAIB
BW - SA - 5SAIB
BW - SA - 6SAIB
BW - SA - 8ACH
BW - SA - AAMC
BW - Tas
BW - Tas - 1ACH
BW - Tas - 1TIB
BW - Tas - 1TMI
BW - Tas - 2TB
BW - Tas - 2TIB
BW - Tas - 3ACH
BW - Tas - 8ACH
BW - Vic
BW - Vic - 1VMI
BW - Vic - 2ACH
BW - Vic - 2VMR
BW - Vic - 3VB
BW - Vic - 4ACH
BW - Vic - 4VIB
BW - Vic - 5VMR
BW - Vic - 6ACH
BW - Vic - AAMC
BW - Vic - Scot H
BW - WA
BW - WA - 1WAMI
BW - WA - 2ACH
BW - WA - 2WAMI
BW - WA - 3WAB
BW - WA - 4ACH
BW - WA - 4WAMI
BW - WA - 5WAMI
BW - WA - 6WAMI
BW - WA - 8ACH
BW Gen - Campaign
BW Gen - Soldiers
BW General
Cavalry - General
Diary - Schramm
Egypt - Heliopolis
Egypt - Mena
Gen - Ataturk Pk, CNB
Gen - Australia
Gen - Legends
Gen - Query Club
Gen - St - NSW
Gen - St - Qld
Gen - St - SA
Gen - St - Tas
Gen - St - Vic
Gen - St - WA
Gm - German Items
Gm - Bk - 605 MGC
GW - 11 Nov 1918
GW - Atrocities
GW - August 1914
GW - Biographies
GW - Propaganda
GW - Spies
GW - We forgot
Militia 1899-1920
Militia - Area Officers
Militia - Inf - Infantry
Militia - Inf - 1IB
Militia - Inf - 2IB
Militia - Inf - 3IB
Militia - Inf - NSW
Militia - Inf - Qld
Militia - Inf - SA
Militia - Inf - Tas
Militia - Inf - Vic
Militia - Inf - WA
Militia - K.E.Horse
Militia - LH
Militia - LH - Regts
Militia - LH - 1LHB
Militia - LH - 2LHB
Militia - LH - 3LHB
Militia - LH - 4LHB
Militia - LH - 5LHB
Militia - LH - 6LHB
Militia - LHN - NSW
Militia - LHN - 1/7/1
Militia - LHN - 2/9/6
Militia - LHN - 3/11/7
Militia - LHN - 4/6/16
Militia - LHN - 5/4/15
Militia - LHN - 6/5/12
Militia - LHN - 28
Militia - LHQ - Qld
Militia - LHQ - 13/2
Militia - LHQ - 14/3/11
Militia - LHQ - 15/1/5
Militia - LHQ - 27/14
Militia - LHS - SA
Militia - LHS - 16/22/3
Militia - LHS - 17/23/18
Militia - LHS - 24/9
Militia - LHT - Tas
Militia - LHT - 12/26
Militia - LHV - Vic
Militia - LHV - 7/15/20
Militia - LHV - 8/16/8
Militia - LHV - 9/19
Militia - LHV - 10/13
Militia - LHV - 11/20/4
Militia - LHV - 19/17
Militia - LHV - 29
Militia - LHW - WA
Militia - LHW-18/25/10
Militia - Military Orders
Militia - Misc
MilitiaRC - Rifle Clubs
MilitiaRC - NSW
MilitiaRC - NT
MilitiaRC - Qld
MilitiaRC - SA
MilitiaRC - Tas
MilitiaRC - Vic
MilitiaRC - WA
Militiaz - New Zealand
Tk - Turkish Items
Tk - Army
Tk - Bks - Books
Tk - Bks - 1/33IR
Tk - Bks - 27th IR
Tk - Bks - Air Force
Tk - Bks - Yildirim
Tk - POWs
Wp - Weapons
Wp - Hotchkiss Cav
Wp - Hotchkiss PMG
Blog Tools
Edit your Blog
Build a Blog
RSS Feed
View Profile
Open Community
Post to this Blog
Site Index
Education Centre
LH Militia
Boer War
Transport Ships
LH Battles
ALH - Units
ALH - General
Aboriginal Light H
Weapons
Ottoman Sources

"At a mile distant their thousand hooves were stuttering thunder, coming at a rate that frightened a man - they were an awe inspiring sight, galloping through the red haze - knee to knee and horse to horse - the dying sun glinting on bayonet points..." Trooper Ion Idriess

The Australian Light Horse Studies Centre aims to present an accurate history as chroniclers of early Australian military developments from 1899 to 1920.

The Australian Light Horse Studies Centre site holds over 12,000 entries and is growing daily.

Contact: Australian Light Horse Studies Centre

Let us hear your story: You can tell your story, make a comment or ask for help on our Australian Light Horse Studies Centre Forum called:

Desert Column Forum

WARNING: This site contains: names, information and images of deceased people; and, language which may be considered inappropriate today.

Saturday, 8 August 2009
Battle of Romani, Sinai, August 4 to 5, 1916, Falls Account, The Turkish Advance.
Topic: BatzS - Romani

Battle of Romani

Sinai, August 4 to 5, 1916

Falls Account, The Turkish Advance.


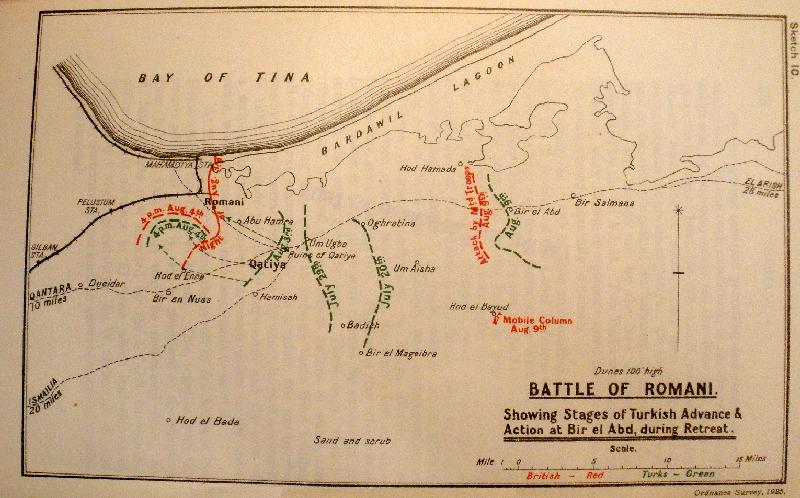
The Battle of Romani, 4-6 August 1916

[Click on map for larger version]

[From: Military operations: Egypt and Palestine, Sketch 10 facing p. 178.]


As part of the Official British War History of the Great War, Captain Cyril Falls and Lieutenant General George MacMunn were commissioned to produce a commentary on the Sinai, Palestine and Syrian operations that took place. In 1928, their finished work, Military Operations, Egypt and Palestine - From the outbreak of war with Germany to June 1917,  was published in London. Their book included a section specifically related to the battle of Romani and is extracted below.

MacMunn, G. & Falls, C., Military operations: Egypt and Palestine, (London 1930), pp. 184 - 190:


Part 2. The Turkish Advance.

July opened quietly. Active patrolling was continued one reconnaissance reaching Bir Salmana on the 9th and finding it unoccupied. The most advanced Turkish camp was at Bir el Mazar, 42 miles east of Romani, where upwards of 2,000 troops were believed to be concentrated, but the garrison showed no sign of aggression. It appeared that, the season being so far gone, the long anticipated Turkish offensive would now be postponed until the winter.

Suddenly the situation changed. On the 17th July enemy aircraft showed great activity over the Romani area. The German aeroplanes were faster and better climbers than any which Sir A. Murray had at his disposal, and though they did not prevent the British machines from reconnoitring the country ahead, they established a definite superiority in the air which was long to endure. [For a statement of the situation, see Note III at end of Chapter. The new German 300th Flight Detachment is mentioned in Note 1.] On the 19th July a British aeroplane, with Brigadier General E. W. C. Chaytor, commanding the New Zealand Mounted Rifles Brigade, acting as observer, discovered that a force estimated at 2,500 had occupied Bir Bayud and that there was a somewhat smaller concentration at Gameil. [Gameil, a small oasis, is west of Bir Bayud.] On the northern route there was a force of equal strength at Bir el Abd, where tents were visible among the groves. Some 6,000 camels were also seen at the camps or moving between Bir el Abd and Bir Salmana. By the morning of the 20th there had been another move forward. Three thousand men were now entrenched at Mageibra, and Bir el Abd had evidently been made an advanced depot for supplies and stores. There was also a small force so far forward as Oghratina, which had grown to 2,000 by the following morning. It was obvious that the Turkish offensive was after all about to be launched.

On receipt of General Chaytor's report, G.H.Q. took steps to reinforce the Romani position, still known as No. 3 Section Canal Defences and commanded by Major-General the Honorable H. A. Lawrence. Two battalions of the 42nd Division were moved up from No. 2 Section to Qantara and the 158th Brigade of the 53rd Division sent out to Romani on the 20th. The troops already at General Lawrence's disposal were the [180] 52nd Division and the A. & N.Z. Mounted Division, less the 3rd L.H. Brigade. On the night of the 22nd the dispositions in No. 3 Section were as follows:

On the main position:-

155th Brigade on the right (Redoubts 23, 22, 21 and 1 to 5);

158th Brigade (less one battalion) in the centre (Redoubts 6 to l0a);

157th Brigade on the left, holding the remainder of the line to the sea; and,

156th Brigade and one battalion 158th in reserve at Romani Station.


At Romani:-

1st and 2nd L.H. Brigades.


At Dueidar:-

5th A.L.H.


At Hill 70: -

N.Z.M.R. Brigade (less 5th A.L.H.), [The Wellington Regiment was attached at this time and throughout the Battle of Romani to the 2nd L.H. Brigade, and the 5th A.L.H. to the N.Z. M.R. Brigade.] and
Composite Regiment 5th Mounted Brigade. [The 5th Mounted Brigade had been in process of reorganization on the Canal after its losses at Qatiya and was gradually being brought up to Hill 70. A composite regiment of two squadrons Gloucester Yeomanry and one squadron Worcester Yeomanry, was moved up on the 20th. The third squadron of the Gloucester Yeomanry was at Pelusium when the Turks attacked the Australian outposts on the 4th August.] (Section Mounted Troops.)


At Hill 40:-

1st Dismounted Yeomanry Brigade.


The total rifle strength was about 14,000.

A relatively small proportion of the available artillery had been brought up owing to the shortage of water for the teams. The guns in position, including those sent up within the next few days, consisted of

one battery 60-pdrs.,

two batteries 4.5-inch howitzers, and

four 18-pdr, batteries.

The Ayr and Leicester Batteries R.H.A., with the A. & N.Z. Mounted Division, brought the total up to 36 guns.

Two 18-pdr. batteries 263rd Brigade, in position south of the railway, to fire south and south-east;

One 60-pdr, battery, 2 howitzer batteries 262nd Brigade and one 18-pdr. battery 260th Brigade in the centre, within the loop formed by the railway;

One 18-pdr. battery 260th Brigade on the shore near Mahamdiyah.


The employment of "ped-rails" - short wooden planks fastened to each wheel of the guns and wagons-had greatly increased the mobility of field artillery in the desert. Their object was to distribute the weight resting at any moment on the sand over a considerable surface, and thus minimize the sinking of the wheel. They were used throughout the campaign in Sinai and only removed when the comparatively firm soil of Southern Palestine was reached.

The water supply, which limited the amount of artillery that could be maintained at Romani, had a similar effect [181] with regard to troops. Sir A. Murray decided not to increase the force of four infantry brigades, but moved up the 160th and 161st Machine-Gun Companies, of the 53rd and 54th Divisions respectively, thus greatly increasing his fire power at a comparatively small cost in water. Meanwhile with the possibility of offensive action before his eyes, he ordered the concentration of a small mobile column of mounted troops and Imperial Camel Corps in No. 2 Section, [11th A.L.H. (less one squadron), City of London Yeomanry (less one squadron), 4th, 6th, and 9th Companies Imperial Camel Corps.] under the command of Lieut.-Colonel C. L. Smith, Imperial Camel Corps, and assembled the camel transport necessary to enable the 42nd Division to advance into the desert.

The two brigades of the A. & N.Z. Mounted Division at Romani redoubled their activity in patrolling. On the 20th July the 2nd L.H. Brigade, with two guns of the Ayrshire Battery, demonstrated against Oghratina and captured several prisoners, from whom the enemy's order of battle was learnt. It appeared that the Turkish force was commanded by Kress in person and consisted of the 3rd Division, of which one regiment had proved its marching and fighting qualities at Qatiya, and a regiment of camelry ; with a number of special machine-gun companies, heavy and mountain artillery, officered and partly manned by Germans and Austrians. [Fuller details of the enemy's force, from Turkish sources, are given in Turkish Forces.] From this date until the opening of the battle one of the two Light Horse brigades at Romani marched out each morning towards Qatiya at 2 a.m., and bivouacked till dawn in front of the position. It then advanced on a wide front until it had drawn the enemy's fire. If the Turkish outposts were weak, they were driven in; if the enemy appeared disposed to counter-attack, the brigade retired slowly. It returned to camp at nightfall, and the second brigade carried out an identical manoeuvre next day.

Until the 28th the enemy remained quiet, but that morning he was found to have occupied the Hod um Ugba, 5 miles east of the British line. Lieut.-Colonel W. Meldrum, commanding the Wellington Regiment, proposed to eject him from this position, which did not appear to be strongly held. Approval was given to his suggestion, and a brisk [182] attack by two squadrons, supported by two guns and several machine guns, drove the Turks from the hod, with the loss of 8 prisoners of the 31st Regiment.

The enemy's hesitation, his cautious advance and careful entrenchment of successive positions, was puzzling to G.H.Q., which asked for nothing better than an attack upon the Romani defences. We now know that the long pause was due simply to the fact that the Turks were awaiting their heavy artillery, delayed by the necessity for constructing tracks through the areas of heaviest sand and even then compelled to move by very short stages. But to the British command it seemed possible that Kress was not, after all, contemplating an attack, and that he would content, himself with sitting down and blocking the British advance. In this case it was probable that he would soon receive reinforcements, and it was therefore necessary to be prepared to attack him before they arrived. The Commander-in-Chief considered it scarcely possible that the Turks could attack in force elsewhere than on the northern route, and was prepared to reduce the troops in Nos. 1 and 2 Sections to a minimum. He calculated that all his preparations for the equipment of his force with camel transport would be complete by the 3rd August, but he decided to give the enemy another ten days, and instructed General Lawrence to be prepared to attack about the 13th, the date of the full moon, unless himself attacked earlier.

Sir A. Murray also discussed with Vice-Admiral Sir R. E. Wemyss, commanding the East Indies Station, the possibility of a landing at El Arish and the destruction of the Turkish base there. It was proposed to land an infantry brigade 3,000 strong, with detachments of engineers, and to construct entrenchments which it might be necessary, on that treacherous coast, to hold for several days while awaiting weather conditions favourable for re-embarkation. The C.I.G.S. cordially approved of the proposal and in fact agreed with reluctance to its abandonment when the victory of Romani and the retreat of the enemy towards El Arish had altered the situation.

The advance to the Hod um Ugba on the 28th, disturbed though it was by the Wellington Regiment, proved to be the beginning of the Turkish offensive. Next morning the enemy's line again ran through the hod, stretching for a short distance north of the caravan route and about six miles [183] south of it, to a point west of Badieh. By the morning of the 3rd August it was evident that he was at last about to launch his attack, for he had moved forward to Qatiya. His line now ran north-east and south-west, from the Bardawil Lagoon to east of Qatiya, with his left flank thrown well forward.

To Sir A. Murray it appeared that the enemy commander was bound down to one plan of operations. It was incredible that he should throw his main weight against the prepared defences. What was anticipated was a containing attack against these defences and an attack with all available strength against the British right south of Katib Gannit. A manoeuvre of this nature would obviously expose the Turkish left flank to an attack by mounted troops, an arm in which the British were strong and the enemy weak. To meet an attack designed to turn his right and pass round it against the camps at Romani and the railway, Sir A. Murray's plan was as follows. In the first place, the enemy was to be delayed and made to pay as dearly as possible for every foot of ground won south of Katib Gannit; then, when he was thoroughly committed and, it was hoped, in some degree disorganized, he was to be attacked in flank by the Section Mounted Troops from Hill 70 and Dueidar, and by the 3rd L.H. Brigade from the Canal Defences, while the Mobile Column already described operated more widely against his flank and rear.

The former of these two elements in the scheme of defence was ensured by a concealed prolongation of the right flank south of Katib Gannit. Major-General Chauvel, after a careful reconnaissance, had selected a position from Katib Gannit to the Hod el Enna, some four miles long, with a second position covering the series of parallel gullies, running south-east and north-west, which gave access to the area of soft sand in rear of the Romani defences. No entrenchments were made, as they would have betrayed the position to the active enemy aircraft, but telephone lines were laid down and the officers of the 1st and 2nd L. H. Brigades made themselves thoroughly acquainted with the ground. It was on these two brigades, under the command of General Chauvel, that was to fall the task of holding up the enemy till he could be taken in flank by the rest of the mounted troops, echeloned in rear. These were on the 3rd August disposed as follows At Dueidar:-

5th A.L.H. This regiment which, as has been stated, temporarily formed part of the N.Z.M.R. Brigade, was sent forward at night to reconnoitre the Turkish left, the Auckland Regiment taking its place at Dueidar.

At Hill 70:-

N.Z.M.R. Brigade (less 5th A.L.H.) and 5th Mounted Brigade, still Section Mounted Troops, that is, under General Lawrence's direct command.


At Ballybunion, the railhead of the metre-gauge railway from Ballah:

3rd L.H. Brigade.


At the railhead of the metre-gauge railway from Ferdan:-

Mobile Column.


The 42nd Division had been concentrated at Qantara between the 20th July and the end of the month, and by the 3rd August moved out along the railway and disposed as follows:

At Gilban Station:-

127th Brigade.

At Hill 70:-

126th Brigade.

At Hill 40:-

125th Brigade.


As it seemed probable that the enemy would attack next morning, the 1st L.H. Brigade was ordered to occupy at dusk the skeleton position south-west of Katib Gannit, with two regiments in line and one in reserve. The 1st and 2nd L.H. Brigades had had heavy and trying work in the desert heat and were both below strength, so that when horseholders and other details were deducted neither had more than eight hundred rifles available for dismounted action.

The preparations were now complete. British monitors had been lying off Mahamdiyah for some days, shelling the assembling Turkish force. An armoured train was in a siding at Qantara, ready to assist in the defence of the right flank. All available aircraft had been collected at Ismailia, Qantara, Port Said and Romani.


Previous: The British Occupation of Romani 

Next: The Turkish Attack on The 4th August 


Further Reading:

Battle of Romani, Sinai, August 4 to 5, 1916

Bir el Abd, Sinai, 9 August 1916

Battles where Australians fought, 1899-1920


Citation: Battle of Romani, Sinai, August 4 to 5, 1916, Falls Account, The Turkish Advance.

Posted by Project Leader at 12:01 AM EADT
Updated: Monday, 7 September 2009 6:24 PM EADT
Friday, 7 August 2009
Battle of Romani, Sinai, August 4 to 5, 1916, Roll of Honour, Smith's Column
Topic: BatzS - Romani

Battle of Romani

Sinai, August 4 to 5, 1916

Roll of Honour

Smith's Column


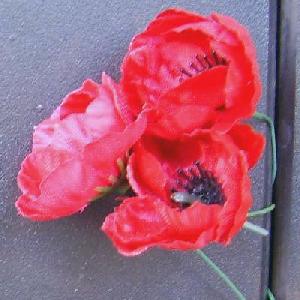
Poppies on the Roll of Honour, Australian War Memorial, Canberra


The Roll of Honour contains the names of all the men from Smith's Column known to have served and lost their lives during the Battle of Bir el Aweidia as part of the Battle of Romani.


Roll of Honour


Killed in Action or Died of Wounds

Bertie Gerald BARRETT, 11th Light Horse Regiment, Killed in Action, 7 August 1916.

William CLARK, 10th Company, Imperial Camel Corps, Killed in Action, 7 August 1916.

Septimus Crown Vass DANSIE, 3rd County of London Yeomanry (Sharpshooters), Killed in Action, 4 August 1916.

David William DAVIES, Imperial Camel Corps, Died of Wounds, 31 August 1916.

John Julius Jersey DE KNOOP, 6th Company, Imperial Camel Corps, Killed in Action, 7 August 1916.

Alan Frederick James, Baron DE RUTZEN, 6th Company, Imperial Camel Corps, Killed in Action, 7 August 1916.

Harold GIBBON, 11th Light Horse Regiment, Killed in Action, 7 August 1916.

Thomas Lambert GLASBY, 11th Light Horse Regiment, Killed in Action, 7 August 1916.

George HARRIS, 6th or 10th Company, Imperial Camel Corps, Killed in Action, 7 August 1916.

John William JONES, 4th Company, Imperial Camel Corps, Killed in Action, 6 August 1916.

Albert Edward PREWETT, 6th Company, Imperial Camel Corps, Killed in Action, 6 August 1916.

Allan James REED, 1/3 County of London Yeomanry (Sharpshooters), Died of Wounds, 15 August 1916.

Harold Rowton STEVENS, 11th Light Horse Regiment, Killed in Action, 7 August 1916.

Cecil M. WILSON, 1/3rd County of London Yeomanry (Sharpshooters), Killed in Action, 8 August 1916.


Wounded in Action

Earl Clarence BRIDGES, 4th Company, Imperial Camel Corps, Wounded in Action, 7 August 1916.

Percy Alfred BUSHBY, 4th Company, Imperial Camel Corps, Wounded in Action, 7 August 1916.

William R. DICK, 7th Company, Imperial Camel Corps, Wounded in Action 8 August 1916.

Thomas GOUGH, 4th Company, Imperial Camel Corps, Wounded in Action, 7 August 1916.

John George HAMILTON, 4th Company, Imperial Camel Corps, Wounded in Action, 7 August 1916.

Arthur Edward MacPHERSON, 4th Company, Imperial Camel Corps, Wounded in Action, 7 August 1916.

Neville Liddell PORTEOUS, 4th Company, Imperial Camel Corps, Wounded in Action, 7 August 1916.

George Reginald SALISBURY, 4th Company, Imperial Camel Corps, Wounded in Action, 7 August 1916.

Jack Carmichael THOMSON, 4th Company, Imperial Camel Corps, Wounded in Action, 7 August 1916.

Ernest Frederick UPSON, 4th Company, Imperial Camel Corps, Wounded in Action, 7 August 1916.


Lest We Forget


Acknowledgement: Many thanks to Steve Becker who provided much of the raw material that appears in this item.


Further Reading:

Battle of Romani, Sinai, August 4 to 5, 1916 

Bir el Abd, Sinai, 9 August 1916

Battles where Australians fought, 1899-1920


Citation: Battle of Romani, Sinai, August 4 to 5, 1916, Roll of Honour, Smith's Column

Posted by Project Leader at 12:01 AM EADT
Updated: Sunday, 25 October 2009 3:08 PM EADT
Battle of Romani, Sinai, August 4 to 5, 1916, Falls Account, The Turkish Attack on The 4th August
Topic: BatzS - Romani

Battle of Romani

Sinai, August 4 to 5, 1916

Falls Account, The Turkish Attack on The 4th August


The Battle of Romani, 4-6 August 1916

[Click on map for larger version]

[From: Military operations: Egypt and Palestine, Sketch 10 facing p. 178.]


As part of the Official British War History of the Great War, Captain Cyril Falls and Lieutenant General George MacMunn were commissioned to produce a commentary on the Sinai, Palestine and Syrian operations that took place. In 1928, their finished work, Military Operations, Egypt and Palestine - From the outbreak of war with Germany to June 1917,  was published in London. Their book included a section specifically related to the battle of Romani and is extracted below.

MacMunn, G. & Falls, C., Military operations: Egypt and Palestine, (London 1930), pp. 190 - 194:


Part 3. The Turkish Attack on The 4th August.

The Turks were fully prepared to play the role allotted to them by the British command. The account given by Kress of his plan of attack shows that it was exactly what had been anticipated. He intended to bombard the line of redoubts with his heavy artillery but to employ only weak infantry detachments against them. His main attack was to be launched against the British right and rear.

The night of the 3rd August was mild and still. There was a slight haze, but the shimmer of the sand made it possible to distinguish objects moving at a hundred yards' distance. A shot or two fired out in the desert to the southeast had put the long piquet line of the 1st and 2nd A.L.H. thoroughly on the alert, but it was almost midnight when a post reported a large body of men to its front. It afterwards became known that the enemy had followed the 2nd L.H. Brigade in its usual evening retirement from before Qatiya, hoping to pass round the flank of the British position on its heels. The regularity of the Australians' method of patrolling exposed them to a risk of this sort.

As soon as he was assured of the Turkish advance, Lieut.-Colonel J. B. Meredith, commanding the 1st L.H. Brigade, called up his third regiment. Finding the gullies held, the enemy came to a standstill, and there was silence for an hour. Then a sudden heavy fire burst out along the whole front, and, making their way forward in considerably superior strength, the Turks were by 2 a.m. in many places within fifty yards of the Australian line.

The squadrons on the left near Katib Gannit were hard pressed, but it was against Mount Meredith, a high dune in the centre, that the full weight of the attack developed. At 2.30 the Turks charged the hillock with loud shouts. Their masses, visible against the silver sheen of the sand, offered excellent targets to magazine fire and their first assault was beaten back with heavy loss, the fallen rolling down the steep slope. But steady pressure on its flanks speedily rendered the hill untenable, and at 3 a.m. it was abandoned. The squadron to the right of it was now taken in flank and suffered considerable loss, but was ordered to hold its ground until the position in rear was occupied. At 3.30 all the Australians immediately south of the hill, having been forced back upon their led horses, succeeded in mounting, disengaging themselves, and falling back to the second position. The Turks followed up swiftly and a machine gun on Mount Meredith swept the Australian lines.

Day broke, revealing to the enemy how slenderly the position was held and to the Australians that their right was outflanked by strong forces. The second position was therefore abandoned, and the brigade withdrew slowly to Wellington Ridge, troop covering troop, and by steady and accurate fire staving off a general attack with the bayonet, which might have meant the annihilation of the defence. The enemy now opened artillery fire upon the infantry defences and the camps in rear. The shrapnel caused some loss, but the high explosive shell was smothered in the soft sand.

At 4.30 a.m. Colonel J. R. Royston's 2nd L.H. Brigade came up from Etmaler. After its return from reconnaissance, it had almost immediately been ordered to turn out in readiness to support the 1st Brigade. General Chauvel, however, relying on the latter's steadiness, [It was General Chauvel's old brigade, which he had commanded at Gallipoli.] had refused to allow the 2nd Brigade to be committed to the fight until daylight had disclosed the general situation. He now ordered two of its regiments to move up on Colonel Meredith's right. Despite the reinforcement, the enemy's pressure continued and his advance up the valley between Wellington Ridge and Mount Royston, a dune about the same height as Katib Gannit and Mount Meredith, and 24 miles west of Wellington Ridge, continually forced back the right. Between 5 and 6 a.m. the light horsemen were compelled to retire slowly from the ridge, though the 6th and 7th A.L.H. still held the western edge. Finally, at 6.15, Colonel Meredith was ordered to withdraw his brigade behind the line occupied by the 7th A.L.H. to a position north of Etmaler camp. At 7 a.m. the 6th and 7th A.L.H. retired squadron by squadron from the remainder of Wellington Ridge. The enemy did not appear on the crest until an hour later, but then poured a heavy fire into the camp, only a few hundred yards away. The fire of the Ayr and Leicester Batteries, however, quickly drove him off it, and the immediate danger was averted.

The situation was now somewhat threatening, for the enemy's outflanking movement was steadily progressing, pushing along the slopes of Mount Royston and turning the right of the 2nd L.H. Brigade. Its third regiment, the Wellington M.R., had meanwhile been thrown in. Major C. E. Turner, commanding "D" squadron of the Gloucester Hussars at Pelusium Station, saw in the distance infantry moving about Mount Royston. He had had no report as to the situation, but at once marched his squadron towards the advancing enemy. His prompt action checked the outflanking movement, which made no further progress during the next two hours. Ugly as the aspect of the battle appeared, the enemy had already virtually failed in his bold attempt. His programme had been upset by the resistance of the two light horse brigades, his troops were fatigued and having drunk the water in their water-bottles, had now to face the growing heat without any.

Meanwhile, frontal attacks had been made on the main defences, but without ever causing anxiety to Major-General W. E. B. Smith, commanding the 52nd Division. At 8 a.m. extended lines of infantry advanced against Work 4. It was evidently the enemy's intention, though his attack was mainly for the purpose of holding the British infantry to their ground, to overwhelm Works 4 and 5 with heavy artillery fire and thus make a breach for an infantry attack. The shelling was heavy and accurate, [At the day's end it was found that 108 shells had fallen inside Work 4 and 61 within the perimeter of its wire defences; 89 shells in Work 5 and 43 within its perimeter.] but the Turkish attack broke down completely 150 yards from Work 4 under the fire of the divisional cyclist company and of the supporting artillery. Subsequent attempts to advance were less resolute.

Headquarters No. 3 Section, at Qantara, had already begun to put in train the movement against the Turkish left. At 5.35 a.m. General Lawrence ordered the 5th Mounted Brigade at Hill 70 to move towards Mount Royston. The Composite Regiment at once moved off and the remainder of the brigade prepared to follow. Then, as the situation became clearer, at 7.25, General Lawrence ordered the N.Z.M.R. Brigade to advance on Mount Royston via Dueidar, picking up its outlying regiment (the Auckland) at that point, and to "operate vigorously so as to cut off the enemy, who appears to have got round the right of the A. & N.Z. Mounted Division." The 3rd L.H. Brigade at Ballybunion was ordered to move forward to Hill 70 and send one regiment to Dueidar. G.H.Q. at the same time ordered the Mobile Column to march on Mageibra.

While the mounted troops were advancing the fight became almost stationary on the front of the A. & N.Z. Mounted Division. At 10 a.m. it faced south from a point 700 yards north-west of Work 22, north of Wellington Ridge, to the sand-hills north of Mount Royston. As the line had fallen back, the 2nd and 3rd Regiments had come in between the 6th and 7th, and the order from right to left was now 6th A.L.H., 3rd A.L.H., 2nd A.L.H., 7th A.L.H., Wellington M.R. A mile N.N.W. of Mount Royston " D " Squadron, Gloucester Hussars, held its ground. The Composite Regiment, 5th Mounted Brigade, arriving in advance of the rest of the brigade, came up very opportunely on the flank of this squadron, to a position 1,500 yards west of Mount Royston, taking in enfilade a strong body of Turks attacking " D " Squadron and forcing them back to the higher slopes of the hill.

At 10 a.m. General Chauvel, who knew that the N.Z.M.R. Brigade was on its way, but had as yet seen no signs of its advance, sent a staff officer to Br.-General E. S. Girdwood, commanding the 156th Brigade, in reserve, proposing that the latter should move up his fresh infantry to relieve the 1st and 2nd L.H. Brigades, whereupon the Australians, after watering their horses, would swing round the enemy's left flank and co-operate with the New Zealanders and 5th Mounted Brigade in enveloping it. General Girdwood replied, however, that it was the intention of Major-General Smith to make an attack eastward when the moment seemed favourable and that he himself was in reserve for that operation.

The orders received by the N.Z.M.R. Brigade were to move on Dueidar and operate against the enemy's flank. When these orders were issued Mount Royston was not in the enemy's hands, and the situation was different when the brigade approached Dueidar. The enemy's line had now swung round until it faced north, and a dune known as Canterbury Hill, east of Pelusium Station, was the last defensible position between it and the railway. A mile short of Dueidar Br.-General Chaytor received orders to move north to Canterbury Hill. He reached it about 11.30 a.m. and found the Composite Yeomanry Regiment in action against the Turks on Mount Royston. He was still without the 5th A.L.H., which had not received orders of recall and remained out on the Turkish left. Seeing 2,000 of the enemy entrenching on Mount Royston, General Chaytor swung right to attack that position. About the same time the 127th Brigade of the 42nd Division, sent up by rail, began detraining at Pelusium Station.

General Chauvel's brigades first found touch with the advancing New Zealanders by heliograph, and then Colonel Royston galloped across and explained the situation. General Chaytor decided to move up between the right of the Australians and the Yeomanry (which was shortly afterwards joined by the remainder of the 5th Mounted Brigade under Br.-General Wiggin) and attack Mount Royston.

Supported by the Somerset Battery, the two New Zealand regiments began an advance upon the hill about 2 p.m. But, moving dismounted over heavy sand, exposed to the fire of an almost invisible enemy, their progress was very slow. At 4 p.m. General Chaytor arranged with General Wiggin to push home the attack an hour later. Lieut. Colonel R. M. Yorke led one squadron Gloucester Hussars and two troops Worcester Yeomanry at a gallop against the southern spur of Mount Royston and took it, the enemy on the crest not awaiting the onset. Down below large numbers of the enemy were concentrated about a battery of pack guns in action. The teams were shot down by the Gloucester squadron on the crest, and numbers of Turks came running up the ridge, holding their hands up. By 6 p.m. the whole position was taken by the New Zealanders and Yeomanry, who were supported in the final stages of the attack by the leading battalions of the 127th Brigade. Five hundred prisoners and two machine guns in addition to the pack battery were taken, and the outer flank of the enemy's force was completely routed.


Just before the recapture of Mount Royston the enemy on the inner flank had made a last effort to advance across Wellington Ridge, but was driven back by artillery fire. Fresh frontal attacks were also launched upon the main defences, which can have had no other object than of preventing a British advance while the Turkish heavy guns were withdrawn. They broke down completely, the enemy apparently suffering considerable loss.

At 5.5 p.m. Major-General Smith had ordered the 156th Brigade to attack Wellington Ridge on the left of the A. & N.Z. Mounted Division and in conformity with the counterattack upon Mount Royston. A bombardment of the ridge was begun by the artillery at 6.45 and just before 7 p.m. the 7th and 8th Scottish Rifles moved south from behind Work 93. But it was now becoming dark, and on the rough ground direction was hard to keep. The 8/Scottish Rifles advanced to within a hundred yards of the crest of Wellington Ridge, but was there held up by heavy rifle fire. Br.-General Girdwood ordered the two battalions to advance no further until daylight, but to keep the enemy closely engaged all night, as it appeared to him that by such tactics he might hope to make a larger haul of prisoners in the morning than if the enemy were dislodged and scattered in the darkness.

The day's fighting was therefore over. The Turks, after a bold and skilful attack, had completely failed in their object. So far, they had not lost heavily in prisoners, but the British had at their disposal for the morrow's operations five mounted brigades: one (the 3rd L.H. Brigade) not yet engaged, two (the 5th Mounted and N.Z.M.R. Brigades) still fairly fresh, while the 1st and 2nd L.H. Brigades, after twenty hours in action - but almost all that time dismounted -were still capable of new efforts. There was yet a possibility of destroying the opposing force.

The 1st and 2nd L.H. Brigades spent the night on the battlefield. The N.Z.M.R. and 5th Mounted Brigades withdrew on the water supply and their supply camels at Pelusium Station, where the brigades of the 42nd Division were also assembling. The 3rd L.H. Brigade halted at Hill 70, and the Mobile Force at the Hod el Bada, 14 miles south of Romani Station.


Previous: The Turkish Advance

Next: The Pursuit on The 5th August 


Further Reading:

Battle of Romani, Sinai, August 4 to 5, 1916

Bir el Abd, Sinai, 9 August 1916

Battles where Australians fought, 1899-1920


Citation: Battle of Romani, Sinai, August 4 to 5, 1916, Falls Account, The Turkish Attack on The 4th August

Posted by Project Leader at 12:01 AM EADT
Updated: Monday, 7 September 2009 6:22 PM EADT
Thursday, 6 August 2009
Battle of Romani, Sinai, August 4 to 5, 1916, Falls Account, The Pursuit on The 5th August
Topic: BatzS - Romani

Battle of Romani

Sinai, August 4 to 5, 1916

Falls Account, The Pursuit on The 5th August


The Battle of Romani, 4-6 August 1916

[Click on map for larger version]

[From: Military operations: Egypt and Palestine, Sketch 10 facing p. 178.]


As part of the Official British War History of the Great War, Captain Cyril Falls and Lieutenant General George MacMunn were commissioned to produce a commentary on the Sinai, Palestine and Syrian operations that took place. In 1928, their finished work, Military Operations, Egypt and Palestine - From the outbreak of war with Germany to June 1917,  was published in London. Their book included a section specifically related to the battle of Romani and is extracted below.

MacMunn, G. & Falls, C., Military operations: Egypt and Palestine, (London 1930), pp. 190 - 194:


Part 4. The Pursuit on The 5th August.

As soon as he was acquainted with the situation, General Lawrence issued orders for a general advance to take place at 4 a.m. next morning. The A. & N.Z. Mounted Division was to press forward with its right on the Hod el Enna and its left in close touch with the 156th Brigade of the 52nd Division, advancing on Mount Meredith. The 3rd L.H. Brigade was to advance towards Bir en Nuss and attack the Hod el Enna from the south, keeping touch with the A. & N.Z. Mounted Division or the 5th Mounted Brigade, which, under the orders of Major-General Sir W. Douglas, commanding the 42nd Division, was to assist in linking up the right of the A. & N.Z. Mounted Division with the 3rd L.H. Brigade. The 42nd Division' was to advance on the line Canterbury Hill to Mount Royston to the Hod el Enna and drive back any opposition to the advance of the mounted troops, while part of the 52nd Division was to act in a similar manner towards Mount Meredith. The G.O.C. 52nd Division was also instructed to prepare for an advance eastwards towards Abu Hamra, which, however, was not to be undertaken without further orders from Section Headquarters. [Only two brigades were ready for the move, and the 126th Brigade remained in reserve at Pelusium Station.]

As day broke on the 5th August the 8/Scottish Rifles, which had passed the night just short of the crest of Wellington Ridge, advanced in company with the 7th A.L.H, and Wellington M.R. on their right. The attack was covered by the 7/Scottish Rifles on the left, who had during the night brought a total of 16 machine guns and Lewis guns into a position from which they were able to sweep the crest and reverse slopes of the ridge. Well as the Turks had fought hitherto, they knew now that they had been abandoned, and the lines of bayonets in the dim light were too much for their exhausted nerves. A white flag was hoisted and a forest of arms held high. Eight hundred and sixty-four men surrendered to the 8/Scottish Rifles and a great number more to the Light Horse and Wellingtons, who breasted the rise a few minutes later. In all, 1,500 prisoners were taken in the neighbourhood of Wellington Ridge. Other bodies of Turks, pinned to the ground by fire from the works further north, were likewise unable to join in the general retirement, and at 6 a.m. a further 119 surrendered to the infantry in Work 3. Most of the prisoners were in a pitiable state of fatigue and had long been without water.

While this rear guard was being rounded up it had become apparent that the Turks were in full retreat. At 6.30 a.m. General Lawrence ordered General Chauvel to take command of all the mounted troops [That is to say, of the Section Mounted Troops (N.Z.M.R. and 5th Mounted Brigades) and the 3rd L.H. Brigade, but not the Mobile Column, which was under the orders of the G.O.C. No. 2 Section.] and move in pursuit. But, as already stated, the brigades were somewhat scattered, and the troops of the 1st and 2nd L.H. Brigades had to be collected and mounted. The N.Z.M.R. Brigade reached Bir en Nuss at 8.30 a.m., where it found the 3rd L.H. Brigade still watering. The latter brigade; was ordered by General Chauvel to move on Hamisah, beyond which it had been ascertained that the enemy's left flank extended, though his main body had fallen back on Qatiya. Thence, the brigade was to wheel left towards Qatiya, to co-operate in a general attack by the mounted troops. Its advanced guard moved off to fulfil this mission at 9 a.m.

The general mounted advance began at 10.30. By noon the troops under General Chauvel's command were on a line from west of Bir Nagid to south of Katib Gannit ; the 3rd L.H. Brigade on the right, advancing on Hamisah, then the N.Z.M.R. Brigade and the 1st and 2nd L.H. Brigades, with the 5th Mounted Brigade on the left.

There were greater delays before the infantry divisions were on the move. In the case of the 42nd Division this was not of great importance - save that it involved a very trying advance in the heat of the day - because the division's role was only to advance to the Hod el Enna in support of the mounted troops, and it is doubtful whether it could in any event have gone further; actually the Turkish rear guard was routed and largely captured without its assistance being required. But, as a matter of fact, the first message sent to the 127th Brigade, which was to lead the advance, miscarried, and the second, despatched at 2.45 a.m., did not reach it till 5.40 a.m. [Divisional headquarters had just arrived at Pelusium Station, and there appears to have been extraordinary pressure on the single signal station there. But brigade headquarters was only 4 miles away at Mount Royston.] Nor did the brigade's first-line camels arrive till after this, and the troops had then to fill their water-bottles. The brigade marched at 7.30 a.m. and reached the Hod el Enna between 9.30 and 10 a.m., considerably fatigued. The 125th Brigade at Pelusium, delayed by the troops' ignorance of the handling of camels, moved off at 5.15 a.m. and arrived in rear of the 127th Brigade at 11.15, having suffered still more severely in its longer march.

In the case of the 52nd Division, the delay was more serious. Immediately after ordering General Chauvel to take command of the mounted troops and pursue the enemy, General Lawrence, at 6.37 a.m., sent a message to the 52nd Division instructing it to carry out the advance eastwards on Abu Hamra which had been anticipated in his orders of the previous night. On receiving this message General Smith ordered the R.F.C. squadron at Mahamdiyah, which was at his disposal, to reconnoitre while his brigades were completing their preparations. At 10.15 am. General Lawrence urgently repeated his order, but it was some time longer before the 155th and 157th Brigades were able to march. Here again the distribution of water from the camel fanatis [Fantasse, plural fanatis, an Arabic word adopted by the Army. The fantasse was a small metal tank of which each camel carried two. It had a capacity of 12 gallons. The water supply was carried by the 1st-line camels, and each division had also a camel convoy with one day's water.] was the chief cause of delay. There was delay also in distributing food to the men, and it was highly necessary that the troops should have a meal after the night's work, with the prospect of a march and possibly a battle in the sun before them. It was not till noon that the 157th Brigade, followed by the 155th, moved out from the defences, and Abu Hamra was not reached till nightfall.

Meanwhile the 3rd L.H. Brigade had gained a striking success against the enemy on the high ground west of Hamisah. The 9th A.L.H. under Lieut.-Colonel. W. H. Scott, boldly galloped to within a few hundred yards of the Turkish line and then attacked on foot under cover of the fire of the Inverness Battery and machine guns. The enemy hastily abandoned his position, but 425 prisoners and seven machine guns were captured. Unfortunately the brigade then came under fire of the heavy guns behind Qatiya, and withdrew late in the afternoon to Bir Nagid, 21 miles west of Hamisah, before receiving an order from General Chauvel to protect his right.

Between 12 noon and 1 p.m. the four brigadiers of the N.Z.M.R.B. 1st and 2nd L.H. and 5th Mounted, Brigades reconnoitred the enemy's position from a sandy ridge 2 miles west of Qatiya. Many stragglers had been passed in the course of the advance, and it seemed possible that the enemy holding the position was in a demoralized condition and that brusque tactics might result in large captures of men and guns. It was accordingly decided that the three Australian brigades should advance mounted on Qatiya while the 5th Mounted Brigade, also mounted, attacked the enemy's right flank.

The three brigades advanced on Qatiya at 3.30 p.m., the Yeomanry on the far left. Reaching the edge of the white gypsum bed which lay before them, they formed line and, fining bayonets to give at least moral effect to mounted action, advanced at a gallop, cheering loudly. But as the oasis was neared the ground became so swampy that the horses were at once checked. The regiments then dismounted and continued the advance on foot. The 5th Mounted Brigade (which was, unlike the others, armed with the sword) likewise found a mounted advance impossible owing to the intensity of the enemy's fire and was obliged to send back its horses.

Of the expected demoralization in the Turkish ranks there was no sign. Their fire was hot and well directed, while their artillery out-gunned the supporting Ayr and Somerset Batteries. By sunset the advance had ceased, seeing which, from his position 3 miles in rear, General Chauvel ordered a retirement to Romani.

When the 1st and 2nd L.H. Brigades reached camp some of the horses had not been watered for sixty hours. The men of the 2nd and 3rd A.L.H. had been during practically the whole of that period in action or in the saddle. Both sides were almost at their last gasp. While the British mounted troops were moving back to Romani, men sleeping as they rode, the Turks were struggling back to Oghratina under cover of darkness.

The infantry brigades were disposed for the night as follows:-The 155th and 157th Brigades at Abu Hamra, the 127th Brigade at Hod el Enna, the 125th Brigade on its left, in touch with the 156th Brigade, which had its left on Work 21. The Mobile Column, which had found Mageibra evacuated, spent the night there.


Previous: The Turkish Attack on The 4th August 

Next: The end of the pursuit 


Further Reading:

Battle of Romani, Sinai, August 4 to 5, 1916

Bir el Abd, Sinai, 9 August 1916

Battles where Australians fought, 1899-1920


Citation: Battle of Romani, Sinai, August 4 to 5, 1916, Falls Account, The Pursuit on The 5th August

Posted by Project Leader at 12:01 AM EADT
Updated: Monday, 7 September 2009 6:21 PM EADT
Wednesday, 5 August 2009
Romani, Sinai, 4-5 August 1916, Massey Account
Topic: BatzS - Romani

Battle of Romani

Sinai, 4 - 5 August 1916

Massey Account


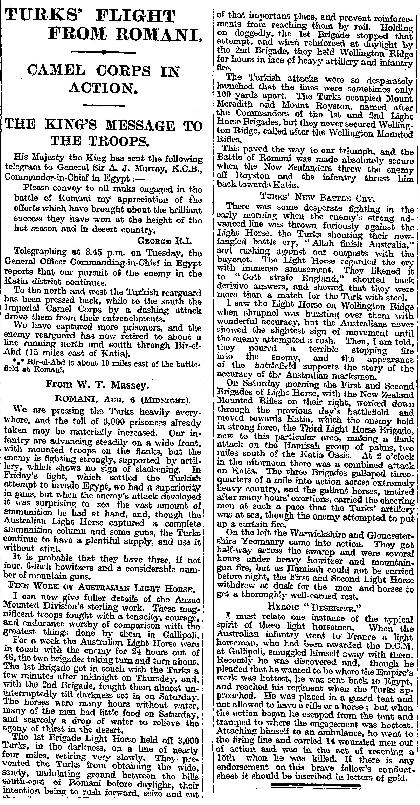
Massey, WT, "Turks' Flight from Romani",
 
[From: Times,  10 August 1916, p. 6.]


William Thomas Massey describes the Battle of Romani for the London Times

William Thomas Massey was the embedded London Times journalist with the British and Allied forces during the Sinai and Palestine campaign. After the battle of Beersheba, he filed a report to the London Times on 10 August 1916 detailing the event.


TURKS' FLIGHT FROM ROMANI,

CAMEL CORPS IN ACTION.

THE KING'S MESSAGE TO THE TROOPS.

His Majesty the King has sent the following telegram to General Sir A. J. Murray, K.C.B., Commander-in-Chief in Egypt:

Please convey to all ranks engaged in the battle of Romani my appreciation of the efforts which have brought about the brilliant success they have won at the height of the hot season and in desert country.

GEORGE R.I.


Telegraphing at 8.45 p.m. on Tuesday, the General Officer Commanding-in-Chief in Egypt reports that our pursuit of the enemy in the Katia district continues.

To the north and west the Turkish rearguard has been pressed back, while to the south the Imperial Camel Corps by a dashing attack drove them from their entrenchments. We have captured more prisoners, and the enemy rearguard has now retired to about a line running north and south through Bir el Abd (15 miles east of Katia).

Bir-el-Abd is about 19 miles cast of the battlefield at Romani.

From W. T. Massey. ROMANI, AUG. 6 (Midnight).

We are pressing the Turks heavily everywhere, and the toll of 3,000 prisoners already taken may be materially increased. Our infantry are advancing steadily on a wide front, with mounted troops on the flanks, but the enemy is fighting strongly, supported by artillery, which shows no sign of slackening. In Friday's fight, which settled the Turkish attempt to invade Egypt, we had a superiority in guns, but when the enemy's attack developed it was surprising to see the vast amount of ammunition he had at hand, and, though the Australian Light Horse captured a complete ammunition column and some guns, the Turks continue to have a plentiful supply, and use it without stint.

It is probable that they have three, if not four, 6-inch howitzers and a considerable number of mountain guns.

FINE WORK OF AUSTRALIAN LIGHT HORSE.

I can now give fuller details of the Anzac Mounted Division's sterling work. These magnificent troops fought with a tenacity, courage, and endurance worthy of comparison with the greatest things done by them in Gallipoli.

For a week the Australian Light Horse were in touch with the enemy for 24 hours out of 48, the two brigades taking turn and turn about. Tho 1st Brigade got in touch with the Turks a few minutes after midnight on Thursday, and, with the 2nd Brigade, fought them almost uninterruptedly till darkness sat in on Saturday. The horses were many hours without water, many of the men had little food on Saturday, and scarcely a drop of water to relieve the agony of thirst in the desert.

The 1st Brigade Light Horse held off 3,000 Turks, in the darkness, on a line of nearly four miles, retiring very slowly. They prevented the Turks from obtaining the wide, sandy, undulating ground between the hills south-east of Romani before daylight, their intention being to rush forward, seize and cut the railway west of Romani, isolate the garrison of that important place, and prevent reinforcements from reaching them by rail. Holding on doggedly, the 1st Brigade stopped that attempt, and when reinforced at daylight by the 2nd Brigade, they held Wellington Ridge for hours in face of heavy artillery and infantry fire.

The Turkish attacks were so desperately launched that the lines were sometimes only 100 yards apart. The Turks occupied Mount Meredith and Mount Royston, named after the Commanders of the 1st and 2nd Light Horse Brigades, but they never secured Wellington Ridge, called after the Wellington Mounted Rifles.

This paved the way to our triumph, and the Battle of Romani was made absolutely secure when the New Zealanders threw the enemy off Royston and the infantry thrust him back towards Katia.

TURKS' NEW BATTLE CRY.

There was some desperate fighting in the early morning when the enemy's strong advanced line was thrown furiously against the Light Horse, the Turks shouting their newfangled battle cry, "Allah finish Australia," and rushing against our outposts with the bayonet. The Light Horse regarded the cry with immense amusement. They likened it to "Gott strafe England," shouted back derisive answers, and showed that they were more than a match for the Turk with steel.

I saw the Light Horse on Wellington Ridge when shrapnel was bursting over them with wonderful accuracy, but the Australians never showed the slightest sign of movement until the enemy attempted a rush. Then, I am told they poured a terrible stopping fire into the enemy, and the appearance of the battlefield supports the story of the accuracy of the Australian marksmen.

On Saturday morning the First and Second Brigades of Light Horse, with the New Zealand Mounted Rifles on their right, worked down through the previous day's battlefield any moved towards Katia, which the enemy held in strong force, the Third Light Horse Brigade new to this particular area, making a in attack on the Hamisah group of palms, two miles south of the Katia Oasis. At 2 o'clock in the afternoon there was a combined attack on Katia. The three Brigades galloped three quarters of a mile into action across extreme heavy country, and the gallant horses, untired after many hours' exertions, carried the cheering men at such a pace that the Turks' artillery was at sea, though the enemy attempted to put up a curtain fire.

On the left the Warwickshire and. Gloucestershire Yeomanry came into action. They got half-way across the swamp and were several hours under heavy howitzer and mountain gun fire, but as Hamisah could not be carried before night, the First and Second Light Her withdrew at dusk for the men and horses get a thoroughly well-earned rest.

HEROIC "DESERTER"

I must relate one instance of the typical spirit of these light horsemen. When the Australian infantry went to France a light horseman, who had been awarded the D.C.M. at Gallipoli, smuggled himself away with them. Recently he was discovered and, though he pleaded that he wanted to be where the Empire's work was hottest, he was sent back to Egypt and reached his regiment when the Turks approached. He was placed in a guard tent and not allowed to have a rifle or a horse; but when the action began he escaped from the tent and tramped to where the engagement was hottest. Attaching himself to an ambulance, he went to the firing line and carried 14 wounded men out of action and was in the act of rescuing a 15th when he was killed. If there is a endorsement on this brave fellow's conduct sheet it should be inscribed in letters of gold.


Editor's note

Note about the identity of the HEROIC "DESERTER" mentioned in the above article by William Thomas Massey. The man was Francis Patrick Curran of the 7th Light Horse Regiment.  See:

859 Corporal Francis Patrick Curran, 7th LHR


Further Reading:

Battle of Romani, Sinai, August 4 to 5, 1916 

Bir el Abd, Sinai, 9 August 1916

Battles where Australians fought, 1899-1920


Citation: Romani, Sinai, 4-5 August 1916, Massey Account

Posted by Project Leader at 12:01 AM EADT
Updated: Monday, 26 October 2009 4:33 PM EADT

Newer | Latest | Older

Full Site Index


powered by FreeFind
Let us hear your story: You can tell your story, make a comment or ask for help on our forum.

Desert Column Forum

A note on copyright

The Australian Light Horse Studies Centre is a not for profit and non profit group whose sole aim is to write the early history of the Australian Light Horse from 1900 - 1920. It is privately funded and the information is provided by the individuals within the group and while permission for the use of the material has been given for this site for these items by various donors, the residual and actual copyright for these items, should there be any, resides exclusively with the donors. The information on this site is freely available for private research use only and if used as such, should be appropriately acknowledged. To assist in this process, each item has a citation attached at the bottom for referencing purposes.

Please Note: No express or implied permission is given for commercial use of the information contained within this site.

A note to copyright holders

The Australian Light Horse Studies Centre has made every endeavour to contact copyright holders of material digitised for this blog and website and where appropriate, permission is still being sought for these items. Where replies were not received, or where the copyright owner has not been able to be traced, or where the permission is still being sought, the Australian Light Horse Studies Centre has decided, in good faith, to proceed with digitisation and publication. Australian Light Horse Studies Centre would be happy to hear from copyright owners at any time to discuss usage of this item.

Contact

Australian Light Horse Studies Centre

eXTReMe Tracker