« September 2009 »
S M T W T F S
1 2 3 4 5
6 7 8 9 10 11 12
13 14 15 16 17 18 19
20 21 22 23 24 25 26
27 28 29 30
You are not logged in. Log in


Search the site:


powered by FreeFind
Volunteer with us.

Entries by Topic All topics  
A Latest Site News
A - Using the Site
AAA Volunteers
AAB-Education Centre
AAC-Film Clips
AAC-Photo Albums
AIF & MEF & EEF
AIF - Lighthorse
AIF - ALH - A to Z
AIF - DMC
AIF - DMC - Or Bat
AIF - DMC - Anzac MD
AIF - DMC - Aus MD
AIF - DMC - British
AIF - DMC - BWI
AIF - DMC - French
AIF - DMC - Indian
AIF - DMC - Italian
AIF - DMC - Medical
AIF - DMC - Remounts
AIF - DMC - Scouts
AIF - DMC - Sigs
AIF - DMC - Sigs AirlnS
AIF - DMC - 1 Sig Sqn
AIF - DMC - 2 Sig Sqn
AIF - DMC - Eng
AIF - DMC - Eng 1FSE
AIF - DMC - Eng 2FSE
AIF - DMC - GSR
AIF - 1B - 1 LHB
AIF - 1B - 6 MVS
AIF - 1B - 1 LHMGS
AIF - 1B - 1 Sig Trp
AIF - 1B - 1 LHFA
AIF - 1B - 1 LHR
AIF - 1B - 2 LHR
AIF - 1B - 3 LHR
AIF - 2B - 2 LHB
AIF - 2B - 7 MVS
AIF - 2B - 2 LHFA
AIF - 2B - 2 LHMGS
AIF - 2B - 2 Sig Trp
AIF - 2B - 5 LHR
AIF - 2B - 6 LHR
AIF - 2B - 7 LHR
AIF - 3B - 3 LHB
AIF - 3B - 8 MVS
AIF - 3B - 3 LHB Sigs
AIF - 3B - 3 LHFA
AIF - 3B - 3 LHMGS
AIF - 3B - 3 Sig Trp
AIF - 3B - 8 LHR
AIF - 3B - 9 LHR
AIF - 3B - 10 LHR
AIF - 4B - 4 LHB
AIF - 4B - 4 Sig Trp
AIF - 4B - 9 MVS
AIF - 4B - 4 LHFA
AIF - 4B - 4 LHMGS
AIF - 4B - 4 LHR
AIF - 4B - 11 LHR
AIF - 4B - 12 LHR
AIF - 5B - 5 LHB
AIF - 5B - 10 MVS
AIF - 5B - 5 LHFA
AIF - 5B - 5 Sig Trp
AIF - 5B - ICC
AIF - 5B - 14 LHR
AIF - 5B - 15 LHR
AIF - 5B - 1er Regt
AIF - 5B - 2 NZMGS
AIF - AASC
AIF - Aboriginal LH
AIF - Badges
AIF - Cars
AIF - Chinese LH
AIF - Double Sqns
AIF - Engineers
AIF - Fr - 22 Corps
AIF - Fr - 13 LHR
AIF - Honour Roll
AIF - HQ - 3rd Echelon
AIF - Marching Songs
AIF - Misc Topics
AIF - NZMRB
AIF - NZMRB - AMR
AIF - NZMRB - CMR
AIF - NZMRB - EFT
AIF - NZMRB - NZMFA
AIF - NZMRB - NZMGS
AIF - NZMRB - OMR
AIF - NZMRB - Sig-Trp
AIF - NZMRB - WMR
AIF - Ships
AIF - Ships - Encountr
AIF - Ships - Una
AIF - WFF
AIF - Wireless Sqn
Battles
BatzA - Australia
BatzA - Broken Hill
BatzA - Liverpool
BatzA - Merivale
BatzB - Boer War
BatzB - Bakenlaagte
BatzB - Belmont
BatzB - Bothaville
BatzB - Buffels Hoek
BatzB - Coetzees Drift
BatzB - Diamond Hill
BatzB - Driefontein
BatzB - Elands
BatzB - Graspan
BatzB - Grobelaar
BatzB - Grootvallier
BatzB - Hartebestfontn
BatzB - Houtnek
BatzB - Karee Siding
BatzB - Kimberley
BatzB - Koster River
BatzB - Leeuw Kop
BatzB - Mafeking
BatzB - Magersfontein
BatzB - Modder River
BatzB - Onverwacht
BatzB - Paardeberg
BatzB - Palmietfontein
BatzB - Pink Hill
BatzB - Poplar Grove
BatzB - Rhenoster
BatzB - Sannahs Post
BatzB - Slingersfontn
BatzB - Stinkhoutbm
BatzB - Sunnyside
BatzB - Wilmansrust
BatzB - Wolvekuil
BatzB - Zand River
BatzG - Gallipoli
BatzG - Anzac
BatzG - Aug 1915
BatzG - Baby 700
BatzG - Evacuation
BatzG - Hill 60
BatzG - Hill 971
BatzG - Krithia
BatzG - Lone Pine
BatzG - Nek
BatzJ - Jordan Valley
BatzJ - 1st Amman
BatzJ - 2nd Amman
BatzJ - Abu Tellul
BatzJ - Es Salt
BatzJ - JV Maps
BatzJ - Ziza
BatzM - Mespot
BatzM - Baghdad
BatzM - Ctesiphon
BatzM - Daur
BatzM - Kurna
BatzM - Kut el Amara
BatzM - Ramadi
BatzN - Naval
BatzN - AE1
BatzN - Cocos Is
BatzN - Heligoland
BatzN - Marmara
BatzN - Zeebrugge
BatzN - Zeppelin L43
BatzNG - Bitapaka
BatzO - Other
BatzO - Baku
BatzO - Egypt 1919
BatzO - Emptsa
BatzO - Karawaran
BatzO - Peitang
BatzO - Wassa
BatzP - Palestine
BatzP - 1st Gaza
BatzP - 2nd Gaza
BatzP - 3rd Gaza
BatzP - Aleppo
BatzP - Amwas
BatzP - Ayun Kara
BatzP - Bald Hill
BatzP - Balin
BatzP - Beersheba
BatzP - Berkusieh
BatzP - Damascus
BatzP - El Auja
BatzP - El Buggar
BatzP - El Burj
BatzP - Haifa
BatzP - Huj
BatzP - JB Yakub
BatzP - Kaukab
BatzP - Khan Kusseir
BatzP - Khuweilfe
BatzP - Kuneitra
BatzP - Megiddo
BatzP - Nablus
BatzP - Rafa
BatzP - Sasa
BatzP - Semakh
BatzP - Sheria
BatzP - Surafend
BatzP - Wadi Fara
BatzS - Sinai
BatzS - Bir el Abd
BatzS - El Arish
BatzS - El Mazar
BatzS - El Qatiya
BatzS - Jifjafa
BatzS - Magdhaba
BatzS - Maghara
BatzS - Romani
BatzS - Suez 1915
BatzSe - Senussi
BatzWF - Westn Front
BW - Boer War
BW - NSW
BW - NSW - 1ACH
BW - NSW - 1NSWMR
BW - NSW - 2NSWMR
BW - NSW - 3ACH
BW - NSW - 3NSWIB
BW - NSW - 3NSWMR
BW - NSW - 5ACH
BW - NSW - A Bty RAA
BW - NSW - AAMC
BW - NSW - Aust H
BW - NSW - Lancers
BW - NSW - NSW Inf
BW - NSW - NSWCBC
BW - NSW - NSWIB
BW - NSW - NSWMR_A
BW - NZ
BW - Qld
BW - Qld - 1ACH
BW - Qld - 1QMI
BW - Qld - 2QMI
BW - Qld - 3ACH
BW - Qld - 3QMI
BW - Qld - 4QIB
BW - Qld - 5QIB
BW - Qld - 6QIB
BW - Qld - 7ACH
BW - QLD - AAMC
BW - SA
BW - SA - 1SAMR
BW - SA - 2ACH
BW - SA - 2SAMR
BW - SA - 3SACB
BW - SA - 4ACH
BW - SA - 4SAIB
BW - SA - 5SAIB
BW - SA - 6SAIB
BW - SA - 8ACH
BW - SA - AAMC
BW - Tas
BW - Tas - 1ACH
BW - Tas - 1TIB
BW - Tas - 1TMI
BW - Tas - 2TB
BW - Tas - 2TIB
BW - Tas - 3ACH
BW - Tas - 8ACH
BW - Vic
BW - Vic - 1VMI
BW - Vic - 2ACH
BW - Vic - 2VMR
BW - Vic - 3VB
BW - Vic - 4ACH
BW - Vic - 4VIB
BW - Vic - 5VMR
BW - Vic - 6ACH
BW - Vic - AAMC
BW - Vic - Scot H
BW - WA
BW - WA - 1WAMI
BW - WA - 2ACH
BW - WA - 2WAMI
BW - WA - 3WAB
BW - WA - 4ACH
BW - WA - 4WAMI
BW - WA - 5WAMI
BW - WA - 6WAMI
BW - WA - 8ACH
BW Gen - Campaign
BW Gen - Soldiers
BW General
Cavalry - General
Diary - Schramm
Egypt - Heliopolis
Egypt - Mena
Gen - Ataturk Pk, CNB
Gen - Australia
Gen - Legends
Gen - Query Club
Gen - St - NSW
Gen - St - Qld
Gen - St - SA
Gen - St - Tas
Gen - St - Vic
Gen - St - WA
Gm - German Items
Gm - Bk - 605 MGC
GW - 11 Nov 1918
GW - Atrocities
GW - August 1914
GW - Biographies
GW - Propaganda
GW - Spies
GW - We forgot
Militia 1899-1920
Militia - Area Officers
Militia - Inf - Infantry
Militia - Inf - 1IB
Militia - Inf - 2IB
Militia - Inf - 3IB
Militia - Inf - NSW
Militia - Inf - Qld
Militia - Inf - SA
Militia - Inf - Tas
Militia - Inf - Vic
Militia - Inf - WA
Militia - K.E.Horse
Militia - LH
Militia - LH - Regts
Militia - LH - 1LHB
Militia - LH - 2LHB
Militia - LH - 3LHB
Militia - LH - 4LHB
Militia - LH - 5LHB
Militia - LH - 6LHB
Militia - LHN - NSW
Militia - LHN - 1/7/1
Militia - LHN - 2/9/6
Militia - LHN - 3/11/7
Militia - LHN - 4/6/16
Militia - LHN - 5/4/15
Militia - LHN - 6/5/12
Militia - LHN - 28
Militia - LHQ - Qld
Militia - LHQ - 13/2
Militia - LHQ - 14/3/11
Militia - LHQ - 15/1/5
Militia - LHQ - 27/14
Militia - LHS - SA
Militia - LHS - 16/22/3
Militia - LHS - 17/23/18
Militia - LHS - 24/9
Militia - LHT - Tas
Militia - LHT - 12/26
Militia - LHV - Vic
Militia - LHV - 7/15/20
Militia - LHV - 8/16/8
Militia - LHV - 9/19
Militia - LHV - 10/13
Militia - LHV - 11/20/4
Militia - LHV - 19/17
Militia - LHV - 29
Militia - LHW - WA
Militia - LHW-18/25/10
Militia - Military Orders
Militia - Misc
MilitiaRC - Rifle Clubs
MilitiaRC - NSW
MilitiaRC - NT
MilitiaRC - Qld
MilitiaRC - SA
MilitiaRC - Tas
MilitiaRC - Vic
MilitiaRC - WA
Militiaz - New Zealand
Tk - Turkish Items
Tk - Army
Tk - Bks - Books
Tk - Bks - 1/33IR
Tk - Bks - 27th IR
Tk - Bks - Air Force
Tk - Bks - Yildirim
Tk - POWs
Wp - Weapons
Wp - Hotchkiss Cav
Wp - Hotchkiss PMG
Blog Tools
Edit your Blog
Build a Blog
RSS Feed
View Profile
Open Community
Post to this Blog
Site Index
Education Centre
LH Militia
Boer War
Transport Ships
LH Battles
ALH - Units
ALH - General
Aboriginal Light H
Weapons
Ottoman Sources

"At a mile distant their thousand hooves were stuttering thunder, coming at a rate that frightened a man - they were an awe inspiring sight, galloping through the red haze - knee to knee and horse to horse - the dying sun glinting on bayonet points..." Trooper Ion Idriess

The Australian Light Horse Studies Centre aims to present an accurate history as chroniclers of early Australian military developments from 1899 to 1920.

The Australian Light Horse Studies Centre site holds over 12,000 entries and is growing daily.

Contact: Australian Light Horse Studies Centre

Let us hear your story: You can tell your story, make a comment or ask for help on our Australian Light Horse Studies Centre Forum called:

Desert Column Forum

WARNING: This site contains: names, information and images of deceased people; and, language which may be considered inappropriate today.

Tuesday, 29 September 2009
11th Australian Light Horse Regiment, AIF, Outline
Topic: AIF - 4B - 11 LHR

11th LHR, AIF

11th Australian Light Horse Regiment

Outline


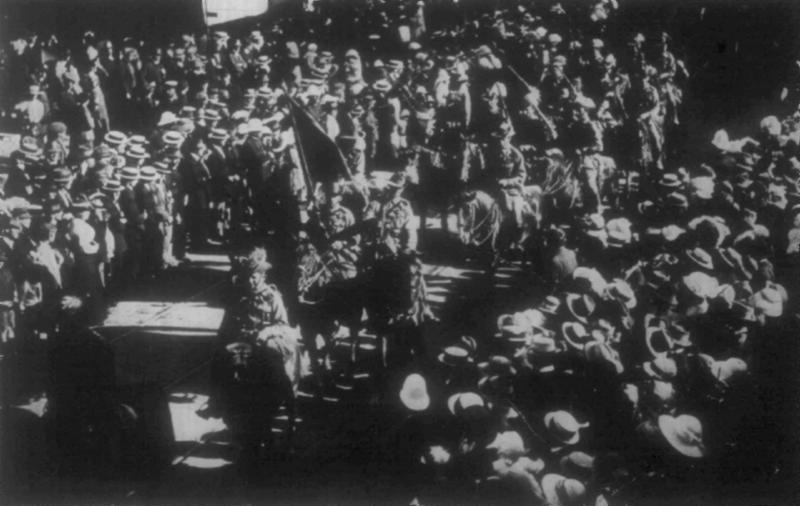
11th Light Horsemen parading through Brisbane, Queensland, June 1915.

[From: The Queenslander, 6 June 1915, p. 21.]


Formation

The 11th Light Horse Regiment was formed as part of the 4th Australian Light Horse Brigade, 1915 , 4th Contingent and attached to the Australian Division. The 11th Light Horse Regiment was a composite regiment with two squadrons made up by recruits from the 1st Military District which incorporated all of Queensland, Darwin and Northern New South Wales while the last squadron, "C" Squadron was composed of men from the 4th Military District [South Australia and the Broken Hill region of New South Wales]. The 11th Light Horse Regiment was established at Enoggera Training Camp to the west of Brisbane, Queensland, at the end of March 1915. The South Australian members trained at Morphettville Race Track Training Camp to the west of Adelaide, South Australia. 

"A" Squadron recruited from Queensland.

"B" Squadron recruited from Queensland.

"C" Squadron recruited from South Australia.


Training 


11th Light Horse Regiment Routine Order No 1, 24 March 1915

[Click on page for larger version.]


The 11th Light Horse Regiment commenced training at Enoggera Training Camp to the west of Brisbane, Queensland, at the end of March 1915. The South Australian members trained at Morphettville Race Track Training Camp and later moving to the Mitcham Training Camp to the south of Adelaide, South Australia. On 2 May 1915, the 11th Light Horse Regiment came together at Fraser’s Paddock Camp, outside Brisbane, and trained as a single Regiment as opposed to previous composite regiments when training occurred at different locations.


Embarkation

Embarkation of the 11th Light Horse Regiment was accomplished in two groups using both the HMAT A7 Medic and HMAT A30 Borda from Brisbane, Queensland. 


White Star Liner Medic leaving Port Melbourne, 28 October 1899

[See: His Majesty's Australian Transports [HMAT] Ships, A7.


The 11th Light Horse Regiment Headquarters, Machine Gun Section, "A" and "C" Squadrons embarked on the HMAT A7 Medic from Brisbane, Queensland, 2 June 1915.


HMAT A30 Borda
 
[See: His Majesty's Australian Transports [HMAT] Ships, A30.


11th Light Horse Regiment "B" Squadron embarked on the  HMAT A30 Borda from Brisbane, Queensland, 16 June 1915.

The 11th Light Horse Regiment sailed to Egypt and disembarked on 23 July 1915.


Colour Patch

Initially, the only colour separation of the various Australian mounted troops was by use of the pennant. The marker pennants were carried on poles to mark lines troop lines in camps in Egypt. They were not lance pennants as the Australian lancers had red over white pennants on their lances.


Pennant of the 11th Light Horse Regiment


While this pennant was useful in distinguishing horse and troop lines, it failed to identify the individual with a unit. The AIF 1st Australian Division Standing Orders issued in December 1914 ordered the Australian Light Horse Regiments to wear a 4 inch wide [10.2cm] blue armband with the regiment name marked on the band in black lettering.

The earlier systems proved to be ineffective so to assist with identification of the men in the various units within the AIF, Divisional Order No 81 (A) Administration was issued at Mena on 8 March 1915 detailing the Colour Patch for the 11th Light Horse Regiment as others received their colours. The colour patch was made of cloth 1¼ inches wide and 2¾ inches long and worn on the sleeve one inch below the shoulder seam.


First 11th Light Horse Regiment Colour Patch
 
 
The first colour patch for the 11th Light Horse Regiment was a circle with white over red. This was worn by the men from the renamed 11th Light Horse Regiment became the 1st Camel Regiment.


Second 11th Light Horse Regiment Colour Patch


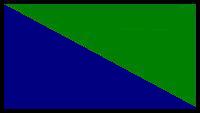
The reformed 11th Light Horse Regiment as part of the 4th Australian Light Horse Brigade, Australian Mounted Division, carried the blue Brigade colour as the lower triangle part of the colour patch, while the green unit colour was on the top. This is illustrated with the above presentation.


Aden

During the voyage to Egypt, the part of the 11th Light Horse Regiment travelling on the HMAT A7 Medic was diverted to Aden and landed on 12 July 1916 to bolster the defences of the British garrison which was under pressure from Yemeni tribesmen who were threatening an attack. By 18 July no attack had occurred and the threat diminished allowing the Regiment re-embarked to Egypt.


Gallipoli

As mounted troops, the Light Horse was considered to be unsuitable for work in Gallipoli. The mounted troops volunteered to operate as infantry. Because of the level of casualties at Gallipoli, the 11th Light Horse Regiment was broken up on 26 August 1915 with squadrons being allotted to other Regiments as reinforcements.

"A" Squadron became "D" Squadron,  2nd Australian Light Horse Regiment.

"B" Squadron became "D" Squadron, 5th Australian Light Horse Regiment.

"C" Squadron became "D" Squadron, 9th Australian Light Horse Regiment.

The various squadrons of the Regiment were deployed on primarily defensive activities throughout the stay at Gallipoli. The various squadrons of the 11th Light Horse Regiment left the peninsula during December 1915.


Defence of Egypt

After the return to Egypt, on 19 February 1916, the 11th Light Horse Regiment reformed and re-equipped. On 28 February 1916, the 11th Light Horse Regiment moved to the Suez Canal taking part in its defence. The work was hot and monotonous.


Sinai

After many months service in the Sinai, during September 1916 the 11th Light Horse Regiment was redesignated as the 1st Camel Regiment. The Regiment continued to see further service in the Sinai. 


Palestine

During the reorganisation of the Light Horse Divisions, the Regiment resumed its old identity as the 11th Light Horse Regiment in February 1917. The 11th Light Horse Regiment became part of the 4th Light Horse Brigade in the Imperial Mounted Division and then Australian Mounted Division.

The 11th Light Horse Regiment  took part in the Second Battle of Gaza on 19 April 1917 and suffered the heaviest casualties since Gallipoli.

The 11th Light Horse Regiment took part in the Battle of Beersheba but while they were part of the 4th Light Horse Brigade, the 11th Light Horse Regiment took no part in the charge.

On 7 November 1917, while charging at Tel el Sheria, a troop became separated from the squadron and was totally destroyed.

The 11th Light Horse Regiment and then took part in the follow up actions that lasted until early January 1918.

From this time onwards, for the next two months, the 11th Light Horse Regiment remained in continuous combat action until relieved for three months refit and training at Deir el Belah from early January 1918.

In early April 1918, the 11th Light Horse Regiment moved into the Jordan Valley and took part in the invasion of Moab and took Es Salt during the action of 30 April – 4 May 1918. Unfortunately, due to a Turkish attack on the lines of communication which was being defended by 4th Light Horse Brigade, this raid nearly turned into a disaster where the Turkish forces almost cut off the Australian Mounted Division in the hills.


Megiddo

In a move that converted the Light Horse into full cavalry, the Australian Mounted Division was issued with swords during August and early September 1917. The Australian Mounted Division went to work training with swords and undertaking cavalry work.

On 19 September 1918 the Battle of Megiddo began. The infantry over ran the Turkish defensive trenches allowing the cavalry to debouch into the Turkish hinterland. The 11th Light Horse Regiment participated in the breakthrough which moved rapidly through the north of Palestine. At the end of the first week, it was obvious that the way to Damascus was open and so a second push occurred on the heels of the first assault. On 1 October 1918, Damascus was taken.

After a rest in Damascus, the 11th Light Horse Regiment moved towards Homs when the Turks surrendered on 30 October 1918.


Return to Australia

After the conclusion of hostilities, the 11th Light Horse Regiment was marked to return to Australia. Prior to that action, one of the saddest actions occurred for the Australian Lighthorsemen, they had to farewell their best friends, the horses. All the Light Horse unit horses' health was ascertained with the fit horses being transferred to the Indian Cavalry while those in poor condition were destroyed by the Veterinary units.

On 13 March 1919 the 11th Light Horse Regiment was deployed  to assist in suppressing the Egyptian Uprising. When the revolt collapsed, the 11th Light Horse Regiment embarked on the 17 July 1919 for the long voyage to Australia where the unit was disbanded. 


Commanding Officers

Lieutenant Colonel William Grant
Lieutenant Colonel John William Parsons
Lieutenant Colonel Percival John Bailey
 

Decorations earned by the 11th Light Horse Regiment

  • 4 DSO - Distinguished Service Orders
  • 9 MC & 1 Bar - Military Crosses
  • 6 DCM - Distinguished Conduct Medals
  • 13 MM- Military Medals
  • 27 MID - Mentioned in Despatches
  • 2 foreign awards 


Campaigns

Gallipoli

  • Sari Bair
  • Gallipoli 1915-1916

Egypt

  • Defence of Egypt

Palestine

  • Second Battle of Gaza
  • Third Battle of Gaza
  • Beersheba
  • El Mughar
  • Nebi Samwill
  • Jerusalem
  • Jericho
  • Es Salt
  • Megiddo
  • Sharon
  • Palestine 1917-1918


Casualties suffered by the 11th Light Horse Regiment

  • 95 killed
  • 521 wounded


War Diary

The Australian War Memorial has put these on line and may be accessed here:

11th Light Horse Regiment War Diaries.


Embarkations:

The following list details all the embarkations in support of the 11th Light Horse Regiment, AIF, during the Great War. Each entry details to formation and the ships on which the units embarked with the date and place of embarkation. The detail of the formation is linked to a list of men who embarked upon that ship on the specific date.


Regimental Headquarters Section

Brisbane, Queensland on board HMAT A7 Medic 2 June 1915

"A" Squadron

Brisbane, Queensland on board HMAT A7 Medic 2 June 1915

"B" Squadron

Brisbane, Queensland on board HMAT A30 Borda 16 June 1915

"C" Squadron

Brisbane, Queensland on board HMAT A7 Medic 2 June 1915

Machine Gun Section

Brisbane, Queensland on board HMAT A7 Medic 2 June 1915

1st Reinforcements Medic Group 

1st Reinforcements Borda Group 

Brisbane, Queensland on board HMAT A7 Medic 2 June 1915

Adelaide, South Australia on board HMAT A30 Borda 23 June 1915

2nd Reinforcements Shropshire Group  

2nd Reinforcements Kanowna Group

Sydney, New South Wales on board HMAT A9 Shropshire 20 August 1915

Adelaide, South Australia on board HMAT A61 Kanowna 24 June 1915

3rd Reinforcements Kyarra Group 

3rd Reinforcements Star Of England Group

Brisbane, Queensland on board HMAT A55 Kyarra 16 August 1915

Adelaide, South Australia on board HMAT A15 Star Of England 21 September 1915

4th Reinforcements Hymettus Group

4th Reinforcements Star Of England Group  

Brisbane, Queensland on board HMAT A1 Hymettus 17 September 1915

Adelaide, South Australia on board HMAT A15 Star Of England 21 September 1915

5th Reinforcements Warilda Group 

5th Reinforcements Ballarat Group 

Brisbane, Queensland on board HMAT A69 Warilda 5 October 1915

Adelaide, South Australia on board HMAT A70 Ballarat 14 September 1915

6th Reinforcements Mashobra Group 

6th Reinforcements Benalla Group 

6th Reinforcements Hawkes Bay 23 October Group 

6th Reinforcements Hawkes Bay 26 October Group

Sydney, New South Wales on board HMAT A47 Mashobra 4 October 1915

Adelaide, South Australia on board HMAT A24 Benalla 27 October 1915

Sydney, New South Wales on board SS Hawkes Bay 23 October 1915

Melbourne, Victoria on board SS Hawkes Bay 26 October 1915

7th Reinforcements Hawkes Bay Group 

7th Reinforcements Suffolk Group 

7th Reinforcements Geelong Group

Sydney, New South Wales on board SS Hawkes Bay 23 October 1915

Sydney, New South Wales on board HMAT A23 Suffolk 30 November 1915

Adelaide, South Australia on board HMAT A2 Geelong 18 November 1915

8th Reinforcements

Sydney, New South Wales on board HMAT A10 Karoo 5 May 1916

9th Reinforcements

Brisbane, Queensland on board HMAT A49 Seang Choon 4 May 1916

10th Reinforcements

Sydney, New South Wales on board RMS Mongolia 8 July 1916

11th Reinforcements

Sydney, New South Wales on board RMS Malwa 22 July 1916

12th Reinforcements

Sydney, New South Wales on board RMS Mooltan 19 August 1916

13th Reinforcements

Melbourne, Victoria on board HMAT A65 Clan Macewen 9 October 1916

18th Reinforcements

Sydney, New South Wales on board HMAT A15 Port Sydney 9 May 1917

19th Reinforcements

Sydney, New South Wales on board HMAT A15 Port Sydney 9 May 1917

20th Reinforcements

Sydney, New South Wales on board HMAT A38 Ulysses 19 December 1917

See: Troop transport ships for information and photographs about the various ships employed in transporting the troops to Egypt.


Further Reading:

11th Australian Light Horse Regiment, AIF
 
11th Australian Light Horse Regiment, Roll of Honour 

Battles where Australians fought, 1899-1920


Citation: 11th Australian Light Horse Regiment, AIF, Outline

Posted by Project Leader at 12:01 AM EADT
Updated: Saturday, 9 January 2010 8:56 PM EAST
Monday, 28 September 2009
Australian Service Personnel, Photograph Albums, Contents
Topic: AAC-Photo Albums

Australian Service Personnel

Photograph Albums

Trooper Ellis, The Military Force Souvenir Album


At the conclusion of his service in the Light Horse during the Great War, Trooper Ellis self published an album of his photographs. The album was bound by hand tooled leather and contained 90 photographs, all of which were captioned.

The photographs cover the period from Romani to 3rd Gaza. There are additional commentaries on the photographs where they are warranted.

Here are a sample of four pictures which give the range of subjects photographed by Trooper Ellis.

Image


Resting after Stunt


Quite a nicely composed picture of horse and horseman sleeping after the Battle of Romani.


Image

General Kress von Kressenstein Comdr of Gaza Captured by Anzac M Div

This photograph's caption makes a startling claim, that Kress was captured at Gaza. Since Kress was never captured by the Allied forces, the scene is not of Kress but another officer.


Image

French Soldiers camped somewhere


Oddly enough, in Ellis's album, there is not one picture of a British soldier. So the next best thing was the French.


Image

Remains of a Dead Turk


The album does give the grisly side to the war with a few pictures such as this.


The complete photograph album of Trooper Ellis is now available on the Australian Light Horse Studies Centre Site at:

The Military Force Souvenir Album


Further Reading:

Australian Service Personnel, Photograph Albums

Australian Light Horse

Battles where Australians fought, 1899-1920


Citation: Australian Service Personnel, Photograph Albums, Trooper Ellis, The Military Force Souvenir Album

Posted by Project Leader at 12:01 AM EADT
Updated: Tuesday, 28 September 2010 10:03 AM EADT
Victorian (Volunteer) Mounted Rifles, Formation 1886
Topic: Militia - LHV - Vic

VMR

Victorian (Volunteer) Mounted Rifles

Formation 1886


Victorian (Volunteer) Mounted Rifles was gazetted as a Volunteer formation by General Order 559 of 2 December 1885 with the express aim of consolidating all the disparate cavalry units dotted around Victoria into on co-ordinated and single administrative and military unit.


Headquarters

Melbourne

Commanding Officer

Lieutenant Colonel Tom Price, 1 May 1885.


Adjutant

Lieutenant John Charles Hoad, 4 June 1886.


Quartermaster

Captain Thomas Mann, 2 July 1886.


Surgeons

Archibald McDonald, 16 April 1886.

Henry St. John Mitchell, 16 April 1886.

William Francis Sweetman, 16 April 1886.

Henry Ogle Moore, 16 April 1886.

William Cleland Wilkinson, 16 April 1886.

Augustus McManus, 16 April 1886.


Veterinary Surgeon

Graham Mitchell, 16 April 1886.


"A" Company

Headquarters
Preston

Detachments
Dromana

Ferntree Gully

Flinders

Geelong

Preston


"B" Company

Headquarters
Kyneton

Detachments
Daylesford

Gisborne

Kyneton

Woodend


"C" Company

Headquarters
Heyfield

Detachments
Glengarry

Heyfield

Maffra

Rosedale

Sale


"D" Company

Headquarters
Drouin

Detachments
Drouin

Moe

Morwell

Trafalgar

Yarragon


"E" Company

Headquarters
Euroa

Detachments
Euroa

Strathbogie

Violet Town

Yea


"F" Company

Headquarters
Broadford

Detachments
Broadford

Katandra

Nagambie

Numurkah

Wunghnu


"G" Company

Headquarters
Camperdown

Detachments
Camperdown

Caramut

Dunkeld

Hexham

Mortlake

Penshurst


"H" Company

Headquarters
Hamilton

Detachments
Branxholme

Casterton

Coleraine

Digby

Hamilton

Heywood

Merino


"I" Company

Headquarters
Kerang

Detachments
Elmore

Kerang

Pyramid Hill


Lieutenants

Lieutenant Edgar Slee, 16 April 1886.

Lieutenant William Hallett Thomas, 16 April 1886.

Lieutenant William Braithwaite, 16 April 1886.

Lieutenant Walter George Farroll, 16 April 1886.

Lieutenant Martin Joseph Ryan, 16 April 1886.

Lieutenant William Hart Fawcett, 16 April 1886.

Lieutenant Richard Barker, 16 April 1886.

Lieutenant George Francis Nethercote, 16 April 1886.

Lieutenant William Thomas Reay, 16 April 1886.

Lieutenant John Parsons Learmonth, 16 April 1886.

Lieutenant Richard James Howell, 16 April 1886.

Lieutenant Charles Blanchard, 16 April 1886.

Lieutenant Alfred William Crowe, 16 April 1886.

Lieutenant David Alexander Skene, 16 April 1886.

Lieutenant Christopher Richard Smithwick, 16 April 1886.

Lieutenant William Benjamin Pleasants, 16 April 1886.

Lieutenant Reginald Ivon Argyle, 16 April 1886.

Lieutenant Charles Murray, 16 April 1886.

Lieutenant William Borthwick, 16 April 1886.

Lieutenant Edward Walker Boake, 16 April 1886.

Lieutenant William Henry Hooper, 16 April 1886.

Lieutenant John Niel McArthur, 16 April 1886.

Lieutenant Thomas Carre Riddell, 16 April 1886.

Lieutenant David James Rourke, 16 April 1886.

Lieutenant Henry Southern, 16 April 1886.

Lieutenant Emil Theodor Sichlau, 16 April 1886.


Further Reading:

Victorian Mounted Rifles

The Light Horse

Australian Light Horse Militia

Militia 1899 - 1920


Citation: Victorian (Volunteer) Mounted Rifles, Formation 1886

Posted by Project Leader at 12:01 AM EADT
Updated: Tuesday, 29 September 2009 5:47 PM EADT
Sunday, 27 September 2009
Australian Service Personnel, Photograph Albums, Lieutenant William Lang Photograph Album
Topic: AAC-Photo Albums

Australian Service Personnel

Photograph Albums

Lieutenant William Lang Photograph Album


William Lang


William Lang was born 14 May 1893, at Auckland, New Zealand. He went to school at Palmerston North High School, New Zealand. At the age of 15 he came to Australia with his family who settled in the property known as 'Marmora', located on Corner Street, Burwood, New South Wales. At the age of 18 he was amongst the first intake in 1911 for the new Royal Military College Duntroon although due to war demands was specially graduated and commissioned November 1914 when Lang enlisted in the AIF on 3 November 1914 as a Lieutenant with the 6th LHR (Light Horse Regiment), Machine Gun Section. The 6th LHR was part of the 2nd Light Horse Brigade. This unit embarked from Sydney, New South Wales, on board HMAT A29 Suevic on 21 December 1914. After service at Gallipoli and in anticipation of the August offensive, he was given the rank of Temporary Captain on 4 August 1915. Lang was wounded in action on the evening of 6 August 1915 during the attack on Lone Pine. Days later Lang died of wounds on 13 August 1915 while aboard HS Guildford Castle and was buried at sea. His service is recorded on the Lone Pine Memorial (Panel 4), Gallipoli, Turkey. 

The complete photograph album of Lieutenant William Lang is now available on the Australian Light Horse Studies Centre Site at:

Lieutenant William Lang Photograph Album


Further Reading:

Australian Service Personnel, Photograph Albums

Australian Light Horse

Battles where Australians fought, 1899-1920


Citation: Australian Service Personnel, Photograph Albums, Lieutenant William Lang Photograph Album

Posted by Project Leader at 12:01 AM EADT
Updated: Wednesday, 20 April 2011 8:24 AM EADT
Australian Service Personnel, Photograph Albums, Trooper Ellis, The Military Force Souvenir Album, Contents
Topic: AAC-Photo Albums

Australian Service Personnel

Photograph Albums

Trooper Ellis, The Military Force Souvenir Album, Contents


The complete photograph album of Trooper Ellis is now available on the Australian Light Horse Studies Centre Site at:

The Military Force Souvenir Album


Finding more about a service person.

See: Navigating the National Archives Service File 


The following lists the photographs that are available. Part A are the listings of the photographs on each page of the album while Part B following below Part A is an alphabetical listing of the men named in photographs.


PART A: Photograph Listing per  Album Page

Page 1: 

Artillery Officers Captured at Gaza

Captured at Gaza

German Aeroplane downed after Air Duel

Turkish Engineers Captured at Gaza

ASC Dump in the desert

ELC with the Army

Grazing in the Holyland

Shepherds watching their flock Holyland

Wadi-Ghuzzeh General View

Railway Bridge Shallal


Page 2:  

Railway Bridge Shallal

Turkish Prisoners

Wadi-Ghuzzeh

Wadi-Ghuzzeh

After bombing Turkish HQ Jerusalem

Captured by Anzac M Div

General Kress von Kressenstein Comdr of Gaza Captured by Anzac M Div

After a visit of hostile Aeroplane

Horses under cover from the enemy

Turkish Prisoners


Page 3: 

Turkish Viaduct Before

Turkish Viaduct Blowing Up

Turkish Viaduct After

Fumigating Soldiers clothes

Drawing water from Turkish Well Khan Yunes

Surfing

Bedouin Group

Anzac Well Bielah

Anzac Well Bielah


 Page 4:

Bielah

Lagoon Bielah

Gas Over

Washing & Bathing place for the troops

Horses watering

French Soldiers camped somewhere

Grazing in Palestine

Desert Train

Turkish Mine Before

Turkish Mine After


Page 5:

Natives drawing water from Khan Yunes, Picture 1

Natives drawing water from Khan Yunes, Picture 2

Natives drawing water from Khan Yunes, Picture 3

Natives drawing water from Khan Yunes, Picture 4

Old Church at Khan Yunes

Town of Khan Yunes

Scene in the Holyland

Ploughing in the Holyland

Native of El Arish

Garden Scene El Arish


Page 6: 

Turkish Trenches El Arish

RAMC Attending to a Native El Arish

Start of Anzac Steeple Chase

Winner of Anzac Steeple Chase

Border Post Rafa
Rafa Redoubt taken by Anzac M Div
First stunt into Holyland
Halt on the track to Holyland
Camels used for transport
On the sand of the Desert
 
Page 7:  
Remains of a Dead Turk
Construction of Railway El Arish
Cheikh Tomb el Arish
Camp at Mesaid
Turkish Red Crescent camels
German Officer's Grave
Bomb from Taube
Turkish Trench near Katia
Turkish Red Crescent Camel
Unexploded 14 inch shell
 
Page 8:
Shell bursting among horses
Bomb from Taube, Picture 1
Bomb from Taube, Picture 2
Panorama of Cairo Railway Station, Picture 1 
Panorama of Cairo Railway Station, Picture 2
Armenian Refugee in Hospital
Armenian Refugee Children
Anzac Field Ambulance
Turkish Colonel captured at Romani
Turkish Officer captured at Romani
 
Page 9: 
Turkish Prisoners
German Prisoners MGC
Turkish Flag found on dead Turk
Turkish Field Ambulance Captured Romani, Picture 1
Turkish Field Ambulance Captured Romani, Picture 2
Attending Turkish wounded at Romani
After the battle of Romani Anzac dead
After the battle of Romani, Picture 1
After the battle of Romani, Picture 2
Dead Turks equipment after their defeat Romani
 
Page 10:
Dead Turk in disused well Romani
Resting after Stunt  


Sources Used:

National Archives Service File.

Embarkation Roll, AWM8.

Australian War Memorial Roll of Honour

Nominal Roll, AWM133, Nominal Roll of Australian Imperial Force who left Australia for service abroad, 1914-1918 War.


Further Reading:

Australian Service Personnel, Photograph Albums

Australian Light Horse

Battles where Australians fought, 1899-1920


Citation: Australian Service Personnel, Photograph Albums, Trooper Ellis, The Military Force Souvenir Album, Contents

Posted by Project Leader at 12:01 AM EADT
Updated: Thursday, 26 May 2011 5:44 PM EADT

Newer | Latest | Older

Full Site Index


powered by FreeFind
Let us hear your story: You can tell your story, make a comment or ask for help on our forum.

Desert Column Forum

A note on copyright

The Australian Light Horse Studies Centre is a not for profit and non profit group whose sole aim is to write the early history of the Australian Light Horse from 1900 - 1920. It is privately funded and the information is provided by the individuals within the group and while permission for the use of the material has been given for this site for these items by various donors, the residual and actual copyright for these items, should there be any, resides exclusively with the donors. The information on this site is freely available for private research use only and if used as such, should be appropriately acknowledged. To assist in this process, each item has a citation attached at the bottom for referencing purposes.

Please Note: No express or implied permission is given for commercial use of the information contained within this site.

A note to copyright holders

The Australian Light Horse Studies Centre has made every endeavour to contact copyright holders of material digitised for this blog and website and where appropriate, permission is still being sought for these items. Where replies were not received, or where the copyright owner has not been able to be traced, or where the permission is still being sought, the Australian Light Horse Studies Centre has decided, in good faith, to proceed with digitisation and publication. Australian Light Horse Studies Centre would be happy to hear from copyright owners at any time to discuss usage of this item.

Contact

Australian Light Horse Studies Centre

eXTReMe Tracker