« October 2009 »
S M T W T F S
1 2 3
4 5 6 7 8 9 10
11 12 13 14 15 16 17
18 19 20 21 22 23 24
25 26 27 28 29 30 31
You are not logged in. Log in


Search the site:


powered by FreeFind
Volunteer with us.

Entries by Topic All topics  
A Latest Site News
A - Using the Site
AAA Volunteers
AAB-Education Centre
AAC-Film Clips
AAC-Photo Albums
AIF & MEF & EEF
AIF - Lighthorse
AIF - ALH - A to Z
AIF - DMC
AIF - DMC - Or Bat
AIF - DMC - Anzac MD
AIF - DMC - Aus MD
AIF - DMC - British
AIF - DMC - BWI
AIF - DMC - French
AIF - DMC - Indian
AIF - DMC - Italian
AIF - DMC - Medical
AIF - DMC - Remounts
AIF - DMC - Scouts
AIF - DMC - Sigs
AIF - DMC - Sigs AirlnS
AIF - DMC - 1 Sig Sqn
AIF - DMC - 2 Sig Sqn
AIF - DMC - Eng
AIF - DMC - Eng 1FSE
AIF - DMC - Eng 2FSE
AIF - DMC - GSR
AIF - 1B - 1 LHB
AIF - 1B - 6 MVS
AIF - 1B - 1 LHMGS
AIF - 1B - 1 Sig Trp
AIF - 1B - 1 LHFA
AIF - 1B - 1 LHR
AIF - 1B - 2 LHR
AIF - 1B - 3 LHR
AIF - 2B - 2 LHB
AIF - 2B - 7 MVS
AIF - 2B - 2 LHFA
AIF - 2B - 2 LHMGS
AIF - 2B - 2 Sig Trp
AIF - 2B - 5 LHR
AIF - 2B - 6 LHR
AIF - 2B - 7 LHR
AIF - 3B - 3 LHB
AIF - 3B - 8 MVS
AIF - 3B - 3 LHB Sigs
AIF - 3B - 3 LHFA
AIF - 3B - 3 LHMGS
AIF - 3B - 3 Sig Trp
AIF - 3B - 8 LHR
AIF - 3B - 9 LHR
AIF - 3B - 10 LHR
AIF - 4B - 4 LHB
AIF - 4B - 4 Sig Trp
AIF - 4B - 9 MVS
AIF - 4B - 4 LHFA
AIF - 4B - 4 LHMGS
AIF - 4B - 4 LHR
AIF - 4B - 11 LHR
AIF - 4B - 12 LHR
AIF - 5B - 5 LHB
AIF - 5B - 10 MVS
AIF - 5B - 5 LHFA
AIF - 5B - 5 Sig Trp
AIF - 5B - ICC
AIF - 5B - 14 LHR
AIF - 5B - 15 LHR
AIF - 5B - 1er Regt
AIF - 5B - 2 NZMGS
AIF - AASC
AIF - Aboriginal LH
AIF - Badges
AIF - Cars
AIF - Chinese LH
AIF - Double Sqns
AIF - Engineers
AIF - Fr - 22 Corps
AIF - Fr - 13 LHR
AIF - Honour Roll
AIF - HQ - 3rd Echelon
AIF - Marching Songs
AIF - Misc Topics
AIF - NZMRB
AIF - NZMRB - AMR
AIF - NZMRB - CMR
AIF - NZMRB - EFT
AIF - NZMRB - NZMFA
AIF - NZMRB - NZMGS
AIF - NZMRB - OMR
AIF - NZMRB - Sig-Trp
AIF - NZMRB - WMR
AIF - Ships
AIF - Ships - Encountr
AIF - Ships - Una
AIF - WFF
AIF - Wireless Sqn
Battles
BatzA - Australia
BatzA - Broken Hill
BatzA - Liverpool
BatzA - Merivale
BatzB - Boer War
BatzB - Bakenlaagte
BatzB - Belmont
BatzB - Bothaville
BatzB - Buffels Hoek
BatzB - Coetzees Drift
BatzB - Diamond Hill
BatzB - Driefontein
BatzB - Elands
BatzB - Graspan
BatzB - Grobelaar
BatzB - Grootvallier
BatzB - Hartebestfontn
BatzB - Houtnek
BatzB - Karee Siding
BatzB - Kimberley
BatzB - Koster River
BatzB - Leeuw Kop
BatzB - Mafeking
BatzB - Magersfontein
BatzB - Modder River
BatzB - Onverwacht
BatzB - Paardeberg
BatzB - Palmietfontein
BatzB - Pink Hill
BatzB - Poplar Grove
BatzB - Rhenoster
BatzB - Sannahs Post
BatzB - Slingersfontn
BatzB - Stinkhoutbm
BatzB - Sunnyside
BatzB - Wilmansrust
BatzB - Wolvekuil
BatzB - Zand River
BatzG - Gallipoli
BatzG - Anzac
BatzG - Aug 1915
BatzG - Baby 700
BatzG - Evacuation
BatzG - Hill 60
BatzG - Hill 971
BatzG - Krithia
BatzG - Lone Pine
BatzG - Nek
BatzJ - Jordan Valley
BatzJ - 1st Amman
BatzJ - 2nd Amman
BatzJ - Abu Tellul
BatzJ - Es Salt
BatzJ - JV Maps
BatzJ - Ziza
BatzM - Mespot
BatzM - Baghdad
BatzM - Ctesiphon
BatzM - Daur
BatzM - Kurna
BatzM - Kut el Amara
BatzM - Ramadi
BatzN - Naval
BatzN - AE1
BatzN - Cocos Is
BatzN - Heligoland
BatzN - Marmara
BatzN - Zeebrugge
BatzN - Zeppelin L43
BatzNG - Bitapaka
BatzO - Other
BatzO - Baku
BatzO - Egypt 1919
BatzO - Emptsa
BatzO - Karawaran
BatzO - Peitang
BatzO - Wassa
BatzP - Palestine
BatzP - 1st Gaza
BatzP - 2nd Gaza
BatzP - 3rd Gaza
BatzP - Aleppo
BatzP - Amwas
BatzP - Ayun Kara
BatzP - Bald Hill
BatzP - Balin
BatzP - Beersheba
BatzP - Berkusieh
BatzP - Damascus
BatzP - El Auja
BatzP - El Buggar
BatzP - El Burj
BatzP - Haifa
BatzP - Huj
BatzP - JB Yakub
BatzP - Kaukab
BatzP - Khan Kusseir
BatzP - Khuweilfe
BatzP - Kuneitra
BatzP - Megiddo
BatzP - Nablus
BatzP - Rafa
BatzP - Sasa
BatzP - Semakh
BatzP - Sheria
BatzP - Surafend
BatzP - Wadi Fara
BatzS - Sinai
BatzS - Bir el Abd
BatzS - El Arish
BatzS - El Mazar
BatzS - El Qatiya
BatzS - Jifjafa
BatzS - Magdhaba
BatzS - Maghara
BatzS - Romani
BatzS - Suez 1915
BatzSe - Senussi
BatzWF - Westn Front
BW - Boer War
BW - NSW
BW - NSW - 1ACH
BW - NSW - 1NSWMR
BW - NSW - 2NSWMR
BW - NSW - 3ACH
BW - NSW - 3NSWIB
BW - NSW - 3NSWMR
BW - NSW - 5ACH
BW - NSW - A Bty RAA
BW - NSW - AAMC
BW - NSW - Aust H
BW - NSW - Lancers
BW - NSW - NSW Inf
BW - NSW - NSWCBC
BW - NSW - NSWIB
BW - NSW - NSWMR_A
BW - NZ
BW - Qld
BW - Qld - 1ACH
BW - Qld - 1QMI
BW - Qld - 2QMI
BW - Qld - 3ACH
BW - Qld - 3QMI
BW - Qld - 4QIB
BW - Qld - 5QIB
BW - Qld - 6QIB
BW - Qld - 7ACH
BW - QLD - AAMC
BW - SA
BW - SA - 1SAMR
BW - SA - 2ACH
BW - SA - 2SAMR
BW - SA - 3SACB
BW - SA - 4ACH
BW - SA - 4SAIB
BW - SA - 5SAIB
BW - SA - 6SAIB
BW - SA - 8ACH
BW - SA - AAMC
BW - Tas
BW - Tas - 1ACH
BW - Tas - 1TIB
BW - Tas - 1TMI
BW - Tas - 2TB
BW - Tas - 2TIB
BW - Tas - 3ACH
BW - Tas - 8ACH
BW - Vic
BW - Vic - 1VMI
BW - Vic - 2ACH
BW - Vic - 2VMR
BW - Vic - 3VB
BW - Vic - 4ACH
BW - Vic - 4VIB
BW - Vic - 5VMR
BW - Vic - 6ACH
BW - Vic - AAMC
BW - Vic - Scot H
BW - WA
BW - WA - 1WAMI
BW - WA - 2ACH
BW - WA - 2WAMI
BW - WA - 3WAB
BW - WA - 4ACH
BW - WA - 4WAMI
BW - WA - 5WAMI
BW - WA - 6WAMI
BW - WA - 8ACH
BW Gen - Campaign
BW Gen - Soldiers
BW General
Cavalry - General
Diary - Schramm
Egypt - Heliopolis
Egypt - Mena
Gen - Ataturk Pk, CNB
Gen - Australia
Gen - Legends
Gen - Query Club
Gen - St - NSW
Gen - St - Qld
Gen - St - SA
Gen - St - Tas
Gen - St - Vic
Gen - St - WA
Gm - German Items
Gm - Bk - 605 MGC
GW - 11 Nov 1918
GW - Atrocities
GW - August 1914
GW - Biographies
GW - Propaganda
GW - Spies
GW - We forgot
Militia 1899-1920
Militia - Area Officers
Militia - Inf - Infantry
Militia - Inf - 1IB
Militia - Inf - 2IB
Militia - Inf - 3IB
Militia - Inf - NSW
Militia - Inf - Qld
Militia - Inf - SA
Militia - Inf - Tas
Militia - Inf - Vic
Militia - Inf - WA
Militia - K.E.Horse
Militia - LH
Militia - LH - Regts
Militia - LH - 1LHB
Militia - LH - 2LHB
Militia - LH - 3LHB
Militia - LH - 4LHB
Militia - LH - 5LHB
Militia - LH - 6LHB
Militia - LHN - NSW
Militia - LHN - 1/7/1
Militia - LHN - 2/9/6
Militia - LHN - 3/11/7
Militia - LHN - 4/6/16
Militia - LHN - 5/4/15
Militia - LHN - 6/5/12
Militia - LHN - 28
Militia - LHQ - Qld
Militia - LHQ - 13/2
Militia - LHQ - 14/3/11
Militia - LHQ - 15/1/5
Militia - LHQ - 27/14
Militia - LHS - SA
Militia - LHS - 16/22/3
Militia - LHS - 17/23/18
Militia - LHS - 24/9
Militia - LHT - Tas
Militia - LHT - 12/26
Militia - LHV - Vic
Militia - LHV - 7/15/20
Militia - LHV - 8/16/8
Militia - LHV - 9/19
Militia - LHV - 10/13
Militia - LHV - 11/20/4
Militia - LHV - 19/17
Militia - LHV - 29
Militia - LHW - WA
Militia - LHW-18/25/10
Militia - Military Orders
Militia - Misc
MilitiaRC - Rifle Clubs
MilitiaRC - NSW
MilitiaRC - NT
MilitiaRC - Qld
MilitiaRC - SA
MilitiaRC - Tas
MilitiaRC - Vic
MilitiaRC - WA
Militiaz - New Zealand
Tk - Turkish Items
Tk - Army
Tk - Bks - Books
Tk - Bks - 1/33IR
Tk - Bks - 27th IR
Tk - Bks - Air Force
Tk - Bks - Yildirim
Tk - POWs
Wp - Weapons
Wp - Hotchkiss Cav
Wp - Hotchkiss PMG
Blog Tools
Edit your Blog
Build a Blog
RSS Feed
View Profile
Open Community
Post to this Blog
Site Index
Education Centre
LH Militia
Boer War
Transport Ships
LH Battles
ALH - Units
ALH - General
Aboriginal Light H
Weapons
Ottoman Sources

"At a mile distant their thousand hooves were stuttering thunder, coming at a rate that frightened a man - they were an awe inspiring sight, galloping through the red haze - knee to knee and horse to horse - the dying sun glinting on bayonet points..." Trooper Ion Idriess

The Australian Light Horse Studies Centre aims to present an accurate history as chroniclers of early Australian military developments from 1899 to 1920.

The Australian Light Horse Studies Centre site holds over 12,000 entries and is growing daily.

Contact: Australian Light Horse Studies Centre

Let us hear your story: You can tell your story, make a comment or ask for help on our Australian Light Horse Studies Centre Forum called:

Desert Column Forum

WARNING: This site contains: names, information and images of deceased people; and, language which may be considered inappropriate today.

Tuesday, 27 October 2009
Web Sites of Interest
Topic: A Latest Site News

Web Sites of Interest


Below is a list of web sites that  might be of further interest.


Biographical Research Links
 
 
Fora
 
 
Useful Links
 

Genealogical Links

1. NSW Births and Deaths Records Search

2. Victorian Births and Deaths Records Search

3. Australian Cemeteries

4. England- 1901 Census

5. Scotlands People

6. Society of Australian Genealogists


Other Links

Families and Friends of the First AIF


Military History Society

Military History Society, Victoria Branch

The Charge at the Nek, Gallipoli - 7th August 1915 - Presented by Jeff Pickerd, MHSA Victoria Branch. 

The Rifle Club Movement and Australian Defence 1860-1920, Andrew Kilsby 


Citation:  Web Sites of Interest


Posted by Project Leader at 12:01 AM EADT
Updated: Friday, 30 October 2009 10:48 PM EADT
Monday, 26 October 2009
King Edward's Horse, King Edward's Horse an Oversea Dominions' Regiment, The Advertiser, Wednesday 7 September 1910, p. 8
Topic: Militia - K.E.Horse

King Edward's Horse

King Edward's Horse an Oversea Dominions' Regiment

The Advertiser, Wednesday 7 September 1910, p. 8


The Advertiser, SA, Wednesday 7 September 1910, p. 8


The transcription:

KING EDWARD'S HORSE AN OVERSEA DOMINIONS' REGIMENT.

FINE BODY OF MEN.

(From our Special Correspondent.)

London, August 5.

The King has given his special approval to the change of name of the King's Colonials, which body is in future to be called King Edward's Horse. Thanks to a munificent gift from Lord Strathcona and to other liberal contributions, the future of King Edward's Horse rests upon a solid foundation, and the gradual expansion of the corps and its influence throughout the Empire may be expected with confidence.

The King's Colonials were raised in November, 1909, and through the influence and keen personal sympathy of King Edward, who was pleased to become honorary colonel, were enrolled in the forces of the Crown as a regiment of Imperial Yeomanry. The raison d'etre of the King's Colonials was to commemorate the personal services rendered in South Africa to the Empire by the oversea Dominions, and to enable citizens of the different States domiciled or temporarily resident in England to qualify themselves for the defence of the Empire. The qualifications for King Edward's Horse are that the recruit shall be born in a Dominion or Crown colony, or that he shall come of parents born in a Dominion or Crown colony, or shall have lived in a Dominion or Crown colony for not less than five years, while all who join the regiment give on undertaking to fight for the Empire in the case of national emergency wherever their services may be required.

The gradual creation of an Imperial general staff happily synchronises with the enlarged activities which certainly lie ahead of the King's Oversea Dominions Regiment, for it is to be hoped that the newly named corps will prove a valuable source of supply of men trained and qualified to take their place as officers in the local forces. The enlisted strength of the regiment at present is 472 officers and men, and included in this number are 38 Rhodes scholars and representatives from every oversea Dominion. It may be mentioned that the Rhodes trustees contribute to the funds of the regiment, thus giving practical proof of their approval of King Edward's Horse as a factor in Imperial education and federation.

King Edward's Horse, which is a unit of the London Mounted Brigade, is now training on Salisbury Plain, and all critics are agreed that the spirit, intelligence, and, physique of all ranks are so splendid that, given adequate training, a finer lot of soldiers would not be found anywhere.

[A recent cable message announced that King George had accepted the colonelcy-in-chief of King Edward's Horse.]


Further Reading:

King Edward's Horse

The Light Horse

Australian Light Horse Militia

Militia 1899 - 1920


Citation: King Edward's Horse, King Edward's Horse an Oversea Dominions' Regiment, The Advertiser, Wednesday 7 September 1910, p. 8

Posted by Project Leader at 12:01 AM EADT
Updated: Thursday, 17 December 2009 12:09 AM EAST
The Australian Light Horse, The Bayonet for Mounted Riflemen by GGA
Topic: AIF - Lighthorse

The Australian Light Horse

Bayonet for Mounted Riflemen

"GGA"


 9th Australian Light Horse Regiment "On Manoeuvres" with bayonets in hand.

[Schramm Photograph Album]

[Click on photograph for a larger version.]


The following item penned by "GGA" called The Bayonet for Mounted Riflemen details the use to which the bayonet may be used in the hands of a Light Horseman. It is most prescient in content laying the intellectual ground work for the famous charge at Beersheba by the 4th Light  Horse Brigade some three years after publication in the Military Journal in January 1914.

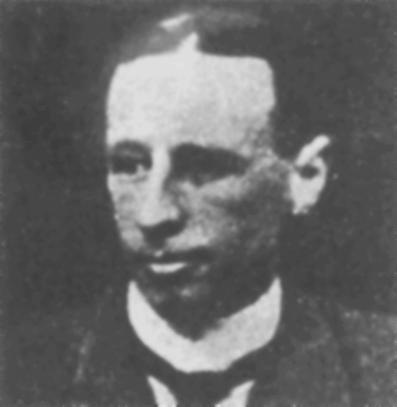
The identity of GGA is possibly Gerald Gleeson Ayliffe who had been a trooper in the South Australian Mounted Rifles, Active No.1 Squadron where he rose through the ranks. Ayliffe was given a commission with the 5th South Australian Imperial Bushmen, 28 February 1901. He served in South Africa till the end of the war. Ayliffe remained with the Light Horse retaining the Honorary Rank of Lieutenant. The essay encapsulates his experience in South Africa.

GGA, The Bayonet for Mounted Riflemen, Military Journal, January 1914, pp. 135 - 140.


The Bayonet for Mounted Riflemen


In dealing with this question it is important first to come to a clear understanding; as to what we mean by a mounted rifleman. The question of mounted rifle tactics is here dealt with on the distinct understanding that a mounted rifleman is a good horseman and horse master, equal to the cavalryman in these respects, and that he fights on foot and not mounted. He is not a cavalryman, as we understand the word, and he is not a mounted infantryman.

As regards his action when mounted, the question of fire from the saddle was discussed at Bloemfontein in 11912 between Boer and British officers; it was suggested as an occasional method to meet special conditions, rather than put forward as a tactical practice. The so-called "mounted rifle charge," by which occasional success has been attained, was shown as a rule to have been a rapid gallop for a fire position close to an enemy taken unawares, especially in the cases where success was achieved. After peace trials in South Africa the bayonet was proved quite unsuitable as a weapon for use when mounted.

In this article it is proposed to consider the question whether the mounted rifleman should be armed with the bayonet, for use on foot only, and the conclusions arrived at are based upon the discussions at Bloemfontein referred to above.

Partly in order to encourage the offensive spirit, and partly to make full use of the moral and material effects which are produced by cold steel, the cavalryman is armed with the sword or lance, the infantryman with the bayonet. The cavalryman makes full use of the momentum of his horse, is taught to press home his attack mounted, and is armed with an arme blanche suitable for this purpose and for no other. The infantryman is taught to get to close grips with his enemy on foot, and is equipped accordingly. Mounted riflemen-those of them at all events who are trained on a citizen basis, and only for short annual periods-are not taught mounted shock tactics, nor are their horses trained for the purpose, or suited to such training. The question arises whether they should be- taught ever to press their attacks h(-me on foot and use the bayonet as infantry are taught to do.

Let us consider first the essential tactical difference between the two arm, that do their fighting on foot, the mounted rifleman and the infantryman. This difference is due to the greater mobility of the former, which he owes entirely to his horse. To retain this mobility it is essential that his horse shall be readily available for his use when he requires it. To fulfil this condition the horses must usually be mobile, especially in the attack, and for this to be the case it is necessary to have one horse holder out of every four mounted riflemen. For a given strength, in these circumstances, 25 per cent of fire effect is lost with mounted riflemen, as compared with infantry. A commander of mounted riflemen, if he wants to obtain the full effect of his arm, must use its mobility to its full extent, and he mast think constantly, not only of the positions of his men, but also of the positions of his led horses.

In view of the fact that full tactical use can only be made of this mobility where freedom to manoeuvre is unfettered, it will be as well to consider our question under two definite headings

I. - Freedom of manoeuvre unlimited.

II. - Freedom of manoeuvre limited for one side or the other, either by the nature of the country, or by the mission which the force is required to carry out.


I. - Freedom of Manoeuvre Unlimited.


(a) In the Attack.

In the attack by daylight we see at once how difficult it is for mounted riflemen, who are advancing on foot, to have their horses constantly close to them. Masses of horses afford a large and conspicuous target for guns and rifles, cover for them is difficult to find, and this difficulty increases as the defended position is approached. The defenders, on the other hand, can usually have their horses under cover not far front the firing line. For these reasons it seems highly improbable that mounted riflemen, advancing for long distances on foot, will have much chance of getting home with the bayonet against well handled enemies in a defensive position. Rather than await such attack, it would be open for the defenders to mount rapidly, make use of the superior mobility thus assured, out-manoeuvre the dismounted attackers, and either pour a heavy fire upon them from some fire position or, a flank, or shoot down their horses and so destroy their mobility once for all.

The foregoing remarks apply to attacks in daylight by mounted riflemen upon mounted riflemen, and not upon infantry. Infantry, on account of their inferior mobility, cannot occupy as extended a front in proportion to their numbers as can mounted riflemen. It is open to the latter either to manoeuvre the infantry out of their position by seizing fire positions on their flank, or, if no such positions are available, to outflank the infantry and even to surround them. With plenty of time available, a force of mounted riflemen adopting these surrounding tactics has practically a certainty of defeating, in a country like South Africa at all events, a slightly inferior force of infantry. They kill, moreover, be able to do so with a minimum of loss to themselves, and they will not require the bayonet for the purpose. On the other hand, if time is limited owing to the defenders expecting reinforcements from elsewhere, or for other reasons, a superior force of mounted riflemen, which does not succeed in ousting infantry from a position by manoeuvre and fire action alone, must then fight as infantry fight, and be taught, as infantry are taught, to get home with the bayonet. With good troops on both sides the attackers will require greatly superior numbers for the purpose. When the full use has been made of the horses to enable the mounted riflemen to deliver their attack from the most effective direction, then it is improbable that further use can be made, in this instance, of superior mobility. As the horses need no longer be mobile, most of the horseholders can be in the firing line. Unless they go there, the mounted riflemen will lose 25 per cent of fire effect and of impetus for their bayonet charge.

For night attacks the bayonet should be of use in all cases. Owing to restricted view the fire of the defenders cannot be as effective as by day, so the approach mounted can be closer. Surprise, as we all know, is a dominating factor, and the silence and secrecy of the bayonet in skilled hands makes it above all others the most effective weapon to employ. Furthermore, its use, as compared with rifle fire minimizes the chances of killing friends instead of foes.


(b) In the Defence.

We can now consider the use of the bayonet by mounted riflemen who are, for same purpose or other, occupying a defensive position-freedom of manoeuvre being complete for both sides. In such circumstances, when considering the attack, we saw that, in most cases, the defending mounted riflemen could operate most effectively by waiting until the attackers had lost mobility by leaving their horses at a distance, and then mount under cover and make full use of their own mobility to out-manoeuvre their opponents.

Should this course be impossible for some reason or other, and should the attackers succeed in creeping so close that the defenders are unable to get to their horses, then again we find a use for the bayonet by mounted riflemen. A bayonet charge by the defenders may be the most effective, or even the only way to save the situation, This subject will be treated at greater length when considering the case where freedom to manoeuvre is limited for one or both sides.

As regards defence of a position by night, the defenders will be especially anxious to prevent rather than to ensure, secrecy regarding the development of an attack. The free use of rifle fire will, therefore, be less open to objection, and the bayonet perhaps less important for this reason. At the same time, the advantage of being better able to distinguish friend from foe when using this weapon holds good in this as in the former case.

II. - Freedom of Manoeuvre Limited.

Before proceeding farther, it seems desirable again to impress the point that, so far, we have only been considering the tactics of the mounted rifleman whose, freedom of manoeuvre is unlimited. We had an example of this in the case of the Boer forces in some of the phases of the South African War. They could rove at will over wide and sparsely populated country, giving or refusing battle at their will, and making full use of their mobility to arrange sudden combinations, and to strike sudden and unexpected blows. They were good horsemen who had spent their lives in the saddle, and good individual rifle shots. It was under these conditions that armed with the rifle only, they made their world-wide reputation. But even in that war it was not on all occasions that freedom of manoeuvre was complete. The forces investing Ladysmith, for instance, were tiled to the vicinity of that place when attacked by the British relieving forces, and it is not difficult to imagine somewhat similar cases in which one side or the other will be unable to manoeuvre at will in wars fought in other countries, and wen in South Africa itself.

A force of mounted riflemen may have its movements limited by the fact that it is only a comparatively small portion of a very large force which shuts it in on both flanks. The mission of mounted riflemen may be to press forward and interfere with mobilization, demolish bridges or other facilities for movement of troops and stores, and so forth. Such objectives may be guarded by small bodies of infantry, or even of mounted troops, who are obliged to stand their ground n order to carry out their mission. It is not difficult to conceive a number of similar examples of cases in war in which mounted riflemen - defined as “good horsemen, armed with rifles, who fight on foot" - would find that their freedom of manoeuvre was limited. In fact, it would hardly be going too far to say that such conditions represent the average, rather than the exceptional, case in war generally.

We now come to the question whether, in such circumstances, mounted riflemen require rifles only, or whether they should have bayonets and be carefully trained in their use.

(a) In the Attack.

Let us again consider the attack first. In discussions with some of our most distinguished opponents in the late war, the point has frequently been made that, by creeping under cover to close range, bodies of Boers on some occasions succeeded, using rifle fire alone, in driving good infantry out of defended positions. They did this by skilful use of cover, creeping up to within few yards, and picking off every defender who showed his head to fire. As these examples provide a very strong argument in favour of equipping mounted riflemen with the bayonet for use when acting on the defensive, it is not necessary to answer the point at this stage; it will be referred to later. In considering the attack generally, it seems sufficient to note that, when mounted riflemen are fighting under conditions which prevent the tactical application of their superior mobility, then they have lost the factor--mobility-which distinguishes them from infantry. They must fight as infantry fight. Wide experience, drawn not from one; special example, but from wars over all parts of the world, has taught the lesson that infantry require bayonets as well as rifles, and if this is the case then mounted riflemen, fighting as infantry, require the same amount when pressing home an attack.

(b) In the Defence

Turning now to the question of the defensive, with freedom of manoeuvre limited, we can adopt the same argument. Our tactical instructions for infantry impress, as strongly as anything can be impressed, the importance of the use of the bayonet by defenders of a position, both as a means of meeting assaulting troops, and as a means of carrying out local counter-attacks to force an enemy to throw his reserves into his firing line.

But let us consider at greater length the examples, referred to above, where Boer mounted riflemen succeeded, by rifle fire alone, in wresting positions from good infantry. On investigating these cases, it will be found that positions so captured were most of them on the skyline of steep, rocky hills or kopjes. Such positions are, of course, very weak ones, because they do not provide a good field of fire. They afford a view of the low ground a few hundred yards away, but no view at all of the steep, rocky slope immediately at the defenders' feet. Attackers who succeed in reaching the foot of such steep slopes are practically safe from rifle fire, unless flanking fire can be provided, which is seldom possible. Such attackers can creep up to very close range, even within 8 or 10 yards, and then be concealed and wait till a defender's head shows on the skyline. The result is obvious. The defender has to peer about for some time for his enemy, who spots him at once and shoots first. But what is the solution from the defender's point of view? There seems to be only one alternative to “Hands up," and that is to form behind the skyline, charge over it, and hurl the attackers down the slope, bayoneting those that hesitate about leaving. Numerous examples can be quoted of the success of such tactics. Waggon Hill suffices as a case in point.

It may be advanced that a weak skyline position of this nature should never be held, and that all positions should have a clear and continuous field of fire, extending from the firing line itself for many hundred yards. Desirable as this may be in theory, it is seldom attainable in practice, and although sometimes possible with small forces, it is seldom possible with very large ones. Nearly all extended positions have weak points in them.

Conclusion

With complete freedom to manoeuvre for both sides, it does not seem pi that mounted riflemen will find as much use as infantry do for the beyond forces are not too unwieldy because of their size, then the mobility of m riflemen affords them effective means of dealing with enemies who leave, horses and attempt long advances on foot. On the other hand, even with complete freedom to manoeuvre, uses can be found for the bayonet, especially night.

Where for some reason the power of manoeuvre is limited by the ground, by the situation of neighbouring forces, or by the mission entrusted to the troops, then mounted riflemen must fight as infantry fight, and be armed as infantry are armed.

In deciding upon the armament of mounted troops due regard must be paid to the periods of training undergone by men and horses, and especially also to skill in leadership. The cavalry leader, for instance, may have to make up his mind in the fraction of a second whether shock tactics or fire tactics, or a combination of the two, will be the best method to defeat his enemy. Such leadership requires practice and judgment attainable only by the professional soldier. As regards completeness of armament, we can put at one end of the scale the Russian cavalryman, who receives several years' continuous training as a regular soldier, who:

"carries a rifle slung over the left shoulder, a sword from his right shoulder, a bayonet superimposed on the sword-scabbard, forty-five rounds of ammunition in two pouches at his waist, a steel tube lance if he is a front rank man, and perhaps a light entrenching tool." [The Army Review, April, 1913, page 580]

At the other end of the scale of armament we can put the citizen mounted troops of a Dominion like South Africa, who are nearly all good horsemen and fairly good shots when they join as recruits, but are unable to spare time for more than a very few weeks' training every year. Some of the men of forces of this nature have in the past carried a rifle only. The majority have now recognized the need of a bayonet, both on account of its practical utility, and also on account of its great moral effect.


Further Reading:

Western Australian Mounted Infantry 

10th Australian Light Horse Regiment, AIF

The Light Horse

Australian Light Horse Militia

Militia 1899 - 1920

Battles where Australians fought, 1899-1920


Citation: The Australian Light Horse, The Bayonet for Mounted Riflemen by GGA

Posted by Project Leader at 12:01 AM EADT
Updated: Wednesday, 16 December 2009 6:36 PM EAST
Brigade Scouts, Obituary, Frederick Allan Dove
Topic: AIF - DMC - Scouts

Brigade Scouts

Obituary

Frederick Allan Dove


Light Horse Scout in the Sinai, 1916


The following obituary was extracted from the Commonwealth Military Journal, 1914, p. 241:


The Late Major Frederick Allan Dove, DSO.

There went over to the Great Army, on the 9th December, 1913, Major Frederick Allan Dove, scholar, soldier, and gentleman. Of that great military quality, courage, he had abundance, and with it the sound commonsense which made his services during the South African War, 1899-1902, so appreciated. But physical courage is, after all, an animal characteristic; moral courage and fortitude are much higher qualities. Of moral courage Major Dove had no lack, and the fortitude with which he fought for long against a painful illness is a shining example of the power of the mind over the body. The notes upon the subject of the gold medal essay for last year, which will be published in the July number of the Journal, were found in his portfolio at the Sydney Hospital, and they show that to the last his mind struggled to give all that it was capable of for the benefit of the forces in whose interests alone he served.

Major Dove was born on the 20th December, 1867, and became second lieutenant (volunteers) in 1897; lieutenant in 1898; captain in 1899; and brevet major in 1903. In 1900 he went on the unattached list, and in the following year he transferred to the reserve of officers. On the 1st May, 1906, he joined the Administrative and Instructional Staff with the rank of captain, and on the 1st October, 1911, he received his substantive majority. From the date of his appointment to the permanent forces until the 30th June, 1911, he served on the Instructional Staff of the 2nd Military District; was Director of Equipment at Head-quarters from the 1st July, 1911, to the 30th June, 1912; and on the 1st July, 1912, he was appointed to the Instructional Staff of the 3rd Military District - an appointment which, unfortunately, ill-health precluded him from taking up.

In 1899 the late Major Dove went to South Africa as a lieutenant in the only infantry contingent despatched from New South Wales. The contingent was mounted in South Africa, and became “E" squadron of the lot New South Wales Mounted Rifles. lie took part in operations in Cape Colony, south of the Orange River, including the action at Colesberg in February, 1900; operations in the Orange River Colony, February to May, 1900, including actions at Houtnek, Vet River, 5th and 6th May, and Zand River; and operations in the Transvaal in May and June, 1900, including actions near Johannesburg, Pretoria, and Diamond 17i11, 11th and 12th June. On the 26th February, 1900, he was wounded at Mader's Farm.

For his services he was mentioned in despatches (London Gazette, 16th April, 1901), and earned the coveted distinction of the Distinguished Service Order. The following extracts from reports submitted by Captain (now Lieutenant-Colonel) J. G. Legge and Captain (now Colonel) W. Holmes, D.S.O., throw an illuminating light on Major Dove's gallantry and coolness in action:- "After a reinforcement of guns, on the 22nd February, our force advanced west, and another force from the camp attacked the Boers on the south, and gave them a heavy shell fire. Lieutenant Dove did an excellent piece of scouting on the right with his division, and drove off the Boer patrols, thus rendering the advance of the guns possible." (Report of Captain Legge, February, 1900). “28th April. In camp, Israel's Poort. - Detailed Lieutenant Dove and 25 men to scout in the vicinity of Thoba Mountain and Houtnek. Lieutenant Dove was instructed to locate the position of the Boer laager. In this duty he was eminently successful, and received the commendation of General Ian Hamilton and Colonel De Lisle. As a result of this reconnaissance the battle of Houtnek was fought two days later. 30th April. Marched at daylight and came into collision with the enemy, who were strongly posted at Thoba Mountain and Houtnek. Lieutenant Dove and 25 men were detached from my command for scouting work." (Report of Captain Holmes, April, 1900).

In 1902 he again went to South Africa as captain and adjutant of the 3rd Battalion Australian Commonwealth Horse, a fine regiment commanded by Colonel R. Wallace, which, however, arrived in South Africa only a month before the peace of Vereeniging.

The military forces of the Commonwealth have, in the death of Major Dove, suffered a great loss, but they are richer for the services he has rendered them, and richer for the footprints he has left on the sands of time.


Margot Z. Simington, 'Dove, Frederick Allan (1867 - 1913)', Australian Dictionary of Biography, Volume 8, Melbourne University Press, 1981, pp 328-329.

DOVE, FREDERICK ALLAN (1867-1913), soldier and teacher, was born on 21 December 1867 in Sydney, son of Daniel Dove, contractor, and Annie Bell. He became a pupil-teacher at Newtown Public School in 1883 and after graduating from Fort Street Training School in 1888 taught for the next eleven years at several Sydney primary schools, including Fort Street, Crown Street and Camperdown. His soldiering began in 1897 when he was commissioned second lieutenant in the 5th Infantry Regiment (Volunteers); he was promoted lieutenant in 1898 and captain in 1899.

After the South African War broke out Dove joined the New South Wales Infantry, the only infantry contingent recruited in the colony, as a lieutenant. His company joined the 1st Australian Regiment at Cape Town in December 1899 and for two months served with the Kimberley Relief Force. In February 1900 the company was converted to 'E' Squadron, New South Wales Mounted Rifles, and, commanded by Captain J. G. Legge, accompanied Major General R. A. P. Clement's column via Colesberg to Norval's Pont, Orange River, and to Bloemfontein. Legge reported that on 22 February 'Lieutenant Dove did an excellent piece of scouting … with his division, and drove off the Boer patrols, thus rendering the advance of the guns possible'. Four days later Dove was slightly wounded at Maeder's Farm. Under Captain W. Holmes his unit then joined General (Sir) Ian Hamilton's column for operations at Pretoria and Diamond Hill.

In April, during the advance on Houtnek, Dove's successful reconnaissance of enemy positions and his command of a detachment which held an advanced post for a whole day earned Hamilton's praise. When Holmes was wounded at Diamond Hill on 12 June Dove was promoted captain and led 'E' Squadron in operations against De Wet and De La Rey in the Transvaal and northern Orange River Colony. For meritorious service in South Africa he was mentioned in dispatches and awarded the Distinguished Service Order. Lieutenant-Colonel De Lisle commented: 'On numerous occasions he has volunteered for dangerous undertakings at night. He is a wonderful scout, and on no single occasion has he failed to accomplish his objective, nor has he lost a man accompanying him'.

Dove returned with his unit to Sydney in January 1901. He resumed teaching at Barmedman, New South Wales, but enlisted again next year as captain and adjutant of the 3rd Battalion, Australian Commonwealth Horse. The battalion embarked on 2 April. Peace was only two months off, however, so by August, after brief service as a staff officer of the Australian Brigade at Newcastle, Natal, Dove was back in Sydney. After serving as a brevet major in the New South Wales Scottish Rifles he was made a captain on the reserve of officers in 1904. That year, on 27 December, at the Presbyterian church, Hill End, he married Adelaide Bryant; the marriage was dissolved on 21 April 1910 with Dove as petitioner and on 11 May he married Margaret Morrison Myles at the Presbyterian manse, Waverley.

In May 1906 Dove had joined the Permanent Forces as a captain on the Administrative and Instructional Staff; he became director of equipment at Army Headquarters, Melbourne, in August 1911 and in October was promoted major. Next January he was appointed president of the examination board for first appointment and transfer of Administrative and Instructional Staff, but illness prevented him from performing his duties after April 1912. Much respected, he died in Sydney Hospital on 9 December 1913 of paraplegia from hydatids of the spine. He was buried with Anglican rites in Waverley cemetery and was survived by his wife, a seven-year-old son from his first marriage and a two-year-old daughter.
 
Select Bibliography

Australian Defence Department, Official Records of the Australian Military Contingents to the War in South Africa, P. L. Murray ed (Melb, 1911); R. L. Wallace, The Australians at the Boer War (Canb, 1976); London Gazette, 16, 19 Apr 1901; Town and Country Journal, 10, 17 Dec 1913; register of careers (history section, Education Dept, Sydney).


Further Reading:

Brigade Scouts

The Light Horse

Australian Light Horse Militia

Militia 1899 - 1920

Battles where Australians fought, 1899-1920


Citation: Brigade Scouts, Obituary, Frederick Allan Dove

Posted by Project Leader at 12:01 AM EADT
Updated: Saturday, 26 December 2009 10:53 AM EAST
The Battle of El Buqqar (Buggar) Ridge, Palestine, 27 October 1917, Outline
Topic: BatzP - El Buggar

The Battle of El Buggar Ridge

Palestine, 27 October 1917

Outline


The scene from El Buggar Ridge, Hill 720, facing north west
 
[Photograph by Gal Shaine.]


The Battle of El Buggar Ridge took place on 27 October 1917. It began as a reconnaissance in force by the Ottoman forces to test the resolve of the Allied defensive perimeter around the newly opened supply station of Karm. It ended in a battle which progressively drew in more Allied forces until they were able to eject the Ottoman forces from the trenches on El Buggar Ridge.

With the completion of the rail link and water pipe from Tel el Fara to Karm, the final logistic preparations for the oncoming battle at Beersheba had been completed. To protect this vital supply depot from artillery harassment from the Ottoman forces at Abu Hareira, Henry Chauvel, the General Officer in Command of the Desert Mounted Corps decided to transform a ring of temporary outposts into a permanent defensive line. To that effect, on 22 October, he ordered the seizure of the outpost line and conversion into a permanent defensive line. The line traversed west to east from "Two Tree Farm", Point 510, Point 550, Point 630 and then south to Point 720 and crossing the Beersheba Road at El Buggar.


El Buggar Ridge defensive line.

[Click on map for larger version.]


The Allied Defence Perimeter consisted of minor trench works built after the 8th Mounted Brigade took possession of the outpost line when they relieved the Australian 4th Light Horse Brigade. By 27 October, the line was still disorganised with only weak redoubts constructed at Points 720 and 630.

For the Ottoman forces, the occupation of Karm created a major point of supply and water for the Allied troops in the immediate area. The placement of the station at Karm placed under threat the defensive positions known as the Hureira Redoubt and Rushdie System which formed a powerful bulwark against any Allied action. Karm Station pointed right to the heart of this system.


Karm Station today

 [Photograph by Gal Shaine.]


To overcome this, General Erich von Falkenhayn, the Commander of the Yildirim Group, proposed a two phase attack. Firstly the plan called for a reconnaissance in force from Beersheba for 27 October which was to be followed by an all out attack launched by the 8th Army from Hureira, ironically scheduled to occur on the morning of 31 October 1917, the day when the Battle of Beersheba began.

At four o'clock on the morning of 27 October, the outpost at El Buggar was fired upon by a Troop of Ottoman cavalry. An hour later the attack developed across a wide front employing some 2,000 Ottoman infantry, 1,200 cavalry, supported by a three batteries of Mountain Guns, some twelve guns in all. The advancing Ottoman forces debouched from the Kauwukah defensive system to attack the Allied forces occupying the ridge.

The initial battle occurred around Point 630. The Ottoman infantry, the 125th Infantry Regiment, worked its way around both flanks of the redoubt and brought heavy machine-gun and artillery fire to bear on the squadron holding it. Flying overhead on the day, the Royal Flying Corps estimated that a force of about 2,000 men had attacked the garrison, which was at that time cut off from any support.

In response, the 1/1 City of London Yeomanry sent a squadron to reinforce the surrounded 1/1 County of London Yeomanry squadron at Point 630. The relieving force was held up by an effective machine gun barrage and after several attempts at entering the redoubt, was compelled to withdraw. In further assistance, two squadrons from the 10th Light Horse Regiment were despatched but they too were held up. Despite these set backs, the garrison held out in a support trench close behind the crest of El Buggar Ridge. Here they repeatedly fought off Ottoman attempts to rush them. The garrison held out until relieved later that evening.

In contrast, the assault on Point 720 against "B" Squadron, 1/1 County of London Yeomanry was far more determined. The attacking force was composed of 1,200 men from the Ottoman 3rd Cavalry Division supported by an under-strength battalion from the 27th Infantry Division. Following a heavy volume of shell and machine gun fire the Ottoman force launched two charges which were beaten off. After regrouping, a third charge pressed home the attack and gained possession of the hill. "B" Squadron had held out for six hours. Except for three men, all the defenders were either killed or wounded.

In support of the beleaguered garrison, at noon, the 9th Light Horse Regiment despatched two squadrons to relieve the 1/1 County of London Yeomanry at Point 720. By 3pm, two infantry brigades of the 53rd Division were moving towards the ridge. A officer's patrol from the 9th Light Horse Regiment at 7 pm established that the Ottoman forces had withdrawn from their positions on Point 720 which allowed the Allied forces to re-occupy El Buggar Ridge without further casualties. That night 229th Infantry Brigade took over the defensive perimeter and re-established Allied control over the area.

The recapture of El Buggar Ridge had two strategic effects.

In the first instance it gave the Ottoman forces the wrong message as to where the projected Allied offensive might strike. Subsequent Turkish air reconnaissance indicated that nothing had changed with the Allied forces dispositions. Falkenhayn drew the inference that he needed to act first with a pre-emptive strike at the heart of the Allied logistic system and thus set in motion the planned attack by the 8th Army scheduled for 31 October, and by doing so, inadvertently unbalanced the Ottoman defensive system.

By diverting the attention of the Ottoman forces, Allenby was able to direct the movement of some 40,000 men from two corps (the XX Corps and the Desert Mounted Corps) to the Beersheba perimeter in complete secrecy. This was possibly one of the most brilliant pieces of staff work in the Allied forces at that time. When the two corps debouched from the hinterland onto the Beersheba defences, the Ottoman forces were taken by complete surprise.


Major Alexander Malins "Laffy" Lafone, the Commander at Point 720 redoubt was awarded a posthumous Victoria Cross for this action.


References cited:

AWM 253, 455-5-705, 3rd Light Horse Brigade Routine Orders, 1917.

Falls, Cyril, Palestine, Official British War History, (London 1929).

Massey, W.T., How Jerusalem was Won, (London 1918).

Major General Hüseyin Hüsnü Emir (Erkilet), Yildirim, (Ankara 1922).

Olden, ACN, The Westralian Cavalry in the War - 10th Light Horse AIF, (Melbourne 1921)


Further Reading:

The Battle of El Buqqar (Buggar) Ridge, Palestine, 27 October 1917

The Third Battle of Gaza, Palestine, 26 October 1917 - 2 January 1918

The Third Battle of Gaza, Palestine, Z - 4, 27 October 1917, Roll of Honour

Battles where Australians fought, 1899-1920


Citation: The Battle of El Buqqar (Buggar) Ridge, Palestine, 27 October 1917, Outline

Posted by Project Leader at 12:01 AM EADT
Updated: Sunday, 17 October 2010 11:23 AM EADT

Newer | Latest | Older

Full Site Index


powered by FreeFind
Let us hear your story: You can tell your story, make a comment or ask for help on our forum.

Desert Column Forum

A note on copyright

The Australian Light Horse Studies Centre is a not for profit and non profit group whose sole aim is to write the early history of the Australian Light Horse from 1900 - 1920. It is privately funded and the information is provided by the individuals within the group and while permission for the use of the material has been given for this site for these items by various donors, the residual and actual copyright for these items, should there be any, resides exclusively with the donors. The information on this site is freely available for private research use only and if used as such, should be appropriately acknowledged. To assist in this process, each item has a citation attached at the bottom for referencing purposes.

Please Note: No express or implied permission is given for commercial use of the information contained within this site.

A note to copyright holders

The Australian Light Horse Studies Centre has made every endeavour to contact copyright holders of material digitised for this blog and website and where appropriate, permission is still being sought for these items. Where replies were not received, or where the copyright owner has not been able to be traced, or where the permission is still being sought, the Australian Light Horse Studies Centre has decided, in good faith, to proceed with digitisation and publication. Australian Light Horse Studies Centre would be happy to hear from copyright owners at any time to discuss usage of this item.

Contact

Australian Light Horse Studies Centre

eXTReMe Tracker