Topic: BatzJ - JV Maps
Jordan Valley 1918
Jordan Valley Maps
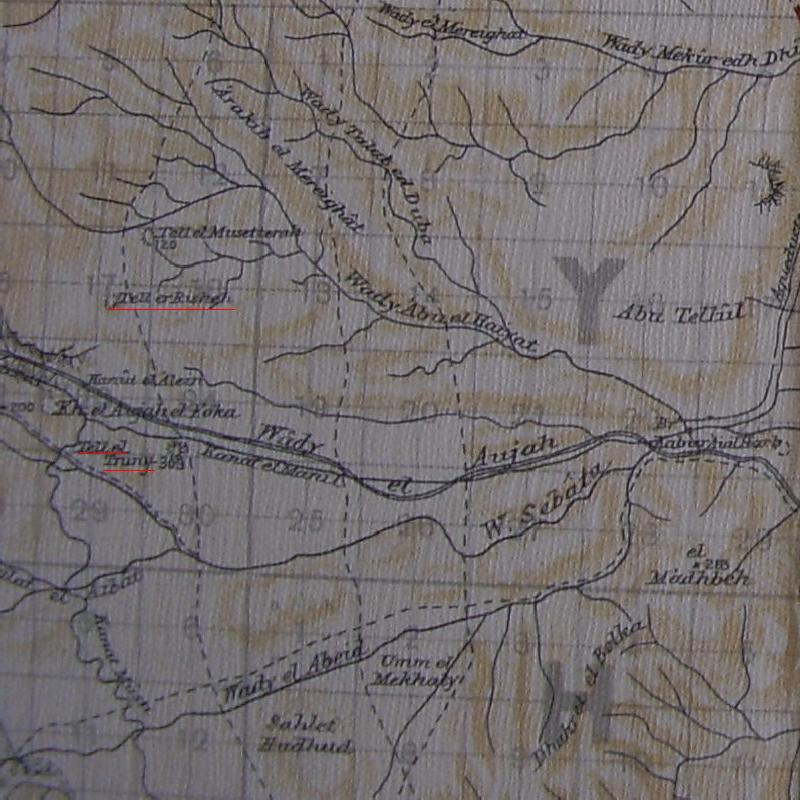
El Ghoraniye Bridgehead
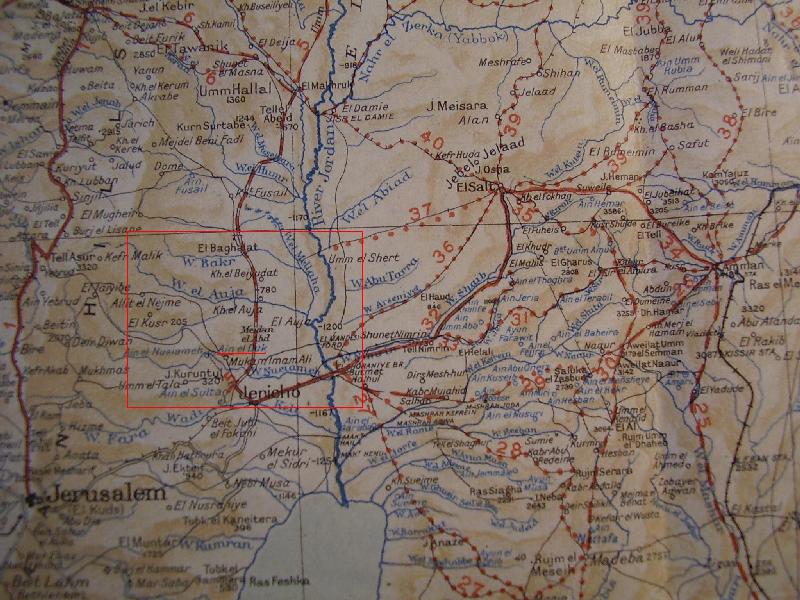
Jordan Valley Map highlighting the region around the El Ghoraniye Bridgehead
[Click on map for enlarged version.]
The El Ghoraniye Bridgehead was seen as an important crossing point from Jerusalem to the west of the Jordan River over to the east into the hills of Moab. When the Allied forces arrived in the Jordan Valley at the end of 1917 to take full control of the region in early 1918, the problem of pursuing the war into Moab required excellent communications between the two sides of the river, a major natural barrier.
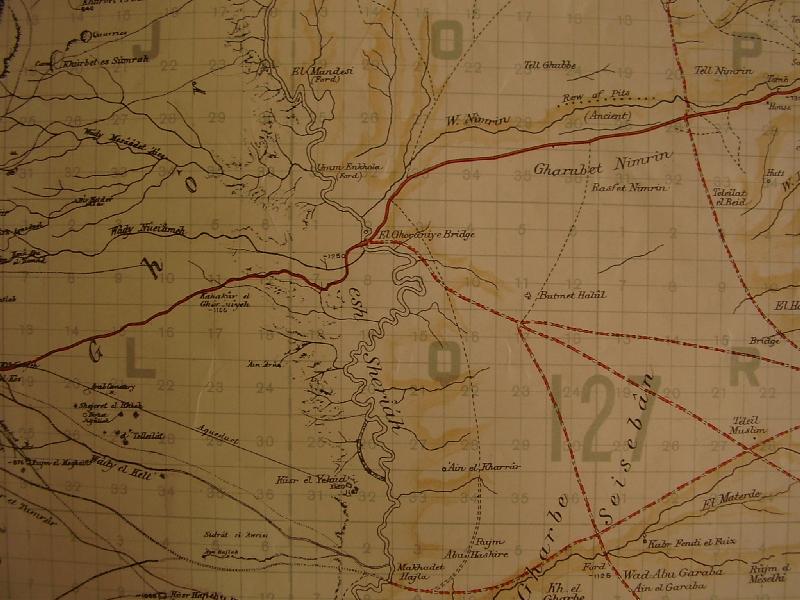
El Ghoraniye Bridgehead
[Click on map for enlarged version.]
El Ghoraniye Bridgehead, during 1918, was occupied by a strong British infantry force supplemented by Australian Light Horse and New Zealand Mounted Rifles. The above map gives a clear idea of the approaches to the El Ghoraniye Bridgehead.

Talaat ed Dumm
[Click on map for enlarged version.]
Talaat ed Dumm was the western entry point to the Jordan Valley. It was here that an Allied base was built to allow transit of troops going east and west.
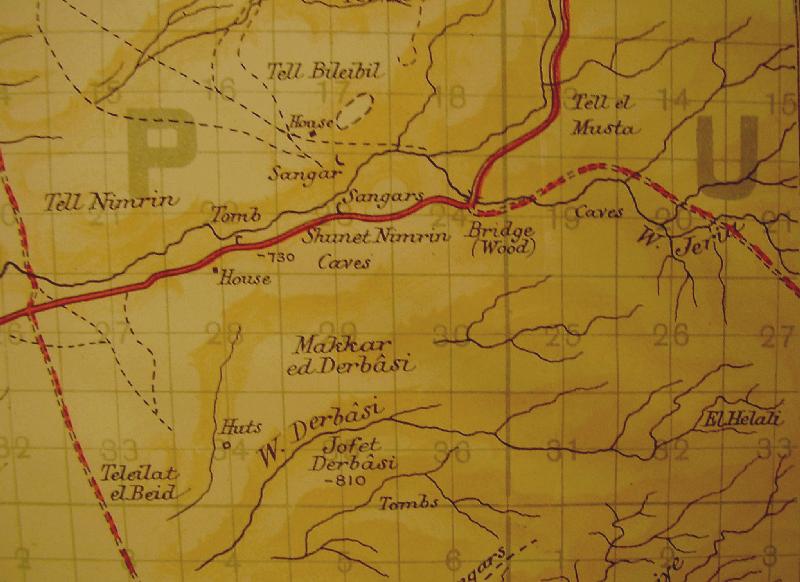
Shunet Nimrin
[Click on map for enlarged version.]
Shunet Nimrin was the access route to Amman through Moab on the eastern bank of the Jordan River.
Further Reading:
Battles where Australians fought, 1899-1920
Citation: Jordan Valley 1918, Jordan Valley Maps, El Ghoraniye Bridgehead