« February 2009 »
S M T W T F S
1 2 3 4 5 6 7
8 9 10 11 12 13 14
15 16 17 18 19 20 21
22 23 24 25 26 27 28
You are not logged in. Log in


Search the site:


powered by FreeFind
Volunteer with us.

Entries by Topic All topics  
A Latest Site News
A - Using the Site
AAA Volunteers
AAB-Education Centre
AAC-Film Clips
AAC-Photo Albums
AIF & MEF & EEF
AIF - Lighthorse
AIF - ALH - A to Z
AIF - DMC
AIF - DMC - Or Bat
AIF - DMC - Anzac MD
AIF - DMC - Aus MD
AIF - DMC - British
AIF - DMC - BWI
AIF - DMC - French
AIF - DMC - Indian
AIF - DMC - Italian
AIF - DMC - Medical
AIF - DMC - Remounts
AIF - DMC - Scouts
AIF - DMC - Sigs
AIF - DMC - Sigs AirlnS
AIF - DMC - 1 Sig Sqn
AIF - DMC - 2 Sig Sqn
AIF - DMC - Eng
AIF - DMC - Eng 1FSE
AIF - DMC - Eng 2FSE
AIF - DMC - GSR
AIF - 1B - 1 LHB
AIF - 1B - 6 MVS
AIF - 1B - 1 LHMGS
AIF - 1B - 1 Sig Trp
AIF - 1B - 1 LHFA
AIF - 1B - 1 LHR
AIF - 1B - 2 LHR
AIF - 1B - 3 LHR
AIF - 2B - 2 LHB
AIF - 2B - 7 MVS
AIF - 2B - 2 LHFA
AIF - 2B - 2 LHMGS
AIF - 2B - 2 Sig Trp
AIF - 2B - 5 LHR
AIF - 2B - 6 LHR
AIF - 2B - 7 LHR
AIF - 3B - 3 LHB
AIF - 3B - 8 MVS
AIF - 3B - 3 LHB Sigs
AIF - 3B - 3 LHFA
AIF - 3B - 3 LHMGS
AIF - 3B - 3 Sig Trp
AIF - 3B - 8 LHR
AIF - 3B - 9 LHR
AIF - 3B - 10 LHR
AIF - 4B - 4 LHB
AIF - 4B - 4 Sig Trp
AIF - 4B - 9 MVS
AIF - 4B - 4 LHFA
AIF - 4B - 4 LHMGS
AIF - 4B - 4 LHR
AIF - 4B - 11 LHR
AIF - 4B - 12 LHR
AIF - 5B - 5 LHB
AIF - 5B - 10 MVS
AIF - 5B - 5 LHFA
AIF - 5B - 5 Sig Trp
AIF - 5B - ICC
AIF - 5B - 14 LHR
AIF - 5B - 15 LHR
AIF - 5B - 1er Regt
AIF - 5B - 2 NZMGS
AIF - AASC
AIF - Aboriginal LH
AIF - Badges
AIF - Cars
AIF - Chinese LH
AIF - Double Sqns
AIF - Engineers
AIF - Fr - 22 Corps
AIF - Fr - 13 LHR
AIF - Honour Roll
AIF - HQ - 3rd Echelon
AIF - Marching Songs
AIF - Misc Topics
AIF - NZMRB
AIF - NZMRB - AMR
AIF - NZMRB - CMR
AIF - NZMRB - EFT
AIF - NZMRB - NZMFA
AIF - NZMRB - NZMGS
AIF - NZMRB - OMR
AIF - NZMRB - Sig-Trp
AIF - NZMRB - WMR
AIF - Ships
AIF - Ships - Encountr
AIF - Ships - Una
AIF - WFF
AIF - Wireless Sqn
Battles
BatzA - Australia
BatzA - Broken Hill
BatzA - Liverpool
BatzA - Merivale
BatzB - Boer War
BatzB - Bakenlaagte
BatzB - Belmont
BatzB - Bothaville
BatzB - Buffels Hoek
BatzB - Coetzees Drift
BatzB - Diamond Hill
BatzB - Driefontein
BatzB - Elands
BatzB - Graspan
BatzB - Grobelaar
BatzB - Grootvallier
BatzB - Hartebestfontn
BatzB - Houtnek
BatzB - Karee Siding
BatzB - Kimberley
BatzB - Koster River
BatzB - Leeuw Kop
BatzB - Mafeking
BatzB - Magersfontein
BatzB - Modder River
BatzB - Onverwacht
BatzB - Paardeberg
BatzB - Palmietfontein
BatzB - Pink Hill
BatzB - Poplar Grove
BatzB - Rhenoster
BatzB - Sannahs Post
BatzB - Slingersfontn
BatzB - Stinkhoutbm
BatzB - Sunnyside
BatzB - Wilmansrust
BatzB - Wolvekuil
BatzB - Zand River
BatzG - Gallipoli
BatzG - Anzac
BatzG - Aug 1915
BatzG - Baby 700
BatzG - Evacuation
BatzG - Hill 60
BatzG - Hill 971
BatzG - Krithia
BatzG - Lone Pine
BatzG - Nek
BatzJ - Jordan Valley
BatzJ - 1st Amman
BatzJ - 2nd Amman
BatzJ - Abu Tellul
BatzJ - Es Salt
BatzJ - JV Maps
BatzJ - Ziza
BatzM - Mespot
BatzM - Baghdad
BatzM - Ctesiphon
BatzM - Daur
BatzM - Kurna
BatzM - Kut el Amara
BatzM - Ramadi
BatzN - Naval
BatzN - AE1
BatzN - Cocos Is
BatzN - Heligoland
BatzN - Marmara
BatzN - Zeebrugge
BatzN - Zeppelin L43
BatzNG - Bitapaka
BatzO - Other
BatzO - Baku
BatzO - Egypt 1919
BatzO - Emptsa
BatzO - Karawaran
BatzO - Peitang
BatzO - Wassa
BatzP - Palestine
BatzP - 1st Gaza
BatzP - 2nd Gaza
BatzP - 3rd Gaza
BatzP - Aleppo
BatzP - Amwas
BatzP - Ayun Kara
BatzP - Bald Hill
BatzP - Balin
BatzP - Beersheba
BatzP - Berkusieh
BatzP - Damascus
BatzP - El Auja
BatzP - El Buggar
BatzP - El Burj
BatzP - Haifa
BatzP - Huj
BatzP - JB Yakub
BatzP - Kaukab
BatzP - Khan Kusseir
BatzP - Khuweilfe
BatzP - Kuneitra
BatzP - Megiddo
BatzP - Nablus
BatzP - Rafa
BatzP - Sasa
BatzP - Semakh
BatzP - Sheria
BatzP - Surafend
BatzP - Wadi Fara
BatzS - Sinai
BatzS - Bir el Abd
BatzS - El Arish
BatzS - El Mazar
BatzS - El Qatiya
BatzS - Jifjafa
BatzS - Magdhaba
BatzS - Maghara
BatzS - Romani
BatzS - Suez 1915
BatzSe - Senussi
BatzWF - Westn Front
BW - Boer War
BW - NSW
BW - NSW - 1ACH
BW - NSW - 1NSWMR
BW - NSW - 2NSWMR
BW - NSW - 3ACH
BW - NSW - 3NSWIB
BW - NSW - 3NSWMR
BW - NSW - 5ACH
BW - NSW - A Bty RAA
BW - NSW - AAMC
BW - NSW - Aust H
BW - NSW - Lancers
BW - NSW - NSW Inf
BW - NSW - NSWCBC
BW - NSW - NSWIB
BW - NSW - NSWMR_A
BW - NZ
BW - Qld
BW - Qld - 1ACH
BW - Qld - 1QMI
BW - Qld - 2QMI
BW - Qld - 3ACH
BW - Qld - 3QMI
BW - Qld - 4QIB
BW - Qld - 5QIB
BW - Qld - 6QIB
BW - Qld - 7ACH
BW - QLD - AAMC
BW - SA
BW - SA - 1SAMR
BW - SA - 2ACH
BW - SA - 2SAMR
BW - SA - 3SACB
BW - SA - 4ACH
BW - SA - 4SAIB
BW - SA - 5SAIB
BW - SA - 6SAIB
BW - SA - 8ACH
BW - SA - AAMC
BW - Tas
BW - Tas - 1ACH
BW - Tas - 1TIB
BW - Tas - 1TMI
BW - Tas - 2TB
BW - Tas - 2TIB
BW - Tas - 3ACH
BW - Tas - 8ACH
BW - Vic
BW - Vic - 1VMI
BW - Vic - 2ACH
BW - Vic - 2VMR
BW - Vic - 3VB
BW - Vic - 4ACH
BW - Vic - 4VIB
BW - Vic - 5VMR
BW - Vic - 6ACH
BW - Vic - AAMC
BW - Vic - Scot H
BW - WA
BW - WA - 1WAMI
BW - WA - 2ACH
BW - WA - 2WAMI
BW - WA - 3WAB
BW - WA - 4ACH
BW - WA - 4WAMI
BW - WA - 5WAMI
BW - WA - 6WAMI
BW - WA - 8ACH
BW Gen - Campaign
BW Gen - Soldiers
BW General
Cavalry - General
Diary - Schramm
Egypt - Heliopolis
Egypt - Mena
Gen - Ataturk Pk, CNB
Gen - Australia
Gen - Legends
Gen - Query Club
Gen - St - NSW
Gen - St - Qld
Gen - St - SA
Gen - St - Tas
Gen - St - Vic
Gen - St - WA
Gm - German Items
Gm - Bk - 605 MGC
GW - 11 Nov 1918
GW - Atrocities
GW - August 1914
GW - Biographies
GW - Propaganda
GW - Spies
GW - We forgot
Militia 1899-1920
Militia - Area Officers
Militia - Inf - Infantry
Militia - Inf - 1IB
Militia - Inf - 2IB
Militia - Inf - 3IB
Militia - Inf - NSW
Militia - Inf - Qld
Militia - Inf - SA
Militia - Inf - Tas
Militia - Inf - Vic
Militia - Inf - WA
Militia - K.E.Horse
Militia - LH
Militia - LH - Regts
Militia - LH - 1LHB
Militia - LH - 2LHB
Militia - LH - 3LHB
Militia - LH - 4LHB
Militia - LH - 5LHB
Militia - LH - 6LHB
Militia - LHN - NSW
Militia - LHN - 1/7/1
Militia - LHN - 2/9/6
Militia - LHN - 3/11/7
Militia - LHN - 4/6/16
Militia - LHN - 5/4/15
Militia - LHN - 6/5/12
Militia - LHN - 28
Militia - LHQ - Qld
Militia - LHQ - 13/2
Militia - LHQ - 14/3/11
Militia - LHQ - 15/1/5
Militia - LHQ - 27/14
Militia - LHS - SA
Militia - LHS - 16/22/3
Militia - LHS - 17/23/18
Militia - LHS - 24/9
Militia - LHT - Tas
Militia - LHT - 12/26
Militia - LHV - Vic
Militia - LHV - 7/15/20
Militia - LHV - 8/16/8
Militia - LHV - 9/19
Militia - LHV - 10/13
Militia - LHV - 11/20/4
Militia - LHV - 19/17
Militia - LHV - 29
Militia - LHW - WA
Militia - LHW-18/25/10
Militia - Military Orders
Militia - Misc
MilitiaRC - Rifle Clubs
MilitiaRC - NSW
MilitiaRC - NT
MilitiaRC - Qld
MilitiaRC - SA
MilitiaRC - Tas
MilitiaRC - Vic
MilitiaRC - WA
Militiaz - New Zealand
Tk - Turkish Items
Tk - Army
Tk - Bks - Books
Tk - Bks - 1/33IR
Tk - Bks - 27th IR
Tk - Bks - Air Force
Tk - Bks - Yildirim
Tk - POWs
Wp - Weapons
Wp - Hotchkiss Cav
Wp - Hotchkiss PMG
Blog Tools
Edit your Blog
Build a Blog
RSS Feed
View Profile
Open Community
Post to this Blog
Site Index
Education Centre
LH Militia
Boer War
Transport Ships
LH Battles
ALH - Units
ALH - General
Aboriginal Light H
Weapons
Ottoman Sources

"At a mile distant their thousand hooves were stuttering thunder, coming at a rate that frightened a man - they were an awe inspiring sight, galloping through the red haze - knee to knee and horse to horse - the dying sun glinting on bayonet points..." Trooper Ion Idriess

The Australian Light Horse Studies Centre aims to present an accurate history as chroniclers of early Australian military developments from 1899 to 1920.

The Australian Light Horse Studies Centre site holds over 12,000 entries and is growing daily.

Contact: Australian Light Horse Studies Centre

Let us hear your story: You can tell your story, make a comment or ask for help on our Australian Light Horse Studies Centre Forum called:

Desert Column Forum

WARNING: This site contains: names, information and images of deceased people; and, language which may be considered inappropriate today.

Wednesday, 18 February 2009
The Battle of Magdhaba, Sinai, December 23, 1916, 9th LHR, AIF, Unit History Account
Topic: AIF - 3B - 9 LHR

The Battle of Magdhaba

Sinai, 23 December 1916

9th LHR, AIF, Unit History Account


9th LHR men sorting through rifles captured at Hamissah.


Major Thomas Henry Darley produced a unit history of the 9th Light Horse Regiment, AIF, called With the Ninth Light Horse in the Great War, in which included a section specifically related to the Battle of Magdhaba and is extracted below.

Darley, TH, With the Ninth Light Horse in the Great War, Adelaide, Hassell Press, 1924, pp. 60 - 63.


El Arish and El Magdhaba Operations

El Magdhaba is situated on the banks of the Wadi El Arish, about 23 miles, as the crow flies, from the sea. Except from a military point of view, it was a place of no importance, but standing in a natural defensive position it was well garrisoned with a view to holding up our further advance. It could also be used by the enemy as a starting place for a turning movement against our right flank. It was clear to all that no further advance could be made in our direct line until this menace to our communications was removed, and the Commander in Chief decided that the Anzac Mounted Division would efficiently carry out this duty.

At daybreak, shortly after arrival at Es Ria, the Regiment took up a position about 3,000 yards north of El Magdhaba. From this point the 1st Light Horse Brigade could be clearly seen closing in to the attack. At 9.45 a.m. the Brigade commenced to move round the enemy's right flank, whilst the New Zealanders occupied some prominent sand hills; the Inverness and Leicester Batteries, Royal Horse Artillery, being between them and the Imperial Camel Corps. These batteries immediately opened fire on the redoubts, thus enabling the advancing troops to gain ground. The enemy up to this had lain low, but he prepared to give his usual display of defensive fighting and opened heavy and accurate fire at ranges of from 1,000 to 1,200 yards.

The Regiment now took up a position on the left of the New Zealanders and was supported by the 8th Light Horse Regiment. The two Regiments dismounted and advanced in extended order. The country at this particular point was practically level for a distance of 2,000 yards, whilst the enemy trenches were on a slight rise, and so placed that their fire would sweep the whole plain. A few grassy hillocks dotted over the plain afforded slight cover, but these were few and far between. As the Regiments advanced the line was shortened by the 8th Light Horse Regiment advancing on a slightly different direction, and two troops were dropped back as support.
When about 1,000 yards from the enemy position snipers and Lewis guns were pushed forward to cover the advance, which was made by alternate rushes, troop by troop, each troop supporting the advance by rapid fire. The heavy and accurately placed fire of the enemy began to take effect, and a number of casualties occurred, but by 2.30 p.m. the line had been advanced to within 500 yards of the position, and drew the attention of the enemy gunners who opened a brisk fire with shrapnel.

The line was now straightened up and reserve ammunition brought forward for the Lewis guns. At 3.15 p.m. the line again advanced by rushes of 25 yards, whilst the batteries kept up a brisk fire on the redoubts. On arrival at 150 yards from the redoubts, the line laid low for a spell and at 3.45 p.m. bayonets were fixed ready for the final rush. At a given signal the whole line leapt to their feet, and, rushing forward with wild cheers, carried the outer trenches, many of the enemy being bayoneted before the remainder surrendered

Our machine guns, which had been in rear supporting the move by overhead fire, now came forward, and together with the Lewis guns and rifles, opened a heavy fire on the enemy position to our right thus enabling the Imperial Camel Corps and New Zealanders to advance. In the meantime the 10th Light Horse Regiment had moved round the right flank for the purpose of cutting off any attempt at escape.

The 8th and 9th Light Horse Regiments now advanced against the buildings from which rifle fire was being directed, the 8th Light Horse Regiment capturing a battery of light guns during the move. As the prisoners were being rounded up news arrived that the 10th Light Horse Regiment were hard pressed on the far side of the buildings, and McKenzie, Major KA, with 50 men were immediately sent to their support.

Royston, Brigadier General JR, called for two mounted troops, and as the horses had just arrived, these were despatched under the command of Chanter, Captain JC, but this party on arrival found that the enemy force had already surrendered to McKenzie, Major KA, and his party. McKenzie, Major KA, with C Squadron did excellent work during the day, and to them fell the honour of taking the first enemy trench.

The Royal Flying Corps was by no means idle during the day, our pilots skimming the enemy trenches frequently and doing good work with their machine guns. They also dropped a liberal supply of light bombs on enemy strong points, doing considerable damage and with good moral effect.

This was the first action in which the Lewis gun teams had used their new guns, their work showing great initiative and tactical judgment, special credit being due to McKenna, 804 Corporal B; Harley, 471 Corporal A; and, Carter, 892A Corporal WH, for the manner in which they handled their teams, reconnoitred the position, and brought effective fire to bear with economical use of ammunition. Cruddas, 397 Trooper GF; and, Fulwood, 11 Trooper AL, did splendid work in bringing up supplies of ammunition under heavy machine gun fire, whilst the stretcher bearers, Crack, 1472 Trooper AH; and, Currie, 645 Trooper AH, did excellent work amongst the wounded.

The Regiment had little time to collect prisoners, but five officers and 154 other ranks taken in the first trench were handed over to the Division. It had been stated that the enemy had destroyed their water service when all hope of a successful resistance had been abandoned, but this was found to be incorrect, and both horses and men drank to their heart's content from his abundant supply. A party was sent out to collect the wounded and bury the dead, whilst another party from one of the Brigades was sent to clear up the battle ground.

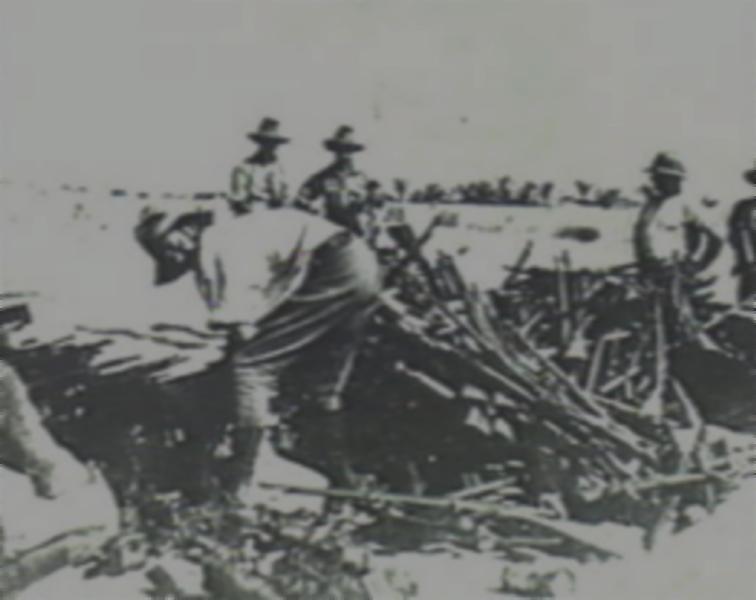
A plentiful supply of wood was found, and as the night was drawing in and was bitterly cold large fires were lighted. It was indeed a strange sight to see our men and the Turks, who one hour before had been fighting a bitter fight, sitting side by side round the fires, sharing their evening meal and cigarettes, apparently on the best of terms.

At 11 p.m. the Division moved off on the return journey, arriving at Bir Lahfan at 3 a.m., where it halted and bivouacked. The huge column of prisoners arrived at 4.30 a.m. and halted. A convoy of 400 camels had been sent out from El Arish, and at daybreak each enemy prisoner received a ration consisting of one tin of bully beef, one pound of biscuits, and one quart of water. For the purpose of distributing these rations the prisoners were paraded in line, and were told off in parties of 20, under their own officers and Non Commissioned Officers. Each party was then given 20 tins of meat and one tin of biscuits, and were marched off a short distance, where the supplies were distributed amongst the party. It is doubtful whether they had ever received such a generous ration during the whole of their desert campaign.

At daybreak the Division resumed the march to El Arish, and went into bivouac at Hod Masaid, which was reached at 9 a.m. on the 24th December 1916. The operations had been a severe test on the endurance of both men and horses, as three night marches had been done during the past four nights, with plenty of hard work during the intervening days.

That the operations were an unqualified success is proved by the fact that the whole garrison of roughly 2,000 had been captured, together with a large quantity of stores, a battery of guns, and many machine guns. The prisoners were a mixed lot, representing many tribes, but were all of fine physique. Several Germans were amongst the bag, and one black officer was seen. After a short rest and meal they were conducted to El Arish and sent to Egypt.

The work of the transport was very trying throughout these operations. When the force moved from the Wadi El Arish on the night of the 22nd December 1916, the transport camels allotted to the Brigade were collected and marched to the supply depot on the beach at El Arish by Darley, Captain TH, and loaded with further supplies. At 10 a.m. on the 23rd December 1916 this party commenced the long and trying journey to El Magdhaba, 80 per cent of the camels carrying drinking water. By continuous marching El Magdhaba was reached at 9.30 p.m., and the supplies were issued to the various units. The convoy immediately started on the return journey, arriving at Bir Lahfan at 2 a.m. where it halted. After the prisoners had been rationed the two convoys were moved back to El Arish, arriving at 3 p.m. on the 24th December 1916.


Further Reading:

9th Light Horse Regiment, AIF

9th Australian Light Horse Regiment, Roll of Honour 

The Battle of Magdhaba

The Battle of Magdhaba, Sinai, December 23, 1916, Roll of Honour, Australia and New Zealand

Battles where Australians fought, 1899-1920


Citation: The Battle of Magdhaba, Sinai, December 23, 1916, 9th LHR, AIF, Unit History Account

Posted by Project Leader at 12:01 AM EAST
Updated: Sunday, 21 March 2010 2:19 PM EADT

View Latest Entries

Full Site Index


powered by FreeFind
Let us hear your story: You can tell your story, make a comment or ask for help on our forum.

Desert Column Forum

A note on copyright

The Australian Light Horse Studies Centre is a not for profit and non profit group whose sole aim is to write the early history of the Australian Light Horse from 1900 - 1920. It is privately funded and the information is provided by the individuals within the group and while permission for the use of the material has been given for this site for these items by various donors, the residual and actual copyright for these items, should there be any, resides exclusively with the donors. The information on this site is freely available for private research use only and if used as such, should be appropriately acknowledged. To assist in this process, each item has a citation attached at the bottom for referencing purposes.

Please Note: No express or implied permission is given for commercial use of the information contained within this site.

A note to copyright holders

The Australian Light Horse Studies Centre has made every endeavour to contact copyright holders of material digitised for this blog and website and where appropriate, permission is still being sought for these items. Where replies were not received, or where the copyright owner has not been able to be traced, or where the permission is still being sought, the Australian Light Horse Studies Centre has decided, in good faith, to proceed with digitisation and publication. Australian Light Horse Studies Centre would be happy to hear from copyright owners at any time to discuss usage of this item.

Contact

Australian Light Horse Studies Centre

eXTReMe Tracker