


Topic: BW - NSW - 1NSWMR
1st NSWMR
1st New South Wales Mounted Rifles
Hilliard Letter, 11 July 1900
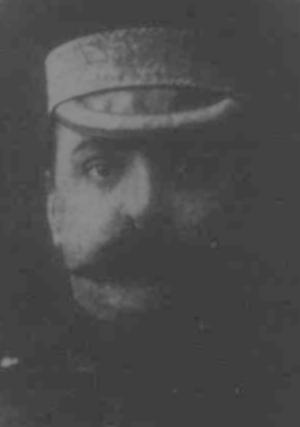
The following letter to an unnamed Colonel in the NSW Military was written by Captain Maurice Alfred HILLIARD (19 March 1964 - 1907), the Officer Commanding “C” Squadron, 1st New South Wales Mounted Rifles in South Africa. During his service he was accidentally injured Heidelberg 27 June 1900. Much to his despair he was invalided to Australia and arrived on 17 August 1900. He was Mentioned in Despatches in the London Gazette edition of 18 April 1901 and awarded the DSO. His service in South Africa saw him awarded the Queen’s South African Medal with four clasps – Driefontein, Transvaal, Johannesburg and Diamond Hill. After returning to Sydney he remained in the permanent forces.
To place people and places into the context of the letter, a series of explanatory notes have been placed below the body of the letter. These match up with the reference numbers in the letter’s text.
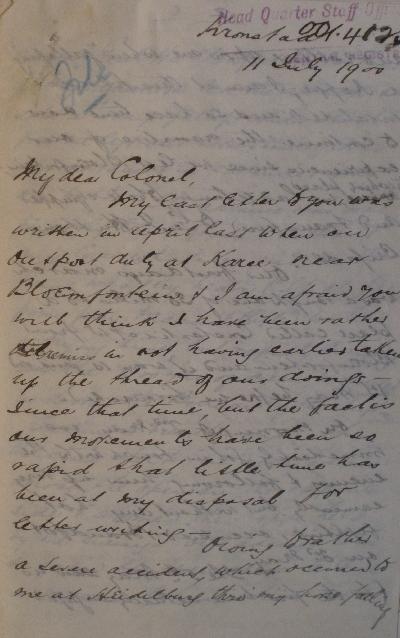
Arundel
11 July 1900
My dear Colonel
My last letter to you was written in April last when on Outpost duty at Karee near Bloemfontein and I am afraid you will think I have been rather remiss in not having earlier taken up the thread of our doings since that time, but the fact is our movements have been so rapid that little time has been at my disposal for letter writing.
Owing to rather a severe accident, which occurred to me at Heidelberg through my horse falling and rolling upon me when "galloping a kopje", I am at this place invalided and so have time now to continue the narrative of our experiences since we left Bloemfontein to which place we had returned to be re-equipped and transferred to General Hutton's Brigade.
Our first day's march was a rough one of 30 miles to a place called Constantia at west from Bloemfontein and it was 10 hours on 1st May before we bivouacked.
On morning of 2nd May we immediately got in touch with the enemy and following him very earnestly but without any hot fighting, occupied Brandfort on 3rd May.
The 5th May saw us (for the first time actually engaged under General Hutton) at the Vet River.
My Squadron led the attack and after a sharp gallop under shell fire we left our horses under cover and advanced in extended order on foot.
The advance was over perfectly level ground without any cover whatever and as the firing was very heavy (shell fire, pom-pom, Maxim and rifle) we had a trying time, but rapidly crossing over the 1,500 yards of open, succeeded in driving the Boers out of the drift.
Taking a breather under this welcome shelter we again advanced across the open on the opposite side and stormed the kopje held by the enemy. Our advance was so rapid they were obliged to leave a Maxim behind which we captured. We also seized six or seven prisoners and accounted for a good many killed.
None of our men were killed and only a few slightly wounded, which considering the rain of bullets is to me marvellous. I can only attribute such luck to the rapidity with which we moved and the excellent way intervals were maintained.
General Hutton was too generous in his remarks when congratulating me personally - but the warm praise he bestowed upon my Squadron in particular and the Regiment generally was well deserved and will ever be warmly cherished by us all.
On the 6th inst we met Colonel Parrot and Captain Copeland (1) at Smaldeel the junction of the main Railway and Winburg line.
The 7th inst again found us under a heavy shell fire on the South Bank of the Zand River where we had suddenly come upon a Boer Laager of 10 to 12,000 enemy.
Retiring that night to Welgelegen we awaited the arrival of Lord Roberts' Column and on the morning of the 9th inst he arrived and we were immediately marched out to take a drift higher up the river which we successfully crossed without opposition just as dark and bivouacked on the opposite bank at du Preez Laager. (2)
You have of course read the account of the Battle of Zand River of the 10th May and how the Boers scattered like chaff.
This day was however responsible for a Calamity on our side and I witnessed one of the most painful sights I ever hope to see.
My Squadron having been on outpost all night was told to follow on after the advance had commenced and missing the Regiment on the field we were placed by General Hutton as escort to supporting guns.
It was a most trying day of incessant shell fire and the range being too long for our twelve pounders (without dangerously exposing them to the mercy of the Boers big guns) the Carabineers and Scots Grey (to which the 1st Australian Horse were attached) were ordered to charge the gun positions.
The Boers quickly got their guns away but left an ambush of 300 men in a Kaffir Kraal and our Cavalry seeing no one and cattle on the top of kopje rote to within 70 yards of the Kraal when the Boers opened fire. You can imagine what a sight of dead and dying men and horses met our eyes when we, following up, occupied the position.
It was here that Lieutenant Wilkinson was taken prisoner. He has of course, as you know, been since released.
At 7.30 pm on 12th inst we entered the town from which I am now writing - after all the long marches and hard work we were grateful for a rest on Sunday 13th inst.
Monday 14th May saw us marching again and with much regret we left General French's command and transferred to that of General Ian Hamilton under whom we have since served.
It was here poor Harriott (3) and his troop after having been to Kimberely and back and rejoined my Squadron - of this dear fellow's death I shall tell you as I follow the course of our career.
Our Regimental strength was augmented also by Legge's Company which added on ours as "E" Company under Holmes and Dove (Legge (4) having become adjutant since and joining us at Bloemfontein).
I see I have arrived at page 9 and am afraid I am too exhaustive in my details which weary you to read it all therefore I must curtail and touch only on one or two of the most important days concerning us in my descriptive.
Marching rapidly (always camping and starting again in the dark) we occupied Lindley (without fighting) on 18th May.
A little fighting on 20th and 21st May and then Heilbron was occupied on 22 inst. We left this place next day and monotonous marchings brought us back to the main railway line again just north of Roodewal on the 24th inst.
All hoped to have crossed the Vaal on Her Majesty's Birthday and we were but a day late as the next day after a long and rapid march we did so.
We fully expected opposition here and waited near the river till dark when we galloped the drift at Boschbok south west of Vereeniging to which place Lord Roberts was advancing. To our surprise the enemy was not in evidence and we felt a joy at being at last in the Transvaal.
Rough marches and hardship and two day's hard fighting gave us Johannesburg which was occupied on the 30th May.
After 2 or 3 day's rest we pushed on for our goal, Pretoria, which after a magnificent artillery duel was ours on the 5 June. We were all proud and I am sure you all were in Australia that Lieutenant Watson (5) of our Regiment was the first into Pretoria.
He was lucky enough to be galloper to our Brigadier (Lieutenant Colonel De Lisle) and the Colonel sent him in to demand the surrender of the town. I must leave Watson to tell his own tale, but I take special interest in the lucky lot falling to him as I induced him to join our Permanent Paid Forces as Subaltern in the 4th Regiment.
Great was our disappointment on the 5th when instead of joining in the formalities of taking the town over we were suddenly saddled up and hastened out beyond Pretoria. From that day until the 11th inst we were kept going hither and thither after the enemy and on the 11th and 12th inst we had some of the hottest fighting on the Campaign. (See: The Battle of Diamond Hill, South Africa, 11 - 12 June 1900)
All day on the 11th through some apparent blunder we got between two fires and had to simply stand and be shelled. To have retired would have appeared weakness and the only thing to do was to wait until our big guns came up the next day. (British casualties this day were heavy including Earl of Airlie (6))
At day break on the memorable 12th my Squadron was sent as escort to the Big Guns. They got into position by 10 am and having plenty of Infantry escort, I was ordered to rejoin the Regiment. The whole of the day the guns kept pounding away at each other and the sight was one of a lifetime. Towards noon it was with much satisfaction that we observed our guns had silenced those of the enemy which had the day before so much harassed us. The frontage of the battle must have been fully six miles in extent and the position held by the Boers was a long line of Kopjes (here little mountains).
Just about 3 pm our turn came - advancing across the veldt for about half a mile (in columns of troop in extended order) at a walk we then broke into a hot trot and when another half mile had been covered we broke into a gallop and made for the sheltering base of part of the Kopje straight in front of us.
After a most exciting gallop of a mile partly under fire we reached the shelter for our horses, dismounted and then scaled the Kopje.
My Squadron was first up and I had Mr Anderson (7) on my left and on my immediate right Mr Newman (8) and next to him Mr Harriott. It was a difficult climb especially after a trying gallop but out men never hesitated and we soon reached the first rugged "table top".
The bullets began to hiss in real earnest so we dashed across the open and gained the next line of pinnacle rocks. Keeping firing we halted for a little while and then made another rush for the next line of shelter.
It was then that poor Harriott fell shot in the thigh by either an expansive or a MH bullet. Private Cameron was also shot in the stomach.
Seeing the Boers retreating bayonets were fixed and a dash forward made which was too much for the and they "scattered". A Field Cornet was shot and his cousin after narrowly shooting Lieutenant Newman through the head was made prisoner.
The Boers managed to get away all their other dead and wounded.
At this juncture they opened a big gun on us at very short range also two pom poms, and discovering that we were being enfiladed with rifle fire on the left, I ordered the men to lie flat behind cover and so we remained and longed for darkness not daring to lift our heads up to reply to their fire except by an occasional volley. I afterwards learned that the other Squadron Commanders had a similar experience.
Poor Drage (10) fell just on my left shot through the left head – also though he lived a little while he was dead when I saw him. Captain Holmes was sounded in the right forearm but pluckily stayed with me all night on the Kopje which we had to hold. Harriott's loss was a great sorrow to me as I had become greatly attached to him.
He was plucky to rashness and I had often warned him to be careful but on this occasion poor chap it was the fortunes of war and a finer young fellow couldn't have been chosen for a Soldier's fate. He never rallied properly and died next day and was buried in the garden of a farm house.
Drage was also buried at another farm in a most picturesque spot.
Next day finding the Boers had cleared we gave chase and got on to their rear guard about 6 miles out and chased them up at the historical Bronkhorst Spruit. (9)
My Squadron and a company of 6th Mounted Infantry held the enemy whilst the remainder of our Advanced Guard retired which was considered expedient as the enemy was in force.
14th and 15th June saw us resting at Elands River and on the 16th we marched back to Pretoria which town we "did" on 17th and 18th. It was a treat and the town the prettiest we have struck. Houses and gardens like Strathfield.
Leaving Pretoria again on the 19th June easy marches brought us within sight of the hills behind which Heidelberg was hidden on the 22nd inst. We fully anticipated a fight next day but our patrols got right into the town and we following cautiously formed up at the Railway Station at 10.30 am.
Lieutenant Bowman and his patrol were first into the town and hoisted the "Jack".
We were just preparing to settle down when it was discovered the enemy held the hills on the opposite side of the town and had to be driven out.
It was just lunch time when we moved off at a smart trot to a position on the left of the attack.
There was only Captain Lenehan's (11) and my Squadrons engaged of our Regiment as the remainder were holding the town.
After about two hours firing the advance was ordered and we broke into a canter and it was just at this juncture that my horse (a large waler) put both his fore feet into a hole and turned completely over rolling I am told twice over me. I came off very lucky as outside a sprained foot, slight concussion of the brain and a nasty shaking I am sound in limb.
However, it was with the deepest regret that I saw my Regiment march off without me en route to Frankfort on the morning of the 27th June inst.
Since that date I have news of the Regiment anticipating they would work across here have made my way down gradually hoping to rejoin.
The doctor here however advises me to rest for a week or two longer after which I hope to be once again in the saddle.
This is all my news up to date except perhaps I shall like you to know that Colonel Knight informs me my name has gone forward in despatches.
Of matters generally you will know more than we do out here so that I need not add to my already too lengthy resume of our doings. Will you kindly send this letter on to Colonel Ranclaud (12) and I would ask him to accept it as a communication from me also.
Trusting you have all escaped the ravages of the Bubonic plague and with kind regards
I am dear Colonel
Yours Sincerely
MA Hilliard, Captain.
Notes:
(1) Colonel Parrot and Captain Copeland = Colonel Thomas Samuel PARROTT and Captain Henry Paul Ramsay COPELAND, Special Service Officers.
(2) du Preez Laager = The laager formed by Field-Cornet Jan du Preez.
(3) Harriott = Lieutenant William Rupert HARRIOTT, "C" Squadron, NSWMR. Died of Wounds at Diamond Hill 13 June 1900. His grave is in Diamond Hill Cemetery
(4) Legge = Captain James Gordon LEGGE, see New South Wales Infantry Contingent.
(5) Watson = Lieutenant William Walker Russell WATSON, appointed Captain "D" Squadron, NSWMR. Appointed Service Officer 2nd Imperial Mounted Infantry Corps. Mentioned in Despatches, 18 April 1901.
(6) Earl of Airlie = Lieutenant Colonel David Stanley William Ogilvy, 11th Earl of Airlie (20 January 1856 — 11 June 1900)
(7) Anderson = Lieutenant Charles Godfrey ANDERSON, later Captain "C" Squadron, NSWMR. Born 1862 Stockholm Sweden.
(8) Newman = Lieutenant William Augustine NEWMAN, "C" Squadron, NSWMR.
(9) Bronkhorst Spruit = (From Wikipedia - Action_at_Bronkhorstspruit )
The Action at Bronkhorstspruit was one of the first serious clashes of the First Boer War. It was a skirmish between a British army column and a group of Boers, fought a few miles east of the town of Bronkhorstspruit, Transvaal on 20 December 1880.
A column of British soldiers consisting of six officers and 246 men of the 94th Regiment, as well as 12 men of the Army Service Corps and four of the Army Hospital Corps, were marching on a road to Pretoria, when at least 250 Boers appeared to the left of the column. Making use of the limited cover, the Boers crept to within 200 yards of the British. Lt. Col. Anstruther parleyed with a Boer envoy, who had brought a request from the Transvaal government to turn back. Anstruther refused, but before he could move his column into skirmish formation the Boers opened fire at 12:30 pm.
Within 15 minutes, most of the officers were killed or wounded, and the horses and oxen pulling the covered wagons at the front and rear of the column were killed, preventing any movement. Shocked by the sudden and aggressive nature of the attack, Lt. Col. Anstruther gave the order to surrender. In a battle lasting just 15 minutes, 156 British soldiers were killed or wounded, with the rest taken prisoner. Reported Boer casualties were only two killed and five wounded.
(10) Drage = Lieutenant Percy William Chanter DRAGE, "D" Squadron, NSWMR, Killed in Action at Diamond Hill 12 June 1900 buried and buried at Rhenosterfontein Farm and reburied with his grave at Diamond Hill Cemetery.
(11) Captain Lenehan = Captain Robert William LENEHAN, Officer Commanding "B" Squadron, NSWMR.
(12) Colonel Ranclaud = Colonel Charles Mark Ranclaud (b. 31 July 1851 - d. 1931 )
Second Lieutenant: 3 March 1882
Lieutenant: 31 May 1882
Captain: 14 March 1884
Major: 2 November 1885
Lieutenant Colonel: (Local) 9 January 1896, Commanding Officer 4th Infantry Regiment.
Lieutenant Colonel: (Substantive) 19 January 1897.
Colonel: 1 October 1906
Commanding Officer 1st Infantry Brigade: 1 January 1907
Retired: 1 January 1912
Further Reading:
1st New South Wales Mounted Rifles
1st New South Wales Mounted Rifles, Roll of Honour
Battles where Australians fought, 1899-1920
Citation: 1st New South Wales Mounted Rifles, Hilliard Letter, 11 July 1900
