« February 2003 »
S M T W T F S
1
2 3 4 5 6 7 8
9 10 11 12 13 14 15
16 17 18 19 20 21 22
23 24 25 26 27 28
You are not logged in. Log in


Search the site:


powered by FreeFind
Volunteer with us.

Entries by Topic All topics  
A Latest Site News
A - Using the Site
AAA Volunteers
AAB-Education Centre
AAC-Film Clips
AAC-Photo Albums
AIF & MEF & EEF
AIF - Lighthorse
AIF - ALH - A to Z
AIF - DMC
AIF - DMC - Or Bat
AIF - DMC - Anzac MD
AIF - DMC - Aus MD
AIF - DMC - British
AIF - DMC - BWI
AIF - DMC - French
AIF - DMC - Indian
AIF - DMC - Italian
AIF - DMC - Medical
AIF - DMC - Remounts
AIF - DMC - Scouts
AIF - DMC - Sigs
AIF - DMC - Sigs AirlnS
AIF - DMC - 1 Sig Sqn
AIF - DMC - 2 Sig Sqn
AIF - DMC - Eng
AIF - DMC - Eng 1FSE
AIF - DMC - Eng 2FSE
AIF - DMC - GSR
AIF - 1B - 1 LHB
AIF - 1B - 6 MVS
AIF - 1B - 1 LHMGS
AIF - 1B - 1 Sig Trp
AIF - 1B - 1 LHFA
AIF - 1B - 1 LHR
AIF - 1B - 2 LHR
AIF - 1B - 3 LHR
AIF - 2B - 2 LHB
AIF - 2B - 7 MVS
AIF - 2B - 2 LHFA
AIF - 2B - 2 LHMGS
AIF - 2B - 2 Sig Trp
AIF - 2B - 5 LHR
AIF - 2B - 6 LHR
AIF - 2B - 7 LHR
AIF - 3B - 3 LHB
AIF - 3B - 8 MVS
AIF - 3B - 3 LHB Sigs
AIF - 3B - 3 LHFA
AIF - 3B - 3 LHMGS
AIF - 3B - 3 Sig Trp
AIF - 3B - 8 LHR
AIF - 3B - 9 LHR
AIF - 3B - 10 LHR
AIF - 4B - 4 LHB
AIF - 4B - 4 Sig Trp
AIF - 4B - 9 MVS
AIF - 4B - 4 LHFA
AIF - 4B - 4 LHMGS
AIF - 4B - 4 LHR
AIF - 4B - 11 LHR
AIF - 4B - 12 LHR
AIF - 5B - 5 LHB
AIF - 5B - 10 MVS
AIF - 5B - 5 LHFA
AIF - 5B - 5 Sig Trp
AIF - 5B - ICC
AIF - 5B - 14 LHR
AIF - 5B - 15 LHR
AIF - 5B - 1er Regt
AIF - 5B - 2 NZMGS
AIF - AASC
AIF - Aboriginal LH
AIF - Badges
AIF - Cars
AIF - Chinese LH
AIF - Double Sqns
AIF - Engineers
AIF - Fr - 22 Corps
AIF - Fr - 13 LHR
AIF - Honour Roll
AIF - HQ - 3rd Echelon
AIF - Marching Songs
AIF - Misc Topics
AIF - NZMRB
AIF - NZMRB - AMR
AIF - NZMRB - CMR
AIF - NZMRB - EFT
AIF - NZMRB - NZMFA
AIF - NZMRB - NZMGS
AIF - NZMRB - OMR
AIF - NZMRB - Sig-Trp
AIF - NZMRB - WMR
AIF - Ships
AIF - Ships - Encountr
AIF - Ships - Una
AIF - WFF
AIF - Wireless Sqn
Battles
BatzA - Australia
BatzA - Broken Hill
BatzA - Liverpool
BatzA - Merivale
BatzB - Boer War
BatzB - Bakenlaagte
BatzB - Belmont
BatzB - Bothaville
BatzB - Buffels Hoek
BatzB - Coetzees Drift
BatzB - Diamond Hill
BatzB - Driefontein
BatzB - Elands
BatzB - Graspan
BatzB - Grobelaar
BatzB - Grootvallier
BatzB - Hartebestfontn
BatzB - Houtnek
BatzB - Karee Siding
BatzB - Kimberley
BatzB - Koster River
BatzB - Leeuw Kop
BatzB - Mafeking
BatzB - Magersfontein
BatzB - Modder River
BatzB - Onverwacht
BatzB - Paardeberg
BatzB - Palmietfontein
BatzB - Pink Hill
BatzB - Poplar Grove
BatzB - Rhenoster
BatzB - Sannahs Post
BatzB - Slingersfontn
BatzB - Stinkhoutbm
BatzB - Sunnyside
BatzB - Wilmansrust
BatzB - Wolvekuil
BatzB - Zand River
BatzG - Gallipoli
BatzG - Anzac
BatzG - Aug 1915
BatzG - Baby 700
BatzG - Evacuation
BatzG - Hill 60
BatzG - Hill 971
BatzG - Krithia
BatzG - Lone Pine
BatzG - Nek
BatzJ - Jordan Valley
BatzJ - 1st Amman
BatzJ - 2nd Amman
BatzJ - Abu Tellul
BatzJ - Es Salt
BatzJ - JV Maps
BatzJ - Ziza
BatzM - Mespot
BatzM - Baghdad
BatzM - Ctesiphon
BatzM - Daur
BatzM - Kurna
BatzM - Kut el Amara
BatzM - Ramadi
BatzN - Naval
BatzN - AE1
BatzN - Cocos Is
BatzN - Heligoland
BatzN - Marmara
BatzN - Zeebrugge
BatzN - Zeppelin L43
BatzNG - Bitapaka
BatzO - Other
BatzO - Baku
BatzO - Egypt 1919
BatzO - Emptsa
BatzO - Karawaran
BatzO - Peitang
BatzO - Wassa
BatzP - Palestine
BatzP - 1st Gaza
BatzP - 2nd Gaza
BatzP - 3rd Gaza
BatzP - Aleppo
BatzP - Amwas
BatzP - Ayun Kara
BatzP - Bald Hill
BatzP - Balin
BatzP - Beersheba
BatzP - Berkusieh
BatzP - Damascus
BatzP - El Auja
BatzP - El Buggar
BatzP - El Burj
BatzP - Haifa
BatzP - Huj
BatzP - JB Yakub
BatzP - Kaukab
BatzP - Khan Kusseir
BatzP - Khuweilfe
BatzP - Kuneitra
BatzP - Megiddo
BatzP - Nablus
BatzP - Rafa
BatzP - Sasa
BatzP - Semakh
BatzP - Sheria
BatzP - Surafend
BatzP - Wadi Fara
BatzS - Sinai
BatzS - Bir el Abd
BatzS - El Arish
BatzS - El Mazar
BatzS - El Qatiya
BatzS - Jifjafa
BatzS - Magdhaba
BatzS - Maghara
BatzS - Romani
BatzS - Suez 1915
BatzSe - Senussi
BatzWF - Westn Front
BW - Boer War
BW - NSW
BW - NSW - 1ACH
BW - NSW - 1NSWMR
BW - NSW - 2NSWMR
BW - NSW - 3ACH
BW - NSW - 3NSWIB
BW - NSW - 3NSWMR
BW - NSW - 5ACH
BW - NSW - A Bty RAA
BW - NSW - AAMC
BW - NSW - Aust H
BW - NSW - Lancers
BW - NSW - NSW Inf
BW - NSW - NSWCBC
BW - NSW - NSWIB
BW - NSW - NSWMR_A
BW - NZ
BW - Qld
BW - Qld - 1ACH
BW - Qld - 1QMI
BW - Qld - 2QMI
BW - Qld - 3ACH
BW - Qld - 3QMI
BW - Qld - 4QIB
BW - Qld - 5QIB
BW - Qld - 6QIB
BW - Qld - 7ACH
BW - QLD - AAMC
BW - SA
BW - SA - 1SAMR
BW - SA - 2ACH
BW - SA - 2SAMR
BW - SA - 3SACB
BW - SA - 4ACH
BW - SA - 4SAIB
BW - SA - 5SAIB
BW - SA - 6SAIB
BW - SA - 8ACH
BW - SA - AAMC
BW - Tas
BW - Tas - 1ACH
BW - Tas - 1TIB
BW - Tas - 1TMI
BW - Tas - 2TB
BW - Tas - 2TIB
BW - Tas - 3ACH
BW - Tas - 8ACH
BW - Vic
BW - Vic - 1VMI
BW - Vic - 2ACH
BW - Vic - 2VMR
BW - Vic - 3VB
BW - Vic - 4ACH
BW - Vic - 4VIB
BW - Vic - 5VMR
BW - Vic - 6ACH
BW - Vic - AAMC
BW - Vic - Scot H
BW - WA
BW - WA - 1WAMI
BW - WA - 2ACH
BW - WA - 2WAMI
BW - WA - 3WAB
BW - WA - 4ACH
BW - WA - 4WAMI
BW - WA - 5WAMI
BW - WA - 6WAMI
BW - WA - 8ACH
BW Gen - Campaign
BW Gen - Soldiers
BW General
Cavalry - General
Diary - Schramm
Egypt - Heliopolis
Egypt - Mena
Gen - Ataturk Pk, CNB
Gen - Australia
Gen - Legends
Gen - Query Club
Gen - St - NSW
Gen - St - Qld
Gen - St - SA
Gen - St - Tas
Gen - St - Vic
Gen - St - WA
Gm - German Items
Gm - Bk - 605 MGC
GW - 11 Nov 1918
GW - Atrocities
GW - August 1914
GW - Biographies
GW - Propaganda
GW - Spies
GW - We forgot
Militia 1899-1920
Militia - Area Officers
Militia - Inf - Infantry
Militia - Inf - 1IB
Militia - Inf - 2IB
Militia - Inf - 3IB
Militia - Inf - NSW
Militia - Inf - Qld
Militia - Inf - SA
Militia - Inf - Tas
Militia - Inf - Vic
Militia - Inf - WA
Militia - K.E.Horse
Militia - LH
Militia - LH - Regts
Militia - LH - 1LHB
Militia - LH - 2LHB
Militia - LH - 3LHB
Militia - LH - 4LHB
Militia - LH - 5LHB
Militia - LH - 6LHB
Militia - LHN - NSW
Militia - LHN - 1/7/1
Militia - LHN - 2/9/6
Militia - LHN - 3/11/7
Militia - LHN - 4/6/16
Militia - LHN - 5/4/15
Militia - LHN - 6/5/12
Militia - LHN - 28
Militia - LHQ - Qld
Militia - LHQ - 13/2
Militia - LHQ - 14/3/11
Militia - LHQ - 15/1/5
Militia - LHQ - 27/14
Militia - LHS - SA
Militia - LHS - 16/22/3
Militia - LHS - 17/23/18
Militia - LHS - 24/9
Militia - LHT - Tas
Militia - LHT - 12/26
Militia - LHV - Vic
Militia - LHV - 7/15/20
Militia - LHV - 8/16/8
Militia - LHV - 9/19
Militia - LHV - 10/13
Militia - LHV - 11/20/4
Militia - LHV - 19/17
Militia - LHV - 29
Militia - LHW - WA
Militia - LHW-18/25/10
Militia - Military Orders
Militia - Misc
MilitiaRC - Rifle Clubs
MilitiaRC - NSW
MilitiaRC - NT
MilitiaRC - Qld
MilitiaRC - SA
MilitiaRC - Tas
MilitiaRC - Vic
MilitiaRC - WA
Militiaz - New Zealand
Tk - Turkish Items
Tk - Army
Tk - Bks - Books
Tk - Bks - 1/33IR
Tk - Bks - 27th IR
Tk - Bks - Air Force
Tk - Bks - Yildirim
Tk - POWs
Wp - Weapons
Wp - Hotchkiss Cav
Wp - Hotchkiss PMG
Blog Tools
Edit your Blog
Build a Blog
RSS Feed
View Profile
Open Community
Post to this Blog
Site Index
Education Centre
LH Militia
Boer War
Transport Ships
LH Battles
ALH - Units
ALH - General
Aboriginal Light H
Weapons
Ottoman Sources

"At a mile distant their thousand hooves were stuttering thunder, coming at a rate that frightened a man - they were an awe inspiring sight, galloping through the red haze - knee to knee and horse to horse - the dying sun glinting on bayonet points..." Trooper Ion Idriess

The Australian Light Horse Studies Centre aims to present an accurate history as chroniclers of early Australian military developments from 1899 to 1920.

The Australian Light Horse Studies Centre site holds over 12,000 entries and is growing daily.

Contact: Australian Light Horse Studies Centre

Let us hear your story: You can tell your story, make a comment or ask for help on our Australian Light Horse Studies Centre Forum called:

Desert Column Forum

WARNING: This site contains: names, information and images of deceased people; and, language which may be considered inappropriate today.

Tuesday, 4 February 2003
2nd Tasmanian Imperial Bushmen, Outline
Topic: BW - Tas - 2TIB

2nd TIB 

2nd Tasmanian Imperial Bushmen

Outline


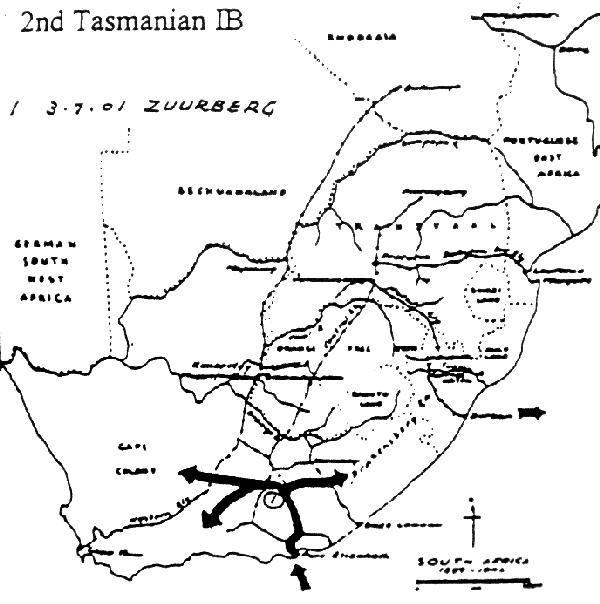
Map illustrating the activities of the 2nd Tasmanian Imperial Bushmen in South Africa, 1901-1902.

[From: Chamberlain, M., The Australians in the South African War 1899-1902, Canberra, 1999.]


In 1911, Lieutenant-Colonel P. L. Murray, produced a marvellous Boer War reference detailing all the contingents sent from Australia to South Africa, giving a brief history of the formation and finally, listing all the soldiers who saw service in South Africa with that unit. The book was called, Official Records of the Australian Military Contingents to the War in South Africa. It is now the standard reference and starting place for any person interested in pursuing information about Australian involvement in the Boer War.

Murray, P. L., Official Records of the Australian Military Contingents to the War in South Africa, pp. 561 - 562.


Fourth (Second Imperial Bushmen) Contingent.

Consisted of two Companies (or Squadrons), enrolled upon a system similar to that which obtained in constituting the previous Contingent. Rates of pay, equipment, etc., as before. The establishment comprised a small Battalion staff, consisting, in the first instance, of:

1 Lieutenant-Colonel (Commanding),

1 Lieutenant (Medical Staff),

1 Regimental Sergeant-Major,

1 Regimental Quartermaster Sergeant, and

1 Transport Sergeant.


To these were added an adjutant, appointed from the Company officers, and an Orderly Room Sergeant, also drawn from “A” Company.

Each Company establishment included:

1 Captain,

4 Subalterns,

1 Colour-Sergeant,

1 Quartermaster-Sergeant,

1 Farrier-Sergeant,

3 Sergeants,

2 buglers, and

109 rank and file.


Departure and Return.

The 2nd Tasmanian Imperial Bushmen left on 27th March, 1901, comprising -12 officers, 241 others, with 289 horses. Six were killed or died ; 10 officers and 6 others were struck off in South Africa; 2 officers were appointed from the ranks ; 1 N.C.O. obtained an Imperial commission. The remainder returned to Tasmania.


Promotions, etc

Lieutenant J. M'Cormick, to Adjutant, 27th March, 1901.

Lieutenant H. Hallam, to Transport Officer, 6th June, 1901.

Lieutenant M. H. Swan, to Paymaster, 1st August, 1901.

2nd Lieutenant F. R. Chalmers, to 1st Lieutenant, 1st August, 1901.

Colour-Sergeant A, J. P. Suche, to 2nd Lieutenant, 27th April, 1901.

Corporal G. L. McIntyre, to Provisional Lieutenant, 19th February, 1902.

Sergeant G. Shaw, promoted Lieutenant from 1st Tasmanian Imperial Bushmen.

Trooper L. H. Laughton, promoted Lieutenant from 1st Tasmanian Tasmanian Imperial Bushmen.

Lance-Corporal Brownell received an Imperial commission.


For promotions other than Commissions, aide Nominal Roll.


Service.

The Contingent embarked at Hobart on the transport Chicago, on 27th March, 1901, and landed at Port Elisabeth on 24th April.

Their service was in Cape Colony, under General French; and may be summarized as follows:-

8th, 9th, and 10th May-Ganna Hoek, driving Scheeper's Commando out of Craddock District; joined General Scobell's Column, operating still about Craddock ; joined Colonel Gorring's "Flying Column."

1st June - Fight at Aliman's Fontein.

8th June - Fight at Rietfontein, Malan's Commando.

3rd July - Fight near Zuurberg.

29th July - Fighting near Schilder Krans.

1st August - Chased enemy into Munro's Column.

13th August - Fight at Roodepoort, captured Commandant Erasmus, Cachet, and others of Kruitsinger's Commando.

14th August - Fight with Kruitainger at Lamenkronst.

16th August - Chased Kruitzinger across Orange River.

16th September - Surprised Commando at Wildeschutt's Berg, capturing some prisoners; operations against Smut's Commando in Drakensberg district.

21st October - Fight with Van Reenan's Commando.

23rd November - Captured Commandant Beaters and ten others.

February, 1902 - Operations with 17th Lancers in Bamboo Mountain.

On the 18th February, 1902 - Captured and shot Commandant Judge Hugo at Grootfontein.

10th March - Captured Commandant Rhudolph at Klein Taffelberg.


Soon after landing the Corps was engaged with Scheepers at Ganna Hoek Cape Colony, where Trooper Warburton was killed. Trooper Brownell distinguished himself in this affair and afterwards received a commission in the Imperial Army. On the 19th May, the Tasmanians joined Scobell's Column, which was one of the most successful. On the let June, they passed to Colonel Gorring, whose force was formed into a Flying Column, without wheeled transport.

On 13th February, 1902, Colonel Doran took over the Column, and the Contingent served under him until 4th May. On 18th February, they suffered several casualties, and the strain on men and horses was very great; but the Column did excellent work, and was frequently complimented by General French and Lord Kitchener. The various leaders commended the Contingent for fearlessness, good horsemastership, and cheerful endurance of the greatest hardships. On 18th August, 1901, Sergeant-Major Young, of the Cape Police, with Quartermaster Sergeant Lynes, Sergeant Coombes, and eight other Tasmanians, charged a kopje where the enemy were strongly entrenched, and captured Commandant Erasmus and others. Young obtained the Victoria Cross.

The Contingent were several times successful in capturing influential Boer leaders. For twelve months they were incessantly employed; long marches often being undertaken by night, followed by actions with the Commandoes of Kruitzinger, Scheepers, Myberg, and others.

On the 22nd May, 1902, the Contingent embarked on the transport Manila at Durban, and arrived in Tasmania on 25th June, having called at Albany, Adelaide, and Melbourne en route. Disbanded on 30th June.


Further Reading:

2nd Tasmanian Imperial Bushmen

2nd Tasmanian Imperial Bushmen, Roll of Honour 

Boer War, 1899 - 1902

Battles where Australians fought, 1899-1920


Citation: 2nd Tasmanian Imperial Bushmen, Outline

Posted by Project Leader at 12:01 AM EAST
Updated: Monday, 8 August 2011 12:52 PM EADT

View Latest Entries

Full Site Index


powered by FreeFind
Let us hear your story: You can tell your story, make a comment or ask for help on our forum.

Desert Column Forum

A note on copyright

The Australian Light Horse Studies Centre is a not for profit and non profit group whose sole aim is to write the early history of the Australian Light Horse from 1900 - 1920. It is privately funded and the information is provided by the individuals within the group and while permission for the use of the material has been given for this site for these items by various donors, the residual and actual copyright for these items, should there be any, resides exclusively with the donors. The information on this site is freely available for private research use only and if used as such, should be appropriately acknowledged. To assist in this process, each item has a citation attached at the bottom for referencing purposes.

Please Note: No express or implied permission is given for commercial use of the information contained within this site.

A note to copyright holders

The Australian Light Horse Studies Centre has made every endeavour to contact copyright holders of material digitised for this blog and website and where appropriate, permission is still being sought for these items. Where replies were not received, or where the copyright owner has not been able to be traced, or where the permission is still being sought, the Australian Light Horse Studies Centre has decided, in good faith, to proceed with digitisation and publication. Australian Light Horse Studies Centre would be happy to hear from copyright owners at any time to discuss usage of this item.

Contact

Australian Light Horse Studies Centre

eXTReMe Tracker