The following account is extracted from H.S. Gullett, (1944), The Australian Imperial Force in Sinai and Palestine, Sydney: Angus & Robertson, pp. 430 - 435.
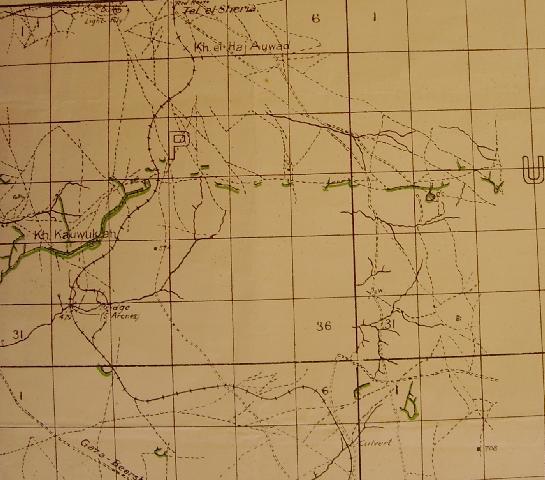
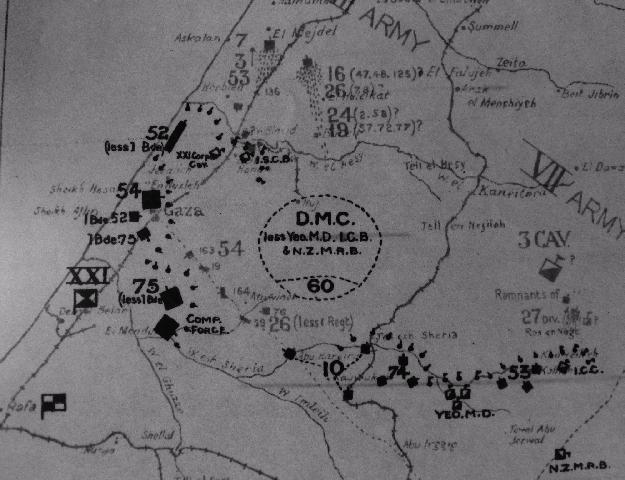
While the divisions of the XXI Corps at Gaza were advancing swiftly, and almost unresisted where they had expected extremely heavy and expensive fighting, the XX Corps on the right was completing the fine work which they had carried so far on the day before. On the early morning of the 7th, the line of the XX Corps extended from Khurbet Um el Bakr on the right through Khurbet Barrata to the Sheria railway station, and thence to a point close to the Hareira Redoubt. Allenby hoped that day to make his decisive north-west blow at the enemy's rear and communications. While the infantry seized Tel el Sheria and the Hareira Redoubt, Chauvel's mounted troops, skirting the flank or driving through the Turkish resistance, were to seize the water, first at Jemmameh and then at Huj. The 60th Division, after taking Tel el Sheria, was also to fight its way forward to Huj, for which operation it had been placed under the command of Desert Mounted Corps. All arms were to be advanced with the greatest energy; for Allenby recognised that, if the resistance could be destroyed in the early morning and the enemy rapidly pursued, the rout and capture of the bulk of the Turkish army was more than a possibility.
The day opened well for the British plan. The 10th Infantry Division rushed the Hareira Redoubt in the early morning, despite heavy opposition from machine-guns, and the 60th Division after a hard fight seized the great mound at Sheria. Driven from Tel el Sheria, the Turks retired to a line about a mile and a half behind, on a long, gentle, bare slope leading up from the wadi; here they were re-formed and, digging vigorously, soon found cover on ground which gave them an excellent zone of fire. The Londoners, going on with great dash, marched against this position, which was then, with the exception of a line of isolated posts extending towards Khuweilfe, almost on the extreme flank of the enemy's defences. The attacking force, however, was light, breathless, and spent; the enemy, sweeping the slope with shrapnel, machine-guns, and rifle-fire, brought it to a standstill, and the Londoners were compelled to lie down on their advanced line and wait for assistance.
Meanwhile the Anzac and the Australian Mounted Divisions were in readiness for an opportunity to deliver a mounted blow. Immediately after Tel el Sheria was captured by the Londoners, Chauvel, accompanied by Brigadier-General R G. H. Howard-Vyse," his chief of staff climbed up to the mound and reviewed the position ahead. At that time Hodgson, with the 4th Light Horse Brigade and the 5th Mounted Brigade, was about three miles behind Tel el Sheria. Chaytor, with the 1st and 2nd Light Horse Brigades (less two squadrons and eight machine-guns), was, after a heavy night march, a few miles away to the west. Barrow's Yeomanry Division on the right flank did not engage in the drive to the north-west. The New Zealand Brigade was in support to the 53rd Division and the Camels, who were so heavily engaged at Khuweilfe.
The check to the Londoners on the slope beyond Sheria seriously hampered the success of the British plan. If accepted, it meant a day's delay at least to Shea's advance towards Huj, and also delay to Chauvel's mounted divisions. Chauvel from his height on the mound had the situation clearly in sight; he resolved to employ Hodgson's two brigades in an attempt to smash through the Turkish resistance. Soon after 10 o’clock Hodgson received from Chauvel's headquarters orders to " clear the enemy from the front of the 60th Division." This order was afterwards the subject of much discussion and criticism. Hodgson's obvious line of advance against the Turkish resistance was to move by the east, make touch with the Anzacs, and take the enemy on his exposed flank. But the order he received from Desert Mounted Corps was a specific one. He was to march north west from Tel el Sheria through defined squares on the map of operations, with his centre on a mud hut at Khurbet Buteihah, on the ridge behind the Turkish line of defences. This committed him to an advance through the ranks of the Londoners, and then through the Turks. Success was only possible on the supposition that the Turks would again become flustered, as they did at Beersheba, by the galloping advance of Hodgson's horsemen.
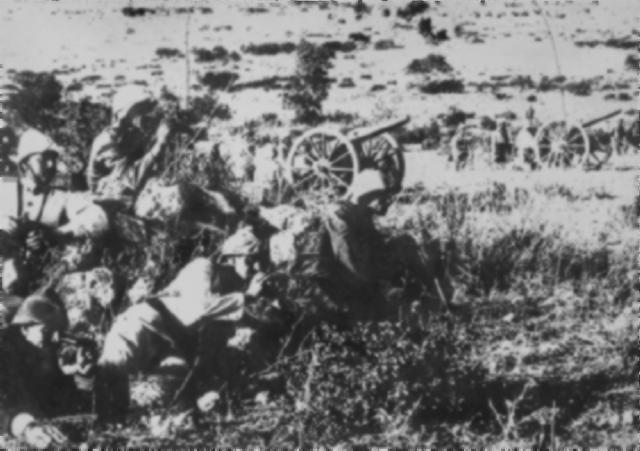
The desperate mission was entrusted to Grant's 4th Light Horse Brigade, which was ordered to cross the wadi mounted and strike hard for Khurbet Buteihah. The 5th Mounted Brigade was to move to the wadi in readiness to support, while touch was to be made with the Anzacs on the right. Chauvel, when he gave his order, had expected that Hodgson's horsemen would move immediately; but it was nearly 11 o'clock before the 11th and 12th Light Horse Regiments rode towards the crossing over the wadi. Meanwhile the Turkish riflemen ahead were each minute improving their cover and completing their line. As the Australians approached the wadi, shrapnel burst freely over the trotting horses. The 11th Regiment under Major P. J. Bailey was on the left, with the 12th led by Cameron to the right. At this time the horses had been twenty-eight hours without a drink; as the wadi contained a little water, a brief, although, perhaps, an unfortunate halt was made while they drank greedily, despite the bursting of shells close overhead. It was clear that heavy punishment awaited the regiments as soon as they reached the northern bank, and that pace alone could give the attack any chance of success. The leading 'squadrons therefore urged their horses on, and trotted and cantered up the steep tracks on the other side. As they emerged, they rode into shafts of machinegun and heavy rifle fire at effective range. Cameron on the right decided at once that there was no opportunity here for a second " Beersheba "; he dismounted one of his squadrons and sent back the horses while the men advanced on foot.
Another squadron, galloping forward about 500 yards, also dismounted and went to work with the rifle.
On the left two squadrons of the 11th, deploying as they cleared the wadi, went forward at the gallop. On this sector the line of the British infantry was close to the wadi. Careless of the heavy fire, and riding hard, they passed many dead Londoners who had fallen earlier in the morning, and dashed on through the advanced riflemen beyond. The gallant Cockneys, remembering Beersheba, rose and cheered them as they went by. But the opposing fire, wild when first the light horsemen left the wadi, was now steadier and more accurate.
The leaders saw, like Cameron, that the low-lying Turks were not to be demoralised by two slender squadrons, and a few hundred yards beyond the infantry the order was given to halt, the horses were rushed back, and the men, lying close to the ground, opened fire with their rifles.
But one of the troops of Major E. Costello's4 squadron missed the signal to dismount and galloped on. With their leader, Lieutenant A. R. Brierty at their head, this little party of twenty-one light horsemen spurred straight at a group of shallow Turkish entrenchments. The rifle-fire was terrific, but the pace saved the Australians, and when they came within a few horse-lengths of the advanced line the Turks raised their hands. Brierty led the troop over the little trench at the gallop; then, with enemy riflemen all round them, the men flung themselves from their saddles to rush in with the bayonet. As they halted, the Turks who had surrendered opened fire with their rifles at a few yards' range, and the other troops all round joined in the shooting. In a few seconds every Australian horse had fallen, eleven men had been killed, and the rest of the troop, except one, wounded. The disaster was so complete that relief was purposeless, but Lieutenant J. S. Bartlett: a fellow troop leader of Brierty's, advanced boldly from the left with a Hotchkiss and nine riflemen, got into a good position, and shot down a number of Turks who were moving from their trenches towards Brierty's party. Twenty Turks and one German officer were afterwards found dead there in a heap. Of Bartlett's party of ten, four were killed and three wounded.
The remaining men of the two squadrons were now precariously placed some hundred yards in front of the infantry, and the Turks concentrated their fire upon them, at the same time creeping forward with the bayonet. The ground gave very little cover, but the light horsemen hung on all day, shooting in that terribly deliberate, sure way which always distinguished them in bitter fire-fights. Bailey, fearing the Turks would close in overwhelming numbers ran back to the line of the Londoners and persuaded a young officer to dash forward with a machine-gun. The officer and two of his gunners were killed, but the gun was very finely handled by a young British private. " He was," said Bailey, " the coolest man I ever saw." Later on two other machine-guns were brought forward into the open, and the Turkish countermovement was arrested.
During the afternoon a call was made for stretcher-bearers at the 11th Regiment's headquarters just south of the wadi. Chaplain W. J. Dunbar,? the regimental "Padre," an Australian Methodist clergyman who had joined the light horse as a trooper and had been promoted in the field, was among those who at once volunteered. Crossing the wadi on his horse Dunbar rode forward under heavy fire, the one horseman on the landscape, to some little straw-stacks, where he engaged in dressing a number of wounded men. While he was there Trooper W. P. Forster: who had been with Brierty and had been only slightly wounded, rose from amidst the mass of dead horses, and, avoiding the Turks, ran towards the wadi. Dunbar, despite the protests of a few men at the straw-stacks, at once dashed out to meet him. As Forster ran, the German machine-gunners opened fire. For some time the bullets cut up the dust close behind him; and, as he went on unhit, and the chaplain ran to join him, every Londoner and Australian lying on the exposed slope and breathlessly watching the two men, prayed for their escape.
Forster was hit and fell.
But he rose at once and, staggering on, met Dunbar; then both men, coming under a stream of bullets, were killed.
Towards sunset the light horsemen rejoiced to see waves of the reserve brigade of the 60th Division advancing from their left rear. The brigade came on steadily despite heavy Turkish shelling. It was dusk when they reached the Australians, who cheered them as they had themselves been cheered by the Londoners in the morning. But this was no madcap exploit by a few horsemen. The infantrymen had strength and depth. " How far away are the blighters?" asked a sergeant. " Five hundred yards," replied an Australian.
" Then in five minutes," said the Londoner, " we'll be into them." Some of the Australians rose to join in the sport, and marched away with the infantry into the growing darkness; a few minutes later those who remained heard a hoarse roar above the rattle of the machine-gun and rifle fire. The Londoners had charged home with the bayonet; the Turkish resistance was finally broken, and the gateway to Palestine was open.
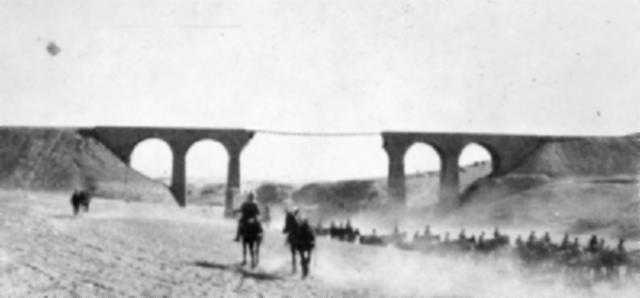
But the day's fighting on this position was to have far-reaching effects on Allenby's great design against the Turkish rear. Gaza had been evacuated early that morning, and the main Turkish army was already in full retreat up the maritime plain towards Huj. Had Allenby's plan been carried through, had the Anzac and Australian Mounted Divisions reached Huj that day, complete disaster might have overtaken the enemy. But the holding up of the 60th Division and Australian Mounted Division at Sheria prevented these troops from joining up with the Anzacs; and Chaytor, with only the 1st Light Horse Brigade and part of the 2nd Light Horse Brigade, less most of its machine-gun squadron, was obliged to advance alone. The Anzacs were not only greatly reduced in numbers, but were advancing, with both their flanks exposed, against constant opposition; although they fought dashingly and travelled fast, they were unable to strike decisively.
H.S. Gullett, (1944), The Australian Imperial Force in Sinai and Palestine, Sydney: Angus & Robertson.