"At a mile distant their thousand hooves were stuttering thunder, coming at a rate that frightened a man - they were an awe inspiring sight, galloping through the red haze - knee to knee and horse to horse - the dying sun glinting on bayonet points..." Trooper Ion Idriess
The Australian Light Horse Studies Centre aims to present an accurate history as chroniclers of early Australian military developments from 1899 to 1920.
The Australian Light Horse Studies Centre site holds over 12,000 entries and is growing daily.
Contact:Australian Light Horse Studies CentreLet us hear your story:
You can tell your story, make a comment or ask for help on our Australian Light Horse Studies Centre Forum called:
WARNING: This site contains: names, information and images of deceased people; and, language which may be considered inappropriate today.
Friday, 2 April 2004
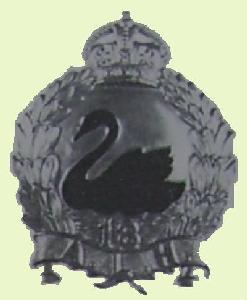
25th (Western Australian Mounted Infantry) Australian Light Horse, 1916 Topic: Militia - LHW-18/25/10
25th ALH
25th (Western Australian Mounted Infantry) Australian Light Horse
1916
Western Australian Mounted Infantry [1900 - 1903] 18th (Western Australian Mounted Infantry) Australian Light Horse [1903 - 1912] 25th (Western Australian Mounted Infantry) Australian Light Horse [1912 - 1918] 10th (Western Australian Mounted Infantry) Australian Light Horse [1918 - 1942] 10th (Western Australian Mounted Infantry) Recce Battalion [1918 - 1942] 10th (Western Australian Mounted Infantry) Australian Light Horse [1942 - 1944] "A" Squadron 10th Western Australian Mounted Infantry [1948 - 1952] 10th Western Australian Mounted Infantry [1952 - ]
25th (Western Australian Mounted Infantry) Australian Light Horse, 1917 Topic: Militia - LHW-18/25/10
25th ALH
25th (Western Australian Mounted Infantry) Australian Light Horse
1917
Western Australian Mounted Infantry [1900 - 1903] 18th (Western Australian Mounted Infantry) Australian Light Horse [1903 - 1912] 25th (Western Australian Mounted Infantry) Australian Light Horse [1912 - 1918] 10th (Western Australian Mounted Infantry) Australian Light Horse [1918 - 1942] 10th (Western Australian Mounted Infantry) Recce Battalion [1918 - 1942] 10th (Western Australian Mounted Infantry) Australian Light Horse [1942 - 1944] "A" Squadron 10th Western Australian Mounted Infantry [1948 - 1952] 10th Western Australian Mounted Infantry [1952 - ]
South African (Second Boer) War: 1899-1902, Historical Outline Topic: BW - Boer War
South African (Second Boer) War
1899-1902
Historical Outline
The Causes
The growing competition between Boer and Briton for control of the South African veldt and its gold mines brought about a second collision between the two white rivals for a black realm. Hoping to spark an uprising by Uitlanders (foreign born miners) in the Transvaal, Dr. L. Starr Jameson, a close friend of Cecil Rhodes, led 600 raiders deep into the Boer republic on December 29, 1895.
The Boers easily rounded up Jameson's raiders at Doornkop in the first days of 1896, and the only results of the raid were 16 dead and 49 wounded Uitlanders, along with one slain Boer, and increased bitterness and suspicion between Afrikaaners and Englishmen.
The War
When all-out war broke out on October 11, 1899, the two Boer republics, the Transvaal and the Orange Free State, could muster about 35,000 armed men.
About 7,000 Boers from the British dominated Cape Colony later joined the soldiers of the Boer republics. At their peak the Afrikaaners would be able to field no more than 45,000 soldiers. Included in the Boer ranks were 1,200 well-trained artillerymen (800 of them Transvaalers), who manned 75mm and 155mm French-made Creusot howitzers, a few 120mm Krupps howitzers, and twenty-three 37mm Vickers-Maxim quick-fire guns (pom-poms), which could fire a belt of ten 1-pound shells at a rate of 1 every 2 seconds up to a range of 4,000 yards.
The typical Boer soldier, mounted for mobility, was an accurate marksman and a hunter trained from childhood. He was armed with a Mauser bolt-action rifle firing 5-bullet clips to a range of 2,200 yards. Individually, the Boer soldier was usually more than a match for the khaki-clad enemy opposing him, but Afrikaaner military organization was weak and haphazard, with the main combat unit being a loosely organized, variably strengthened formation called the com mando. Discipline was sketchy, and the tactical and strategic leadership of their commanders was without sophistication.
The British began the war with only 22,000 soldiers (14,750 of them regulars) and 60 cannon in all of South Africa. An expedition of 47,000 was in transit to reinforce the South African garrison. By January 1900 British strength in South Africa had risen to 86,730 men and 270 guns.
British infantrymen were armed with either Lee-Enfield British infantrymen were armed with either Lee-Enfield or Lee-Metford bolt-action repeaters, which had 5-bullet magazines but no clips with which to load them, as had the Boers. This draw back required that each bullet had to be loaded individually into the magazine, thus diminishing British firepower. As a consequence, the Boers could pop off 50 rounds from their clip-fed weapons in the same time required of his opponent to fire only 20 rounds. Like the Boers, the British were supported by .303 Maxim machine guns.
Jumping the gun on the mobilizing British, the Boers took the offensive in October 1899, moving west against Mafeking and Kimberley and east across the Drakensburg Mountains into Natal.
Transvaal General Piet Arnoldus Cronje, at the head of 5,000 Boers, invested Mafeking, which was defended by 700 irregulars and 500 armed citizens under the command of Colonel Robert Baden Powell, who was later to found the Boy Scouts. Isolated far to the north of all other British garrisons, Mafeking endured a siege of seven months, before its garrison was finally relieved by a flying column of 1,149 led by Major General Bryan Mahon on May 17, 1900. Baden Powell's garrison lost 273 killed or wounded, as well as 354 African non combatants killed, and the Boers 1,000 killed or wounded during the course of the 218-day siege.
On October 15 a force of 8,000 Orange Free Staters under the command of Commandant Marthinus Wessels surrounded Kimberley, where the founder of Rhodesia, Cecil Rhodes, had raised a defence corps of 3,000 foot soldiers and 850 mounted men.
The main Afrikaaner effort was made in the east against Natal, where 14,000 Transvaalers under General Piet Joubert marched on Ladysmith, de fended by 12,000 troops under the command of General Sir George White.
General William Symons with 4,000 British soldiers tried to impede Boer progress toward their goal at Talana Hill and Dundee on October 20, 1899, but ere unsuccessful, suffering a loss of 59 KIA, including Symons, 221 WIA, 209 MIA or POWs, to Boer losses of 35 KIA, 9 WIA out of 3,000 engaged under the command of Lucas Meyer. White and General John French attempted another stand at Elandslaagte the following day, but, after at first checking the Transvaal command of Lucas Meyer. White and General John French attempted another stand at Elandslaagte the following day, but, after at first checking the Transvaal advance, the British were ultimately forced to fall back after taking casualties of 55 killed and 205 wounded out of 3,496 engaged. Boer losses were 46 KIA, including General J.H.M. Kock, 105 WIA, 181 MIA or POWs out of 1,000 engaged. Outside of Ladysmith, the Boers caught the retreating British in the pass of Nicholson's Nek on October 30 and badly battered them, capturing 1,068 prisoners, as well as killing 38 British soldiers and wounding 105. As a consequence of this string of setbacks, White and 13,497 soldiers of the British Empire, plus 5,400 non-combatants, found themselves bottled up inside Ladysmith by a Boer army flush with victory and bent on their destruction.
The British hastily scraped together a corps and assigned it and the job of relieving both Ladysmith and Kimberley to General Sir Redvers Buller. The British commanding officer in turn dispatched General Lord Paul Methuen with 8,000 men and 16 guns toward Kimberley. The relief force drove a Free State unit of 3,000 from Belmont Rail road Station on November 23, killing 30 Boers and wounding 70 at a cost of 75 KIA and 220 WIA. Then Methuen marched to the Modder (Muddy) River, where on November 28 he sent 8,000 men into 108-degree heat and the rifle fire of 3,500 Boer commandos under Cronje and Jacobus Hercules De la Rey.
The Boer trenches were carried, but at a cost of 72 killed, 413 wounded. Boer casualties, in comparison, were about 80 killed or wounded. Finally, on December 10-11, Methuen, now 13,000 strong, assaulted in massed formation the last Boer defence line before Kimberley, that on Magersfontein Hill manned by 8,500 Afrikaaners under Cronje's command.
Attacking at dawn in the rain, the British were cut down by the deadly accurate rifle fire of the Boers. Methuen's regiments let 210 KIA, 675 WIA, and 63 MIA before the barbed wire of the Boer line. The Highland Brigade lost its commander, General Andrew Wauchope, slain, and 57 officers and 700 men killed or wounded. Cronje counted 320 killed or wounded among the ranks of the defenders.
Disaster struck twice for British arms on December 10. On the central front a Boer column had thrust toward the Midlands, threatening to disrupt the British rear. A force of 3,000 under General Sir William Gatacre undertook a night march to pounce on the Boer spearhead at Stormberg. Gatacre's force was misled by guides and blundered into Disaster struck twice for British arms on December 10. On the central front a Boer column had thrust toward the Midlands, threatening to disrupt the British rear. A force of 3,000 under General Sir William Gatacre undertook a night march to pounce on the Boer spearhead at Stormberg. Gatacre's force was misled by guides and blundered into the concentrated firepower of 2,300 Boer rifles. The British toll was 29 KIA, 57 WIA, 633 POWs. The Boers lost only 6 killed and 27 wounded.
The Battle of Colenso on December 15 completed this tragic triad of defeat for the British and made this seven-day period in December forever "Black Week" in Britain's military history. On the eastern front, Buller led over 13,400 men in an attempt to relieve Ladysmith.
Crossing the Tugela River, he tried to turn the left flank of General Louis Botha and his 6,000 men at Colenso. The combination of a broken terrain and an un broken wall of Boer small arms fire con spired to defeat the British attack. The casualty rolls listed 143 KIA, 755 WIA, 240 POWs, plus 11 guns lost. About half of the casualties were suffered by the Irish Brigade. The Boers admitted to only 8 killed and 30 wounded. Buller paid for Black Week with the loss of his supreme command, being replaced as head of British forces in South Africa by Field Marshal Frederick Roberts, with General H.H. Kitchener as his chief of staff.
While Roberts reorganized the British army, building its strength up to 207,000 men, Buller, still in immediate command of the army attempting to relieve Ladysmith, made another try at breaking the siege, this time with 24,000 men. Ladysmith's garrison had just beaten off a 2,000-man assault on their defences on Wagon Hill and at Caesar's Camp, January 6, 1900, at a cost to the 2,000 British soldiers engaged of 424 casualties, including 175 killed, to Boer losses of 183, including 99 killed. Now on January 19 Buller sent General Charles Warren's division of 12,800, with Buller in support with another 7,600, to turn the left of the Boer army besieging Ladysmith. On the night of January 22, Brigadier General Edward Woodgate and 1,900 rank and file seized the centre of the Afrikaaner position, the hill of Spion Kop. But by incredibly poor generalship, Woodgate's command on Spion Kop was left un-reinforced and unsupported to face the inevitable Boer counterattacks. After Woodgate fell slain to Boer fire, the new commander, Colonel A.W. Thorneycroft, decided on January 24 to abandon the hill. The following day Buller recrossed the Tugela. Spion Kop cost the British 383 KIA, including 243 on Spion Kop itself, 1,054 WIA, 303 POWs, compared to acknowledged Boer losses of 58 KIA, 140 WIA on the hill, and 335 total casualties for the operation (a monument to the Boer dead of the battle lists 106 names).
On February 5 Buller, with 20,000 men, tried a third time to unlock the Boer lines on the Tugela. At the hill of Vaal Krantz 2,000 Boers defeated a British brigade attempting to hold the height after its initial seizure. It was a miniature repeat of Spion Kop. The bloody bill for the British was 34 KIA and 335 WIA.
In February 1900 Roberts started his march. One goal of his campaign, the relief of Kimberley, was achieved early. A 5,000-man flying column of cavalry under the lead of General John French (later to become CO of the BEF [British Expeditionary Force] in France, 1914-15) broke the siege of Kimberley on February 15. The garrison of that town had lost 181 killed or wounded, most of them to the 8,500 Boer artillery shells that had struck their lines. Total deaths, military and civilian, black and white, to battle and disease were 1,500.
Roberts's main column marched around Cronje's left flank at Magersfontein to threaten his line of communi cation and supply. The Boers, consequently, withdrew eastward towards the Orange Free State capital at Bloemfontein, but they were overtaken and their path blocked by the British at Paardeberg on February 18. There, Kitchener with four brigades and four batteries stormed Cronje's fortified laager. The 5,000 Afrikaaner marksmen threw back the British attack, inflicting losses of 303 killed, 901 wounded, and 61 missing out of 15,000 engaged in the assault. The riflemen behind the Boer laager counted 100 dead and 250 wounded.
Roberts resumed direct command after an illness and pressed the siege of Cronje's laager at Paardeberg. The field marshal's persistence paid off on February 27, when Cronje surrendered his 3,000 Transvaalers, 1,100 Orange Free Staters, and 6 guns. Total British casual ties at Paardeberg, including those of the first day's assault, were 98 officers and 1,437 rank and file killed or wounded.
On the eastern front, Buller, now with 25,000, made his fourth and finally attempt to succour Ladysmith, with 2 brigades seizing Wynne and Inniskilling Hills, February 22-25, at a cost of 80 killed and 400 wounded on Inniskilling Hill (also called Hart's Hill) alone. The 5,000 Boers under Botha withdrew on February 27 after Buller had pierced their line at Pieter’s Hill, and after 118 days Ladysmith was relieved. The British garrison there had lost 89 officers and 805 men in the course of the siege. British casualties in the final relief operation, February 19-27, totalled 1,896.
Roberts continued his march on Bloemfontein. On March 10 Christian de Wet and 1,500 Boers were driven from a covering position at Driefontein by 10,000 British. Losses were: 82 KIA, 342 WIA for the British; 102 KIA and 22 POWs for the Boers. Three days later Roberts entered the capital of the Orange Free State at the head of 25,531 men, 116 artillery pieces, and 76 machine guns.
The conventional phase of the war quickly moved to a conclusion now. The Transvaal was invaded in May and Pretoria, its capital, was occupied by the British on June 5. On June 11-12 Roberts with 16,000 men dispersed Botha's last major field army of 5,000 men at Diamond Hill. British casualties totalled 162. On July 4 the two conquering columns commanded by Roberts and Buller linked up at Vlakfontein. Transvaal President Kruger fled, the Transvaal was annexed to British South Africa on September 3, and Roberts went home in triumph to leave Kitchener in command.
The war seemed finished.
The Guerrilla War
But it had only entered its second and in many ways more gruelling phase.
De Wet, De la Rey, Botha, and other Boer leaders remained in the field with 25,000 commandos, refusing to capitulate, harrying the forces of the British Empire with guerrilla attacks for another 18 months. De Wet was the most successful of the raiders. Typical of his victories was Sanna's Post on March 31, 1900, when, with 350 men, he cut up General Robert Broadwood's column of 1,700 soldiers. The British lost 155 killed or wounded, 426 POWs, and 7 guns; the Boers lost only 2 wounded. It required the use of blockhouses on lines of communications, flying columns of mounted infantry, a scorched earth policy against Boer homesteads in which 30,000 Boer farms were destroyed, the recruitment of 5,464 Boers to fight in the British army against their fellow Boers, and the resettlement of 120,000 Boer civilians in concentration camps to finally bring the Afrikaaners to the negotiating table. By the Treaty of Vereeniging, May 31, 1902, the Boers finally accepted British sovereignty.
Winning that acceptance had cost the British Empire dearly. The realms, dominions, and colonies of Queen Victoria had deployed a total of 448,435 men to defeat the Boers. Of this number, 365,693 had been imperial troops, including 256,000 British regulars, and 82,742 had been colonial troops. Making up these totals, in part, were 52,000 South Africans, 16,124 Australians, 7,995 New Zealanders, and 4,025 Canadians. This force of nearly half a million men suffered 7,582 battle deaths, including 712 officers - 5,774 KIA and 1,808 DOW. Another 13,139, including 406 officers, died of disease, most of them from enteric fever. The fatal toll from accidents and all other causes was 1,221, making a grand total of 21,942 dead from all causes. The wounded in battle numbered 22,829. Included in the toll were 518 Australian battle dead, 228 New Zealand combat deaths, and 1,473 South African deaths in action and 1,607 deaths from disease. In addition, the British lost 400,346 horses, mules, or donkeys in operations against the Boers and expended more than 200 million pounds to subdue the Dutch farmers of the Transvaal and the Orange Free State.
All this effort can be compared to the 750,000 men committed by Britain to the defeat of Napoleon and the French Empire over a twelve-year period and the 100,000 men and 75 million pounds employed or expended by the British in the Crimean War. The South African War was Britain's costliest conflict, both in lives and treasure taken, in the century between 1815 and 1914.
The two small Boer states that had forced Britain to spend so much in blood and bullion fielded a total of 87,365 armed men in the course of the conflict.
This figure included 13,300 Afrikaaners from the Cape Colony and Natal and 2,120 foreign volunteers, anxious for adventure and a chance to tweak the nose of the mighty British Empire. Boers in uniform died in combat to the number of 6,650; 1,150 more died of disease and 1,000 died from other causes; and some 10,000 were wounded. Of total Boer military deaths, 3,950 were suffered by the Transvaal and 2,610 by the grange Free State. But the real toll for the Afrikaaners fell among those out of uniform.
At least 18,000, and possibly as many as 28,000, Boer civilians died in the concentration camps set up by Kitchener.
And finally, an often forgotten statistic of the Boer War was the 12,000 blacks who died, mostly from disease, on either side, while serving as porters, servants, and la borers with the contending armies.
(Some blacks served as combatants against the Boers as well. Zulu Chief Sikobobo, in retaliation for Boer cattle raids on his herds, led his warriors against a Boer unit at Holkrantz on May 6) 1902, killing 56 Boers, at a cost of 52 killed and 48 wounded for the Zulus.)
Major Battles
Mafeking (siege), October 14, 1899 - May 17, 1900: British - 700 irregulars, 500 civilian volunteers: 273 killed or wounded, 354 African civilians killed; Boers - 5,000:1,000 killed or wounded.
Kimberley (siege), October 14, 1899 - February 15, 1900: British - 3,850: 181 killed or wounded (1,500 total deaths, including civilians); Boers - 8,000: n.a.
Ladysmith (siege) (losses include those at Wagon Hill), November 2, 1899 - February 27, 1900: British 13,497: 894 killed or wounded; Boers 14,000: 500 killed or wounded (not including losses against British relief columns).
Wagon Hill, January 6, 1900: British - 2,000:175 killed, 249 wounded; Boers - 2,000: 99 killed, 84 wounded.
Elandslaagte, October 21, 1899: British - 3,496: 55 killed, 205 wounded; Boers - 1,000: 46 killed, 105 wounded, 181 missing or captured.
Nicholson's Nek, October 30, 1899: British - 13,000: 38 killed, 105 wounded, 1,068 captured; Boers - 14,000: negligible losses.
Belmont, November 23, 1899: British 8,000: 75 killed, 220 wounded; Boers 3,000: 30 killed, 70 wounded.
Modder River, November 28,1899: British - 8,000: 72 killed, 413 wounded; Boers - 3,500: 80 killed or wounded.
Magersfontein, December 10 - 11, 1899: British 13,000: 210 killed, 675 wounded, 63 missing; Boers 8,500: 320 killed or wounded.
Stormberg, December 10, 1899: British - 3,000: 29 killed, 57 wounded, 633 captured; Boers 2,300: 6 killed, 27 wounded.
Colenso, December 15, 1899: British - 11,250 infantry, 1,325 mounted infantry, 836 cavalry, 44 guns: 143 killed, 755 wounded, 240 captured (the Irish Brigade suffered 50 percent of these casualties), 11 guns lost; Boers 6,000: 8 killed, 30 wounded.
Spion Kop, January 22-24, 1900: British - 20,400: 383 killed, 1,054 wounded, 303 captured; Boers 5,000: 58 killed, 140 wounded on Spion Kop, 335 total casualties for the operation.
Vaal Krantz, February 5, 1900: British 20,000: 34 killed, 335 wounded; Boers 2,000: negligible losses.
Paardeberg (British assault), February 18, 1900: British 15,000: 303 killed, 901 wounded, 61 missing; Boers 5,000: 100 killed, 250 wounded.
Paardeberg (siege and surrender), February 19 - 27, 1900: British 20,000: 270 killed or wounded; Boers 4,500: 4,069 captured, 6 guns lost.
Inniskilling Hill, February 23, 1900: British - 1 brigade: 80 killed, 400 wounded; Boers-5,000: 500 killed, wounded, or captured.
Driefontein, March 10, 1900: British - 10,000: 82 killed, 342 wounded; Boers 1,500: 102 killed, 22 captured.
[From: Michael Clodfelter, Warfare and Armed Conflicts, 2nd Edition, pp. 236-9.]
25th (Western Australian Mounted Infantry) Australian Light Horse, 1918 Topic: Militia - LHW-18/25/10
25th ALH
25th (Western Australian Mounted Infantry) Australian Light Horse
1918
Western Australian Mounted Infantry [1900 - 1903] 18th (Western Australian Mounted Infantry) Australian Light Horse [1903 - 1912] 25th (Western Australian Mounted Infantry) Australian Light Horse [1912 - 1918] 10th (Western Australian Mounted Infantry) Australian Light Horse [1918 - 1942] 10th (Western Australian Mounted Infantry) Recce Battalion [1918 - 1942] 10th (Western Australian Mounted Infantry) Australian Light Horse [1942 - 1944] "A" Squadron 10th Western Australian Mounted Infantry [1948 - 1952] 10th Western Australian Mounted Infantry [1952 - ]
The Australian Light Horse Studies Centre is a not for profit and non profit group whose sole aim is to write the early history of the Australian Light Horse from 1900
- 1920. It is privately funded and the information is provided by the individuals within the group and while permission for the use of the material has been given for this
site for these items by various donors, the residual and actual copyright for these items, should there be any, resides exclusively with the donors. The information on
this site is freely available for private research use only and if used as such, should be appropriately acknowledged. To assist in this process, each item has a citation
attached at the bottom for referencing purposes.
Please Note: No express or implied permission is given for commercial use of the information contained within this site.
A note to copyright holders
The Australian Light Horse Studies Centre has made every endeavour to contact copyright holders of material digitised for this blog and website and where
appropriate, permission is still being sought for these items. Where replies were not received, or where the copyright owner has not been able to be traced, or where
the permission is still being sought, the Australian Light Horse Studies Centre has decided, in good faith, to proceed with digitisation and publication. Australian Light
Horse Studies Centre would be happy to hear from copyright owners at any time to discuss usage of this item.