« March 2009 »
S M T W T F S
1 2 3 4 5 6 7
8 9 10 11 12 13 14
15 16 17 18 19 20 21
22 23 24 25 26 27 28
29 30 31
You are not logged in. Log in


Search the site:


powered by FreeFind
Volunteer with us.

Entries by Topic All topics  
A Latest Site News
A - Using the Site
AAA Volunteers
AAB-Education Centre
AAC-Film Clips
AAC-Photo Albums
AIF & MEF & EEF
AIF - Lighthorse
AIF - ALH - A to Z
AIF - DMC
AIF - DMC - Or Bat
AIF - DMC - Anzac MD
AIF - DMC - Aus MD
AIF - DMC - British
AIF - DMC - BWI
AIF - DMC - French
AIF - DMC - Indian
AIF - DMC - Italian
AIF - DMC - Medical
AIF - DMC - Remounts
AIF - DMC - Scouts
AIF - DMC - Sigs
AIF - DMC - Sigs AirlnS
AIF - DMC - 1 Sig Sqn
AIF - DMC - 2 Sig Sqn
AIF - DMC - Eng
AIF - DMC - Eng 1FSE
AIF - DMC - Eng 2FSE
AIF - DMC - GSR
AIF - 1B - 1 LHB
AIF - 1B - 6 MVS
AIF - 1B - 1 LHMGS
AIF - 1B - 1 Sig Trp
AIF - 1B - 1 LHFA
AIF - 1B - 1 LHR
AIF - 1B - 2 LHR
AIF - 1B - 3 LHR
AIF - 2B - 2 LHB
AIF - 2B - 7 MVS
AIF - 2B - 2 LHFA
AIF - 2B - 2 LHMGS
AIF - 2B - 2 Sig Trp
AIF - 2B - 5 LHR
AIF - 2B - 6 LHR
AIF - 2B - 7 LHR
AIF - 3B - 3 LHB
AIF - 3B - 8 MVS
AIF - 3B - 3 LHB Sigs
AIF - 3B - 3 LHFA
AIF - 3B - 3 LHMGS
AIF - 3B - 3 Sig Trp
AIF - 3B - 8 LHR
AIF - 3B - 9 LHR
AIF - 3B - 10 LHR
AIF - 4B - 4 LHB
AIF - 4B - 4 Sig Trp
AIF - 4B - 9 MVS
AIF - 4B - 4 LHFA
AIF - 4B - 4 LHMGS
AIF - 4B - 4 LHR
AIF - 4B - 11 LHR
AIF - 4B - 12 LHR
AIF - 5B - 5 LHB
AIF - 5B - 10 MVS
AIF - 5B - 5 LHFA
AIF - 5B - 5 Sig Trp
AIF - 5B - ICC
AIF - 5B - 14 LHR
AIF - 5B - 15 LHR
AIF - 5B - 1er Regt
AIF - 5B - 2 NZMGS
AIF - AASC
AIF - Aboriginal LH
AIF - Badges
AIF - Cars
AIF - Chinese LH
AIF - Double Sqns
AIF - Engineers
AIF - Fr - 22 Corps
AIF - Fr - 13 LHR
AIF - Honour Roll
AIF - HQ - 3rd Echelon
AIF - Marching Songs
AIF - Misc Topics
AIF - NZMRB
AIF - NZMRB - AMR
AIF - NZMRB - CMR
AIF - NZMRB - EFT
AIF - NZMRB - NZMFA
AIF - NZMRB - NZMGS
AIF - NZMRB - OMR
AIF - NZMRB - Sig-Trp
AIF - NZMRB - WMR
AIF - Ships
AIF - Ships - Encountr
AIF - Ships - Una
AIF - WFF
AIF - Wireless Sqn
Battles
BatzA - Australia
BatzA - Broken Hill
BatzA - Liverpool
BatzA - Merivale
BatzB - Boer War
BatzB - Bakenlaagte
BatzB - Belmont
BatzB - Bothaville
BatzB - Buffels Hoek
BatzB - Coetzees Drift
BatzB - Diamond Hill
BatzB - Driefontein
BatzB - Elands
BatzB - Graspan
BatzB - Grobelaar
BatzB - Grootvallier
BatzB - Hartebestfontn
BatzB - Houtnek
BatzB - Karee Siding
BatzB - Kimberley
BatzB - Koster River
BatzB - Leeuw Kop
BatzB - Mafeking
BatzB - Magersfontein
BatzB - Modder River
BatzB - Onverwacht
BatzB - Paardeberg
BatzB - Palmietfontein
BatzB - Pink Hill
BatzB - Poplar Grove
BatzB - Rhenoster
BatzB - Sannahs Post
BatzB - Slingersfontn
BatzB - Stinkhoutbm
BatzB - Sunnyside
BatzB - Wilmansrust
BatzB - Wolvekuil
BatzB - Zand River
BatzG - Gallipoli
BatzG - Anzac
BatzG - Aug 1915
BatzG - Baby 700
BatzG - Evacuation
BatzG - Hill 60
BatzG - Hill 971
BatzG - Krithia
BatzG - Lone Pine
BatzG - Nek
BatzJ - Jordan Valley
BatzJ - 1st Amman
BatzJ - 2nd Amman
BatzJ - Abu Tellul
BatzJ - Es Salt
BatzJ - JV Maps
BatzJ - Ziza
BatzM - Mespot
BatzM - Baghdad
BatzM - Ctesiphon
BatzM - Daur
BatzM - Kurna
BatzM - Kut el Amara
BatzM - Ramadi
BatzN - Naval
BatzN - AE1
BatzN - Cocos Is
BatzN - Heligoland
BatzN - Marmara
BatzN - Zeebrugge
BatzN - Zeppelin L43
BatzNG - Bitapaka
BatzO - Other
BatzO - Baku
BatzO - Egypt 1919
BatzO - Emptsa
BatzO - Karawaran
BatzO - Peitang
BatzO - Wassa
BatzP - Palestine
BatzP - 1st Gaza
BatzP - 2nd Gaza
BatzP - 3rd Gaza
BatzP - Aleppo
BatzP - Amwas
BatzP - Ayun Kara
BatzP - Bald Hill
BatzP - Balin
BatzP - Beersheba
BatzP - Berkusieh
BatzP - Damascus
BatzP - El Auja
BatzP - El Buggar
BatzP - El Burj
BatzP - Haifa
BatzP - Huj
BatzP - JB Yakub
BatzP - Kaukab
BatzP - Khan Kusseir
BatzP - Khuweilfe
BatzP - Kuneitra
BatzP - Megiddo
BatzP - Nablus
BatzP - Rafa
BatzP - Sasa
BatzP - Semakh
BatzP - Sheria
BatzP - Surafend
BatzP - Wadi Fara
BatzS - Sinai
BatzS - Bir el Abd
BatzS - El Arish
BatzS - El Mazar
BatzS - El Qatiya
BatzS - Jifjafa
BatzS - Magdhaba
BatzS - Maghara
BatzS - Romani
BatzS - Suez 1915
BatzSe - Senussi
BatzWF - Westn Front
BW - Boer War
BW - NSW
BW - NSW - 1ACH
BW - NSW - 1NSWMR
BW - NSW - 2NSWMR
BW - NSW - 3ACH
BW - NSW - 3NSWIB
BW - NSW - 3NSWMR
BW - NSW - 5ACH
BW - NSW - A Bty RAA
BW - NSW - AAMC
BW - NSW - Aust H
BW - NSW - Lancers
BW - NSW - NSW Inf
BW - NSW - NSWCBC
BW - NSW - NSWIB
BW - NSW - NSWMR_A
BW - NZ
BW - Qld
BW - Qld - 1ACH
BW - Qld - 1QMI
BW - Qld - 2QMI
BW - Qld - 3ACH
BW - Qld - 3QMI
BW - Qld - 4QIB
BW - Qld - 5QIB
BW - Qld - 6QIB
BW - Qld - 7ACH
BW - QLD - AAMC
BW - SA
BW - SA - 1SAMR
BW - SA - 2ACH
BW - SA - 2SAMR
BW - SA - 3SACB
BW - SA - 4ACH
BW - SA - 4SAIB
BW - SA - 5SAIB
BW - SA - 6SAIB
BW - SA - 8ACH
BW - SA - AAMC
BW - Tas
BW - Tas - 1ACH
BW - Tas - 1TIB
BW - Tas - 1TMI
BW - Tas - 2TB
BW - Tas - 2TIB
BW - Tas - 3ACH
BW - Tas - 8ACH
BW - Vic
BW - Vic - 1VMI
BW - Vic - 2ACH
BW - Vic - 2VMR
BW - Vic - 3VB
BW - Vic - 4ACH
BW - Vic - 4VIB
BW - Vic - 5VMR
BW - Vic - 6ACH
BW - Vic - AAMC
BW - Vic - Scot H
BW - WA
BW - WA - 1WAMI
BW - WA - 2ACH
BW - WA - 2WAMI
BW - WA - 3WAB
BW - WA - 4ACH
BW - WA - 4WAMI
BW - WA - 5WAMI
BW - WA - 6WAMI
BW - WA - 8ACH
BW Gen - Campaign
BW Gen - Soldiers
BW General
Cavalry - General
Diary - Schramm
Egypt - Heliopolis
Egypt - Mena
Gen - Ataturk Pk, CNB
Gen - Australia
Gen - Legends
Gen - Query Club
Gen - St - NSW
Gen - St - Qld
Gen - St - SA
Gen - St - Tas
Gen - St - Vic
Gen - St - WA
Gm - German Items
Gm - Bk - 605 MGC
GW - 11 Nov 1918
GW - Atrocities
GW - August 1914
GW - Biographies
GW - Propaganda
GW - Spies
GW - We forgot
Militia 1899-1920
Militia - Area Officers
Militia - Inf - Infantry
Militia - Inf - 1IB
Militia - Inf - 2IB
Militia - Inf - 3IB
Militia - Inf - NSW
Militia - Inf - Qld
Militia - Inf - SA
Militia - Inf - Tas
Militia - Inf - Vic
Militia - Inf - WA
Militia - K.E.Horse
Militia - LH
Militia - LH - Regts
Militia - LH - 1LHB
Militia - LH - 2LHB
Militia - LH - 3LHB
Militia - LH - 4LHB
Militia - LH - 5LHB
Militia - LH - 6LHB
Militia - LHN - NSW
Militia - LHN - 1/7/1
Militia - LHN - 2/9/6
Militia - LHN - 3/11/7
Militia - LHN - 4/6/16
Militia - LHN - 5/4/15
Militia - LHN - 6/5/12
Militia - LHN - 28
Militia - LHQ - Qld
Militia - LHQ - 13/2
Militia - LHQ - 14/3/11
Militia - LHQ - 15/1/5
Militia - LHQ - 27/14
Militia - LHS - SA
Militia - LHS - 16/22/3
Militia - LHS - 17/23/18
Militia - LHS - 24/9
Militia - LHT - Tas
Militia - LHT - 12/26
Militia - LHV - Vic
Militia - LHV - 7/15/20
Militia - LHV - 8/16/8
Militia - LHV - 9/19
Militia - LHV - 10/13
Militia - LHV - 11/20/4
Militia - LHV - 19/17
Militia - LHV - 29
Militia - LHW - WA
Militia - LHW-18/25/10
Militia - Military Orders
Militia - Misc
MilitiaRC - Rifle Clubs
MilitiaRC - NSW
MilitiaRC - NT
MilitiaRC - Qld
MilitiaRC - SA
MilitiaRC - Tas
MilitiaRC - Vic
MilitiaRC - WA
Militiaz - New Zealand
Tk - Turkish Items
Tk - Army
Tk - Bks - Books
Tk - Bks - 1/33IR
Tk - Bks - 27th IR
Tk - Bks - Air Force
Tk - Bks - Yildirim
Tk - POWs
Wp - Weapons
Wp - Hotchkiss Cav
Wp - Hotchkiss PMG
Blog Tools
Edit your Blog
Build a Blog
RSS Feed
View Profile
Open Community
Post to this Blog
Site Index
Education Centre
LH Militia
Boer War
Transport Ships
LH Battles
ALH - Units
ALH - General
Aboriginal Light H
Weapons
Ottoman Sources

"At a mile distant their thousand hooves were stuttering thunder, coming at a rate that frightened a man - they were an awe inspiring sight, galloping through the red haze - knee to knee and horse to horse - the dying sun glinting on bayonet points..." Trooper Ion Idriess

The Australian Light Horse Studies Centre aims to present an accurate history as chroniclers of early Australian military developments from 1899 to 1920.

The Australian Light Horse Studies Centre site holds over 12,000 entries and is growing daily.

Contact: Australian Light Horse Studies Centre

Let us hear your story: You can tell your story, make a comment or ask for help on our Australian Light Horse Studies Centre Forum called:

Desert Column Forum

WARNING: This site contains: names, information and images of deceased people; and, language which may be considered inappropriate today.

Monday, 2 March 2009
1st Australian Armoured Car Section - THE BATTLE WITH THE KURDISH BANDITS - Part 3
Topic: AIF - Cars

1st AUSTRALIAN ARMOURED CAR SECTION, AIF

THE BATTLE WITH THE KURDISH BANDITS

Part 3


Below is a transcription from a manuscript submitted by Captain E.H. James called "The Motor Patrol". It is lodged in the AWM as AWM 224 MSS 209.  This is Part 3.


THE BATTLE WITH THE KURDISH BANDITS - Part 3

About this time also, we sent another detachment names to the Euphrates to join up with a party from Mespot, who had come across from Baghded thus joining up the British forces in Palestine and Mesopotania.

On the 1st March we received orders to return to Aleppo and we were relieved by No.3 Patrol. We did not take long to do the 100 miles back although it had been snowing a couple of days previously. Two days afterwards great was the joy throughout the unit when orders were received to hand in all guns and cars as the unit was to proceed to Egypt ready for return to Australia. We handed in all our war worn and battered, but still serviceable outfits and received clean receipts. The German car which we captured at Afule was handed over to the Commandant at Aleppo. We had managed to keep this car on the road ever since we grabbed it and had done many thousands of miles with it. Although spares were unobtainable, we had always managed to devise substitutes and we had a sneaking idea that we might smuggle the outfit down to Egypt somehow and finally get it to Australia, but it was not to be.

However, there was only one subject in everybody's mind and that was home. On the evening of the 5th March, we embarked on the train at Aleppo for Damascus where we arrived at 11 p.m. the following night. It was quite interesting viewing the country that we had travelled and fought over previously from the train. We changed trains at Damascus and next morning left by the narrow gauge train for Haifa via Dersa end Semek. We stayed the next night at Haifa and after another day and night in the broad gauge military railway we arrived at the Canal at Kantara. We crossed over the pontoon bridge (this time on foot) and that evening were in Cairo.

Next day the native revolution broke out. All the other Light Car Patrols and Armoured Car Batteries were immediately sent to the various towns where disturbances were taking place to make the niggers learn sense. However, we were useless as we had no guns or cars (our teeth had been drawn) and we were sent to camp at Ismailia to await news for embarkation. On the 16th May we embarked on the Kaiser-i-Hind with the Air Force for Australia and four weeks later we arrived at Melbourne where we had embarked three years previously almost to the day.

It was with mixed feelings that we arrived at our home ports. There was no doubt about everyone being glad to get home to their dear ones again. Nevertheless, there was a distinct air of sadness at each port as old comrades parted. No. 1 Light Car Patrol was certainly an interstate unit, as its personnel consisted of Victorians, New South Welshmen, South Australians, Queenslanders and Westerners.

There men had been comrades in arms on three Continents; some of them had been together for four years or more. They had fought together and had shared the good and bad times and had always played the game towards each other. There must have been many occasions with all when the prospects of ever returning home again looked hopeless.
No wonder then, that eyes looked a little dim as each man shook hands all round and wished his mates "Good Luck" before disembarking. Friendships such as these will last through all time.

"OLD SOLDIERS NEVER DIE - THEY SIMPLY FADE AWAY."

Note: This is the final episode of this story about The Motor Patrol. Only the memory of these deeds are written here. The men have faded away until all are out of living memory but their names and deeds now live on.


Previous section: 1st Australian Armoured Car Section - THE BATTLE WITH THE KURDISH BANDITS - Part 2

Next section: No further sections


Further Reading:

Australian Light Horse Order of Battle - Outline 

The Australian Light Horse - Structure

Australian Light Horse Order of Battle

Battles where Australians fought, 1899-1920


Citation: 1st Australian Armoured Car Section - THE BATTLE WITH THE KURDISH BANDITS - Part 3

Posted by Project Leader at 12:01 AM EAST
Updated: Monday, 13 April 2009 11:33 PM EADT
Suez Canal Attack, Egypt, Official British History Account, Pt 9
Topic: BatzS - Suez 1915

Suez Canal Attack

Egypt, January 28 - February 3, 1915

 Official British History Account, Pt 9


The following is an extract from:

MacMunn, G., and Falls, C., Military Operations Egypt & Palestine - From the Outbreak of War with Germany to June 1917, London, 1928, pp. 50 -  52.


Chapter III


NOTE.

THE ATTACK, FROM GERMAN AND TURKISH SOURCES.

The Turkish right, or northern, column consisted of a squadron of cavalry and some mounted irregulars and Bedouin, with detachments of infantry from the 80th and 81st Regiments, 27th Division.

The central and main column marched in two echelons. The first consisted of the VIII Corps Headquarters (Major-General Djemal Pasha, Kuchuk, with Kress as Chief of the Staff), the 25th Division and the 68th Regiment, 23rd Division, three or four squadrons 29th Cavalry Regiment, a camel squadron, the 4th and 8th Engineer Battalions (both with pontoons), irregulars such as the "Champions of Islam," and mounted Bedouin.

The second echelon consisted of the 10th Division, with cavalry and auxiliary troops. With this marched Army Headquarters, Djemal Pasha, Biyuk (the Great) with Colonel von Frankenberg as Chief of the Staff. The total artillery with this column was one two-gun battery of 15-cm. howitzers and nine field batteries. [There was, however, a battery or at least a gun, of 12-cm. calibre in action north of Tussum, as was proved by fired cartridge cases picked up.]

The left, or southern, column consisted of the 69th Regiment, 23rd Division, mounted gendarmerie and irregulars, and a pack battery.

Most regiments appear to have left behind their third battalion, from which it is possible that the fittest men were transferred to the other two and the weak left in Palestine. With regard to numbers, Kress speaks of the expeditionary force as composed of "about 20,000 men," without stating whether this includes the northern and southern columns. Djemal Pasha puts the total force, including these columns, at 25,000 men, and this figure may probably be accepted as correct.

Kress states that the attack at Tussum failed for three reasons. In the first place the sandstorm delayed the attempt to cross until it was almost dawn. Of that we need make small account, for the boat-attack was in any case defeated before it was light. His second reason is more plausible: that neither the troops nor the subordinate command had sufficient discipline or training for an operation such as crossing a canal over 100 yards broad in face of opposition and in darkness. The third reason given for the failure is that the Turkish command committed the error of employing an Arab rather than a Turkish division in the first assault. [The VIII Corps belonged, as has been stated, to the Damascus Inspectorate, the recruiting area of the 23rd Division being Homs and that of the 25th Division Damascus.] The deep-seated, age-old hatred between Turk and Arab had been underestimated and it had been thought that a Holy War would unite the two races. The Arab soldiers proved unreliable and went over, sometimes in formed bodies, to the enemy.

Now, it is perhaps questionable whether Djemal should not have employed his best division, the 10th, of Turkish troops, for the crossing, but the remainder of the argument does not hold water. The total number of prisoners taken on the 3rd February on the Tussum-Serapeum front was 279, of whom a number were wounded and about 26 were taken on the west bank after a most gallant crossing. [A total of 25 pontoons was found by the British.] The vision of the faithless Arabs surrendering in formed bodies cannot therefore be taken seriously. Liman von Sanders states that the British fire caused a panic, which probably represents the situation more accurately.

A general retirement was ordered by Djemal (by his own account against
the advice of Kress) on the evening of the 3rd. Though his reserve was untouched, his pontoons were almost all destroyed, and he had observed that the British position had been reinforced. Kress gives his opinion
that the decision was correct and that a renewal of the attack might have led to the destruction of the force. He records that the return march was carried out in good order, undisturbed by the enemy. Dr. Paul Range, the chief authority regarding the Turkish water supply in the various campaigns, has a few words only to say on this matter, but he admits that the force had difficulties on its way back owing to lack of water. The bones of its transport animals subsequently found in Sinai are even surer testimony.

Kress concludes that, though the expedition against the Suez Canal failed to achieve the results anticipated, yet it was by no means fruitless. The fact that the Turks had been able to bring strong forces with heavy artillery across the desert caused anxiety in England and Egypt and compelled the British to hold the country strongly.

The explanation of the presence of Turkish troops at Rigum on the 10th February and of their constant appearance during the weeks that followed is that Djemal Pasha left Kress in the desert with three battalions, two mountain batteries, and a squadron of cavalry, to attempt to keep the British on the stretch by local attacks and to endanger the shipping in the Canal.


Previous Chapter: Suez Canal Attack, Egypt, THE DAYS SUCCEEDING THE ATTACK, Official British History Account, Pt 8

Next Chapter: Suez Canal Attack, Egypt, THE SINAI FRONT IN FEBRUARY, Official British History Account, Pt 10


Further Reading:

Suez Canal Attack, Egypt, Contents

Where Australians Fought, Sinai, 1916-1917

Light Horse Battles

Battles where Australians fought, 1899-1920


Citation: Suez Canal Attack, Egypt, Official British History Account, Pt 9


Posted by Project Leader at 12:01 AM EAST
Updated: Sunday, 26 April 2009 10:40 PM EADT
Bert Schramm's Diary, 2 March 1919
Topic: Diary - Schramm

Diaries of AIF Servicemen

Bert Schramm


During part of the course of his military service with the AIF, 2823 Private Herbert Leslie Schramm, a farmer from White's River, near Tumby Bay on the Eyre Peninsular, kept a diary of his life. Bert was not a man of letters so this diary was produced with great effort on his behalf. Bert made a promise to his sweetheart, Lucy Solley, that he would do so after he received the blank pocket notebook wherein these entries are found. As a Brigade Scout since September 1918, he took a lead part in the September 1918 breakout by the Allied forces in Palestine. Bert's diary entries are placed alongside those of the 9th Light Horse Regiment to which he belonged and to the 3rd Light Horse Brigade to which the 9th LHR was attached. On this basis we can follow Bert in the context of his formation.

 Bert Schramm's Diary, 2 March 1919


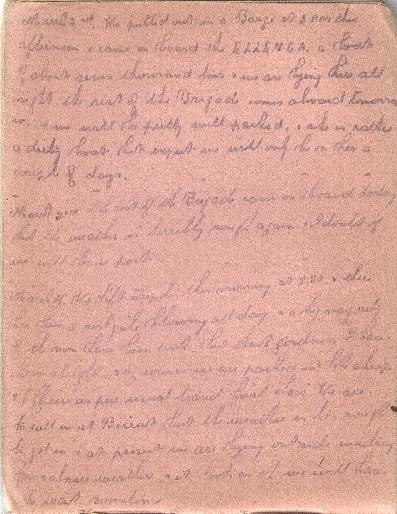
Bert Schramm's Handwritten Diary, 2 - 4 March 1919

[Click on page for a larger print version.]

Diaries

Bert Schramm

Sunday, March 2, 1919

Bert Schramm's Location - HMT Ellenga, at sea.

Bert Schramm's Diary - We pulled out on a barge a 3 pm this afternoon and came a board the Ellenga, a boat of almost seven thousand tons and we are lying here all night. The rest of the brigade comes aboard tomorrow and we will be pretty well packed. She is a rather dirty boat but expect we will only be on her a couple days.


9th Light Horse Regiment War Diary

9th Light Horse Regiment Location - Rafa, Egypt.

9th Light Horse Regiment War Diary -  1400 Commenced transporting baggage by camels and wagons to railway station.

1800 Regiment marched dismounted to Rafa station and entrained. One Officer and 67 Other Ranks on the baggage train; eleven Officers 174 Other Ranks on troops train.


Darley

Darley, TH, With the Ninth Light Horse in the Great War, Adelaide, Hassell Press, 1924.

No Entry


Previous: Bert Schramm's Diary, 1 March 1919

Next: Bert Schramm's Diary, 3 March 1919


Further Reading:

9th Light Horse Regiment AIF War Diary - Complete day by day list

Bert Schramm Diary 

Bert Schramm Diary - Complete day by day list


Additional Reading:

Darley, TH, With the Ninth Light Horse in the Great War, Adelaide, Hassell Press, 1924.


Citation: Bert Schramm's Diary, 2 March 1919


Posted by Project Leader at 12:01 AM EAST
Updated: Wednesday, 6 May 2009 1:23 PM EADT
605th Machine Gun Company, 5 August 1916
Topic: Gm - Bk - 605 MGC

German 605th Machine Gun Company (MGC)

War Diary, 5 August 1916


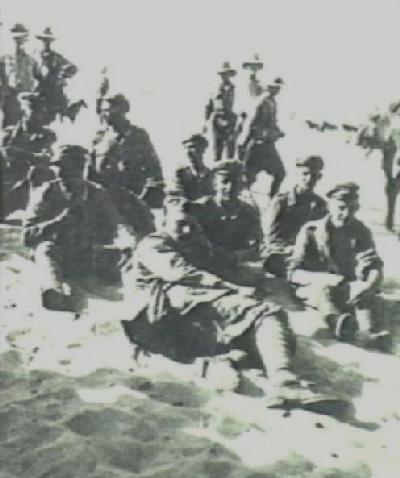
Men of the 605th Machine Gun Company captured at Romani.


The War Diary of the 605th Machine Gun Company ended mysteriously with the common sentence opening of

"Today ..." on 27 July 1916.

Then there was no more.

It was as though the man recording the diary was ordered to undertake a duty which led to the diary being packed and no further words recorded. What actually happened will always remain a mystery.

To follow the general movements of this formation, the entries from the Official History by the Turkish General Staff, Birinci Dunya Harbinde Turk Harbi, IV ncu cilt, 1 nci Kisim Sina Filistin Cephesi, Harbin Baslangicindan Ikinci Gazze Muharebesinin Sonuna Kadar. (Turkish War During WW1, Vol. 4, 1st part, Sinai-palestne Front. From thebeginning of war till the end of 2nd Gazze) 1979, pp. 338- 394, fills in the story till 4 August 1916. These entries are brief and focused in upon the general force rather than specific units.

P.340   Last units of Pascha 1 arrived at their positions at the beginning of June 1916. Thus Birinci Kuvvei Seferiye (1st Expeditiornay Force) were able to be ready to the duty.


p. 346   On April 11-15th 1916 a reinforced company raided to Jifjafe which was 40 kms away from the Canal and took an Austian Engeneers officer and 33 Turks POW who were opening new water wells.


p. 371    The new order of 1st Expeditionary Force:
Headquarters was at Hod el Hilva

First Group: (right wing) commanded by Col Refet (Gen. Bele) commander of 3rd Div.

Units:    31st Inf. Reg., 601st and 604th MG Companies, a mountain battery, a long range 100 mm artillary battery, a 150 mm Howitzer Obus battery, and a company of engeneers.

This group moved from Bir el Abd following the coast towards Ogratina. Their Headquarters were established at Hod el Naga.


Second Group: (middle line) commanded by Colonel Ibrahim.
Units:    32nd Infantry Regiment, 602nd and 605th Machine Gun Companies, a mountain battery, Austrian-Hungarian mountain Howitzer battalion, a company of engeeneers.
This group moved from Bir el Abd to Hod el Masya over Hod um Vayhelhilm which was their HQ.

Third Group (left wing) commanded by Major Kamil commander of 39th Infantry Regiment.
Units:    39th Infantry Regiment, including the 603rd and 606th Machine Gun Companies, a mountain battary, a company of engeneers.
This group moved from Bir el Bayud to Bir el Magiebra. Mamaybrua HQ.

4th Group was established as a reserve Regiment built by the 4th battalions of the active service Regiments, along with the 607th and 608th Machine Gun Companies.

p. 374    On July 29th 1916 the HQ of the 1st Exp. Forces made the following changes amoung the units.

1st Group:    4th Battalion of the 31st Infantry Regiment, a company of the 2nd Battalion of the 81st Infantry Regtiment, a K u K mountain Howitzer Battalion of the 2nd Group was was placed under the command of the 1st Group. On the other hand, the 3rd Mountain Battery and half of the 2nd Ammunition Company was was placed under the command of the 4th Group.
2nd Group:     A team of independent Hecinsüvar (camel raiders) company was was placed under the command of the 4th Group. The KuK Mountain Howitzer Battalion was placed under the command of the 1st Group. The places such as Hod el Mahari, Hod el Masya, Hod el Dakr was given to the responsibility of the 4th Group under command of Major Mayer. The group has to occupy the region until 1800 hours of August 1st. The group was organized to be the reserve of the Expedition. A compny of the 2nd Battalion of the 81st Infantry Regiment was ordered to build a airfield at the north east of Bir el Abd. 608th Machine Gun Company was placed under the command of the 4th Group.

p. 384    On August 4th at 1800 very strong force of Allied cavalry attacked from the direction of Duedar turning the left side towards the rear of the 4th group the 39th Infantry Regiment.

The Group resisted the attack fiercely but Major Kamil and 500 of his men and the mountain battary were captured and taken as prisoners of war. The Machine Gun Companies resisted until last of their ammunition. They destroyed their guns and reteated to safety.

p. 385    On the morning of August 5th, 605th Machine Gun Company and some men of the 32nd Infantry Regiment were captured and taken as prisoners of war.

p. 386    At the end totally 850 men of 1st Expeditionary Force were captured and taken as prisoners of war by the Allied Forces.

From this description, it is difficult to know exactly where the 605th Machine Gun Company was placed as there were two actions on 5 August 1916 where German machine gunners were captured. We can only read hints through the following reports.


From the War Diary of the General Staff, General Headquarters, Egyptian Expeditionary Force, August 1916.


From 6th Australian Light Horse Regiment Routine Order No. 90, 16 August 1916.


During the Battle of Romani, at Bir um Ziad, the men from the 2nd Light Horse Brigade captured members of the 605th Machine Gun Company. Along with the machine guns, a number of gun chests were also recovered. An ambulance man, 429 Sgt John Jackson Dunbar from the 2nd Light Horse Field Ambulance opened up one of the chests and discovered the unit's War Diary. Much later on, the War Diary was translated by Major General John Gellibrand. Eventually it found its way by donation to the Australian War Memorial by the good services of Captain RA Perkins from the 2/41st Battalion.


Previous Page: 605th Machine Gun Company War Diary, 23 to 27 July 1916

Next Page: No further entries.


Further Reading:

German 605th Machine Gun Company (MGC) , Contents 

The Battle of Romani

Light Horse Battles

Battles where Australians fought, 1899-1920


Citation: 605th Machine Gun Company, 5 August 1916

Posted by Project Leader at 12:01 AM EAST
Updated: Wednesday, 15 April 2009 12:58 PM EADT
Sunday, 1 March 2009
Second Bullecourt, France, May 3 to 17, 1917
Topic: BatzWF - Westn Front

Second Bullecourt

France, 3 - 17 May 1917


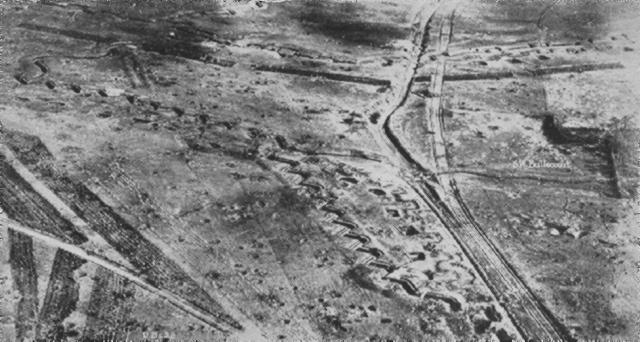
The Hindenburg Line at Bullecourt from the air.


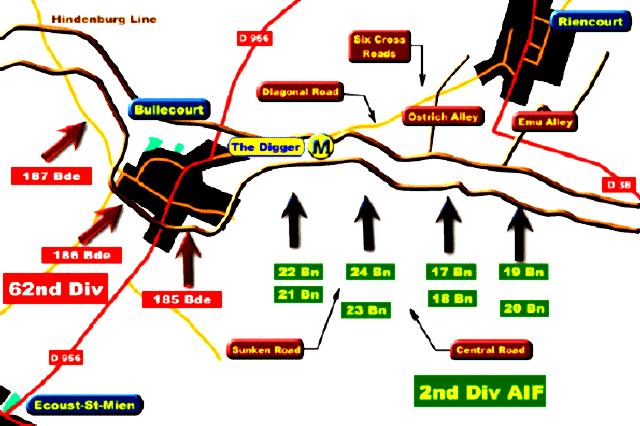
Second Bullecourt, the renewed attempt to seize an advanced bastion of the Hindenburg Line (see First Bullecourt), took place on 3-17 May 1917. Again, enveloping attacks were to be made by the 2nd Australian Division and the British 62nd Division - the former striking east of the village (now reduced to rubble), the latter to the west. Following the failure of the first attack, which had been hastily devised by the British Fifth Army, the staff of I Anzac Corps insisted on having a greater say in preparations. This time there would he no tanks working with the Australians (there was with the British) and the mistake of dispensing with a protective barrage for the infantry was not repeated. This operation was to form the extreme right portion of a resumed offensive being launched on 3 May by British forces along a front of 25 kilometres, in conjunction with a French offensive further south to begin the following day.


The Attack.


The attack went in at 3.45 a.m. on the planned date. On the Australian side the advancing 5th and 6th brigades encountered deadly fire while breaching wire entanglements, but part of the latter succeeded in breaking into the enemy trenches and seized a foothold of several bays. On the left the 62nd Division also managed to seize part of the enemy line but could not take the village, which was one of its objectives. Attempts were made to expand the gains made by the Australians by bombing up the trenches, but these were furiously resisted by troops of the 27th Württemberg Division forming the garrison. Despite the strength of the enemy's counter-attacks, the gap seized - about 600 metres - was still held as night fell, and at 1 a.m. on 4 May the weary 6th Brigade was relieved by troops of the 1st Division.


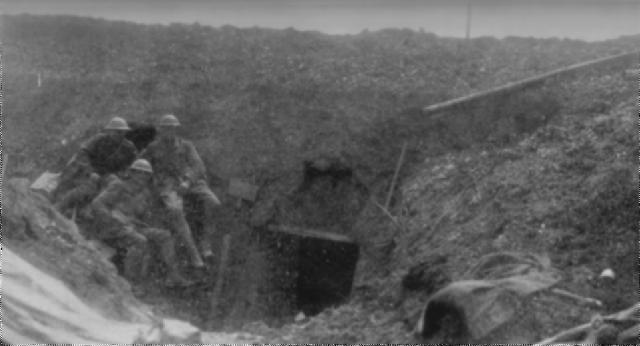
Captured German trench at Bullecourt.


German efforts to dislodge the Australians followed for the next fortnight, producing some of the most intense trench fighting of the war. On 7 May a renewed effort by the British on the left, this time by the 7th Division, succeeded in reaching the eastern side of Bullecourt and linking up with the Australians. The next day the 5th Australian Division was brought up and took over from the 1st Division the defence of the eastern part of the line. Efforts by both British and Australian troops to steadily consolidate their hold were interrupted by a final furious counter-attack on 15 May, and when this was repulsed the enemy decided to withdraw entirely from around what was left of Bullecourt.


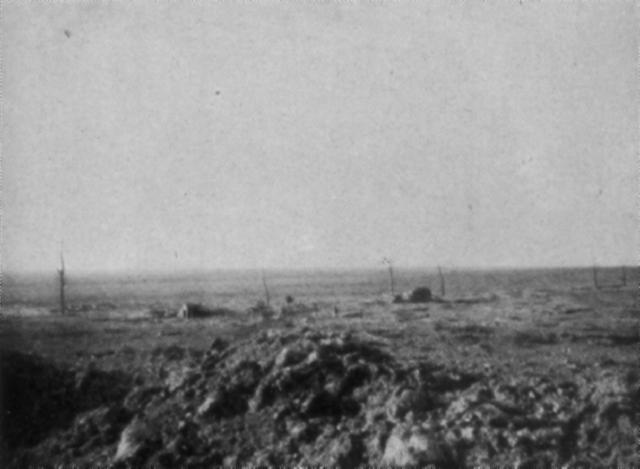
The Bullecourt-Hendecourt area from the German view of the battlefield.


Although this battle had resulted in a remarkable victory, the effort had cost the A.I.F. 7,482 casualties. Instead of a subsidiary attack as part of' a wider Allied offensive, Bullecourt had become the focus of practically the whole British front when operations elsewhere failed; the French advance did not proceed at all. This meant that the struggle for a small, tactically useless piece of ground had assumed an importance out of all proportion to the original rationale. Moreover, it had drawn in not one but three Australian divisions and left them all in serious need of rest and recovery. The drain on reinforcements entailed by this effort had wider implications too, ending plans to continue expanding the AIF.


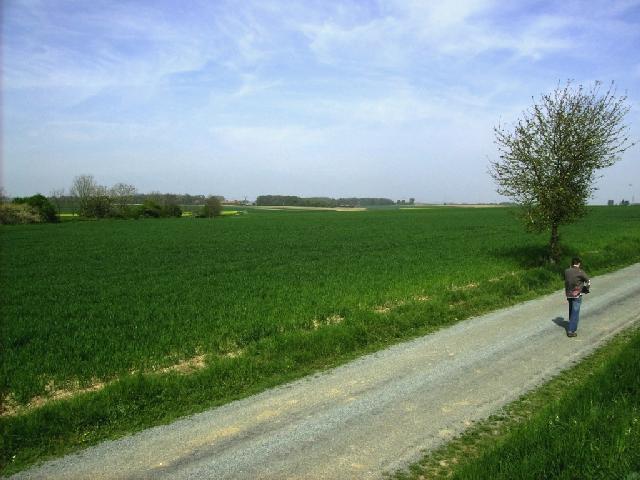
Road from Bullecourt to Diggers Memorial.

[Photograph by Lawrie]


Extracted from the book produced by Chris Coulthard-Clark, Where Australians Fought - The Encyclopaedia of Australia's Battles, Allen and Unwin, Sydney, 1998, pp. 127-128.


Additional References cited by Chris Coulthard-Clark:

C.E.W. Bean, (1933), The Australian Imperial Force in France 1917,  Sydney: Angus & Robertson.


Further Reading:

Battles where Australians fought, 1899-1920


Citation: Second Bullecourt, France, May 3 to 17, 1917

Posted by Project Leader at 11:01 PM EAST
Updated: Sunday, 5 April 2009 12:55 PM EADT

Newer | Latest | Older

Full Site Index


powered by FreeFind
Let us hear your story: You can tell your story, make a comment or ask for help on our forum.

Desert Column Forum

A note on copyright

The Australian Light Horse Studies Centre is a not for profit and non profit group whose sole aim is to write the early history of the Australian Light Horse from 1900 - 1920. It is privately funded and the information is provided by the individuals within the group and while permission for the use of the material has been given for this site for these items by various donors, the residual and actual copyright for these items, should there be any, resides exclusively with the donors. The information on this site is freely available for private research use only and if used as such, should be appropriately acknowledged. To assist in this process, each item has a citation attached at the bottom for referencing purposes.

Please Note: No express or implied permission is given for commercial use of the information contained within this site.

A note to copyright holders

The Australian Light Horse Studies Centre has made every endeavour to contact copyright holders of material digitised for this blog and website and where appropriate, permission is still being sought for these items. Where replies were not received, or where the copyright owner has not been able to be traced, or where the permission is still being sought, the Australian Light Horse Studies Centre has decided, in good faith, to proceed with digitisation and publication. Australian Light Horse Studies Centre would be happy to hear from copyright owners at any time to discuss usage of this item.

Contact

Australian Light Horse Studies Centre

eXTReMe Tracker