« November 2009 »
S M T W T F S
1 2 3 4 5 6 7
8 9 10 11 12 13 14
15 16 17 18 19 20 21
22 23 24 25 26 27 28
29 30
You are not logged in. Log in


Search the site:


powered by FreeFind
Volunteer with us.

Entries by Topic All topics  
A Latest Site News
A - Using the Site
AAA Volunteers
AAB-Education Centre
AAC-Film Clips
AAC-Photo Albums
AIF & MEF & EEF
AIF - Lighthorse
AIF - ALH - A to Z
AIF - DMC
AIF - DMC - Or Bat
AIF - DMC - Anzac MD
AIF - DMC - Aus MD
AIF - DMC - British
AIF - DMC - BWI
AIF - DMC - French
AIF - DMC - Indian
AIF - DMC - Italian
AIF - DMC - Medical
AIF - DMC - Remounts
AIF - DMC - Scouts
AIF - DMC - Sigs
AIF - DMC - Sigs AirlnS
AIF - DMC - 1 Sig Sqn
AIF - DMC - 2 Sig Sqn
AIF - DMC - Eng
AIF - DMC - Eng 1FSE
AIF - DMC - Eng 2FSE
AIF - DMC - GSR
AIF - 1B - 1 LHB
AIF - 1B - 6 MVS
AIF - 1B - 1 LHMGS
AIF - 1B - 1 Sig Trp
AIF - 1B - 1 LHFA
AIF - 1B - 1 LHR
AIF - 1B - 2 LHR
AIF - 1B - 3 LHR
AIF - 2B - 2 LHB
AIF - 2B - 7 MVS
AIF - 2B - 2 LHFA
AIF - 2B - 2 LHMGS
AIF - 2B - 2 Sig Trp
AIF - 2B - 5 LHR
AIF - 2B - 6 LHR
AIF - 2B - 7 LHR
AIF - 3B - 3 LHB
AIF - 3B - 8 MVS
AIF - 3B - 3 LHB Sigs
AIF - 3B - 3 LHFA
AIF - 3B - 3 LHMGS
AIF - 3B - 3 Sig Trp
AIF - 3B - 8 LHR
AIF - 3B - 9 LHR
AIF - 3B - 10 LHR
AIF - 4B - 4 LHB
AIF - 4B - 4 Sig Trp
AIF - 4B - 9 MVS
AIF - 4B - 4 LHFA
AIF - 4B - 4 LHMGS
AIF - 4B - 4 LHR
AIF - 4B - 11 LHR
AIF - 4B - 12 LHR
AIF - 5B - 5 LHB
AIF - 5B - 10 MVS
AIF - 5B - 5 LHFA
AIF - 5B - 5 Sig Trp
AIF - 5B - ICC
AIF - 5B - 14 LHR
AIF - 5B - 15 LHR
AIF - 5B - 1er Regt
AIF - 5B - 2 NZMGS
AIF - AASC
AIF - Aboriginal LH
AIF - Badges
AIF - Cars
AIF - Chinese LH
AIF - Double Sqns
AIF - Engineers
AIF - Fr - 22 Corps
AIF - Fr - 13 LHR
AIF - Honour Roll
AIF - HQ - 3rd Echelon
AIF - Marching Songs
AIF - Misc Topics
AIF - NZMRB
AIF - NZMRB - AMR
AIF - NZMRB - CMR
AIF - NZMRB - EFT
AIF - NZMRB - NZMFA
AIF - NZMRB - NZMGS
AIF - NZMRB - OMR
AIF - NZMRB - Sig-Trp
AIF - NZMRB - WMR
AIF - Ships
AIF - Ships - Encountr
AIF - Ships - Una
AIF - WFF
AIF - Wireless Sqn
Battles
BatzA - Australia
BatzA - Broken Hill
BatzA - Liverpool
BatzA - Merivale
BatzB - Boer War
BatzB - Bakenlaagte
BatzB - Belmont
BatzB - Bothaville
BatzB - Buffels Hoek
BatzB - Coetzees Drift
BatzB - Diamond Hill
BatzB - Driefontein
BatzB - Elands
BatzB - Graspan
BatzB - Grobelaar
BatzB - Grootvallier
BatzB - Hartebestfontn
BatzB - Houtnek
BatzB - Karee Siding
BatzB - Kimberley
BatzB - Koster River
BatzB - Leeuw Kop
BatzB - Mafeking
BatzB - Magersfontein
BatzB - Modder River
BatzB - Onverwacht
BatzB - Paardeberg
BatzB - Palmietfontein
BatzB - Pink Hill
BatzB - Poplar Grove
BatzB - Rhenoster
BatzB - Sannahs Post
BatzB - Slingersfontn
BatzB - Stinkhoutbm
BatzB - Sunnyside
BatzB - Wilmansrust
BatzB - Wolvekuil
BatzB - Zand River
BatzG - Gallipoli
BatzG - Anzac
BatzG - Aug 1915
BatzG - Baby 700
BatzG - Evacuation
BatzG - Hill 60
BatzG - Hill 971
BatzG - Krithia
BatzG - Lone Pine
BatzG - Nek
BatzJ - Jordan Valley
BatzJ - 1st Amman
BatzJ - 2nd Amman
BatzJ - Abu Tellul
BatzJ - Es Salt
BatzJ - JV Maps
BatzJ - Ziza
BatzM - Mespot
BatzM - Baghdad
BatzM - Ctesiphon
BatzM - Daur
BatzM - Kurna
BatzM - Kut el Amara
BatzM - Ramadi
BatzN - Naval
BatzN - AE1
BatzN - Cocos Is
BatzN - Heligoland
BatzN - Marmara
BatzN - Zeebrugge
BatzN - Zeppelin L43
BatzNG - Bitapaka
BatzO - Other
BatzO - Baku
BatzO - Egypt 1919
BatzO - Emptsa
BatzO - Karawaran
BatzO - Peitang
BatzO - Wassa
BatzP - Palestine
BatzP - 1st Gaza
BatzP - 2nd Gaza
BatzP - 3rd Gaza
BatzP - Aleppo
BatzP - Amwas
BatzP - Ayun Kara
BatzP - Bald Hill
BatzP - Balin
BatzP - Beersheba
BatzP - Berkusieh
BatzP - Damascus
BatzP - El Auja
BatzP - El Buggar
BatzP - El Burj
BatzP - Haifa
BatzP - Huj
BatzP - JB Yakub
BatzP - Kaukab
BatzP - Khan Kusseir
BatzP - Khuweilfe
BatzP - Kuneitra
BatzP - Megiddo
BatzP - Nablus
BatzP - Rafa
BatzP - Sasa
BatzP - Semakh
BatzP - Sheria
BatzP - Surafend
BatzP - Wadi Fara
BatzS - Sinai
BatzS - Bir el Abd
BatzS - El Arish
BatzS - El Mazar
BatzS - El Qatiya
BatzS - Jifjafa
BatzS - Magdhaba
BatzS - Maghara
BatzS - Romani
BatzS - Suez 1915
BatzSe - Senussi
BatzWF - Westn Front
BW - Boer War
BW - NSW
BW - NSW - 1ACH
BW - NSW - 1NSWMR
BW - NSW - 2NSWMR
BW - NSW - 3ACH
BW - NSW - 3NSWIB
BW - NSW - 3NSWMR
BW - NSW - 5ACH
BW - NSW - A Bty RAA
BW - NSW - AAMC
BW - NSW - Aust H
BW - NSW - Lancers
BW - NSW - NSW Inf
BW - NSW - NSWCBC
BW - NSW - NSWIB
BW - NSW - NSWMR_A
BW - NZ
BW - Qld
BW - Qld - 1ACH
BW - Qld - 1QMI
BW - Qld - 2QMI
BW - Qld - 3ACH
BW - Qld - 3QMI
BW - Qld - 4QIB
BW - Qld - 5QIB
BW - Qld - 6QIB
BW - Qld - 7ACH
BW - QLD - AAMC
BW - SA
BW - SA - 1SAMR
BW - SA - 2ACH
BW - SA - 2SAMR
BW - SA - 3SACB
BW - SA - 4ACH
BW - SA - 4SAIB
BW - SA - 5SAIB
BW - SA - 6SAIB
BW - SA - 8ACH
BW - SA - AAMC
BW - Tas
BW - Tas - 1ACH
BW - Tas - 1TIB
BW - Tas - 1TMI
BW - Tas - 2TB
BW - Tas - 2TIB
BW - Tas - 3ACH
BW - Tas - 8ACH
BW - Vic
BW - Vic - 1VMI
BW - Vic - 2ACH
BW - Vic - 2VMR
BW - Vic - 3VB
BW - Vic - 4ACH
BW - Vic - 4VIB
BW - Vic - 5VMR
BW - Vic - 6ACH
BW - Vic - AAMC
BW - Vic - Scot H
BW - WA
BW - WA - 1WAMI
BW - WA - 2ACH
BW - WA - 2WAMI
BW - WA - 3WAB
BW - WA - 4ACH
BW - WA - 4WAMI
BW - WA - 5WAMI
BW - WA - 6WAMI
BW - WA - 8ACH
BW Gen - Campaign
BW Gen - Soldiers
BW General
Cavalry - General
Diary - Schramm
Egypt - Heliopolis
Egypt - Mena
Gen - Ataturk Pk, CNB
Gen - Australia
Gen - Legends
Gen - Query Club
Gen - St - NSW
Gen - St - Qld
Gen - St - SA
Gen - St - Tas
Gen - St - Vic
Gen - St - WA
Gm - German Items
Gm - Bk - 605 MGC
GW - 11 Nov 1918
GW - Atrocities
GW - August 1914
GW - Biographies
GW - Propaganda
GW - Spies
GW - We forgot
Militia 1899-1920
Militia - Area Officers
Militia - Inf - Infantry
Militia - Inf - 1IB
Militia - Inf - 2IB
Militia - Inf - 3IB
Militia - Inf - NSW
Militia - Inf - Qld
Militia - Inf - SA
Militia - Inf - Tas
Militia - Inf - Vic
Militia - Inf - WA
Militia - K.E.Horse
Militia - LH
Militia - LH - Regts
Militia - LH - 1LHB
Militia - LH - 2LHB
Militia - LH - 3LHB
Militia - LH - 4LHB
Militia - LH - 5LHB
Militia - LH - 6LHB
Militia - LHN - NSW
Militia - LHN - 1/7/1
Militia - LHN - 2/9/6
Militia - LHN - 3/11/7
Militia - LHN - 4/6/16
Militia - LHN - 5/4/15
Militia - LHN - 6/5/12
Militia - LHN - 28
Militia - LHQ - Qld
Militia - LHQ - 13/2
Militia - LHQ - 14/3/11
Militia - LHQ - 15/1/5
Militia - LHQ - 27/14
Militia - LHS - SA
Militia - LHS - 16/22/3
Militia - LHS - 17/23/18
Militia - LHS - 24/9
Militia - LHT - Tas
Militia - LHT - 12/26
Militia - LHV - Vic
Militia - LHV - 7/15/20
Militia - LHV - 8/16/8
Militia - LHV - 9/19
Militia - LHV - 10/13
Militia - LHV - 11/20/4
Militia - LHV - 19/17
Militia - LHV - 29
Militia - LHW - WA
Militia - LHW-18/25/10
Militia - Military Orders
Militia - Misc
MilitiaRC - Rifle Clubs
MilitiaRC - NSW
MilitiaRC - NT
MilitiaRC - Qld
MilitiaRC - SA
MilitiaRC - Tas
MilitiaRC - Vic
MilitiaRC - WA
Militiaz - New Zealand
Tk - Turkish Items
Tk - Army
Tk - Bks - Books
Tk - Bks - 1/33IR
Tk - Bks - 27th IR
Tk - Bks - Air Force
Tk - Bks - Yildirim
Tk - POWs
Wp - Weapons
Wp - Hotchkiss Cav
Wp - Hotchkiss PMG
Blog Tools
Edit your Blog
Build a Blog
RSS Feed
View Profile
Open Community
Post to this Blog
Site Index
Education Centre
LH Militia
Boer War
Transport Ships
LH Battles
ALH - Units
ALH - General
Aboriginal Light H
Weapons
Ottoman Sources

"At a mile distant their thousand hooves were stuttering thunder, coming at a rate that frightened a man - they were an awe inspiring sight, galloping through the red haze - knee to knee and horse to horse - the dying sun glinting on bayonet points..." Trooper Ion Idriess

The Australian Light Horse Studies Centre aims to present an accurate history as chroniclers of early Australian military developments from 1899 to 1920.

The Australian Light Horse Studies Centre site holds over 12,000 entries and is growing daily.

Contact: Australian Light Horse Studies Centre

Let us hear your story: You can tell your story, make a comment or ask for help on our Australian Light Horse Studies Centre Forum called:

Desert Column Forum

WARNING: This site contains: names, information and images of deceased people; and, language which may be considered inappropriate today.

Friday, 20 November 2009
The Australian Light Horse, Militia and AIF, Mounted Rifle Tactics, Part 9, Conclusion
Topic: AIF - Lighthorse

The Australian Light Horse,

Militia and AIF

Mounted Rifle Tactics, Part 9, Conclusion


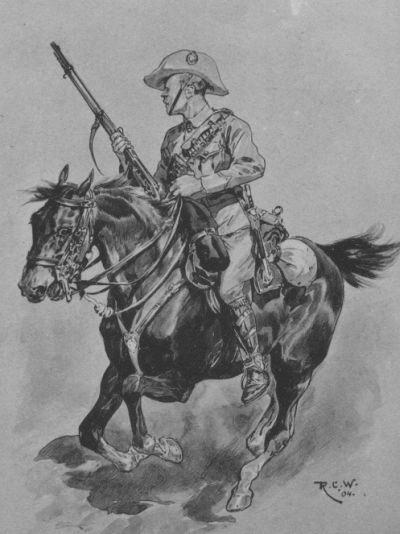
Cape Mounted Rifleman

[Drawing from 1904 by Richard Caton Woodville, 1856 - 1927.]


The following series is from an article called Mounted Rifle Tactics written in 1914 by a former regimental commander of the Cape Mounted Riflemen, Lieutenant-Colonel J. J. Collyer. His practical experience of active service within a mounted rifles formation gives strength to the theoretical work on this subject. It was the operation of the Cape Mounted Riflemen within South Africa that formed the inspiration for the theoretical foundations of the Australian Light Horse, and was especially influential in Victoria where it formed the cornerstone of mounted doctrine. 

Collyer, JJ, Mounted Rifle Tactics, Military Journal, April, 1915, pp. 265 - 305:


Mounted Rifle Tactics.

VII - Conclusion

This brings us to the close of our discussions on mounted riflemen. I have endeavoured to refrain from elaborating points from the text-books, though adhering to their teaching, and to put forward some general principles which seem to me worthy of consideration and examination if the arm -mounted riflemen-is to be used to the great effect which is undoubtedly possible. I have also tried to make use of what is a great advantage to the mounted troops of the Union, the experiences of war in South Africa in which mounted riflemen formed the bulk of the contestants some ten years ago.

I am convinced that in a calm and temperate analysis of those experiences and the acceptance of sound principles, and rejection of defects, the mounted riflemen of South Africa will find teaching which will make them the equal of any body of the arm in the world. As years go on the actors in the last war-who are now at hand to advise and teach-will pass, and it is essential that the teaching should be laid down now, that the experience may in the future prove a real support of the military forces of the Union.


Previous: Part 8, Reconnaissance 

Next: The Light Horse


Further Reading:

The Light Horse

Australian Light Horse Militia

Militia 1899 - 1920

Battles where Australians fought, 1899-1920


Citation: The Australian Light Horse, Militia and AIF, Mounted Rifle Tactics, Part 9, Conclusion

Posted by Project Leader at 12:01 AM EAST
Updated: Thursday, 10 December 2009 8:33 AM EAST
Thursday, 19 November 2009
The Battle of Anzac Cove, Gallipoli, 25 April 1915, Canterbury Infantry Battalion War Diary
Topic: BatzG - Anzac

The Battle of Anzac Cove

Gallipoli, 25 April 1915

Canterbury Infantry Battalion War Diary 


War Diary account of the Canterbury Infantry Battalion.


The following is a transcription of the War Diary of the Canterbury Infantry Battalion, of their role in the landings at Anzac on 25 April 1915.


24 April 1915

Lemnos

6.30 pm - HMT Lutzow left inner harbour and anchored outside. Leaving for Kaba Tepe at midnight 24/25.


25 April 1915

Anzac Cove

Battalion less 11th and 13th Companies landed under shrapnel fire. No casualties. Disembarkation completed at about 12.30 pm.

Received Brigade Orders to prolong left of Australian Division rendering whatever assistance possible. Auckland Battalion supporting.

Walker's Ridge

The order was at once carried out under heavy shrapnel fire. Companies got separated on arriving on the top of Plugge’s Plateau.

Plugge's Plateau

2 pm - Urgent message received from Major Stuckey Auckland Battalion that his left was being turned and ammunition had run out. Captain Critchley-Salmonson collecting a small party of New Zealand and Australians, proceeded to Walker's Ridge and finding the left not held occupied it with his left flank on the beach.

Parties of Australians retired through the position during afternoon and evening.

6.30 pm - Lieutenant Colonel Stewart reported killed. Major Loach assumed command Brigade Headquarters informed.

Walker's Ridge

Received message from Divisional Headquarters that Major Loach with two Companies was being sent to reinforce the left.

9.30 pm - Major Loach with 12th and 13th Companies arrived. These companies should have disembarked at 12 noon but the transport conveying them did not arrive at her anchorage till 5 pm.

At this time a local reserve consisting of details from 1st and 2nd Companies was being collected on the beach.

The Battalion dug in during the night and maintained the line.

List of Casualties:

Officers -
Lieutenant Colonel D McB Stewart, killed.
Major D Grant, killed.
Lieutenant OH Mead, wounded slightly.
Lieutenant JC Hill, wounded.
Lieutenant Barclay, wounded and missing.

Other Ranks, 21 killed, 87 wounded, 100 missing.


26 July 1915

Walker's Ridge

Strengthened position and re-organised.

2 pm - Officer Commanding 2nd Battalion Australian Regiment which was holding a position on the left front ordered Major Loach to reinforce his left. The 12th Nelson Company was ordered to do this but were checked on account of two platoons 2nd Battalion Australian Regiment who were retiring from the ridge. Eventually the position was re-established at 6.30 pm. The whole position was strengthened during the night. Desultory firing lasted till 3 am 27 April 1915.

6 pm - Casualty - Officers - Lieutenant HF Fitch, killed.

Water and ammunition supply were the greatest difficulties which had to be contended with. This was chiefly due to the nature of the country and having to be man handled a long distance.


War Diaries

All War Diaries cited on this site should be read in conjunction with the Australian Light Horse Studies Centre, AIF War Diaries of the Great War, Site Transcription Policy which may be accessed at:

Australian Light Horse Studies Centre, AIF War Diaries of the Great War, Site Transcription Policy 


Further Reading:

The Battle of Anzac Cove, Gallipoli, 25 April 1915

The Battle of Anzac Cove, Gallipoli, 25 April 1915, Canterbury Infantry Battalion, Roll of Honour  

The Battle of Anzac Cove, Gallipoli, 25 April 1915, NZEF Roll of Honour

Battles where Australians fought, 1899-1920


Citation: The Battle of Anzac Cove, Gallipoli, 25 April 1915, Canterbury Infantry Battalion War Diary

Posted by Project Leader at 12:01 AM EAST
Updated: Tuesday, 13 April 2010 9:33 PM EADT
Wednesday, 18 November 2009
The Battle of Amwas, Palestine, 18 November 1917, Outline
Topic: BatzP - Amwas

The Battle of Amwas

Palestine, 18 November 1917

Outline


The action at Amwas.

[From: Gullett, p. 490.]


As a preliminary to the advance of the 75th Division into the hills, the Australian Mounted Division on November 18th forced the enemy from Latron by a flanking movement on the north. The Turks were reported to be evacuating Jerusalem, and Chauvel ordered Barrow with his yeomanry to move rapidly on Bireh and cut off the retreat. Hodgson was to attack the Latron-Amwas position early in the afternoon and. if successful, to push on towards Bireh, on the right of the yeomanry. The 3rd Australian Light Horse Brigade on the left was to endeavour to outflank Latron from the north and north-east while the 4th Brigade made a direct assault.


In the distance following the mountains is the road from Latron in the foreground to Amwas.


This day's operations served to bring home to all leaders the nature of the task ahead. As Scott with the 9th Regiment on the flank pushed into the hills on his enveloping movement, he came under brisk fire from machine-guns and light artillery. No Turks showed on the dark, harsh hills ahead, but each approach was evidently watched and guarded. For some hours the 8th and 9th Regiments probed fruitlessly at the frowning ramparts. So steep and rocky was the ground that the horses had frequently to be led. After much difficulty, the Notts Battery was brought forward, and was rewarded with a good target on four enemy guns near Amwas; these the gunners silenced at a range of 5,000 yards, and they were next day found by the British infantry. Towards evening, as the result of a striking change in Bulfin's tactics, the 3rd and 4th Brigades were withdrawn. On the left the Yeomanry Division had made indifferent headway towards Bireh. Like the Australians, they found the country impossible for mounted action. Shilta had been occupied, and the troops had advanced within two miles of Beit ur et Tahta (Lower Bethoron); but the batteries of horse artillery had found the old track impossible for wheels. Some of the guns were man-handled for miles, and the Hong Kong and Singapore Battery, mounted on its stalwart camels, climbed almost as far as the advanced troops. In the face of the opposition everywhere met by the Australian and Yeomanry Divisions it was obvious that a mounted advance was impracticable. As of old, Jerusalem, if it was to be won, must be assailed by infantry.

Bulfin decided to attack Latron on the following day with the 75th Division, while the 52nd Division was to strike into the hills by the Beit Likia on its left. The light horse were not to play an active part in the capture of Jerusalem. Yet the advance into the hills by Wilson's brigade on the 18th provided a good example of the effect of that sort of enveloping movement which can he made only by mounted troops, even though it is not at the time attended by material results. A patrol o€ Scott's advanced troops under Sergeant G. G. Masson had penetrated as far as Yalo a native village about five miles almost due east of Amwas.

Next morning, when the 75th Division moved on Latron, they found the position evacuated; the Turks, fearing that isolation and capture would follow the thrust to Yalo, had abandoned strongly-held ground, and the men of the 75th were saved severe fighting and heavy casualties.


Extracted from H.S. Gullett (1944) The Australian Imperial Force in Sinai and Palestine, Sydney: Angus & Robertson, pp. 489 - 491. 


Further Reading:

The Battle of Amwas, Palestine, 18 November 1917

Battles where Australians fought, 1899-1920


Citation: The Battle of Amwas, Palestine, 18 November 1917, Outline

Posted by Project Leader at 12:01 AM EAST
Updated: Friday, 19 November 2010 4:44 PM EAST
The Battle of Anzac Cove, Gallipoli, 25 April 1915, Wellington Infantry Battalion Roll of Honour
Topic: BatzG - Anzac

The Battle of Anzac Cove

Gallipoli, 25 April 1915

Roll of Honour

Wellington Infantry Battalion


Poppies on the Auckland Cenotaph plinth


The Roll of Honour contains the names of all the men from the Wellington Infantry Battalion who are known to have served and lost their lives during the Battle of Anzac, 25 April 1915.


Roll of Honour


Philip Gardner TATTLE, Wellington Infantry Battalion.


Lest We Forget


Further Reading:

The Battle of Anzac Cove, Gallipoli, 25 April 1915

The Battle of Anzac Cove, Gallipoli, 25 April 1915, NZEF Roll of Honour 

Battles where Australians fought, 1899-1920


Citation: The Battle of Anzac Cove, Gallipoli, 25 April 1915, Wellington Infantry Battalion Roll of Honour

Posted by Project Leader at 12:01 AM EAST
Updated: Tuesday, 13 April 2010 10:08 AM EADT
Tuesday, 17 November 2009
The Jifjafa Raid, Sinai, April 10 to 14, 1916, Mapping the Jifjafa Region
Topic: BatzS - Jifjafa

The Jifjafa Raid

Sinai, 10 - 14 April 1916

 Mapping the Jifjafa Region


British Map 1:125,000 Little Bitter Lake illustrating western section of journey to Jifjafa.
 
Note: "M" = Wadi um Mukhsheib, "MH" = Moiya Harab.

[Click on map for larger version.]


1913 British Map Giddi 1:125,000 illustrating the eastern route to Jifjafa.
 
Note: "X" = Point 1340, "J" = Jifjafa.

[Click on map for larger version.]


1:250,000, 1915 German map with Ottoman overlay detailing the topography around Jifjafa
 
[Click on map for larger version.]


Further Reading:

Reconnaissance to Muksheib by Captain Wearne

Jifjafa Raid Progressive Maps

The Jifjafa Raid, Sinai, April 10 to 14

Battles where Australians fought, 1899-1920


Citation: The Jifjafa Raid, Sinai, April 10 to 14, 1916, Mapping the Jifjafa Region

Posted by Project Leader at 12:01 AM EAST
Updated: Sunday, 29 November 2009 7:54 AM EAST

Newer | Latest | Older

Full Site Index


powered by FreeFind
Let us hear your story: You can tell your story, make a comment or ask for help on our forum.

Desert Column Forum

A note on copyright

The Australian Light Horse Studies Centre is a not for profit and non profit group whose sole aim is to write the early history of the Australian Light Horse from 1900 - 1920. It is privately funded and the information is provided by the individuals within the group and while permission for the use of the material has been given for this site for these items by various donors, the residual and actual copyright for these items, should there be any, resides exclusively with the donors. The information on this site is freely available for private research use only and if used as such, should be appropriately acknowledged. To assist in this process, each item has a citation attached at the bottom for referencing purposes.

Please Note: No express or implied permission is given for commercial use of the information contained within this site.

A note to copyright holders

The Australian Light Horse Studies Centre has made every endeavour to contact copyright holders of material digitised for this blog and website and where appropriate, permission is still being sought for these items. Where replies were not received, or where the copyright owner has not been able to be traced, or where the permission is still being sought, the Australian Light Horse Studies Centre has decided, in good faith, to proceed with digitisation and publication. Australian Light Horse Studies Centre would be happy to hear from copyright owners at any time to discuss usage of this item.

Contact

Australian Light Horse Studies Centre

eXTReMe Tracker