« January 2008 »
S M T W T F S
1 2 3 4 5
6 7 8 9 10 11 12
13 14 15 16 17 18 19
20 21 22 23 24 25 26
27 28 29 30 31
You are not logged in. Log in


Search the site:


powered by FreeFind
Volunteer with us.

Entries by Topic All topics  
A Latest Site News
A - Using the Site
AAA Volunteers
AAB-Education Centre
AAC-Film Clips
AAC-Photo Albums
AIF & MEF & EEF
AIF - Lighthorse
AIF - ALH - A to Z
AIF - DMC
AIF - DMC - Or Bat
AIF - DMC - Anzac MD
AIF - DMC - Aus MD
AIF - DMC - British
AIF - DMC - BWI
AIF - DMC - French
AIF - DMC - Indian
AIF - DMC - Italian
AIF - DMC - Medical
AIF - DMC - Remounts
AIF - DMC - Scouts
AIF - DMC - Sigs
AIF - DMC - Sigs AirlnS
AIF - DMC - 1 Sig Sqn
AIF - DMC - 2 Sig Sqn
AIF - DMC - Eng
AIF - DMC - Eng 1FSE
AIF - DMC - Eng 2FSE
AIF - DMC - GSR
AIF - 1B - 1 LHB
AIF - 1B - 6 MVS
AIF - 1B - 1 LHMGS
AIF - 1B - 1 Sig Trp
AIF - 1B - 1 LHFA
AIF - 1B - 1 LHR
AIF - 1B - 2 LHR
AIF - 1B - 3 LHR
AIF - 2B - 2 LHB
AIF - 2B - 7 MVS
AIF - 2B - 2 LHFA
AIF - 2B - 2 LHMGS
AIF - 2B - 2 Sig Trp
AIF - 2B - 5 LHR
AIF - 2B - 6 LHR
AIF - 2B - 7 LHR
AIF - 3B - 3 LHB
AIF - 3B - 8 MVS
AIF - 3B - 3 LHB Sigs
AIF - 3B - 3 LHFA
AIF - 3B - 3 LHMGS
AIF - 3B - 3 Sig Trp
AIF - 3B - 8 LHR
AIF - 3B - 9 LHR
AIF - 3B - 10 LHR
AIF - 4B - 4 LHB
AIF - 4B - 4 Sig Trp
AIF - 4B - 9 MVS
AIF - 4B - 4 LHFA
AIF - 4B - 4 LHMGS
AIF - 4B - 4 LHR
AIF - 4B - 11 LHR
AIF - 4B - 12 LHR
AIF - 5B - 5 LHB
AIF - 5B - 10 MVS
AIF - 5B - 5 LHFA
AIF - 5B - 5 Sig Trp
AIF - 5B - ICC
AIF - 5B - 14 LHR
AIF - 5B - 15 LHR
AIF - 5B - 1er Regt
AIF - 5B - 2 NZMGS
AIF - AASC
AIF - Aboriginal LH
AIF - Badges
AIF - Cars
AIF - Chinese LH
AIF - Double Sqns
AIF - Engineers
AIF - Fr - 22 Corps
AIF - Fr - 13 LHR
AIF - Honour Roll
AIF - HQ - 3rd Echelon
AIF - Marching Songs
AIF - Misc Topics
AIF - NZMRB
AIF - NZMRB - AMR
AIF - NZMRB - CMR
AIF - NZMRB - EFT
AIF - NZMRB - NZMFA
AIF - NZMRB - NZMGS
AIF - NZMRB - OMR
AIF - NZMRB - Sig-Trp
AIF - NZMRB - WMR
AIF - Ships
AIF - Ships - Encountr
AIF - Ships - Una
AIF - WFF
AIF - Wireless Sqn
Battles
BatzA - Australia
BatzA - Broken Hill
BatzA - Liverpool
BatzA - Merivale
BatzB - Boer War
BatzB - Bakenlaagte
BatzB - Belmont
BatzB - Bothaville
BatzB - Buffels Hoek
BatzB - Coetzees Drift
BatzB - Diamond Hill
BatzB - Driefontein
BatzB - Elands
BatzB - Graspan
BatzB - Grobelaar
BatzB - Grootvallier
BatzB - Hartebestfontn
BatzB - Houtnek
BatzB - Karee Siding
BatzB - Kimberley
BatzB - Koster River
BatzB - Leeuw Kop
BatzB - Mafeking
BatzB - Magersfontein
BatzB - Modder River
BatzB - Onverwacht
BatzB - Paardeberg
BatzB - Palmietfontein
BatzB - Pink Hill
BatzB - Poplar Grove
BatzB - Rhenoster
BatzB - Sannahs Post
BatzB - Slingersfontn
BatzB - Stinkhoutbm
BatzB - Sunnyside
BatzB - Wilmansrust
BatzB - Wolvekuil
BatzB - Zand River
BatzG - Gallipoli
BatzG - Anzac
BatzG - Aug 1915
BatzG - Baby 700
BatzG - Evacuation
BatzG - Hill 60
BatzG - Hill 971
BatzG - Krithia
BatzG - Lone Pine
BatzG - Nek
BatzJ - Jordan Valley
BatzJ - 1st Amman
BatzJ - 2nd Amman
BatzJ - Abu Tellul
BatzJ - Es Salt
BatzJ - JV Maps
BatzJ - Ziza
BatzM - Mespot
BatzM - Baghdad
BatzM - Ctesiphon
BatzM - Daur
BatzM - Kurna
BatzM - Kut el Amara
BatzM - Ramadi
BatzN - Naval
BatzN - AE1
BatzN - Cocos Is
BatzN - Heligoland
BatzN - Marmara
BatzN - Zeebrugge
BatzN - Zeppelin L43
BatzNG - Bitapaka
BatzO - Other
BatzO - Baku
BatzO - Egypt 1919
BatzO - Emptsa
BatzO - Karawaran
BatzO - Peitang
BatzO - Wassa
BatzP - Palestine
BatzP - 1st Gaza
BatzP - 2nd Gaza
BatzP - 3rd Gaza
BatzP - Aleppo
BatzP - Amwas
BatzP - Ayun Kara
BatzP - Bald Hill
BatzP - Balin
BatzP - Beersheba
BatzP - Berkusieh
BatzP - Damascus
BatzP - El Auja
BatzP - El Buggar
BatzP - El Burj
BatzP - Haifa
BatzP - Huj
BatzP - JB Yakub
BatzP - Kaukab
BatzP - Khan Kusseir
BatzP - Khuweilfe
BatzP - Kuneitra
BatzP - Megiddo
BatzP - Nablus
BatzP - Rafa
BatzP - Sasa
BatzP - Semakh
BatzP - Sheria
BatzP - Surafend
BatzP - Wadi Fara
BatzS - Sinai
BatzS - Bir el Abd
BatzS - El Arish
BatzS - El Mazar
BatzS - El Qatiya
BatzS - Jifjafa
BatzS - Magdhaba
BatzS - Maghara
BatzS - Romani
BatzS - Suez 1915
BatzSe - Senussi
BatzWF - Westn Front
BW - Boer War
BW - NSW
BW - NSW - 1ACH
BW - NSW - 1NSWMR
BW - NSW - 2NSWMR
BW - NSW - 3ACH
BW - NSW - 3NSWIB
BW - NSW - 3NSWMR
BW - NSW - 5ACH
BW - NSW - A Bty RAA
BW - NSW - AAMC
BW - NSW - Aust H
BW - NSW - Lancers
BW - NSW - NSW Inf
BW - NSW - NSWCBC
BW - NSW - NSWIB
BW - NSW - NSWMR_A
BW - NZ
BW - Qld
BW - Qld - 1ACH
BW - Qld - 1QMI
BW - Qld - 2QMI
BW - Qld - 3ACH
BW - Qld - 3QMI
BW - Qld - 4QIB
BW - Qld - 5QIB
BW - Qld - 6QIB
BW - Qld - 7ACH
BW - QLD - AAMC
BW - SA
BW - SA - 1SAMR
BW - SA - 2ACH
BW - SA - 2SAMR
BW - SA - 3SACB
BW - SA - 4ACH
BW - SA - 4SAIB
BW - SA - 5SAIB
BW - SA - 6SAIB
BW - SA - 8ACH
BW - SA - AAMC
BW - Tas
BW - Tas - 1ACH
BW - Tas - 1TIB
BW - Tas - 1TMI
BW - Tas - 2TB
BW - Tas - 2TIB
BW - Tas - 3ACH
BW - Tas - 8ACH
BW - Vic
BW - Vic - 1VMI
BW - Vic - 2ACH
BW - Vic - 2VMR
BW - Vic - 3VB
BW - Vic - 4ACH
BW - Vic - 4VIB
BW - Vic - 5VMR
BW - Vic - 6ACH
BW - Vic - AAMC
BW - Vic - Scot H
BW - WA
BW - WA - 1WAMI
BW - WA - 2ACH
BW - WA - 2WAMI
BW - WA - 3WAB
BW - WA - 4ACH
BW - WA - 4WAMI
BW - WA - 5WAMI
BW - WA - 6WAMI
BW - WA - 8ACH
BW Gen - Campaign
BW Gen - Soldiers
BW General
Cavalry - General
Diary - Schramm
Egypt - Heliopolis
Egypt - Mena
Gen - Ataturk Pk, CNB
Gen - Australia
Gen - Legends
Gen - Query Club
Gen - St - NSW
Gen - St - Qld
Gen - St - SA
Gen - St - Tas
Gen - St - Vic
Gen - St - WA
Gm - German Items
Gm - Bk - 605 MGC
GW - 11 Nov 1918
GW - Atrocities
GW - August 1914
GW - Biographies
GW - Propaganda
GW - Spies
GW - We forgot
Militia 1899-1920
Militia - Area Officers
Militia - Inf - Infantry
Militia - Inf - 1IB
Militia - Inf - 2IB
Militia - Inf - 3IB
Militia - Inf - NSW
Militia - Inf - Qld
Militia - Inf - SA
Militia - Inf - Tas
Militia - Inf - Vic
Militia - Inf - WA
Militia - K.E.Horse
Militia - LH
Militia - LH - Regts
Militia - LH - 1LHB
Militia - LH - 2LHB
Militia - LH - 3LHB
Militia - LH - 4LHB
Militia - LH - 5LHB
Militia - LH - 6LHB
Militia - LHN - NSW
Militia - LHN - 1/7/1
Militia - LHN - 2/9/6
Militia - LHN - 3/11/7
Militia - LHN - 4/6/16
Militia - LHN - 5/4/15
Militia - LHN - 6/5/12
Militia - LHN - 28
Militia - LHQ - Qld
Militia - LHQ - 13/2
Militia - LHQ - 14/3/11
Militia - LHQ - 15/1/5
Militia - LHQ - 27/14
Militia - LHS - SA
Militia - LHS - 16/22/3
Militia - LHS - 17/23/18
Militia - LHS - 24/9
Militia - LHT - Tas
Militia - LHT - 12/26
Militia - LHV - Vic
Militia - LHV - 7/15/20
Militia - LHV - 8/16/8
Militia - LHV - 9/19
Militia - LHV - 10/13
Militia - LHV - 11/20/4
Militia - LHV - 19/17
Militia - LHV - 29
Militia - LHW - WA
Militia - LHW-18/25/10
Militia - Military Orders
Militia - Misc
MilitiaRC - Rifle Clubs
MilitiaRC - NSW
MilitiaRC - NT
MilitiaRC - Qld
MilitiaRC - SA
MilitiaRC - Tas
MilitiaRC - Vic
MilitiaRC - WA
Militiaz - New Zealand
Tk - Turkish Items
Tk - Army
Tk - Bks - Books
Tk - Bks - 1/33IR
Tk - Bks - 27th IR
Tk - Bks - Air Force
Tk - Bks - Yildirim
Tk - POWs
Wp - Weapons
Wp - Hotchkiss Cav
Wp - Hotchkiss PMG
Blog Tools
Edit your Blog
Build a Blog
RSS Feed
View Profile
Open Community
Post to this Blog
Site Index
Education Centre
LH Militia
Boer War
Transport Ships
LH Battles
ALH - Units
ALH - General
Aboriginal Light H
Weapons
Ottoman Sources

"At a mile distant their thousand hooves were stuttering thunder, coming at a rate that frightened a man - they were an awe inspiring sight, galloping through the red haze - knee to knee and horse to horse - the dying sun glinting on bayonet points..." Trooper Ion Idriess

The Australian Light Horse Studies Centre aims to present an accurate history as chroniclers of early Australian military developments from 1899 to 1920.

The Australian Light Horse Studies Centre site holds over 12,000 entries and is growing daily.

Contact: Australian Light Horse Studies Centre

Let us hear your story: You can tell your story, make a comment or ask for help on our Australian Light Horse Studies Centre Forum called:

Desert Column Forum

WARNING: This site contains: names, information and images of deceased people; and, language which may be considered inappropriate today.

Wednesday, 9 January 2008
The Battle of Rafa, Sinai, 9 January 1917, Anzac Mounted Division, Order No. 69
Topic: BatzP - Rafa

The Battle of Rafa

Sinai, 9 January 1917

Anzac Mounted Division, Order No. 69


Order No. 69


The following is a transcription of the War Diary of the Anzac Mounted Division of their role at the Battle of Rafa, Sinai, 9 January 1917.
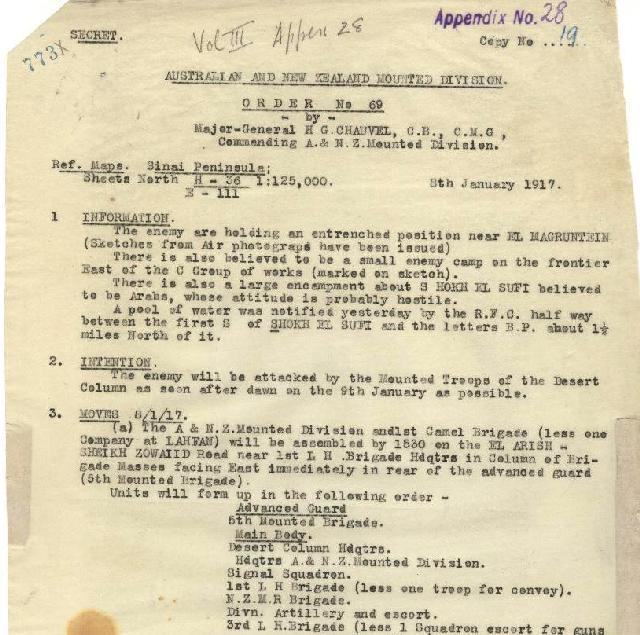
 

Secret

Australian and New Zealand Mounted Division

Order No. 69

Major General HG Chauvel, CB, CMG, Commanding Australian and New Zealand Mounted Division

Reference Map: Sinai Peninsular, Sheet North H36/EIII

8th January 1917


1. Information

The enemy are holding an entrenched position near El Magruntein (Sketches from Air Photographs have been issued).

See: Map of Turkish Trench Works

There is also believed to be a small enemy camp on the frontier East of the "C" Group of works (marked on sketch).

There is also a large encampment about Shokh el Sufi believed to be Arabs, whose attitude is probably hostile.

A pool of water was notified yesterday by the Royal Flying Corps half way between the first "S" of Shokh el Sufi and the letters BP about 1½ miles north of it.


2. Intention

The enemy will be attacked by the Mounted Troops of the Desert Column as soon after dawn on the 9th January as possible.


3. Moves 8 July 1917

(a) The Australian and New Zealand Mounted Division and 1st Camel Brigade (less on Company at Lahfan) will be assembled by 1530 on the El Arish - Sheikh Zowaiid Road near 1st Light Horse Brigade Headquarters in Column of Brigade Masses facing East immediately in rear of the advanced guard (5th Mounted Brigade).

Units will form up in the following order:-

Advanced Guard 

5th Mounted Brigade

Main Body

Desert Mounted Column Headquarters

Headquarters Australian and New Zealand Mounted Division

1st Light Horse Brigade (less one troop for convoy).

New Zealand Mounted Rifles Brigade

Divisional Artillery and escort.

3rd Light Horse Brigade (less 1 Squadron escort for guns and Ammunition Columns).

1st Camel Brigade (less one Company).

1st Line Transport (ammunition sections only) in same order of march as the Force.

Field Ambulance and Ambulance convoys.

Divisional Ammunition Column.

Right and Left Flank Guards

One troop on each flank from 1st Light Horse Brigade ahead of main body.

(b) Baggage sections of 1st Line Transport move off in rear of the Divisional Ammunition Column.

(c) Australian and New Zealand Mounted Division and 1st Camel Brigade will pass the 1st Light Horse Brigade Headquarters at 1600 and proceed by El Burj to Sheikh Zowaiid, each Brigade moving in Column of Squadrons with each squadron in line of Troop Columns.

(d) The rate of march will be such as to ensure the head of the Main Body reaching Sheikh Zowaiid by 2200.

Halts will be made from:-

(a) 1650 to 1700

(b) 1845 to 1900

(c) 2045 to 2100

(e) The column will halt one mile West of Sheikh Zowaiid.

Australian and New Zealand Mounted Division and 1st Camel Brigade will collect and concentrate in Column of Brigade masses south of the Road facing East. Here girths will be loosened and horses fed.


4. Officers to Assist Officer Commanding Advanced Guard

BGC, 1st Light Horse Brigade will tell off 3 officers who know the country about Sheikh Zowaiid to report to the advanced guard commander at the position of assembly.

The advanced guard Commander has to place a cordon of posts round Sheikh Zowaiid to prevent anyone leaving the village to give warning to the enemy, and, the success of this will depend on the knowledge these officers have of the country.


5. Water

Assistant Adjutant and Quartermaster General, Australian and New Zealand Mounted Division will be responsible for the allotment of watering areas and wells for men and horses on the return of the Force to Sheikh Zowaiid. He will also allot bivouac areas about that place to be occupied by the troops on the night of 9th/10th.


6. Medical

The Deputy Director Medical Services, Desert Column has been ordered to arrange for the erection of EP tents for the accommodation of wounded who are unable to return with the force to El Arish. 


7. Prisoners

The Assistant Provost Marshal, Australian and New Zealand Mounted Division will make such arrangements as he considers necessary for the reception of such prisoners as may fall into our hands - until they can accompany the Force back to El Arish.


8. Setting Watches

A Staff Officer from Australian and New Zealand Mounted Division and Camel Brigade will report to Desert Column Headquarters at the position of assembly at 1530 on January 8th to set watches.

Officers from each Brigade, and Artillery with report at Divisional Headquarters to set watches.


9. Communication

The Officer Commanding, Signal Squadron will ensure that the strips for aeroplanes to drop messages are taken and placed near the Divisional Headquarters report centre.


10. Moves 9 January 1917

(a) At 0100, the Australian and New Zealand Mounted Division and Camel Brigade will leave Sheikh Zowaiid and move via points 210 and 250.

Advanced Guard

One Squadron, 1st Light Horse Brigade

Right and Left Flank Guards

One Troop each from 3rd Light Horse Brigade

Rear Guard

One Troop from 3rd Light Horse Brigade.

(b) The rate of march will be such as to ensure the Column being clear of the cross-roads at 210 by 0400, and of those at point 250 by 0500.

(c) The 5th Mounted Brigade are moving parallel to and on the North of the Camel Brigade as far as pint 210, and thence to a point on the Rafa Road about 2 miles North East near the word "of" in "Patches of Cultivation". They will be in reserve.


Desert Column Headquarters move with the 5th Mounted Brigade.


11. Special Duties

On arrival at Point 250, the New Zealand Mounted Rifles Brigade will be detached to round up the Arab Camp, disarming the men and collecting them under a guard about point 250. Major Barlow will accompany this Brigade to help in the direction of this work.

After being collected at point 250 these prisoners will be taken over by an escort detailed from the Camel Brigade.

The New Zealand Mounted Rifles Brigade will rejoin the Division after completion of this duty.


12. The remainder of the division will move North East to a position from which the following operations will be undertaken.

(a) The Camp East of "C" Group of works will be dealt with.

(b) Attack will be launched on works "C" and the Reduit from East and South East.

(c) The Camel Brigade will follow the Australian and New Zealand Mounted Division and will, under the direction of the General Officer Commanding, Australian and New Zealand Mounted Division, attack work "B" from the South East.

The attacks of the Australian and New Zealand Mounted Division and the Camel Brigade will be made in conjunction with each other. Orders as to hour, and method of attack, and special tasks will be issued on the ground after reconnaissance by General Officer Commanding Australian and New Zealand Mounted Division.


13. Pursuit

Should the enemy have retired or commence to retire, pursuit will be taken up by the Division; but will not be continued beyond Khan Yunis without orders from the Column Headquarters.


War Diaries

All War Diaries cited on this site should be read in conjunction with the Australian Light Horse Studies Centre, AIF War Diaries of the Great War, Site Transcription Policy which may be accessed at:

Australian Light Horse Studies Centre, AIF War Diaries of the Great War, Site Transcription Policy 


Further Reading:

The Battle of Rafa, Sinai, 9 January 1917

The Battle of Rafa, Sinai, 9 January 1917, Roll of Honour

The Palestine Campaign, 1917 - 1918

Battles where Australians fought, 1899-1920


Citation: The Battle of Rafa, Sinai, 9 January 1917, Anzac Mounted Division, Order No. 69


Posted by Project Leader at 12:01 AM EAST
Updated: Tuesday, 18 January 2011 10:04 AM EAST

View Latest Entries

Full Site Index


powered by FreeFind
Let us hear your story: You can tell your story, make a comment or ask for help on our forum.

Desert Column Forum

A note on copyright

The Australian Light Horse Studies Centre is a not for profit and non profit group whose sole aim is to write the early history of the Australian Light Horse from 1900 - 1920. It is privately funded and the information is provided by the individuals within the group and while permission for the use of the material has been given for this site for these items by various donors, the residual and actual copyright for these items, should there be any, resides exclusively with the donors. The information on this site is freely available for private research use only and if used as such, should be appropriately acknowledged. To assist in this process, each item has a citation attached at the bottom for referencing purposes.

Please Note: No express or implied permission is given for commercial use of the information contained within this site.

A note to copyright holders

The Australian Light Horse Studies Centre has made every endeavour to contact copyright holders of material digitised for this blog and website and where appropriate, permission is still being sought for these items. Where replies were not received, or where the copyright owner has not been able to be traced, or where the permission is still being sought, the Australian Light Horse Studies Centre has decided, in good faith, to proceed with digitisation and publication. Australian Light Horse Studies Centre would be happy to hear from copyright owners at any time to discuss usage of this item.

Contact

Australian Light Horse Studies Centre

eXTReMe Tracker