« July 2024 »
S M T W T F S
1 2 3 4 5 6
7 8 9 10 11 12 13
14 15 16 17 18 19 20
21 22 23 24 25 26 27
28 29 30 31
You are not logged in. Log in


Search the site:


powered by FreeFind
Volunteer with us.

Entries by Topic All topics
A Latest Site News
A - Using the Site
AAA Volunteers
AAB-Education Centre
AAC-Film Clips
AAC-Photo Albums
AIF & MEF & EEF
AIF - Lighthorse
AIF - ALH - A to Z
AIF - DMC
AIF - DMC - Or Bat
AIF - DMC - Anzac MD
AIF - DMC - Aus MD
AIF - DMC - British
AIF - DMC - BWI
AIF - DMC - French
AIF - DMC - Indian
AIF - DMC - Italian
AIF - DMC - Medical
AIF - DMC - Remounts
AIF - DMC - Scouts
AIF - DMC - Sigs
AIF - DMC - Sigs AirlnS
AIF - DMC - 1 Sig Sqn
AIF - DMC - 2 Sig Sqn
AIF - DMC - Eng
AIF - DMC - Eng 1FSE
AIF - DMC - Eng 2FSE
AIF - DMC - GSR
AIF - 1B - 1 LHB
AIF - 1B - 6 MVS
AIF - 1B - 1 LHMGS
AIF - 1B - 1 Sig Trp
AIF - 1B - 1 LHFA
AIF - 1B - 1 LHR
AIF - 1B - 2 LHR
AIF - 1B - 3 LHR
AIF - 2B - 2 LHB
AIF - 2B - 7 MVS
AIF - 2B - 2 LHFA
AIF - 2B - 2 LHMGS
AIF - 2B - 2 Sig Trp
AIF - 2B - 5 LHR
AIF - 2B - 6 LHR
AIF - 2B - 7 LHR
AIF - 3B - 3 LHB
AIF - 3B - 8 MVS
AIF - 3B - 3 LHB Sigs
AIF - 3B - 3 LHFA
AIF - 3B - 3 LHMGS
AIF - 3B - 3 Sig Trp
AIF - 3B - 8 LHR
AIF - 3B - 9 LHR  
AIF - 3B - 10 LHR
AIF - 4B - 4 LHB
AIF - 4B - 4 Sig Trp
AIF - 4B - 9 MVS
AIF - 4B - 4 LHFA
AIF - 4B - 4 LHMGS
AIF - 4B - 4 LHR
AIF - 4B - 11 LHR
AIF - 4B - 12 LHR
AIF - 5B - 5 LHB
AIF - 5B - 10 MVS
AIF - 5B - 5 LHFA
AIF - 5B - 5 Sig Trp
AIF - 5B - ICC
AIF - 5B - 14 LHR
AIF - 5B - 15 LHR
AIF - 5B - 1er Regt
AIF - 5B - 2 NZMGS
AIF - AASC
AIF - Aboriginal LH
AIF - Badges
AIF - Cars
AIF - Chinese LH
AIF - Double Sqns
AIF - Engineers
AIF - Fr - 22 Corps
AIF - Fr - 13 LHR
AIF - Honour Roll
AIF - HQ - 3rd Echelon
AIF - Marching Songs
AIF - Misc Topics
AIF - NZMRB
AIF - NZMRB - AMR
AIF - NZMRB - CMR
AIF - NZMRB - EFT
AIF - NZMRB - NZMFA
AIF - NZMRB - NZMGS
AIF - NZMRB - OMR
AIF - NZMRB - Sig-Trp
AIF - NZMRB - WMR
AIF - Ships
AIF - Ships - Encountr
AIF - Ships - Una
AIF - WFF
AIF - Wireless Sqn
Battles
BatzA - Australia
BatzA - Broken Hill
BatzA - Liverpool
BatzA - Merivale
BatzB - Boer War
BatzB - Bakenlaagte
BatzB - Belmont
BatzB - Bothaville
BatzB - Buffels Hoek
BatzB - Coetzees Drift
BatzB - Diamond Hill
BatzB - Driefontein
BatzB - Elands
BatzB - Graspan
BatzB - Grobelaar
BatzB - Grootvallier
BatzB - Hartebestfontn
BatzB - Houtnek
BatzB - Karee Siding
BatzB - Kimberley
BatzB - Koster River
BatzB - Leeuw Kop
BatzB - Mafeking
BatzB - Magersfontein
BatzB - Modder River
BatzB - Onverwacht
BatzB - Paardeberg
BatzB - Palmietfontein
BatzB - Pink Hill
BatzB - Poplar Grove
BatzB - Rhenoster
BatzB - Sannahs Post
BatzB - Slingersfontn
BatzB - Stinkhoutbm
BatzB - Sunnyside
BatzB - Wilmansrust
BatzB - Wolvekuil
BatzB - Zand River
BatzG - Gallipoli
BatzG - Anzac
BatzG - Aug 1915
BatzG - Baby 700
BatzG - Evacuation
BatzG - Hill 60
BatzG - Hill 971
BatzG - Krithia
BatzG - Lone Pine
BatzG - Nek
BatzJ - Jordan Valley
BatzJ - 1st Amman
BatzJ - 2nd Amman
BatzJ - Abu Tellul
BatzJ - Es Salt
BatzJ - JV Maps
BatzJ - Ziza
BatzM - Mespot
BatzM - Baghdad
BatzM - Ctesiphon
BatzM - Daur
BatzM - Kurna
BatzM - Kut el Amara
BatzM - Ramadi
BatzN - Naval
BatzN - AE1
BatzN - Cocos Is
BatzN - Heligoland
BatzN - Marmara
BatzN - Zeebrugge
BatzN - Zeppelin L43
BatzNG - Bitapaka
BatzO - Other
BatzO - Baku
BatzO - Egypt 1919
BatzO - Emptsa
BatzO - Karawaran
BatzO - Peitang
BatzO - Wassa
BatzP - Palestine
BatzP - 1st Gaza
BatzP - 2nd Gaza
BatzP - 3rd Gaza
BatzP - Aleppo
BatzP - Amwas
BatzP - Ayun Kara
BatzP - Bald Hill
BatzP - Balin
BatzP - Beersheba
BatzP - Berkusieh
BatzP - Damascus
BatzP - El Auja
BatzP - El Buggar
BatzP - El Burj
BatzP - Haifa
BatzP - Huj
BatzP - JB Yakub
BatzP - Kaukab
BatzP - Khan Kusseir
BatzP - Khuweilfe
BatzP - Kuneitra
BatzP - Megiddo
BatzP - Nablus
BatzP - Rafa
BatzP - Sasa
BatzP - Semakh
BatzP - Sheria
BatzP - Surafend
BatzP - Wadi Fara
BatzS - Sinai
BatzS - Bir el Abd
BatzS - El Arish
BatzS - El Mazar
BatzS - El Qatiya
BatzS - Jifjafa
BatzS - Magdhaba
BatzS - Maghara
BatzS - Romani
BatzS - Suez 1915
BatzSe - Senussi
BatzWF - Westn Front
BW - Boer War
BW - NSW
BW - NSW - 1ACH
BW - NSW - 1NSWMR
BW - NSW - 2NSWMR
BW - NSW - 3ACH
BW - NSW - 3NSWIB
BW - NSW - 3NSWMR
BW - NSW - 5ACH
BW - NSW - A Bty RAA
BW - NSW - AAMC
BW - NSW - Aust H
BW - NSW - Lancers
BW - NSW - NSW Inf
BW - NSW - NSWCBC
BW - NSW - NSWIB
BW - NSW - NSWMR_A
BW - NZ
BW - Qld
BW - Qld - 1ACH
BW - Qld - 1QMI
BW - Qld - 2QMI
BW - Qld - 3ACH
BW - Qld - 3QMI
BW - Qld - 4QIB
BW - Qld - 5QIB
BW - Qld - 6QIB
BW - Qld - 7ACH
BW - QLD - AAMC
BW - SA
BW - SA - 1SAMR
BW - SA - 2ACH
BW - SA - 2SAMR
BW - SA - 3SACB
BW - SA - 4ACH
BW - SA - 4SAIB
BW - SA - 5SAIB
BW - SA - 6SAIB
BW - SA - 8ACH
BW - SA - AAMC
BW - Tas
BW - Tas - 1ACH
BW - Tas - 1TIB
BW - Tas - 1TMI
BW - Tas - 2TB
BW - Tas - 2TIB
BW - Tas - 3ACH
BW - Tas - 8ACH
BW - Vic
BW - Vic - 1VMI
BW - Vic - 2ACH
BW - Vic - 2VMR
BW - Vic - 3VB
BW - Vic - 4ACH
BW - Vic - 4VIB
BW - Vic - 5VMR
BW - Vic - 6ACH
BW - Vic - AAMC
BW - Vic - Scot H
BW - WA
BW - WA - 1WAMI
BW - WA - 2ACH
BW - WA - 2WAMI
BW - WA - 3WAB
BW - WA - 4ACH
BW - WA - 4WAMI
BW - WA - 5WAMI
BW - WA - 6WAMI
BW - WA - 8ACH
BW Gen - Campaign
BW Gen - Soldiers
BW General
Cavalry - General
Diary - Schramm
Egypt - Heliopolis
Egypt - Mena
Gen - Ataturk Pk, CNB
Gen - Australia
Gen - Legends
Gen - Query Club
Gen - St - NSW
Gen - St - Qld
Gen - St - SA
Gen - St - Tas
Gen - St - Vic
Gen - St - WA
Gm - German Items
Gm - Bk - 605 MGC
GW - 11 Nov 1918
GW - Atrocities
GW - August 1914
GW - Biographies
GW - Propaganda
GW - Spies
GW - We forgot
Militia 1899-1920
Militia - Area Officers
Militia - Inf - Infantry
Militia - Inf - 1IB
Militia - Inf - 2IB
Militia - Inf - 3IB
Militia - Inf - NSW
Militia - Inf - Qld
Militia - Inf - SA
Militia - Inf - Tas
Militia - Inf - Vic
Militia - Inf - WA
Militia - K.E.Horse
Militia - LH
Militia - LH - Regts
Militia - LH - 1LHB
Militia - LH - 2LHB
Militia - LH - 3LHB
Militia - LH - 4LHB
Militia - LH - 5LHB
Militia - LH - 6LHB
Militia - LHN - NSW
Militia - LHN - 1/7/1
Militia - LHN - 2/9/6
Militia - LHN - 3/11/7
Militia - LHN - 4/6/16
Militia - LHN - 5/4/15
Militia - LHN - 6/5/12
Militia - LHN - 28
Militia - LHQ - Qld
Militia - LHQ - 13/2
Militia - LHQ - 14/3/11
Militia - LHQ - 15/1/5
Militia - LHQ - 27/14
Militia - LHS - SA
Militia - LHS - 16/22/3
Militia - LHS - 17/23/18
Militia - LHS - 24/9
Militia - LHT - Tas
Militia - LHT - 12/26
Militia - LHV - Vic
Militia - LHV - 7/15/20
Militia - LHV - 8/16/8
Militia - LHV - 9/19
Militia - LHV - 10/13
Militia - LHV - 11/20/4
Militia - LHV - 19/17
Militia - LHV - 29
Militia - LHW - WA
Militia - LHW-18/25/10
Militia - Military Orders
Militia - Misc
MilitiaRC - Rifle Clubs
MilitiaRC - NSW
MilitiaRC - NT
MilitiaRC - Qld
MilitiaRC - SA
MilitiaRC - Tas
MilitiaRC - Vic
MilitiaRC - WA
Militiaz - New Zealand
Tk - Turkish Items
Tk - Army
Tk - Bks - Books
Tk - Bks - 1/33IR
Tk - Bks - 27th IR
Tk - Bks - Air Force
Tk - Bks - Yildirim
Tk - POWs
Wp - Weapons
Wp - Hotchkiss Cav
Wp - Hotchkiss PMG
Blog Tools
Edit your Blog
Build a Blog
RSS Feed
View Profile
Open Community
Post to this Blog
Site Index
Education Centre
LH Militia
Boer War
Transport Ships
LH Battles
ALH - Units
ALH - General
Aboriginal Light H
Weapons
Ottoman Sources

"At a mile distant their thousand hooves were stuttering thunder, coming at a rate that frightened a man - they were an awe inspiring sight, galloping through the red haze - knee to knee and horse to horse - the dying sun glinting on bayonet points..." Trooper Ion Idriess

The Australian Light Horse Studies Centre aims to present an accurate history as chroniclers of early Australian military developments from 1899 to 1920.

The Australian Light Horse Studies Centre site holds over 12,000 entries and is growing daily.

Contact: Australian Light Horse Studies Centre

Let us hear your story: You can tell your story, make a comment or ask for help on our Australian Light Horse Studies Centre Forum called:

Desert Column Forum

WARNING: This site contains: names, information and images of deceased people; and, language which may be considered inappropriate today.

Tuesday, 10 November 2009
9th Australian Light Horse Regiment, Contents
Topic: AIF - 3B - 9 LHR

9th LHR, AIF

9th Australian Light Horse Regiment

Contents


9th Light Horse Regiment Colour Patch


The 9th Light Horse Regiment was formed as part of the 3rd Australian Light Horse Brigade, 3rd Contingent and attached to the Australian Division. The 9th Light Horse Regiment was a composite regiment with two squadrons made up by recruits from the 4th Military District [South Australia and the Broken Hill region of New South Wales] while the last squadron, "C" Squadron was composed of men from the 3rd Military District [Victoria].


Structure

The Australian Light Horse – Structural outline

Australian Light Horse Order of Battle


Corps

Desert Mounted Corps (DMC)


Division

Anzac Mounted Division

Australian Mounted Division 


Brigade

3rd Australian Light Horse Brigade


Regiment

9th Australian Light Horse Regiment, AIF, History


Newspaper Stories

Return of the 9th LHR, AIF, Advertiser, 12 August 1919 


Battles

Hill 60, Gallipoli

9th LHR personnel at Hill 60, 27 August 1915

The Nek and Hill 60 - The massacre of the Australians

 Romani

9th LHR, AIF account about the Battle of Romani

9th ALHR, AIF, War Diary, account about the Battle of Romani


Bir el Abd

Bir el Abd, Sinai, 9 August 1916, 9th LHR, AIF, War Diary Account 

Bir el Abd, Sinai, 9 August 1916, 9th LHR, AIF, Unit History Account 


Bir el Mazar

Bir el Mazar, Sinai, 17 September 1916, 9th LHR, AIF, War Diary Account 

Bir el Mazar, Sinai, 17 September 1916, 9th LHR, AIF, Unit History Account


Bir el Magdhaba

The Battle of Magdhaba, Sinai, December 23, 1916, 9th LHR, AIF, War Diary Account

The Battle of Magdhaba, Sinai, December 23, 1916, 9th LHR, AIF, Unit History Account

The Battle of Magdhaba, Sinai, 23 December 1916, El Arish and El Magdhaba, 9th LHR, AIF, Commentary 


Beersheba

9th ALHR AIF account about the fall of Beersheba

9th ALHR, AIF, War Diary, account about the fall of Beersheba


El Burj

El Burj, Palestine, 1 December 1917, 9th Light Horse Regiment War Diary Account

El Burj, Palestine, 1 December 1917, Darley, 9th Light Horse Account 


Routine Orders


Embarkation

Full Roll

Roll: A - C

Roll: D - F

Roll: G - J

Roll: K - L

Roll: M - Q

Roll: R - S

Roll: T - Z


Individual Rolls

Regimental Headquarters Section

"A" Squadron

"B" Squadron

"C" Squadron

Machine Gun Section

1st Reinforcement

2nd Reinforcement

3rd Reinforcement Mashobra Group

3rd Reinforcement Pera Group

4th Reinforcement Port Lincoln Group

4th Reinforcement Wiltshire Group

5th Reinforcement Kabinga Group

5th Reinforcement Botanist Group

6th Reinforcement Afric Group Melbourne

6th Reinforcement Afric Group Adelaide

7th Reinforcement Kanowna Group

7th Reinforcement Marere Group

8th Reinforcement Kyarra Group

8th Reinforcement Morea Group

9th Reinforcement Star Of England Group

9th Reinforcement Hororata Group

10th Reinforcement Ballarat Group Melbourne

10th Reinforcement Ballarat Group Adelaide

11th Reinforcement Hawkes Bay Group

11th Reinforcement Ulysses Group

11th Reinforcement Benalla Group

12th Reinforcement Geelong Group

12th Reinforcement Ceramic Group

13th Reinforcement Afric Group

13th Reinforcement Borda Group

14th Reinforcement

15th Reinforcement

16th Reinforcement

17th Reinforcement

18th Reinforcement

19th Reinforcement

20th Reinforcement

21st Reinforcement

22nd Reinforcement

23rd Reinforcement

24th Reinforcement

25th Reinforcement

26th Reinforcement Morea Group Adelaide

26th Reinforcement Morea Group Perth

27th Reinforcement

28th Reinforcement Port Lincoln Group

28th Reinforcement Kyarra Group

28th Reinforcement Commonwealth Group

29th Reinforcement Kyarra Group

29th Reinforcement Commonwealth Group

30th Reinforcement

31st Reinforcement

32nd Reinforcement

33rd Reinforcement

34th Reinforcement


Personnel

Military biographies of men who served with the 9th Light Horse Regiment.

The peculiar case of Arthur Carrington Smedley

3 Sergeant Albert John Kilsby

Merrill, Betteridge and Paxton

3052 Trooper Arthur Arnold Herde

345 Sergeant Linton Hall Swann

3051 Trooper George Hodby

3050 Trooper Hubert Mead Gowling

3049 Trooper Stanley Alexander Ferguson

3048 Trooper Montague Eli Frederick Forth

3047 Trooper Richard Percy Dunstan

9th LHR, AIF, Thomas Joseph Canny 


Roll of Honour

9th Australian Light Horse Regiment, Roll of Honour 

Lest we forget


War Diary Day by Day Account

9th Australian Light Horse Regiment, War Diary, Day by Day Account


Bert Schramm’s Diary

Bert Schramm Diary


Unit History

Darley, TH, With the Ninth Light Horse in the Great War, Adelaide, Hassell Press, 1924. 


Further Reading:

9th Light Horse Regiment, AIF

9th Australian Light Horse Regiment, Roll of Honour 

Battles where Australians fought, 1899-1920


Citation: 9th Australian Light Horse Regiment, Contents

Posted by Project Leader at 12:01 AM EAST
Updated: Wednesday, 24 February 2010 10:03 PM EAST
Monday, 9 November 2009
9th Australian Light Horse Regiment, AIF, Outline
Topic: AIF - 3B - 9 LHR

9th LHR, AIF

9th Australian Light Horse Regiment

Outline


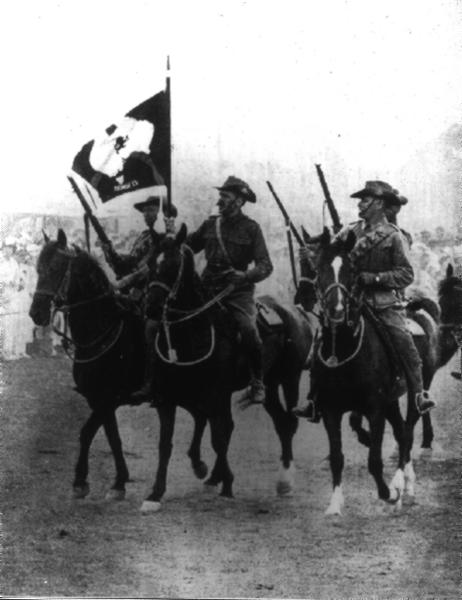
9th Light Horsemen Receiving the Regimental Standard, Adelaide, 15 November 1914.

[From: The Sydney Mail, 16 December 1914, p. 31.]


Outline of the 9th Australian Light Horse Regiment, AIF


Formation

The 9th Light Horse Regiment was formed as part of the 3rd Australian Light Horse Brigade, 3rd Contingent and attached to the Australian Division. The 9th Light Horse Regiment went through two distinct phases during its formation.


"B" Squadron, 7th Light Horse Regiment

Initially, it was envisaged that the unit would be designated as "B" Squadron, 7th Light Horse Regiment as part of the 2nd Australian Light Horse Brigade. The 7th Light Horse Regiment was to be a composite regiment based and trained in Queensland with "A" Squadron and Headquarters recruited in Queensland, "B" Squadron from South Australia with Western Australia providing the "C" Squadron. However, recruitment produced an overflow of men in all states. The result was the cancellation of the original structure of the 7th Light Horse Regiment and this regimental designation now applied to a unit raised in New South Wales.  


3rd Australian Light Horse Brigade

With the creation of the 3rd Australian Light Horse Brigade, "B" Squadron, 7th Light Horse Regiment was renamed "A" Squadron, 7th Light Horse Regiment. The 9th Light Horse Regiment was a composite regiment with two squadrons made up by recruits from the 4th Military District [South Australia and the Broken Hill region of New South Wales] while the last squadron, "C" Squadron was composed of men from the 3rd Military District [Victoria]. The 9th Light Horse Regiment was established at Morphettville Race Track Training Camp to the west of Adeliade, South Australia, and the Broadmeadows Training Camp to the north of Melbourne, Victoria. 


Training 


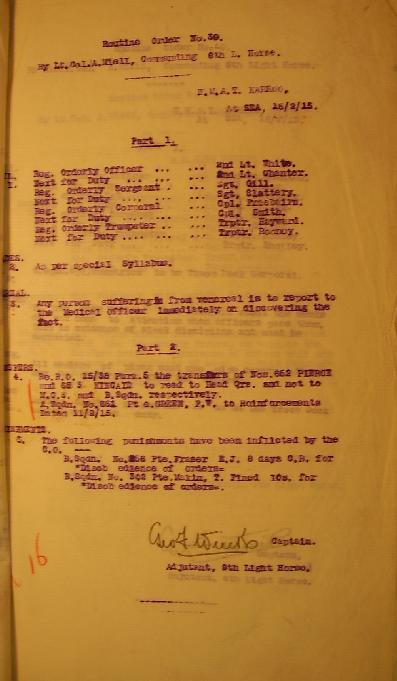
9th Light Horse Regiment Routine Order No 39, 15 February 1915

[Note: Earliest RO available. Click on page for larger version.]


Training for the 9th Light Horse Regiment occurred originally at Morphettville Race Track Training Camp to the west of Adeliade, South Australia, and the Broadmeadows Training Camp to the north of Melbourne, Victoria. By late November 1914, the main training occurred at Broadmeadows while reinforcement training still remained at the two original depots.


Embarkation

Embarkation of the 9th Light Horse Regiment was accomplished in two groups using both the HMAT A10 Karroo and HMAT A26 Armadale from Melbourne, Victoria. 


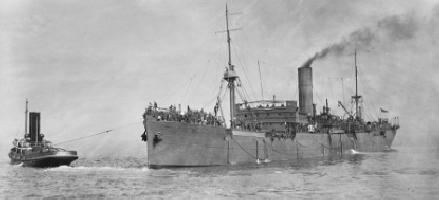
HMAT A10 Karroo at Port Melbourne, Victoria, 18 September 1916.
 
[See: His Majesty's Australian Transports [HMAT] Ships, A10.]


The 9th Light Horse Regiment Headquarters, Machine Gun Section, "B" and "C" Squadrons embarked on the HMAT A10 Karroo from Melbourne, Victoria, 11 February 1915.


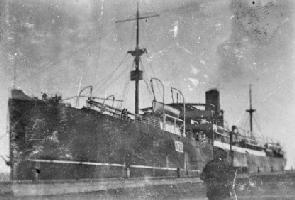
HMAT A26 Armadale, at Port Melbourne, February 1915
 
[See: His Majesty's Australian Transports [HMAT] Ships, A26.]


9th Light Horse Regiment "A" Squadron embarked on the HMAT A26 Armadale from Melbourne, Victoria, 12 February 1915.

The 9th Light Horse Regiment sailed to Egypt and disembarked on 14 March 1915.


Colour Patch

Initially, the only colour separation of the various Australian mounted troops was by use of the pennant. The marker pennants were carried on poles to mark lines troop lines in camps in Egypt. They were not lance pennants as the Australian lancers had red over white pennants on their lances.


Pennant of the 9th Light Horse Regiment


While this pennant was useful in distinguishing horse and troop lines, it failed to identify the individual with a unit. The AIF 1st Australian Division Standing Orders issued in December 1914 ordered the Australian Light Horse Regiments to wear a 4 inch wide [10.2cm] blue armband with the regiment name marked on the band in black lettering.

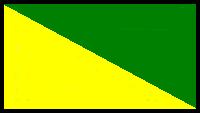
The earlier systems proved to be ineffective so to assist with identification of the men in the various units within the AIF, Divisional Order No 81 (A) Administration was issued at Mena on 8 March 1915 detailing the Colour Patch for the 9th Light Horse Regiment as others received their colours. The colour patch was made of cloth 1¼ inches wide and 2¾ inches long and worn on the sleeve one inch below the shoulder seam. The colour patch for the 9th Light Horse Regiment was green over yellow.


9th Light Horse Regiment Colour Patch


The 9th Light Horse Regiment carried the yellow Brigade colour as the lower triangle part of the colour patch, while the green unit colour was on the top. This is illustrated with the above presentation.


Gallipoli

As mounted troops, the Light Horse was considered to be unsuitable for work in Gallipoli. The mounted troops volunteered to operate as infantry and thus were sent to Gallipoli with the 9th Light Horse Regiment landing on 20 May 1915. The Regiment was deployed on primarily defensive activities at Russel's Top and Rhododendron Spur throughout the stay at Gallipoli. The 9th Light Horse Regiment participated in the ill fated charge at Hill 60 on 27 August 1915 where most of the Regiment was either killed or wounded. The 9th Light Horse Regiment left the peninsula on 20 December 1915.


Defence of Egypt

After the return to Egypt, the 9th Light Horse Regiment reformed and re-equipped. The reorganisation of the Light Horse led to the formation of the ANZAC Mounted Division to which the 9th Light Horse Regiment became a foundation member.

On 28 February 1916, the 9th Light Horse Regiment moved to join its parent brigade, the 3rd Australian Light Horse Brigade, which was taking part in the defence of the Suez Canal. The work was hot and monotonous. They remained here until moved to the Romani region to bolster the defence of that area.


Sinai

The 3rd Australian Light Horse Brigade played an important role in beating back the Turkish invasion of the Suez Canal zone at Romani. Now known as the Battle of Romani which lasted from 4-6 August which was quickly followed by the Battle of Katia and then Bir el Abd on 9 August. All the actions in which the 9th Light Horse Regiment finally led to the defeat of the Ottoman Canal Expeditionary force and its retreat to Bir el Mazar.


Over the next few months, the 9th Light Horse Regiment took part in the Allied advance over the Sinai leading to the fall of Bir el Mazar, then El Arish followed by Bir el Magdhaba and finally Rafa in January 1917. The Ottoman forces were expelled from the Sinai and were poised to be tackled in Palestine.


Palestine

On 27 March 1917, the 9th Light Horse Regiment took part in the First Battle of Gaza. While involved in the encirclement of the city as a prelude to its capture, the 9th Light Horse Regiment received the order to withdraw and return to the starting line. Grudgingly they did so but realised the Turks had snatched victory out of the jaws of defeat.

The 9th Light Horse Regiment  took part in the Second Battle of Gaza on 19 April 1917 and suffered the heaviest casualties since Gallipoli.

The 9th Light Horse Regiment took part in the Battle of Beersheba and then the follow up actions that lasted until early January 1918.

From this time onwards, for the next two months, the 9th Light Horse Regiment remained in continuous combat action until relieved for three months refit and training at Deir el Belah from early January 1918.

In early April 1918, the 9th Light Horse Regiment moved into the Jordan Valley and took part in the invasion of Moab and took Es Salt during the action of 30 April – 4 May 1918. Unfortunately, due to a Turkish attack on the lines of communication, this raid nearly turned into a disaster where the Turkish forces almost cut off the Australian Mounted Division in the hills.


Megiddo

In a move that converted the Light Horse into full cavalry, the Australian Mounted Division was issued with swords during August and early September 1917. The Australian Mounted Division went to work training with swords and undertaking cavalry work.

On 19 September 1918 the Battle of Megiddo began. The infantry over ran the Turkish defensive trenches allowing the cavalry to debouch into the Turkish hinterland. The 9th Light Horse Regiment participated in the breakthrough which moved rapidly through the north of Palestine. At the end of the first week, it was obvious that the way to Damascus was open and so a second push occurred on the heels of the first assault. On 1 October 1918, Damascus was taken. As part of the 3rd Light Horse Brigade, they marched through the city after its surrender by the Sarai.

After a rest in Damascus, the 9th Light Horse Regiment moved towards Homs when the Turks surrendered on 30 October 1918.


Return to Australia

After the conclusion of hostilities, the 9th Light Horse Regiment was marked to return to Australia. Prior to that action, one of the saddest actions occurred for the Australian Lighthorsemen, they had to farewell their best friends, the horses. All the Light Horse unit horses' health was ascertained with the fit horses being transferred to the Indian Cavalry while those in poor condition were destroyed by the Veterinary units.

On 13 March 1919 the 9th Light Horse Regiment was deployed  to assist in suppressing the Egyptian Uprising. When the revolt collapsed, the 9th Light Horse Regiment embarked on the 10 July 1919 for the long voyage to Australia where the unit was disbanded. 


Commanding Officers

Lieutenant Colonel Albert Miell
Lieutenant Colonel Carew Reynell
Lieutenant Colonel William Grant
Lieutenant Colonel John McLean Arnott
Lieutenant Colonel William Henry Scott
Lieutenant Colonel Thomas Joseph Daly
 

Decorations earned by the 9th Light Horse Regiment

  • 2 CMG - Companion in The Most Distinguished Order of St. Michael and St. George
  • 5 DSO & 1 Bar - Distinguished Service Orders
  • 1 OBE - Order of the British Empire
  • 6 MC - Military Crosses
  • 8 DCM - Distinguished Conduct Medals
  • 14 MM- Military Medals
  • 1 MSM - Meritorious Service Medal
  • 44 MID - Mentioned in Despatches
  • 2 foreign awards 


Campaigns

Gallipoli

  • Defence at Anzac
  • Suvla
  • Sari Bair
  • Gallipoli 1915-1916

Egypt

  • Defence of Egypt

Sinai

  • Romani
  • Magdhaba
  • Rafa 

Palestine

  • First Battle of Gaza
  • Second Battle of Gaza
  • Third Battle of Gaza
  • Beersheba
  • El Mughar
  • Nebi Samwill
  • Jerusalem
  • Jericho
  • Es Salt
  • Megiddo
  • Sharon
  • Palestine 1917-1918


Casualties suffered by the 9th Light Horse Regiment

  • 190 killed
  • 481 wounded


War Diary

The Australian War Memorial has put these on line and may be accessed here:

9th Light Horse Regiment War Diaries.

In addiiton, on this site, the War Diaries for the 9th Light horse Regiment have been fully transcribed. The full index is here:

9th Light Horse Regiment - War Diary


Embarkations:

The following list details all the embarkations in support of the 9th Light Horse Regiment, AIF, during the Great War. Each entry details to formation and the ships on which the units embarked with the date and place of embarkation. The detail of the formation is linked to a list of men who embarked upon that ship on the specific date.

Regimental Headquarters Section

Melbourne, Victoria on board HMAT A10 Karroo 11 February 1915

"A" Squadron

Melbourne, Victoria on board HMAT A26 Armadale 12 February 1915

"B" Squadron

Melbourne, Victoria on board HMAT A10 Karroo 11 February 1915

"C" Squadron

Melbourne, Victoria on board HMAT A10 Karroo 11 February 1915

Machine Gun Section

Melbourne, Victoria on board HMAT A10 Karroo 11 February 1915

1st Reinforcement

Melbourne, Victoria on board HMAT A52 Surada 6 February 1915

2nd Reinforcement

Melbourne, Victoria on board HMAT A26 Armadale 12 February 1915

3rd Reinforcement Mashobra Group

3rd Reinforcement Pera Group

Melbourne, Victoria on board HMAT A47 Mashobra 29 January 1915

Melbourne, Victoria on board HMAT A4 Pera 8 February 1915

4th Reinforcement Port Lincoln Group

4th Reinforcement Wiltshire Group

Adelaide, South Australia on board HMAT A17 Port Lincoln 1 April 1915

Melbourne, Victoria on board HMAT A18 Wiltshire 13 April 1915

5th Reinforcement Kabinga Group

5th Reinforcement Botanist Group

Melbourne, Victoria on board HMAT A58 Kabinga 8 May 1915

Adelaide, South Australia on board HMAT A59 Botanist 2 June 1915

6th Reinforcement Afric Group Melbourne

6th Reinforcement Afric Group Adelaide

Melbourne, Victoria on board HMAT A19 Afric 22 May 1915

Adelaide, South Australia on board HMAT A19 Afric 26 May 1915

7th Reinforcement Kanowna Group

7th Reinforcement Marere Group

Adelaide, South Australia on board HMAT A61 Kanowna 24 June 1915

Sydney, New South Wales on board HMAT A21 Marere 16 August 1915

8th Reinforcement Kyarra Group

8th Reinforcement Morea Group

Melbourne, Victoria on board HMAT A55 Kyarra 20 August 1915

Adelaide, South Australia on board RMS Morea 26 August 1915

9th Reinforcement Star Of England Group

9th Reinforcement Hororata Group

Adelaide, South Australia on board HMAT A15 Star Of England 21 September 1915

Melbourne, Victoria on board HMAT A20 Hororata 27 September 1915

10th Reinforcement Ballarat Group Melbourne

10th Reinforcement Ballarat Group Adelaide

Melbourne, Victoria on board HMAT A70 Ballarat 9 September 1915

Adelaide, South Australia on board HMAT A70 Ballarat 14 September 1915

11th Reinforcement Hawkes Bay Group

11th Reinforcement Ulysses Group

11th Reinforcement Benalla Group

Melbourne, Victoria on board SS Hawkes Bay 21 October 1915

Melbourne, Victoria on board HMAT A38 Ulysses 27 October 1915

Adelaide, South Australia on board HMAT A24 Benalla 27 October 1915

12th Reinforcement Geelong Group

12th Reinforcement Ceramic Group 

Adelaide, South Australia on board HMAT A2 Geelong 18 November 1915

Melbourne, Victoria on board HMAT A40 Ceramic 23 November 1915

13th Reinforcement Afric Group

13th Reinforcement Borda Group 

Melbourne, Victoria on board HMAT A19 Afric 5 January 1916

Adelaide, South Australia on board HMAT A30 Borda 11 January 1916

14th Reinforcement

Adelaide, South Australia on board HMAT A69 Warilda 10 February 1916

15th Reinforcement

Adelaide, South Australia on board HMAT A68 Anchises 16 March 1916

16th Reinforcement

Adelaide, South Australia on board HMAT A41 Bakara 28 April 1916

17th Reinforcement

Melbourne, Victoria on board HMAT A58 Kabinga 8 May 1916

18th Reinforcement

Adelaide, South Australia on board HMAT A13 Katuna 23 June 1916

19th Reinforcement

Adelaide, South Australia on board RMS Mongolia 13 July 1916

20th Reinforcement

Adelaide, South Australia on board RMS Malwa 27 July 1916

21st Reinforcement

Adelaide, South Australia on board RMS Mooltan 24 August 1916

22nd Reinforcement

Adelaide, South Australia on board HMAT A41 Bakara 4 November 1916

23rd Reinforcement

Adelaide, South Australia on board HMAT A45 Bulla 16 January 1917

24th Reinforcement

Adelaide, South Australia on board HMAT A6 Clan Mccorquodale 5 February 1917

25th Reinforcement

Adelaide, South Australia on board RMS Karmala 8 February 1917

26th Reinforcement Morea Group Adelaide

26th Reinforcement Morea Group Perth

Adelaide, South Australia on board RMS Morea 22 February 1917

Fremantle, Western Australia on board RMS Morea 26 February 1917

27th Reinforcement

Sydney, New South Wales on board HMAT A15 Port Sydney 9 May 1917

28th Reinforcement Port Lincoln Group

28th Reinforcement Kyarra Group

28th Reinforcement Commonwealth Group

Melbourne, Victoria on board HMAT A17 Port Lincoln 22 June 1917

Melbourne, Victoria on board HMAT A55 Kyarra 7 September 1917

Melbourne, Victoria on board HMAT A73 Commonwealth 2 November 1917

29th Reinforcement Kyarra Group

29th Reinforcement Commonwealth Group

Melbourne, Victoria on board HMAT A55 Kyarra 7 September 1917

Melbourne, Victoria on board HMAT A73 Commonwealth 2 November 1917

30th Reinforcement

Melbourne, Victoria on board HMAT A73 Commonwealth 2 November 1917

31st Reinforcement

Melbourne, Victoria on board HMAT A73 Commonwealth 2 November 1917

32nd Reinforcement

Melbourne, Victoria on board HMAT A73 Commonwealth 2 November 1917

33rd Reinforcement

Sydney, New South Wales on board SS Port Darwin 30 April 1918

34th Reinforcement

Sydney, New South Wales on board SS Port Darwin 30 April 1918

See: Troop transport ships for information and photographs about the various ships employed in transporting the troops to Egypt.


Further Reading:

9th Light Horse Regiment, AIF

9th Australian Light Horse Regiment, Roll of Honour 

Battles where Australians fought, 1899-1920


Citation: 9th Australian Light Horse Regiment, AIF, Outline

Posted by Project Leader at 12:01 AM EAST
Updated: Sunday, 31 October 2010 4:00 PM EADT
Sunday, 8 November 2009
9th Australian Light Horse Regiment, Roll of Honour
Topic: AIF - 3B - 9 LHR

9th LHR, AIF

9th Australian Light Horse Regiment

Roll of Honour


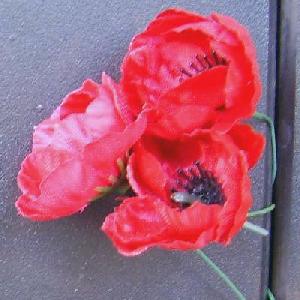
Poppies on the Roll of Honour, Australian War Memorial, Canberra


The Roll of Honour contains the names of all the men known to have served at one time with the 9th Light Horse Regiment and gave their lives in service of Australia, whether as part of the 9th Light Horse Regiment or another unit.


Roll of Honour


Thomas AGNEW, Died of Accident, 26 March 1915

William Arthur Francis ALLAN, Died of Wounds, 11 June 1918

Sidney Ernest ALLASON, Killed in Action, 4 July 1918

Harry ALLEN, Died of Illness, 6 November 1918

Christopher William ALLMOND, Died of Illness, 4 September 1918

Harold Leonard ANTONSON, Died of Illness, 16 October 1918

Charles ARBLASTER, Died of Wounds, 24 July 1916

Alfred ARNOLD, Killed in Action, 7 October 1917

Leslie ATKINSON, Died of Illness, 12 December 1916

Alec Luffman AXTENS, Killed in Action, 30 May 1915


William BAKER, Killed in Action, 3 May 1918

William Albert BAKER, Killed in Action, 28 November 1915

William George BALL, Killed in Action, 3 September 1915

James William BARRY, Died of Wounds, 27 April 1917

Walter George BATES, Killed in Action, 29 August 1915

John Pressey BAVIN, Died of Illness, 20 October 1918

Keith Clarence BENNETT, Killed in Action, 12 November 1917

Joseph BETRO, Died of Wounds, 26 October 1915

Harry BINYON, Killed in Action, 30 May 1915

Walter Lewis BISHOP, Died of Wounds, 23 September 1917

Henry Albert BLACKWELL, Died of Wounds, 29 May 1915

Edward Thomas BLAKE, Died of Wounds, 30 August 1917

Henry BLANCH, Killed in Action, 20 June 1915

Rockley Joseph BOARDMAN, Killed in Action, 1 September 1918

Felix Baron BOCKELBERG, Killed in Action, 3 May 1918

James Lowry BODKIN, Died of Wounds, 1 November 1917

Robert Hugh BOND, Died of Illness, 11 December 1916

Ernest BONE, Died of Illness, 5 October 1918

Josiah Clifton BONEHAM, Died of Illness, 15 October 1918

James Albert BOTHWELL, Died of Accident, 7 August 1917

John BRENNAN, Died of Wounds, 16 October 1915

Allan Reuben BROWN, Died of Illness, 26 March 1916

William BROWNEY, Killed in Action, 28 July 1917

Charles John BRUCE, Killed in Action, 5 August 1916

Alexander Millar BUGBIRD, Killed in Action, 29 August 1915

Robert David BURNSIDE, Killed in Action, 31 August 1916

James Andrew BURROUGH, Died of Illness, 9 December 1915

Michael BYRNE, Died of Wounds, 30 August 1915


Reuben CAIRNS, Killed in Action, 29 August 1915

Philip Ignatius CALLARY, Killed in Action, 29 August 1915

William CAMERON, Killed in Action, 4 September 1915

Thomas CAMPBELL, Killed in Action, 8 April 1917

George Alton CANE, Died of Wounds, 30 August 1915

Percival CAPERN, Killed in Action, 28 August 1915

William Ross CAPPER, Killed in Action, 28 August 1915

Leslie Harry CAREY, Drowned 1 May 1917

Frederick Michael CARNEY, Killed in Action, 1 November 1917

Alexander Lawrence CARRAILL, Died of Wounds, 8 August 1918

Henry James CARROLL, Died of Wounds, 9 August 1916

Reginald Stanley CHRISTIE, Died of Illness, 5 December 1918

Eric Gordon CLARK, Killed in Action, 28 June 1915

Edward Charles CLOUGH, Killed in Action, 29 May 1915

Charles William COLLINS, Killed in Action, 29 November 1915

Alfred Edward COOK, Died of Wounds, 4 July 1915

Clarence George COOPER, Died of Illness, 17 January 1917

Clifford COOPER, Died of Illness, 8 August 1915

Arthur COPELAND, Died of Wounds, 5 September 1917

Alfred CORK, Killed in Action, 19 April 1917

Robert COVERDALE, Killed in Action, 29 August 1915

Walter Hiram CRAVEN, Killed in Action, 29 August 1915

Frank CREER, Died of disease 2 May 1915

Raymond Henry CRITCHFIELD, Died of Illness, 9 September 1919

Michael Parnel CRONIN, Killed in Action, 19 April 1917

Patrick Augustine CROWE, Died of Wounds, 28 March 1918

Thomas William CULPH, Died of Wounds, 14 August 1915


John Newton DAVIES, Killed in Action, 11 March 1917

Perry Thomas DAVIS, Died of Wounds, 27 November 1917

Claude Maxmillian Eugan DAWSON, Died of Illness, 29 October 1918

Walter DAWSON, Killed in Action, 28 August 1915

Albert Thomas DAY, Died of Wounds, 10 August 1915

Garnet DELANTY, Died of Illness, 17 October 1918

Francis James DENNIS, Killed in Action, 6 November 1917

Martin DEVITT, Died of Illness, 7 July 1918

Avery Benjamin DICKINSON, Died of Wounds, 22 July 1915

Thomas DICKINSON, Killed in Action, 28 August 1915

Frederick Roy DICKSON, Died of Illness, 1 February 1920

John Bernard DILLON, Died of Illness, 16 October 1918

Gordon McKellar DOBBIE, Died of Wounds, 26 September 1917

Leopold Daniel DOOLEY, Died of Illness, 7 December 1916

Arthur Denis DORIS, Killed in Action, 28 August 1915

Arthur Christopher DOWN, Died of Wounds, 9 October 1918

Frank Napier DREW, Died of Wounds, 8 August 1915


Arthur Roy EARL, Died of Accident, 26 July 1917

George EDDINGTON, Killed in Action, 2 October 1917

Alfred Lawrence EDWARDS, Killed in Action, 4 September 1917

Francis Patrick EGAN, Died of Illness, 12 May 1916

Fred Bertram ELLIS, Killed in Action, 28 March 1918

Cuthbert ELSDON, Killed in Action, 19 April 1917


Melville Orchard FARMER, Killed in Action, 30 April 1918

George FENNING, Died of Accident, 23 March 1919

William FENTON, Died of Illness, 23 December 1916

James Maxwell FERGUSON, Died of Wounds, 20 March 1919

John Matt FITCHER, Killed in Action, 28 August 1915

William George Gladstone FITZGERALD, Killed in Action, 29 August 1915

Norman MacPherson FLEMING, Killed in Action, 30 April 1918

George Edwin Pearce FLETCHER, Died of Wounds, 20 July 1918

Hedley Vickers FLOWER, Died of Wounds, 30 June 1915

John Lester FOREMAN, Died of Illness, 12 October 1918

Harold Stanley FREEMAN, Died of Illness, 29 January 1916

Edward FROST, Died of Illness, 23 October 1918


William John GALLAGHER, Died of Illness, 13 October 1918

Alfred Joseph GARRATT , Died of Wounds, 18 July 1918

Norman William GATES, Killed in Action, 28 March 1917

John William GAVIN, Killed in Action, 9 August 1916

Percy Alexander GIBBS, Died of Wounds, 12 November 1917

Benjamin Digby GIBSON, Drowned 14 January 1917

John William GILL, Killed in Action, 29 August 1915

Hugh Louden GOOCH, Killed in Action, 28 August 1915

Alick Ferguson GOODE, Killed in Action, 10 September 1917

Arthur Hulme GOTT, Died of Illness, 25 August 1915

William Harry GREEN, Died of Wounds, 3 September 1915

William James GRIBBLE, Killed in Action, 22 June 1915

Thomas GRIFFITHS, Killed in Action, 30 May 1915


George Joseph HAAG, Killed in Action, 30 March 1918

Walter HACKETT, Killed in Action, 22 October 1918

William HAINS, Killed in Action, 19 April 1917

Herbert Bowen HAMLIN, Died of Illness, 30 May 1919

Hubert Herman HANK, Died of Illness, 13 June 1918

Edward Pearce HANRAHAN, Died of Wounds, 9 October 1918

John Albert HARRELL, Killed in Action, 4 February 1917

Maxwell David HARRINGTON, Killed in Action, 29 August 1915

Charles Morley HARRIS, Died of Accident, 23 September 1918

Rowland HARRIS, Died of Illness, 18 March 1917

Samuel HARRIS, Died of Illness, 7 May 1918

Albert Harris HARVEY, Died of Wounds, 3 October 1918

William Edward HARVEY, Killed in Action, 7 August 1915

Frederick Eugene HAWKE, Died of Illness, 4 September 1916

Waldeman Robert HAWKES, Killed in Action, 29 October 1917

Alexander Lincoln HAWSON, Died of Wounds, 12 June 1915

Harold HEATH, Died of Wounds, 3 June 1916

Austin James HEITHERSAY, Died of Wounds, 12 January 1917

John HENNESSY, Died of Illness, 23 July 1915

John Henry HILDEBRAND, Killed in Action, 28 June 1915

Herbert John HILDER, Died of Illness, 27 November 1917

Francis George HIPWORTH, Died of Accident, 20 May 1915

Robert Charles HOCKRIDGE, Died of Illness, 24 July 1915

Herbert Clifford HOLLOWAY, Died of Illness, 3 December 1918

James Patrick HOLOPHY, Died of Wounds, 1 April 1918

Guy HOOPER, Killed in Action, 16 August 1917

John Leslie HOPPING, Killed in Action, 30 June 1915

William John HOY, Died of Illness, 13 October 1916

Roy William HUDSON, Died of Wounds, 18 September 1919

Cyril HUMPHREYS, Killed in Action, 29 August 1915

John Edward HUTCHINS, Died of Accident, 12 June 1919

Arthur Justin Sanford HUTCHINSON, Killed in Action, 19 July 1916

Frank HYDEN, Died of Wounds, 24 October 1917


Alfred John JAFFRAY, Killed in Action, 29 August 1915

Eric James JARRETT, Killed in Action, 28 March 1918

Harold Norman JARRETT, Died of Wounds, 16 September 1915

Arthur Alfred JOHNS, Died of Illness, 11 October 1918

David JOHNSON, Died of Illness, 2 August 1915

Reginald John James JOHNSON, Killed in Action, 27 June 1917

Herbert Malcolm JOHNSTON, Died of Illness, 22 February 1916

Albert Edward JONES, Died of Accident, 24 June 1918

Keith David JONES, Died of Wounds, 2 March 1918

Elias JUDELL, Killed in Action, 9 August 1915


Herbert Clifford Henry KADOW, Killed in Action, 1 September 1918

Frederick Thomas KEANE, Killed in Action, 19 April 1917

Hugh Craine KELLY, Killed in Action, 18 October 1917

Harry KEMP, Killed in Action, 14 October 1917

Francis Burwood KENT, Died of Wounds, 10 July 1915

John Scott KENT, Killed in Action, 29 August 1915

William Thomas KEOUGH, Died of Illness, 18 October 1915

Frederick Arthur KESHAN, Died of Illness, 11 December 1918

Alexander KING, Killed in Action, 6 August 1915

John Fleming KITHER, Died of Illness, 12 November 1918

Adolph KLAR , Died of Wounds, 25 March 1918

William John KNIBBS, Killed in Action, 29 August 1915

Ernest Hyahman KORTMAN, Died of Wounds, 22 August 1917


Alfred James LAKE, Killed in Action, 30 April 1918

Robert William LAKIN, Killed in Action, 22 July 1917

Charles Henry LANE, Died of Wounds, 29 June 1915

Eric Robert LANGE, Died of Wounds, 13 June 1919

Alfred LAWTON, Died of Wounds, 22 April 1917

Claude Michael LEAHY, Killed in Action, 31 October 1917

William Edward LEAR, Killed in Action, 29 August 1915

William James LEARMONTH, Died of Accident, 22 April 1918

James LEMON, Died of Illness, 30 October 1918

Benjamin Cyril LEVIEN, Killed in Action, 28 August 1915

Alfred LEVINGSTON, Died of Illness, 17 November 1917

Thomas Albert LEWIS, Died of Accident, 27 January 1919

John Thomas Joseph LIDDY, Died of Illness, 3 March 1919

Timothy Michael LINEHAN, Died of Wounds, 20 April 1917

Thomas LITSTER, Killed in Action, 5 August 1916

William Horace LLOYD, Killed in Action, 25 March 1918

James Leonard LOCKE, Died of Wounds, 5 June 1915

Arthur LOWRIE, Died of Illness, 31 January 1918


Clement Aloysius Joseph MAHONY, Killed in Action, 11 April 1917

Thomas MAKIN, Killed in Action, 22 June 1915

Fred Stanley MALE, Killed in Action, 27 May 1918

Patrick Joseph MALONEY, Died of Illness, 19 October 1918

George Noble MANN, Died of Wounds, 29 September 1918

Robert MANUEL, Died of Wounds, 3 November 1917

Clifford Roy MARR, Killed in Action, 6 July 1918

George Henry MARSH, Died of Wounds, 12 August 1918

Wallace MAUDE, Killed in Action, 13 August 1915

Christopher Alfred MAUSOLF, Killed in Action, 2 May 1918

Herbert George MAY, Died of Illness, 26 September 1917

Clarence James MCCARRON, Died of Wounds, 21 March 1918

Arthur Elliot MCDONALD, Died of Wounds, 9 September 1915

John Frederick William MCDONALD, Died of Illness, 21 April 1918

Richard Augustine MCDONALD, Died of Illness, 17 October 1918

Duncan MCDOUGALL, Killed in Action, 28 August 1915

Frank Ormond MCEVOY, Killed in Action, 9 April 1917

James Alexander MCGILLIVRAY, Killed in Action, 28 August 1915

Stephen Percival MCGINTY, Killed in Action, 3 May 1918

John Robert MCINTOSH , Died of Wounds, 15 April 1917

Brian MCKENNA, Killed in Action, 19 April 1917

Bernard Scrymgour MCKENZIE, Died of Wounds, 20 January 1918

Leslie John MCLEOD, Died of Illness, 29 August 1915

Angas MCMASTER, Killed in Action, 31 July 1917

Stirling Alexander MCWILLIAM, Died of Wounds, 30 May 1915

Provo William MEDHURST, Killed in Action, 3 May 1918

John Henry MEGAN, Died of Wounds, 29 August 1915

Owen Thomas MERCER, Died of Wounds, 4 June 1915

Albert MIELL, Killed in Action, 7 August 1915

Thomas Francis MILES, Died of Illness, 26 February 1917

Ernest William MILLARD, Died of Wounds, 15 May 1918

Charles Leslie MITCHELL, Died of Wounds, 19 April 1917

William George Delmar MOBBS, Killed in Action, 28 August 1915

Frederick Richard MORGAN, Died of Wounds, 13 October 1918

William MORPHETT, Killed in Action, 10 August 1915

Arthur Oliver MORRELL, Killed in Action, 27 September 1917

Donald James MORRISON, Killed in Action, 31 October 1917

Richard Giles MOULD, Died of Illness, 6 September 1915

Gilbert Charles MOUNSEY, Killed in Action, 9 August 1916

Kenneth Andrew MUDGE, Killed in Action, 19 April 1917

Kenneth Andrew MUDGE, Killed in Action, 19 April 1917

Malcolm George Douglas MURRAY, Died of Illness, 25 October 1918


Leonard Temper NAPPER, Killed in Action, 28 August 1915

William NETTLETON, Killed in Action, 19 April 1917

William NEVIN, Killed in Action, 5 November 1917

Arthur Rastarick NIELD, Killed in Action, 11 April 1918

Clarence Edwin NORTON, Killed in Action, 4 December 1915


William Arthur O'BRIEN, Killed in Action, 5 April 1918

Roy OERMANN, Died of Wounds, 10 June 1918


Percy George PAGET, Died of Wounds, 18 February 1917

Alan Dexter PALMER, Killed in Action, 6 August 1916

Roy Victor PARASIERS, Killed in Action, 4 September 1917

Frederick William PARKER, Died of Wounds, 14 August 1918

Charles Daniel PATTEN, Died of Illness, 9 February 1917

Albert Edward John PETRUSCH, Died of Wounds, 20 June 1915

Leonard PITCHERS, Died of Accident, 13 October 1914

Henry Richard Alfred PIX, Killed in Action, 23 December 1916

Richard Rowett POND, Killed in Action, 9 August 1916

Arthur Henry POPE, Died of Illness, 17 November 1918

Charles Baxter POWELL, Killed in Action, 9 August 1916

George Albert PRICE, Died of Illness, 26 July 1917

James Bryant PULLEINE, Killed in Action, 28 August 1915


Edward RADBURN, Died of Wounds, 10 July 1915

John Thain RAMSAY, Killed in Action, 31 August 1918

Leslie REGAN, Killed in Action, 29 August 1915

George Donald RENTON, Died of Illness, 29 May 1916

Carew REYNELL, Killed in Action, 28 August 1915

John Thomas REYNOLDS, Died of Wounds, 16 November 1917

Frederick James Archibald RICHARDS, Killed in Action, 16 September 1915

Reginald Holman RICHARDS, Died of Wounds, 16 September 1915

William Ernest RICHTER, Died of Wounds, 9 August 1919

Harrie Cecil RICKARD, Killed in Action, 5 September 1915

Eric Bertram RIDGWAY, Died of Wounds, 1 July 1917

William Thomas RILEY, Died of Wounds, 15 June 1915

Kelvin ROACH, Died of Wounds, 20 April 1917

Geoffrey Ochiltree ROBERTSON, Killed in Action, 13 August 1916

Geoffrey De Quetteville ROBIN, Killed in Action, 19 July 1916

Richard George ROBINSON, Died of Wounds, 19 April 1917

Sinclair Archibald ROSIE, Died of Illness, 15 October 1916

Richard Calo ROSS, Killed in Action, 7 June 1917

Dedrich ROZENFELD, Died of Wounds, 9 September 1917

James RUSHTON, Killed in Action, 3 May 1918


Ralph Thomas SABINE, Killed in Action, 28 October 1915

Charles Ernest George SAMPSON, Killed in Action, 28 August 1915

Harold SAMUELS, Killed in Action, 19 April 1917

Spencer Lane SCHOCROFT, Died of Wounds, 13 August 1915

Frank Lesley SCHUYLER, Died of Wounds, 20 April 1917

Andrew SCOTT, Died of Wounds, 2 November 1917

John Burns SCOTT, Killed in Action, 8 October 1915

Percy George SCROOP, Died of Illness, 28 December 1916

George Routhwell SEAGER, Killed in Action, 7 August 1915

William Henry SHADFORTH, Killed in Action, 12 November 1917

Andrew Mitchell SHARP, Killed in Action, 5 August 1916

Gavin SHUTTLEWORTH, Killed in Action, 9 August 1916

James Haining SINCLAIR, Killed in Action, 31 July 1917

Francis William SLATTERY, Killed in Action, 19 September 1916

Arthur Carrington SMEDLEY, Died of Wounds, 9 August 1915

Percival Vernon SMILY, Died of Wounds, 17 June 1915

Alfred John SMITH, Died of Wounds, 14 July 1918

Eric Korf SMITH, Died of Illness, 9 October 1918

Fredrick Joseph SMITH, Killed in Action, 7 August 1915

Harold Edward SMITH, Killed in Action, 29 August 1915

James Charles SMITH, Died of Accident, 29 January 1915

Lawrence Jacob SMITH, Died of Illness, 11 November 1918

Thomas William SMITH, Killed in Action, 30 September 1918

Walter George SMITH, Drowned 15 June 1917

William Japhet James SMITH, Died of Illness, 22 October 1918

James Norman SMYTH, Died of Illness, 25 October 1918

John Hearn SNOWBALL, Died of Wounds, 15 September 1916

Clifton James SPARGO, Died of Illness, 15 October 1918

Henry SPENCER, Died of Wounds, 28 August 1915

Laurans Charles SPINKS, Killed in Action, 28 August 1915

Gilbert STALKER, Died of Illness, 31 December 1916

Allan STEPHENSON, Killed in Action, 5 April 1918

William STEVENS, Died of Illness, 17 October 1918

Hartley James STEWART, Died of Wounds, 23 August 1918

John Thomas STILL, Died of Wounds, 1 November 1917

Harold SULLIVAN, Died of Illness, 6 March 1917

Montague SWETTENHAM, Killed in Action, 15 June 1918

Sydney Louis SWIFT, Died of Wounds, 25 August 1918


Eric Darcy TAPFIELD, Killed in Action, 30 March 1918

Murray Gleeson TAYLOR, Died of Illness, 27 January 1917

Oliver Frank Leopold TAYLOR, Killed in Action, 29 August 1915

Arthur THURLOW, Killed in Action, 12 November 1917

Stephen John TOMKINS, Died of Wounds, 19 April 1917

Charles TOMLINSON, Died of Wounds, 30 July 1917

Geoffrey TRAVERS, Died of Wounds, 11 August 1916

Leslie Albert Llewellyn TREBILCOCK, Died of Illness, 22 July 1915

Percy Oswald TRUMAN, Killed in Action, 19 April 1917

Richard George TUDGEY, Died of Wounds, 7 June 1915

Robert TUHERA, Died of Illness, 12 September 1918


Frank Richard UPHILL, Died of Illness, 21 October 1918


Charles VINCENT, Died of Illness, 24 November 1916


Eric Arnold WADE, Killed in Action, 25 July 1916

George Byron WALLACE, Died of Illness, 20 January 1918

William Nicholls WALLACE, Died of Illness, 26 October 1918

Albert WALLADGE, Died of Illness, 28 August 1915

James Robertson WALTERS, Killed in Action, 30 April 1918

William Victor WEABER, Died of Wounds, 7 June 1918

Thomas Francis WEATHERS, Died of Wounds, 15 June 1915

Alfred Charles WEAVER, Died of Wounds, 31 March 1918

Fredrick Henry WEAVER, Killed in Action, 28 August 1915

Roy Albert WHEATON, Died of Wounds, 23 April 1917

William Henry WHITE, Died of Wounds, 16 September 1915

Francis Charles WILKIN, Killed in Action, 30 September 1918

George WILLIAMSON, Died of Accident, 11 April 1918

Francis WILLOUGHBY, Killed in Action, 28 August 1915

Leslie Samuel WILSON, Killed in Action, 22 June 1915

William Ferguson WOOD, Killed in Action, 6 August 1915

Douglas WOODHOUSE, Died of Wounds, 28 June 1918

Arthur WOODS, Died of Illness, 8 October 1918

Alexander Roberteon WRIGHT, Killed in Action, 6 November 1917

Leo John WYMAN, Killed in Action, 9 August 1915


Andrew Powell YEATES, Died of Wounds, 30 August 1915


Lest We Forget
 

Acknowledgement: Many thanks to Steve Becker who provided much of the raw material that appears in this item.
 

Further Reading:

9th Australian Light Horse Regiment, AIF

Battles where Australians fought, 1899-1920


Citation: 9th Australian Light Horse Regiment, Roll of Honour

Posted by Project Leader at 12:01 AM EAST
Updated: Sunday, 22 November 2009 6:42 AM EAST
Sunday, 9 August 2009
Bir el Abd, Sinai, 9 August 1916, 9th LHR, AIF, Unit History Account
Topic: AIF - 3B - 9 LHR

Bir el Abd

Sinai, 9 August 1916

9th LHR, AIF, Unit History Account


Major Thomas Henry Darley produced a unit history of the 9th Light Horse Regiment, AIF, called With the Ninth Light Horse in the Great War, in which included a section specifically related to the battle of Bir el Abd and is extracted below.

Darley, TH, With the Ninth Light Horse in the Great War, Adelaide, Hassell Press, 1924.


On the 8th the Regiment left Abu Daren with the main body of the Brigade and marched to Hod Dhahab, arriving there at about p.m. At 3 a.m. the following morning the Regiment moved off and joined up with the 8th Light Horse who had been on outpost duty. The 8th then moved off as advance guard with the Regiment in support, and followed by the 10th. The advance guard gained touch with the enemy at 6 a.m. about one mile east of Hod Hassaniya where they held a strong position consisting of two redoubts covering Hod El-Bada. These redoubts were well sited and prepared, with good trenches and field fortifications, and it was evident that they had been prepared during the forward move as strong points to be used in the event of a retirement.

The 8th soon became heavily engaged, and "C" Squadron of the Regiment under the command of Major McKenzie was sent up in support and to protect our right flank; but the greater portion had to be diverted to strengthen the centre of the 8th Light Horse line.

A" Squadron under Major H. M. Parsons was therefore sent up to extend the line to the right and to reinforce where necessary.

It was now discovered that there was a gap of about one and a half miles between the left of our line, and the right of the New Zealanders, and "B" Squadron, under Major T. A. Brinkworth, was sent to fill it. "A" Troop of this squadron was sent to gain touch with the New Zealanders, who were seen to be advancing on Abd, touch being gained near El Birdieh. Large enemy movements were observed in the direction of Bir-el-Abd, and the position in the immediate front was found to be strongly held. Several attempts were made to dislodge this force, but these attempts were all held up by heavy rifle and machine gun fire.

It was reported that away to the south in the vicinity of Hod el-Bayud a column, known as "the mobile column," composed of two squadrons of the 11th Light Horse, the City of London Yeomanry, and two companies of the Imperial Camel Corps, were endeavouring to make a wide flanking movement, and to threaten the enemy's lines of communication. It was essential that they should gain possession of Hod Bayud, which was strongly held by the enemy, and, after heavy fighting, the Hod was captured. They watered their horses and held on during the night, but a determined counter-attack in the early morning of the 10th resulted in the Hod being recaptured by the enemy.

It was understood that the duty assigned to the 3rd Light Horse Brigade consisted of holding the enemy in his present position until the turning movement had been carried out, and during the whole of the day the Inverness Battery did excellent work, especially in the early morning when the enemy attempted to launch a counter-attack. At sundown the enemy made a most determined attack on our position, and four men of "A" Squadron were captured. During this attack the enemy advanced within 200 yards of our position, and as a result of the heavy fire brought to bear on them, a party opposite "C" Squadron put up the white flag.

On seeing these flags, Lieut. G. O. Robertson, after ordering his men to cease fire, stood up and went forward to take their surrender, but as he approached, a heavy cross fire was opened by the enemy on the flank, when he was about 100 yards from the enemy, and he fell badly wounded. On seeing the officer fall, No. 84 Corporal Titan Barrington, of "A" Squadron, a big and powerful man, ran forward with great gallantry and determination, and in spite of the fact that Lieut. Robertson weighed over 13 stone, picked him up and ran with him towards our line.

During the whole of this proceeding the enemy maintained a heavy fire, and a number of Turks rushed out in an effort to capture him, yet in spite of his heavy load, and that he had to cover a distance of nearly 100 yards, he succeeded in reaching our lines in safety. No. 462 L.-Corp. Neyland had in the meantime brought up Lieutenant Robertson's horse, and took the wounded officer to safety under intense fire. This officer, it is regretted to state, succumbed to his injuries shortly after his arrival at Kantara Hospital.

Cpl. Barrington was recommended for the Victoria Cross on the evidence of Lieut. Robertson, Major McLaurin, and Lieut.-Colonel L. C. Maygar, V.C., of the 8th Light Horse, who were eye witnesses, whilst L.-Cpl. Neyland was recommended for the Distinguished Conduct Medal, but no awards were made. It is an astonishing fact that one of the bravest deeds of the war should thus pass unrewarded and the two gallant men were not even mentioned in dispatches for their splendid work.

Of the four men captured, only one, Pte. Rose, survived the terrible treatment meted out by their inhuman captors. He passed through Tripoli, Syria, on his release and met the Regiment, which had just arrived at that place from Homs. He stated that when captured, he and some of the others were wounded, but were immediately taken before a German officer and interrogated. Sgt. H. Sullivan, who had been captured whilst endeavouring to rescue one of the wounded men, was the first to be questioned. On being asked questions of military importance, such as, "Who is your commanding officer, etc., he replied, "I don't know. The German officer immediately replied that he being a sergeant must know these facts, and Sullivan said, "I don't know, for you." The German then threatened to shoot him and had a machine gun brought and placed in front of him, but still this gallant soldier, of Coromandel Valley, South Australia, refused to give any information whatever. The German, after adopting a very threatening attitude, asked various questions, but seeing the determination of the sergeant' not to answer, he finally gave up the attempt. Sergeant Sullivan was reported some time later to have died of dysentery.

The enemy maintained his efforts, continually counter-attacking, but our line held, and at 7 p.m. the enemy retired to their trenches. The 10th Light Horse, who had been held in reserve during the day, now came forward and took up an outpost line in rear of the battle line. As soon as they were in position the Regiment withdrew to Hod Hassaniya for water and supplies.


Further Reading:

9th Light Horse Regiment, AIF

9th Australian Light Horse Regiment, Roll of Honour 

Battle of Romani, Sinai, August 4 to 5, 1916 

Bir el Abd, Sinai, 9 August 1916

Battles where Australians fought, 1899-1920


Citation: Bir el Abd, Sinai, 9 August 1916, 9th LHR, AIF, Unit History Account

Posted by Project Leader at 12:01 AM EADT
Updated: Tuesday, 22 September 2009 8:13 AM EADT
Wednesday, 5 August 2009
Battle of Romani, Sinai, August 4 to 5, 1916, 9th LHR, AIF, Unit History Account
Topic: AIF - 3B - 9 LHR

Battle of Romani

Sinai, August 4 to 5, 1916

9th LHR, AIF, Unit History Account


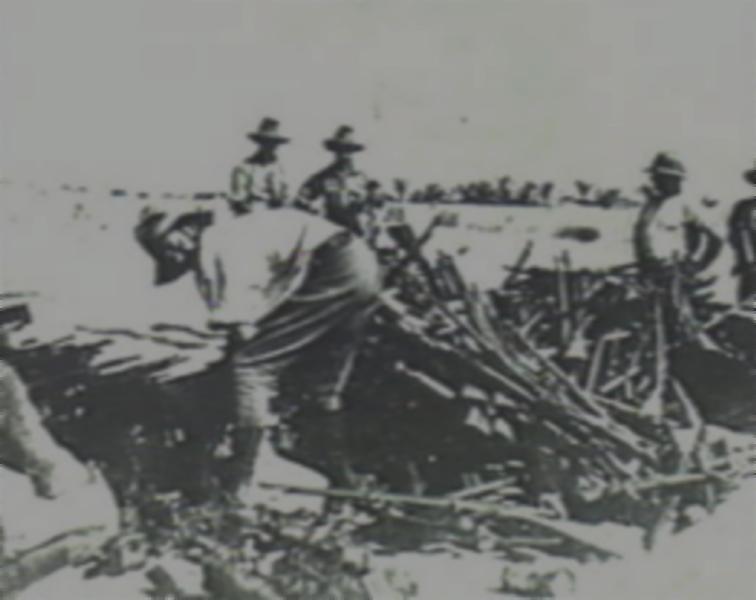
9th LHR men sorting through rifles captured at Hamissah.


Major Thomas Henry Darley produced a unit history of the 9th Light Horse Regiment, AIF, called With the Ninth Light Horse in the Great War, in which included a section specifically related to the battle of Romani and is extracted below.

Darley, TH, With the Ninth Light Horse in the Great War, Adelaide, Hassell Press, 1924, pp. 43 - 47.


CHAPTER XI ROMANI

For some months past it had been known that the enemy were collecting a large force in the vicinity of Bir-el-Abd, whilst smaller parties were scattered amongst the hods energetically developing the water supply. A daring raid had been carried out on the Yeomanry Camp at Qatia and heavy casualties inflicted.

At that time, the British line in this sector ran from Mahamdiya on the Mediterranean, South, covering Romani to Katib Gannit, thence in a series of strong posts to protect the light railway from Kantara to Romani, with headquarters at Kantara.

In the early days of August, reconnoitring patrols were sent out daily in the direction of Hod-el-Arras, Hod Jehierat and Hod Abu-Samara, with special instructions as to searching for water.

At dawn on the 4th August the enemy delivered a heavy frontal attack in a determined effort to seize the railhead at Romani. The attack was so sudden and fierce that for a time they made good progress, and the Light Horse holding the point at which the thrust was directed were forced back by sheer weight of numbers. Their splendid discipline and determination, however, held them together and the enemy were gradually forced to withdraw. Heavy fighting continued throughout the day, but towards evening they withdrew to reorganise.

On the morning of the 4th August, orders were issued to the effect that the Brigade would march out at 8.30 a.m. and would travel as light as possible. No news had reached us of the commencement of the enemy attack, and although an early move had been expected, this short notice took everyone by surprise, arid caused the greatest excitement.

For eight months the Regiment had been practically in standing camps, looking forward to the time when the enemy would come within striking distance, and the long-looked-for moment had apparently arrived. 

Everywhere was bustle and excitement, and the instruction to travel light was certainly carried out, as many did not even take a jacket or spare shirt, expecting that a few hours would see them back in the camp which they had gone to so much trouble to make comfortable. They were, however, destined to receive a rude shock, as it was many weeks before they saw a standing camp again.

Only one hour's notice was given, and in that time supplies of rations, forage, and ammunition had to be drawn and issued, and [43] arrangements made as to the stores which were to be left behind. Still, at the stated time the Regiment was on parade, fully equipped to move, with a strength on parade) of 21 officers, 415 Other ranks, and 459 horses. All Wheeled transport was left behind also 115 men and 87 horses under the command of Lieut AH Nelson.

First orders stated that the Brigade would march via Hod el Arras to Romani, but after proceeding about two miles the direction of the march was changed to Hill 70 which had been held by the New Zealanders. Hill 70 is on the main Kantara-Qatia caravan route, 10 miles north of Bally Bunion, and about seven miles east of the Suez Canal. The Brigade reached Hill 70 at 11.30 am and halted until 5 p.m. Immediately on arrival, the Brigadier left by motor to report to the G.O.C of the sector, and on his return the Brigade moved to Dueidar, arriving at 10 pm and bivouacking for the night.

The point was found to be held by the New Zealanders and Scottish Horse, who found the outposts. During the march, frequent gun flashes had been noticed on our left and information came to hand of the desperate attack made on the line. Desperate fighting was stated to have taken place on a long hill, covering the camp, afterwards named “Mount Royston" after that splendid old soldier, Brigadier General Royston, who, a few days later, was appointed to command the 3rd Light Horse Brigade.

At 4 am on the following morning the Regiment moved out from Dueidar as advance guard to the Brigade followed by the 10th Light Horse, the intention being to attack Hod el-Enna in conjunction with the 5th Light Horse Regiment. On arrival at Bir-el Nuss we gained touch with the headquarters and one squadron of the New Zealand Mounted Rides, who informed us that the enemy attack on Romani had been broken up, and that a number of prisoners and guns had been taken. As was only to be expected, this information caused general rejoicing, and seemed a good omen for the future. A good well having been found in this Hod, the horses were watered and fed, the men also taking the opportunity to make a good meal.

At 9 a.m. the advance was continued in the direction of Hod El Enna, but on receipt of information to the effect that the enemy had vacated that place, the direction of march was altered to Bir Nagid and Hod Hamissah. During this move junction was made with the New Zealanders on our left. At about noon, the advance patrols came in touch with a portion of the enemy rearguard, about one mile west of Bir Nagid, who opened fire, but a few minutes later surrendered to our men.

On moving towards Bir Nagid, the sand plainly showed that large numbers of men and camels had passed towards the east. We accordingly increased our pace as much as the heavy sand would allow and soon came into sight of a string of camels loaded with [44] ammunition. These were promptly shot down, but the drivers escaped. The ammunition (about 40,000 rounds) was captured. The main portion of the enemy rearguard which had taken up a position along a line of sand hills, about two miles N.E. of Bir Nagid, opened a heavy fire on “A” Squadron at 12.40 p.m.

Information was brought in that about one thousand of the enemy were occupying a position covering Hamissah, and orders were immediately issued for the Regiment to deploy for action, "A" Squadron in the centre with two troops of "B" Squadron on each flank, whilst "C" Squadron were to make a wide detour to the south with the object of outflanking and enfilading the enemy's position. "A" and "B" Squadrons advanced to within 700 or 800 yards and dismounted, sending their horses to cover. They then opened a brisk fire and pushed forward as opportunity offered.

At 1 p.m. a message was sent to Brigade Headquarters at Nagid, asking that one squadron be sent in support as the whole Regiment was by this time heavily engaged. In the meantime the enemy, seeing the movement of "C" Squadron, began to withdraw in an easterly direction. The led horses were therefore signalled up, and "A" and "B" Squadrons mounted and pushed forward to the foot of the ridge, where they dismounted and went in with the bayonet.  A sharp fight took place, and Lieut. Ayliffe’s troop captured two officers and 63 men, unwounded, also many sets of arms, and a quantity of stores and equipment. Various other troops captured prisoners in this melee, and when a count was taken the total was found to be 308, of which the Brigade scouts captured 27.

The enemy continued to retire towards a strong position, held by machine guns, covering Hamissah, and at 1.30 p.m. "A" Squadron of the 10th Light Horse arrived under the command of Major Olden. The Inverness Battery, Royal Horse Artillery, had by this time got into position, and quickly put a section into action. This was the first time they had been in action, and their target was a camel convoy carrying machine guns and ammunition at a distance of about 3,000 yards. In spite of the fact that range-taking instruments could not be used, the gunners got on to their target with the first shot, and made splendid practice, their shrapnel being timed to perfection. This somewhat annoyed the enemy, who immediately opened fire on the battery, sending over salvoes of six inch howitzer shells, and the guns were forced to withdraw.

At 2.30 p.m. the remainder of the 10th Light Horse came up and worked round the right flank in conjunction with the Brigade Scouts and "C" Squadron of the Regiment, a number of prisoners and machine guns being captured during the movement.

It was noticed that the enemy machine guns were under the command of German officers and non-commissioned officers, and in one instance, when a party of Turks put up the white flag, a German NCO was seen to shoot the surrendering Turks. At another time [45] when the Brigade Scouts and a troop of the 10th Light Horse under Lieut. J Lyall were collecting prisoners, a German NCO opened fire with his machine gun on a party of the enemy who were in the act of surrendering. This German no doubt stopped, for the time being, the surrender of about 100 Turks.

During the whole of the engagement the enemy guns made good shooting, our small casualty list being chiefly due to the fact that they were firing high explosive shells which buried themselves in the sand before bursting, with the result that the force of the explosion was almost neutralized by the sand. Cases were frequent where shells fell within six or eight feet of men without any worse effect than the inconvenience of being covered in a shower of sand.

As the Regiment continued to advance, the enemy gunners shortened their range, with the result that when it halted the shells fell amongst their own troops, one shell reaching their ammunition convoy with disastrous results. At the end of the day’s fighting it was found that the bag of the Brigade amounted to a total of 10 officers and 415 other enemy ranks, whilst seven machine guns and large quantities of stores had been captured. Although the prisoners appeared to be in good condition they were evidently beginning to feel the strain of having marched on foot through the deserts of the Sinai Peninsula. During the latter part of the retreat march they had been badly fed and were short of water. In fact the only food the writer saw in the possession of this batch of prisoners was dates collected from the neighbouring Hods.

During this engagement Lieut. A. D. Palmer had two machine guns supporting the Regiment and did excellent work, but late in the day he received wounds which unfortunately ended fatally.

At 6.30 p.m. orders were received to fall back on Bir Nagid when the Brigade would bivouac for the night, the 8th Light Horse finding outpost duties. After dark the Brigade left Nagid and moved about two miles in a north-westerly direction where it halted and placed an outpost furnished by the Regiment. At 4 a.m. on the 6th, the Regiment left for Hod EI-Enna to water the horses, but as the guide failed to find the track through the high sand dunes the Regiment returned to Nagid where it halted, horses and men enjoying a well-earned meal.

At 3 p.m. the Brigade moved to Hod Abu Daren, where it camped for the night. The enemy had continued to fall back after the engagement at Hamissah and contact was not gained during the day, but during the march the Brigade was shelled from the north-east with heavy shells, evidently fired at long range, whilst enemy Planes dropped light bombs on the convoy.

At dawn on the 7th, the 8th Light Horse moved off, supported by the Regiment, and shortly after daybreak, about one mile east of Hod Es Sagia, gained touch with the enemy, who brought a very heavy fire to bear. The 9th Regiment moved up in close support [46] and dismounting, sent the horses back to the Hod, one squadron at a time to war. This move was evidently seen by the enemy, who kept up a heavy shrapnel fire both on the troops and on the Hod during the watering. At 2 p.m. the Regiment took over the line from the 8th Light Horse, who moved back to water, having suffered a number of casualties during the early part of the day.

The Inverness Battery occupied a ridge to the west of Hod Es Sagia, close to the ruins of a wonderfully well-preserved ancient temple, of which the tops of the pillars and capitols alone stood above the sand, the remainder having been buried by the drift. The Battery did excellent shooting against the enemy convoys, etc., and made them very careful as to their movements. During the afternoon a force, believed to be New Zealanders, was seen to make an advance about two miles to the north, and to become heavily engaged. After dark the Regiment fell back on Abu Daren and established a line of outposts for the night.


Further Reading:

9th Australian Light Horse Regiment, AIF
 
9th Australian Light Horse Regiment, Roll of Honour 

Battle of Romani, Sinai, August 4 to 5, 1916 

Bir el Abd, Sinai, 9 August 1916

Battles where Australians fought, 1899-1920


Citation: Battle of Romani, Sinai, August 4 to 5, 1916, 9th LHR, AIF, Unit History Account

Posted by Project Leader at 12:01 AM EADT
Updated: Tuesday, 27 October 2009 9:57 PM EADT

Newer | Latest | Older

Full Site Index


powered by FreeFind
Let us hear your story: You can tell your story, make a comment or ask for help on our forum.

Desert Column Forum

A note on copyright

The Australian Light Horse Studies Centre is a not for profit and non profit group whose sole aim is to write the early history of the Australian Light Horse from 1900 - 1920. It is privately funded and the information is provided by the individuals within the group and while permission for the use of the material has been given for this site for these items by various donors, the residual and actual copyright for these items, should there be any, resides exclusively with the donors. The information on this site is freely available for private research use only and if used as such, should be appropriately acknowledged. To assist in this process, each item has a citation attached at the bottom for referencing purposes.

Please Note: No express or implied permission is given for commercial use of the information contained within this site.

A note to copyright holders

The Australian Light Horse Studies Centre has made every endeavour to contact copyright holders of material digitised for this blog and website and where appropriate, permission is still being sought for these items. Where replies were not received, or where the copyright owner has not been able to be traced, or where the permission is still being sought, the Australian Light Horse Studies Centre has decided, in good faith, to proceed with digitisation and publication. Australian Light Horse Studies Centre would be happy to hear from copyright owners at any time to discuss usage of this item.

Contact

Australian Light Horse Studies Centre

eXTReMe Tracker