« September 2024 »
S M T W T F S
1 2 3 4 5 6 7
8 9 10 11 12 13 14
15 16 17 18 19 20 21
22 23 24 25 26 27 28
29 30
You are not logged in. Log in


Search the site:


powered by FreeFind
Volunteer with us.

Entries by Topic All topics
A Latest Site News
A - Using the Site
AAA Volunteers
AAB-Education Centre
AAC-Film Clips
AAC-Photo Albums
AIF & MEF & EEF
AIF - Lighthorse
AIF - ALH - A to Z
AIF - DMC
AIF - DMC - Or Bat
AIF - DMC - Anzac MD
AIF - DMC - Aus MD
AIF - DMC - British
AIF - DMC - BWI
AIF - DMC - French
AIF - DMC - Indian
AIF - DMC - Italian
AIF - DMC - Medical
AIF - DMC - Remounts
AIF - DMC - Scouts
AIF - DMC - Sigs
AIF - DMC - Sigs AirlnS
AIF - DMC - 1 Sig Sqn
AIF - DMC - 2 Sig Sqn
AIF - DMC - Eng
AIF - DMC - Eng 1FSE
AIF - DMC - Eng 2FSE
AIF - DMC - GSR
AIF - 1B - 1 LHB
AIF - 1B - 6 MVS
AIF - 1B - 1 LHMGS
AIF - 1B - 1 Sig Trp
AIF - 1B - 1 LHFA
AIF - 1B - 1 LHR
AIF - 1B - 2 LHR
AIF - 1B - 3 LHR
AIF - 2B - 2 LHB
AIF - 2B - 7 MVS
AIF - 2B - 2 LHFA
AIF - 2B - 2 LHMGS
AIF - 2B - 2 Sig Trp
AIF - 2B - 5 LHR
AIF - 2B - 6 LHR
AIF - 2B - 7 LHR
AIF - 3B - 3 LHB
AIF - 3B - 8 MVS
AIF - 3B - 3 LHB Sigs
AIF - 3B - 3 LHFA
AIF - 3B - 3 LHMGS
AIF - 3B - 3 Sig Trp
AIF - 3B - 8 LHR
AIF - 3B - 9 LHR
AIF - 3B - 10 LHR
AIF - 4B - 4 LHB
AIF - 4B - 4 Sig Trp
AIF - 4B - 9 MVS
AIF - 4B - 4 LHFA
AIF - 4B - 4 LHMGS
AIF - 4B - 4 LHR
AIF - 4B - 11 LHR  
AIF - 4B - 12 LHR
AIF - 5B - 5 LHB
AIF - 5B - 10 MVS
AIF - 5B - 5 LHFA
AIF - 5B - 5 Sig Trp
AIF - 5B - ICC
AIF - 5B - 14 LHR
AIF - 5B - 15 LHR
AIF - 5B - 1er Regt
AIF - 5B - 2 NZMGS
AIF - AASC
AIF - Aboriginal LH
AIF - Badges
AIF - Cars
AIF - Chinese LH
AIF - Double Sqns
AIF - Engineers
AIF - Fr - 22 Corps
AIF - Fr - 13 LHR
AIF - Honour Roll
AIF - HQ - 3rd Echelon
AIF - Marching Songs
AIF - Misc Topics
AIF - NZMRB
AIF - NZMRB - AMR
AIF - NZMRB - CMR
AIF - NZMRB - EFT
AIF - NZMRB - NZMFA
AIF - NZMRB - NZMGS
AIF - NZMRB - OMR
AIF - NZMRB - Sig-Trp
AIF - NZMRB - WMR
AIF - Ships
AIF - Ships - Encountr
AIF - Ships - Una
AIF - WFF
AIF - Wireless Sqn
Battles
BatzA - Australia
BatzA - Broken Hill
BatzA - Liverpool
BatzA - Merivale
BatzB - Boer War
BatzB - Bakenlaagte
BatzB - Belmont
BatzB - Bothaville
BatzB - Buffels Hoek
BatzB - Coetzees Drift
BatzB - Diamond Hill
BatzB - Driefontein
BatzB - Elands
BatzB - Graspan
BatzB - Grobelaar
BatzB - Grootvallier
BatzB - Hartebestfontn
BatzB - Houtnek
BatzB - Karee Siding
BatzB - Kimberley
BatzB - Koster River
BatzB - Leeuw Kop
BatzB - Mafeking
BatzB - Magersfontein
BatzB - Modder River
BatzB - Onverwacht
BatzB - Paardeberg
BatzB - Palmietfontein
BatzB - Pink Hill
BatzB - Poplar Grove
BatzB - Rhenoster
BatzB - Sannahs Post
BatzB - Slingersfontn
BatzB - Stinkhoutbm
BatzB - Sunnyside
BatzB - Wilmansrust
BatzB - Wolvekuil
BatzB - Zand River
BatzG - Gallipoli
BatzG - Anzac
BatzG - Aug 1915
BatzG - Baby 700
BatzG - Evacuation
BatzG - Hill 60
BatzG - Hill 971
BatzG - Krithia
BatzG - Lone Pine
BatzG - Nek
BatzJ - Jordan Valley
BatzJ - 1st Amman
BatzJ - 2nd Amman
BatzJ - Abu Tellul
BatzJ - Es Salt
BatzJ - JV Maps
BatzJ - Ziza
BatzM - Mespot
BatzM - Baghdad
BatzM - Ctesiphon
BatzM - Daur
BatzM - Kurna
BatzM - Kut el Amara
BatzM - Ramadi
BatzN - Naval
BatzN - AE1
BatzN - Cocos Is
BatzN - Heligoland
BatzN - Marmara
BatzN - Zeebrugge
BatzN - Zeppelin L43
BatzNG - Bitapaka
BatzO - Other
BatzO - Baku
BatzO - Egypt 1919
BatzO - Emptsa
BatzO - Karawaran
BatzO - Peitang
BatzO - Wassa
BatzP - Palestine
BatzP - 1st Gaza
BatzP - 2nd Gaza
BatzP - 3rd Gaza
BatzP - Aleppo
BatzP - Amwas
BatzP - Ayun Kara
BatzP - Bald Hill
BatzP - Balin
BatzP - Beersheba
BatzP - Berkusieh
BatzP - Damascus
BatzP - El Auja
BatzP - El Buggar
BatzP - El Burj
BatzP - Haifa
BatzP - Huj
BatzP - JB Yakub
BatzP - Kaukab
BatzP - Khan Kusseir
BatzP - Khuweilfe
BatzP - Kuneitra
BatzP - Megiddo
BatzP - Nablus
BatzP - Rafa
BatzP - Sasa
BatzP - Semakh
BatzP - Sheria
BatzP - Surafend
BatzP - Wadi Fara
BatzS - Sinai
BatzS - Bir el Abd
BatzS - El Arish
BatzS - El Mazar
BatzS - El Qatiya
BatzS - Jifjafa
BatzS - Magdhaba
BatzS - Maghara
BatzS - Romani
BatzS - Suez 1915
BatzSe - Senussi
BatzWF - Westn Front
BW - Boer War
BW - NSW
BW - NSW - 1ACH
BW - NSW - 1NSWMR
BW - NSW - 2NSWMR
BW - NSW - 3ACH
BW - NSW - 3NSWIB
BW - NSW - 3NSWMR
BW - NSW - 5ACH
BW - NSW - A Bty RAA
BW - NSW - AAMC
BW - NSW - Aust H
BW - NSW - Lancers
BW - NSW - NSW Inf
BW - NSW - NSWCBC
BW - NSW - NSWIB
BW - NSW - NSWMR_A
BW - NZ
BW - Qld
BW - Qld - 1ACH
BW - Qld - 1QMI
BW - Qld - 2QMI
BW - Qld - 3ACH
BW - Qld - 3QMI
BW - Qld - 4QIB
BW - Qld - 5QIB
BW - Qld - 6QIB
BW - Qld - 7ACH
BW - QLD - AAMC
BW - SA
BW - SA - 1SAMR
BW - SA - 2ACH
BW - SA - 2SAMR
BW - SA - 3SACB
BW - SA - 4ACH
BW - SA - 4SAIB
BW - SA - 5SAIB
BW - SA - 6SAIB
BW - SA - 8ACH
BW - SA - AAMC
BW - Tas
BW - Tas - 1ACH
BW - Tas - 1TIB
BW - Tas - 1TMI
BW - Tas - 2TB
BW - Tas - 2TIB
BW - Tas - 3ACH
BW - Tas - 8ACH
BW - Vic
BW - Vic - 1VMI
BW - Vic - 2ACH
BW - Vic - 2VMR
BW - Vic - 3VB
BW - Vic - 4ACH
BW - Vic - 4VIB
BW - Vic - 5VMR
BW - Vic - 6ACH
BW - Vic - AAMC
BW - Vic - Scot H
BW - WA
BW - WA - 1WAMI
BW - WA - 2ACH
BW - WA - 2WAMI
BW - WA - 3WAB
BW - WA - 4ACH
BW - WA - 4WAMI
BW - WA - 5WAMI
BW - WA - 6WAMI
BW - WA - 8ACH
BW Gen - Campaign
BW Gen - Soldiers
BW General
Cavalry - General
Diary - Schramm
Egypt - Heliopolis
Egypt - Mena
Gen - Ataturk Pk, CNB
Gen - Australia
Gen - Legends
Gen - Query Club
Gen - St - NSW
Gen - St - Qld
Gen - St - SA
Gen - St - Tas
Gen - St - Vic
Gen - St - WA
Gm - German Items
Gm - Bk - 605 MGC
GW - 11 Nov 1918
GW - Atrocities
GW - August 1914
GW - Biographies
GW - Propaganda
GW - Spies
GW - We forgot
Militia 1899-1920
Militia - Area Officers
Militia - Inf - Infantry
Militia - Inf - 1IB
Militia - Inf - 2IB
Militia - Inf - 3IB
Militia - Inf - NSW
Militia - Inf - Qld
Militia - Inf - SA
Militia - Inf - Tas
Militia - Inf - Vic
Militia - Inf - WA
Militia - K.E.Horse
Militia - LH
Militia - LH - Regts
Militia - LH - 1LHB
Militia - LH - 2LHB
Militia - LH - 3LHB
Militia - LH - 4LHB
Militia - LH - 5LHB
Militia - LH - 6LHB
Militia - LHN - NSW
Militia - LHN - 1/7/1
Militia - LHN - 2/9/6
Militia - LHN - 3/11/7
Militia - LHN - 4/6/16
Militia - LHN - 5/4/15
Militia - LHN - 6/5/12
Militia - LHN - 28
Militia - LHQ - Qld
Militia - LHQ - 13/2
Militia - LHQ - 14/3/11
Militia - LHQ - 15/1/5
Militia - LHQ - 27/14
Militia - LHS - SA
Militia - LHS - 16/22/3
Militia - LHS - 17/23/18
Militia - LHS - 24/9
Militia - LHT - Tas
Militia - LHT - 12/26
Militia - LHV - Vic
Militia - LHV - 7/15/20
Militia - LHV - 8/16/8
Militia - LHV - 9/19
Militia - LHV - 10/13
Militia - LHV - 11/20/4
Militia - LHV - 19/17
Militia - LHV - 29
Militia - LHW - WA
Militia - LHW-18/25/10
Militia - Military Orders
Militia - Misc
MilitiaRC - Rifle Clubs
MilitiaRC - NSW
MilitiaRC - NT
MilitiaRC - Qld
MilitiaRC - SA
MilitiaRC - Tas
MilitiaRC - Vic
MilitiaRC - WA
Militiaz - New Zealand
Tk - Turkish Items
Tk - Army
Tk - Bks - Books
Tk - Bks - 1/33IR
Tk - Bks - 27th IR
Tk - Bks - Air Force
Tk - Bks - Yildirim
Tk - POWs
Wp - Weapons
Wp - Hotchkiss Cav
Wp - Hotchkiss PMG
Blog Tools
Edit your Blog
Build a Blog
RSS Feed
View Profile
Open Community
Post to this Blog
Site Index
Education Centre
LH Militia
Boer War
Transport Ships
LH Battles
ALH - Units
ALH - General
Aboriginal Light H
Weapons
Ottoman Sources

"At a mile distant their thousand hooves were stuttering thunder, coming at a rate that frightened a man - they were an awe inspiring sight, galloping through the red haze - knee to knee and horse to horse - the dying sun glinting on bayonet points..." Trooper Ion Idriess

The Australian Light Horse Studies Centre aims to present an accurate history as chroniclers of early Australian military developments from 1899 to 1920.

The Australian Light Horse Studies Centre site holds over 12,000 entries and is growing daily.

Contact: Australian Light Horse Studies Centre

Let us hear your story: You can tell your story, make a comment or ask for help on our Australian Light Horse Studies Centre Forum called:

Desert Column Forum

WARNING: This site contains: names, information and images of deceased people; and, language which may be considered inappropriate today.

Wednesday, 30 September 2009
11th Australian Light Horse Regiment, Contents
Topic: AIF - 4B - 11 LHR

11th LHR, AIF

11th Australian Light Horse Regiment

Contents


11th Light Horse Regiment Colour Patch after February 1917


The 11th Light Horse Regiment was formed as part of the 4th Australian Light Horse Brigade, 1915 , 4th Contingent and attached to the Australian Division. The 11th Light Horse Regiment was a composite regiment with two squadrons made up by recruits from the 1st Military District which incorporated all of Queensland, Darwin and Northern New South Wales while the last squadron, "C" Squadron was composed of men from the 4th Military District [South Australia and the Broken Hill region of New South Wales].


Structure

The Australian Light Horse – Structural outline

Australian Light Horse Order of Battle


Corps

Desert Mounted Corps (DMC)


Division

Australian Mounted Division


Brigade

Imperial Camel Corps - units

4th Light Horse Brigade


Regiment

11th Australian Light Horse Regiment


History

Romani (Battle of Aweidia)

Battle of Romani, Sinai, August 4 to 5, 1916, 11th LHR, AIF, War Diary Account (Battle of Aweidia) 

Battle of Romani, Sinai, August 4 to 5, 1916, 11th LHR, AIF, Unit History Account (Battle of Aweidia) 

Beersheba

The Battle of Beersheba, Palestine, 31 October 1917, 11th LHR, AIF, Unit History Account 

Es Salt Raid

11th LHR, AIF account about the 2nd Es Salt Raid – Chapter XVI

Jordan Valley

11th LHR, AIF account about the Jordan Valley – Chapter XVII


Routine Orders

One of the best sources of information available for understanding the immediate challenges facing a regiment is to be found in the Routine Orders. They are a wealth of detail. The Routine Orders provide an unvarnished history of the Regiment.

11th LHR Routine Order 101, 18 June 1916


Embarkation

Full Roll

Roll: A - C

Roll: D - F

Roll: G - J

Roll: K - L

Roll: M - Q

Roll: R - S

Roll: T - Z


Individual Rolls

Regimental Headquarters Section

"A" Squadron

"B" Squadron

"C" Squadron

Machine Gun Section

1st Reinforcements Medic Group 

1st Reinforcements Borda Group

2nd Reinforcements Kanowna Group

2nd Reinforcements Shropshire Group 

3rd Reinforcements Kyarra Group 

3rd Reinforcements Star Of England Group

4th Reinforcements Hymettus Group

4th Reinforcements Star Of England Group 

5th Reinforcements Warilda Group 

5th Reinforcements Ballarat Group

6th Reinforcements Mashobra Group 

6th Reinforcements Benalla Group 

6th Reinforcements Hawkes Bay 23 October Group 

6th Reinforcements Hawkes Bay 26 October Group

7th Reinforcements Hawkes Bay Group 

7th Reinforcements Suffolk Group 

7th Reinforcements Geelong Group

8th Reinforcements

9th Reinforcements

10th Reinforcements

11th Reinforcements

12th Reinforcements

13th Reinforcements

18th Reinforcements

19th Reinforcements

20th Reinforcements


Personnel

865 Sgt Percy Charles POINTON


Roll of Honour

11th Australian Light Horse Regiment, Roll of Honour  

Lest We Forget


Further Reading:

11th Australian Light Horse Regiment, AIF
 
11th Australian Light Horse Regiment, Roll of Honour 

Battles where Australians fought, 1899-1920


Citation: 11th Australian Light Horse Regiment, Contents

Posted by Project Leader at 12:01 AM EADT
Updated: Monday, 4 January 2010 11:42 AM EAST
Tuesday, 29 September 2009
11th Australian Light Horse Regiment, AIF, Outline
Topic: AIF - 4B - 11 LHR

11th LHR, AIF

11th Australian Light Horse Regiment

Outline


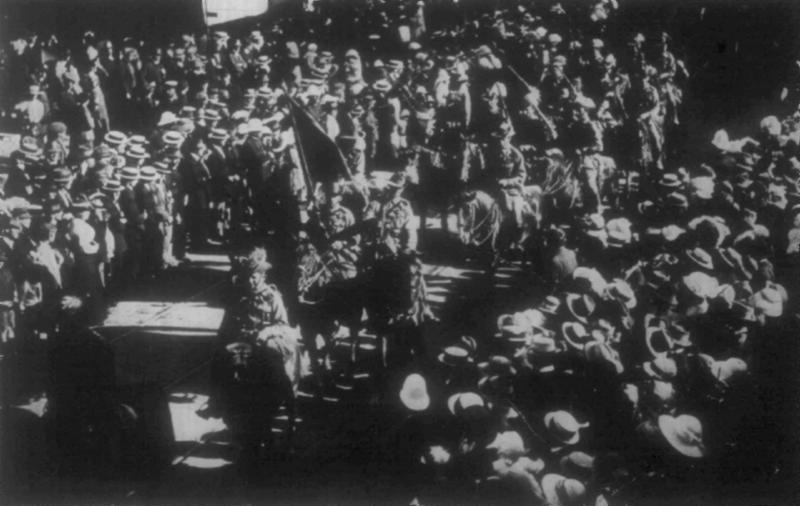
11th Light Horsemen parading through Brisbane, Queensland, June 1915.

[From: The Queenslander, 6 June 1915, p. 21.]


Formation

The 11th Light Horse Regiment was formed as part of the 4th Australian Light Horse Brigade, 1915 , 4th Contingent and attached to the Australian Division. The 11th Light Horse Regiment was a composite regiment with two squadrons made up by recruits from the 1st Military District which incorporated all of Queensland, Darwin and Northern New South Wales while the last squadron, "C" Squadron was composed of men from the 4th Military District [South Australia and the Broken Hill region of New South Wales]. The 11th Light Horse Regiment was established at Enoggera Training Camp to the west of Brisbane, Queensland, at the end of March 1915. The South Australian members trained at Morphettville Race Track Training Camp to the west of Adelaide, South Australia. 

"A" Squadron recruited from Queensland.

"B" Squadron recruited from Queensland.

"C" Squadron recruited from South Australia.


Training 


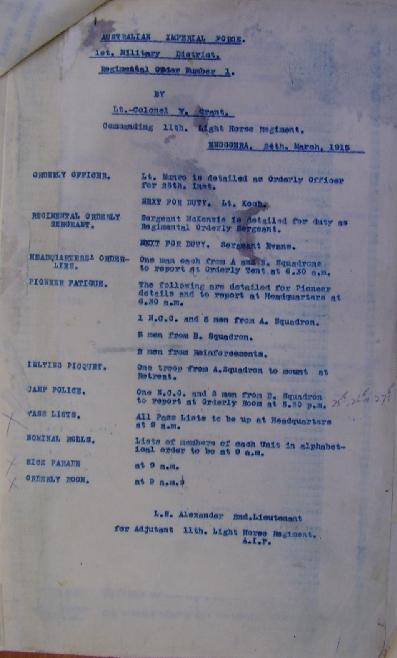
11th Light Horse Regiment Routine Order No 1, 24 March 1915

[Click on page for larger version.]


The 11th Light Horse Regiment commenced training at Enoggera Training Camp to the west of Brisbane, Queensland, at the end of March 1915. The South Australian members trained at Morphettville Race Track Training Camp and later moving to the Mitcham Training Camp to the south of Adelaide, South Australia. On 2 May 1915, the 11th Light Horse Regiment came together at Fraser’s Paddock Camp, outside Brisbane, and trained as a single Regiment as opposed to previous composite regiments when training occurred at different locations.


Embarkation

Embarkation of the 11th Light Horse Regiment was accomplished in two groups using both the HMAT A7 Medic and HMAT A30 Borda from Brisbane, Queensland. 


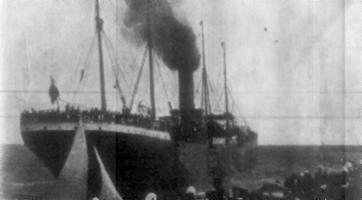
White Star Liner Medic leaving Port Melbourne, 28 October 1899

[See: His Majesty's Australian Transports [HMAT] Ships, A7.


The 11th Light Horse Regiment Headquarters, Machine Gun Section, "A" and "C" Squadrons embarked on the HMAT A7 Medic from Brisbane, Queensland, 2 June 1915.


HMAT A30 Borda
 
[See: His Majesty's Australian Transports [HMAT] Ships, A30.


11th Light Horse Regiment "B" Squadron embarked on the  HMAT A30 Borda from Brisbane, Queensland, 16 June 1915.

The 11th Light Horse Regiment sailed to Egypt and disembarked on 23 July 1915.


Colour Patch

Initially, the only colour separation of the various Australian mounted troops was by use of the pennant. The marker pennants were carried on poles to mark lines troop lines in camps in Egypt. They were not lance pennants as the Australian lancers had red over white pennants on their lances.


Pennant of the 11th Light Horse Regiment


While this pennant was useful in distinguishing horse and troop lines, it failed to identify the individual with a unit. The AIF 1st Australian Division Standing Orders issued in December 1914 ordered the Australian Light Horse Regiments to wear a 4 inch wide [10.2cm] blue armband with the regiment name marked on the band in black lettering.

The earlier systems proved to be ineffective so to assist with identification of the men in the various units within the AIF, Divisional Order No 81 (A) Administration was issued at Mena on 8 March 1915 detailing the Colour Patch for the 11th Light Horse Regiment as others received their colours. The colour patch was made of cloth 1¼ inches wide and 2¾ inches long and worn on the sleeve one inch below the shoulder seam.


First 11th Light Horse Regiment Colour Patch
 
 
The first colour patch for the 11th Light Horse Regiment was a circle with white over red. This was worn by the men from the renamed 11th Light Horse Regiment became the 1st Camel Regiment.


Second 11th Light Horse Regiment Colour Patch


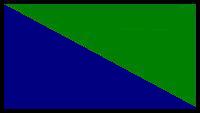
The reformed 11th Light Horse Regiment as part of the 4th Australian Light Horse Brigade, Australian Mounted Division, carried the blue Brigade colour as the lower triangle part of the colour patch, while the green unit colour was on the top. This is illustrated with the above presentation.


Aden

During the voyage to Egypt, the part of the 11th Light Horse Regiment travelling on the HMAT A7 Medic was diverted to Aden and landed on 12 July 1916 to bolster the defences of the British garrison which was under pressure from Yemeni tribesmen who were threatening an attack. By 18 July no attack had occurred and the threat diminished allowing the Regiment re-embarked to Egypt.


Gallipoli

As mounted troops, the Light Horse was considered to be unsuitable for work in Gallipoli. The mounted troops volunteered to operate as infantry. Because of the level of casualties at Gallipoli, the 11th Light Horse Regiment was broken up on 26 August 1915 with squadrons being allotted to other Regiments as reinforcements.

"A" Squadron became "D" Squadron,  2nd Australian Light Horse Regiment.

"B" Squadron became "D" Squadron, 5th Australian Light Horse Regiment.

"C" Squadron became "D" Squadron, 9th Australian Light Horse Regiment.

The various squadrons of the Regiment were deployed on primarily defensive activities throughout the stay at Gallipoli. The various squadrons of the 11th Light Horse Regiment left the peninsula during December 1915.


Defence of Egypt

After the return to Egypt, on 19 February 1916, the 11th Light Horse Regiment reformed and re-equipped. On 28 February 1916, the 11th Light Horse Regiment moved to the Suez Canal taking part in its defence. The work was hot and monotonous.


Sinai

After many months service in the Sinai, during September 1916 the 11th Light Horse Regiment was redesignated as the 1st Camel Regiment. The Regiment continued to see further service in the Sinai. 


Palestine

During the reorganisation of the Light Horse Divisions, the Regiment resumed its old identity as the 11th Light Horse Regiment in February 1917. The 11th Light Horse Regiment became part of the 4th Light Horse Brigade in the Imperial Mounted Division and then Australian Mounted Division.

The 11th Light Horse Regiment  took part in the Second Battle of Gaza on 19 April 1917 and suffered the heaviest casualties since Gallipoli.

The 11th Light Horse Regiment took part in the Battle of Beersheba but while they were part of the 4th Light Horse Brigade, the 11th Light Horse Regiment took no part in the charge.

On 7 November 1917, while charging at Tel el Sheria, a troop became separated from the squadron and was totally destroyed.

The 11th Light Horse Regiment and then took part in the follow up actions that lasted until early January 1918.

From this time onwards, for the next two months, the 11th Light Horse Regiment remained in continuous combat action until relieved for three months refit and training at Deir el Belah from early January 1918.

In early April 1918, the 11th Light Horse Regiment moved into the Jordan Valley and took part in the invasion of Moab and took Es Salt during the action of 30 April – 4 May 1918. Unfortunately, due to a Turkish attack on the lines of communication which was being defended by 4th Light Horse Brigade, this raid nearly turned into a disaster where the Turkish forces almost cut off the Australian Mounted Division in the hills.


Megiddo

In a move that converted the Light Horse into full cavalry, the Australian Mounted Division was issued with swords during August and early September 1917. The Australian Mounted Division went to work training with swords and undertaking cavalry work.

On 19 September 1918 the Battle of Megiddo began. The infantry over ran the Turkish defensive trenches allowing the cavalry to debouch into the Turkish hinterland. The 11th Light Horse Regiment participated in the breakthrough which moved rapidly through the north of Palestine. At the end of the first week, it was obvious that the way to Damascus was open and so a second push occurred on the heels of the first assault. On 1 October 1918, Damascus was taken.

After a rest in Damascus, the 11th Light Horse Regiment moved towards Homs when the Turks surrendered on 30 October 1918.


Return to Australia

After the conclusion of hostilities, the 11th Light Horse Regiment was marked to return to Australia. Prior to that action, one of the saddest actions occurred for the Australian Lighthorsemen, they had to farewell their best friends, the horses. All the Light Horse unit horses' health was ascertained with the fit horses being transferred to the Indian Cavalry while those in poor condition were destroyed by the Veterinary units.

On 13 March 1919 the 11th Light Horse Regiment was deployed  to assist in suppressing the Egyptian Uprising. When the revolt collapsed, the 11th Light Horse Regiment embarked on the 17 July 1919 for the long voyage to Australia where the unit was disbanded. 


Commanding Officers

Lieutenant Colonel William Grant
Lieutenant Colonel John William Parsons
Lieutenant Colonel Percival John Bailey
 

Decorations earned by the 11th Light Horse Regiment

  • 4 DSO - Distinguished Service Orders
  • 9 MC & 1 Bar - Military Crosses
  • 6 DCM - Distinguished Conduct Medals
  • 13 MM- Military Medals
  • 27 MID - Mentioned in Despatches
  • 2 foreign awards 


Campaigns

Gallipoli

  • Sari Bair
  • Gallipoli 1915-1916

Egypt

  • Defence of Egypt

Palestine

  • Second Battle of Gaza
  • Third Battle of Gaza
  • Beersheba
  • El Mughar
  • Nebi Samwill
  • Jerusalem
  • Jericho
  • Es Salt
  • Megiddo
  • Sharon
  • Palestine 1917-1918


Casualties suffered by the 11th Light Horse Regiment

  • 95 killed
  • 521 wounded


War Diary

The Australian War Memorial has put these on line and may be accessed here:

11th Light Horse Regiment War Diaries.


Embarkations:

The following list details all the embarkations in support of the 11th Light Horse Regiment, AIF, during the Great War. Each entry details to formation and the ships on which the units embarked with the date and place of embarkation. The detail of the formation is linked to a list of men who embarked upon that ship on the specific date.


Regimental Headquarters Section

Brisbane, Queensland on board HMAT A7 Medic 2 June 1915

"A" Squadron

Brisbane, Queensland on board HMAT A7 Medic 2 June 1915

"B" Squadron

Brisbane, Queensland on board HMAT A30 Borda 16 June 1915

"C" Squadron

Brisbane, Queensland on board HMAT A7 Medic 2 June 1915

Machine Gun Section

Brisbane, Queensland on board HMAT A7 Medic 2 June 1915

1st Reinforcements Medic Group 

1st Reinforcements Borda Group 

Brisbane, Queensland on board HMAT A7 Medic 2 June 1915

Adelaide, South Australia on board HMAT A30 Borda 23 June 1915

2nd Reinforcements Shropshire Group  

2nd Reinforcements Kanowna Group

Sydney, New South Wales on board HMAT A9 Shropshire 20 August 1915

Adelaide, South Australia on board HMAT A61 Kanowna 24 June 1915

3rd Reinforcements Kyarra Group 

3rd Reinforcements Star Of England Group

Brisbane, Queensland on board HMAT A55 Kyarra 16 August 1915

Adelaide, South Australia on board HMAT A15 Star Of England 21 September 1915

4th Reinforcements Hymettus Group

4th Reinforcements Star Of England Group  

Brisbane, Queensland on board HMAT A1 Hymettus 17 September 1915

Adelaide, South Australia on board HMAT A15 Star Of England 21 September 1915

5th Reinforcements Warilda Group 

5th Reinforcements Ballarat Group 

Brisbane, Queensland on board HMAT A69 Warilda 5 October 1915

Adelaide, South Australia on board HMAT A70 Ballarat 14 September 1915

6th Reinforcements Mashobra Group 

6th Reinforcements Benalla Group 

6th Reinforcements Hawkes Bay 23 October Group 

6th Reinforcements Hawkes Bay 26 October Group

Sydney, New South Wales on board HMAT A47 Mashobra 4 October 1915

Adelaide, South Australia on board HMAT A24 Benalla 27 October 1915

Sydney, New South Wales on board SS Hawkes Bay 23 October 1915

Melbourne, Victoria on board SS Hawkes Bay 26 October 1915

7th Reinforcements Hawkes Bay Group 

7th Reinforcements Suffolk Group 

7th Reinforcements Geelong Group

Sydney, New South Wales on board SS Hawkes Bay 23 October 1915

Sydney, New South Wales on board HMAT A23 Suffolk 30 November 1915

Adelaide, South Australia on board HMAT A2 Geelong 18 November 1915

8th Reinforcements

Sydney, New South Wales on board HMAT A10 Karoo 5 May 1916

9th Reinforcements

Brisbane, Queensland on board HMAT A49 Seang Choon 4 May 1916

10th Reinforcements

Sydney, New South Wales on board RMS Mongolia 8 July 1916

11th Reinforcements

Sydney, New South Wales on board RMS Malwa 22 July 1916

12th Reinforcements

Sydney, New South Wales on board RMS Mooltan 19 August 1916

13th Reinforcements

Melbourne, Victoria on board HMAT A65 Clan Macewen 9 October 1916

18th Reinforcements

Sydney, New South Wales on board HMAT A15 Port Sydney 9 May 1917

19th Reinforcements

Sydney, New South Wales on board HMAT A15 Port Sydney 9 May 1917

20th Reinforcements

Sydney, New South Wales on board HMAT A38 Ulysses 19 December 1917

See: Troop transport ships for information and photographs about the various ships employed in transporting the troops to Egypt.


Further Reading:

11th Australian Light Horse Regiment, AIF
 
11th Australian Light Horse Regiment, Roll of Honour 

Battles where Australians fought, 1899-1920


Citation: 11th Australian Light Horse Regiment, AIF, Outline

Posted by Project Leader at 12:01 AM EADT
Updated: Saturday, 9 January 2010 8:56 PM EAST
Saturday, 26 September 2009
11th Australian Light Horse Regiment, Roll of Honour
Topic: AIF - 4B - 11 LHR

11th LHR, AIF

11th Australian Light Horse Regiment

Roll of Honour


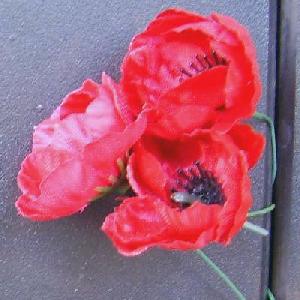
Poppies on the Roll of Honour, Australian War Memorial, Canberra


The Roll of Honour contains the names of all the men known to have served at one time with the 11th Light Horse Regiment and gave their lives in service of Australia, whether as part of the 11th Light Horse Regiment or another unit.


Roll of Honour


William Harold BAIN , Killed in Action, 2 May 1918.

Bertie Gerald BARRETT , Killed in Action, 7 August 1916.

John William BAXTER , Died of Wounds, 1 May 1918.

Benjamin BEETHAM , Killed in Action, 19 April 1917.

Thomas Albert BENNETT , Died of Wounds, 7 November 1917.

Lawrence BERWICK , Killed in Action, 2 April 1917.

James BLACK , Killed in Action, 24 April 1918.

Robert BLACK , Died of Wounds, 8 May 1918.

William BLOOMFIELD , Killed in Action, 25 September 1918.

Victor Godfrey BOTTOMLEY , Killed in Action, 19 April 1917.

John BOYDLE , Died of Wounds, 8 September 1915.

Horace BRAHAM , Died of Disease, 21 October 1918.

Frederick Charles BUCKHOLTZ , Died of Disease, 27 October 1918.

William John BURTON , Died of Wounds, 8 May 1918.


Frank Banister CAMPBELL , Died of Wounds, 20 May 1917.

Frederick Michael CARNEY , Killed in Action, 1 November 1917.

Douglas CARRINGTON , Killed in Action, 19 April 1917.

Ernest James CHANDLER , Killed in Action, 12 August 1918.

Edward James CLEMENTS , Died of Wounds, 19 April 1917.

George COLEMAN , Killed in Action, 7 November 1917.

Francis Aloysius CONNOLLY , Killed in Action, 19 April 1917.

Francis COOPER , Died of Disease, 20 December 1915.

Edward CRAWFORD , Died of Disease, 31 January 1918.

Harold Nesbit CUMMINS , Died of Wounds, 1 December 1917.


George DARE , Died of Wounds, 18 October 1917.

Ivo Virgel DAVIDSON , Died of Disease, 27 January 1917.

Perry Thomas DAVIS , Died of Wounds, 27 November 1917.

Martin DEVITT , Died of Disease, 7 July 1918.

Daryl James Gilchrist DODDS , Killed in Action, 25 September 1918.

Alexander DONALDSON , Killed in Action, 23 September 1918.

William DONALDSON , Died of Wounds, 26 September 1918.

Maurice Michael DONNELLY , Killed in Action, 19 April 1917.

Harry DOWIE , Killed in Action, 4 July 1917.

Alexander Mark DOWNIE , Killed in Action, 14 July 1918.

John Denis DUNN , Killed in Action, 28 March 1918.

Patrick Bernard DWYER , Killed in Action, 3 May 1917.


Francis Patrick EGAN , Died of Disease, 12 May 1916.

Frederick Bertram ELLIS , Killed in Action, 28 March 1918 .

William EMMERT , Killed in Action, 14 July 1918.


George FALLON , Died of Wounds, 10 August 1916.

Frederick Garnet FARLOW , Killed in Action, 25 September 1918.

William FENTON , Died of Disease, 23 December 1918.

Cyril John Alfred FLYNN , Killed in Action, 7 November 1917.

William Bateman FORSTER , Killed in Action, 7 November 1917.

William Albert FRASER , Died of Wounds, 9 November 1915, and subsequently buried at sea.

Edward FROST , Died of Disease, 23 October 1918.


Herbert John GEE , Killed in Action, 25 September 1918.

Cecil GERMAIN , Died of Wounds, 1 May 1918.

Thomas GERRARD , Died of Disease, 21 June 1916.

Harold GIBBON , Killed in Action, 7 August 1916.

Alphonsus GILLIGAN , Died of Disease, 29 October 1918.

Thomas Lambert GLASBY , Killed in Action, 7 August 1916.

Frederick GOLDEN , Died of Disease, 9 October 1918.

Lucas Joseph Paul GOLIK , Killed in Action, 2 May 1918.

Clement Francis GOOD , Killed in Action, 4 May 1918.


Reginald George HALLAM , Died of Disease, 9 October 1918.

Frederick Allan Anthony HICKS , Died of Wounds, 23 September 1915.

Havelock HIGGS , Killed in Action, 1 November 1917 .

Herbert John HILDER , Died of Disease, 27 November 1917.

Alexander Forbes HOGARTH , Died of Disease, 6 August 1915.

Edgar Stanley HOWELL , Killed in Action, 5 August 1916.

William Edward Ludlow HUGHES , Killed in Action, 25 September 1918.

James John HULL , Killed in Action, 7 November 1917.


Pelham Steane JACKSON , Died of Wounds, 19 April 1917.

Eric James JARRETT , Killed in Action, 28 March 1918.

Harold Norman JARRETT , Died of Wounds, 16 September 1915, and subsequently buried at sea.

Thomas Norman JOHNSON , Killed in Action, 20 July 1916.

George Richard Somerville JOHNSTON , Died of Wounds, 10 November 1915.

John JOHNSTON , Died of Wounds, 1 June 1918 .

Stanley McGillivray JOHNSTON , Killed in Action, 2 May 1918.

Keith David JONES , Died of Wounds, 2 March 1918.


John Joseph KENNY , Killed in Action, 19 April 1917.

William Thomas KEOGH , Died of Disease, 18 October 1915.

William Edward KERRIGAN , Killed in Action, 31 October 1917.

Thomas Harold KIMPTON , Killed in Action, 24 October 1917.

Louis Paul KREIG , Died of Accident, 19 August 1918.


Alfred James LAKE , Killed in Action, 30 April 1918.

Frank Pierpoint LAXTON , Died of Wounds, 19 April 1917.

Wilfred LEACH , Died of Disease, 18 March 1917.

Lionel Kenneth LEE , Died of Disease, 5 April 1919.

James LEMON , Died of Disease, 30 October 1918.

Jack (John) LESWELL , Killed in Action, 15 October 1916.

Alfred LEVINGSTON , Died of Disease, 17 November 1917.

William Jack LINEDALE , Killed in Action, 7 November 1917.

Henry LITTLE , Killed in Action, 7 November 1917.

Thomas LLOYD , Killed in Action, 22 December 1916.

Edward Cahill LOUGHRAN , Died of Wounds, 25 May 1918.


John MALLETT , Died of Disease, 18 February 1916.

Clifford Roy MARR , Killed in Action, 6 July 1918.

Christopher Alfred MAUSOLF , Killed in Action, 2 May 1918.

William McBURNIE , Died of Wounds, 22 October 1917.

John McCARTHY , Killed in Action, 25 September 1918.

Michael Henry McCARTHY , Killed in Action, 19 April 1917.

Richard Augustus McDONALD , Died of Disease, 17 October 1918.

Alexander Stuart McGREGOR , Died of Disease, 14 April 1917.

Ernest McKAY , Killed in Action, 25 September 1918 .

Lewis Fordyce McKAY , Killed in Action, 10 August 1916.

Bernard Scrymgour McKENZIE , Died of Accident, 20 January 1918.

Thomas Mclean McLAREN , Killed in Action, 8 September 1915.

Ernest William MILLARD , Died of Wounds, 15 May 1918.

William Casper MILLER , Killed in Action, 10 April 1918 .

Roderick MORRISON , Died of Disease, 10 December 1917 .

Kenneth Andrew MUDGE , Killed in Action, 19 April 1917 .

Marcus Bowerman MUIR , Died of Wounds, 30 September 1918.

Arthur NEWMAN , Died of Disease, 19 October 1918.


Michael NUSS , Died of Wounds, 10 November 1917.


William James O'BRIEN , Died of Disease, 2 November 1915.

Peter Matthew O'DOWD , Killed in Action, 19 April 1917.

Timothy James O'NEILL , Killed in Action, 7 November 1917.

Joseph Lionel Alexander OSBORNE , Killed in Action, 10 April 1918 .


Joseph Henry PASCOE , Killed in Action, 22 September 1915.

Alexander Learmouth PATERSON , Died of Disease, 6 November 1918.

Frederick William PATERSON , Died of Wounds, 1 May 1918.

Robert Portway PLEDGER , Killed in Action, 25 September 1918.

John Joyce POSTLETHWAITE , Killed in Action, 2 November 1915.

Claude POWELL , Killed in Action, 1 May 1918.

John Richard PRENTICE , Died of Disease, 1 October 1915.


Thomas Alexander RANKIN , Killed in Action, 7 November 1917.

Alfred Charles RANN , Died of Wounds, 26 November 1915.

George Edward RATHJEN , Killed in Action, 19 April 1917.

John Thomas REYNOLDS , Died of Wounds, 16 November 1917.

Frederick James Archibald RICHARDS , Died of Wounds, 16 September 1915.

Percy McDonald ROBERTS , Died of Wounds, 27 November 1915, and subsequently buried at sea.

Allan David ROBINSON , Died of Wounds, 21 October 1915.

Stanley Oswald ROBINSON , Killed in Action, 7 November 1917.

Frederick Robert ROY , Died of Accident, 5 July 1918.


Ralph Thomas SABINE , Killed in Action, 28 October 1915 .

Alfred John SMITH , Died of Wounds, 14 July 1918.

Joseph SOLOMON , Died of Accident, 4 October 1918.

Harold Rowton STEVENS , Killed in Action, 7 August 1916.


Phillip Stanley TATNELL , Killed in Action, 3 August 1917.

Howard Hedley TAYLOR , Killed in Action, 25 September 1918.

Richard TAYLOR , Died of Wounds, 12 November 1917.

William TAYLOR , Died of Wounds, 10 April 1918 .

William Fairbairn TEMPLE , Killed in Action, 30 March 1918.

James Robert George TERRY , Died of Wounds, 27 April 1917 .

John Charles THOMPSON , Killed in Action, 10 November 1915.

John Arthur THOMSON , Died of Wounds, 8 November 1917.

Kenneth Stanley Willis THORN , Killed in Action, 25 September 1918.


Eric Arnold WADE , Killed in Action, 25 July 1916.

Harvey Thomas WAKE , Died of Disease, 2 November 1918.

Arthur Plenderleith WALKER , Died of Wounds, 13 July 1918.

James Robertson WALTERS , Killed in Action, 30 April 1918.

William WATTS , Died of Wounds, 22 July 1917.

Wilfred Allen WHITE , Killed in Action, 3 September 1915 .

William Henry WHITE , Died of Wounds, 16 September 1915.

Wesley Frank WHITFIELD , Killed in Action, 25 September 1918.

Charles Calliope WILEY , Killed in Action, 7 June 1917.

Thomas Stanley WRIGHT , Died of Wounds, 8 May 1918.


Lest We Forget
 

Acknowledgement: Many thanks to Steve Becker who provided much of the raw material that appears in this item.
 

Further Reading:

11th Australian Light Horse Regiment, AIF

Battles where Australians fought, 1899-1920


Citation: 11th Australian Light Horse Regiment, Roll of Honour

Posted by Project Leader at 12:01 AM EADT
Updated: Monday, 26 October 2009 8:38 PM EADT
Friday, 7 August 2009
Battle of Romani (Battle of Aweidia), Sinai, August 4 to 5, 1916, 11th LHR, AIF, War Diary Account
Topic: AIF - 4B - 11 LHR

Battle of Romani (Battle of Aweidia)

Sinai, August 4 to 5, 1916

11th LHR, AIF, War Diary Account


War Diary account of the 11th LHR, AIF.


The transcription:


4 August

Mobile Column moved from Rail Head at 1245, watered at Mahadat, bivouacked at Badr.

5 August

Patrol sent to Jeffeir at 1400. One Troop under Lieutenant Manning observation post. Regiment moved to Jeffeir in support of Imperial Camel Corps. Bivouacked for night. Supplies brought by camel transport. Lieutenant Manning's Troop returned to Bada at 1600.

6 August

Moved to Mageibra, arrived 0945 with Imperial Camel Corps.

Imperial Camel Corps moved towards Bayud.

Patrol of 10 men under Sergeant Merson of "A" Squadron sent to Badieh where they captured eight Turks who were there as a camp guard. 500 kits and a lot of tools and equipment was found in the camp.

As the Commanding Officer was the senior officer present, he stayed at Mageibra to receive messages by wireless from the Commander of the Mobile Column at Jaffeir retaining one Troop under Lieutenant Koch for protection of the camp together with the Machine Gun Section.

The balance of the Regiment (5 Troops) under Major Parsons moved in support of the Imperial Camel Corps to Bir el Aweidiya with instructions to return in the evening to water the horses and to draw rations and forage. There are nine wells at Mageibra and the Turks left three pumps and about 20 small wooden troughs at the wells. There is a good supply of water here and the quality is good.

The four Companies of the Imperial Camel Corps (being No.’s 4, 6, 9, and 10) under Major de Knoop gained touch with the enemy at 1730 about 1½ miles north east of Bir el Aweidiya. (Reference Map - Qatia 1:100,000 C.18) Two Troops under Lieutenant Stumm and Second Lieutenant Hoffman remained with the Imperial Camel Corps and occupied a position for the night covering the well. The remainder of the Regiment under Major Parsons returned to Mageibra.

City of London Yeomanry arrived at 1800. Lieutenant Koch's Troop furnished the bulwark with two men Troops told off as Inlying Picquets. Aeroplane dropped message at 1830 giving information about the enemy in the vicinity.


7 August

Camel convoy with supplies arrived at 0030. Rations and forage for 24 hours were issued at 0330 and the horses watered. Moved at 0530 for Aweidiya with the Light Horse and one Squadron and the Machine Gun Section of the City of London Yeomanry. Lieutenant Colonel Clark of the Imperial Camel Corpswith one Squadron remaining at the camp under Lieutenant Colonel Grant's instructions to guard the camp and to send out a patrol of one Troop to the north east to grain touch with the enemy. Arrived at Aweidiya at 0715 and relieved the Troops of Lieutenant Stumm and Second Lieutenant Hoffman who were sent back to camp to draw their 24 hours rations and forage. They were ordered to return when this was completed.

These two Troops and the Imperial Camel Corps were on a high sand ridge running east and west about ¾ mile north of the well at Aweidiya. They reported the enemy to be in a position on a high sand dune ¾ mile south east of Hod el Muhammam and the lower spurs running north east from it. Posts were also observed on the high ground near Hod el Baheir. I instructed the Imperial Camel Corps to attack on the south side of the enemy with the Light Horse on their right facing north west and the Imperial Camel Corps to move to the north east and then north so as to come against his flank and rear and to join in to the outer flank of the Light Horse. A message dropped from one of our planes at 0710 assured me that no enemy were within eight miles eastward of Aweidiya, and as his front was too strong to be taken I decided to attack his flank rear. The enemy had two field guns and at least two machine guns and 250 rifles in action at this place. The action started at 1050 and at 1250 he finally retired having been driven out by the Light Horse who advanced all together a mile on foot and the presence of the Imperial Camel Corps  who threatened his rear. At 1230 four columns were seen retiring from the high ground near Hod el Bahier where they had expected to be attacked from the direction of Mageibra and had the position carefully prepared. The pursuit was then taken up and forty Turks were captured near Bahier together with their rifles and a lot of equipment and small arms ammunition. We came into action with the enemy's rearguard at 1430 near Hod el Dhaheiha. The Imperial Camel Corps arrived shortly afterwards and were deployed on the right of the Light Horse. The enemy was driven out of his first position and retired about ½ mile to the northward where he made a determined stand. His strength was probably four Field Guns, six Machine Guns and 1,000 rifles.

The City of London Yeomanry arrived on the scene of action at 1530 and I ordered them to occupy the line on the right of the Imperial Camel Corps so as to get round the enemy's flank. They did not get into action until 1615 after making a long advance on foot and mistaking No. 4 Company of the Imperial Camel Corps for the enemy. As they did not appear to be in a good position here, I withdrew them and sent them 800 yards to the north so as to outflank the enemy. This movement was carried out satisfactorily. The two Troops of the 11th Light Horse Regiment which had been sent to camp in the morning for supplies arrived at 1700. Those two Troops were put into the gap in the line between the Imperial Camel Corps and City of London Yeomanry  and were instructed to cover the withdrawal of our force and act as rearguard. At 1715 I ordered the force to withdraw at 1745 but owing to the difficulty of evacuating the wounded caused by the shortage of cacolets and medical arrangements in the Imperial Camel Corps, the retirement could not be carried out until dark. The rearguard left at 1930 after all the wounded had been evacuated.


The total casualties in the force were:-

 OfficersOther Ranks
Killed212
Wounded137


Roll of Honour

Bertie Gerald BARRETT

Harold GIBBON

Thomas Lambert GLASBY

Harold Rowton STEVENS

Lest We Forget


Further Reading:
 
11th Australian Light Horse Regiment, AIF
 
11th Australian Light Horse Regiment, Roll of Honour 

Battle of Romani, Sinai, August 4 to 5, 1916 

Bir el Abd, Sinai, 9 August 1916

Battles where Australians fought, 1899-1920


Citation: Battle of Romani, Sinai, August 4 to 5, 1916, 11th LHR, AIF, War Diary Account (Battle of Aweidia)

Posted by Project Leader at 12:01 AM EADT
Updated: Monday, 26 October 2009 8:49 PM EADT
Battle of Romani (Battle of Aweidia), Sinai, August 4 to 5, 1916, 11th LHR, AIF, Unit History Account
Topic: AIF - 4B - 11 LHR

Battle of Romani (Battle of Aweidia)

Sinai, August 4 to 5, 1916

11th LHR, AIF, Unit History Account


Turkish prisoners captured at Aweidia being interrogated by Lieutenant Colonel Grant in the oasis at Hod el Bayoud.

[From Hammond, between p. 40 and p. 41.]


Ernest W. Hammond, in 1984, produced the unit history for the 11th LHR called the History of the 11th Light Horse Regiment, Fourth Light Horse Brigade, Australian Imperial Forces, war 1914-1919, which included a section specifically related to Smith's Column which participated in the Battle of Bir el Aweidia as part of the the Battle of Romani and is extracted below.

Hammond, EW, History of the 11th Light Horse Regiment, Fourth Light Horse Brigade, Australian Imperial Forces, war 1914-1919, (Singapore 1984)

 
Chapter VII

Battles of Aweidia and Bayoud


On the morning of the 7th August, the Desert Column was hastily drawn up at Mageibra and ordered to advance and attack the enemy's left flank. The column comprised the 11th Light Horse Regiment, a regiment of City of London Yeomanry, and the 4th, 6th 9th and 10th companies of the Imperial Camel Corps, all of which were under the command of Colonel CL Smith, VC. At Daybreak, we moved quietly out of the camp and advanced to Bir el Aweidia, a distance of four miles without encountering the enemy. The country here was made up of a series of small sand hills packed closely together with narrow strips of desert gorse bush filling the ravines. It was difficult country for scouting, and we realised this, a mile or so beyond Aweidia, when our advance guard, under lieutenant F Farlow, came within a hundred yards of a Turkish outpost before either party was aware of the other's presence. The Turks were too dumbfounded to offer resistance, and endeavoured to escape to their main line of defence, located on a long narrow ridge in the background. Quickly recovering from the first sharp shock of surprise, Lieutenant Farlow ordered his men to charge, and, with splendid dash, they galloped forward, capturing a number of Turks and routing the remainder.

Shortly afterwards, a time probably coincident with the arrival of the Turkish stragglers, who had escaped to their own lines, the enemy opened fire on us with shrapnel and machine guns. We estimated that he had four field batteries, twelve machine guns, and five hundred rifles, whereas we had no artillery and only four machine guns and four Lewis guns to support our rifles. We had moved very rapidly in our advance, and to such an extent, in fact, that we were out of touch with the Corps Commander's Headquarters at Jaffier. Lieutenant Colonel Grant was the senior officer in the line, and he assumed command of the column, his plan of attack being as follows:-

The 11th Regiment would make a frontal attack on the Turkish position whilst the Yeomanry, and the Imperial Camel Corps would deploy to the north and south respectively, to harass the enemy's flanks.

His position overlooked a narrow plain on which there was little cover for the purpose of an attacking force. The gullies to this plain were well covered by his artillery and machine gun fire, and it was apparent that no good purpose would be served by a direct frontal thrust. We were outnumbered when the battle commenced, and as the day wore on the enemy was heavily reinforced from the north; this information being furnished by one of our 'planes, which dropped messages at intervals throughout the day.

Communications between sections of the Regiment were maintained by flags and heliographs. In open desert country the heliograph can be used over long distances, but here, owing to the mass of small hills, observation was limited, and five or six signalling stations had to be established, where, ordinarily, two would have been sufficient. This meant a shortage of signallers, and two men were placed on stations normally occupied by three.

Stations No. 1 and No. 2, important links in the chain of communications, were controlled by Sergeant J. McElligott and Corporal G. Groundwater respectively, and both remained on duty for long periods without rest. Furthermore, by sheer ability and perseverance, they were successful in transmitting and receiving heliograph messages by moonlight, this being the first occasion when messages were transmitted in that manner with any degree of success. Next day the Corps Commander, Colonel C. L. Smith, V.C., visited both stations and congratulated Sergeant McElligott and Corporal Groundwater for their resourcefulness and devotion to duty; both were mentioned in despatches.

Our frontal attack on the enemy did not develop, and on the morning of the 8th, we withdrew and concentrated our attack on his left flank and rear left flank. We moved swiftly into the new position, and, at 10.30 a.m., the action commenced. By 12.30, the enemy began to give ground, and, shortly afterwards, retired. The Regiment had advanced a mile, fighting in dismounted order from hill to hill. Suddenly, four columns of Turks were seen retiring from high ground, near the oasis of Hod el Beheir. The horses were rushed up, and, mounting, the troopers gave chase, capturing forty prisoners.

At this time the Imperial Camel Corps arrived, taking up a position on the right of the Regiment. The combined force drove the enemy out of an entrenched position, and he retired northwards, linking up with his main force in that area. His strength was estimated at 1,500 rifles, 12 machine guns, and 6 field guns.

At 3 o'clock in the afternoon, our O.C., Lieutenant Colonel Grant, was directing operations from the brow of a sand dune, when a sniper's bullet passed through his helmet, knocking it from his head. Those who witnessed the occurrence were always eager and proud to relate how Colonel Grant stooped, without undue haste, recovered his helmet, examined the bullet hole, and, replacing his headgear, exclaimed, "My word, that was a close call."

At 5 o'clock, orders were received from Desert Column Headquarters to retire, but owing to a shortage of cacolets to convey our wounded from the scene of action, the withdrawal was not effected until nightfall. "B" Squadron, under Major Lee, covered the retirement, and the Regiment returned to Mageibra.

Our Medical Officer, Captain G. H. Vernon, worked tirelessly throughout the engagement under the most trying conditions, and frequently under fire. He was short of medical supplies, water, and transport for the wounded. On the last night of the engagement, he penetrated far beyond our lines alone, and at great personal risk bandaged a wounded man and brought him back to safety. He was awarded the Military Cross for gallantry in the field.

Captain L. S. Alexander, Adjutant of the Regiment, was severely wounded while directing an attack. Our total casualties during the engagement were one officer wounded, four other ranks killed, and four other ranks wounded.
On the 8th August the Regiment rested at Mageibra, as both men and horses were beginning to feel the strain of fighting under such fierce conditions. During the day the heat was intense; at night it was cold, while food and water were scarce. Our camp was formed in a depression at the foot of Mageibra Hill, and the only shade in the vicinity was a narrow latticed strip cast upon the sand by a -few withered date palm fronds that had been transported from an oasis fourteen miles away.

The Army Medical Corps had thoughtfully carried them along to provide a shade for the wounded. On the morning of the 9th, while the horses were being watered, an enemy 'plane bombed our camp, stampeding the horses, many of which were not recovered until several hours later. That day we left Mageibra to relieve the City of London Yeomanry, who were holding a position to the south at Hill 286, near the oasis of Hod el Bayoud. After watering our horses, we made camp with the Yeomanry, and the 4th and 10th Companies of the Imperial Camel Corps. At daybreak, three patrols under Lieutenants Koch, Gee and Stumm were sent out to reconnoitre the ground to the north-east, north, and east of our position, and shortly afterwards two companies of the Camel Corps were sent to occupy a forward position at Hod el Honoasia, the Regiment being instructed to follow when the horses were watered. In preparation for the advance, the patrols were called in, and it was found that the patrol under Lieutenant Koch had captured a Turkish sniper. The other two patrols had sighted large parties of Turks and many transport camels. There seemed to be considerable movement in and around the Turkish position. Having watered the horses, the Regiment advanced to a large dune at Hilu, and here our advance guard was attacked by the enemy. Several troops were rushed to the front• and these snipers and enemy outposts were quickly driven back. By 9.30 a.m., the Regiment occupied a position opposite the Turkish force, which held an entrenched line on the hills, south-west of Mushalfat. "A" Squadron, commanded by Major P. J. Bailey and "C" Squadron, under Major J. W. Parsons, commenced a direct frontal attack, while "B" Squadron, under Major C. A. Lee, moved to the south-east of the enemy position. The enemy had two nine-pound batteries, eight machine guns and about one thousand rifles.

The Regiment made every endeavour to come to close quarters with him, but his position was unassailable, and by 4 o'clock in the afternoon very little ground had been gained. About this time the Turk commenced a heavy counter attack, the full force being directed against our right flank, and "B" Squadron was in danger of being cut off from the rest of the line. Realising the gravity of the position, Major Bailey, by a skilful move, brought two troops of his squadron into a position which enabled them to concentrate a severe fire on the advancing Turks, thus relieving the pressure on "B" Squadron, which then withdrew.

The horses of Lieutenant Gee's troop, a troop which was fighting dismounted on the extreme right flank, were stampeded by shell fire just before the order to retire was received, and as a result this troop leader and his men were forced to escape on foot. Theirs was a narrow escape and indeed an unenviable experience. There were brief moments of doubt, when it was thought that the whole troop would either be annihilated or captured.

During the retirement, Trooper W. H. Crawford, a member of Lieut. Gee's troop, made an unsuccessful, but nevertheless praiseworthy attempt to carry a wounded comrade (Trooper McKay) from the field of action under heavy fire, delaying his own escape until the Turks were almost upon him. For this action he was awarded the Military Medal. For bravery and devotion to duty Trooper W. R. Wilson was also awarded the Military Medal.

The enemy did not follow through with his counter attack and the Regiment retired with the remainder of the column and bivouacked on high ground, south of the wells and oasis of Hod el Bayoud. During the night, Turkish reinforcements under Semi Bey marched from Maghara, a Turkish position in the north, and entrenched themselves in the high sand dunes north of the Bayoud wells.

At daybreak next morning, the Regiment prepared to water the horses. The oasis at Bayoud consisted of a small grove of palm trees nestling close under the high, steep face of a large sand dune, about four hundred yards in length and three hundred feet high. The oasis faced the enemy position, and, in order to water the horses, we were compelled to descend the sand dune in single file along a narrow camel path which struck obliquely across its steep face. One troop had reached the wells and was drawing water, when a party of Turks, who had crept unseen to a ridge two hundred yards distant, opened fire on them with machine guns and rifles. The bullets whipped up the sand, and slashed through the palm trees before our fellows were aware of the position. Prisoners, who were captured by us later that day, informed us that the Turks thought we had retired to Mageibra, and they were actually coming in to the wells to water their animals when they found us already in possession. The surprise, therefore, was mutual and complete, and it demonstrated very clearly the difficulties of the Sinai campaign, where the very nature of the country, with its sand hills packed together, prevented successful scouting and reconnaissance work.

After the first burst of enemy fire, our fellows acted quickly. Some of them raced up the narrow path to safety, whilst the remainder galloped along the foot of the hill northwards. The escape of the troop was aided by the prompt action of Lieutenant-Colonel Grant, who at once assumed command of the whole force. He despatched the Yeomanry and "B" Squadron under Major Bailey with all speed to the left flank ; the Imperial Camel Corps raced to the right flank, and the Regiment attacked with machine guns and rifles from the sand dune above the wells. The enemy replied with machine gun and rifle, curd with shrapnel from his field guns in the background. In the first few moments of the engagement the Lewis gunners of the Camel Brigade and our machine gunners picked up the enemy range, and we witnessed the utter confusion into which he was thrown. Men and animals fell side by side, and lay still. The remainder of' his force retired from their forward position in complete disorder. Dashing in pursuit, we soon covered the ground which he had lately occupied, finding 21 enemy dead, and the bodies of 37 camels and 15 mules. The pursuit was not continued beyond that point, as our horses were worn out through lack of water; and so we retired to our camp at Bayoud. Arriving there, we set about cooking our breakfast, the preparation of which had been so rudely interrupted it few hours earlier. The "fates," however, persisted in being adverse in the matter of our meal, for our bacon had hardly commenced to grow warm in the dixies when tin enemy 'plane swooped down upon our camp with machine gun and bombs. Hurriedly, the men untied heir horses from the ground lines and scattered across the desert in order to confuse the raider and offer a less conspicuous target. The raider inflicted no casualties and when he departed we were ordered to break camp and retire to Mageibra, and so we ate a meagre break fast of biscuit and jam in the saddle as we rode along. Our casualties during the engagement; were one killed, eight wounded, and one missing.

During the next two days, the Regiment rested at Mageibra, but small patrols were sent out daily to test the enemy's strength, and discover his movements.
These patrols found numerous newly-made graves, where the enemy had buried his dead. On the 13th, 14th and 15th of August enemy 'planes bombed our camp, but no direct hits were registered. On the 16th we broke camp, returning to our base at El Ferdan to reorganise, and rest both men and animals.

The light casualties suffered by us, in comparison to the heavy enemy losses, is a tribute to the brilliant field work of our commanding officer, Lieutenant Colonel Grant, and his ability as a leader of mounted troops; qualities that were to bring him fame, later, at the gates of Beersheba and beyond. He was brilliant, without being spectacular; cautious, but unafraid, and his was a steadfastness of purpose that could not be denied. Above all, he possessed an overwhelming regard for the welfare, not only of his men, but also of his horses, a characteristic that endeared him to every bushman in the "outfit."

The Aweidia and Bayoud engagements had occupied 12 days, during which our losses were five killed, 12 wounded, and one missing. The total casualties suffered by the "Flying Column" was two officers and ten other ranks killed, one officer and 37 other ranks wounded, two other ranks missing. Several horses were killed outright, or destroyed later as a result of wounds received in the field of action.


Further Reading:

11th Australian Light Horse Regiment, AIF
 
11th Australian Light Horse Regiment, Roll of Honour

Battle of Romani, Sinai, August 4 to 5, 1916

Bir el Abd, Sinai, 9 August 1916

Battles where Australians fought, 1899-1920


Citation: Battle of Romani, Sinai, August 4 to 5, 1916, 11th LHR, AIF, Unit History Account (Battle of Aweidia)

Posted by Project Leader at 12:01 AM EADT
Updated: Monday, 26 October 2009 8:48 PM EADT

Newer | Latest | Older

Full Site Index


powered by FreeFind
Let us hear your story: You can tell your story, make a comment or ask for help on our forum.

Desert Column Forum

A note on copyright

The Australian Light Horse Studies Centre is a not for profit and non profit group whose sole aim is to write the early history of the Australian Light Horse from 1900 - 1920. It is privately funded and the information is provided by the individuals within the group and while permission for the use of the material has been given for this site for these items by various donors, the residual and actual copyright for these items, should there be any, resides exclusively with the donors. The information on this site is freely available for private research use only and if used as such, should be appropriately acknowledged. To assist in this process, each item has a citation attached at the bottom for referencing purposes.

Please Note: No express or implied permission is given for commercial use of the information contained within this site.

A note to copyright holders

The Australian Light Horse Studies Centre has made every endeavour to contact copyright holders of material digitised for this blog and website and where appropriate, permission is still being sought for these items. Where replies were not received, or where the copyright owner has not been able to be traced, or where the permission is still being sought, the Australian Light Horse Studies Centre has decided, in good faith, to proceed with digitisation and publication. Australian Light Horse Studies Centre would be happy to hear from copyright owners at any time to discuss usage of this item.

Contact

Australian Light Horse Studies Centre

eXTReMe Tracker