« March 2009 »
S M T W T F S
1 2 3 4 5 6 7
8 9 10 11 12 13 14
15 16 17 18 19 20 21
22 23 24 25 26 27 28
29 30 31
You are not logged in. Log in


Search the site:


powered by FreeFind
Volunteer with us.

Entries by Topic All topics  
A Latest Site News
A - Using the Site
AAA Volunteers
AAB-Education Centre
AAC-Film Clips
AAC-Photo Albums
AIF & MEF & EEF
AIF - Lighthorse
AIF - ALH - A to Z
AIF - DMC
AIF - DMC - Or Bat
AIF - DMC - Anzac MD
AIF - DMC - Aus MD
AIF - DMC - British
AIF - DMC - BWI
AIF - DMC - French
AIF - DMC - Indian
AIF - DMC - Italian
AIF - DMC - Medical
AIF - DMC - Remounts
AIF - DMC - Scouts
AIF - DMC - Sigs
AIF - DMC - Sigs AirlnS
AIF - DMC - 1 Sig Sqn
AIF - DMC - 2 Sig Sqn
AIF - DMC - Eng
AIF - DMC - Eng 1FSE
AIF - DMC - Eng 2FSE
AIF - DMC - GSR
AIF - 1B - 1 LHB
AIF - 1B - 6 MVS
AIF - 1B - 1 LHMGS
AIF - 1B - 1 Sig Trp
AIF - 1B - 1 LHFA
AIF - 1B - 1 LHR
AIF - 1B - 2 LHR
AIF - 1B - 3 LHR
AIF - 2B - 2 LHB
AIF - 2B - 7 MVS
AIF - 2B - 2 LHFA
AIF - 2B - 2 LHMGS
AIF - 2B - 2 Sig Trp
AIF - 2B - 5 LHR
AIF - 2B - 6 LHR
AIF - 2B - 7 LHR
AIF - 3B - 3 LHB
AIF - 3B - 8 MVS
AIF - 3B - 3 LHB Sigs
AIF - 3B - 3 LHFA
AIF - 3B - 3 LHMGS
AIF - 3B - 3 Sig Trp
AIF - 3B - 8 LHR
AIF - 3B - 9 LHR
AIF - 3B - 10 LHR
AIF - 4B - 4 LHB
AIF - 4B - 4 Sig Trp
AIF - 4B - 9 MVS
AIF - 4B - 4 LHFA
AIF - 4B - 4 LHMGS
AIF - 4B - 4 LHR
AIF - 4B - 11 LHR
AIF - 4B - 12 LHR
AIF - 5B - 5 LHB
AIF - 5B - 10 MVS
AIF - 5B - 5 LHFA
AIF - 5B - 5 Sig Trp
AIF - 5B - ICC
AIF - 5B - 14 LHR
AIF - 5B - 15 LHR
AIF - 5B - 1er Regt
AIF - 5B - 2 NZMGS
AIF - AASC
AIF - Aboriginal LH
AIF - Badges
AIF - Cars
AIF - Chinese LH
AIF - Double Sqns
AIF - Engineers
AIF - Fr - 22 Corps
AIF - Fr - 13 LHR
AIF - Honour Roll
AIF - HQ - 3rd Echelon
AIF - Marching Songs
AIF - Misc Topics
AIF - NZMRB
AIF - NZMRB - AMR
AIF - NZMRB - CMR
AIF - NZMRB - EFT
AIF - NZMRB - NZMFA
AIF - NZMRB - NZMGS
AIF - NZMRB - OMR
AIF - NZMRB - Sig-Trp
AIF - NZMRB - WMR
AIF - Ships
AIF - Ships - Encountr
AIF - Ships - Una
AIF - WFF
AIF - Wireless Sqn
Battles
BatzA - Australia
BatzA - Broken Hill
BatzA - Liverpool
BatzA - Merivale
BatzB - Boer War
BatzB - Bakenlaagte
BatzB - Belmont
BatzB - Bothaville
BatzB - Buffels Hoek
BatzB - Coetzees Drift
BatzB - Diamond Hill
BatzB - Driefontein
BatzB - Elands
BatzB - Graspan
BatzB - Grobelaar
BatzB - Grootvallier
BatzB - Hartebestfontn
BatzB - Houtnek
BatzB - Karee Siding
BatzB - Kimberley
BatzB - Koster River
BatzB - Leeuw Kop
BatzB - Mafeking
BatzB - Magersfontein
BatzB - Modder River
BatzB - Onverwacht
BatzB - Paardeberg
BatzB - Palmietfontein
BatzB - Pink Hill
BatzB - Poplar Grove
BatzB - Rhenoster
BatzB - Sannahs Post
BatzB - Slingersfontn
BatzB - Stinkhoutbm
BatzB - Sunnyside
BatzB - Wilmansrust
BatzB - Wolvekuil
BatzB - Zand River
BatzG - Gallipoli
BatzG - Anzac
BatzG - Aug 1915
BatzG - Baby 700
BatzG - Evacuation
BatzG - Hill 60
BatzG - Hill 971
BatzG - Krithia
BatzG - Lone Pine
BatzG - Nek
BatzJ - Jordan Valley
BatzJ - 1st Amman
BatzJ - 2nd Amman
BatzJ - Abu Tellul
BatzJ - Es Salt
BatzJ - JV Maps
BatzJ - Ziza
BatzM - Mespot
BatzM - Baghdad
BatzM - Ctesiphon
BatzM - Daur
BatzM - Kurna
BatzM - Kut el Amara
BatzM - Ramadi
BatzN - Naval
BatzN - AE1
BatzN - Cocos Is
BatzN - Heligoland
BatzN - Marmara
BatzN - Zeebrugge
BatzN - Zeppelin L43
BatzNG - Bitapaka
BatzO - Other
BatzO - Baku
BatzO - Egypt 1919
BatzO - Emptsa
BatzO - Karawaran
BatzO - Peitang
BatzO - Wassa
BatzP - Palestine
BatzP - 1st Gaza
BatzP - 2nd Gaza
BatzP - 3rd Gaza
BatzP - Aleppo
BatzP - Amwas
BatzP - Ayun Kara
BatzP - Bald Hill
BatzP - Balin
BatzP - Beersheba
BatzP - Berkusieh
BatzP - Damascus
BatzP - El Auja
BatzP - El Buggar
BatzP - El Burj
BatzP - Haifa
BatzP - Huj
BatzP - JB Yakub
BatzP - Kaukab
BatzP - Khan Kusseir
BatzP - Khuweilfe
BatzP - Kuneitra
BatzP - Megiddo
BatzP - Nablus
BatzP - Rafa
BatzP - Sasa
BatzP - Semakh
BatzP - Sheria
BatzP - Surafend
BatzP - Wadi Fara
BatzS - Sinai
BatzS - Bir el Abd
BatzS - El Arish
BatzS - El Mazar
BatzS - El Qatiya
BatzS - Jifjafa
BatzS - Magdhaba
BatzS - Maghara
BatzS - Romani
BatzS - Suez 1915
BatzSe - Senussi
BatzWF - Westn Front
BW - Boer War
BW - NSW
BW - NSW - 1ACH
BW - NSW - 1NSWMR
BW - NSW - 2NSWMR
BW - NSW - 3ACH
BW - NSW - 3NSWIB
BW - NSW - 3NSWMR
BW - NSW - 5ACH
BW - NSW - A Bty RAA
BW - NSW - AAMC
BW - NSW - Aust H
BW - NSW - Lancers
BW - NSW - NSW Inf
BW - NSW - NSWCBC
BW - NSW - NSWIB
BW - NSW - NSWMR_A
BW - NZ
BW - Qld
BW - Qld - 1ACH
BW - Qld - 1QMI
BW - Qld - 2QMI
BW - Qld - 3ACH
BW - Qld - 3QMI
BW - Qld - 4QIB
BW - Qld - 5QIB
BW - Qld - 6QIB
BW - Qld - 7ACH
BW - QLD - AAMC
BW - SA
BW - SA - 1SAMR
BW - SA - 2ACH
BW - SA - 2SAMR
BW - SA - 3SACB
BW - SA - 4ACH
BW - SA - 4SAIB
BW - SA - 5SAIB
BW - SA - 6SAIB
BW - SA - 8ACH
BW - SA - AAMC
BW - Tas
BW - Tas - 1ACH
BW - Tas - 1TIB
BW - Tas - 1TMI
BW - Tas - 2TB
BW - Tas - 2TIB
BW - Tas - 3ACH
BW - Tas - 8ACH
BW - Vic
BW - Vic - 1VMI
BW - Vic - 2ACH
BW - Vic - 2VMR
BW - Vic - 3VB
BW - Vic - 4ACH
BW - Vic - 4VIB
BW - Vic - 5VMR
BW - Vic - 6ACH
BW - Vic - AAMC
BW - Vic - Scot H
BW - WA
BW - WA - 1WAMI
BW - WA - 2ACH
BW - WA - 2WAMI
BW - WA - 3WAB
BW - WA - 4ACH
BW - WA - 4WAMI
BW - WA - 5WAMI
BW - WA - 6WAMI
BW - WA - 8ACH
BW Gen - Campaign
BW Gen - Soldiers
BW General
Cavalry - General
Diary - Schramm
Egypt - Heliopolis
Egypt - Mena
Gen - Ataturk Pk, CNB
Gen - Australia
Gen - Legends
Gen - Query Club
Gen - St - NSW
Gen - St - Qld
Gen - St - SA
Gen - St - Tas
Gen - St - Vic
Gen - St - WA
Gm - German Items
Gm - Bk - 605 MGC
GW - 11 Nov 1918
GW - Atrocities
GW - August 1914
GW - Biographies
GW - Propaganda
GW - Spies
GW - We forgot
Militia 1899-1920
Militia - Area Officers
Militia - Inf - Infantry
Militia - Inf - 1IB
Militia - Inf - 2IB
Militia - Inf - 3IB
Militia - Inf - NSW
Militia - Inf - Qld
Militia - Inf - SA
Militia - Inf - Tas
Militia - Inf - Vic
Militia - Inf - WA
Militia - K.E.Horse
Militia - LH
Militia - LH - Regts
Militia - LH - 1LHB
Militia - LH - 2LHB
Militia - LH - 3LHB
Militia - LH - 4LHB
Militia - LH - 5LHB
Militia - LH - 6LHB
Militia - LHN - NSW
Militia - LHN - 1/7/1
Militia - LHN - 2/9/6
Militia - LHN - 3/11/7
Militia - LHN - 4/6/16
Militia - LHN - 5/4/15
Militia - LHN - 6/5/12
Militia - LHN - 28
Militia - LHQ - Qld
Militia - LHQ - 13/2
Militia - LHQ - 14/3/11
Militia - LHQ - 15/1/5
Militia - LHQ - 27/14
Militia - LHS - SA
Militia - LHS - 16/22/3
Militia - LHS - 17/23/18
Militia - LHS - 24/9
Militia - LHT - Tas
Militia - LHT - 12/26
Militia - LHV - Vic
Militia - LHV - 7/15/20
Militia - LHV - 8/16/8
Militia - LHV - 9/19
Militia - LHV - 10/13
Militia - LHV - 11/20/4
Militia - LHV - 19/17
Militia - LHV - 29
Militia - LHW - WA
Militia - LHW-18/25/10
Militia - Military Orders
Militia - Misc
MilitiaRC - Rifle Clubs
MilitiaRC - NSW
MilitiaRC - NT
MilitiaRC - Qld
MilitiaRC - SA
MilitiaRC - Tas
MilitiaRC - Vic
MilitiaRC - WA
Militiaz - New Zealand
Tk - Turkish Items
Tk - Army
Tk - Bks - Books
Tk - Bks - 1/33IR
Tk - Bks - 27th IR
Tk - Bks - Air Force
Tk - Bks - Yildirim
Tk - POWs
Wp - Weapons
Wp - Hotchkiss Cav
Wp - Hotchkiss PMG
Blog Tools
Edit your Blog
Build a Blog
RSS Feed
View Profile
Open Community
Post to this Blog
Site Index
Education Centre
LH Militia
Boer War
Transport Ships
LH Battles
ALH - Units
ALH - General
Aboriginal Light H
Weapons
Ottoman Sources

"At a mile distant their thousand hooves were stuttering thunder, coming at a rate that frightened a man - they were an awe inspiring sight, galloping through the red haze - knee to knee and horse to horse - the dying sun glinting on bayonet points..." Trooper Ion Idriess

The Australian Light Horse Studies Centre aims to present an accurate history as chroniclers of early Australian military developments from 1899 to 1920.

The Australian Light Horse Studies Centre site holds over 12,000 entries and is growing daily.

Contact: Australian Light Horse Studies Centre

Let us hear your story: You can tell your story, make a comment or ask for help on our Australian Light Horse Studies Centre Forum called:

Desert Column Forum

WARNING: This site contains: names, information and images of deceased people; and, language which may be considered inappropriate today.

Tuesday, 24 March 2009
4th Australian Light Horse Brigade
Topic: AIF - 4B - 4 LHB

4th LHB, AIF

4th Australian Light Horse Brigade


Outline of the 4th Australian Light Horse Brigade, AIF

Formed in February 1917 as part of the Imperial Mounted Division. The previous 4th Light Horse Brigade was formed in March 1915 and disbanded on 26 August 1915 when the 11th, 12th and 13th Light Horse Regiments were broken up to provide reinforcements for the units that were at Gallipoli. The reconstituted Brigade lost the 13th Light Horse Regiment which went to France but gained the 4th Light Horse Regiment. Regiments included:


4th Australian Light Horse Regiment

This Regiment was recruited exclusively Victoria in August 1914 as divisional cavalry for the Australian Division. During the Gallipoli campaign, the Regiment was attached to the 2nd Infantry Brigade. "B" and "D" Squadrons embarked for France in May 1916. A new "B" Squadron was raised as a consequence. The Regiment was renamed 3rd Camel Regiment in September 1916 and served with the Imperial Camel Corps until it brigaded with the 11th and 12th Light Horse Regiments into the 4th Light Horse Brigade in February 1917.

4th Australian Light Horse Regiment, AIF, History


11th Australian Light Horse Regiment

This was a composite Regiment recruited primarily from Queensland with a South Australian Squadron. 

"A" Squadron recruited from Queensland.

"B" Squadron recruited from Queensland.

"C" Squadron recruited from South Australia.

The Regiment was broken up on 26 August 1915 as reinforcements to Regiments at Gallipoli.

"A" Squadron became "D" Squadron, 2nd Light Horse Regiment.

"B" Squadron became "D" Squadron, 5th Light Horse Regiment.

"C" Squadron became "D" Squadron, 9th Light Horse Regiment.

The Regiment was reconstituted on 20 February 1916 at Heliopolis, Egypt.

The Regiment was renamed 1st Camel Regiment in September 1916 and served with the Imperial Camel Corps until it brigaded with the 4th Light Horse Brigade in February 1917.

11th Australian Light Horse Regiment, AIF, History


12th Australian Light Horse Regiment

This Regiment was recruited exclusively from New South Wales.

The Regiment was broken up on 26 August 1915 as reinforcements to Regiments at Gallipoli.

"A" Squadron became "D" Squadron, 1st Light Horse Regiment.

"B" Squadron became "D" Squadron, 7th Light Horse Regiment.

"C" Squadron became "D" Squadron, 6th Light Horse Regiment.

The Regiment was reconstituted on 20 February 1916 in Egypt.

The Regiment was renamed 2nd Camel Regiment in September 1916 and served with the Imperial Camel Corps until it brigaded with the 4th Light Horse Brigade in February 1917.

12th Australian Light Horse Regiment, AIF, History


4th Signal Troop

The 4th Signal Troop was created in February 1917.


4th Light Horse Field Ambulance

The 4th Light Horse Field Ambulance was formed in February 1917 from some 60 men drawn out of all the other Light Horse formations in Egypt.

4th Light Horse Field Ambulance Formation


4th Light Horse Brigade Train

The 4th Light Horse Brigade Train was primarily recruited around Melbourne and trained at Broadmeadows. After Gallipoli, this unit underwent some name changes from 4th Supply Section in February 1917 to 36th Australian Army Service Corps Company in August 1917.


9th Mobile Veterinary Section

The 9th Mobile Veterinary Section was formed in February 1917.


4th Light Horse Machine Gun Squadron

The 4th Light Horse Machine Gun Squadron was formed when the Parent Brigade was formed in February 1917.


Artillery

Artillery support was provided for the 4th Light Horse Brigade from the British 19th Horse Artillery Brigade, "A" Battery, Honourable Artillery Company.


4th Light Horse Training Regiment

Formed in Egypt during February 1917, this unit trained incoming reinforcements while allowing the wounded and sick a place to recover before returning to active service. The Training Regiment contained three squadrons, each duplicating the Regiments within the Brigade to whom it supplied the reinforcements. The Training Regiment was disbanded in July 1918 to be replaced by the Australian Light Horse Training Regiment when recruits were no longer tied to a Regiment but placed in a general pool of reinforcements called the General Service Reinforcements.


Embarkation

The original Brigade embarked to Egypt during months of May and June 1915. In Egypt additional training occurred at Heliopolis Camp.

See: Troop transport ships for information and photographs about the various ships employed in transporting the troops to Egypt.


Colour Patch

To assist with identification of the various units within the AIF, Divisional Order No 81 (A) Administration was issued at Mena on 8 March 1915 detailing the Colour Patch for the various units. The 4th Light Horse Brigade received the colour in 1917. The colour patch for the Regiments was made of cloth 1¼ inches wide and 2¾ inches long and worn on the sleeve one inch below the shoulder seam. In contrast, the colour patch for the 4th Light Horse Brigade was plain electric blue although for Headquarters was in the shape of a triangle while the individual Regiments used the rectangle shape in the prescribed manner.


4th Light Horse Brigade Colour Patch

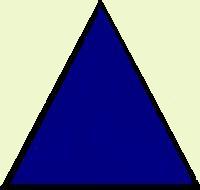
The individual units attached to the 4th Light Horse Brigade carried the royal blue colour as a lower triangular part of the colour patch, the unit itself having their colour on the top. This is illustrated with the above description about each individual unit.


Commanders

Brigadier General John Baldwin Meredith, 13 February 1917 to 13 September 1917.

Brigadier General William Grant, 13 September 1917 to June 1919


Attachments

Formed Australia March 1914.

Disbanded and broken up when sent to Gallipoli and attached to the New Zealand and Australian Division at Gallipoli from May 1915 to February 1916.

Reconstituted Regiments were attached to the Imperial Camel Corps as the 1st, 2nd and 3rd Camel Regiments from September 1916 until February 1917.

Attached to the Imperial Mounted Division February 1917 until August 1917. 

Attached to the Australian Mounted Division August 1917 until June 1919.


Campaigns

Palestine:
  • First Battle of Gaza;
  • Second Battle of Gaza;
  • Third Battle of Gaza;
  • Beersheba;
  • Jerusalem;
  • Jericho;
  • Es Salt;
  • Megiddo; and,
  • Damascus


Disbandment

The Brigade returned to Australia from June to July 1919. As each Regiment arrived in the specific home port, they were disbanded.


Further Reading:

Australian Light Horse Order of Battle - Outline 

The Australian Light Horse - Structure

Australian Light Horse Order of Battle


Citation: 4th Australian Light Horse Brigade

Posted by Project Leader at 11:01 PM EADT
Updated: Sunday, 19 April 2009 3:15 PM EADT

View Latest Entries

Full Site Index


powered by FreeFind
Let us hear your story: You can tell your story, make a comment or ask for help on our forum.

Desert Column Forum

A note on copyright

The Australian Light Horse Studies Centre is a not for profit and non profit group whose sole aim is to write the early history of the Australian Light Horse from 1900 - 1920. It is privately funded and the information is provided by the individuals within the group and while permission for the use of the material has been given for this site for these items by various donors, the residual and actual copyright for these items, should there be any, resides exclusively with the donors. The information on this site is freely available for private research use only and if used as such, should be appropriately acknowledged. To assist in this process, each item has a citation attached at the bottom for referencing purposes.

Please Note: No express or implied permission is given for commercial use of the information contained within this site.

A note to copyright holders

The Australian Light Horse Studies Centre has made every endeavour to contact copyright holders of material digitised for this blog and website and where appropriate, permission is still being sought for these items. Where replies were not received, or where the copyright owner has not been able to be traced, or where the permission is still being sought, the Australian Light Horse Studies Centre has decided, in good faith, to proceed with digitisation and publication. Australian Light Horse Studies Centre would be happy to hear from copyright owners at any time to discuss usage of this item.

Contact

Australian Light Horse Studies Centre

eXTReMe Tracker