« March 2009 »
S M T W T F S
1 2 3 4 5 6 7
8 9 10 11 12 13 14
15 16 17 18 19 20 21
22 23 24 25 26 27 28
29 30 31
You are not logged in. Log in


Search the site:


powered by FreeFind
Volunteer with us.

Entries by Topic All topics  
A Latest Site News
A - Using the Site
AAA Volunteers
AAB-Education Centre
AAC-Film Clips
AAC-Photo Albums
AIF & MEF & EEF
AIF - Lighthorse
AIF - ALH - A to Z
AIF - DMC
AIF - DMC - Or Bat
AIF - DMC - Anzac MD
AIF - DMC - Aus MD
AIF - DMC - British
AIF - DMC - BWI
AIF - DMC - French
AIF - DMC - Indian
AIF - DMC - Italian
AIF - DMC - Medical
AIF - DMC - Remounts
AIF - DMC - Scouts
AIF - DMC - Sigs
AIF - DMC - Sigs AirlnS
AIF - DMC - 1 Sig Sqn
AIF - DMC - 2 Sig Sqn
AIF - DMC - Eng
AIF - DMC - Eng 1FSE
AIF - DMC - Eng 2FSE
AIF - DMC - GSR
AIF - 1B - 1 LHB
AIF - 1B - 6 MVS
AIF - 1B - 1 LHMGS
AIF - 1B - 1 Sig Trp
AIF - 1B - 1 LHFA
AIF - 1B - 1 LHR
AIF - 1B - 2 LHR
AIF - 1B - 3 LHR
AIF - 2B - 2 LHB
AIF - 2B - 7 MVS
AIF - 2B - 2 LHFA
AIF - 2B - 2 LHMGS
AIF - 2B - 2 Sig Trp
AIF - 2B - 5 LHR
AIF - 2B - 6 LHR
AIF - 2B - 7 LHR
AIF - 3B - 3 LHB
AIF - 3B - 8 MVS
AIF - 3B - 3 LHB Sigs
AIF - 3B - 3 LHFA
AIF - 3B - 3 LHMGS
AIF - 3B - 3 Sig Trp
AIF - 3B - 8 LHR
AIF - 3B - 9 LHR
AIF - 3B - 10 LHR
AIF - 4B - 4 LHB
AIF - 4B - 4 Sig Trp
AIF - 4B - 9 MVS
AIF - 4B - 4 LHFA
AIF - 4B - 4 LHMGS
AIF - 4B - 4 LHR
AIF - 4B - 11 LHR
AIF - 4B - 12 LHR
AIF - 5B - 5 LHB
AIF - 5B - 10 MVS
AIF - 5B - 5 LHFA
AIF - 5B - 5 Sig Trp
AIF - 5B - ICC
AIF - 5B - 14 LHR
AIF - 5B - 15 LHR
AIF - 5B - 1er Regt
AIF - 5B - 2 NZMGS
AIF - AASC
AIF - Aboriginal LH
AIF - Badges
AIF - Cars
AIF - Chinese LH
AIF - Double Sqns
AIF - Engineers
AIF - Fr - 22 Corps
AIF - Fr - 13 LHR
AIF - Honour Roll
AIF - HQ - 3rd Echelon
AIF - Marching Songs
AIF - Misc Topics
AIF - NZMRB
AIF - NZMRB - AMR
AIF - NZMRB - CMR
AIF - NZMRB - EFT
AIF - NZMRB - NZMFA
AIF - NZMRB - NZMGS
AIF - NZMRB - OMR
AIF - NZMRB - Sig-Trp
AIF - NZMRB - WMR
AIF - Ships
AIF - Ships - Encountr
AIF - Ships - Una
AIF - WFF
AIF - Wireless Sqn
Battles
BatzA - Australia
BatzA - Broken Hill
BatzA - Liverpool
BatzA - Merivale
BatzB - Boer War
BatzB - Bakenlaagte
BatzB - Belmont
BatzB - Bothaville
BatzB - Buffels Hoek
BatzB - Coetzees Drift
BatzB - Diamond Hill
BatzB - Driefontein
BatzB - Elands
BatzB - Graspan
BatzB - Grobelaar
BatzB - Grootvallier
BatzB - Hartebestfontn
BatzB - Houtnek
BatzB - Karee Siding
BatzB - Kimberley
BatzB - Koster River
BatzB - Leeuw Kop
BatzB - Mafeking
BatzB - Magersfontein
BatzB - Modder River
BatzB - Onverwacht
BatzB - Paardeberg
BatzB - Palmietfontein
BatzB - Pink Hill
BatzB - Poplar Grove
BatzB - Rhenoster
BatzB - Sannahs Post
BatzB - Slingersfontn
BatzB - Stinkhoutbm
BatzB - Sunnyside
BatzB - Wilmansrust
BatzB - Wolvekuil
BatzB - Zand River
BatzG - Gallipoli
BatzG - Anzac
BatzG - Aug 1915
BatzG - Baby 700
BatzG - Evacuation
BatzG - Hill 60
BatzG - Hill 971
BatzG - Krithia
BatzG - Lone Pine
BatzG - Nek
BatzJ - Jordan Valley
BatzJ - 1st Amman
BatzJ - 2nd Amman
BatzJ - Abu Tellul
BatzJ - Es Salt
BatzJ - JV Maps
BatzJ - Ziza
BatzM - Mespot
BatzM - Baghdad
BatzM - Ctesiphon
BatzM - Daur
BatzM - Kurna
BatzM - Kut el Amara
BatzM - Ramadi
BatzN - Naval
BatzN - AE1
BatzN - Cocos Is
BatzN - Heligoland
BatzN - Marmara
BatzN - Zeebrugge
BatzN - Zeppelin L43
BatzNG - Bitapaka
BatzO - Other
BatzO - Baku
BatzO - Egypt 1919
BatzO - Emptsa
BatzO - Karawaran
BatzO - Peitang
BatzO - Wassa
BatzP - Palestine
BatzP - 1st Gaza
BatzP - 2nd Gaza
BatzP - 3rd Gaza
BatzP - Aleppo
BatzP - Amwas
BatzP - Ayun Kara
BatzP - Bald Hill
BatzP - Balin
BatzP - Beersheba
BatzP - Berkusieh
BatzP - Damascus
BatzP - El Auja
BatzP - El Buggar
BatzP - El Burj
BatzP - Haifa
BatzP - Huj
BatzP - JB Yakub
BatzP - Kaukab
BatzP - Khan Kusseir
BatzP - Khuweilfe
BatzP - Kuneitra
BatzP - Megiddo
BatzP - Nablus
BatzP - Rafa
BatzP - Sasa
BatzP - Semakh
BatzP - Sheria
BatzP - Surafend
BatzP - Wadi Fara
BatzS - Sinai
BatzS - Bir el Abd
BatzS - El Arish
BatzS - El Mazar
BatzS - El Qatiya
BatzS - Jifjafa
BatzS - Magdhaba
BatzS - Maghara
BatzS - Romani
BatzS - Suez 1915
BatzSe - Senussi
BatzWF - Westn Front
BW - Boer War
BW - NSW
BW - NSW - 1ACH
BW - NSW - 1NSWMR
BW - NSW - 2NSWMR
BW - NSW - 3ACH
BW - NSW - 3NSWIB
BW - NSW - 3NSWMR
BW - NSW - 5ACH
BW - NSW - A Bty RAA
BW - NSW - AAMC
BW - NSW - Aust H
BW - NSW - Lancers
BW - NSW - NSW Inf
BW - NSW - NSWCBC
BW - NSW - NSWIB
BW - NSW - NSWMR_A
BW - NZ
BW - Qld
BW - Qld - 1ACH
BW - Qld - 1QMI
BW - Qld - 2QMI
BW - Qld - 3ACH
BW - Qld - 3QMI
BW - Qld - 4QIB
BW - Qld - 5QIB
BW - Qld - 6QIB
BW - Qld - 7ACH
BW - QLD - AAMC
BW - SA
BW - SA - 1SAMR
BW - SA - 2ACH
BW - SA - 2SAMR
BW - SA - 3SACB
BW - SA - 4ACH
BW - SA - 4SAIB
BW - SA - 5SAIB
BW - SA - 6SAIB
BW - SA - 8ACH
BW - SA - AAMC
BW - Tas
BW - Tas - 1ACH
BW - Tas - 1TIB
BW - Tas - 1TMI
BW - Tas - 2TB
BW - Tas - 2TIB
BW - Tas - 3ACH
BW - Tas - 8ACH
BW - Vic
BW - Vic - 1VMI
BW - Vic - 2ACH
BW - Vic - 2VMR
BW - Vic - 3VB
BW - Vic - 4ACH
BW - Vic - 4VIB
BW - Vic - 5VMR
BW - Vic - 6ACH
BW - Vic - AAMC
BW - Vic - Scot H
BW - WA
BW - WA - 1WAMI
BW - WA - 2ACH
BW - WA - 2WAMI
BW - WA - 3WAB
BW - WA - 4ACH
BW - WA - 4WAMI
BW - WA - 5WAMI
BW - WA - 6WAMI
BW - WA - 8ACH
BW Gen - Campaign
BW Gen - Soldiers
BW General
Cavalry - General
Diary - Schramm
Egypt - Heliopolis
Egypt - Mena
Gen - Ataturk Pk, CNB
Gen - Australia
Gen - Legends
Gen - Query Club
Gen - St - NSW
Gen - St - Qld
Gen - St - SA
Gen - St - Tas
Gen - St - Vic
Gen - St - WA
Gm - German Items
Gm - Bk - 605 MGC
GW - 11 Nov 1918
GW - Atrocities
GW - August 1914
GW - Biographies
GW - Propaganda
GW - Spies
GW - We forgot
Militia 1899-1920
Militia - Area Officers
Militia - Inf - Infantry
Militia - Inf - 1IB
Militia - Inf - 2IB
Militia - Inf - 3IB
Militia - Inf - NSW
Militia - Inf - Qld
Militia - Inf - SA
Militia - Inf - Tas
Militia - Inf - Vic
Militia - Inf - WA
Militia - K.E.Horse
Militia - LH
Militia - LH - Regts
Militia - LH - 1LHB
Militia - LH - 2LHB
Militia - LH - 3LHB
Militia - LH - 4LHB
Militia - LH - 5LHB
Militia - LH - 6LHB
Militia - LHN - NSW
Militia - LHN - 1/7/1
Militia - LHN - 2/9/6
Militia - LHN - 3/11/7
Militia - LHN - 4/6/16
Militia - LHN - 5/4/15
Militia - LHN - 6/5/12
Militia - LHN - 28
Militia - LHQ - Qld
Militia - LHQ - 13/2
Militia - LHQ - 14/3/11
Militia - LHQ - 15/1/5
Militia - LHQ - 27/14
Militia - LHS - SA
Militia - LHS - 16/22/3
Militia - LHS - 17/23/18
Militia - LHS - 24/9
Militia - LHT - Tas
Militia - LHT - 12/26
Militia - LHV - Vic
Militia - LHV - 7/15/20
Militia - LHV - 8/16/8
Militia - LHV - 9/19
Militia - LHV - 10/13
Militia - LHV - 11/20/4
Militia - LHV - 19/17
Militia - LHV - 29
Militia - LHW - WA
Militia - LHW-18/25/10
Militia - Military Orders
Militia - Misc
MilitiaRC - Rifle Clubs
MilitiaRC - NSW
MilitiaRC - NT
MilitiaRC - Qld
MilitiaRC - SA
MilitiaRC - Tas
MilitiaRC - Vic
MilitiaRC - WA
Militiaz - New Zealand
Tk - Turkish Items
Tk - Army
Tk - Bks - Books
Tk - Bks - 1/33IR
Tk - Bks - 27th IR
Tk - Bks - Air Force
Tk - Bks - Yildirim
Tk - POWs
Wp - Weapons
Wp - Hotchkiss Cav
Wp - Hotchkiss PMG
Blog Tools
Edit your Blog
Build a Blog
RSS Feed
View Profile
Open Community
Post to this Blog
Site Index
Education Centre
LH Militia
Boer War
Transport Ships
LH Battles
ALH - Units
ALH - General
Aboriginal Light H
Weapons
Ottoman Sources

"At a mile distant their thousand hooves were stuttering thunder, coming at a rate that frightened a man - they were an awe inspiring sight, galloping through the red haze - knee to knee and horse to horse - the dying sun glinting on bayonet points..." Trooper Ion Idriess

The Australian Light Horse Studies Centre aims to present an accurate history as chroniclers of early Australian military developments from 1899 to 1920.

The Australian Light Horse Studies Centre site holds over 12,000 entries and is growing daily.

Contact: Australian Light Horse Studies Centre

Let us hear your story: You can tell your story, make a comment or ask for help on our Australian Light Horse Studies Centre Forum called:

Desert Column Forum

WARNING: This site contains: names, information and images of deceased people; and, language which may be considered inappropriate today.

Sunday, 15 March 2009
Peitang, China, September 25, 1900
Topic: BatzO - Peitang

Peitang

China, 25 September 1900


Peitang, the only combat operation involving Australian troops sent to northern China at the time of the Boxer Rebellion, was fought on the shores of the Gulf of Chihli (now called the Bohai Wan) 40 kilometres east of Tientsin on 25 September 1900. The Australians were members of a naval brigade offered to Britain in June, at the time that a multi-national force was being assembled to lift the siege of foreign embassies in Peking (now Beijing) by a Chinese cult of extreme nationalists nicknamed `Boxers'. The brigade, comprising 200 men from the naval forces of Victoria and another 260 from those of New South Wales, arrived on 8 September and was absorbed within the British contingent of the international field force, with their quarters at Tientsin.

By this stage, however, most of the fighting was already over. Troops of the eight participating powers had landed on the China coast in mid-June, captured Tientsin a month later, and relieved the besieged diplomatic missions in the capital a month after that-whereupon military resistance from the Boxers quickly dissipated. Not until a fortnight after their arrival did the
Australians have any prospect of seeing action. On 24 September, 300 men of the brigade (150 from each colony) formed part of a four-nation force of $,000 men-1,700 provided by Britain-which was ordered to move against the Chinese fort at Peitang.

Moving initially by lighter down the waterways towards the coast, the next day the Australians were obliged to travel the last 30 kilometres by foot. Urged on by the sounds of battle• ahead and the sight of rising pillars of' smoke, they covered the remaining distance in a gruelling forced march. All this effort proved wasted when, coming across a Russian field hospital at E, p.m., they learnt that the Russians had gone ahead and stormed the fort on their own an hour earlier. The only consolation to be had was that the Chinese had chosen not to hold the position in strength, but left a single four-man gun crew to delay the attackers; this they had achieved, at the cost of their lives, while the Russians suffered seven men killed and 30 wounded.

During the following month the Victorians took part in a similar expedition to capture par,-zing fu (now Baoding), the capital of Chihli Province situated about 115 kilometres south-west of Beijing. This also did not see any Australians come under fire, as on the forces approach Chinese officials surrendered the city without offering any resistance. Thereafter the Australians filled only garrison duties at Beijing and Tientsin until their return home.


Extracted from the book produced by Chris Coulthard-Clark, Where Australians Fought - The Encyclopaedia of Australia's Battles, Allen and Unwin, Sydney, 1998, pp. 86-87.


Additional References cited by Chris Coulthard-Clark:

Bob Nicholls (1986) Bluejackets and Boxers, Sydney: Allen & Unwin


Further Reading:

Battles where Australians fought, 1899-1920


Citation: Peitang, China, September 25, 1900

Posted by Project Leader at 11:01 PM EADT
Updated: Sunday, 5 April 2009 11:55 AM EADT
The Egyptian Rebellion, Egypt, 13 March to 10 April 1919
Topic: BatzO - Egypt 1919

The Egyptian Rebellion

Egypt, 13 March -10 April 1919.


Most of the light horse regiments before their campaigning was over were employed in the unhappy work of suppressing the rebellion in Egypt, which broke out early in 1919.

The story of that rising does not come within the scope of this volume. It had been carefully fostered by the malcontents, and demonstrations by Cairo students early in March were the signal for widespread rioting. Native civil servants at once contributed to the trouble by declaring a general strike; and the position of the British was made difficult by the suspension of most of the railway and telegraph services. Within a few days the outbreak had spread through all the lower provinces and extended to Upper Egypt.

At that time the Anzac Mounted Division (less the 1st and 2nd Light Horse Regiments) was still at Rafa, but the Australian Mounted Division had been moved by sea from Tripoli to Moascar. All units had handed in their equipment, and were awaiting embarkation to Australia. No. 1 Australian Flying Squadron and the 1st and 2nd Light Horse Regiments had already sailed. There were no large forces of British troops in Egypt. As the efficient organisation and the ugly temper of the revolt were disclosed further embarkations for Australia were arrested; horses and equipment were rapidly assembled, and within twenty-four hours the 3rd Light Horse Brigade under Wilson was on the march across the desert for Zagazig. The whole-hearted response of the troopers was impressive; they abandoned without a murmur their dreams of Australia, and went out gaily on a new enterprise the probable duration and seriousness of which were uncertain. All the regiments of the two Dominions, with the exception of the 1st and 2nd, were soon in the saddle, and their zone of activity extended from Upper Egypt to the Delta. So urgent at the outset was the call for the mounted men that even the convalescents from the hospitals were enlisted. There was no actual organised fighting, but a few sharp decisive brushes with the rioters cost the Australians about twenty casualties. Seven of the twelve regiments, under the capable command of Wilson, were based on Zagazig, three on Damanhur, one at Cairo, and one in Upper Egypt (Minia), and other small columns were commanded by Lieutenant-Colonel W. J. Foster and Lieutenant-Colonel Olden.

The Egyptians lost their nerve at the sight of the horsemen, and soon most of the leading spirits were in prison, while others at the firm bidding of the soldiers were strenuously mending the broken railways, and generally were as emphatic in their expression of loyalty as a few days before they had been turbulent in revolt. The Australians and New Zealanders formed the great part of the British force employed, and owing to their mobility, their reputation, and their decisiveness, they were undoubtedly the dominant factor in temporarily restoring tranquillity to Egypt.

Within a month all present danger had passed, but before embarkation the mounted troops, engaged in patrolling and other light work, comfortably billeted and with an abundance of fresh rations, passed several pleasant weeks beside the Nile.


Reference:

H.S. Gullett (1944) The Australian Imperial Force in Sinai and Palestine, Sydney: Angus & Robertson, Appendix 1.


Further Reading:

Battles where Australians fought, 1899-1920


Citation: The Egyptian Rebellion, Egypt, 13 March to 10 April 1919

Posted by Project Leader at 11:01 PM EADT
Updated: Sunday, 5 April 2009 11:57 AM EADT
Hartebeestfontein, South Africa, February 18 to March 21, 1901
Topic: BatzB - Hartebestfontn

Hartebeestfontein

South Africa, 14 February-21 March 1901


Hartebeestfontein, an action fought on J 8 February 1901 (during the Second South African War) about 25 kilometres north-west of Klerksdorp in western Transvaal On receiving information on the 17th that scattered bands of Boers from several commandos were concentrating on the village of Hartebeestfontein, Lieut.-General Lord Methuen moved out to attack them with a column of 900 men which included Victorian Bushmen. He was not aware until he approached the enemy position, occupying the Cyferlaagte ridge north of the town, that the burghers originally reported there had been reinforced by a roving force under General J.H. De la Rey and now numbered 1,300 - 1,400 men. Undeterred by his inferior strength, Methuen resolved to press ahead with his planned attack.

The assault which was begun at 8 a.m. initially made no impression on the Boer defence, even after reinforcements (including the Victorians) were sent to bolster the pressure applied against the enemy's right flank. At 11 a.m. De la Rey made a counter-attack against the British left which was also unsuccessful. Later that afternoon he decided to abandon his positions, leaving eighteen dead on the field. The sharp little action had cost Methuen 49 casualties, three of the dead and eleven of the wounded being Victorians.

A month later, the area around Hartebeestfontein was the scene of further clashes between two British columns pursuing De la Rey, after the latter had staged a raid on Lichtenburg in the north on 3 March. A party of New Zealanders and Australian Bushmen from the column led by Major-General J.M. Babington reportedly fought an action on 21 March which was notable for entailing an 'old-fashioned cavalry charge' which forced the Boers to flee in terror. While details of this incident are difficult to verify, the New Zealanders and Bushmen undoubtedly played a leading role in chasing down De la Rey's Boer wagon train three days later at Wildfontein, taking 140 prisoners, several guns and large quantities of rifles and ammunition.


Extracted from the book produced by Chris Coulthard-Clark, Where Australians Fought - The Encyclopaedia of Australia's Battles, Allen and Unwin, Sydney, 1998, pp. 89-90.


Additional References cited by Chris Coulthard-Clark:

L.S. Amery, (ed.) The Times History of the War in South Africa 1899-1902, Vol. 5 (1907), London: Sampson Low, Marston & Co.

MH Grant, History of the War in South Africa 1899-1902, Vol. 4 (1910), London.

John Stirling (1907) The Colonials in South Africa, 1899-1902, Edinburgh: W. Blackwood & Sons. 

R.L. Wallace (1976) The Australians at the Boer War, Canberra: Australian War Memorial & Australian Government Publishing Service.


Further Reading:

Battles where Australians fought, 1899-1920


Citation: Hartebeestfontein, South Africa, February 18 to March 21, 1901

Posted by Project Leader at 11:01 PM EADT
Updated: Sunday, 5 April 2009 4:27 PM EADT
Bert Schramm's Diary, 15 March 1919
Topic: Diary - Schramm

Diaries of AIF Servicemen

Bert Schramm


During part of the course of his military service with the AIF, 2823 Private Herbert Leslie Schramm, a farmer from White's River, near Tumby Bay on the Eyre Peninsular, kept a diary of his life. Bert was not a man of letters so this diary was produced with great effort on his behalf. Bert made a promise to his sweetheart, Lucy Solley, that he would do so after he received the blank pocket notebook wherein these entries are found. As a Brigade Scout since September 1918, he took a lead part in the September 1918 breakout by the Allied forces in Palestine. Bert's diary entries are placed alongside those of the 9th Light Horse Regiment to which he belonged and to the 3rd Light Horse Brigade to which the 9th LHR was attached. On this basis we can follow Bert in the context of his formation.

 Bert Schramm's Diary, 15 March 1919


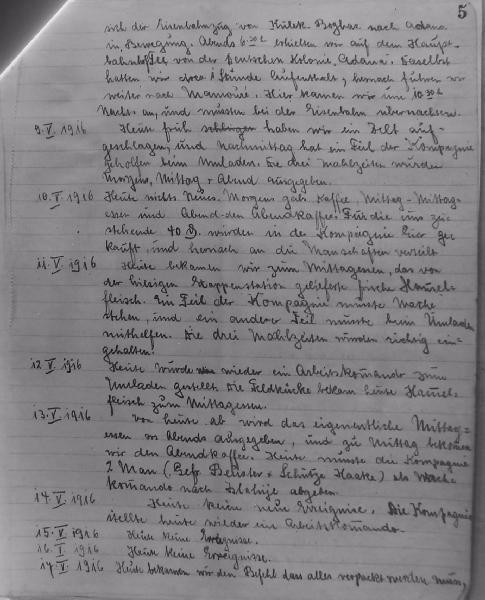
Bert Schramm's Handwritten Diary, 12 - 16 March 1919

[Click on page for a larger print version.]

Diaries

Bert Schramm

Saturday, March 15, 1919

Bert Schramm's Location - Moascar, Egypt.

Bert Schramm's Diary - Trouble has begun again in Cairo and all communication between here and Cairo have been cut. Natives attacked a hospital train coming through today and some damage done but haven't heard anything definite. One hundred men were called up out of this Brigade and left this evening. Their destination unknown. Anyhow if this is any serious trouble and we are all called out I guess someone will suffer. What annoys one most is the possibility of us being kept here a few months longer. I think I shall be inclined to desert if we are kept here much longer.


9th Light Horse Regiment War Diary

9th Light Horse Regiment Location - Moascar, Egypt.

9th Light Horse Regiment War Diary -  0900 General Officer in Command Australian Mounted Division [Ryrie, Brigadier General G de L, CB CMG VD] addressed the 3rd Light Horse Brigade reference discipline.

Captain Parry Regimental Medical Officer proceeded by train to Kantara to embark on HMT Euripides. Information received that inhabitants had attacked a train travelling between Cairo and Kantara. Disturbances at Zagazig extending.

1945 three Officers 50 Other Ranks each from 8th and 10th Light Horse Regiments proceeded by train to Zagazig. Telegraphic communication with Cairo cut.

10th Australian Light Horse Regiment War Diary - Lieutenants Macgregor MC and Doig MC with 50% were sent to Minet Quam out duty.

General Ryrie held a mass parade and addressed the Brigade.

Extract from Vincent, Phoebe, My darling Mick: the life of Granville Ryrie, 1865 - 1937, p. 191 although first appeared in the Brisbane Daily Telegraph 18 April 1927 -

'On 15 March Granville was at Moascar, where a minor incident took place which, if anyone had doubted it, would have been ample proof of the respect his men had for him and for the understanding he had shown them throughout the last five arduous years.

The men of the brigade, exhausted after all the campaigning only just behind them, were thinking of nothing but rest, a ship home, when one day out of the blue a Moascar 'brass hat' popped up and ordered that they perform recruit drill out under the blazing Egyptian sun. The bugle call to fall in after breakfast was ignored by the entire brigade. The order was repeated and the rumblings of complaint began to build until atmosphere in the camp was mutinous. At this point Granville ordered them out on parade. Not a man refused. Out in the heat of the parade ground he addressed them briefly but sympathetically on the subject of discipline, then gave them strict orders, instead of attending recruit drill, to get their towels a 'go for a swimming parade in Lake Timsah'. Having been the only man of his rank in the Australian Army to command the same brigade for the full duration of the war, it could be said with little doubt that no senior officer knew his men better than 'the Old Brigadier'.


Darley

Darley, TH, With the Ninth Light Horse in the Great War, Adelaide, Hassell Press, 1924.

No Entry


Previous: Bert Schramm's Diary, 14 March 1919

Next: Bert Schramm's Diary, 16 March 1919


Further Reading:

9th Light Horse Regiment AIF War Diary - Complete day by day list

Bert Schramm Diary 

Bert Schramm Diary - Complete day by day list


Additional Reading:

Darley, TH, With the Ninth Light Horse in the Great War, Adelaide, Hassell Press, 1924.


Citation: Bert Schramm's Diary, 15 March 1919


Posted by Project Leader at 12:01 AM EADT
Updated: Wednesday, 6 May 2009 11:55 AM EADT
Steam Tug at the Dead Sea
Topic: AIF - Cars

 1st AUSTRALIAN ARMOURED CAR SECTION, AIF

The Dead Sea

Steam Tug at the Dead Sea


Twin Screw Steel Steamer at Rujm el Bahr, Dead Sea

[Click on picture for larger version.]


Reference

The manuscript submitted by Captain E.H. James called "The Motor Patrol" lodged in the AWM as AWM 224 MSS 209, Chapter 6: THE DEAD SEA.


1st Australian Armoured Car Section - The Dead Sea - Part 2 


The following details were given regarding the capture of a steam tug at the Dead Sea.

Amongst the stuff left behind at the Dead Sea Post when captured, were all the parts of a large steam tug which had been taken to pieces at Haifa and transported overland in sections by the Germans and Turks. It must have taken a large amount of labour and time to do this as every piece had to be brought by road over the steep hills for something like 100 miles. All the parts were there except the engines and these could not be found. These had either not been brought or had been sunk in the water. Divers were sent down to search but no trace could be discovered. The British authorities decided to assemble the boat as all the parts were so conveniently left for them, and internal combustion engines from some of the Tractors were to be installed. Some shipwrights were brought down and the frames and plates of the boat were all riveted up. When we left the Jordan Valley some months afterwards the hull seemed to be all ready for launching but we never heard whether this had ever been done.


Previous section: 1st Australian Armoured Car Section - The Dead Sea - Part 2

Next section: 1st Australian Armoured Car Section - The Dead Sea - Part 3


Further Reading:

1st AUSTRALIAN ARMOURED CAR SECTION, AIF, Contents 

Australian Light Horse Order of Battle - Outline 

The Australian Light Horse - Structure

Australian Light Horse Order of Battle

Battles where Australians fought, 1899-1920


Citation: Steam Tug at the Dead Sea

Posted by Project Leader at 12:01 AM EADT
Updated: Monday, 13 April 2009 11:20 PM EADT

Newer | Latest | Older

Full Site Index


powered by FreeFind
Let us hear your story: You can tell your story, make a comment or ask for help on our forum.

Desert Column Forum

A note on copyright

The Australian Light Horse Studies Centre is a not for profit and non profit group whose sole aim is to write the early history of the Australian Light Horse from 1900 - 1920. It is privately funded and the information is provided by the individuals within the group and while permission for the use of the material has been given for this site for these items by various donors, the residual and actual copyright for these items, should there be any, resides exclusively with the donors. The information on this site is freely available for private research use only and if used as such, should be appropriately acknowledged. To assist in this process, each item has a citation attached at the bottom for referencing purposes.

Please Note: No express or implied permission is given for commercial use of the information contained within this site.

A note to copyright holders

The Australian Light Horse Studies Centre has made every endeavour to contact copyright holders of material digitised for this blog and website and where appropriate, permission is still being sought for these items. Where replies were not received, or where the copyright owner has not been able to be traced, or where the permission is still being sought, the Australian Light Horse Studies Centre has decided, in good faith, to proceed with digitisation and publication. Australian Light Horse Studies Centre would be happy to hear from copyright owners at any time to discuss usage of this item.

Contact

Australian Light Horse Studies Centre

eXTReMe Tracker