« July 2024 »
S M T W T F S
1 2 3 4 5 6
7 8 9 10 11 12 13
14 15 16 17 18 19 20
21 22 23 24 25 26 27
28 29 30 31
You are not logged in. Log in


Search the site:


powered by FreeFind
Volunteer with us.

Entries by Topic All topics
A Latest Site News
A - Using the Site
AAA Volunteers
AAB-Education Centre
AAC-Film Clips
AAC-Photo Albums
AIF & MEF & EEF
AIF - Lighthorse
AIF - ALH - A to Z
AIF - DMC
AIF - DMC - Or Bat
AIF - DMC - Anzac MD
AIF - DMC - Aus MD
AIF - DMC - British
AIF - DMC - BWI
AIF - DMC - French
AIF - DMC - Indian
AIF - DMC - Italian
AIF - DMC - Medical
AIF - DMC - Remounts
AIF - DMC - Scouts
AIF - DMC - Sigs
AIF - DMC - Sigs AirlnS
AIF - DMC - 1 Sig Sqn
AIF - DMC - 2 Sig Sqn
AIF - DMC - Eng
AIF - DMC - Eng 1FSE
AIF - DMC - Eng 2FSE
AIF - DMC - GSR
AIF - 1B - 1 LHB
AIF - 1B - 6 MVS
AIF - 1B - 1 LHMGS
AIF - 1B - 1 Sig Trp
AIF - 1B - 1 LHFA
AIF - 1B - 1 LHR
AIF - 1B - 2 LHR
AIF - 1B - 3 LHR
AIF - 2B - 2 LHB
AIF - 2B - 7 MVS
AIF - 2B - 2 LHFA
AIF - 2B - 2 LHMGS
AIF - 2B - 2 Sig Trp
AIF - 2B - 5 LHR
AIF - 2B - 6 LHR
AIF - 2B - 7 LHR  
AIF - 3B - 3 LHB
AIF - 3B - 8 MVS
AIF - 3B - 3 LHB Sigs
AIF - 3B - 3 LHFA
AIF - 3B - 3 LHMGS
AIF - 3B - 3 Sig Trp
AIF - 3B - 8 LHR
AIF - 3B - 9 LHR
AIF - 3B - 10 LHR
AIF - 4B - 4 LHB
AIF - 4B - 4 Sig Trp
AIF - 4B - 9 MVS
AIF - 4B - 4 LHFA
AIF - 4B - 4 LHMGS
AIF - 4B - 4 LHR
AIF - 4B - 11 LHR
AIF - 4B - 12 LHR
AIF - 5B - 5 LHB
AIF - 5B - 10 MVS
AIF - 5B - 5 LHFA
AIF - 5B - 5 Sig Trp
AIF - 5B - ICC
AIF - 5B - 14 LHR
AIF - 5B - 15 LHR
AIF - 5B - 1er Regt
AIF - 5B - 2 NZMGS
AIF - AASC
AIF - Aboriginal LH
AIF - Badges
AIF - Cars
AIF - Chinese LH
AIF - Double Sqns
AIF - Engineers
AIF - Fr - 22 Corps
AIF - Fr - 13 LHR
AIF - Honour Roll
AIF - HQ - 3rd Echelon
AIF - Marching Songs
AIF - Misc Topics
AIF - NZMRB
AIF - NZMRB - AMR
AIF - NZMRB - CMR
AIF - NZMRB - EFT
AIF - NZMRB - NZMFA
AIF - NZMRB - NZMGS
AIF - NZMRB - OMR
AIF - NZMRB - Sig-Trp
AIF - NZMRB - WMR
AIF - Ships
AIF - Ships - Encountr
AIF - Ships - Una
AIF - WFF
AIF - Wireless Sqn
Battles
BatzA - Australia
BatzA - Broken Hill
BatzA - Liverpool
BatzA - Merivale
BatzB - Boer War
BatzB - Bakenlaagte
BatzB - Belmont
BatzB - Bothaville
BatzB - Buffels Hoek
BatzB - Coetzees Drift
BatzB - Diamond Hill
BatzB - Driefontein
BatzB - Elands
BatzB - Graspan
BatzB - Grobelaar
BatzB - Grootvallier
BatzB - Hartebestfontn
BatzB - Houtnek
BatzB - Karee Siding
BatzB - Kimberley
BatzB - Koster River
BatzB - Leeuw Kop
BatzB - Mafeking
BatzB - Magersfontein
BatzB - Modder River
BatzB - Onverwacht
BatzB - Paardeberg
BatzB - Palmietfontein
BatzB - Pink Hill
BatzB - Poplar Grove
BatzB - Rhenoster
BatzB - Sannahs Post
BatzB - Slingersfontn
BatzB - Stinkhoutbm
BatzB - Sunnyside
BatzB - Wilmansrust
BatzB - Wolvekuil
BatzB - Zand River
BatzG - Gallipoli
BatzG - Anzac
BatzG - Aug 1915
BatzG - Baby 700
BatzG - Evacuation
BatzG - Hill 60
BatzG - Hill 971
BatzG - Krithia
BatzG - Lone Pine
BatzG - Nek
BatzJ - Jordan Valley
BatzJ - 1st Amman
BatzJ - 2nd Amman
BatzJ - Abu Tellul
BatzJ - Es Salt
BatzJ - JV Maps
BatzJ - Ziza
BatzM - Mespot
BatzM - Baghdad
BatzM - Ctesiphon
BatzM - Daur
BatzM - Kurna
BatzM - Kut el Amara
BatzM - Ramadi
BatzN - Naval
BatzN - AE1
BatzN - Cocos Is
BatzN - Heligoland
BatzN - Marmara
BatzN - Zeebrugge
BatzN - Zeppelin L43
BatzNG - Bitapaka
BatzO - Other
BatzO - Baku
BatzO - Egypt 1919
BatzO - Emptsa
BatzO - Karawaran
BatzO - Peitang
BatzO - Wassa
BatzP - Palestine
BatzP - 1st Gaza
BatzP - 2nd Gaza
BatzP - 3rd Gaza
BatzP - Aleppo
BatzP - Amwas
BatzP - Ayun Kara
BatzP - Bald Hill
BatzP - Balin
BatzP - Beersheba
BatzP - Berkusieh
BatzP - Damascus
BatzP - El Auja
BatzP - El Buggar
BatzP - El Burj
BatzP - Haifa
BatzP - Huj
BatzP - JB Yakub
BatzP - Kaukab
BatzP - Khan Kusseir
BatzP - Khuweilfe
BatzP - Kuneitra
BatzP - Megiddo
BatzP - Nablus
BatzP - Rafa
BatzP - Sasa
BatzP - Semakh
BatzP - Sheria
BatzP - Surafend
BatzP - Wadi Fara
BatzS - Sinai
BatzS - Bir el Abd
BatzS - El Arish
BatzS - El Mazar
BatzS - El Qatiya
BatzS - Jifjafa
BatzS - Magdhaba
BatzS - Maghara
BatzS - Romani
BatzS - Suez 1915
BatzSe - Senussi
BatzWF - Westn Front
BW - Boer War
BW - NSW
BW - NSW - 1ACH
BW - NSW - 1NSWMR
BW - NSW - 2NSWMR
BW - NSW - 3ACH
BW - NSW - 3NSWIB
BW - NSW - 3NSWMR
BW - NSW - 5ACH
BW - NSW - A Bty RAA
BW - NSW - AAMC
BW - NSW - Aust H
BW - NSW - Lancers
BW - NSW - NSW Inf
BW - NSW - NSWCBC
BW - NSW - NSWIB
BW - NSW - NSWMR_A
BW - NZ
BW - Qld
BW - Qld - 1ACH
BW - Qld - 1QMI
BW - Qld - 2QMI
BW - Qld - 3ACH
BW - Qld - 3QMI
BW - Qld - 4QIB
BW - Qld - 5QIB
BW - Qld - 6QIB
BW - Qld - 7ACH
BW - QLD - AAMC
BW - SA
BW - SA - 1SAMR
BW - SA - 2ACH
BW - SA - 2SAMR
BW - SA - 3SACB
BW - SA - 4ACH
BW - SA - 4SAIB
BW - SA - 5SAIB
BW - SA - 6SAIB
BW - SA - 8ACH
BW - SA - AAMC
BW - Tas
BW - Tas - 1ACH
BW - Tas - 1TIB
BW - Tas - 1TMI
BW - Tas - 2TB
BW - Tas - 2TIB
BW - Tas - 3ACH
BW - Tas - 8ACH
BW - Vic
BW - Vic - 1VMI
BW - Vic - 2ACH
BW - Vic - 2VMR
BW - Vic - 3VB
BW - Vic - 4ACH
BW - Vic - 4VIB
BW - Vic - 5VMR
BW - Vic - 6ACH
BW - Vic - AAMC
BW - Vic - Scot H
BW - WA
BW - WA - 1WAMI
BW - WA - 2ACH
BW - WA - 2WAMI
BW - WA - 3WAB
BW - WA - 4ACH
BW - WA - 4WAMI
BW - WA - 5WAMI
BW - WA - 6WAMI
BW - WA - 8ACH
BW Gen - Campaign
BW Gen - Soldiers
BW General
Cavalry - General
Diary - Schramm
Egypt - Heliopolis
Egypt - Mena
Gen - Ataturk Pk, CNB
Gen - Australia
Gen - Legends
Gen - Query Club
Gen - St - NSW
Gen - St - Qld
Gen - St - SA
Gen - St - Tas
Gen - St - Vic
Gen - St - WA
Gm - German Items
Gm - Bk - 605 MGC
GW - 11 Nov 1918
GW - Atrocities
GW - August 1914
GW - Biographies
GW - Propaganda
GW - Spies
GW - We forgot
Militia 1899-1920
Militia - Area Officers
Militia - Inf - Infantry
Militia - Inf - 1IB
Militia - Inf - 2IB
Militia - Inf - 3IB
Militia - Inf - NSW
Militia - Inf - Qld
Militia - Inf - SA
Militia - Inf - Tas
Militia - Inf - Vic
Militia - Inf - WA
Militia - K.E.Horse
Militia - LH
Militia - LH - Regts
Militia - LH - 1LHB
Militia - LH - 2LHB
Militia - LH - 3LHB
Militia - LH - 4LHB
Militia - LH - 5LHB
Militia - LH - 6LHB
Militia - LHN - NSW
Militia - LHN - 1/7/1
Militia - LHN - 2/9/6
Militia - LHN - 3/11/7
Militia - LHN - 4/6/16
Militia - LHN - 5/4/15
Militia - LHN - 6/5/12
Militia - LHN - 28
Militia - LHQ - Qld
Militia - LHQ - 13/2
Militia - LHQ - 14/3/11
Militia - LHQ - 15/1/5
Militia - LHQ - 27/14
Militia - LHS - SA
Militia - LHS - 16/22/3
Militia - LHS - 17/23/18
Militia - LHS - 24/9
Militia - LHT - Tas
Militia - LHT - 12/26
Militia - LHV - Vic
Militia - LHV - 7/15/20
Militia - LHV - 8/16/8
Militia - LHV - 9/19
Militia - LHV - 10/13
Militia - LHV - 11/20/4
Militia - LHV - 19/17
Militia - LHV - 29
Militia - LHW - WA
Militia - LHW-18/25/10
Militia - Military Orders
Militia - Misc
MilitiaRC - Rifle Clubs
MilitiaRC - NSW
MilitiaRC - NT
MilitiaRC - Qld
MilitiaRC - SA
MilitiaRC - Tas
MilitiaRC - Vic
MilitiaRC - WA
Militiaz - New Zealand
Tk - Turkish Items
Tk - Army
Tk - Bks - Books
Tk - Bks - 1/33IR
Tk - Bks - 27th IR
Tk - Bks - Air Force
Tk - Bks - Yildirim
Tk - POWs
Wp - Weapons
Wp - Hotchkiss Cav
Wp - Hotchkiss PMG
Blog Tools
Edit your Blog
Build a Blog
RSS Feed
View Profile
Open Community
Post to this Blog
Site Index
Education Centre
LH Militia
Boer War
Transport Ships
LH Battles
ALH - Units
ALH - General
Aboriginal Light H
Weapons
Ottoman Sources

"At a mile distant their thousand hooves were stuttering thunder, coming at a rate that frightened a man - they were an awe inspiring sight, galloping through the red haze - knee to knee and horse to horse - the dying sun glinting on bayonet points..." Trooper Ion Idriess

The Australian Light Horse Studies Centre aims to present an accurate history as chroniclers of early Australian military developments from 1899 to 1920.

The Australian Light Horse Studies Centre site holds over 12,000 entries and is growing daily.

Contact: Australian Light Horse Studies Centre

Let us hear your story: You can tell your story, make a comment or ask for help on our Australian Light Horse Studies Centre Forum called:

Desert Column Forum

WARNING: This site contains: names, information and images of deceased people; and, language which may be considered inappropriate today.

Friday, 9 October 2009
7th Australian Light Horse Regiment, Contents
Topic: AIF - 2B - 7 LHR

7th LHR, AIF

7th Australian Light Horse Regiment

Contents


7th Light Horse Regiment Colour Patch


The 7th Light Horse Regiment was formed as part of the 2nd Light Horse Brigade, 2nd Contingent and attached to the Australian Division. The 7th Light Horse Regiment was drawn from throughout New South Wales.


Structure

The Australian Light Horse – Structural outline

Australian Light Horse Order of Battle


Corps

Desert Mounted Corps (DMC)


Division

Anzac Mounted Division


Brigade

2nd Australian Light Horse Brigade


Regiment

7th Australian Light Horse Regiment


History

Romani

Battle of Romani, Sinai, August 4 to 5, 1916, 7th LHR, AIF, War Diary Account 
Battle of Romani, Sinai, August 4 to 5, 1916, 7th LHR, AIF, Unit History Account
Bir el Abd
Bir el Abd, Sinai, 9 August 1916, 7th LHR, AIF, War Diary Account 
Bir el Abd, Sinai, 9 August 1916, 7th LHR, AIF, Unit History Account 
Bir el Mazar
Bir el Mazar, Sinai, 17 September 1916, 7th LHR, AIF, War Diary Account
Bir el Mazar, Sinai, 17 September 1916, 7th LHR, AIF, Unit History Account

Beersheba

7th LHR, AIF account about the fall of Beersheba

7th ALHR, AIF, War Diary, account about the fall of Beersheba


Gallipoli 1918

7th Australian Light Horse Regiment, Return to Gallipoli, 1918


Routine Orders

7th LHR RO 18, 29 October 1914, p. 1

7th LHR Routine Order No 156, 17 June 1916


Embarkation

Full Roll

Roll: A - C

Roll: D - F

Roll: G - J

Roll: K - L

Roll: M - Q

Roll: R - S

Roll: T - Z


Individual Rolls

Regimental Headquarters Section

"A" Squadron

"B" Squadron

"C" Squadron

Machine Gun Section

1st Reinforcement

2nd Reinforcement

3rd Reinforcement

4th Reinforcement

5th Reinforcement

6th Reinforcement

7th Reinforcement

8th Reinforcement

9th Reinforcement

10th Reinforcement

11th Reinforcement Euripides Group

11th Reinforcement Hawkes Bay Group

12th Reinforcement Hawkes Bay Group 

12th Reinforcement Persic Group

13th Reinforcement

14th Reinforcement

15th Reinforcement

16th Reinforcement

17th Reinforcement

18th Reinforcement

19th Reinforcement

20th Reinforcement

21st Reinforcement

22nd Reinforcement Clan Mcewen Group 

22nd Reinforcement Katuna Group

23rd Reinforcement

24th Reinforcement

25th Reinforcement

26th Reinforcement

27th Reinforcement

28th Reinforcement Port Lincoln Group

28th Reinforcement Kyarra Group 

29th Reinforcement

30th Reinforcement

31st Reinforcement

32nd Reinforcement

33rd Reinforcement

34th Reinforcement

35th Reinforcement 


Personnel

3782 Trooper Victor Lionel Kearns, aka John Thomas Kerr, 7th LHR


Roll of Honour

7th Australian Light Horse Regiment, Roll of Honour 

Lest we forget


Further Reading:

7th Australian Light Horse Regiment, AIF

7th Australian Light Horse Regiment, Roll of Honour 

Battles where Australians fought, 1899-1920


Citation: 7th Australian Light Horse Regiment, Contents

Posted by Project Leader at 12:01 AM EADT
Updated: Sunday, 7 February 2010 1:12 PM EAST
Thursday, 8 October 2009
7th Australian Light Horse Regiment, AIF, Outline
Topic: AIF - 2B - 7 LHR

7th LHR, AIF

7th Australian Light Horse Regiment

Outline


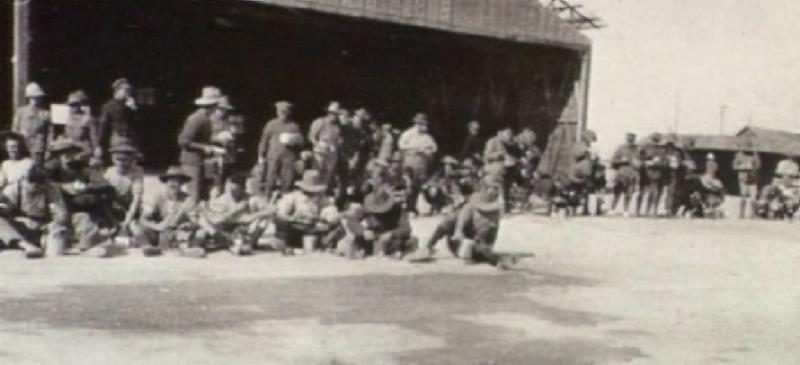
7th Light Horsemen opening Christmas Billies

[From: AWM P00522.015]


Formation

The 7th Light Horse Regiment was formed as part of the 2nd Light Horse Brigade, 2nd Contingent and attached to the Australian Division. The 7th Light Horse Regiment went through two distinct phases during its formation.


1st Formation of the 7th Light Horse Regiment

Initially, it was envisaged that the 7th Light Horse Regiment would be a composite regiment made up of men from three Military Districts: 1st, 4th and 5th Military Districts. The 7th Light Horse Regiment Headquarters was established at the Enoggera Training Camp to the west of Brisbane, Queensland. The basis of the three squadrons was as follows:

"A" Squadron recruited mainly from the 1st Military District which included Queensland and Northern New South Wales.

"B" Squadron recruited mainly from the 4th Military District which included all of South Australia and the Broken Hill region of New South Wales.

"C" Squadron recruited mainly from the 5th Military District which included the entire state of Western Australia.


2nd Formation of the 7th Light Horse Regiment

On 17 October 1914, the 7th Light Horse Regiment was completely reformed. The original "A" Squadron was transferred to the 5th Light Horse Regiment, "B" Squadron was formed into the 9th Light Horse Regiment while "C" Squadron became the 10th Light Horse Regiment.

The new 7th Light Horse Regiment was based at the Liverpool Training Camp to the west of Sydney, New South Wales, during September 1914. The recruits were drawn from throughout New South Wales. Many of the men went from the Light Horse Militia formation into the AIF Light Horse.


Training 


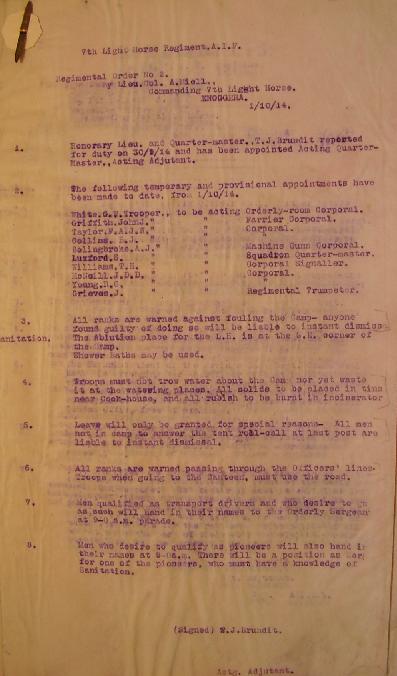
7th Light Horse Regiment Routine Order No 1, 30 October 1914

[Click on page for larger version.]


Training of the 7th Light Horse Regiment occurred at Liverpool Training Camp from October 1914. Later on training was tranferred to Holdsworthy Training Camp to the south of Sydney, New South Wales.


Embarkation

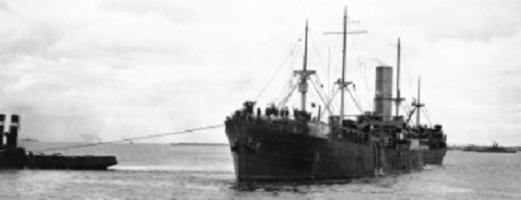
Embarkation of the 7th Light Horse Regiment was accomplished in two groups using both the HMAT A33 Ayrshire and HMAT A31 Ajana from Sydney, New South Wales. 


 HMAT A33 Ayrshire departing from Port Melbourne on 3 July 1916 

[See: His Majesty's Australian Transports [HMAT] Ships, A52.


7th Light Horse Regiment Headquarters, "A" and "B" Squadrons, embarked on the HMAT A33 Ayrshire from Sydney, New South Wales, 21 December 1914.


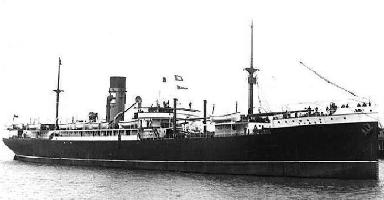
HMAT A31 Ajana
 
[See: His Majesty's Australian Transports [HMAT] Ships, A31.


7th Light Horse Regiment "C" Squadron and Machine Gun Section, embarked on the HMAT A31 Ajana from Sydney, New South Wales, 19 December 1914.

The 7th Light Horse Regiment sailed to Egypt and disembarked on 1 February 1915.


Colour Patch

Initially, the only colour separation of the various Australian mounted troops was by use of the pennant. The marker pennants were carried on poles to mark lines troop lines in camps in Egypt. They were not lance pennants as the Australian lancers had red over white pennants on their lances.


Pennant of the 7th Light Horse Regiment


While this pennant was useful in distinguishing horse and troop lines, it failed to identify the individual with a unit. The AIF 1st Australian Division Standing Orders issued in December 1914 ordered the Australian Light Horse Regiments to wear a 4 inch wide [10.2cm] blue armband with the regiment name marked on the band in black lettering.

The earlier systems proved to be ineffective so to assist with identification of the men in the various units within the AIF, Divisional Order No 81 (A) Administration was issued at Mena on 8 March 1915 detailing the Colour Patch for the 7th Light Horse Regiment as others received their colours. The colour patch was made of cloth 1¼ inches wide and 2¾ inches long and worn on the sleeve one inch below the shoulder seam. The colour patch for the 7th Light Horse Regiment was black over red.


7th Light Horse Regiment Colour Patch


The 7th Light Horse Regiment carried the red Brigade colour as the lower triangle part of the colour patch, while the black unit colour was on the top. This is illustrated with the above presentation.


Gallipoli

As mounted troops, the Light Horse was considered to be unsuitable for work in Gallipoli. The mounted troops volunteered to operate as infantry and thus were sent to Gallipoli with the 7th Light Horse Regiment landing on 20 May 1915. The Regiment was only deployed on defensive activities on the far right of the front line [the southern regions of Anzac] throughout the stay at Gallipoli. The 7th Light Horse Regiment left the peninsula on 20 December 1915.


Defence of Egypt

After the return to Egypt, the 7th Light Horse Regiment reformed and re-equipped. The reorganisation of the Light Horse led to the formation of the ANZAC Mounted Division to which the 7th Light Horse Regiment became a foundation member.

On 28 February 1916, the 7th Light Horse Regiment moved to join its parent brigade, the 2nd Light Horse Brigade, which was taking part in the defence of the Suez Canal. The work was hot and monotonous. They remained here until moved to the Romani region to bolster the defence of that area.


Sinai

The 2nd Light Horse Brigade played an important role in beating back the Turkish invasion of the Suez Canal zone at Romani. Now known as the Battle of Romani which lasted from 4-6 August which was quickly followed by the Battle of Katia and then Bir el Abd on 9 August. All the actions in which the 7th Light Horse Regiment finally led to the defeat of the Ottoman Canal Expeditionary force and its retreat to Bir el Mazar.

Over the next few months, the 7th Light Horse Regiment took part in the Allied advance over the Sinai leading to the fall of Bir el Mazar, then El Arish followed by Bir el Magdhaba and finally Rafa in January 1917. The Ottoman forces were expelled from the Sinai and were poised to be tackled in Palestine.


Palestine

On 27 March 1917, the 7th Light Horse Regiment took an adventurous role during the First Battle of Gaza. While involved in the encirclement of the city as a prelude to its capture, the 7th Light Horse Regiment received the order to withdraw and return to the starting line. Grudgingly they did so but realised the Turks had snatched victory out of the jaws of defeat.

The 7th Light Horse Regiment  took part in the Second Battle of Gaza on 19 April 1917 and suffered the heaviest casualties since Gallipoli.

The 7th Light Horse Regiment took part in the Battle of Beersheba and then the follow up actions that lasted until early January 1918. After the fall of Jerusalem the 7th Light Horse Regiment moved to the Jordan Valley and took parts in operations in this region. This included the taking of Jericho, the attack on Amman during 27 March - 2 April 1918 and Es Salt Raid of 30 April – 4 May 1918.


Amman

At the opening of the final Allied offensive on 19 September 1918, the 7th Light Horse Regiment took part in the invasion of the Moab hills for the third time. This time Amman was captured with the participation of the 7th Light Horse Regiment. Finally, the Ottomans called for an Armistice on 30 October 1918.


Return to Australia

After the conclusion of hostilities, the 7th Light Horse Regiment was marked to return to Australia. Prior to that action, one of the saddest actions occurred for the Australian Lighthorsemen, they had to farewell their best friends, the horses. All the Light Horse unit horses' health was ascertained with the fit horses being transferred to the Indian Cavalry while those in poor condition were destroyed by the Veterinary units.

On 13 March 1919 the 7th Light Horse Regiment was deployed  to assist in suppressing the Egyptian Uprising. When the revolt collapsed, the 7th Light Horse Regiment embarked on the 28 June 1919 for the long voyage to Australia where the unit was disbanded. 


Commanding Officers

Lieutenant Colonel John McLean Arnott
Lieutenant Colonel George Macleay Macarthur-Onslow
Lieutenant Colonel John Dalyell Richardson
 

Decorations earned by the 7th Light Horse Regiment

  • 1 CMG - Companion in The Most Distinguished Order of St. Michael and St. George
  • 5 DSO - Distinguished Service Orders
  • 1 OBE - Order of the British Empire
  • 7 MC - Military Crosses
  • 8 DCM - Distinguished Conduct Medals
  • 20 MM- Military Medals
  • 28 MID - Mentioned in Despatches


Campaigns

Gallipoli

  • Anzac
  • Defence at Anzac
  • Suvla
  • Sari Bair
  • Gallipoli 1915-1916

Egypt

  • Defence of Egypt

Sinai

  • Romani
  • Magdhaba
  • Rafa 

Palestine

  • First Battle of Gaza
  • Third Battle of Gaza
  • Beersheba
  • El Mughar
  • Nebi Samwill
  • Jerusalem
  • Jericho
  • Amman
  • Es Salt
  • Megiddo
  • Nablus
  • Palestine 1917-1918


Casualties suffered by the 7th Light Horse Regiment

  • 165 killed
  • 655 wounded


War Diary

The Australian War Memorial has put these on line and may be accessed here:

7th Light Horse Regiment War Diaries.


Embarkations:

The following list details all the embarkations in support of the 7th Light Horse Regiment, AIF, during the Great War. The list has been constructed from information and links kindly provided by The AIF Project. Each entry details to formation and the ships on which the units embarked with the date and place of embarkation. The detail of the formation is linked to a list of men who embarked upon that ship on the specific date. Each man is then linked to a brief military biography.

Regimental Headquarters Section

Sydney, New South Wales on board HMAT A33 Ayrshire 20 December 1914

"A" Squadron

Sydney, New South Wales on board HMAT A33 Ayrshire 20 December 1914

"B" Squadron

Sydney, New South Wales on board HMAT A33 Ayrshire 20 December 1914

"C" Squadron

Sydney, New South Wales on board HMAT A31 Ajana 19 December 1914

Machine Gun Section

Sydney, New South Wales on board HMAT A31 Ajana 19 December 1914

1st Reinforcement

Sydney, New South Wales on board HMAT A35 Berrima 19 December 1914

2nd Reinforcement

Sydney, New South Wales on board HMAT A12 Saldanha 5 February 1915

3rd Reinforcement

Sydney, New South Wales on board HMAT A1 Hymettus 8 February 1915

4th Reinforcement

Sydney, New South Wales on board HMAT A8 Argyllshire 9 April 1915

5th Reinforcement

Newcastle, New South Wales on board HMAT A58 Kabinga 21 May 1915

6th Reinforcement

Sydney, New South Wales on board HMAT A66 Uganda 15 June 1915

7th Reinforcement

Sydney, New South Wales on board HMAT A51 Chilka 7 June 1915

8th Reinforcement

Sydney, New South Wales on board HMAT A23 Suffolk 28 July 1915

9th Reinforcement

Sydney, New South Wales on board HMAT A8 Argyllshire 30 September 1915

10th Reinforcement

Sydney, New South Wales on board HMAT A32 Themistocles 5 October 1915

11th Reinforcement Euripides Group

11th Reinforcement Hawkes Bay Group

Sydney, New South Wales on board HMAT A14 Euripides 2 November 1915

Sydney, New South Wales on board SS Hawkes Bay 23 October 1915

12th Reinforcement Hawkes Bay Group 

12th Reinforcement Persic Group

Sydney, New South Wales on board SS Hawkes Bay 23 October 1915

Sydney, New South Wales on board HMAT A34 Persic 18 November 1915

13th Reinforcement

Sydney, New South Wales on board HMAT A60 Aeneas 20 December 1915

14th Reinforcement

Sydney, New South Wales on board HMAT A57 Malakuta 16 March 1916

15th Reinforcement

Sydney, New South Wales on board HMAT A67 Orsova 11 March 1916

16th Reinforcement

Sydney, New South Wales on board HMAT A56 Palermo 18 April 1916

17th Reinforcement

Sydney, New South Wales on board HMAT A39 Port Macquarie 26 April 1916

18th Reinforcement

Sydney, New South Wales on board HMAT A20 Hororata 2 May 1916

19th Reinforcement

Sydney, New South Wales on board RMS Mongolia 8 July 1916

20th Reinforcement

Sydney, New South Wales on board RMS Malwa 22 July 1916

21st Reinforcement

Melbourne, Victoria on board HMAT A1 Hymettus 12 September 1916

22nd Reinforcement Clan Mcewen Group 

22nd Reinforcement Katuna Group

Melbourne, Victoria on board HMAT A65 Clan Mcewen 9 October 1916

Sydney, New South Wales on board HMAT A13 Katuna 23 November 1916

23rd Reinforcement

Melbourne, Victoria on board HMAT A42 Boorara 10 May 1917

24th Reinforcement

Melbourne, Victoria on board HMAT A42 Boorara 10 May 1917

25th Reinforcement

Melbourne, Victoria on board HMAT A42 Boorara 10 May 1917

26th Reinforcement

Melbourne, Victoria on board HMAT A42 Boorara 10 May 1917

27th Reinforcement

Sydney, New South Wales on board HMAT A15 Port Sydney 9 May 1917

28th Reinforcement Port Lincoln Group

28th Reinforcement Kyarra Group  

Sydney, New South Wales on board HMAT A17 Port Lincoln 11 June 1917

Melbourne, Victoria on board HMAT A55 Kyarra 7 September 1917

29th Reinforcement

Sydney, New South Wales on board HMAT A55 Kyarra 3 September 1917

30th Reinforcement

Melbourne, Victoria on board HMAT A73 Commonwealth 2 November 1917

31st Reinforcement

Melbourne, Victoria on board HMAT A73 Commonwealth 2 November 1917

32nd Reinforcement

Melbourne, Victoria on board HMAT A73 Commonwealth 2 November 1917

33rd Reinforcement

Sydney, New South Wales on board SS Canberra 16 November 1917

34th Reinforcement

Sydney, New South Wales on board HMAT A38 Ulysses 19 December 1917

35th Reinforcement

Sydney, New South Wales on board SS Ormonde 2 March 1918

See: Troop transport ships for information and photographs about the various ships employed in transporting the troops to Egypt.


Further Reading:

7th Australian Light Horse Regiment, AIF

7th Australian Light Horse Regiment, Roll of Honour 

Battles where Australians fought, 1899-1920


Citation: 7th Australian Light Horse Regiment, AIF, Outline

Posted by Project Leader at 12:01 AM EADT
Updated: Thursday, 11 February 2010 2:23 PM EAST
Wednesday, 7 October 2009
7th Australian Light Horse Regiment, Roll of Honour
Topic: AIF - 2B - 7 LHR

7th LHR, AIF

7th Australian Light Horse Regiment

Roll of Honour


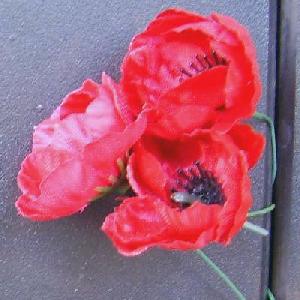
Poppies on the Roll of Honour, Australian War Memorial, Canberra


The Roll of Honour contains the names of all the men known to have served at one time with the 7th Light Horse Regiment and gave their lives in service of Australia, whether as part of the 7th Light Horse Regiment or another unit.


Roll of Honour


Leslie John ABBERTON, Died of Wounds, 30 November 1917.

Stanley Frank ALBON, Died of Disease, 21 August 1918.

Ralph ANDERSON, Died of Wounds, 8 June 1917.

Thomas ANDREW, Killed in Action, 6 August 1915.


Alfred Henry BARKER, Killed in Action, 5 November 1917.

James Henry BARTLETT, Died of Wounds, 20 October 1918.

Claude John BATEMAN, Killed in Action, 22 June 1915.

Albert BAXTER, Killed in Action, 16 May 1917.

Neil BEATON, Died of Wounds, 13 October 1915, and subsequently buried at sea.

Valentine Francis BEAZLEY, Killed in Action, 9 August 1918.

William Joseph BEER, Killed in Action, 19 September 1918.

Henry BELL, Died of Wounds, 6 August 1916.

Christie Archibald BENHAM, Killed in Action, 14 November 1917.

Cyril Arthur BENNETT, Died of Wounds, 8 July 1915, and subsequently buried at sea.

Roland Walter BENNETT, Died of Wounds, 22 June 1917.

Henry Norman BILSBOROUGH, Died of Wounds, 29 March 1917.

Arthur William BLACK, Killed in Action, 3 August 1917.

Thomas Harold BLOMLEY, Killed in Action, 6 November 1917.

Francis Patrick Lawrence BOWEN, Died of Wounds, 15 December 1917.

John BRAY, Died of Disease, 2 February 1919.

Terry Patrick BRAY, Died of Disease, 20 November 1918.

Walter Joseph BRODIE, Killed in Action, 8 November 1917.

Lawrence BRUNTON, Killed in Action, 4 July 1918.

Richard BRYANT, Died of Disease, 4 November 1918.

Alfred BUCKLEY, Died of Wounds, 14 March 1918.

Francis Tresilian BULL, Killed in Action, 7 May 1918.

Robert Cumming BUTTERS, Died of Wounds, 5 October 1915.


John CAMPBELL, Killed in Action, 28 June 1915.

John Thomas CAMPBELL, Killed in Action, 9 November 1917.

Roy Daniel CAMPBELL, Died of Wounds, 18 October 1918.

Frederick Wallace CANNAN, Killed in Action, 7 July 1915.

Edward Wilfred CANNONS, Killed in Action, 27 November 1915.

Joseph Leo CARNEY, Killed in Action, 10 October 1917.

Leslie Victor CHANDLER, Killed in Action, 8 August 1918.

Alfred CHAPMAN, Killed in Action, 5 November 1917.

Eric CHENEY, Killed in Action, 30 March 1918.

Raymond Horace CICOLINI, Died of Wounds, 3 June 1918.

Conyers CLIFFORD, Killed in Action, 5 August 1916.

George COLLINS, Died of Wounds, 12 August 1916.

William Galloway CONN, Killed in Action, 12 July 1915.

Roy Egerton COOKE, Killed in Action, 6 August 1915.

Percy Cecil COOPER, Died of Disease, 23 July 1916.

Volney Leonard COOPER, Died of Wounds, 11 July 1915, and subsequently buried at sea.

Arthur Joseph Harold CORBERT, Died of Disease, 11 October 1918.

Augustine COTTER, Killed in Action, 28 June 1915.

Joseph Francis COUGHLAN, Killed in Action, 3 July 1918.

Francis Reynolds COWDERY, Died of Disease, 10 August 1915.

James Paul Gee COX, Killed in Action, 19 September 1918.

William George COX, Killed in Action, 26 September 1917.

Francis Patrick CURRAN, Killed in Action, 4 August 1916.


James DALTON, Died of Disease, 19 December 1918.

Charles Henry DANIEL, Killed in Action, 14 November 1917.

George Douglas DAVIDSON, Died of Wounds, 15 August 1916.

Daniel DeLaHUNTY, Killed in Action, 16 August 1915.

Raymond Francis DEMPSEY, Killed in Action, 5 April 1918.

Leslie Oswald DOBBIE, Killed in Action, 28 June 1915.

Leonard Stanley DOBBS, Killed in Action, 17 August 1917.

Arthur William DRINKWATER, Killed in Action, 5 August 1916.

Thomas Park DUNBAR, Killed in Action, 7 July 1915.

Samuel James DUNKINSON, Killed in Action, 5 August 1916.

Offord William DUPREZ, Died of Wounds, 20 September 1916


Charles Edward ELDRIDGE, Died of Wounds, 25 September 1915, and subsequently buried at sea.

Thomas Patrick ELLIOTT, Killed in Action, 19 July 1916.

Claude ELTON, Died of Wounds, 29 March 1918.


James Hardy FAZIO, Killed in Action, 7 May 1918.

James Herbert FLOWER, Died of Wounds, 25 May 1915, and subsequently buried at sea.

Victor Joseph FOLEY, Killed in Action, 9 August 1915.

Peter Karin FOSTER, Killed in Action, 9 January 1917.

Aubrey Arthur FOWLER, Died of Wounds, 8 January 1917.

Horace Ernest FRAZER, Died of Wounds, 7 August 1916.

Clive Harris FROST, Died of Disease, 1 December 1918.

Edwin George FROST, Died of Disease, 19 October 1918.

Arthur Leeman FULTON, Killed in Action, 7 August 1916.


Stewart Courtney GADEN, Killed in Action, 6 August 1916.

Francis Joseph GANNON, Died of Wounds, 8 July 1915, and subsequently buried at sea.

Thomas GARDINER, Died of Wounds, 3 September 1915, and subsequently buried at sea.

William GEDDES, Killed in Action, 30 July 1915.

William John GEMMELL, Died of Wounds, 26 August 1915.

Arthur Clive GENTLE, Died of Disease, 21 October 1918.

Leslie Eden GEORGE,Died of Accident, 12 May 1918.

Alexander GIBSON, Killed in Action, 19 April 1917.

Horace William GILCHRIST, Died of Wounds, 29 June 1915, and subsequently buried at sea.

William GIRTON, Died of Wounds, 9 November 1917.

Herbert Sherlock GOOCH, Died of Wounds, 21 June 1915.

Milson GOUGH, Died of Disease, 21 January 1917.

George GRAHAM,Died of Accident, 13 January 1916.

Thomas GRAHAM, Died of Wounds, 9 November 1917.

Arthur Alexander GRANT, Killed in Action, 11 April 1917.

William GRAY,Died of Accident, 7 June 1917.

Clement John GRIBBLE, Killed in Action, 22 March 1917.

James Edward GRIFFIN, Killed in Action, 7 July 1915.

Charles Edward GRIMSHAW, Killed in Action, 2 June 1915.

Lambert Adrian GUEST, Died of Wounds, 17 November 1915.


Francis Patrick HALL, Killed in Action, 27 March 1918.

Armitage James HAMPSON, Killed in Action, 20 August 1915.

Thomas McNair HARVEY, Killed in Action, 16 May 1917.

Lawrence HEFFERNAN, Killed in Action, 8 August 1918.

Raymond Charles HENDY, Died of Disease, 9 August 1918.

Rex Edward Steven HEUSTON, Died of Wounds, 7 November 1917.

Victor George HILTON, Died of Wounds, 23 July 1915, and subsequently buried at sea.

Richard George HONEYMAN,Died of Accident, 12 May 1919.


David Matthew JACOMBS, Killed in Action, 17 September 1915.

Harry JOHNSTON, Killed in Action, 8 July 1918.

William JOHNSTON, Killed in Action, 26 May 1917.

Herbert Leslie JONES, Killed in Action, 29 September 1917.

Thomas JONES, Died of Wounds, 25 October 1917.

William Charles JONES, Died of Disease, 8 January 1919.


Oscar KAWLMACKER, Killed in Action, 2 June 1915.

Thomas Llewellen KEEN,Died of Accident, 12 March 1919.

Ernest Edward KELLY, Died of Disease, 11 September 1918.

Alfred KEMP, Killed in Action, 7 June 1917.

Guy Basil KENDALL, Died of Disease, 18 August 1915.

Edward Thomas KEOGH, Died of Disease, 11 March 1919.

David KING, Killed in Action, 27 March 1918.

Ernest John KINKADE, Died of Disease, 9 September 1916.

Edmond KIRBY, Killed in Action, 2 July 1915.


William Henry LACEY, Died of Wounds, 22 November 1917.

Samuel LANGWELL, Killed in Action, 7 May 1918.

Allen John LAVERTY, Died of Disease, 29 December 1917.

James Gordon LAWSON, Killed in Action, 30 March 1918.

Rowland Dennis Clark LEESON, Died of Wounds, 17 October 1918.

Michael LOGAN, Killed in Action, 27 March 1918.

Albert Victor LOUTTIT, Killed in Action, 7 October 1915.

Wilfred Dudley LOVEGROVE, Killed in Action, 6 November 1917.

Herbert Otto LULHAM, Killed in Action, 11 March 1917.


James Edward MacFARLANE, Died of Wounds, 30 July 1918.

Norman Dundonnell MacKENZIE, Died of Wounds, 17 September 1916

Phillip Anslem MADDEN, Killed in Action, 9 November 1917.

Ernest Lindsay MAGILL, Died of Wounds, 20 October 1915.

Edmund Bede MALONE, Died of Wounds, 1 December 1917.

James MARSHALL, Died of Wounds, 15 November 1917.

Thomas MAXWELL, Killed in Action, 7 May 1918.

Thomas James McAREE, Died of Disease, 22 May 1918.

Neil Hamilton McBRIDE, Died of Wounds, 12 January 1917.

William McCARTHY, Killed in Action, 5 November 1917.

William Henry McDONALD,Died of Accident, 5 July 1919.

Jack McFARLANE,Died of Accident, 30 May 1918.

George Francis McGUIRE, Killed in Action, 9 August 1916.

William James McKAY, Died of Disease, 16 August 1915, and subsequently buried at sea.

Montague Charles MELLY, Died of Wounds, 21 September 1916

Francis Frank MILLIGAN, Killed in Action, 26 September 1917.

Harrington Thomas Sterne MITCHELL, Died of Wounds, 30 July 1916.

Harold MOORE, Died of Disease, 28 May 1919.

Reginald George MOORE, Killed in Action, 17 August 1917.

Edwin Hezekiah MORRIS,Died of Accident, 16 August 1915, and subsequently buried at sea.

Frank Robert MORSE-KINCAID, Killed in Action, 9 January 1917.

Harrie Linden MURPHY, Killed in Action, 28 August 1918.

Joseph Henry MURRAY, Killed in Action, 9 January 1917.


William Henry NICHOLLS, Killed in Action, 7 May 1918.


Michael O'LOUGHLIN, Died of Wounds, 11 October 1915, and subsequently buried at sea.


Christopher John PARKER, Killed in Action, 9 November 1917.

Frederick Vance PARKES, Killed in Action, 7 May 1918.

William Arthur PEED, Died of Wounds, 29 March 1918.

Bertie James PEEL, Killed in Action, 7 May 1918.

Leslie PERRY, Killed in Action, 11 December 1915.

Wilfred Mirfield PLASKETT, Killed in Action, 31 March 1918.

Percy POIDEVIN, Killed in Action, 9 November 1917.

Daniel Mallen POLAND, Killed in Action, 6 November 1917.

Ralph POOLE, Died of Wounds, 20 November 1917.

Jack Diamond Sumners POTTS, Killed in Action, 4 January 1918.

Claude Hastings POUNTNEY, Killed in Action, 16 August 1915.

Alfred Edward PRESS, Died of Wounds, 27 March 1918.

Elias Saywell PRYOR, Died of Wounds, 11 December 1917.

Arthur PULLEN, Killed in Action, 26 September 1917.


Wenzel Harold RAYMONT, Died of Wounds, 12 October 1918.

William REID, Killed in Action, 6 November 1917.

Ernest Ambrose ROBERTS, Killed in Action, 17 September 1915.

Mark ROSENBERG, Killed in Action, 5 August 1916.

John Patrick RYAN, Died of Wounds, 9 November 1917.


Roy Edward Francis SADLER, Killed in Action, 14 June 1917.

Herbert Edward SAMUELS, Killed in Action, 9 August 1916.

Milton Harry SEALE, Died of Disease, 26 February 1919.

Alexander John SHERLOCK, Killed in Action, 17 July 1915.

Arthur Thomas SLAVIN, Killed in Action, 25 September 1918.

Archibald SMITH, Killed in Action, 6 November 1917.

Stuart Rutherford SMITH, Killed in Action, 5 August 1916.

William John SMITH, Killed in Action, 30 August 1915.

William Norman SMITH, Died of Wounds, 9 November 1917.

Isaac SNEDDON, Died of Wounds, 12 August 1916.

Francis STANMORE, Died of Wounds, 25 May 1915, and subsequently buried at sea.

Walter STARR, Died of Wounds, 14 August 1916.

Frederick Ladson STEGGLES, Killed in Action, 25 September 1918.

George Grant STEPHEN, Killed in Action, 13 August 1918.

Rowland Clifford STEVENS, Died of Wounds, 30 April 1919.

John William STEWART, Killed in Action, 15 June 1915.

Frederick William STONE, Killed in Action, 30 March 1918.

Reginald Lucian STYLES, Died of Disease, 27 December 1915.


Charles David TAIT, Died of Wounds, 25 January 1916.

Ernest Alexander TAYLOR,Died of Accident, 10 April 1919.

James TAYLOR, Killed in Action, 6 August 1915.

William Thomas TAYLOR, Killed in Action, 21 July 1915.

Lancelot THOMPSON, Died of Wounds, 10 September 1915.

Alan THORNE, Killed in Action, 27 July 1915.

Campbell THROSBY, Died of Disease, 29 February 1916.

Frederick John TIMSON, Killed in Action, 9 November 1917.

Walter Rupert TINK, Killed in Action, 26 March 1917.

Victor TURNBULL, Killed in Action, 7 May 1918.

Charles Eustace TURNER, Died of Wounds, 1 May 1918.


Stanley VILLIS, Killed in Action, 7 August 1915.


Norman WALKER, Killed in Action, 4 December 1916.

William Albert WALKER, Died of Disease, 17 October 1918.

Gordon Hutton WARD, Died of Disease, 1 November 1918.

Francis Stanley WARREN, Killed in Action, 29 January 1917.

William Pickard WASLIN, Killed in Action, 12 November 1915.

John WATERHOUSE, Died of Disease, 20 April 1916, and subsequently buried at sea.

Cyril Anderson WATHERSTON, Killed in Action, 26 May 1916.

Robert Alfred WATSON, Died of Wounds, 10 November 1917 .

Joseph Stanley WELSH, Died of Disease, 2 April 1917.

Aubrey James WETHERALL, Killed in Action, 15 July 1918.

George James WHITE, Died of Disease, 18 October 1918.

Frank WILLIAMS, Killed in Action, 28 April 1917.

Harold Edwin WILLIAMS, Killed in Action, 5 November 1917.

Joseph Enoch WILLIAMSON, Killed in Action, 25 September 1917.

John WILSON, Died of Wounds, 20 September 1915, and subsequently buried at sea.

William John WOODBURY, Killed in Action, 19 October 1915.

Charles Edward WOOTTON, Killed in Action, 9 August 1915.


John Douglas YOUNG, Died of Wounds, 30 June 1915, and subsequently buried at sea.

Matthew O'Grady William YOUNG,Died of Accident, 28 December 1915.


Essington Lowther ZOUCH, Died of Wounds, 17 November 1917.


Lest We Forget

 

Acknowledgement: Many thanks to Steve Becker who provided much of the raw material that appears in this item.
 

Further Reading:

7th Australian Light Horse Regiment, AIF

Battles where Australians fought, 1899-1920


Citation: 7th Australian Light Horse Regiment, Roll of Honour

Posted by Project Leader at 12:01 AM EADT
Updated: Monday, 21 June 2010 10:24 AM EADT
Sunday, 9 August 2009
Bir el Abd, Sinai, 9 August 1916, 7th LHR, AIF, Unit History Account
Topic: AIF - 2B - 7 LHR

Bir el Abd

Sinai, 9 August 1916

7th LHR, AIF, Unit History Account


Lieutenant Colonel John Dalzell Richardson produced a unit history published in 1919 called The History of the 7th Light Horse Regiment AIF which included a section specifically related to the battle of Beersheba and is extracted below.

Richardson, JD, The History of the 7th Light Horse Regiment AIF, Sydney, 1919, pp. 31 - 33:


Orders were received to move out on the 8th, and hang on the flanks and rear of the slowly retiring enemy. He had now withdrawn to Bir el Abd, being followed up by the Yeomanry, New Zealand Mounted Rifles Brigade and 3rd Light Horse Brigade, who were comparatively fresh troops. It was thought that no great opposition would be encountered and permission was given to leave a number of the more exhausted men and animals in camp. Consequently, the Regiment moved out with a total strength of only 214. After a long night march the two brigades (1st. and 2nd.) at dawn on August 9th, were moving among melon patches on the sand dunes to the north-west of Bir El Abd. Suddenly a 5.9 burst close to the centre of the column and others followed. Cover was found under the steep banks of the sand ridges close by, and the Wellingtons were sent forward dismounted, to occupy the high sandhills to the west of, and overlooking Bir El Abd; their advance was quickly checked. A consultation between the Brigadier and Regimental Commanders was held as to the advisability of a dash across the low ground to the north-west of Bir El Abd, but a personal reconnaissance showed this to be strongly held and, the idea was abandoned.

At 11 p.m., orders were received that the regiment would move, dismounted, on the left flank of the Wellingtons, and make a demonstration against the enemy, in which the whole Division would co-operate. The 1st. Light Horse Brigade was on our left. The horses were placed under good cover and a march on foot through the sand was made for about a mile, until the enemy was found occupying a high steep sand ridge running like a whale back into the plain of Bir El Abd, and distant from it about 2,000 yards.

Under our covering fire, which quickly wore down that of the enemy, the Wellingtons advanced and drove him off the ridge with the bayonet-, our advance was then continued. Half the Regiment occupied the captured position with the Wellingtons, who were in close touch. The other half of the Regiment, under Captains Willsallen and Easterbrook (Major Bice had collapsed under the heat and the long march in the sand), pushed down the valley round the north-eastern slope, but were quickly held up, and forced to retire back to the position first advanced from, by heavy enemy fire and a determined counter attack, which also stopped the 1st Light Horse Brigade. Captain Easterbrook was tossed into the air by a heavy shell, and Lieutenant Waddell was badly wounded in the face; Lieutenant Humphries had sustained a severe wound in the hand during the first advance.

Meanwhile, the captured ridge was undergoing a severe bombardment by 5.9's and mountain guns, and a great strain was imposed on the men holding it, lying, as they were, quite in the open, without shelter of any sort. The enemy machine guns and rifles also opened, and his infantry could be seen advancing about 800 yards distant. Our field guns now commenced to fire, and helped to check this advance, but were presently themselves subjected to a searching fire from the 5.9's, which killed many of the gun horses, and later made it difficult for the men to get guns and limbers away. The enemy advance was finally checked about 500 yards from the ridge and an afternoon of great heat wore on under incessant rifle fire, with heavy intermittent shelling. Fortunately, the effect of a 5.9 burst in the sand is very local. In many cases, these shells burst within six feet of men and horses, without doing any damage.

Great difficulty was experienced in getting the wounded away, as owing to the steep ridges, the sand carts could not be brought within a mile of the front line. The horses were brought up closer, and many wounded men were placed upon them and brought out, suffering agony as they went. For gallant work as stretcher bearers,. Troopers McFarland and Gould, later on, received Military Medals and the Serbian Star.

Touch could only be obtained with Brigade Headquarters by dismounted orderly, as the Brigade helio stations were heavily shelled, and found it impossible to carry on.

About 4 p.m. it was decided to make a simultaneous withdrawal from the forward position, in conjunction with the. Wellingtons to ridges about half a mile in rear, where proper touch could be obtained with B.H.Q. and orders received. This was done gradually, the retirement being heavily shelled and the enemy machine guns becoming particularly active. On reaching the first firing line position of the day, the remainder of the Regiment was linked up with; the 6th. Regiment was also found in position there, Orders were then received to retire to a position in rear, and cover the withdrawal of, the field ambulance and the wounded from a hod close by. The horses were mounted under heavy shell fire and the Regiment moved back, the 6th. Regiment covering our withdrawal, and retiring also shortly afterwards. The enemy quickly followed up to the positions vacated but did not attempt any attack on the new line, which was held until all the wounded had been safely taken away.

Abu El Afein, four miles in rear, was the point of concentration given,. and after resting there some hours, further orders were received to retire to Oghratina, as there were indications of an enemy counter attack; Oghratina was reached after mid-night and bivouac was made, all ranks being greatly exhausted. Out casualties for the day were 5 O.R.'s killed, and 3 officers and 14 O.R.'s wounded-marvellously light considering the severity of the fire. To those who endured the shelling on the ridge all that hot afternoon at Bir El Abd, it will always be a memory of great mental and physical strain.

Next morning the Brigade moved to Khirba, eight miles west of Bir El Abd, and patrols were sent out to observe the enemy movements in the vicinity. Turkish ambulance waggons were busy, indicating that the enemy also had suffered severely. It was evident that he was still holding the line in strength. At Khirba, much Turkish grain and stores of various kinds were found, including rolls of dried apricots; without these, the rations for men and horses would have been scanty.


Further Reading:

7th Australian Light Horse Regiment, AIF

7th Australian Light Horse Regiment, Roll of Honour 

Battle of Romani, Sinai, August 4 to 5, 1916 

Bir el Abd, Sinai, 9 August 1916

Battles where Australians fought, 1899-1920


Citation: Bir el Abd, Sinai, 9 August 1916, 7th LHR, AIF, Unit History Account

Posted by Project Leader at 12:01 AM EADT
Updated: Friday, 18 September 2009 8:58 PM EADT
Wednesday, 5 August 2009
Battle of Romani, Sinai, August 4 to 5, 1916, 7th LHR, AIF, Unit History Account
Topic: AIF - 2B - 7 LHR

Battle of Romani

Sinai, August 4 to 5, 1916

7th LHR, AIF, Unit History Account


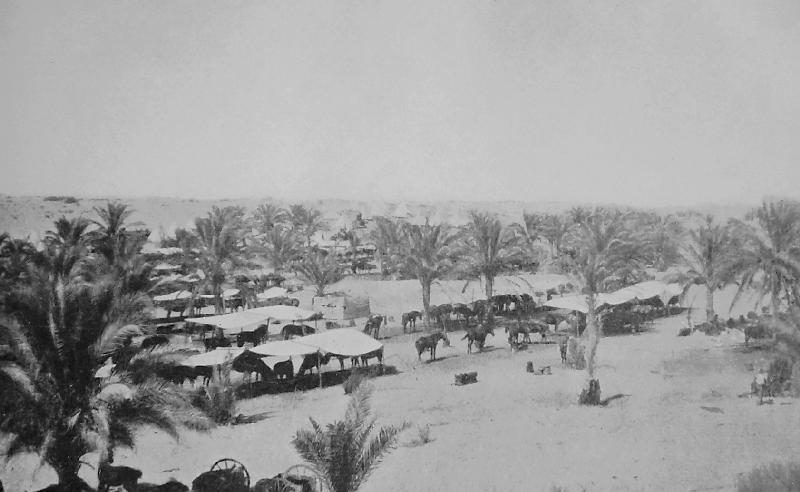
7th LHR Horse Lines at Bir Etmaler

[From: Richardson, photograph plate facing p. 12.]


Lieutenant Colonel John Dalzell Richardson produced a unit history published in 1919 called The History of the 7th Light Horse Regiment AIF which included a section specifically related to the battle of Beersheba and is extracted below.

Richardson, JD, The History of the 7th Light Horse Regiment AIF, Sydney, 1919, pp. 29 - 34:


CHAPTER IV.

ROMANI, KATIA AND BIR EL ABD.


[29] At 1 a.m. on August 4th., orders were received to be ready to move, and at 3.30 a.m. the Brigade moved out to Wellington Ridge, half a mile to the S.W. of our camp, to support the 1st Brigade, whose posts were being slowly driven in, whilst making a most gallant fight in the darkness.

Under shelter of Wellington Ridge, the 7th. Regiment dismounted and moved forward under severe fire to support the 3rd. Regiment, heavily engaged with the enemy on a long low spur, running north-east from Mount Meredith. This advance took place over nearly a mile of heavy sand and many men were greatly exhausted before the ridge was reached. Here it was found that the enemy was in strength. The machine gun and rifle fire were severe, and enemy mountain batteries sprayed the whole line with shrapnel; an effort was being made to encircle both our flanks.

The 3rd. Regiment now commenced to retire, having their horses with them; as the position was clearly untenable. Lieut: Colonel Onslow also gave the order for the 7th. Regiment to fall back on Wellington Ridge and the horses. There had already been over twenty casualties, including Major Windeyer and Lieutenant Ryan, both severely wounded. During the long retirement to Wellington Ridge, the Regiment came under heavy shell, machine gun and rifle fire, and only the very exhausted state of the enemy, owing to his long advance over the sand, prevented him from profiting more by this withdrawal. He was, undoubtedly, slow in following up his advantage.

Many gallant acts were performed in getting our wounded away, the behaviour of Corporal Harrington being especially notable.

At Wellington Ridge, orders were received to take up a position on a low sand dune, about half a mile due west of our camp at Et Maler, and to cover it. The 6th. Regiment had been sent well out on to the right flank, and the Wellington Regiment was in reserve behind our position. This was an excellent one, as, later, when troops of the 1st Light Horse Brigade moved to some high ridges on the north, it could not well be enfiladed, and had to be approached across a long flat. Here the men scooped rough cover in the sand, and our machine guns and two Lewis guns, only that morning obtained, were set up, and any enemy movement brought forth a 'burst of fire. Turkish snipers pushed forward among the bushes on the flat in front of us, but, excepting some intermittent fire from the direction of Wellington Ridge, there was little movement for some time. The enemy bombardment of the redoubts to the west and north of Katib Gannit was now intense, the 5.9 shells making an appalling explosion with clouds of sand and smoke everywhere; but the damage done was not great. Enemy planes hovered overhead, bombing any targets that presented themselves; among others our led horses; but without great results. Our field guns commenced to open at 8 a.m., and did some good shelling of enemy troops that were moving at some distance, on our front.

The day became intensely hot, and difficulty was experienced in keeping up the water supply to the men. After dark, hot tea was sent up by the quartermaster under difficult conditions, as the camp area and the kitchens were riddled with bullets, and it was close to these, that Corporal Curran, who had gained a decoration at Gallipoli, was killed after most gallantly bringing to safety a number of wounded men. By [30] midday it was evident that the Turkish advance had been held up, and Colonel Royston galloped along the line directing that every effort be made to harass and pin the enemy down. Later in the day, news came that 500 Turks had surrendered on the right flank, after being cut off, and orders were received that a continuous fire was to be kept up on those in front. This was done, with due regard to the expenditure of ammunition, and produced the almost inevitable result-heavy shelling of our position by the enemy's mountain guns. This bombardment lasted for half an hour, most of the shells falling just behind us. A signaller was killed, and half a dozen other men were slightly wounded. The shelling, however, had the effect of making the men dig in deeper, and by night fair trenches had been constructed. The horses were watered late in the day with some difficulty, as the watering area was constantly under the enemy's fire. As night approached the position was consolidated and reinforced by 50 men of the 52nd Division, and we linked up on the left with other troops of this Division, and on the right with the 1st. Light Horse Brigade.

The enemy became nervous as soon as darkness set in; there were frequent bursts of rifle fire and a "display" of Verey lights. At intervals also, his 5.9. shells burst with a deafening roar, but as a rule, they did not fall close to the defences. Little sleep was obtained. Orders were received that at 4 o'clock next morning, the whole line would advance.

Lieut.-Colonel Onslow left "B" Squadron with the led horses and the fifty men of the Infantry to act as reserve and to garrison the position; with "A" and "C" Squadrons, and, leading the advance, he commenced to move dismounted against Wellington Ridge. Some time was lost in permitting the Wellingtons and troops of the 1st Light Horse Brigade to get into position; then, in one thin line, the attack was begun. Enemy snipers among the bushes on the flat were soon disposed of, and when their front line was reached, only a feeble resistance was made, though unfortunately among our casualties was Lieut: Colonel Onslow, who was severely wounded through the leg at point blank range. Major Sutton automatically took charge of the Regiment, and the advance proceeded. The enemy now commenced to surrender in a body, and it was evident that his demoralisation was complete. Many machine guns were captured with their crews standing round them without attempting to fire a shot, and a large proportion of these were Germans. The long heavy march through the sand, with the shortage of water and the great heat, had exhausted even the Anatolian troops, the Flower of the Turkish Army. Many were almost in a state of collapse. Altogether 700 enemy were captured by the Regiment, with many machine guns, camels and booty of all kinds.

The led horses with "B" Squadron were brought up, and the Brigade moved on in pursuit under Lieut.-Colonel Meldrum (W.M.R.), Colonel Royston having been slightly wounded in the knee on the previous day. No check was experienced until near Katia, where at a small hod Bir Abu Gulud, south-west of that place and towards Hamisah, an ammunition column and Field ambulance were captured. Here we came under some shell fire, and the Wellingtons on our left ran into machine guns. The 6th. Regiment were still with the 1st Brigade in our rear, and as the enemy strength on our right and in the vicinity of Hamisah was unknown, Major Sutton decided to halt until the 1st. Light Horse Brigade came up. The opportunity was taken to water the horses at rather a poor well, and to pile up the captured ammunition ready for destruction in the event of the Turks making another attack.

About 10 a.m. the 1st. Light Horse Brigade, under Colonel Meredith, came up and orders were received to be ready to make a combined assault by the whole mounted Division on Katia, in the afternoon. In this attack, the 2nd. Light Horse Brigade was placed in the centre position against Katia itself, with the Yeomanry Brigade on the left and the 1st. Light Horse Brigade on the right, the N.Z.M.R. Brigade being on their right, and the 3rd Light Horse Brigade, directed against Hamisah, were to move against [31] enemy's left flank and rear. The 7th. Regiment was in Brigade reserve. The advance commenced mounted, the 6th. Regiment leading, and no check was experienced until the scrubby flat just to the west of the palm groves of Katia was reached, when the enemy's field and heavy guns opened, and shortly afterwards his machine guns began to splutter. The impression had been that the whole Division was to go in mounted, but apparently this idea was abandoned later, though it is possible, that if it had been carried out resolutely, it would have meant the annihilation of the Turkish Force. In a small palm grove and behind a low ridge, the Brigade dismounted for action, and the 6th. Regiment and the Wellingtons moved forward extended, the 7th. Regiment being still in reserve. The horses were now moved up behind the low ridge on the edge of the scrubby flat. It was fortunate that this was done, as the palm groves, in which cover at first had been taken, were soon heavily bombarded by 5.9. and mountain guns.

The battle had now become general. The 6th. Regiment and Wellingtons made some progress at first under heavy fire, but soon sustained a number of causalities, and their advance was finally checked by machine guns, sweeping an open flat, on which no cover could be obtained. The 1st. Light Horse Brigade on the right, was heavily shelled. It was soon seen that the Yeomanry, on the left, had run into some machine guns; they commenced to go right out of the action, which left the flank of our Brigade in the air. The 5th. Light Horse Regiment, which was still attached to the N.Z.M.R. Brigade charged Bir El Maraieh mounted, with bayonets fixed. A few prisoners were taken, but a cross fire from machine guns was met, and so many casualties were sustained, that a short withdrawal had to be made.

The enemy's shell fire increased as the afternoon wore on, and he did his utmost to locate the horses sheltering in rear of the low ridges; but though many shells fell within a few yards, and the shrapnel was like rain just behind, there were only two or three casualties. It seemed as if the muzzles of his guns could not be depressed sufficiently, firing as they were at very close range. The palm groves close by were well searched and his heavies reached for our field guns, which had opened from the high ground, about a mile in our rear.

As the whole line had been checked, and there seemed no further hope of an advance with our greatly exhausted troops, orders were received to be ready to retire at 7 p.m.; about a quarter of an hour before this, the firing ceased on both sides. It was afterwards discovered that the enemy had also made simultaneous withdrawal.

The 7th. Regiment was now ordered to form the rear guard, and "B" Squadron was given the post of honor as rear troops. The main body of the Brigade quickly got away, but much time was occupied getting the wounded into sand carts; this operation had to be covered, though there was no trouble from the enemy. Finally, all were got away, and after a troop had been detailed as escort to the sand carts, the Squadron moved back in rear of the Regiment, both men and horses being exhausted. The casualties for the Regiment for the battle of Romani were 9 O.R's. killed, and 3 officers and 42 O.R's. wounded. The Regiment suffered only one casualty at Katia. The 6th suffered fairly heavily here, Lieut.-Colonel Fuller, the C.O. being severely wounded.

The next two days were spent in resting, and, in the meantime, Major Richardson was placed in command of the Regiment; he continued in this capacity for three months, until the return of Lieut.-Colonel Onslow, holding also the rank of Temporary Lieut.-Colonel for two months.


Further Reading:

7th Australian Light Horse Regiment, AIF

7th Australian Light Horse Regiment, Roll of Honour 

Battle of Romani, Sinai, August 4 to 5, 1916 

Bir el Abd, Sinai, 9 August 1916

Battles where Australians fought, 1899-1920


Citation: Battle of Romani, Sinai, August 4 to 5, 1916, 7th LHR, AIF, Unit History Account

Posted by Project Leader at 12:01 AM EADT
Updated: Monday, 26 October 2009 6:10 PM EADT

Newer | Latest | Older

Full Site Index


powered by FreeFind
Let us hear your story: You can tell your story, make a comment or ask for help on our forum.

Desert Column Forum

A note on copyright

The Australian Light Horse Studies Centre is a not for profit and non profit group whose sole aim is to write the early history of the Australian Light Horse from 1900 - 1920. It is privately funded and the information is provided by the individuals within the group and while permission for the use of the material has been given for this site for these items by various donors, the residual and actual copyright for these items, should there be any, resides exclusively with the donors. The information on this site is freely available for private research use only and if used as such, should be appropriately acknowledged. To assist in this process, each item has a citation attached at the bottom for referencing purposes.

Please Note: No express or implied permission is given for commercial use of the information contained within this site.

A note to copyright holders

The Australian Light Horse Studies Centre has made every endeavour to contact copyright holders of material digitised for this blog and website and where appropriate, permission is still being sought for these items. Where replies were not received, or where the copyright owner has not been able to be traced, or where the permission is still being sought, the Australian Light Horse Studies Centre has decided, in good faith, to proceed with digitisation and publication. Australian Light Horse Studies Centre would be happy to hear from copyright owners at any time to discuss usage of this item.

Contact

Australian Light Horse Studies Centre

eXTReMe Tracker