


Topic: AIF - DMC - Anzac MD
The Battle of Rafa
Sinai, 9 January 1917
Anzac Mounted Division Battle Chronology, 8 - 11 January 1917
The following is a transcription of the Anzac Mounted Division Battle Chronology, of their role at the Battle of Rafa, Sinai, 9 January 1917.
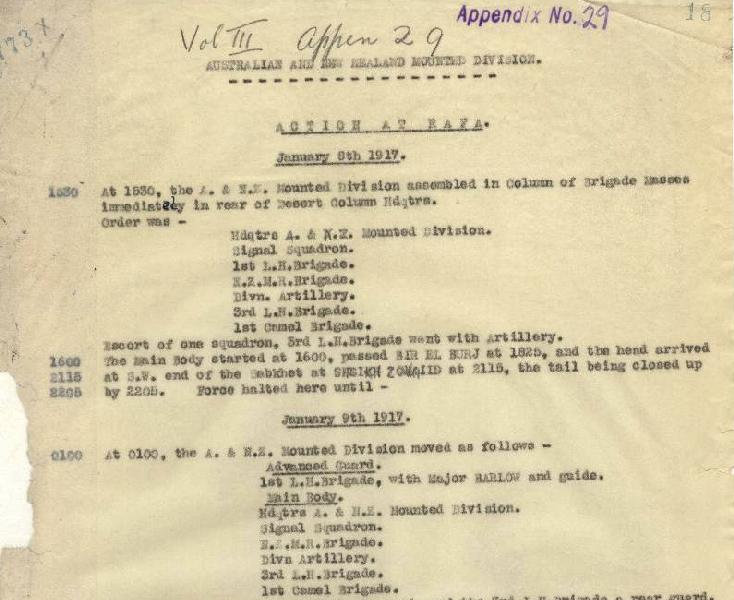
Australian and New Zealand Mounted Division
Action at Rafa
January 8th 1917.
1530 At 1530, the Australian and New Zealand Mounted Division assembled in Column of Brigade Masses immediately in rear of Desert Column Headquarters.
Order was:-
Headquarters Australian and New Zealand Mounted Division
Signal Squadron
1st Light Horse Brigade
New Zealand Mounted Rifles Brigade
Divisional Artillery
3rd Light Horse Brigade
1st Camel Brigade
Escort of one squadron, 3rd Light Horse Brigade went with Artillery.
1600 The Main Body started at 1600, passed Bir el Burj at 1825, and the head arrived at south west end of the Sabkhet at Sheikh Zowaiid at 2118, the tail being closed up by 2205. Forces halted until:-
January 9th 1917
0100 At 0100, the Australian and New Zealand Mounted Division moved as follows:-
Advanced guard
1st Light Horse Brigade, with Major Barlow and guide.
Main Body
Headquarters Australian and New Zealand Mounted Division
Signal Squadron
New Zealand Mounted Rifles Brigade
Divisional Artillery
3rd Light Horse Brigade
1st Camel Brigade
Each Brigade put out a small flank guard, and the 3rd Light Horse Brigade as rear guard.
Half a mile outside Sheikh Zowaiid, a Bedouin Camel patrol was encountered. It made off, but was chased and captured.
0330 At 0330 the force arrived at Point 250, and halted for an hour, then went on to Point 296.
0500 The left flank guard of the 3rd Light Horse Brigade captured two Turks but not before they were able to send up some flares as a warning.
See: Map segment of Rafa 1:125,000
0515 At 0515, General Chaytor, New Zealand Mounted Rifle Brigade, with Major Barlow and a guide left to round up the Bedouin encampments, about Karm ibn Musleh, he arrived at Shokh el Sufi at 0545, and at 0605, a message was received from him to say that he had rounded up 30 Bedouins armed with swords and a few pistols, and, that there was a good place in the rear of Karm ibn Musleh to assemble the Division. General Chauvel accordingly moved the Division up, dropping the Camel Brigade on the way, and by 0645 the Division was placed as follows - Headquarters, two Brigades and Artillery just south of Karm ibn Musleh, New Zealand Mounted Rifles Brigade about 1¼ miles north east at Point 350 close to "I" of Shokh el Sufi, the Camel Brigade ¾ mile west of Karm ibn Musleh.
0700 An officer from the New Zealand Mounted Rifles Brigade was sent off with a patrol to cut the wire running east from Rafa at 0700.
The General Officer Commanding and Commander Royal Artillery reconnoitred the Turkish position from Karm ibn Musleh. Parties of Turks could be seen moving in the position, apparently into the trenches, but some parties were seen going east.
0720 Communication was established with Desert Column by helio about 0720.
0750 At 0750, aeroplanes reported roads all clear to east and south east of Rafa except a few patrols. Aeroplane also reported heavy fire from almost every redoubt at El Magruntein.
A message was received from Desert Column giving estimate of enemy's strength and pointing out the necessity for deliberate artillery preparations and selection of targets. Once the artillery target was selected, he would cross the fire with: B" Battery, Honourable Artillery Company, so as to get concentration fire on the objective.
0800 At 0800, Divisional Headquarters moved to Point 350 close to the "I" in Shokh el Sufi. Communication was established with Desert Column and report of the situation sent in.
0820 Another air report was received at 0820 giving 9 gun positions at El Magruntein and four of these occupied.
0830 At 0830, a cable was laid from Desert Column to Divisional Headquarters which remained in telephone communication throughout the day.
See: Map of Turkish Trench Works
0832 At 0832, General Chauvel gave orders for the attack. New Zealand Mounted Rifles Brigade to attack trenches C4 and C5, the General Officer Commanding making provision for safety of his right flank and rear. The 1st Light Horse Brigade to attack C5, C2 and C1. When these objectives had been carried, both Brigades to rally and attack the redoubt. The Camel Brigade were to attack the B Group of trenches beginning with B4 as first objective. The Commander Royal Artillery was to select gun positions to support the attack. Fire to be first on C4, then C5, then C3 and then C2, C1 and finally the redoubt. If the enemy's artillery opened, on Battery to be detailed as a counter Battery. Fire to open at 0930, and the attack of the Brigades to start at 1000. 3rd Light Horse Brigade to be in reserve.
At this hour the enemy were seen to be sending back camels towards Khan Yunis.
0840 At 0840, another aeroplane message was received saying that the B trenches and C5 had more men in them than the others. A1 and A2 had very few. A trench was located 300 yards south of the "R" in Darb um Amad. Number of enemy in trenches given as 600. All roads five miles east of Rafa and Karm ibn Musleh were clear. Some 30 unloaded camels were seen leaving the trenches . A further air report put C4 and C1 also strongly held and confirmed their numbers in other trenches.
The Leicester and Somerset Batteries were now brought into action against C Group about 1,000 yards north of Karm ibn Musleh and registered on the trenches in their front. A Turkish Mountain Gun opened and for the next two or three hours fired shrapnel and High Explosives at the hill where Divisional Headquarters were, the gun teams and the camels.
0852 At 0852, Desert Column sent to say that Turks were showing unrest and urged on detachments being sent towards Rafa at once in case of their retiring.
Another air report gave loaded camels going east towards Rafa, roads two miles east and south east of that place clear.
0915 At 0915, the situation was as follows. New Zealand Mounted Rifles Brigade moving to a position north east of Divisional Headquarters to attack C4 and C5. 1st Light Horse Brigade moving to a position south of New Zealand Mounted Rifles Brigade. 3rd Light Horse Brigade moving to a position south of Divisional Headquarters under cover of the hill on which Divisional Headquarters was situated.
0920 Warning was sent to the New Zealand Mounted Rifles Brigade that the enemy might retire by the sand dunes, that any sign of this must be reported at once.
The Camel Brigade at this time had one Company deployed. The enemy's guns succeeded in reaching the camels which had to be moved back half a mile.
0935 At 0935, the New Zealand Mounted Rifles Brigade moved in a northerly direction in Column of Troops, to a position to attack C4 and C5. The Inverness Battery were in action 300 yards north east of Point 350 against these trenches.
0945 At 0945, General Cox sent in the 1st Light Horse Regiment and four machine guns keeping touch with the New Zealand Mounted Rifles Brigade on their right. Two more machine guns were pushed forward on the left of the front of attack of the 1st Light Horse Brigade and these crossed their fire with the right flank. The 1st Light Horse Regiment came forward mounted to 2,000 yards from the trenches and then horses were sent back and the advance commenced. The Turkish guns opened with shrapnel and rifle and machine gun fire was fairly heavy, but so far casualties were light.
In keeping touch with the New Zealand Mounted Rifles Brigade, however, the advanced became deflected to the north, and was directed on C4. Finally, the Regiment got to a position 800 yards from the enemy on a sunken road.
1000 At 1000, the Auckland Mounted Rifles were ordered to attack the high ridges one mile south east of Rafa, the Canterbury Mounted Rifles to work forward on their right along the Rafa-Khan Yunis Road. The Wellington Mounted Rifles (less one Squadron) were to follow and support the Canterbury Mounted Rifles; one squadron Wellington Mounted Rifles sent one section to Auckland Mounted Rifles to watch the country towards Shellal and one troop to patrol towards Khan Yunis.
1015 The Auckland Mounted Rifles came into action at 1015.
1020 At 1020, a report was received from New Zealand Mounted Rifles Brigade to Divisional Headquarters that the enemy was retiring and that they were pushing the Canterbury Mounted Rifles round to cut them off.
1040 By 1040 this was done, Canterbury Mounted Rifles moving at a gallop over the hills cut off the Turks retiring on camels and on foot. Rafa was occupied at the same time and 6 Germans, 2 Turkish Officers, 163 Other Ranks, 21 Bedouins and some camels, mules and 5,000 rounds Small Arms Ammunition were captured A line of half completed works running south east from Rafa was found.
Meantime, the Camel attack was progressing, the 1st Camel Battalion being directed on B4. The Hong Kong and Singapore Mountain Battery pushed up to support the attack.
The enemy's position was now definitely disclosed, and all means of exit stopped by the New Zealand Mounted Rifles Brigade. Orders were issued now for the remainder of the Division to take part (less 8th Light Horse Regiment left with Divisional Headquarters).
The 3rd Light Horse Brigade (less 8th Light Horse Regiment) to attack C4 and C3 on left of the 1st Light Horse Brigade, keeping touch with them. The Brigade General Commander, 1st Light Horse Brigade to reinforce his line and attack C4, keeping touch with the New Zealand Mounted Rifles Brigade.
1040 The Camels to attack their original objective, the line of 3 trenches.
1100 By 1100, the position of the troops was as follows, from the right or northern flank. Canterbury Mounted Rifles - Auckland Mounted Rifles - "A" Squadron 2nd Light Horse Regiment - "C" and "A" Squadrons, 1st Light Horse Regiment - "B" Squadron, 2nd Light Horse Regiment - 3rd Light Horse Regiment - 10th Light Horse Regiment - 9th Light Horse Regiment - 1st Camel Brigade. The New Zealand Mounted Rifles Brigade headquarters was a Boundary Post one mile south east of Rafa. 1st Light Horse Brigade Headquarters were at a point 1½ miles due north of Shokh el Sufi, close to the Boundary Post. The Inverness Battery were in action supporting New Zealand Mounted Rifles Brigade attack one mile north of Divisional Headquarters. The Camel Brigade was now within 700 yards of the 3 trenches and their headquarters just north of Karm ibn Musleh.
A message was received from the New Zealand Mounted Rifles Brigade at this time to say that they were endeavouring to get command of some dead ground between their right and the sea, by means of which some enemy were escaping. This was successfully done, and some 40 or 50 men, camels and donkeys were taken.
1125 By 1125, the 1st Light Horse Regiment succeeded in getting down to the large tree. The rifle fire was fairly incessant, but so far, opposition was not very great. On their left, the 10th Light Horse Regiment moved on C4 and the 9th Light Horse Regiment on C5 and got forward to within 900 yards.
1130 The Batteries were working with aeroplanes and wireless and at 1130 the Somersets and Leicesters moved forward to a previously reconnoitred position 2,500 yards south of the Reduit, and by firing on "B" Group, materially assisted the advance of the Camel Brigade, who got up to 800 yards of "B" Group and then came under fire from "C" Group at 1,400 yards.
1145 At 1145, the Inverness Battery moved forward to Headquarters New Zealand Mounted Rifles Brigade and opened fire on C5 and Point 255.
1158 At 1158, an air report was dropped saying that C4 was held strongly but not the Reduit. No enemy posts could be seen in front of the Reduit. Another report immediately after confirmed the fact that there were no troops east of Rafa. Some had been seen moving towards Khan Yunis at 1030. Small groups up to 200 in all had been counted in the Rafa trenches.
1200 By Mid-day, the Canterbury Mounted rifles had cleared the sand hills between Rafa and the sea, and the attack on Point 255 began by the New Zealand Mounted Rifles Brigade.
1215 By 1215, they got within 600 yards of the trenches. At this hour, first calls for more ammunition began. The enemy in B2 were now found to be strong and a heavy fire was opened on the Camel Brigade. Two Companies of the 2nd Battalion were sent to prolong the left and engage the 3 works from the south west. The other Company was sent to reinforce the left centre.
1230 In answer to a question if they were watching their right, the New Zealand Mounted Rifles Brigade reported that all was clear towards Khan Yunis except for some snipers who were engaged with the troop watching that direction.
1255 At 1255, another air report gave the country clear to Khan Yunis. The trenches there were reported empty, and no troops seen.
1300 By 1300, the left of the Camel Brigade was making progress, though the enemy still seemed to be in considerable force. The Hong Kong and Singapore Mountain Battery pushed forward. The centre of the 1st Light Horse Brigade reached the large tree. The New Zealand Mounted Rifles Brigade, pushing round the northern side of the Reduit, linked up with the 5th Mounted Brigade attacking from the west. They reported that they had two squadrons in reserve, and that a long row of trench half a mile south of Rafa Police Barracks had been captured.
1310 Two troops from Wellington Mounted Rifles were now put in to fill the gap between New Zealand Mounted Rifles Brigade and 1st Light Horse Brigade. The Inverness Battery were now in action at 2,200 yards supporting the New Zealand Mounted Rifles Brigade attack on the Reduit and also shelling C5.
1345 At 1345, the left of the Camel Brigade became held up by enfilade fire. Another Company was sent in to help the right of the Brigade and brought fire to bear across the front of the 1st Light Horse Brigade and helped their advance. The Camel Brigade reported that the Turks appeared to be giving way to the 1st Light Horse Brigade attack.
1350 By 1350, New Zealand Mounted Rifles Brigade reported that their Brigade and the 5th mounted Brigade were steadily pushing forward on the seaward side of the Reduit.
The 2nd Light Horse Regiment pushed along the ridge south west of the large tree and two small trenches and 24 prisoners were taken. The Regiment asked fire to be opened on Point 255 to help in taking another trench which at the time was holding up the line. the 10th Light Horse Regiment was held up by rifle and machine gun fire.
1400 At 1400, the fire of the Leicester and Somerset Batteries was turned on to "B" Works and one Company Camel Brigade was moved to the left of the Brigade to envelop B2. B3 was now found to be unoccupied, and the trench was taken. The rest of No. 3 Battalion of the Camel Brigade was moved up.
1425 At 1425, the 1st Light Horse Brigade reported that their right was forward to the ridge north of the big tree and in touch with the New Zealand Mounted Rifles Brigade.
Orders were now give by General Officer Commanding, Desert Column for the attack to be concentrated on the Reduit at 1530. The Artillery to keep up the intensive bombardment up to that hour. The 5th Mounted Brigade were ordered to cooperate with 5½ squadrons.
1445 From information of prisoners, it now appeared that the garrison at Rafa was two taburs of the 21st Regiment, each 1,000 strong and four mountain guns. The 3rd Light Horse Brigade reported that the 9th Light Horse Regiment were still stationary, but the 10th Light Horse Regiment was swinging round. both regiments had now been replenished with ammunition. The New Zealand Mounted Rifles Brigade reported that their right was progressing slowly, but the Brigade on their left seemed held up. Meantime the Camel Brigade and the 5th Mounted Brigade gained touch with each other.
1500 A report came in from the New Zealand Mounted Rifles Brigade that they had caught a Turkish Headquarters officer and 4 Germans on the coast 2 miles north east of Rafa Police Barracks. From them came the report that the 160th Regiment had left Shellal when the attack on Rafa was commenced, to relieve the place.
1530 In spite of the bombardment, the assault on the Reduit only made slow progress. The left of the Camel Brigade was held up by machine gun and two guns in the Reduit. The 1st Light Horse Brigade was being heavily bombarded with High Explosives. The right of the 10th Light Horse Regiment fell back a little. Left of the 1st Light Horse Brigade also fell back a little and reported unable to advance owing to unsilenced machine guns. A message was therefore sent round to Brigades to ask at what hour a general assault could be made with all the available forces.
At this time, hostile aeroplanes appeared and bombed Divisional Headquarters and the Camel Brigade. Little damage was done.
1550 Meantime, news came from the New Zealand Mounted Rifles Brigade that men in scattered formations about two battalions in strength, were advancing over the ridges west of Shellal.
1615 The flank guard in the direction of Khan Yunis also reported a force of about 2,000 advancing on El Magruntein from Khan Yunis, now 4 miles from the Reduit. More troops seen coming over hills five miles away, too far to estimate numbers. The Camel Brigade reported their centre held up and that the right of the Brigade on their right seemed to be retiring. Only half a company was available to throw into that part of the line without withdrawing one from the attack on "B" Works. A report also came that the Turks in the Reduit were counter attacking.
1620 Further report of enemy advance was received from New Zealand Mounted Rifles Brigade. 1st Light Horse Brigade also reported that they could not get on, their right at this time was attacking C5 and seemed to be progressing, though slowly.
A conversation now took place between General Officer Commanding Division and General Officer Commanding Desert Column on the telephone. Owing to the advance of the enemy reinforcements, orders were issued by General Officer Commanding Desert Column for abandonment of the attack, and withdrawal. Before, however, these were issued by General Officer Commanding Division our men were on the hill.
1630 And at 1630, the New Zealand Mounted Rifles Brigade that the green hill Point 255 was taken. The 6 to 800 yards being covered in two rushes, and covered by machine gun and rifle fire.
Almost immediately afterwards, the 3rd Light Horse Brigade advanced and carried the redoubts in their front, the Turks surrendering as they came up.
1640 The Camel Brigade then carried the "B" Group of trenches, taking 5 Officers and 214 Other Ranks. The 1st Light Horse Brigade also rushed the trenches C5 opposite to them.
Detachments from the Wellington Mounted Rifles were, however, engaged with the enemy coming from Shellal, and therefore the General Officer Commanding Division gave orders for the 3rd Light Horse Brigade to form a rear-guard, while the other Brigades collected their prisoners and got away. Two teams with wagon limbers were ordered to the Reduit to bring in captured guns and arrangements made to collect the wounded without delay. The 3rd Light Horse Field Ambulance, under Lieutenant Colonel Fraser, was left for this purpose, the Assistant Director Medical Services, Colonel Bowers remaining with it while a final rear-guard of one Regiment of the 3rd Light Horse Brigade, under Lieutenant Colonel Maygar, was left as escort and covering party.
1900 At 1900, the Divisional Headquarters left for Sheikh Zowaiid, and arrived there at 2300. The General Officer Commanding Desert Column had ordered all fresh troops not engaged in the action to be employed next day in clearing the battle-field.
2359 Accordingly, one Squadron, 3rd Light Horse Brigade with all available limbers, was ordered to leave at 0400 next day for Rafa.
Orders were also issued for the Wellington Mounted Rifles to remain at Sheikh Zowaiid to cover the collecting of wounded and all enemy material. The Division and Desert Column Headquarters to march at 0700 for El Arish.
January 10th 1917
0130 At 0130, the Brigade Major New Zealand Mounted Rifles Brigade, came in with a few more prisoners.
0400 At 0400, the squadron 3rd Light Horse Brigade, under Major Parsons, moved out with all available limbers to Rafa, and returned to Sheikh Zowaiid at 1600, having filled all limbers with arms, ammunition and material, and buried all our dead.
0645 All was reported clear east of Rafa by aeroplane at 0645.
0700 At 0700, the Division and Desert Column Headquarters marched from Sheikh Zowaiid. The Regiment under Colonel Maygar, which had been left the night before covering the collecting of wounded had a small encounter with some mounted troops and camel men to the east of Shokh el Sufi. The Turks retired and the squadron took 14 prisoners.
All our own wounded and such of the Turkish wounded as were left were brought in to Sheikh Zowaiid covered by the rear-guard of the Wellington Mounted Rifles, by 1000 on January 11th.
The results of the action were as follows:-
Losses to the Enemy -
about 200 Killed estimated.
162 wounded collected
25 Officers, 1 Warrant Officer, 1,437 Other Ranks prisoners.
These included the following Germans - 1 Officer, 1 Warrant Officer, and 9 Other Ranks.
The captures were:-
(a) Material
Mountain Guns - 4
Machine Guns - 4
Rifles - 578
Small Arms Ammunition - 40,000
And parts of guns, sights, machine guns, pack saddles, flares, etc.
(b) Animals
Camels - 85
Horses - 19
Mules - 35
The casualties of the Australian and New Zealand Mounted Division were:-
(a) Personnel
Killed - 42 Other Ranks
Wounded - 19 Officers, 233 Other Ranks.
(b) Horses
Killed - 23
Wounded - 63
Missing - 7
The expenditure of ammunition for the three brigades was:-
Small Arms Ammunition - 409,107 rounds.
Shells - 1,637
I desire to specially bring to notice the name of Brigadier General Chaytor in connection with these operations, as I consider it was greatly owing to his energy and Leadership that they were brought to a successful issue.
Major General
Commanding
Australian and New Zealand Mounted Division
War Diaries
All War Diaries cited on this site should be read in conjunction with the Australian Light Horse Studies Centre, AIF War Diaries of the Great War, Site Transcription Policy which may be accessed at:
Australian Light Horse Studies Centre, AIF War Diaries of the Great War, Site Transcription Policy
Further Reading:
The Battle of Rafa, Sinai, 9 January 1917
The Battle of Rafa, Sinai, 9 January 1917, Roll of Honour
The Palestine Campaign, 1917 - 1918
Battles where Australians fought, 1899-1920
Citation: The Battle of Rafa, Sinai, 9 January 1917, Anzac Mounted Division Battle Chronology, 8 - 11 January 1917
