« January 2008 »
S M T W T F S
1 2 3 4 5
6 7 8 9 10 11 12
13 14 15 16 17 18 19
20 21 22 23 24 25 26
27 28 29 30 31
You are not logged in. Log in


Search the site:


powered by FreeFind
Volunteer with us.

Entries by Topic All topics  
A Latest Site News
A - Using the Site
AAA Volunteers
AAB-Education Centre
AAC-Film Clips
AAC-Photo Albums
AIF & MEF & EEF
AIF - Lighthorse
AIF - ALH - A to Z
AIF - DMC
AIF - DMC - Or Bat
AIF - DMC - Anzac MD
AIF - DMC - Aus MD
AIF - DMC - British
AIF - DMC - BWI
AIF - DMC - French
AIF - DMC - Indian
AIF - DMC - Italian
AIF - DMC - Medical
AIF - DMC - Remounts
AIF - DMC - Scouts
AIF - DMC - Sigs
AIF - DMC - Sigs AirlnS
AIF - DMC - 1 Sig Sqn
AIF - DMC - 2 Sig Sqn
AIF - DMC - Eng
AIF - DMC - Eng 1FSE
AIF - DMC - Eng 2FSE
AIF - DMC - GSR
AIF - 1B - 1 LHB
AIF - 1B - 6 MVS
AIF - 1B - 1 LHMGS
AIF - 1B - 1 Sig Trp
AIF - 1B - 1 LHFA
AIF - 1B - 1 LHR
AIF - 1B - 2 LHR
AIF - 1B - 3 LHR
AIF - 2B - 2 LHB
AIF - 2B - 7 MVS
AIF - 2B - 2 LHFA
AIF - 2B - 2 LHMGS
AIF - 2B - 2 Sig Trp
AIF - 2B - 5 LHR
AIF - 2B - 6 LHR
AIF - 2B - 7 LHR
AIF - 3B - 3 LHB
AIF - 3B - 8 MVS
AIF - 3B - 3 LHB Sigs
AIF - 3B - 3 LHFA
AIF - 3B - 3 LHMGS
AIF - 3B - 3 Sig Trp
AIF - 3B - 8 LHR
AIF - 3B - 9 LHR
AIF - 3B - 10 LHR
AIF - 4B - 4 LHB
AIF - 4B - 4 Sig Trp
AIF - 4B - 9 MVS
AIF - 4B - 4 LHFA
AIF - 4B - 4 LHMGS
AIF - 4B - 4 LHR
AIF - 4B - 11 LHR
AIF - 4B - 12 LHR
AIF - 5B - 5 LHB
AIF - 5B - 10 MVS
AIF - 5B - 5 LHFA
AIF - 5B - 5 Sig Trp
AIF - 5B - ICC
AIF - 5B - 14 LHR
AIF - 5B - 15 LHR
AIF - 5B - 1er Regt
AIF - 5B - 2 NZMGS
AIF - AASC
AIF - Aboriginal LH
AIF - Badges
AIF - Cars
AIF - Chinese LH
AIF - Double Sqns
AIF - Engineers
AIF - Fr - 22 Corps
AIF - Fr - 13 LHR
AIF - Honour Roll
AIF - HQ - 3rd Echelon
AIF - Marching Songs
AIF - Misc Topics
AIF - NZMRB
AIF - NZMRB - AMR
AIF - NZMRB - CMR
AIF - NZMRB - EFT
AIF - NZMRB - NZMFA
AIF - NZMRB - NZMGS
AIF - NZMRB - OMR
AIF - NZMRB - Sig-Trp
AIF - NZMRB - WMR
AIF - Ships
AIF - Ships - Encountr
AIF - Ships - Una
AIF - WFF
AIF - Wireless Sqn
Battles
BatzA - Australia
BatzA - Broken Hill
BatzA - Liverpool
BatzA - Merivale
BatzB - Boer War
BatzB - Bakenlaagte
BatzB - Belmont
BatzB - Bothaville
BatzB - Buffels Hoek
BatzB - Coetzees Drift
BatzB - Diamond Hill
BatzB - Driefontein
BatzB - Elands
BatzB - Graspan
BatzB - Grobelaar
BatzB - Grootvallier
BatzB - Hartebestfontn
BatzB - Houtnek
BatzB - Karee Siding
BatzB - Kimberley
BatzB - Koster River
BatzB - Leeuw Kop
BatzB - Mafeking
BatzB - Magersfontein
BatzB - Modder River
BatzB - Onverwacht
BatzB - Paardeberg
BatzB - Palmietfontein
BatzB - Pink Hill
BatzB - Poplar Grove
BatzB - Rhenoster
BatzB - Sannahs Post
BatzB - Slingersfontn
BatzB - Stinkhoutbm
BatzB - Sunnyside
BatzB - Wilmansrust
BatzB - Wolvekuil
BatzB - Zand River
BatzG - Gallipoli
BatzG - Anzac
BatzG - Aug 1915
BatzG - Baby 700
BatzG - Evacuation
BatzG - Hill 60
BatzG - Hill 971
BatzG - Krithia
BatzG - Lone Pine
BatzG - Nek
BatzJ - Jordan Valley
BatzJ - 1st Amman
BatzJ - 2nd Amman
BatzJ - Abu Tellul
BatzJ - Es Salt
BatzJ - JV Maps
BatzJ - Ziza
BatzM - Mespot
BatzM - Baghdad
BatzM - Ctesiphon
BatzM - Daur
BatzM - Kurna
BatzM - Kut el Amara
BatzM - Ramadi
BatzN - Naval
BatzN - AE1
BatzN - Cocos Is
BatzN - Heligoland
BatzN - Marmara
BatzN - Zeebrugge
BatzN - Zeppelin L43
BatzNG - Bitapaka
BatzO - Other
BatzO - Baku
BatzO - Egypt 1919
BatzO - Emptsa
BatzO - Karawaran
BatzO - Peitang
BatzO - Wassa
BatzP - Palestine
BatzP - 1st Gaza
BatzP - 2nd Gaza
BatzP - 3rd Gaza
BatzP - Aleppo
BatzP - Amwas
BatzP - Ayun Kara
BatzP - Bald Hill
BatzP - Balin
BatzP - Beersheba
BatzP - Berkusieh
BatzP - Damascus
BatzP - El Auja
BatzP - El Buggar
BatzP - El Burj
BatzP - Haifa
BatzP - Huj
BatzP - JB Yakub
BatzP - Kaukab
BatzP - Khan Kusseir
BatzP - Khuweilfe
BatzP - Kuneitra
BatzP - Megiddo
BatzP - Nablus
BatzP - Rafa
BatzP - Sasa
BatzP - Semakh
BatzP - Sheria
BatzP - Surafend
BatzP - Wadi Fara
BatzS - Sinai
BatzS - Bir el Abd
BatzS - El Arish
BatzS - El Mazar
BatzS - El Qatiya
BatzS - Jifjafa
BatzS - Magdhaba
BatzS - Maghara
BatzS - Romani
BatzS - Suez 1915
BatzSe - Senussi
BatzWF - Westn Front
BW - Boer War
BW - NSW
BW - NSW - 1ACH
BW - NSW - 1NSWMR
BW - NSW - 2NSWMR
BW - NSW - 3ACH
BW - NSW - 3NSWIB
BW - NSW - 3NSWMR
BW - NSW - 5ACH
BW - NSW - A Bty RAA
BW - NSW - AAMC
BW - NSW - Aust H
BW - NSW - Lancers
BW - NSW - NSW Inf
BW - NSW - NSWCBC
BW - NSW - NSWIB
BW - NSW - NSWMR_A
BW - NZ
BW - Qld
BW - Qld - 1ACH
BW - Qld - 1QMI
BW - Qld - 2QMI
BW - Qld - 3ACH
BW - Qld - 3QMI
BW - Qld - 4QIB
BW - Qld - 5QIB
BW - Qld - 6QIB
BW - Qld - 7ACH
BW - QLD - AAMC
BW - SA
BW - SA - 1SAMR
BW - SA - 2ACH
BW - SA - 2SAMR
BW - SA - 3SACB
BW - SA - 4ACH
BW - SA - 4SAIB
BW - SA - 5SAIB
BW - SA - 6SAIB
BW - SA - 8ACH
BW - SA - AAMC
BW - Tas
BW - Tas - 1ACH
BW - Tas - 1TIB
BW - Tas - 1TMI
BW - Tas - 2TB
BW - Tas - 2TIB
BW - Tas - 3ACH
BW - Tas - 8ACH
BW - Vic
BW - Vic - 1VMI
BW - Vic - 2ACH
BW - Vic - 2VMR
BW - Vic - 3VB
BW - Vic - 4ACH
BW - Vic - 4VIB
BW - Vic - 5VMR
BW - Vic - 6ACH
BW - Vic - AAMC
BW - Vic - Scot H
BW - WA
BW - WA - 1WAMI
BW - WA - 2ACH
BW - WA - 2WAMI
BW - WA - 3WAB
BW - WA - 4ACH
BW - WA - 4WAMI
BW - WA - 5WAMI
BW - WA - 6WAMI
BW - WA - 8ACH
BW Gen - Campaign
BW Gen - Soldiers
BW General
Cavalry - General
Diary - Schramm
Egypt - Heliopolis
Egypt - Mena
Gen - Ataturk Pk, CNB
Gen - Australia
Gen - Legends
Gen - Query Club
Gen - St - NSW
Gen - St - Qld
Gen - St - SA
Gen - St - Tas
Gen - St - Vic
Gen - St - WA
Gm - German Items
Gm - Bk - 605 MGC
GW - 11 Nov 1918
GW - Atrocities
GW - August 1914
GW - Biographies
GW - Propaganda
GW - Spies
GW - We forgot
Militia 1899-1920
Militia - Area Officers
Militia - Inf - Infantry
Militia - Inf - 1IB
Militia - Inf - 2IB
Militia - Inf - 3IB
Militia - Inf - NSW
Militia - Inf - Qld
Militia - Inf - SA
Militia - Inf - Tas
Militia - Inf - Vic
Militia - Inf - WA
Militia - K.E.Horse
Militia - LH
Militia - LH - Regts
Militia - LH - 1LHB
Militia - LH - 2LHB
Militia - LH - 3LHB
Militia - LH - 4LHB
Militia - LH - 5LHB
Militia - LH - 6LHB
Militia - LHN - NSW
Militia - LHN - 1/7/1
Militia - LHN - 2/9/6
Militia - LHN - 3/11/7
Militia - LHN - 4/6/16
Militia - LHN - 5/4/15
Militia - LHN - 6/5/12
Militia - LHN - 28
Militia - LHQ - Qld
Militia - LHQ - 13/2
Militia - LHQ - 14/3/11
Militia - LHQ - 15/1/5
Militia - LHQ - 27/14
Militia - LHS - SA
Militia - LHS - 16/22/3
Militia - LHS - 17/23/18
Militia - LHS - 24/9
Militia - LHT - Tas
Militia - LHT - 12/26
Militia - LHV - Vic
Militia - LHV - 7/15/20
Militia - LHV - 8/16/8
Militia - LHV - 9/19
Militia - LHV - 10/13
Militia - LHV - 11/20/4
Militia - LHV - 19/17
Militia - LHV - 29
Militia - LHW - WA
Militia - LHW-18/25/10
Militia - Military Orders
Militia - Misc
MilitiaRC - Rifle Clubs
MilitiaRC - NSW
MilitiaRC - NT
MilitiaRC - Qld
MilitiaRC - SA
MilitiaRC - Tas
MilitiaRC - Vic
MilitiaRC - WA
Militiaz - New Zealand
Tk - Turkish Items
Tk - Army
Tk - Bks - Books
Tk - Bks - 1/33IR
Tk - Bks - 27th IR
Tk - Bks - Air Force
Tk - Bks - Yildirim
Tk - POWs
Wp - Weapons
Wp - Hotchkiss Cav
Wp - Hotchkiss PMG
Blog Tools
Edit your Blog
Build a Blog
RSS Feed
View Profile
Open Community
Post to this Blog
Site Index
Education Centre
LH Militia
Boer War
Transport Ships
LH Battles
ALH - Units
ALH - General
Aboriginal Light H
Weapons
Ottoman Sources

"At a mile distant their thousand hooves were stuttering thunder, coming at a rate that frightened a man - they were an awe inspiring sight, galloping through the red haze - knee to knee and horse to horse - the dying sun glinting on bayonet points..." Trooper Ion Idriess

The Australian Light Horse Studies Centre aims to present an accurate history as chroniclers of early Australian military developments from 1899 to 1920.

The Australian Light Horse Studies Centre site holds over 12,000 entries and is growing daily.

Contact: Australian Light Horse Studies Centre

Let us hear your story: You can tell your story, make a comment or ask for help on our Australian Light Horse Studies Centre Forum called:

Desert Column Forum

WARNING: This site contains: names, information and images of deceased people; and, language which may be considered inappropriate today.

Wednesday, 9 January 2008
The Battle of Rafa, Sinai, 9 January 1917, 5th Mounted Brigade, War Diary Account
Topic: AIF - DMC - British

The Battle of Rafa

Sinai, 9 January 1917

5th Mounted Brigade War Diary Account


5th Mounted Brigade, War Diary Account


The following is a transcription of the 5th Mounted Brigade, War Diary Account detailing their role at the Battle of Rafa, Sinai, 9 January 1917.


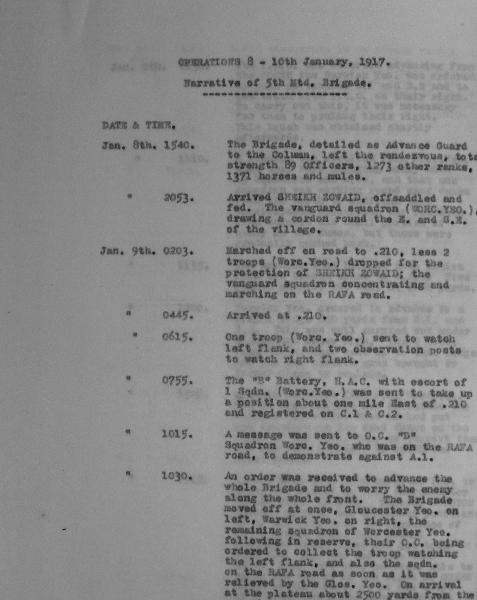
Operations 8 - 10th January, 1917.
Narrative of 5th Mounted Brigade.

El Arish 8 January 1917

1540 The Brigade, detailed as Advance Guard to the Column, left the rendezvous, total strength 89 Officers, 1,273 other ranks,
1,371 horses and mules.

2053 Arrived Sheikh Zowaiid, off saddled and fed. The vanguard squadron (Worcester Yeomanry), drawing a Cordon round the east and south east of the village.


Rafa 9 January 1917

0203 Marched off on road to Point 210, less 2 troops (Worcester Yeomanry) dropped for the protection of Sheikh Zowaiid; the vanguard squadron concentrating and marching on the Rafa Road.

0445 Arrived at Point 210,

0615 One troop (Worcester Yeomanry) sent to watch left flank, and two observation posts to watch right flank.

0755 The "B" Battery, Honourable Artillery Company with escort of 1 Squadron (Worcester Yeomanry) was sent to take up a position about one mile east of Point 210 and registered on C.1 & C.2.

1015 A message was sent to Officer Commanding "D" Squadron Worcester Yeomanry who was on the Rafa road, to demonstrate against A.1.

1030 An order was received to advance the whole Brigade and to worry the enemy along the whole front. The brigade moved off at once, Gloucester Yeomanry on left, Warwick Yeomanry on right, the renaming squadron of Worcester Yeomanry following in reserve, their Officer Commanding being ordered to collect the troop watching the left flank, and also the Squadron on the Rafa road as soon as it was relieved by the Gloucester Yeomanry. On arrival at the plateau about 2500 yards from the enemy's main position, the Warwick Yeomanry was ordered to engage B.1. and B.2, and the Gloucester Yeomanry was sent to the left along the edge of the dunes to attack the right of A.1, Worcester Yeomanry in reserve on right rear of Gloucester Yeomanry. Brigade Headquarters were established in an old Turkish Work Opposite A.2. at 2000 yards distance. The Warwick Yeomanry dismounted and came into action in the open at about 2200 yards from enemy's position, they at Once came under machine gun fire and shrapnel from 3 guns.

1130 The Imperial Camel Corps was observed advancing from the south the Warwick Yeomanry was ordered to push on towards B.1 and B.2 and to get touch with Imperial Camel Corps on their right. To carry out this, it was necessary for them to prolong their right. This touch was obtained shortly afterwards.

1110 A message was received from Gloucester Yeomanry that they were engaging enemy with 1½ Squadrons and machine guns and that one squadron was working round sand dunes from the north to outflank A.1. Considerable opposition was received from snipers and small parties of enemy in the dunes, but these were gradually pushed back.

1135 The machine guns brought into action from old trench close to Brigade Headquarters. Fire opened on A.1. and A.2. at 2000 yards.

1200 Warwick Yeomanry ordered to advance to a slight ridge 800 yards from B.1. and B.2. This was well carried out under a somewhat heavy fire. The 2 machine guns near Brigade Headquarters were sent up to this ridge, and the two reserve guns brought to former place to replace.

1305 Message received from Officer Commanding Worcester Yeomanry who in the meantime had collected the vanguard squadron, that he had put one squadron on the sand dunes on the right of the Gloucester Yeomanry to support them and had sent a patrol to watch the coast route.

1312 Orders were sent to Gloucester Yeomanry to press the attack on A.1, (hereinafter called Green Knoll). General Royston visited my Headquarters, and explained positions of Australian and New Zealand Division. In pursuance of above order, Gloucester Yeomanry pushed eastwards along dunes and got touch with New Zealand Brigade, who had come through Rafa. They were not, however, able to cross the valley on the right of Green Knoll at that time, as it was swept by 2 machine guns and rifle fire from that work.

1340 At this time the Imperial Camel Corps appeared to be advancing towards B.1. and 2. but there was still a gap between them and the Warwick Yeomanry right, so I brought up three troops, (Worcester Yeomanry) from the Battery escort and put their in here.

1400.    I sent orders to "B" Battery to send up one section to a position 200 yards to right rear of my Headquarters and I sent a message to Imperial Camel Corps asking if they could cooperate in an attack on B.1. and 2. my intention was, if a favourable reply was received, to shell the trench wall and then push in the Warwicks and the three Worcester troops in conjunction with the Imperial Camel Corps bringing up another Worcester Squadron in support.

1430 Before however this plan could materialise, I noticed the shearing off to their right and missing above named work.

1440 Ten minutes later an order was received from Column Headquarters that a concentrated attack on the Reduit was to take place at 1530 and that I was to cooperate by pushing a vigorous attack in that direction from my left with every available man. This necessitated my giving up the attack on B.1. and 2. and transferring the 3 troops of Worcesters and 1 Squadron of Warwicks to the left flank. I detailed Colonel Williams, Commanding Officer Worcester Yeomanry to conduct this attack, the force for the purpose mounting to the equivalent of 5½ Squadrons. At the same time I sent for the other section of "B" Battery, to move to the position near my Headquarters and pointed out to them the trenches to be shelled till 1525. I also told Officer Commanding Warwick Yeomanry, that the attack on B.1. and 2 must be temporarily abandoned but to keep up a steady fire from his machine guns and rifles at any target that might present itself there in order to divert attention from Imperial Camel Corps to east of it. Owing to the distance to be traversed by the two Squadrons transferred from right to left, the left attack was a little late is developing.

1600 About 1600 I switched the guns on to Green Knoll and trenches adjoining and excellent practice was made. The attack progressed steadily till about 1645 when the leading lines were within 200 yards of the Green Knoll, but the glacis slope here was by 2 machine guns and many rifles, so that the advance was held up and somewhat heavy Casualties sustained.

1645 A message was received from Column Headquarters that owing to advance of enemy reinforcements, the action was to be broken off at 1700.

At this moment, I observed the New Zealand Mounted Rifles Brigade rushing the summit of Hill 255 and a few minutes later the ANZAC Brigades swept over the crest line on their left. I Immediately informed the General Officer Commanding by telephone, and sent orders to the Warwicks to co-operate vigorously in the enveloping attack on B.1. and 2. which fell shortly after, 320 prisoners were taken in this work alone.

1700 to 1730 As the firing on the left was still heavy I rode to that flank along the dunes, and proceeded thence towards the firing line on foot. I met Officer Commanding Gloucester Yeomanry and gave him the order to pass down the word to withdraw. Just at this time the firing ceased, some of the Gloucesters creeping forward in the darkness found the enemy has evacuated the Green Knoll and adjoining trenches. The majority probably fell into the hands of the Anzacs near Rafa. The collection of wounded was them proceeded with.

1850 I left for Sheikh Zowaiid, leaving one squadron Warwick Yeomanry to help Medical Officers with the wounded.

2100 Brigade (less one squadron) arrived at Sheikh Zowaiid.

2300 Above mentioned Warwick Squadron arrived at Sheikh Zowaiid.


10 January 1917

0100 Brigade marched from Sheikh Zowaiid.

0645 Brigade arrived El Arish.


The Light Car Patrol ably assisted the final attack with their machine guns. They conveyed a number of wounded to Sheikh Zowaiid and their Officer Commanding then guided a number of sand carts back again for further wounded. I understand he made a third journey in the small hours of the 10th. I cannot speak too highly of the behaviour of all ranks throughout the day. Fire control was excellent and the ammunition supply worked smoothly. The "B" Battery, Honourable Artillery Company rendered admirable assistance and both their ranging and fusing were very good. One of my Medical Officers examined "A" trenches the following day and found them choked with the enemy's dead and wounded.


War Diaries

All War Diaries cited on this site should be read in conjunction with the Australian Light Horse Studies Centre, AIF War Diaries of the Great War, Site Transcription Policy which may be accessed at:

Australian Light Horse Studies Centre, AIF War Diaries of the Great War, Site Transcription Policy 


Further Reading:

The British Army

The Battle of Rafa, Sinai, 9 January 1917, British Forces Roll of Honour

The Battle of Rafa, Sinai, 9 January 1917

The Battle of Rafa, Sinai, 9 January 1917, Roll of Honour

The Palestine Campaign, 1917 - 1918

Battles where Australians fought, 1899-1920


Citation: The Battle of Rafa, Sinai, 9 January 1917, 5th Mounted Brigade, War Diary Account


Posted by Project Leader at 12:01 AM EAST
Updated: Monday, 31 January 2011 6:47 AM EAST

View Latest Entries

Full Site Index


powered by FreeFind
Let us hear your story: You can tell your story, make a comment or ask for help on our forum.

Desert Column Forum

A note on copyright

The Australian Light Horse Studies Centre is a not for profit and non profit group whose sole aim is to write the early history of the Australian Light Horse from 1900 - 1920. It is privately funded and the information is provided by the individuals within the group and while permission for the use of the material has been given for this site for these items by various donors, the residual and actual copyright for these items, should there be any, resides exclusively with the donors. The information on this site is freely available for private research use only and if used as such, should be appropriately acknowledged. To assist in this process, each item has a citation attached at the bottom for referencing purposes.

Please Note: No express or implied permission is given for commercial use of the information contained within this site.

A note to copyright holders

The Australian Light Horse Studies Centre has made every endeavour to contact copyright holders of material digitised for this blog and website and where appropriate, permission is still being sought for these items. Where replies were not received, or where the copyright owner has not been able to be traced, or where the permission is still being sought, the Australian Light Horse Studies Centre has decided, in good faith, to proceed with digitisation and publication. Australian Light Horse Studies Centre would be happy to hear from copyright owners at any time to discuss usage of this item.

Contact

Australian Light Horse Studies Centre

eXTReMe Tracker