


Topic: AIF - DMC
The First Battle of Gaza
Palestine, 26 to 27 March 1917
Desert Column, Account
Desert Column, Account.
The following is a transcription of the Account from the War Diary of the Desert Column detailing its role at the First Battle of Gaza, Palestine, 26 to 27 March 1917.
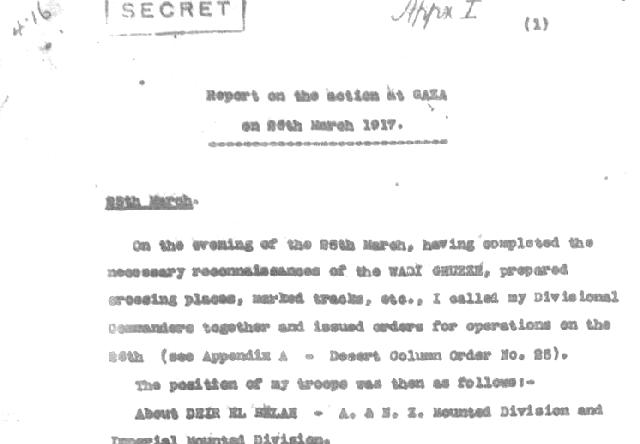
Report on the action at Gaza on 26th March 191725th March
On the evening of the 25th March, having completed the necessary reconnaissances of the Wadi Ghuzze, prepared crossing places, marked tracks, etc., I called Divisional Commanders together and issued orders for operations on the 26th (See Appendix A - Desert Column Order No. 25).
The position of my troops was then as follows:-About Deir el Belah - Anzac Mounted Division and Imperial Mounted Division.
About Abasan el Kebir - the Imperial Camel Brigade and 11th and 12th Light Armoured Motor Batteries and No. 7 Light Car Patrol.
On outpost - overlooking the wadi on a line from the sea to the man Gaza Road - the 53rd Division, with the 54th Division on its right carrying the outpost line on to the Goz el Taire.
26th March
The Anzac Mounted Division, followed by the Imperial Mounted Division, left their bivouac at 0230. The head of the column was lead by Captains Tooth and Maddrell of the 6th and 7th Light Horse Regiments respectively, to whom great credit is due for the way in which they overcame all difficulties and reached the crossing place almost to the minute. The leading Division, having crossed the Wadi by 0615 headed for Deir Durdis.
The Camel Brigade crossed at Tel el Jemmi and proceeded to El Mendur.
Meanwhile the 53rd Division, having thrown forward strong bridgeheads before dawn, crossed the Wadi about El Breij with the 158th Brigade on the right, directed on Mansura, the 160th Brigade on the left, directed on El Sheluf. The 159th Brigade was held in reserve and was passed over in rear of the 158th Brigade.
The Gloucester Hussars, with a Battalion and a section of 60-pounders, crossed the Wadi near the caves at Tel el Ajjul and for the remainder of the day successfully carried out their role of working up the sand hills to cover the left of the 53rd Division and to keep the enemy employed between Sheikh Ahmed and Gaza.
At the same time the Divisional Squadron secured a good gun position, and an excellent observation station, for another section of 60 pounders near the Red Farm.
The 54th Division commenced to cross at Sheikh Nuran at 0700.
The very dense fog, which came on just before dawn and which did not entirely clear till 0800, while undoubtedly delaying the operations very materially, since the General Officer Commanding 53rd Division did not consider it advisable to advance his infantry till gun support could be counted upon, at the same time gave immunity from gun fire to my troops during the time they were crossing the Wadi, and enabled the mounted troops to work forward some distance before their presence was detected.
At 0700 I established my headquarters on Hill 310, In Seirat.
It was not until the fog had cleared, and the 53rd Division decided to move his headquarters and, at the same time, went on himself to the headquarters of one of his Brigades. This resulted in the total loss of communication with this division for a considerable period.
The Imperial Mounted Division reached El Mendur about 0930 and sent forward Officers' Patrols towards Hareira, Tel es Sheria, Zuheilika and Huj, while two squadrons 6th Mounted Brigade were placed astride the Bir Saba - Gaza Road about Khirbit el Baha and one was sent north to gain touch with the Anzac Mounted Division (cf. Appendix 2).
At the same hour Anzac Mounted Division reached Beit Durdis and pushed out the 2nd Light Horse Brigade in the direction of Jeballye with detachments towards Deir Sineid.
By 1015 the Headquarters of the Anzac Mounted Division and Imperial Mounted Division had opened at Beit Durdis and Khirbit er Reseim respectively and communication had been established by cable and helio.
It is interesting to note that the powerful wireless installation at Gaza jammed our instruments, and would have made communication by this means impossible.
During these moves some opposition was met from hostile camel men on the Gaza Bir Saba Road and all the patrols encountered small hostile bodies.
At 1020 the Anzac Mounted Division sent out reconnoitring detachments towards Huj and Nejed.
Soon afterwards the 2nd Light Horse Brigade closed the exits from Gaza and rested their right on the sea. During this movement the commander of the 53rd Turkish Division was captured with his staff while driving into Gaza, also a convoy with 30 Turks, one of whom gave excellent information regarding enemy dispositions (cf Appendix C). Later in the morning the same Brigade destroyed the head of a Turkish column with machine gun fire, as it debouched from Gaza in a north westerly direction.
At 1020 as the attack did not appear developing as rapidly as the situation demanded, I sent a message to General Officer Commanding 53rd Division impressing upon him the importance of capturing Gaza before enemy reinforcements could reach it.
At 1025 General Officer Commanding 53rd Division was informed that the 161st Brigade, with a Brigade of Artillery, was at Sheikh Nebhan and would be at his disposal when required. This Brigade was ordered to Mansura by Eastern Force at 1240 to come, on arrival at that place, under orders of 53rd Division. It appears, however, to have gone to El Sire and did not reach the 53rd Division till about 1500.
The squadrons of the 6th Mounted Brigade around Khirbit el Baha soon found themselves in action with enemy mounted troops, supported by bodies of infantry, and remained so throughout the day against continually increasing numbers.
At 1100 the General Officer Commanding 5th Mounted Brigade considered the enemy were becoming more active and opened with his battery - thus drawing the fire of the heavy guns at Hareira and suffering some casualties in consequence.
At 1130 the 53rd Division, having completed the necessary reconnaissances, commenced to display from the line El Sheluf - Mansura to attack the Ali Muntar position with the following objectives:-The 160th Infantry Brigade astride the Ali Muntar Ridge, on the enemy's south western defences;the 158th Infantry Brigade, moving by El Hamus, on Ali Muntar; and
the 159th Infantry Brigade (less 1 Battalion to Divisional Reserve), to pivot on the right of the 158th Infantry Brigade, through Maidah abu Said on the prominent Hill 1,200 yards north east of Ali Muntar. This attack to synchronise with the attack of the 158th Infantry Brigade.
In support of this, the following artillery dispositions were made:-One Field Artillery Brigade to support 158th and 159th Infantry Brigades from Mansura.
One Field Artillery Brigade to support 160th Infantry Brigade, and to enfilade the enemy's position at Ali Muntar, from the eastern slopes of the El Sheluf Ridge.
At about noon, as the aeroplane observers gave no indication of enemy movement from Huj and Hareira areas, I ordered the reconnaissances to be carried out by both Mounted Divisions with a view to detaching one Brigade from each to the assistance of the Infantry.
An hour later, as the attack on Gaza did not seem to be making headway, I decided to throw the whole of the Anzac Mounted Division against the north and north west of teh town to assist the Infantry.
I therefore placed both Mounted Divisions under the orders of Major General Sir HG Chauvel, KCMG, CB, and indicated to him that he should bring the Imperial Mounted Division further north to about Khirbit Kufeih to continuous observing the enemy, and I ordered the Imperial Camel Brigade to move to Khirbit er Reseim and observe the country from the right of the Imperial Mounted Division to Khirbit el Asaferiyeh.
At 1310 considerable activity on the roads leading north and east of Tel el Sheria was observed by the contact squadron, which was pushed out in the direction of Huj while the 5th Mounted Brigade observed the movement of hostile patrols between Huj and Tel el Sheria, and were able to see that the trenches about Khirbit el Jindy were occupied by infantry. Columns of dust moving into Hareira, and south from Sheria, were also observed.
About this time Major General AG Dallas, CB, DSO, reported that his troops were then moving forward to the attack, which he intended to press vigorously.
For the situation of the Mounted troops at 1400 of Sketch Map - Appendix D
By 1530 General Chauvel had collected his division, with the exception of some detachments not yet relieved, and, with the 3rd Light Horse Brigade from the Imperial Mounted Division, had commenced to move on Gaza.
The following were his dispositions:-The 2nd Light Horse Brigade to attack on a front from the sea to Jeballye Road;the New Zealand Mounted Rifles Brigade through to top of the continuation of the Ali Muntar Ridge, north west of Gaza;
the 22nd Mounted Brigade (less 1 Regiment) thence to the Beit Durdis track.
The attack was timed to commence at 1600.
Meanwhile the General Officer Commanding Imperial Mounted Division established his headquarters near Deir Durdis, and proceeded to relieve detachments of the Anzac Mounted Division from the 6th Mounted Brigade while the 5th Mounted Brigade was assigned the task of keeping touch with the Imperial Camel Brigade on the right, and the reconnoitring squadron near Huj on the left.
To return to the Infantry action. About 1700 when the Field Artillery Brigade f the 54th Division reached Mansura it was, as once, put into cover the advance of the 158th Infantry Brigade.
Supported by artillery and long range machine guns fire the 160th Infantry Brigade advanced along the ridge, while the 158th and 159th Infantry Brigades on their right, attached over a glacis like slope devoid of cover under heavy gun, machine gun and rifle fire. The behaviour of the troops was magnificent and the advance was carried out with the utmost steadiness.
By 1630 considerable progress had been made and portions of the enemy position were already in our hands. The Mosque Hill at Ali Muntar, the Labyrinth, and the ground in the immediate neighbourhood were, soon afterwards, in our possession. The Anzac Mounted Division, whose action will be considered later, was already exerting pressure on the enemy, and elements of the division entered the hostile trenches almost simultaneously with the Infantry. By 1700 the enemy was only holding out in the trenches south of the Mosque and on Green Hill only.
To the 161st Infantry Brigade (less 1 Battalion, which formed the only Divisional Reserve) was allotted the task of taking this hill, which it secured, with great gallantry and after a hard fight.
By dark, the whole of the Ali Muntar position was in our hands.
As regards the Mounted Troops, before the relief of the Anzac Mounted Division observation detachments had been carried out by portions of the Royal Buckinghamshire Hussars, the enemy, from Jemmama, pressed his advance vigorously and succeeded in dislodging our troops from Hill 408 before the 6th Mounted Brigade and Berkshire Battery could be brought u in support. This occurred about 1715.
The situation on this flank was now somewhat critical, so Major General WWH Hodgson, CVO, DSO, applied to General Chauvel for the return of the 3rd Light Horse Brigade.This was at once sent back (less 1 Squadron) and, under the skilful leadership of Brigadier General JR Royston, CMG, SDO, cabled the 6th Mounted Brigade to maintain its position, which otherwise have been untenable.
During these operations General Hodgson records his appreciation of the good work done by the 3rd Light Horse Brigade and the 6th Mounted Brigade and the Berkshire and Nottinghamshire Batteries in holding up the hostile advance.
Touch had, unfortunately, been lost with the 5th Mounted Brigade when the Imperial Mounted Division moved its headquarters and it was found impossible to get messages through. Thus a dangerous gap occurred in the line between the right of the 6th Mounted Brigade and the left of the Imperial Camel Brigade. To close this, the General Officer Commanding Imperial Mounted Division asked for, and obtained, the services of the 10th Light Horse Regiment, the remaining regiment of the 3rd Light Horse Brigade.
Much credit is due to this regiment for the manner in which it reached Divisional Headquarters and took up its place in the line in the dark in an unknown country, seamed with deep and difficult wadi beds. Thanks to the efforts of the Mounted Troops supported by the Nottinghamshire and Berkshire Batteries and the 11th and 12th Light Armoured Motor Batteries, the enemy made no further attempt to advance beyond Hill 405 and proceeded to dig in. There they may be left while the progress of the Anzac Mounted Division is considered.
During this period, while the Anzac Mounted Division was developing its attack on Gaza, patrols reported that three army columns were moving southwards on that place and that 300 Turkish Infantry had occupied the sandhills that of Deir Sineid. A squadron of the 22nd Mounted Brigade was sent at once, with No. 7 Light Car Patrol, to oppose this advance.
The attack of the Anzac Mounted Division on Gaza was pushed home with the greatest dash and gallantry.
The New Zealand Mounted Rifles Brigade was shortly is possession of the Redoubt on the ridge east of Gaza, while the 22nd Mounted Brigade, on their left, carried the knoll running west from that ridge.
During these operations, the Somerset Battery, in support of the 2nd Light Horse Brigade, silenced two enemy guns, and the New Zealand Mounted Rifles Brigade captured, and retained in spite of counter attacks, two 77 mm guns which they used with skill on small bodies of the enemy which were still in occupation of houses in the vicinity. As a result 20 prisoners were taken and eventually the guns were safely brought away.
The whole division then established itself amongst the cactus hedges on the outskirts of the town, all Brigades overcoming serious difficulties in fighting their way through the cactus hedges in spite of the stubborn resistance of the enemy. The 2nd Light Horse Brigade particularly distinguished itself in this phase of the operations.
When darkness fell the situation was still somewhat obscure, but appeared to be as under (cf Sketch Map - Appendix E.)
The 53rd Division was occupying the trenches that had been captured around Gaza with their flank very much in the air. In support of this Division, the 54th Division (less 1 Brigade) was holding Sheikh Abbas with its left about 2½ miles from the flank of the 53rd Division.
The Anzac Mounted Division was very much extended around Gaza and was engaged in street fighting.
The Imperial Mounted Division and Imperial Camel Brigade, on a very wide front, were endeavouring to hold off enemy forces.
As regards the enemy, three columns, estimated at 2,000 men, were at Deir Sineid opposed by less that a regiment. Strong enemy forces, with guns, were moving from Jemmama and had already possessed themselves of the commanding position about Point 405. While from the Hareira area it was estimated 2 Squadrons and 2,000 Infantry were moving on Gaza. In these circumstances I decided to withdraw, to the west of Wadi Ghuzze, all the impediments of the Mounted Troops and be prepared, unless the situation became clearer, to withdraw the Mounted Divisions themselves during the night.
The distance from the enemy forces at Point 405 to Gaza was but 6 miles, and, had they pressed on, I should possibly have had difficulty in extracting the Anzac Mounted Division.
At 1530 Eastern Force ordered the 54th Division on the line El Burjabiya Ridge to one mile north of Mansura. This message was repeated to me at 1800.
At 1810 the majority of my mounted troops having been unable to water their horses during the day, I, with the approval of the General Officer Commanding Eastern Force, placed the Imperial Camel Brigade under the orders of General Chauvel and instructed him to break off the engagement and retire his divisions west of the Wadi el Ghuzze, using the Imperial Camel Brigade to assist in his retirement, and, when shown that was complete, to close the gap between the right of the 54th Division and the Wadi by Khirbit el Adar and Um Jerrar.
At 1835 General Officer Commanding Eastern Force warned us that if Gaza was not taken early in the evening it might be necessary to withdraw the forces south and west of the Wadi to the position occupied on the night 25th/26th (See Appendix F).
A little later, I spoke to General Dallas on the telephone and pointed out to him that I was withdrawing the Mounted Divisons and that his right would be very much exposed since a large gap existed between that flank and the left of the 54th Division. He was very much averse to withdrawing his right since such a movement would entail giving up the trenches he had gained.
The situation, however, appeared to me to demand such a course being adopted, so, after consultation with General Officer Commanding Eastern Force, I ordered the right of the 53rd Division to be drawn back and touch to be gained with the left of the 54th Division.
This movement was carried out during the night, the inner flanks of the two divisions rested one on the other, and the Imperial Camel Brigade coming in on the right of the 54th Division, closed the gap between that Division and the Wadi about Um Jerrar.
The collecting together of the Anzac Mounted Division occupied a considerable time as portions of it were several miles from their horses while others were collecting wounded, etc., in Gaza.
The guns, however, were sent off at once under escort and reached Deir el Belah before dawn.
The mounted troops, covered by the 3rd Light Horse Brigade, were all across the Wadi by 0800 on the 27th and after watering and feeding were concentrated about El Demeita ready to turn out at two hours notice.
During the retirement, the 3rd Light Horse Brigade became engaged with the enemy advancing from the direction of Huj, and, with the assistance of No. 7 Light Car Patrol, succeeded in driving them off.
The 11th and 12th Light Armoured Motor Batteries found themselves at dawn on the 27th in the middle of a large body of the enemy and in extricating themselves caused considerable casualties. Two armoured cars had to be abandoned owing to their axels breaking - one of these has, however, been recovered and the other was rendered useless.
At 2300 General Officer Commanding Eastern Force ordered one Mounted Brigade to be placed at his disposal on its return.
At 2345 it was decided that the General Officer Commanding Eastern Force would take the 53rd Division under his direct orders as soon as communications could be arranged.
27th March
The General Officer Commanding 53rd Division in his report states that had he known earlier that it was intended to occupy the Burjabiya Ridge to 1 mile north of Mansura with the 54th Division he could have held on to most of his gains and deposed the position by pushing on the Gaza with his left.
As it was, the position at dawn was as shown in Sketch Map - Appendix G.
Ali Muntar and the hill to the north east were re-occupied by patrols at daybreak but before reinforcements could be pushed forward the patrols were forced back by a counter attack from Mosque Hill.
It appeared to General Dallas to be useless pressing forward on Ali Muntar as it would not have been possible for him to have retained the position, had he gained it.
He, therefore, decided to make the salient in his line less pronounced by drawing back to a point half way between Sheluf and Ali Muntar.
The enemy soon afterwards occupied Sheikh Abbas and was able to bring gun fire on to the back of General Dallas' position and on to his reserves.
At 0800 the 53rd Division and Imperial Camel Brigade were taken over by Eastern Force and a little later I moved my headquarters to In Seirat.
I would wish to bring forward the name of Major General Sir HG Chauvel, KCMG, CB, who commanded the Mounted Divisions and Imperial Camel Brigade throughout the action with conspicuous skill and success.
I consider his withdrawal of the mounted troops after dark, in the immediate presence of superior enemy forces, was most skilfully carried out.
General Chauvel draws special attention to the excellent service rendered by the Imperial Mounted Division under Major General HW Hodgson, CVO, CB, in holding off the superior forces of the enemy during the afternoon of the 26th and the night 26th/27th and so enabling the Anzac Mounted Division not only to assist in the attack on Gaza but to withdraw later almost without loss. I entirely endorse these remarks and I consider General Hodgson commanded his division with great skill.
General Hodgson expresses his indebtedness to Brigadier General JR Royston, CMG, DSO, for the quickness with which, when sent back from Gaza to rejoin his Division, he grasped the situation and the skill with which he handled his Brigade and made it possible for the 6th Mounted Brigade to retain its position. I concur, and consider it was largely owing to General Royston's quick decision that the enemy never succeeded in advancing beyond the line Hill 405, where eventually he dug in.
The name of Second Lieutenant J Edwards, Worcester Yeomanry, is brought to special notice for the skilful manner in which he handled his patrol towards Huj and for the excellence of the information which he sent in.
The 53rd Division attacked and took the position with the greatest gallantry and the 161st Infantry Brigade also behaved admirably. It would appear, however, that owing to faulty communications, or for some other reason, the Infantry, at times, was not given that artillery support which they should have received, and that, at critical periods during the day, whole batteries were not shooting at all being unaware of the requirements of the Infantry.
I fully share in the disappointment of the Infantry in being unable to remain on the position they had so gallantly won. Two hours more daylight might have enabled arrangements to be made in conjunction with General Officer Commanding Eastern Force for holding the ground so that a hostile attack, in the morning, could have been met under favourable conditions.
But to remain in the actual position, in which the troops found themselves at dark, with the right flank of the 53rd Division completely in the air and with no proper connection between that and the 54th Division would, in my opinion, have been risky in the extreme.
The task allotted to Major General AG Dallas, CB, DSO, was a very difficult one, involving as it did the passage of a difficult Wadi, the wheeling of his attacking troops, and an attack over ground which had not previously been reconnoitred.
Up to a point General Dallas' arrangements appear to have been good; but it would appear that the attack of his Brigades was not properly synchronised, and consequently that Brigades, to a certain extent, went in piecemeal.
I have stated above that the arrangements for artillery support do not appear to have been as good as they might have been. Moreover, I do not understand why the troops, who were to all intents and purposes unopposed during the withdrawal south and west of the Wadi on the night 27th/28th, should have abandoned, as they did, so many machine guns and so much equipment.
General Dallas specially brings forward the names of Brigadier General JH du B Travers, CB, Commanding 159th Brigade, and Brigadier General SF Mott, Commanding 159th Infantry Brigade, both of whom commanded their Brigades with great ability and courage; also of Lieutenant Colonel CPC Blount, his Acting Adjutant and Quartermaster General, and Lieutenant Colonel AEM Sinclair Thomson, DSO, his General Staff Officer 1 (GSO1), who rendered him loyal and devoted support throughout the operations.
P Chetwode, Lieutenant General
Commanding Desert Column
8th April 1917
War Diaries
All War Diaries cited on this site should be read in conjunction with the Australian Light Horse Studies Centre, AIF War Diaries of the Great War, Site Transcription Policy which may be accessed at:
Australian Light Horse Studies Centre, AIF War Diaries of the Great War, Site Transcription Policy
Further Reading:
The Desert Mounted Corps, Roll of Honour
The First Battle of Gaza, Palestine, 26 to 27 March 1917
The First Battle of Gaza, Palestine, 26 to 27 March 1917, Allied Forces, Roll of Honour
The Palestine Campaign, 1917 - 1918
Battles where Australians fought, 1899-1920
Citation: The First Battle of Gaza, Palestine, 26 to 27 March 1917, Desert Column, Account
