


Topic: BatzP - Beersheba
The Battle of Beersheba
Palestine, 31 October 1917
Lock Account
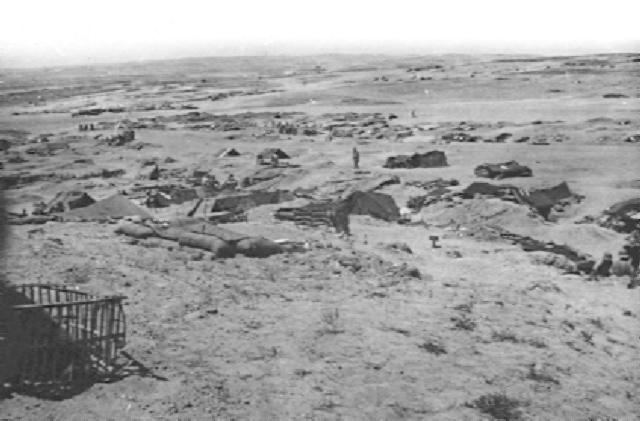
Suffolk Yeomanry bivouac on the Gaza-Beersheba defence line.
[From: AWM H10590]
At the conclusion of the Great War, at the end of 1918, Major Henry Osmond Lock, an officer with the Dorsetshire Regiment, produced a book about the Sinai and Palestine Campaign. The subsequent book was published in London, 1919, called With the British Army in The Holy Land, which included a section specifically related to the battle of Beersheba and is extracted below.
Lock, HO, With the British Army in The Holy Land, (London 1919), p. 51-7:
CHAPTER VII
GAZA AND BEERSHEBA
[51] The plan by which General Allenby defeated the Turks and captured their Gaza-Beersheba line, involved three distinct operations. It will be remembered that the enemy defences consisted of a substantially continuous line from the sea at Gaza to Arab el Teeaha, where the left flank was bent back or "refused" at or about Sheria. Some 4½ miles farther on were the detached works covering Beersheba, which thus constituted a strong outwork protecting the left flank of the main position. The decisive blow was to be struck against the left flank of the main Turkish position at Hareira and Sheria. Before this blow could be struck, it was necessary to clear away the obstacle presented by Beersheba. It was also necessary to keep the enemy in doubt as to where the decisive blow was to fall; so another operation, on as large a scale as the available force would permit, and calculated both to mystify the enemy and to draw off a portion of his reserves, was undertaken on the immediate sea front at Gaza. Thus we get, firstly, the capture of Beersheba; secondly, the attack on the Gaza coastal defences; and, thirdly, the main attack delivered against Sheria.
"This plan of operations was chosen for the following reasons. The enemy's works in the Hareira-Sheria sector were less formidable than elsewhere, and they were easier of approach than other parts of the enemy's defences. The capture of Beersheba was a necessary preliminary to the main operation, in order to secure the water supply at that place, [52] and to give room for the deployment of the attacking force on the high ground to the north and north-west of Beersheba, from which direction the main attack was to be developed. When Beersheba was in our hands, we should have an open flank against which to operate, and full use could be made of our superiority in mounted troops. Moreover, a success here offered prospects of pursuing our advantage, and forcing the enemy to abandon the rest of his fortified positions, which no other line of attack would afford."
The difficulties to be overcome in the operations against Beersheba and the Hareira-Sheria line were considerable. Foremost among them were our old friend, the shortage of water, and, scarcely less formidable, the difficulty of transport.
With regard to water, no supply existed in the area over which operations were to take place. "An ample supply of water was known to exist at Beersheba, but it was uncertain how quickly it could be developed or to what extent the enemy would have damaged the wells before we succeeded in occupying the town. Except at Beersheba, no large supply of water would be found till Sheria and Hareira had been captured. Arrangements had therefore to be made to ensure that the troops could be kept supplied with water, while operating at considerable distances from their original water base, for a period which might amount to a week or more." This was to some extent met by developing the water supplies at Ecani, Khalassa and Asluj, all places in No Man's Land some miles beyond our right flank.
The transport problem was no less difficult. Beersheba, itself some thousand feet above the sea level, lies in a recess on the western slopes of the Judæan Hills. In the bed of this recess runs the Wadi Es Saba. Towards the north-east a good metalled road leads gradually to the summit of the hills and on through Hebron to Jerusalem. North-west a good road led along the enemy's front to Gaza. The railway line, avoiding the heights, for the first ten or twelve [53] miles follows approximately the direction of the Gaza road, and then turns northwards along the Plain or Foothills. But south of the Gaza-Beersheba line there were no good roads, "and no reliance could therefore be placed on the use of motor transport." Owing to the steep banks of many of the wadis which intersected the area of operations, the routes passable by wheeled transport were limited, and, in many places, the going was heavy and difficult.
Practically the whole of the transport available in the force, including 30,000 pack camels, had to be allotted to one portion of the eastern force, to enable it to be kept supplied with food, water and ammunition, at a distance of 15 to 20 miles in advance of railhead.
There already existed a branch from the Kantara military railway; which branch, leaving the main line at Rafa, ran to Shellal and Gamli, supplying the right of our line. Arrangements were made for this railhead to be pushed forward as rapidly as possible from Shellal towards Karm (some 7 miles to the east-south-east of Shellal), and for a line to be laid from Gamli towards Beersheba for the transport of ammunition. No Man's Land being some 10 or 12 miles wide in this sector, railway construction was carried on in front of our front line under cover of yeomanry outposts.
This line of outposts was attacked on the morning of the 27th October by a strong reconnoitring party that the Turks sent out from the direction of Kauwukah to make a reconnaissance towards Karm. On a Division of our infantry coming up, the Turks withdrew.
By the end of October all our preparations were ready. The bombardment of the Gaza defences commenced on the 27th and continued nightly. On the 30th, warships of the Royal Navy, assisted by a French battleship, began co-operating in this bombardment. The actual infantry attack on Gaza was not intended to take place, however, until after the capture of Beersheba, and was delayed accordingly. [54]
The date fixed for the attack on Beersheba was the 31st October. The plan was to attack with two divisions the hostile works between the Khalassa Road and the Wadi Saba, that is, the sector to the south-west of the town. The works north of the Wadi Saba were to be masked with the Imperial Camel Corps and some infantry, while a portion of the 53rd Division further north covered the left of the Corps. The right of the attack was covered by a cavalry regiment. Further east, mounted troops took up a line opposite the southern defences of Beersheba. A mounted force, starting from Khalassa and Asluj, beyond our original right flank, were detailed to make a wide flanking movement and attack Beersheba from the east and north-east.
The units detailed for the attack moved by a night march, and were in their appointed positions by dawn of the 31st. As a preliminary to the main attack, in order to enable field guns to be brought within effective range for wire-cutting, an attack was made upon the enemy's advanced works on the high ground about a couple of miles south-west of the town, at Hill 1070. This had been successfully accomplished by 8.45 a.m., and the cutting of the wire proceeded satisfactorily, though pauses had to be made to allow the dust to clear. The assault was ordered for 12.15 p.m., and proved successful. By about 10 p.m., the whole of the works between the Khalassa Road and the Wadi Saba were in our hands.
"Meanwhile the mounted troops, after a night march of, for a portion of the force, some 35 miles, arrived early on this same morning, the 31st, at about Khasim Zanna, in the hills, some 5 miles east of Beersheba. From the hills, the advance into Beersheba from the east and north-east lies over an open and almost flat plain, commanded by the rising ground north of the town and flanked by an underfeature in the Wadi Saba, called Tel el Saba.
"A force was sent north to secure Bir es Sakaly, on the Hebron Road, and protect the right flank. This force [55] met with some opposition, and was engaged with hostile cavalry at Bir es Sakaly and to the north during the day. Tel el Saba was found strongly held by the enemy, and was not captured till late in the afternoon.
"Meanwhile, attempts to advance in small parties across the plain towards the town made slow progress. In the evening, however, a mounted attack by Australian Light Horse, who rode straight at the town from the East, proved completely successful. They galloped over two deep trenches held by the enemy just outside the town, and entered the town at about 7 p.m., capturing numerous prisoners.
"A very strong position was thus taken with slight loss, and the Turkish detachment at Beersheba almost completely put out of action. This success laid open the left flank of the main Turkish position for a decisive blow."
The actual date of the attack at Gaza had been left open till the result of the attack at Beersheba was known, as it was intended that the attack on Gaza, which was designed to draw hostile reserves towards that sector, should take place a day or two before the attack on the Sheria position. After the complete success of the Beersheba operations, it was decided that the attack on Gaza should take place on the morning of the 2nd November.
"The objectives of this attack were the hostile works from Umbrella Hill (2,000 yards south-west of the town) to Sheikh Hasan, on the sea (about 2,500 yards north-west of the town). The front of the attack was about 6,000 yards, and Sheikh Hasan, the farthest objective, was over 3,000 yards from our front line. The ground over which the attack took place consisted of sand dunes, rising in places up to 150 feet in height. This sand is very deep and heavy going. The enemy's defences consisted of several lines of strongly built trenches and redoubts.
"As Umbrella Hill flanked the advance against the Turkish works farther west, it was decided to capture it by a preliminary [56] operation, to take place four hours previous to the main attack. It was accordingly attacked and captured at 11.0 p.m. on the 1st November by a portion of the 52nd Division. This attack drew a heavy bombardment of Umbrella Hill itself and our front lines, which lasted for two hours, but ceased in time to allow the main attack, which was timed for 3.0 a.m., to form up without interference."
This attack partook of the nature of a modern trench to trench advance, as seen on the battlefields of France, with the co-operation of tanks and the accompaniment of other products of modern science. It was successful in reaching most of its objectives. The enemy losses were heavy, especially from the preliminary bombardment.
"Subsequent reports from prisoners stated that one of the Divisions holding the Gaza Sector was withdrawn on account of casualties, a Division from the general reserve being drawn into this Sector to replace it. The attack thus succeeded in its primary object, which was to prevent any units being withdrawn from the Gaza defences to meet the threat to the Turkish left flank and to draw into Gaza as large a proportion as possible of the available Turkish reserves. Further, the capture of Sheikh Hasan and the south-western defences constituted a very direct threat to the whole of the Gaza position, which could be developed on any sign of a withdrawal on the part of the enemy."
Here the force attacking Gaza stayed its hand, merely holding on to the positions already captured, while the main attack was being developed on the right.
Having captured Beersheba on the 31st October, a force was pushed out early on the following day, the 1st November, into the hills north of Beersheba, with the object of securing the flank of the attack on Sheria, while mounted troops were sent north along the Hebron road. Accordingly, the 53rd Division took up a position from Towal Abu Jerwal (6 miles north of Beersheba) to Muweileh (3½ miles farther west) and [57] the 10th Division occupied Abu Irgeig, on the railway, 6 miles from Beersheba.
Next day, the 2nd, our mounted troops found and engaged considerable enemy forces to the north of Towal Abu Jerwal. Accordingly, on the 3rd, we advanced in that direction towards Ain Kohleh and Khuweilfeh, where the enemy were found to be holding a strong position with considerable and increasing forces. It will be borne in mind that this was only the right flank-guard; our main attack, which was to be delivered against Sheria, was not timed to commence until two or three days later. However, the enemy elected to employ the whole of his available reserves in an immediate counter-attack. During the 4th and 5th he made several determined attacks on the mounted troops in this locality. These attacks were repulsed; and the enemy's action was not allowed to make any essential modification to the original plan, which it had been decided to carry out at dawn on November 6th. It was this exhausting of the Turkish reserves, so early in the operations and so far away to the East as Khuweilfeh, that paved the way for the success of our attack on Sheria.
The Battle of Beersheba, Palestine, 31 October 1917
Citation: The Battle of Beersheba, Palestine, 31 October 1917, Lock Account
