"At a mile distant their thousand hooves were stuttering thunder, coming at a rate that frightened a man - they were an awe inspiring sight, galloping through the red haze - knee to knee and horse to horse - the dying sun glinting on bayonet points..." Trooper Ion Idriess
The Australian Light Horse Studies Centre aims to present an accurate history as chroniclers of early Australian military developments from 1899 to 1920.
The Australian Light Horse Studies Centre site holds over 12,000 entries and is growing daily.
Contact:Australian Light Horse Studies CentreLet us hear your story:
You can tell your story, make a comment or ask for help on our Australian Light Horse Studies Centre Forum called:
The Battle of Baku, Azerbaijan, 26 August to 14 September 1918, Outline Topic: BatzO - Baku
The Battle of Baku
Azerbaijan, 26 August - 14 September 1918
Outline
The Battle of Baku, Azerbaijan, 26 August to 14 September 1918
[From: Purnell's History of the First World War, 1970, p. 2768.]
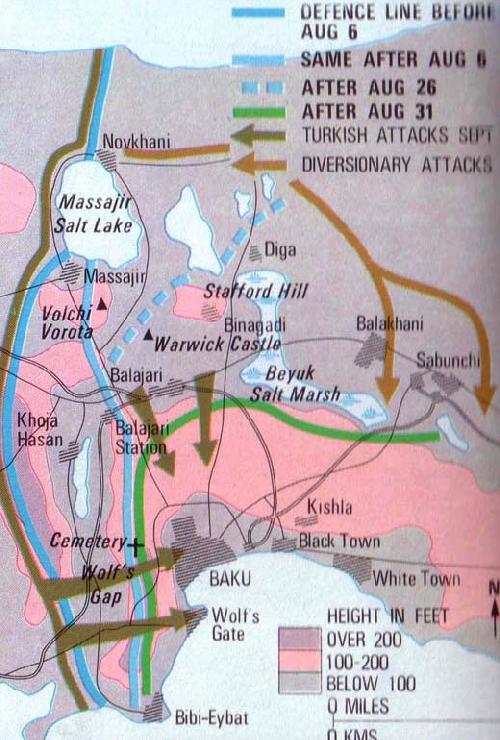
Baku, an oil port and town on the west coast of the Caspian Sea, was the scene of desperate fighting between Turkish forces and a special British unit known as 'Dunsterforce' and their Armenian and Russian allies between 26 August and 14 September 1918. In line with its goal of organising resistance to Turkish and German advances in the region, Dunsterforce - under its commander, Major-General Lionel Dunsterville - had attempted to bolster the local forces totalling 6,000 men which were holding a 20-kilometre-long defensive line across the Baku peninsula against some 14,000 Turkish troops. Apart from the small number of Dunsterforce members advising local commanders, elements of the British 39th Brigade were obtained from Mesopotamia totalling about 1,000 infantry, and one artillery battery.
Following the communist revolution in Russia, the task of Dunsterville's mission was an immensely complicated undertaking Russia's formal withdrawal from the war meant that many Russian Army units were disinclined to fight, while Bolshevik sympathies among large sections of the local populace caused the British presence to be widely viewed with suspicion and hostility. Instead of accepting the assistance of Dunsterville's 'advisers' (several of whom were Australians), local authorities largely expected the British to carry the weight of the fighting for them. Consequently, when the Turks attacked on 26 and 31 August, the Armenian levies promptly melted away or failed to give support.
After the first two Turkish assaults succeeded in making significant gains against the right flank of the town's defences, Dunsterville told the local leaders that he would withdraw his troops whenever it was necessary to save them from destruction. When he next advised them that he intended to leave Baku entirely, he was warned that any attempt to sail away from the port would be resisted. Although not intimidated by this, he decided to remain, and was encouraged by an apparent improvement in affairs during the next fortnight. When a deserter from the Turkish lines disclosed that a further assault was to he expected on 14 September, this news was awaited with greater confidence.
In the event, the Turkish attack met with the same absence of fight by the local troops: first reports that morning were of the enemy advancing at the run upon the town. The British, acting with a handful of Cossacks, stemmed the Turkish advance through the rest of the day, but Dunsterville immediately prepared to make good his threat to withdraw once night arrived. The local authorities initially acquiesced in his plans, then attempted to prevent the evacuation. Despite this, the whole of the British force successfully got off under cover of dark and was taken to Enzeli. Two Australians, Major H.B. Suttor and Sergeant A.L. Bullen, although left behind through not being notified of the departure, subsequently escaped in a refugee boat to Krasnovodsk.
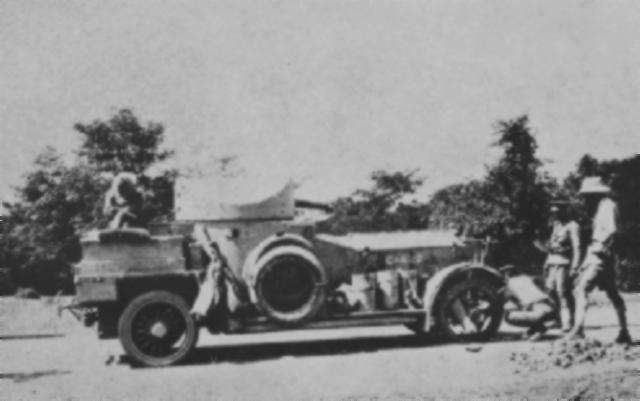
Russian armoured car captured by Dunsterforce near Baku, 1918.
[Photo: S. Fallance]
Extracted from the book produced by Chris Coulthard-Clark, Where Australians Fought - The Encyclopaedia of Australia's Battles, Allen and Unwin, Sydney, 1998, pp. 155-157.
Additional References cited by Chris Coulthard-Clark:
C.E.W. Bean (1937) The Australian Imperial Force in France during the Main German Offensive, 1918, Sydney: Angus & Robertson.
The Battle for Hill 60, Gallipoli, 22 - 23, and 27 August 1915, Outline Topic: BatzG - Hill 60
The Battle for Hill 60
Gallipoli, 22 - 23, and 27 August 1915
Outline
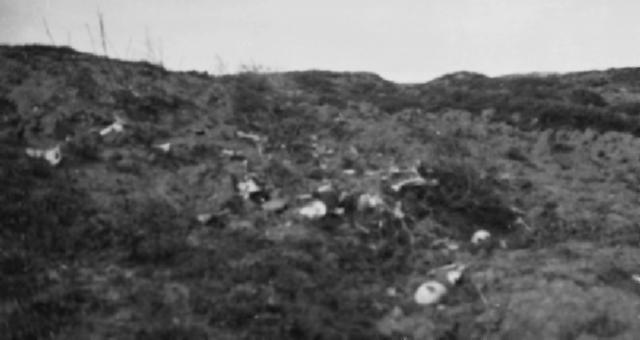
Hill 60 showing bones of members of the 4th Australian Infantry Brigade and New Zealanders, 1919.
[From the CEW Bean Collection.]
Hill 60, a low rise on the north-western approaches to Hill 971 (q.v.), which on 21 and 27 August 1915 became the focus of several badly handled attacks which resulted in costly and confused fighting that marked the end of the last major offensive at Gallipoli. The operation was undertaken in an attempt to widen and strengthen the corridor of foreshore which connected newly landed British forces at Suvla Bay with the established beach-head at Anzac (q.v). While elements of the Suvla force concentrated on seizing a detached foothill of the range behind that beach-head known as the `W Hills', troops from the Anzac position were to capture Hill 60, a low rise on the north-western end of the foothills leading to Hill 971 - thereby effectively enabling the two forces to link up.
The first attempt made on 21 August enjoyed only mixed success. The W Hills were not taken, but to the south a mixed force of British, Indian, New Zealand and Australian troops (the latter men of the Australian 4th Brigade under Brigadier-General John Monash) managed to gain part of Hill 60 but not the cap of the rise which was well defended by trenches hastily dug by the Turks. In an attempt to press home the attack, a renewed effort against Hill 60 was made on 22 August using a battalion (18th) of the fresh Australian 5th Brigade, part of the 2nd Australian Division then in the process of transferring from Egypt. These were raw troops who were not up to dealing with such a hastily conceived and poorly arranged attack. Although the unit went bravely into action at dawn, it was gradually pushed back after half its strength became casualties-half of these being killed.
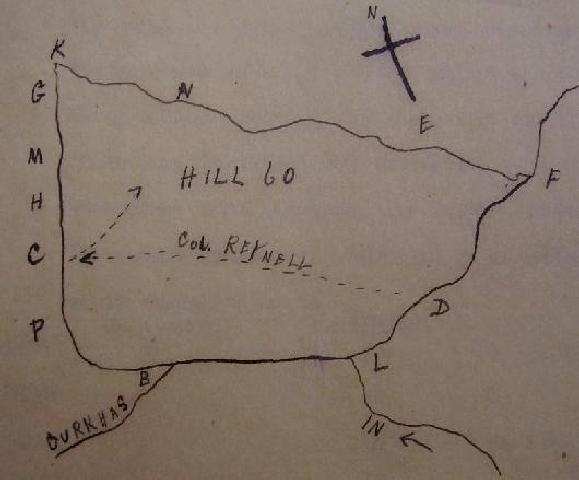
Hand drawn map of the 9th Light Horse Regiment attack at Hill 60, 27 August 1915.
A further attack was begun on the afternoon of 27 August, the troops advancing after a bombardment. Then followed three days of fighting in which the apparent objective was taken, partly lost, and retaken again. The attacking force included detachments from various British, New Zealand and Australian regiments - in the latter case the 18th Infantry Battalion, the 9th and 10th Light Horse, and a composite group of 250 men from Monash's 4th Brigade - practically all who were well enough to take part. When this attempt was also spent it was found that the crest of the rise was still beyond the ground taken, but since the aim of effecting a junction with the Suvla force seemed to have been sufficiently attained matters were allowed to rest at this time.
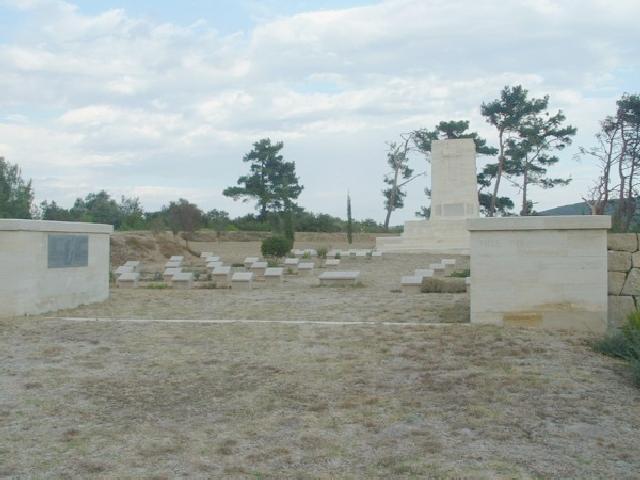
Hill 60 Cemetery, Gallipoli.
[Picture by Brian Budge.]
Extracted from the book produced by Chris Coulthard-Clark, Where Australians Fought - The Encyclopaedia of Australia's Battles, Allen and Unwin, Sydney, 1998, pp. 110-111.
Additional References cited by Chris Coulthard-Clark:
C.E.W. Bean, (1924), The Story of Anzac, Vol. 2 , Sydney: Angus & Robertson.
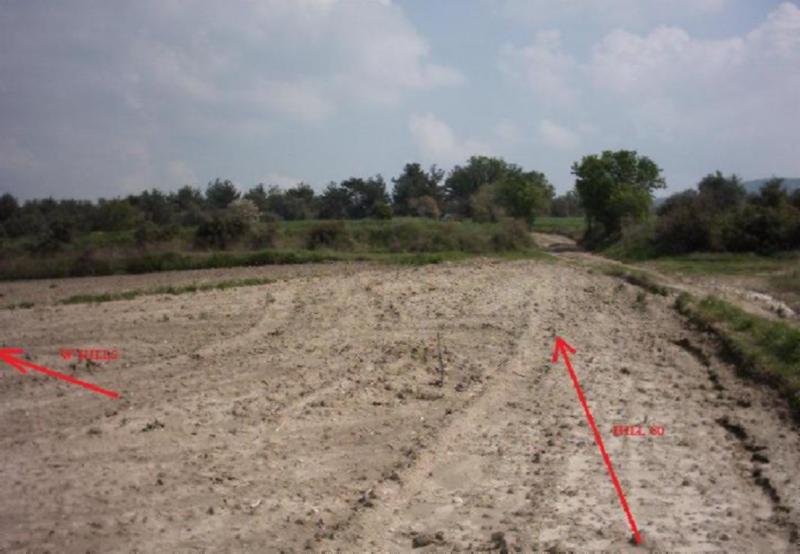
The Battle for Hill 60, Gallipoli, 22 - 23, and 27 August 1915, Photographic representation of Hill 60 Topic: BatzG - Hill 60
The Battle for Hill 60
Gallipoli, 22 - 23, and 27 August 1915
Photographic representation of Hill 60
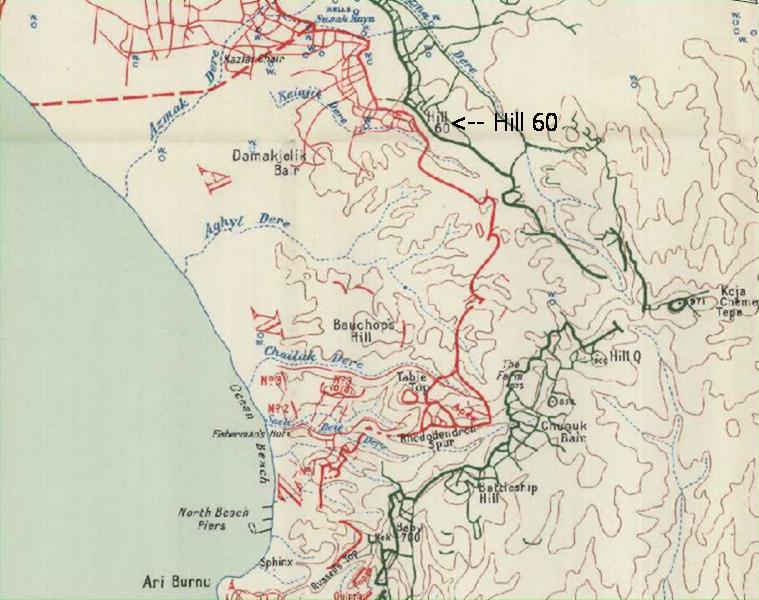
Trench Map highlighting the position of Hill 60
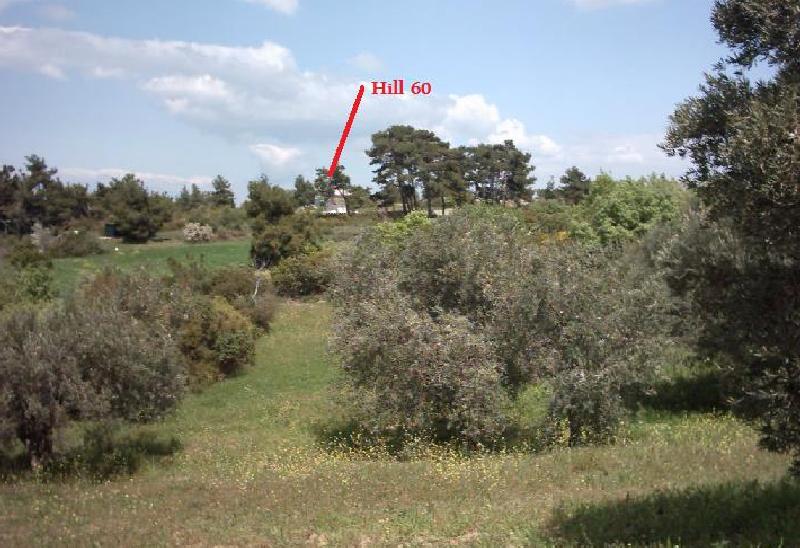
Looking up to the summit of Hill 60
This picture illustrates the task facing the men as they prepared themselves for the battle on 27 August 1917. The task from this view appears deceptively simple and as the soldiers learned at Gallipoli, nothing was ever simple.
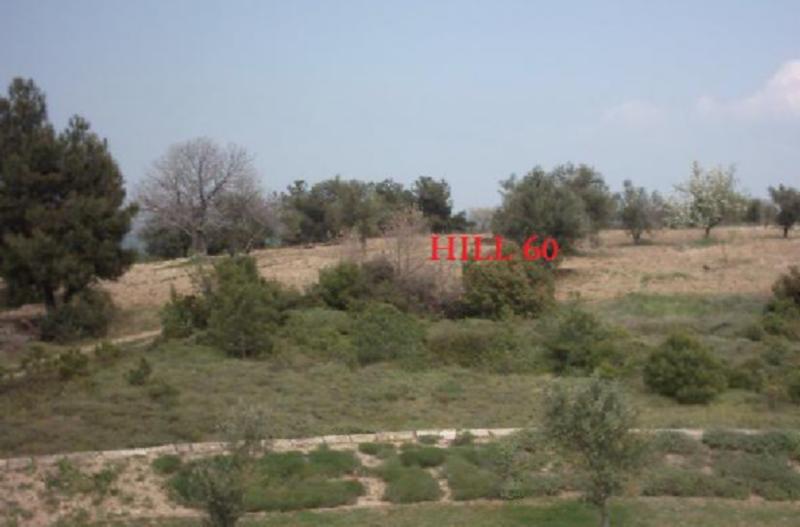
The area in which the fighting took place at Hill 60
This is a much closer picture of Hill 60 illustrating the features the men were to fight and die over that evening.
Location of Allied trenches at Hill 60
The sumit of Hill 60 looking down to where the Allied lines were located. The holding of the hill gave the Turks an advantage in being able to look over the Allied trenches and direct artillery or machine gun fire at targets of opportunity. This harassment proved to be so severe that all movements of supplies became very difficult during the day adding a further burden to the desperate lives of the men in the trenches.
Special thanks are directed to William "Tuna" Crookshanks for his pictures and the time he has spent annotating them.
The Australian Light Horse Studies Centre is a not for profit and non profit group whose sole aim is to write the early history of the Australian Light Horse from 1900
- 1920. It is privately funded and the information is provided by the individuals within the group and while permission for the use of the material has been given for this
site for these items by various donors, the residual and actual copyright for these items, should there be any, resides exclusively with the donors. The information on
this site is freely available for private research use only and if used as such, should be appropriately acknowledged. To assist in this process, each item has a citation
attached at the bottom for referencing purposes.
Please Note: No express or implied permission is given for commercial use of the information contained within this site.
A note to copyright holders
The Australian Light Horse Studies Centre has made every endeavour to contact copyright holders of material digitised for this blog and website and where
appropriate, permission is still being sought for these items. Where replies were not received, or where the copyright owner has not been able to be traced, or where
the permission is still being sought, the Australian Light Horse Studies Centre has decided, in good faith, to proceed with digitisation and publication. Australian Light
Horse Studies Centre would be happy to hear from copyright owners at any time to discuss usage of this item.