« January 2008 »
S M T W T F S
1 2 3 4 5
6 7 8 9 10 11 12
13 14 15 16 17 18 19
20 21 22 23 24 25 26
27 28 29 30 31
You are not logged in. Log in


Search the site:


powered by FreeFind
Volunteer with us.

Entries by Topic All topics  
A Latest Site News
A - Using the Site
AAA Volunteers
AAB-Education Centre
AAC-Film Clips
AAC-Photo Albums
AIF & MEF & EEF
AIF - Lighthorse
AIF - ALH - A to Z
AIF - DMC
AIF - DMC - Or Bat
AIF - DMC - Anzac MD
AIF - DMC - Aus MD
AIF - DMC - British
AIF - DMC - BWI
AIF - DMC - French
AIF - DMC - Indian
AIF - DMC - Italian
AIF - DMC - Medical
AIF - DMC - Remounts
AIF - DMC - Scouts
AIF - DMC - Sigs
AIF - DMC - Sigs AirlnS
AIF - DMC - 1 Sig Sqn
AIF - DMC - 2 Sig Sqn
AIF - DMC - Eng
AIF - DMC - Eng 1FSE
AIF - DMC - Eng 2FSE
AIF - DMC - GSR
AIF - 1B - 1 LHB
AIF - 1B - 6 MVS
AIF - 1B - 1 LHMGS
AIF - 1B - 1 Sig Trp
AIF - 1B - 1 LHFA
AIF - 1B - 1 LHR
AIF - 1B - 2 LHR
AIF - 1B - 3 LHR
AIF - 2B - 2 LHB
AIF - 2B - 7 MVS
AIF - 2B - 2 LHFA
AIF - 2B - 2 LHMGS
AIF - 2B - 2 Sig Trp
AIF - 2B - 5 LHR
AIF - 2B - 6 LHR
AIF - 2B - 7 LHR
AIF - 3B - 3 LHB
AIF - 3B - 8 MVS
AIF - 3B - 3 LHB Sigs
AIF - 3B - 3 LHFA
AIF - 3B - 3 LHMGS
AIF - 3B - 3 Sig Trp
AIF - 3B - 8 LHR
AIF - 3B - 9 LHR
AIF - 3B - 10 LHR
AIF - 4B - 4 LHB
AIF - 4B - 4 Sig Trp
AIF - 4B - 9 MVS
AIF - 4B - 4 LHFA
AIF - 4B - 4 LHMGS
AIF - 4B - 4 LHR
AIF - 4B - 11 LHR
AIF - 4B - 12 LHR
AIF - 5B - 5 LHB
AIF - 5B - 10 MVS
AIF - 5B - 5 LHFA
AIF - 5B - 5 Sig Trp
AIF - 5B - ICC
AIF - 5B - 14 LHR
AIF - 5B - 15 LHR
AIF - 5B - 1er Regt
AIF - 5B - 2 NZMGS
AIF - AASC
AIF - Aboriginal LH
AIF - Badges
AIF - Cars
AIF - Chinese LH
AIF - Double Sqns
AIF - Engineers
AIF - Fr - 22 Corps
AIF - Fr - 13 LHR
AIF - Honour Roll
AIF - HQ - 3rd Echelon
AIF - Marching Songs
AIF - Misc Topics
AIF - NZMRB
AIF - NZMRB - AMR
AIF - NZMRB - CMR
AIF - NZMRB - EFT
AIF - NZMRB - NZMFA
AIF - NZMRB - NZMGS
AIF - NZMRB - OMR
AIF - NZMRB - Sig-Trp
AIF - NZMRB - WMR
AIF - Ships
AIF - Ships - Encountr
AIF - Ships - Una
AIF - WFF
AIF - Wireless Sqn
Battles
BatzA - Australia
BatzA - Broken Hill
BatzA - Liverpool
BatzA - Merivale
BatzB - Boer War
BatzB - Bakenlaagte
BatzB - Belmont
BatzB - Bothaville
BatzB - Buffels Hoek
BatzB - Coetzees Drift
BatzB - Diamond Hill
BatzB - Driefontein
BatzB - Elands
BatzB - Graspan
BatzB - Grobelaar
BatzB - Grootvallier
BatzB - Hartebestfontn
BatzB - Houtnek
BatzB - Karee Siding
BatzB - Kimberley
BatzB - Koster River
BatzB - Leeuw Kop
BatzB - Mafeking
BatzB - Magersfontein
BatzB - Modder River
BatzB - Onverwacht
BatzB - Paardeberg
BatzB - Palmietfontein
BatzB - Pink Hill
BatzB - Poplar Grove
BatzB - Rhenoster
BatzB - Sannahs Post
BatzB - Slingersfontn
BatzB - Stinkhoutbm
BatzB - Sunnyside
BatzB - Wilmansrust
BatzB - Wolvekuil
BatzB - Zand River
BatzG - Gallipoli
BatzG - Anzac
BatzG - Aug 1915
BatzG - Baby 700
BatzG - Evacuation
BatzG - Hill 60
BatzG - Hill 971
BatzG - Krithia
BatzG - Lone Pine
BatzG - Nek
BatzJ - Jordan Valley
BatzJ - 1st Amman
BatzJ - 2nd Amman
BatzJ - Abu Tellul
BatzJ - Es Salt
BatzJ - JV Maps
BatzJ - Ziza
BatzM - Mespot
BatzM - Baghdad
BatzM - Ctesiphon
BatzM - Daur
BatzM - Kurna
BatzM - Kut el Amara
BatzM - Ramadi
BatzN - Naval
BatzN - AE1
BatzN - Cocos Is
BatzN - Heligoland
BatzN - Marmara
BatzN - Zeebrugge
BatzN - Zeppelin L43
BatzNG - Bitapaka
BatzO - Other
BatzO - Baku
BatzO - Egypt 1919
BatzO - Emptsa
BatzO - Karawaran
BatzO - Peitang
BatzO - Wassa
BatzP - Palestine
BatzP - 1st Gaza
BatzP - 2nd Gaza
BatzP - 3rd Gaza
BatzP - Aleppo
BatzP - Amwas
BatzP - Ayun Kara
BatzP - Bald Hill
BatzP - Balin
BatzP - Beersheba
BatzP - Berkusieh
BatzP - Damascus
BatzP - El Auja
BatzP - El Buggar
BatzP - El Burj
BatzP - Haifa
BatzP - Huj
BatzP - JB Yakub
BatzP - Kaukab
BatzP - Khan Kusseir
BatzP - Khuweilfe
BatzP - Kuneitra
BatzP - Megiddo
BatzP - Nablus
BatzP - Rafa
BatzP - Sasa
BatzP - Semakh
BatzP - Sheria
BatzP - Surafend
BatzP - Wadi Fara
BatzS - Sinai
BatzS - Bir el Abd
BatzS - El Arish
BatzS - El Mazar
BatzS - El Qatiya
BatzS - Jifjafa
BatzS - Magdhaba
BatzS - Maghara
BatzS - Romani
BatzS - Suez 1915
BatzSe - Senussi
BatzWF - Westn Front
BW - Boer War
BW - NSW
BW - NSW - 1ACH
BW - NSW - 1NSWMR
BW - NSW - 2NSWMR
BW - NSW - 3ACH
BW - NSW - 3NSWIB
BW - NSW - 3NSWMR
BW - NSW - 5ACH
BW - NSW - A Bty RAA
BW - NSW - AAMC
BW - NSW - Aust H
BW - NSW - Lancers
BW - NSW - NSW Inf
BW - NSW - NSWCBC
BW - NSW - NSWIB
BW - NSW - NSWMR_A
BW - NZ
BW - Qld
BW - Qld - 1ACH
BW - Qld - 1QMI
BW - Qld - 2QMI
BW - Qld - 3ACH
BW - Qld - 3QMI
BW - Qld - 4QIB
BW - Qld - 5QIB
BW - Qld - 6QIB
BW - Qld - 7ACH
BW - QLD - AAMC
BW - SA
BW - SA - 1SAMR
BW - SA - 2ACH
BW - SA - 2SAMR
BW - SA - 3SACB
BW - SA - 4ACH
BW - SA - 4SAIB
BW - SA - 5SAIB
BW - SA - 6SAIB
BW - SA - 8ACH
BW - SA - AAMC
BW - Tas
BW - Tas - 1ACH
BW - Tas - 1TIB
BW - Tas - 1TMI
BW - Tas - 2TB
BW - Tas - 2TIB
BW - Tas - 3ACH
BW - Tas - 8ACH
BW - Vic
BW - Vic - 1VMI
BW - Vic - 2ACH
BW - Vic - 2VMR
BW - Vic - 3VB
BW - Vic - 4ACH
BW - Vic - 4VIB
BW - Vic - 5VMR
BW - Vic - 6ACH
BW - Vic - AAMC
BW - Vic - Scot H
BW - WA
BW - WA - 1WAMI
BW - WA - 2ACH
BW - WA - 2WAMI
BW - WA - 3WAB
BW - WA - 4ACH
BW - WA - 4WAMI
BW - WA - 5WAMI
BW - WA - 6WAMI
BW - WA - 8ACH
BW Gen - Campaign
BW Gen - Soldiers
BW General
Cavalry - General
Diary - Schramm
Egypt - Heliopolis
Egypt - Mena
Gen - Ataturk Pk, CNB
Gen - Australia
Gen - Legends
Gen - Query Club
Gen - St - NSW
Gen - St - Qld
Gen - St - SA
Gen - St - Tas
Gen - St - Vic
Gen - St - WA
Gm - German Items
Gm - Bk - 605 MGC
GW - 11 Nov 1918
GW - Atrocities
GW - August 1914
GW - Biographies
GW - Propaganda
GW - Spies
GW - We forgot
Militia 1899-1920
Militia - Area Officers
Militia - Inf - Infantry
Militia - Inf - 1IB
Militia - Inf - 2IB
Militia - Inf - 3IB
Militia - Inf - NSW
Militia - Inf - Qld
Militia - Inf - SA
Militia - Inf - Tas
Militia - Inf - Vic
Militia - Inf - WA
Militia - K.E.Horse
Militia - LH
Militia - LH - Regts
Militia - LH - 1LHB
Militia - LH - 2LHB
Militia - LH - 3LHB
Militia - LH - 4LHB
Militia - LH - 5LHB
Militia - LH - 6LHB
Militia - LHN - NSW
Militia - LHN - 1/7/1
Militia - LHN - 2/9/6
Militia - LHN - 3/11/7
Militia - LHN - 4/6/16
Militia - LHN - 5/4/15
Militia - LHN - 6/5/12
Militia - LHN - 28
Militia - LHQ - Qld
Militia - LHQ - 13/2
Militia - LHQ - 14/3/11
Militia - LHQ - 15/1/5
Militia - LHQ - 27/14
Militia - LHS - SA
Militia - LHS - 16/22/3
Militia - LHS - 17/23/18
Militia - LHS - 24/9
Militia - LHT - Tas
Militia - LHT - 12/26
Militia - LHV - Vic
Militia - LHV - 7/15/20
Militia - LHV - 8/16/8
Militia - LHV - 9/19
Militia - LHV - 10/13
Militia - LHV - 11/20/4
Militia - LHV - 19/17
Militia - LHV - 29
Militia - LHW - WA
Militia - LHW-18/25/10
Militia - Military Orders
Militia - Misc
MilitiaRC - Rifle Clubs
MilitiaRC - NSW
MilitiaRC - NT
MilitiaRC - Qld
MilitiaRC - SA
MilitiaRC - Tas
MilitiaRC - Vic
MilitiaRC - WA
Militiaz - New Zealand
Tk - Turkish Items
Tk - Army
Tk - Bks - Books
Tk - Bks - 1/33IR
Tk - Bks - 27th IR
Tk - Bks - Air Force
Tk - Bks - Yildirim
Tk - POWs
Wp - Weapons
Wp - Hotchkiss Cav
Wp - Hotchkiss PMG
Blog Tools
Edit your Blog
Build a Blog
RSS Feed
View Profile
Open Community
Post to this Blog
Site Index
Education Centre
LH Militia
Boer War
Transport Ships
LH Battles
ALH - Units
ALH - General
Aboriginal Light H
Weapons
Ottoman Sources

"At a mile distant their thousand hooves were stuttering thunder, coming at a rate that frightened a man - they were an awe inspiring sight, galloping through the red haze - knee to knee and horse to horse - the dying sun glinting on bayonet points..." Trooper Ion Idriess

The Australian Light Horse Studies Centre aims to present an accurate history as chroniclers of early Australian military developments from 1899 to 1920.

The Australian Light Horse Studies Centre site holds over 12,000 entries and is growing daily.

Contact: Australian Light Horse Studies Centre

Let us hear your story: You can tell your story, make a comment or ask for help on our Australian Light Horse Studies Centre Forum called:

Desert Column Forum

WARNING: This site contains: names, information and images of deceased people; and, language which may be considered inappropriate today.

Tuesday, 1 January 2008
The Battle of Rafa, Sinai, 9 January 1917, The Desert Column Account
Topic: BatzP - Rafa

The Battle of Rafa

Sinai, 9 January 1917

The Desert Column Account


The Desert Column Account


The transcription:


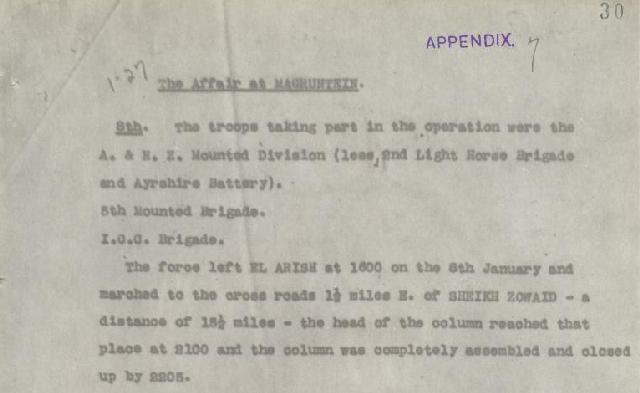
The Affair at Magruntein


8th

The troops taking part in the operation were the

A & NZ Mounted Division (less 2nd Light Horse Brigade and Ayrshire Battery).

5th Mounted Brigade

ICC Brigade

The force left El Arish at 1600 on the 8th January and marched to the cross roads 1½ miles east of Sheikh Zowaid - a distance of 15½ miles - the head of the column reached that place at 2100 and the column was completely assembled and closed up by 2205.

The 5th Mounted Brigade, forming the advanced guard, placed a cordon round the village immediately on arrival and prevented any communication between those inside and the outside world.


9th

The A & NZ Mounted Division and ICC moved off at 0100 via point 210 and 250 to work round the enemy flank and to get into a position from which the works could be attacked from the East and South East.

En route, the New Zealand Mounted Rifles were detailed to rush an encampment of Arabs to prevent information of the move from reaching the Turkish forces. This was sone with complete success and 30 armed Bedouins were secured.

The Column Headquarters and the 5th Mounted Brigade followed an hour later and halted at point 210, pushing officers patrols in the direction of Rafa. Surprise was complete. The position was almost entirely surrounded before the enemy became aware of the presence of large forces in his vicinity, when great confusion prevailed.

At 0700 parties were sent to cut the wires connecting Rafa with Khan Yunis and Shellal.

As the ground appeared considerably more open than could be judged from the map the General Officer Commanding A & NZ Mounted Division was ordered to conduct deliberate artillery preparation while his division and ICC were getting into position to attack.

The guns started registering at 0720.

About this time useful information was received from aeroplane observers as to the trenches occupied and the strength of their garrisons. The information received from this source throughout the day, was good and accurate.

The main attack was timed by General Officer Commanding A & NZ Mounted Division for 1000, with the New Zealand Mounted Rifles Brigade on the right attacking from the East, the 1st Australian Light Horse Brigade next, attacking from East and South East while the camels attacked from South East. 3rd Light Horse Brigade in reserve. 5th Mounted Brigade in Column Reserve with Honourable Artillery Company.

At 1015 parties of Turks, who were attempting to leave Rafa by the Khan Yunis Road, were met by the New Zealand Mounted Rifles Brigade who galloped the Police Barracks and a Machine Gun post 300 yards to the south west. 6 Germans, 2 Turkish Officers and 103 Other Ranks were captured.

Rafa was occupied and at 1054 the 3rd Light Horse Brigade (less 1 Regiment) was put in against C5 and C4 on left of 1st Light Horse Brigade. 1st Light Horse Brigade was ordered to reinforce its line and to press attack on works C4 and C5, keeping touch with New Zealand Mounted Rifles Brigade. The Camel Brigade was ordered to press on. The attack was timed for 1130. Almost at the same time the remainder of the New Zealand Mounted Rifles Brigade with the 1st Light Horse Brigade, galloped the open stretch south of the Police Post and established itself north east of Big Tree (about 500 yards east of C 5.

5th Mounted Brigade, which had been ordered to send a squadron as escort to "B" Battery Honourable Artillery Company, was now (1020) ordered to deploy against works B1 and B2, and to work in conjunction with the Imperial Camel Corps Brigade.

At 1220 "B" Battery Honourable Artillery Company, which had been firing on the C Group from a covered position about ¾ mile North East of the point 210, moved forward about 1600 yards to support the attack of the 5th Mounted Brigade. At 1300 Royal Flying Corps reported our troops were advancing west of A1, A2 and B1, and were then about 500 yards from the enemy trenches. Our artillery were shelling A1 and B1 with good effect. A1 and A2 appeared to be held by 100 Turks in each work. Our dismounted troops had reached a line about 600 yards from B4 and C4.

At 1405 A & NZ Mounted Division reported that the right of the New Zealand Mounted Rifles Brigade had linked up with left of the 5th Mounted Brigade and were pressing attack on rear of redoubt on green knoll (A1).

At 1450 orders were issued by Desert Column for a concerted attack on Reduit by New Zealand Mounted Rifles Brigade and all available troops of A & NZ Mounted Division to commence at 1530. In this attack the 5th Mounted Brigade was ordered to cooperate with 5½ squadrons against the rear of the redoubt. "B" Battery Honourable Artillery Company was ordered to cooperate in an intense bombardment to cease at 1530.

At 1515 the situation was as follows:-

Works B3 and 4 were held by our troops, who were also linking the road running south from the Police Barracks and were within 500 yards of C5 and C6. About 1532 the 1st Light Horse Regiment reported the capture of 94 prisoners.

As this attack was developing a patrol on the coast 2 miles north east of the Rafa Police Barracks captured a machine gun, 4 German and a Turk, who stated that they belonged to a force of 1,500 men marching from Shellal to the relief of Rafa. This report was confirmed later (1550) by General Chauvel in a telephone conversation with Column Headquarters in which he said his patrols had seen a force of about 1,500 men four miles away.

Orders were at once given for the attack to be pressed with vigour and instructions were issued that if the position was not captured by 1700 the engagement was to be broken off and the force to be withdrawn under cover of darkness.

By 1645 the leading lines of the Gloucester and Warwick Yeomanry on the left of the 5th Mounted Brigade, supported by the fire of No. 7 Light Car Patrol, were within 200 yards of Green Knoll (A1). Almost at the same time the New Zealand Mounted Rifles Brigade captured the Reduit with brilliant dash covering the last 800 yards in two rushes supported by machine gun fire, and were thus enabled to take the lower lying works in reverse.

Shortly after the Camel Brigade and a detachment of the Warwick Yeomanry captured works B1 and 2 taking 320 prisoners, whilst the 1st and 3rd Light Horse Brigades carried the C Group of works. Works A1 and A2 were abandoned by the enemy just as the Gloucester Yeomanry reached them and the garrison surrendered to the A & NZ Mounted Division.

By 1730 all organised resistance was over, but the hostile detachment on the Shellal Road now came in contact with the 3rd Light Horse Brigade.

On the night 9th/10th January the force was in bivouac at Sheikh Zowaid with the exception of the 5th Mounted Brigade which returned to El Arish. During the 10th a squadron supported by the Regiment and No. 7 Light Car Patrol cleared the battlefield, whilst the remainder of the force returned to El Arish.

The detachment clearing the battlefield withdrew unmolested at 1300 on the 10th to Sheikh Zowaid. 


Further Reading:

The Battle of Rafa, Sinai, 9 January 1917

The Battle of Rafa, Sinai, 9 January 1917, Roll of Honour

The Palestine Campaign, 1917 - 1918

Battles where Australians fought, 1899-1920


Citation: The Battle of Rafa, Sinai, 9 January 1917, The Desert Column Account


Posted by Project Leader at 12:01 AM EAST
Updated: Sunday, 9 January 2011 8:57 AM EAST

View Latest Entries

Full Site Index


powered by FreeFind
Let us hear your story: You can tell your story, make a comment or ask for help on our forum.

Desert Column Forum

A note on copyright

The Australian Light Horse Studies Centre is a not for profit and non profit group whose sole aim is to write the early history of the Australian Light Horse from 1900 - 1920. It is privately funded and the information is provided by the individuals within the group and while permission for the use of the material has been given for this site for these items by various donors, the residual and actual copyright for these items, should there be any, resides exclusively with the donors. The information on this site is freely available for private research use only and if used as such, should be appropriately acknowledged. To assist in this process, each item has a citation attached at the bottom for referencing purposes.

Please Note: No express or implied permission is given for commercial use of the information contained within this site.

A note to copyright holders

The Australian Light Horse Studies Centre has made every endeavour to contact copyright holders of material digitised for this blog and website and where appropriate, permission is still being sought for these items. Where replies were not received, or where the copyright owner has not been able to be traced, or where the permission is still being sought, the Australian Light Horse Studies Centre has decided, in good faith, to proceed with digitisation and publication. Australian Light Horse Studies Centre would be happy to hear from copyright owners at any time to discuss usage of this item.

Contact

Australian Light Horse Studies Centre

eXTReMe Tracker