


Topic: BatzP - Rafa
The Battle of Rafa
Sinai, 9 January 1917
Imperial Camel Corps Unit History Account
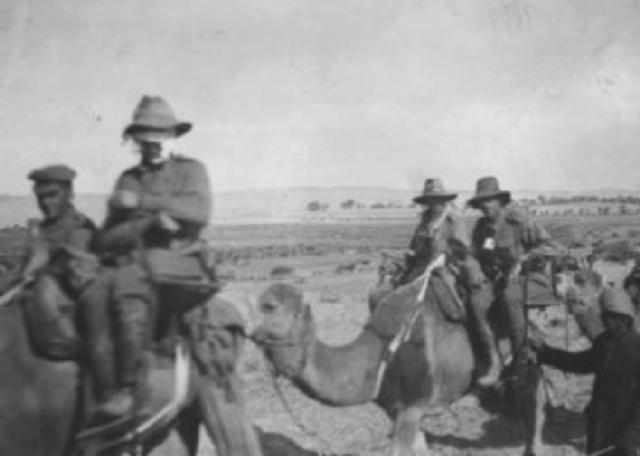
Camels evacuating the wounded at Rafa
The following is an extract from Becker, S, The Imperial Camel Corps, unpublished manuscript, about the role of the Imperial Camel Corps at the Battle of Rafa, Sinai, 9 January 1917.
Rafa
The Battle of RAFA
In the weeks following the successful capture of Magdhaba the Camel Brigade (hastily assembled in December) went through a period of training and reorganization. Part of this reorganisation was to place all British companies together into one battalion and Australians and New Zealanders companies into two Battalions. General Smith still had to rotate his Companies with the Western Desert Force and the Canal defence as new companies were formed and attached to gain experience with his new Battalions and the newly formed 4th Camel Regiment marched into Abbassia for training, this constituted the increasing importance of the Camel Corps in the defence of Egypt by General Murray.
During this time the Brigade continued to send out a number of patrols into the surrounding area searching for Bedouin who acting on Turkish orders spied on the Allied troops around El Arish. One of the patrol areas was at Lahfan Post south of El Arish where a camel company was placed along the Wadi El Arish to warn of any approach of the enemy from that direction. The Brigade was inspected by Generals Cherwode, Dobell and Chauvel on the 28th December where they complemented the men on the part they played during the battle on the 23rd December and the men gave the leaders a march pass mounted on their camels.
On the 4th January 1917 Major Hubert Jervoise Huddlestone MC arrived from the Dorset Regiment who had been serving with the Egyptian Camel Corps in the Darfur area of the Sudan and assumed command of the 3rd Battalion replacing Captain Wright who renewed his command of the 1st Company as it with the 15th NZ Company returned to the 1st Anzac Battalion.
The Camel Brigade at this time was composed of the following troops;
Camel Bde HQ Gen Smith VC
1st Anzac Battalion Maj Langley
1st Co Capt Wright
3rd Co Lt Norris
4th Co Capt Denson
15th NZ Co Capt McCallum
2nd British Battalion Maj Bassett
5th Co Capt Wilson
6th Co Capt Pettit
7th Co Capt Deas
3rd Battalion Maj Huddlestone
11th Co Capt Creswell
12th Co Capt Smith
14th Co Capt Tolmer
HK&S Battery Maj Moore
1/1st Welsh FA
The Allied Air force was continuously active during this period undertaking long flight’s into the desert and carrying out reconnaissance patrols towards the border where it was reported that the Turks still occupied El Magruntein a small police post just south of Rafa along the Palestine-Egypt border, where the Turks through political reasons were forced to maintain a garrison in the Sinai. This garrison consisted of two veteran battalions of the 31st Regiment, 3rd Division, with some camelrey supported by a four-gun battery of mountain artillery which was solidly entrenched in well defended positions around El Magruntein, with large bodies of troops supporting at Gaza. The 31st Regiment was a capable unit having taken part in the attack on the canal in August and had been selected as the rearguard stopping the attack on Mazar in September and had escaped any major hardship.
On the 28thDecember General Philip Chetwode commanding the Desert Column at El Arish proposed a raid on the isolated garrison at Rafa which would be similar to that employed by General Charles Chauvel at Magdhaba, as this offered an excellent chance of capturing the position before the horses would require water. This plan was accepted by General Archibald Murray on the proviso that no undue risk should be run during the attack.
The troops employed in the capture Rafa would consist of the Desert Column of the Australian and New Zealand Mounted Division under General Chauvel, composed of the 1st and 3rd Australian Light Horse Brigades, the New Zealand Mounted Brigade, 5th British Mounted Yeomanry Brigade and the Imperial Camel Corps Brigade, the force would also be supported by the 7th Light Car Patrol.
On the 28th December the 1st Australian Light Horse Brigade carried out a reconnaissance to Bir el Burj, 12 miles along the El Arish - Rafa road and another on the 30th to Sheikh Zowaiid. These operations hardened the troops and prepared them for the hardships ahead as well as discovering the lack of enemy troops covering the main defences at Rafa.
On the 7th January orders were issued for a concentration at Sheikh Zowaiid of the Desert Column and the advance force left El Arish at 4 am on the 8th January with the 5th Mounted Brigade leading which captured Sheikh Zowaiid by 10 am.
The Camel brigade (less the 14th company still on outpost duty at Lahfan Post) was composed of only nine companies held a sports meeting on the 8th, it broke up in time for the troops to parade at 2 pm and depart around 4 pm with full equipment for Sheikh Zowaiid. The brigade pushed on slowly surrounded by the swift moving regiments of the Light Horse and Mounted Rifles where at 9 pm the moon came out displaying the promised land ahead, the troops were heartened to find the desert sands of the Sinai give way to the grassy plains of the land of Palestine as the troops arrived at Shekh Zowaiid around midnight.
At 1 am on the 9th January the advance proceeded the remaining 25 miles to Rafa with the Brigades of the Australian and New Zealand Division followed by the Camel Brigade at 1.30 am then the artillery. The 1st Light Horse brigade leading pushed well ahead over running a Bedouin patrol capturing it to a man.
At 3.30 am the force reached Pt 250 four and a half miles south of Rafa and two Turks on patrol were captured by the 3rd Light Horse brigade yet not before they signalled Rafa by flare, which luckily was not seen.
By 5.15 am the New Zealand brigade, secured Karm Ibn Muslah yet the local Arab population signalled the garrison at Rafa alerting the Turks to their presence, this town was found to be an excellent position for the Headquarters of the Australian and New Zealand Division and was used as an assembly point for the arriving Brigades.
While the concentration was underway, the Camel brigade had dropped off 3/4 of a mile to the west before this town and moved into an assembly area at 5.30 am while the other brigades moved into their positions. The Camel brigade like the light horse left one man in four to hold the animals and all nine companies were dismounted and the animals moved to safety. The brigade was greeted at 8.40 am by Turkish shell fire which landed around the position and despite there having the range marked down too within an inch they failed to hit any of the troops yet gave warning of what was installed for the day. The troops watched the spectacle while moving up and wondered about their chances attacking the Turks formidable defences over such open ground which as the sun came up showed their extent and the rapid movement of troops over a wide area as they deployed into position.
The Battle plan called for an assault by the Camel Brigade against the southern most defence of El Magruntein known as the B series of redoubts which were made up of four major works numbered from left to right as one to four with B 4 Redoubt the outermost to the southeast, all were in support of each other and with more than 2000 yards of exposed ground around them made any movement towards these redoubts vulnerable to their supported fire, the redoubts were occupied with a strong garrison of more than 400 men with machine guns, and artillery was within supporting range. At a distance in front of the redoubts the Turks had placed a number of snipers in spider holes which could be supported from the main trench where these men could inflict casualties on the attacking troops and break up their formations before reaching the main defences; these would become all too familiar to the troops later in the campaign.
General Clarence Smith was aware of the difficult task ahead and organized his brigade with the strong 1st Anzac Battalion under Major George Langley to attack the B 4 redoubt which would be supported on the right flank by the 3rd Light Horse Brigade (during their own attack on the C series of redoubts), in support would be the 2nd (British) Battalion under Major John Basset and the 3rd Battalion under Major Hubert Huddlestone was held in reserve.
The Camel Brigade had formed up into battle formation after having dismounted more than 4000 yards from the enemy’s redoubts as the lead companies advanced in single files to the start line where by 9 am the attacking companies where assembled. The Somerset Battery set up to fire on the C series of redoubts in support of the 3rd Light Horse Brigade while on the far left the 5th Yeomanry Brigade was to attack the A series of redoubts with the Warwickshire Yeomanry Regiment directed towards the B 1 and B 2 redoubts. The Hong Kong and Singapore Battery moved forward to a position 4500 yards from the enemy and came into action to give the Brigade support with their small calibre mountain guns.
At 9.30 am the artillery commenced firing on the enemy’s redoubts and during this half hour preparation fire the attacking troops moved slowly forward. The 1st Anzac Battalion attacked, with the 15th (New Zealand) company leading under Captain John McCallum and the 3rd company under Lieutenant Arthur Norris in support while two sections of the 1st company under Captain Charles Wright and the 4th company under Captain Herbert Denson were retained in reserve, the remaining two sections from the 1st company were detached to protect both the Hong Kong and Singapore Battery and 1/1st Welch Field Ambulance.
The assaulting companies deployed with two sections up and two in support with their Lewis guns to the flanks, the men advanced spread out in artillery formation then moved rapidly into line extended before the companies started advancing by section rushes however with more than 2000 yards of open ground the going was slow and under constant machine gun and rifle fire.
The Turkish fire, as at Magdhaba was strong yet very inaccurate with most of the bullets passing overhead until the troops had closed up on the main defences then the fire would become more accurate. During the 1st Battalion’s attack the advance was to have been coordinated with the 9th Light Horse Regiment yet due to the distances and enemy fire this did not happen instead both units attacked their objectives separately, this was to have tragic consequences later in the morning for both units.
Around 11 am the companies still advancing in section rushes reached a small sand ridge about 800 yards from the B 4 redoubt and there took temporary shelter from the heavy enemy fire directed at them, Captain McCallum took this time to reorganize his men as they had become mixed during the advance. When the company commenced to move forward again they had advanced only a few yards when the men were engulfed in a murderous cross fire from both the B and C series of redoubts as the troops endeavoured to go forward.
In defiance of this fire the kiwis slowly made their way across this isolated sand ridge towards the enemies trenches yet more men fell hit by machine gun fire and snipers hidden in small holes in advance of the main defence, Captain John McCallum a Solicitor from Christchurch NZ and a well-liked Officer, Commanding 15th company was shot and mortally wounded as the fire forced the remainder of the company to fall back to the ridge and safety.
Shells from supporting artillery cheered the troops, which appeared to them to be smashing the enemy trenches yet any man still trying to advance were greeted by a hail of fire both from the front and flank as they became exposed to enfilade fire from the C 3 redoubt on the right killing Private Stuart Kidd and mortally wounding Private William Metcalfe of the 15th company and many men fell wounded. Seeing the madness of continuing the troops were ordered to lie down to find what cover they could, most scraped sand in front of them too hide behind and there were numerous wounded where enemy snipers took great pleasure at picking off individual men including the wounded.
Around this time the 3rd company which had been following the 15th into the fire storm joined up with the hard-pressed New Zealanders and quickly reinforced the firing line and extended the flanks bringing fire onto the enemy trenches, this directly brought the enemies guns onto the company and the casualties began to mount, Privates John Vanstone and Roy Gallwey seeing the suffering of the wounded found a stretcher and under heavy fire evacuated many of the wounded men. Meanwhile Private Edward Sutton was knocked unconscious by the concussion of an exploding shell when he came to he was suffering from shell shock and his mates comforted him as they waited for a chance to remove him.
For four hours the troops remained stranded in front of the enemy works where the only comfort was from the supporting artillery fire and while the Lewis gunners did good work keeping the Turks to their trenches, one gunner Private Joe Paul was shot in the head and killed doing this vital work as was Lieutenant Harry Lindford, a popular young officer from NSW who was shot in the chest soon after him, Private Roy Bailey was also shot in the abdomen during the advance and later died of wounds.
By 11 am the 1st Anzac Battalion was checked and Major Langley committed the two sections of the 1st company to help, they pushed promptly onward towards the exposed companies sheltering in front of the enemy’s redoubt and could make only a limited advance before being forced to go to ground and join the cowering 3rd and 15th company in the sand were exposed to the enemies fire they soon had many casualties, these included Sergeant Peter Foster and Private Phil Holmes killed with Corporal George Wilson mortally wounded. Private Arthur Woodcock late of the 13th Battalion was shot through the bowel later dying in the 1st Light Horse Field Ambulance.
At 11.30 am General Smith ordered forward the 2nd Battalion to support the checked 1st Battalion and the 5th company under Captain Charles Wilson led the 6th under Captain Hubert Pettit and 7th company under Captain Edwin Deas forward, Major Buxton deploying the 5th company to the left rear of the 1st Battalion and there joined in providing fire support by extending the firing line of the 3rd and 15th Company’s onto the Turkish trenches while the 6th and 7th company remained to the rear until ordered forward at 1 pm.
By 12.15 pm General Smith had observed that his line was being cut to pieces by the fire from the Turkish redoubts on the flanks and knew he would have to extend the firing line further to support the isolated companies by taking more redoubts under fire.
The remaining companies of the 2nd Battalion were then committed and the artillery was increased to help. To assist the light guns of the Hong Kong and Singapore battery the Somerset and Leicester batteries were added and at 1 pm the 2nd Battalion sent in the 6th company under Captain Pettit and two sections of the 7th company under Captain Deas to take the B 3 redoubt under fire. The English Cameleers advanced in two waves of three lines by companies with the 6th on the left of the stranded 5th company and the 7th on the left of the 6th company, after quickly moving across the exposed surface they soon came under heavy fire from B 4 and B 2 redoubts forcing the companies to deploy short on their right and like the 1st Anzac Battalion could make no progress against the heavy cross fire on the exposed sand. Captain Deas ordered his men to find cover yet continued to make steady progress forward until becoming bogged down in the sand and where they to had to endure and return fire at their antagonists. Thus the firing line was now extended to the left and were we could now bring a cross fire onto B 4 redoubt, the troops also found that B 3 redoubt was not held in strength by the enemy with only a thin screen of rifleman as its garrison.
During this time the 4th Company under Captain Denson was committed after midday with the hope of extending and reinforcing the 1st Battalions firing line and soon became the focal point of the Turks fire, and quickly lost Private David Farthing mortally wounded and more than 11 men casualties before joining the remainder of the Battalion in the sand entangled under a perilous fire.
Around 11 am the 3rd Battalion had also been brought up from reserve and formed a line to the rear of the 2nd Battalion after its companies had been engaged in the action on B 3. At 1.15 pm the 11th company under Captain Randolph Creswell was committed to the left of the stalled 2nd Battalion its mission was to both extend the firing line and to effect a junction with the 5th Yeomanry Brigade which had not been seen to have engage the B1 redoubt, yet once the company began to advance they abruptly ran into a heavy and concentrated fire from the B 1 and B 2 redoubts which stopped any thought of progress and the company quickly joined the remainder of the Brigade in the sand as this move was not pushed forward.
Major Hubert Huddlestone then brought up the 12th company under Captain George Smith at 2 pm to lengthened his firing line yet again was frustrated by the enemy and had to expose himself to the enemy’s fire to inspire the men of the inexperienced 12th Company, in the end the company was forced to stop well to the rear of the 11th company and was not heavily committed.
Around 4.30 the Australian and New Zealand Division was in trouble as the Turkish defence were with standing the attack of our combined forces and with Turkish reinforcements seen approaching from Gaza forced General Chetwode to consider a withdrawal just as General Chauval had been forced to contemplate at Magdhaba. General Chetwode now proposed that the attack be broken off and waited to consult with higher command while the 5th Yeomanry Brigade was withdrawn from the area of the B 1 and the A series of redoubts. While this was being decided news came in of the success of both the New Zealand and Camel brigades.
After 4 pm General Smith was concerned by the lack of progress of his forward Battalions and conferring with his officers organized one more attack which was to be carried out by three companies against the B 2 redoubt which had not been attacked so far and cooperation and support were arranged with the 5th Mounted Brigade. This attack was to be carried out by two companies of the 3rd Battalion and one company from the 2nd Battalion under the combined command of Major Huddlestone and using the 11th and 12th companies as an axis the 7th company moved in behind them joining up beside the 12th company. It was during this redeployment that orders were received from General Chetwode that units of the 5th Mounted Brigade were to retire leaving the Camel companies flank exposed and would attack alone.
All troops were guided into position by 4.20 pm by Major Langley. At this time the 12th and 7th company worked their way forward by crawling on their hands and knees too within assaulting distance with the 11th company under Captain James Tolmer in support and the combined Lewis gun teams under Lieutenant’s Leslie Bell and John Davidson who with Sergeant Bert Clarke from the 4th Company, were detached and set up to the flank where they had good observation over the enemy’s trenches, and poured a deadly fire at the Turks which could be clearly seen by the rows of bayonets sticking up as if a sign to the cameleers not to come any further. The Brigade then concentrated all its fire on the B 2 and B 4 redoubts as the troops slowly made their way towards the enemy. The remainder of the Brigade at this time brought all the fire to bare on the enemies works and a section of two guns of the Hong Kong and Singapore battery were moved up to within 30 yards of the firing line to add to the fusillade.
With only 40 yards to the Turkish trench the cameleers rose from the hot sand and made a swift rush with the bayonet at the stunned Turks, the men let out a loud cheer as they ran towards the Turks who had only time to fire a few shots before the companies were among them and just as we reached the enemies trenches white flags began to appear. Captain George Smith an accountant from Narrabri NSW commanding the 12th company was shot and killed on reaching the enemies trenches and a short yet deadly fight followed as not all the Turks were prepared to surrender and the bayonet was used freely by Australian and British troops in clearing the trenches, the 12th company lost Corporal Joseph Murray felled by a German NCO along with Private Bill Whildon killed and Private’s John Campbell and George Isles were mortally wounded in the close quarter fighting during this bloody contest, while Neil McBride had been shot in the groin some yards from the trenches. Sergeant Robert Coombe of the 7th company with great dash captured a portion of trench and 40 Turkish prisoners losing Sergeant James Wilson and Private Allan Craig killed, and soon the entire redoubt was in their hands.
The quick seizure of the B 2 redoubt enabled the 3rd Battalion to consolidate the position and allowed the troops to push on and apprehend the B 3 and B 4 redoubts. The 11th company assumed the lead capturing many Turks with the loss of only a few men, Sergeant Edward Lynch a Carpenter from West Wylong NSW and well liked soldier was killed trying to take a Turkish machine gun to secure the advance. Also, killed were Privates Francis Heaney and Frank Morse-Kincaid while Privates Herbert Gyler and John Drage were mortally wounded.
With the 3rd Battalions assault a success the companies of the 1st and 2nd Battalions rose and advanced on the readouts to complete the capture supported by fire from Sergeant Bertram Clark with his Lewis gun teams who with other Lewis gun teams fired more than 9000 rounds of ammunition and shot down any Turks lifting his head above the trench top. There was little fight left in the Turks who after twenty hours in the trenches with little water under the merciless sun now surrendered in large numbers allowing all the trenches to be captured and cleared with little resistance by 4.50 pm. The Brigade had captured more than five officers and 219 other ranks all in the B series of Redoubts and an unknown number were killed, many more ran away only to be picked up by other units, few if any escaped.
While the brigade concentrated a group of men from the Camel Corps pushed on pasted the B series of redoubts and joined the 9th Light Horse in the C series of redoubts taking part with Captain John Chanter of that Regiment in the capture of the battery of four Turkish mountain guns and a number of prisoners.
Meanwhile the Warwickshire Yeomanry of the 5th Mounted Brigade on the left which had withdrawn on order earlier now returned too assisted the Camel Brigade in taking the B 1 redoubt where fighting continued with the Yeomanry for a further twenty minutes before its capture was effected.
The victory by General Chetwode and his men was soon in danger with Turkish reinforcements now approaching El Magruntein in force; detachments of the Wellington Regiment were in action delaying their advance as General Chetwode ordered all troops to withdraw as swiftly as possible. However before they could leave the field of battle had first to be cleared of wounded and prisoners also those who paid the price of victory hurriedly buried, it was getting dark as the cameleers slowly mounted their camels sadly there were many empty saddles as the brigade moved slowly back to Sheikh Zowaiid arriving around midnight where they rested for a few hours and a rum issue was passed around. Lieutenant Archie Campbell and a small party were ordered to return to Rafa at 3 am to bury Captain Smith and others who had been killed and who may have been overlooked, the bodies were found however their remains had been desecrated by Arab scavengers and the cameleers took a particular dislike to them and against British orders few when caught were released in one piece.
In the morning of the 10th January the exhausted Brigade continued its move back to El Arish arriving at 2.30 pm.
The total Camel Brigade casualties were reported in their War Diary as three officers and 60 other ranks killed or wounded.
The records show the Australians of the 1st and 3rd Battalions had lost two officers (George Smith and Harry Linford) and nine other ranks killed and one officer and 42 men wounded of which seven men died of wounds.
The New Zealanders of the 15th company reported the lost of one other rank killed (Stuart Kidd) and one officer and 18 men were wounded of who one officer (John McCallum) and one other rank died of wounds.
The 2nd British Battalion casualties were not recorded, yet a search of records show three other ranks were killed in action and four other ranks died of wounds while the wounded were not recorded.
Further Reading:
The Battle of Rafa, Sinai, 9 January 1917
The Battle of Rafa, Sinai, 9 January 1917, Roll of Honour
The Palestine Campaign, 1917 - 1918
Battles where Australians fought, 1899-1920
Citation: The Battle of Rafa, Sinai, 9 January 1917, Imperial Camel Corps Unit History Account
Posted by Project Leader
at 12:01 AM EAST
Updated: Saturday, 15 January 2011 7:24 AM EAST
