« July 2012 »
S M T W T F S
1 2 3 4 5 6 7
8 9 10 11 12 13 14
15 16 17 18 19 20 21
22 23 24 25 26 27 28
29 30 31
You are not logged in. Log in


Search the site:


powered by FreeFind
Volunteer with us.

Entries by Topic All topics  
A Latest Site News
A - Using the Site
AAA Volunteers
AAB-Education Centre
AAC-Film Clips
AAC-Photo Albums
AIF & MEF & EEF
AIF - Lighthorse
AIF - ALH - A to Z
AIF - DMC
AIF - DMC - Or Bat
AIF - DMC - Anzac MD
AIF - DMC - Aus MD
AIF - DMC - British
AIF - DMC - BWI
AIF - DMC - French
AIF - DMC - Indian
AIF - DMC - Italian
AIF - DMC - Medical
AIF - DMC - Remounts
AIF - DMC - Scouts
AIF - DMC - Sigs
AIF - DMC - Sigs AirlnS
AIF - DMC - 1 Sig Sqn
AIF - DMC - 2 Sig Sqn
AIF - DMC - Eng
AIF - DMC - Eng 1FSE
AIF - DMC - Eng 2FSE
AIF - DMC - GSR
AIF - 1B - 1 LHB
AIF - 1B - 6 MVS
AIF - 1B - 1 LHMGS
AIF - 1B - 1 Sig Trp
AIF - 1B - 1 LHFA
AIF - 1B - 1 LHR
AIF - 1B - 2 LHR
AIF - 1B - 3 LHR
AIF - 2B - 2 LHB
AIF - 2B - 7 MVS
AIF - 2B - 2 LHFA
AIF - 2B - 2 LHMGS
AIF - 2B - 2 Sig Trp
AIF - 2B - 5 LHR
AIF - 2B - 6 LHR
AIF - 2B - 7 LHR
AIF - 3B - 3 LHB
AIF - 3B - 8 MVS
AIF - 3B - 3 LHB Sigs
AIF - 3B - 3 LHFA
AIF - 3B - 3 LHMGS
AIF - 3B - 3 Sig Trp
AIF - 3B - 8 LHR
AIF - 3B - 9 LHR
AIF - 3B - 10 LHR
AIF - 4B - 4 LHB
AIF - 4B - 4 Sig Trp
AIF - 4B - 9 MVS
AIF - 4B - 4 LHFA
AIF - 4B - 4 LHMGS
AIF - 4B - 4 LHR
AIF - 4B - 11 LHR
AIF - 4B - 12 LHR
AIF - 5B - 5 LHB
AIF - 5B - 10 MVS
AIF - 5B - 5 LHFA
AIF - 5B - 5 Sig Trp
AIF - 5B - ICC
AIF - 5B - 14 LHR
AIF - 5B - 15 LHR
AIF - 5B - 1er Regt
AIF - 5B - 2 NZMGS
AIF - AASC
AIF - Aboriginal LH
AIF - Badges
AIF - Cars
AIF - Chinese LH
AIF - Double Sqns
AIF - Engineers
AIF - Fr - 22 Corps
AIF - Fr - 13 LHR
AIF - Honour Roll
AIF - HQ - 3rd Echelon
AIF - Marching Songs
AIF - Misc Topics
AIF - NZMRB
AIF - NZMRB - AMR
AIF - NZMRB - CMR
AIF - NZMRB - EFT
AIF - NZMRB - NZMFA
AIF - NZMRB - NZMGS
AIF - NZMRB - OMR
AIF - NZMRB - Sig-Trp
AIF - NZMRB - WMR
AIF - Ships
AIF - Ships - Encountr
AIF - Ships - Una
AIF - WFF
AIF - Wireless Sqn
Battles
BatzA - Australia
BatzA - Broken Hill
BatzA - Liverpool
BatzA - Merivale
BatzB - Boer War
BatzB - Bakenlaagte
BatzB - Belmont
BatzB - Bothaville
BatzB - Buffels Hoek
BatzB - Coetzees Drift
BatzB - Diamond Hill
BatzB - Driefontein
BatzB - Elands
BatzB - Graspan
BatzB - Grobelaar
BatzB - Grootvallier
BatzB - Hartebestfontn
BatzB - Houtnek
BatzB - Karee Siding
BatzB - Kimberley
BatzB - Koster River
BatzB - Leeuw Kop
BatzB - Mafeking
BatzB - Magersfontein
BatzB - Modder River
BatzB - Onverwacht
BatzB - Paardeberg
BatzB - Palmietfontein
BatzB - Pink Hill
BatzB - Poplar Grove
BatzB - Rhenoster
BatzB - Sannahs Post
BatzB - Slingersfontn
BatzB - Stinkhoutbm
BatzB - Sunnyside
BatzB - Wilmansrust
BatzB - Wolvekuil
BatzB - Zand River
BatzG - Gallipoli
BatzG - Anzac
BatzG - Aug 1915
BatzG - Baby 700
BatzG - Evacuation
BatzG - Hill 60
BatzG - Hill 971
BatzG - Krithia
BatzG - Lone Pine
BatzG - Nek
BatzJ - Jordan Valley
BatzJ - 1st Amman
BatzJ - 2nd Amman
BatzJ - Abu Tellul
BatzJ - Es Salt
BatzJ - JV Maps
BatzJ - Ziza
BatzM - Mespot
BatzM - Baghdad
BatzM - Ctesiphon
BatzM - Daur
BatzM - Kurna
BatzM - Kut el Amara
BatzM - Ramadi
BatzN - Naval
BatzN - AE1
BatzN - Cocos Is
BatzN - Heligoland
BatzN - Marmara
BatzN - Zeebrugge
BatzN - Zeppelin L43
BatzNG - Bitapaka
BatzO - Other
BatzO - Baku
BatzO - Egypt 1919
BatzO - Emptsa
BatzO - Karawaran
BatzO - Peitang
BatzO - Wassa
BatzP - Palestine
BatzP - 1st Gaza
BatzP - 2nd Gaza
BatzP - 3rd Gaza
BatzP - Aleppo
BatzP - Amwas
BatzP - Ayun Kara
BatzP - Bald Hill
BatzP - Balin
BatzP - Beersheba
BatzP - Berkusieh
BatzP - Damascus
BatzP - El Auja
BatzP - El Buggar
BatzP - El Burj
BatzP - Haifa
BatzP - Huj
BatzP - JB Yakub
BatzP - Kaukab
BatzP - Khan Kusseir
BatzP - Khuweilfe
BatzP - Kuneitra
BatzP - Megiddo
BatzP - Nablus
BatzP - Rafa
BatzP - Sasa
BatzP - Semakh
BatzP - Sheria
BatzP - Surafend
BatzP - Wadi Fara
BatzS - Sinai
BatzS - Bir el Abd
BatzS - El Arish
BatzS - El Mazar
BatzS - El Qatiya
BatzS - Jifjafa
BatzS - Magdhaba
BatzS - Maghara
BatzS - Romani
BatzS - Suez 1915
BatzSe - Senussi
BatzWF - Westn Front
BW - Boer War
BW - NSW
BW - NSW - 1ACH
BW - NSW - 1NSWMR
BW - NSW - 2NSWMR
BW - NSW - 3ACH
BW - NSW - 3NSWIB
BW - NSW - 3NSWMR
BW - NSW - 5ACH
BW - NSW - A Bty RAA
BW - NSW - AAMC
BW - NSW - Aust H
BW - NSW - Lancers
BW - NSW - NSW Inf
BW - NSW - NSWCBC
BW - NSW - NSWIB
BW - NSW - NSWMR_A
BW - NZ
BW - Qld
BW - Qld - 1ACH
BW - Qld - 1QMI
BW - Qld - 2QMI
BW - Qld - 3ACH
BW - Qld - 3QMI
BW - Qld - 4QIB
BW - Qld - 5QIB
BW - Qld - 6QIB
BW - Qld - 7ACH
BW - QLD - AAMC
BW - SA
BW - SA - 1SAMR
BW - SA - 2ACH
BW - SA - 2SAMR
BW - SA - 3SACB
BW - SA - 4ACH
BW - SA - 4SAIB
BW - SA - 5SAIB
BW - SA - 6SAIB
BW - SA - 8ACH
BW - SA - AAMC
BW - Tas
BW - Tas - 1ACH
BW - Tas - 1TIB
BW - Tas - 1TMI
BW - Tas - 2TB
BW - Tas - 2TIB
BW - Tas - 3ACH
BW - Tas - 8ACH
BW - Vic
BW - Vic - 1VMI
BW - Vic - 2ACH
BW - Vic - 2VMR
BW - Vic - 3VB
BW - Vic - 4ACH
BW - Vic - 4VIB
BW - Vic - 5VMR
BW - Vic - 6ACH
BW - Vic - AAMC
BW - Vic - Scot H
BW - WA
BW - WA - 1WAMI
BW - WA - 2ACH
BW - WA - 2WAMI
BW - WA - 3WAB
BW - WA - 4ACH
BW - WA - 4WAMI
BW - WA - 5WAMI
BW - WA - 6WAMI
BW - WA - 8ACH
BW Gen - Campaign
BW Gen - Soldiers
BW General
Cavalry - General
Diary - Schramm
Egypt - Heliopolis
Egypt - Mena
Gen - Ataturk Pk, CNB
Gen - Australia
Gen - Legends
Gen - Query Club
Gen - St - NSW
Gen - St - Qld
Gen - St - SA
Gen - St - Tas
Gen - St - Vic
Gen - St - WA
Gm - German Items
Gm - Bk - 605 MGC
GW - 11 Nov 1918
GW - Atrocities
GW - August 1914
GW - Biographies
GW - Propaganda
GW - Spies
GW - We forgot
Militia 1899-1920
Militia - Area Officers
Militia - Inf - Infantry
Militia - Inf - 1IB
Militia - Inf - 2IB
Militia - Inf - 3IB
Militia - Inf - NSW
Militia - Inf - Qld
Militia - Inf - SA
Militia - Inf - Tas
Militia - Inf - Vic
Militia - Inf - WA
Militia - K.E.Horse
Militia - LH
Militia - LH - Regts
Militia - LH - 1LHB
Militia - LH - 2LHB
Militia - LH - 3LHB
Militia - LH - 4LHB
Militia - LH - 5LHB
Militia - LH - 6LHB
Militia - LHN - NSW
Militia - LHN - 1/7/1
Militia - LHN - 2/9/6
Militia - LHN - 3/11/7
Militia - LHN - 4/6/16
Militia - LHN - 5/4/15
Militia - LHN - 6/5/12
Militia - LHN - 28
Militia - LHQ - Qld
Militia - LHQ - 13/2
Militia - LHQ - 14/3/11
Militia - LHQ - 15/1/5
Militia - LHQ - 27/14
Militia - LHS - SA
Militia - LHS - 16/22/3
Militia - LHS - 17/23/18
Militia - LHS - 24/9
Militia - LHT - Tas
Militia - LHT - 12/26
Militia - LHV - Vic
Militia - LHV - 7/15/20
Militia - LHV - 8/16/8
Militia - LHV - 9/19
Militia - LHV - 10/13
Militia - LHV - 11/20/4
Militia - LHV - 19/17
Militia - LHV - 29
Militia - LHW - WA
Militia - LHW-18/25/10
Militia - Military Orders
Militia - Misc
MilitiaRC - Rifle Clubs
MilitiaRC - NSW
MilitiaRC - NT
MilitiaRC - Qld
MilitiaRC - SA
MilitiaRC - Tas
MilitiaRC - Vic
MilitiaRC - WA
Militiaz - New Zealand
Tk - Turkish Items
Tk - Army
Tk - Bks - Books
Tk - Bks - 1/33IR
Tk - Bks - 27th IR
Tk - Bks - Air Force
Tk - Bks - Yildirim
Tk - POWs
Wp - Weapons
Wp - Hotchkiss Cav
Wp - Hotchkiss PMG
Blog Tools
Edit your Blog
Build a Blog
RSS Feed
View Profile
Open Community
Post to this Blog
Site Index
Education Centre
LH Militia
Boer War
Transport Ships
LH Battles
ALH - Units
ALH - General
Aboriginal Light H
Weapons
Ottoman Sources

"At a mile distant their thousand hooves were stuttering thunder, coming at a rate that frightened a man - they were an awe inspiring sight, galloping through the red haze - knee to knee and horse to horse - the dying sun glinting on bayonet points..." Trooper Ion Idriess

The Australian Light Horse Studies Centre aims to present an accurate history as chroniclers of early Australian military developments from 1899 to 1920.

The Australian Light Horse Studies Centre site holds over 12,000 entries and is growing daily.

Contact: Australian Light Horse Studies Centre

Let us hear your story: You can tell your story, make a comment or ask for help on our Australian Light Horse Studies Centre Forum called:

Desert Column Forum

WARNING: This site contains: names, information and images of deceased people; and, language which may be considered inappropriate today.

Saturday, 28 July 2012
Australian Service Personnel, Photograph Albums, 2nd Light Horse Brigade Daily Reports, February 1918, Album Contents
Topic: AAC-Photo Albums

Australian Service Personnel

Photograph Albums

2nd Light Horse Brigade Daily Reports, February 1918, Album Contents


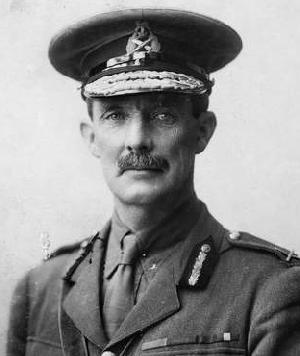
Brigadier General Granville de Laune Ryrie Commanding Officer of the 2nd Light Horse Brigade

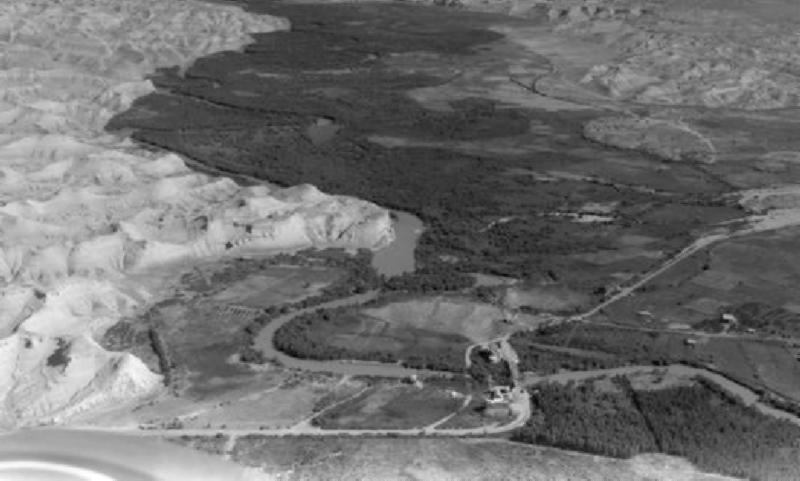
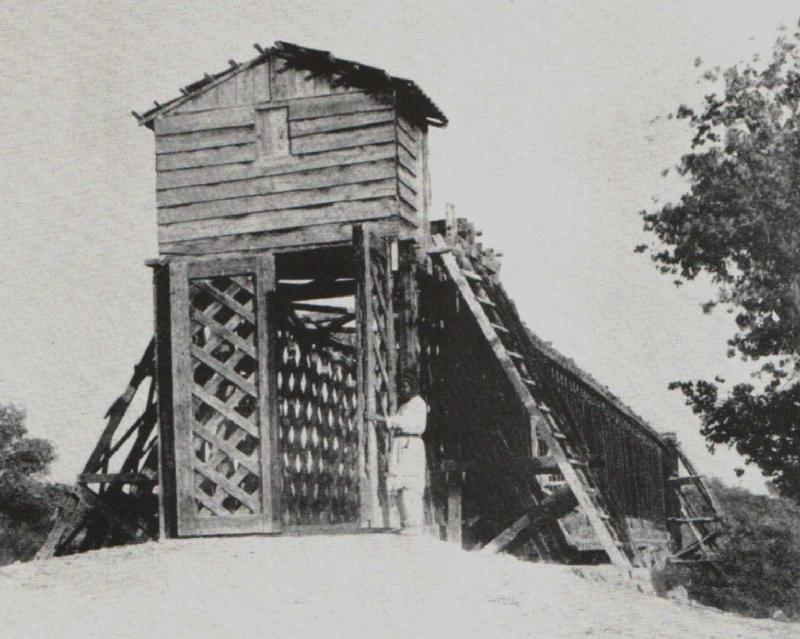
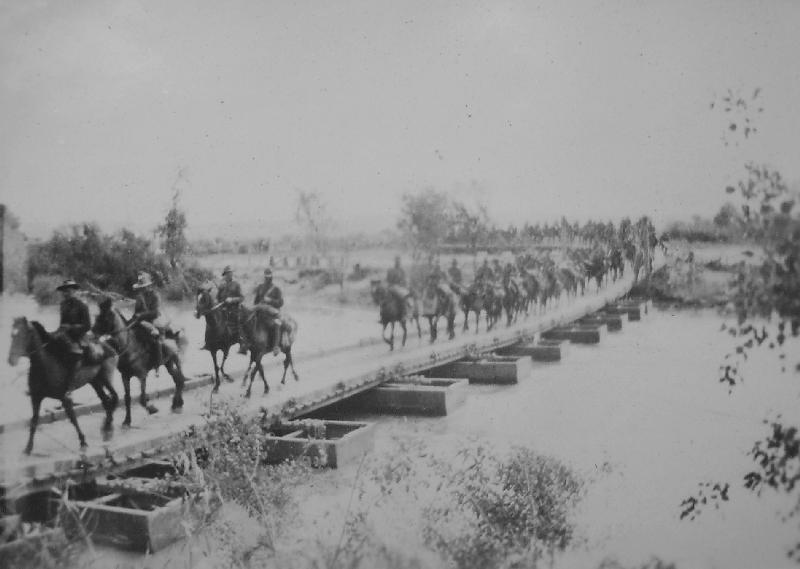
During the Jordan Valley days of the Anzac Mounted Division in 1918, a daily report was issued by the Brigade to Regiments under its command to keep the men informed as to the happenings around them. The information was vital to keep the men alive and well.

This archive was discovered in private hands and has been generously donated to the Australian public for open use. The pages are only free for private study purposes and cannot be reproduced for commercial purposes.

This album comprises these reports. Each report page is posted twice, the first post being a full sized document while the second is of smaller size noted with an "s" at the end of the link.

Each dated document should be read in conjunction with the 2nd Light Horse Brigade War Diary for February 1918 which is available here:

2nd Light Horse Brigade War Diary, February 1918


Listings in the Album:

Page 1

2nd Light Horse Brigade Daily Reports, 1 February 1918

2nd Light Horse Brigade Daily Reports, 1 February 1918 s

2nd Light Horse Brigade Daily Reports, 2 February 1918

2nd Light Horse Brigade Daily Reports, 2 February 1918 s

2nd Light Horse Brigade Daily Reports, 3 February 1918

2nd Light Horse Brigade Daily Reports, 3 February 1918 s

2nd Light Horse Brigade Daily Reports, 4 February 1918, p. 1

2nd Light Horse Brigade Daily Reports, 4 February 1918, p. 1 s

2nd Light Horse Brigade Daily Reports, 4 February 1918, p. 2

2nd Light Horse Brigade Daily Reports, 4 February 1918, p. 2 s


Page 2

2nd Light Horse Brigade Daily Reports, 5 February 1918

2nd Light Horse Brigade Daily Reports, 5 February 1918 s

2nd Light Horse Brigade Daily Reports, 6 February 1918

2nd Light Horse Brigade Daily Reports, 6 February 1918 s

2nd Light Horse Brigade Daily Reports, 7 February 1918

2nd Light Horse Brigade Daily Reports, 7 February 1918 s

2nd Light Horse Brigade Daily Reports, 8 February 1918

2nd Light Horse Brigade Daily Reports, 8 February 1918 s

2nd Light Horse Brigade Daily Reports, 9 February 1918

2nd Light Horse Brigade Daily Reports, 9 February 1918 s


Page 3

2nd Light Horse Brigade Daily Reports, 10 February 1918

2nd Light Horse Brigade Daily Reports, 10 February 1918 s

2nd Light Horse Brigade Daily Reports, 11 February 1918

2nd Light Horse Brigade Daily Reports, 11 February 1918 s

2nd Light Horse Brigade Daily Reports, 12 February 1918

2nd Light Horse Brigade Daily Reports, 12 February 1918 s

2nd Light Horse Brigade Daily Reports, 13 February 1918

2nd Light Horse Brigade Daily Reports, 13 February 1918 s

2nd Light Horse Brigade Daily Reports, 14 February 1918

2nd Light Horse Brigade Daily Reports, 14 February 1918 s


Page 4

2nd Light Horse Brigade Daily Reports, 15 February 1918

2nd Light Horse Brigade Daily Reports, 15 February 1918 s

2nd Light Horse Brigade Daily Reports, 16 February 1918

2nd Light Horse Brigade Daily Reports, 16 February 1918 s

2nd Light Horse Brigade Daily Reports, 17 February 1918

2nd Light Horse Brigade Daily Reports, 17 February 1918 s

2nd Light Horse Brigade Daily Reports, 18 February 1918

2nd Light Horse Brigade Daily Reports, 18 February 1918 s

2nd Light Horse Brigade Daily Reports, 19 February 1918

2nd Light Horse Brigade Daily Reports, 19 February 1918 s


Page 5

2nd Light Horse Brigade Daily Reports, 20 February 1918

2nd Light Horse Brigade Daily Reports, 20 February 1918 s

2nd Light Horse Brigade Daily Reports, 21 February 1918

2nd Light Horse Brigade Daily Reports, 21 February 1918 s

2nd Light Horse Brigade Daily Reports, 22 February 1918

2nd Light Horse Brigade Daily Reports, 22 February 1918 s

2nd Light Horse Brigade Daily Reports, 23 February 1918

2nd Light Horse Brigade Daily Reports, 23 February 1918 s

2nd Light Horse Brigade Daily Reports, 24 February 1918

2nd Light Horse Brigade Daily Reports, 24 February 1918 s


Page 6

2nd Light Horse Brigade Daily Reports, 25 February 1918

2nd Light Horse Brigade Daily Reports, 25 February 1918 s

2nd Light Horse Brigade Daily Reports, 26 February 1918

2nd Light Horse Brigade Daily Reports, 26 February 1918 s

2nd Light Horse Brigade Daily Reports, 27 February 1918

2nd Light Horse Brigade Daily Reports, 27 February 1918 s

2nd Light Horse Brigade Daily Reports, 28 February 1918

2nd Light Horse Brigade Daily Reports, 28 February 1918 s


Further Reading:

Australian Service Personnel, Photograph Albums

2nd Light Horse Brigade, AIF

Anzac Mounted Division, AIF

Australian Light Horse

Battles where Australians fought, 1899-1920


Citation: Australian Service Personnel, Photograph Albums, 2nd Light Horse Brigade Daily Reports, February 1918, Album Contents

Posted by Project Leader at 6:05 PM EADT
Updated: Saturday, 28 July 2012 6:25 PM EADT
Australian Service Personnel, Photograph Albums, Anzac Mounted Division Daily Reports, February 1918, Album Contents
Topic: AAC-Photo Albums

Australian Service Personnel

Photograph Albums

Anzac Mounted Division Daily Reports, February 1918, Album Contents


Major General Sir Edward Walter Clervaux Chaytor KCMG KCVO CB Commanding Officer of the Anzac Mounted Division

During the Jordan Valley days of the Anzac Mounted Division in 1918, a daily report was issued to the Brigades under its command to keep the men informed as to the happenings around them. The information was vital to keep the men alive and well.

This archive was discovered in private hands and has been generously donated to the Australian public for open use. The pages are only free for private study purposes and cannot be reproduced for commercial purposes.

This album comprises these reports. Each report page is posted twice, the first post being a full sized document while the second is of smaller size noted with an "s" at the end of the link.

Each dated document should be read in conjunction with the Anzac Mounted Division War Diary for February 1918 which is available here:

Anzac Mounted Division War Diary, February 1918

Maps of the operations described in the papers have been attached to the rear of the album.


Listings in the Album:

Page 1

Anzac MD Daily Intelligence Report, 1 February 1918

Anzac MD Daily Intelligence Report, 1 February 1918 s

Anzac MD Daily Intelligence Report, 2 February 1918

Anzac MD Daily Intelligence Report, 2 February 1918 s

Anzac MD Daily Intelligence Report, 3 February 1918

Anzac MD Daily Intelligence Report, 3 February 1918 s

Anzac MD Daily Intelligence Report, 4 February 1918

Anzac MD Daily Intelligence Report, 4 February 1918 s

Anzac MD Daily Intelligence Report, 5 February 1918

Anzac MD Daily Intelligence Report, 5 February 1918 s


Page 2

Anzac MD Daily Intelligence Report, 6 February 1918

Anzac MD Daily Intelligence Report, 6 February 1918 s

Anzac MD Daily Intelligence Report, 7 February 1918

Anzac MD Daily Intelligence Report, 7 February 1918 s

Anzac MD Daily Intelligence Report, 8 February 1918

Anzac MD Daily Intelligence Report, 8 February 1918 s

Anzac MD Daily Intelligence Report, 9 February 1918

Anzac MD Daily Intelligence Report, 9 February 1918 s

Anzac MD Daily Intelligence Report, 10 February 1918

Anzac MD Daily Intelligence Report, 10 February 1918 s


Page 3

Anzac MD Daily Intelligence Report, 11 February 1918

Anzac MD Daily Intelligence Report, 11 February 1918 s

Anzac MD Daily Intelligence Report, 12 February 1918

Anzac MD Daily Intelligence Report, 12 February 1918 s

Anzac MD Daily Intelligence Report, 13 February 1918

Anzac MD Daily Intelligence Report, 13 February 1918 s

Anzac MD Daily Intelligence Report, 14 February 1918

Anzac MD Daily Intelligence Report, 14 February 1918 s

Anzac MD Daily Intelligence Report, 15 February 1918

Anzac MD Daily Intelligence Report, 15 February 1918 s


Page 4

Anzac MD Daily Intelligence Report, 16 February 1918, p. 1

Anzac MD Daily Intelligence Report, 16 February 1918, p. 1 s

Anzac MD Daily Intelligence Report, 16 February 1918, p. 2

Anzac MD Daily Intelligence Report, 16 February 1918, p. 2 s

Anzac MD Daily Intelligence Report, 17 February 1918, p. 1

Anzac MD Daily Intelligence Report, 17 February 1918, p. 1 s

Anzac MD Daily Intelligence Report, 17 February 1918, p. 2

Anzac MD Daily Intelligence Report, 17 February 1918, p. 2 s

Anzac MD Daily Intelligence Report, 17 February 1918, p. 3

Anzac MD Daily Intelligence Report, 17 February 1918, p. 3 s


Page 5

Anzac MD Daily Intelligence Report, 17 February 1918, p. 4

Anzac MD Daily Intelligence Report, 17 February 1918, p. 4 s

Anzac MD Daily Intelligence Report, 18 February 1918, p. 1

Anzac MD Daily Intelligence Report, 18 February 1918, p. 1 s

Anzac MD Daily Intelligence Report, 18 February 1918, p. 2

Anzac MD Daily Intelligence Report, 18 February 1918, p. 2 s

Anzac MD Daily Intelligence Report, 19 February 1918

Anzac MD Daily Intelligence Report, 19 February 1918 s

Anzac MD Daily Intelligence Report, 20 February 1918

Anzac MD Daily Intelligence Report, 20 February 1918 s


Page 6

Anzac MD Daily Intelligence Report, 21 February 1918

Anzac MD Daily Intelligence Report, 21 February 1918 s

Anzac MD Daily Intelligence Report, 22 February 1918, p. 1

Anzac MD Daily Intelligence Report, 22 February 1918, p. 1 s

Anzac MD Daily Intelligence Report, 22 February 1918, p. 2

Anzac MD Daily Intelligence Report, 22 February 1918, p. 2 s

Anzac MD Daily Intelligence Report, 22 February 1918, p. 3

Anzac MD Daily Intelligence Report, 22 February 1918, p. 3 s

Anzac MD Daily Intelligence Report, 22 February 1918, p. 4

Anzac MD Daily Intelligence Report, 22 February 1918, p. 4 s


Page 7

Anzac MD Daily Intelligence Report, 22 February 1918, p. 5

Anzac MD Daily Intelligence Report, 22 February 1918, p. 5 s

Anzac MD Daily Intelligence Report, 23 February 1918, p. 1

Anzac MD Daily Intelligence Report, 23 February 1918, p. 1 s

Anzac MD Daily Intelligence Report, 23 February 1918, p. 2

Anzac MD Daily Intelligence Report, 23 February 1918, p. 2 s

Anzac MD Daily Intelligence Report, 23 February 1918, p. 3

Anzac MD Daily Intelligence Report, 23 February 1918, p. 3 s

Anzac MD Daily Intelligence Report, 23 February 1918, p. 4

Anzac MD Daily Intelligence Report, 23 February 1918, p. 4 s


Page 8

Anzac MD Daily Intelligence Report, 23 February 1918, p. 5

Anzac MD Daily Intelligence Report, 23 February 1918, p. 5 s

Anzac MD Daily Intelligence Report, 23 February 1918, p. 6

Anzac MD Daily Intelligence Report, 23 February 1918, p. 6 s

Anzac MD Daily Intelligence Report, 23 February 1918, p. 7

Anzac MD Daily Intelligence Report, 23 February 1918, p. 7 s

Anzac MD Daily Intelligence Report, 24 February 1918

Anzac MD Daily Intelligence Report, 24 February 1918 s

Anzac MD Daily Intelligence Report, 25 February 1918

Anzac MD Daily Intelligence Report, 25 February 1918 s


Page 9

Anzac MD Daily Intelligence Report, 26 February 1918

Anzac MD Daily Intelligence Report, 26 February 1918 s

Anzac MD Daily Intelligence Report, 27 February 1918

Anzac MD Daily Intelligence Report, 27 February 1918 s

Anzac MD Daily Intelligence Report, 28 February 1918

Anzac MD Daily Intelligence Report, 28 February 1918 s

Jericho Operations, Full Map

Jericho Operations, Full Map s

Jericho Operations, Southern Map Section

Jericho Operations, Northern Map Section


Further Reading:

Australian Service Personnel, Photograph Albums

Anzac Mounted Division, AIF

Australian Light Horse

Battles where Australians fought, 1899-1920


Citation: Australian Service Personnel, Photograph Albums, Anzac Mounted Division Daily Reports, February 1918, Album Contents

Posted by Project Leader at 11:26 AM EADT
Updated: Saturday, 28 July 2012 6:26 PM EADT
Friday, 27 July 2012
Jordan Valley 1918, Jordan Valley Maps, Contents
Topic: BatzJ - JV Maps

Jordan Valley 1918

Jordan Valley Maps

Contents


Items

Maps

Outposts - The "W" Series

Tel el Truny

El Ghoraniye Bridgehead

El Ghoraniye Bridges, 1893 - 2010


Campaign Maps

February 1918

Jericho Operations, Full Map

Jericho Operations, Full Map s

Jericho Operations, Southern Map Section

Jericho Operations, Northern Map Section


Further Reading:

Jordan Valley 1918

Jordan Valley Maps

Battles where Australians fought, 1899-1920


Citation: Jordan Valley 1918, Jordan Valley Maps, Contents


Posted by Project Leader at 12:01 AM EADT
Updated: Saturday, 28 July 2012 6:50 PM EADT
Thursday, 26 July 2012
Jordan Valley 1918, Jordan Valley Maps, El Ghoraniye Bridges, 1893 - 2010
Topic: BatzJ - JV Maps

Jordan Valley 1918

Jordan Valley Maps

El Ghoraniye Bridges, 1893 - 2010


Jordan Valley photograph highlighting the region around the El Ghoraniye Bridge


The El Ghoraniye Bridgehead was seen as an important crossing point from Jerusalem to the west of the Jordan River over to the east into the hills of Moab. When the Allied forces arrived in the Jordan Valley during February 1918, the problem of pursuing the war into Moab required excellent communications between the two sides of the river, a major natural barrier.

The Ottomans had erected a wooden bridge in 1893 for the specific purpose of facilitating trade from Amman to Jerusalem. The bridge was designed to collect various tolls and taxes from the travelling merchants and whomever else could afford to use the bridge


El Ghoraniye Bridge built by the Ottomans in 1893


The Ottoman El Ghoraniye Bridge was burnt in 1918 in response to the Allied advance into the Jordan Valley. When the allied forces had secured both sides of the Jordan River around the El Ghoraniye Bridgehead, they proceeded to construct a temporary bridge from pontoons.


El Ghoraniye Pontoon Bridge


This temporary bridge served to allow the Allied forces to enter into Moab and attack Amman during March 1918.

Subsequent to this attack, a more permanent and stable bridge was required and this was quickly erected. 


El Ghoraniye Trestle Bridge


The trestle bridge was a more stable structure but its main feature militating against any long term solution was the trestles themselves which blocked any amenity to the river, let alone snagged every piece of debris floating down the river, including Ottoman devices to destroy the bridge.  


El Ghoraniye Suspension Bridge


As the occupation proceeded, a more substantial suspension bridge was built which satisfied all military requirements and was a great asset to the locals.


Post War El Ghoraniye Suspension Bridge in civilian use


The free use of the suspension bridge by the local people meant that commerce could thrive between both sides of the Jordan River, regardless of whom occupied the various territories. 

After the Great War, the traffic became so intense that plans for a better bridge at El Ghoraniye were laid.


Allenby Bridge Opening 1919


In 1919, the newly built bridge, named by the British Occupation Force as the Allenby Bridge after General Allenby, was opened.


Allenby Bridge, 1919


Over the next decade traffic grew until the single lane bridge proved to be rather cumbersome and prone to traffic jams and hold-ups. The British Palestine Authority began the construction of the two lane bridge which was opened in 1934.


New Allenby Bridge, 1934


This bridge became both the focus of trade between east and west Jordan but also a symbol for those bent on destruction of that communication. The New Allenby Bridge was damaged in 1946 by the Jewish underground army, the Palmach.


The Palmach damage to the Allenby Bridge, 1946


The bridge was repaired and once again traffic resumed. 

After the granting of independence to Israel and Jordan in 1947, the Allenby Bridge became part of the Jordan state infrastructure and remained that way until the Six Day in 1967, when this time the 1934 bridge was completely destroyed.


The destroyed Allenby Bridge on 1 June 1967


At the end of the war, through secret meetings between Israel and Jordan, the bridge was sufficiently restored to allow foot traffic, and so keep the flow of commerce going between the east and west banks.


The Allenby Bridge restorred for foot traffic, 1967


While the Bridge was repaired for limited traffic, the needs of commerce required a bridge capable of sustaining wheeled traffic. Even though Israel and Jordan were in a state of war, the reality of commerce forced these two erstwhile enemies to make agreements regarding a new bridge. Anything of substance was not going to be built during the state of war but a cheap truss style bridge was constructed by the engineering troops of Israel and Jordan. The temporary bridge was opened in 1968.


The replacement Allenby Bridge built in 1968


As the years of truce turned into decades, more and more work was undertaken on the temporary bridge to make it more stable and accessible.


Additional work on the 1968 Allenby Bridge


By 1980, the bridge was quite substantial again although the size meant it was restricted to only one lane of traffic.

The breakthrough occurred with the Jordan-Israel Peace Treaty at the border crossing for the bridge on 26 October 1994. With a state of peace declared between the two nations, thoughts again went to constructing a new bridge, something to reflect the harmony between these two very ancient nations.

To celebrate the Peace Treaty, the Japanese Government gifted a new bridge to Jordan and Israel with construction to begin in 1996 and projected to conclude in 1999.


The Japanese constructed Bridge next to the truss bridge, 1999.


This unique photograph illustrates the nature of the Jordan River and the two bridges spanning the river, as well as the scale of the project. 

In 1999, the new, four lane bridge was ready to be opened. The name of the bridge was already part of the contention so in the end, a compromise was worked out. It would carry two names.


The Japanese constructed Bridge


On the Israeli side it was called the Gesher Alenbi or Allenby Bridge while on the Jordanian side, it bore the name Jisr al-Malek Hussein or in English, the King Hussein Bridge. The bridge forms an important and symbolic meeting between the hills of Judea and the hills of Moab, a symbiosis between these two areas which has been ongoing for many thousands of years.


Further Reading:

Jordan Valley 1918

Jordan Valley Maps

Battles where Australians fought, 1899-1920


Citation: Jordan Valley 1918, Jordan Valley Maps, El Ghoraniye Bridges, 1893 - 2010


Posted by Project Leader at 12:01 AM EADT
Updated: Sunday, 29 July 2012 2:29 PM EADT
Tuesday, 24 July 2012
Australian Service Personnel, Photograph Albums, Man-Power in Egypt, Report, 17 May 1917, Album Contents
Topic: AAC-Photo Albums

Australian Service Personnel

Photograph Albums

Man-Power in Egypt, Report, 17 May 1917, Album Contents


Lieutenant General Sir Henry Merrick Lawson KCB (1859 – 1933)


During the difficult days of man-power shortage in the Middle East, General Henry Merrick LAWSON, a well known specialist in combing out rear areas for front line soldiers, was sent to Egypt to perform a similar function as he had done on the Western Front.

This album comprises his report. Each report page is posted twice, the first post being a full sized document while the second is of smaller size noted with an "s" at the end of the link.


Listings in the Album:

Page 1

Man-Power in Egypt, Report, 17 May 1917, Cover

Man-Power in Egypt, Report, 17 May 1917, Cover s

The Author, Lieutenant General Sir Henry Merrick Lawson KCB (30 January 1859 – 1933)

The Author, Lieutenant General Sir Henry Merrick Lawson KCB (30 January 1859 – 1933), Portrait

Table of Contents

Table of Contents s

Man-Power in Egypt, Report, 17 May 1917, Page 1

Man-Power in Egypt, Report, 17 May 1917, Page 1 s

Man-Power in Egypt, Report, 17 May 1917, Page 2

Man-Power in Egypt, Report, 17 May 1917, Page 2 s


Page 2

Man-Power in Egypt, Report, 17 May 1917, Page 3

Man-Power in Egypt, Report, 17 May 1917, Page 3 s

Man-Power in Egypt, Report, 17 May 1917, Page 4

Man-Power in Egypt, Report, 17 May 1917, Page 4 s

Man-Power in Egypt, Report, 17 May 1917, Page 5

Man-Power in Egypt, Report, 17 May 1917, Page 5 s

Man-Power in Egypt, Report, 17 May 1917, Page 6

Man-Power in Egypt, Report, 17 May 1917, Page 6 s

Man-Power in Egypt, Report, 17 May 1917, Page 7

Man-Power in Egypt, Report, 17 May 1917, Page 7 s


Page 3

Man-Power in Egypt, Report, 17 May 1917, Page 8

Man-Power in Egypt, Report, 17 May 1917, Page 8 s

Man-Power in Egypt, Report, 17 May 1917, Page 9

Man-Power in Egypt, Report, 17 May 1917, Page 9 s

Man-Power in Egypt, Report, 17 May 1917, Page 10

Man-Power in Egypt, Report, 17 May 1917, Page 10 s

Man-Power in Egypt, Report, 17 May 1917, Page 11

Man-Power in Egypt, Report, 17 May 1917, Page 11 s

Man-Power in Egypt, Report, 17 May 1917, Page 12

Man-Power in Egypt, Report, 17 May 1917, Page 12 s


Page 4

Man-Power in Egypt, Report, 17 May 1917, Page 13

Man-Power in Egypt, Report, 17 May 1917, Page 13 s

Man-Power in Egypt, Report, 17 May 1917, Page 14

Man-Power in Egypt, Report, 17 May 1917, Page 14 s

Man-Power in Egypt, Report, 17 May 1917, Page 15

Man-Power in Egypt, Report, 17 May 1917, Page 15 s

Man-Power in Egypt, Report, 17 May 1917, Page 16

Man-Power in Egypt, Report, 17 May 1917, Page 16 s

Man-Power in Egypt, Report, 17 May 1917, Page 17

Man-Power in Egypt, Report, 17 May 1917, Page 17 s


Page 5

Man-Power in Egypt, Report, 17 May 1917, Page 18

Man-Power in Egypt, Report, 17 May 1917, Page 18 s

Man-Power in Egypt, Report, 17 May 1917, Page 19

Man-Power in Egypt, Report, 17 May 1917, Page 19 s

Man-Power in Egypt, Report, 17 May 1917, Page 20

Man-Power in Egypt, Report, 17 May 1917, Page 20 s

Man-Power in Egypt, Report, 17 May 1917, Page 21

Man-Power in Egypt, Report, 17 May 1917, Page 21 s

Man-Power in Egypt, Report, 17 May 1917, Page 22

Man-Power in Egypt, Report, 17 May 1917, Page 22 s


Page 6

Man-Power in Egypt, Report, 17 May 1917, Page 23

Man-Power in Egypt, Report, 17 May 1917, Page 23 s

Man-Power in Egypt, Report, 17 May 1917, Page 24

Man-Power in Egypt, Report, 17 May 1917, Page 24 s

Man-Power in Egypt, Report, 17 May 1917, Page 25

Man-Power in Egypt, Report, 17 May 1917, Page 25 s

Man-Power in Egypt, Report, 17 May 1917, Page 27

Man-Power in Egypt, Report, 17 May 1917, Page 27 s

Man-Power in Egypt, Report, 17 May 1917, Page 28

Man-Power in Egypt, Report, 17 May 1917, Page 28 s


Page 7

Man-Power in Egypt, Report, 17 May 1917, Page 29

Man-Power in Egypt, Report, 17 May 1917, Page 29 s

Man-Power in Egypt, Report, 17 May 1917, Page 30

Man-Power in Egypt, Report, 17 May 1917, Page 30 s

Man-Power in Egypt, Report, 17 May 1917, Page 31

Man-Power in Egypt, Report, 17 May 1917, Page 31 s

Man-Power in Egypt, Report, 17 May 1917, Page 32

Man-Power in Egypt, Report, 17 May 1917, Page 32 s

Man-Power in Egypt, Report, 17 May 1917, Page 33

Man-Power in Egypt, Report, 17 May 1917, Page 33 s


Page 8

Man-Power in Egypt, Report, 17 May 1917, Page 34

Man-Power in Egypt, Report, 17 May 1917, Page 34 s

Man-Power in Egypt, Report, 17 May 1917, Page 35

Man-Power in Egypt, Report, 17 May 1917, Page 35 s

Man-Power in Egypt, Report, 17 May 1917, Page 36

Man-Power in Egypt, Report, 17 May 1917, Page 36 s

Man-Power in Egypt, Report, 17 May 1917, Page 37

Man-Power in Egypt, Report, 17 May 1917, Page 37 s

Man-Power in Egypt, Report, 17 May 1917, Page 38

Man-Power in Egypt, Report, 17 May 1917, Page 38 s


Page 9

Man-Power in Egypt, Report, 17 May 1917, Page 39

Man-Power in Egypt, Report, 17 May 1917, Page 39 s

Man-Power in Egypt, Report, 17 May 1917, Page 40

Man-Power in Egypt, Report, 17 May 1917, Page 40 s

Man-Power in Egypt, Report, 17 May 1917, Page 41

Man-Power in Egypt, Report, 17 May 1917, Page 41 s


Further Reading:

Australian Service Personnel, Photograph Albums

Australian Light Horse

Battles where Australians fought, 1899-1920


Citation: Australian Service Personnel, Photograph Albums, Man-Power in Egypt, Report, 17 May 1917, Album Contents

Posted by Project Leader at 11:52 AM EADT
Updated: Tuesday, 24 July 2012 6:38 PM EADT

Newer | Latest | Older

Full Site Index


powered by FreeFind
Let us hear your story: You can tell your story, make a comment or ask for help on our forum.

Desert Column Forum

A note on copyright

The Australian Light Horse Studies Centre is a not for profit and non profit group whose sole aim is to write the early history of the Australian Light Horse from 1900 - 1920. It is privately funded and the information is provided by the individuals within the group and while permission for the use of the material has been given for this site for these items by various donors, the residual and actual copyright for these items, should there be any, resides exclusively with the donors. The information on this site is freely available for private research use only and if used as such, should be appropriately acknowledged. To assist in this process, each item has a citation attached at the bottom for referencing purposes.

Please Note: No express or implied permission is given for commercial use of the information contained within this site.

A note to copyright holders

The Australian Light Horse Studies Centre has made every endeavour to contact copyright holders of material digitised for this blog and website and where appropriate, permission is still being sought for these items. Where replies were not received, or where the copyright owner has not been able to be traced, or where the permission is still being sought, the Australian Light Horse Studies Centre has decided, in good faith, to proceed with digitisation and publication. Australian Light Horse Studies Centre would be happy to hear from copyright owners at any time to discuss usage of this item.

Contact

Australian Light Horse Studies Centre

eXTReMe Tracker