« April 2009 »
S M T W T F S
1 2 3 4
5 6 7 8 9 10 11
12 13 14 15 16 17 18
19 20 21 22 23 24 25
26 27 28 29 30
You are not logged in. Log in


Search the site:


powered by FreeFind
Volunteer with us.

Entries by Topic All topics  
A Latest Site News
A - Using the Site
AAA Volunteers
AAB-Education Centre
AAC-Film Clips
AAC-Photo Albums
AIF & MEF & EEF
AIF - Lighthorse
AIF - ALH - A to Z
AIF - DMC
AIF - DMC - Or Bat
AIF - DMC - Anzac MD
AIF - DMC - Aus MD
AIF - DMC - British
AIF - DMC - BWI
AIF - DMC - French
AIF - DMC - Indian
AIF - DMC - Italian
AIF - DMC - Medical
AIF - DMC - Remounts
AIF - DMC - Scouts
AIF - DMC - Sigs
AIF - DMC - Sigs AirlnS
AIF - DMC - 1 Sig Sqn
AIF - DMC - 2 Sig Sqn
AIF - DMC - Eng
AIF - DMC - Eng 1FSE
AIF - DMC - Eng 2FSE
AIF - DMC - GSR
AIF - 1B - 1 LHB
AIF - 1B - 6 MVS
AIF - 1B - 1 LHMGS
AIF - 1B - 1 Sig Trp
AIF - 1B - 1 LHFA
AIF - 1B - 1 LHR
AIF - 1B - 2 LHR
AIF - 1B - 3 LHR
AIF - 2B - 2 LHB
AIF - 2B - 7 MVS
AIF - 2B - 2 LHFA
AIF - 2B - 2 LHMGS
AIF - 2B - 2 Sig Trp
AIF - 2B - 5 LHR
AIF - 2B - 6 LHR
AIF - 2B - 7 LHR
AIF - 3B - 3 LHB
AIF - 3B - 8 MVS
AIF - 3B - 3 LHB Sigs
AIF - 3B - 3 LHFA
AIF - 3B - 3 LHMGS
AIF - 3B - 3 Sig Trp
AIF - 3B - 8 LHR
AIF - 3B - 9 LHR
AIF - 3B - 10 LHR
AIF - 4B - 4 LHB
AIF - 4B - 4 Sig Trp
AIF - 4B - 9 MVS
AIF - 4B - 4 LHFA
AIF - 4B - 4 LHMGS
AIF - 4B - 4 LHR
AIF - 4B - 11 LHR
AIF - 4B - 12 LHR
AIF - 5B - 5 LHB
AIF - 5B - 10 MVS
AIF - 5B - 5 LHFA
AIF - 5B - 5 Sig Trp
AIF - 5B - ICC
AIF - 5B - 14 LHR
AIF - 5B - 15 LHR
AIF - 5B - 1er Regt
AIF - 5B - 2 NZMGS
AIF - AASC
AIF - Aboriginal LH
AIF - Badges
AIF - Cars
AIF - Chinese LH
AIF - Double Sqns
AIF - Engineers
AIF - Fr - 22 Corps
AIF - Fr - 13 LHR
AIF - Honour Roll
AIF - HQ - 3rd Echelon
AIF - Marching Songs
AIF - Misc Topics
AIF - NZMRB
AIF - NZMRB - AMR
AIF - NZMRB - CMR
AIF - NZMRB - EFT
AIF - NZMRB - NZMFA
AIF - NZMRB - NZMGS
AIF - NZMRB - OMR
AIF - NZMRB - Sig-Trp
AIF - NZMRB - WMR
AIF - Ships
AIF - Ships - Encountr
AIF - Ships - Una
AIF - WFF
AIF - Wireless Sqn
Battles
BatzA - Australia
BatzA - Broken Hill
BatzA - Liverpool
BatzA - Merivale
BatzB - Boer War
BatzB - Bakenlaagte
BatzB - Belmont
BatzB - Bothaville
BatzB - Buffels Hoek
BatzB - Coetzees Drift
BatzB - Diamond Hill
BatzB - Driefontein
BatzB - Elands
BatzB - Graspan
BatzB - Grobelaar
BatzB - Grootvallier
BatzB - Hartebestfontn
BatzB - Houtnek
BatzB - Karee Siding
BatzB - Kimberley
BatzB - Koster River
BatzB - Leeuw Kop
BatzB - Mafeking
BatzB - Magersfontein
BatzB - Modder River
BatzB - Onverwacht
BatzB - Paardeberg
BatzB - Palmietfontein
BatzB - Pink Hill
BatzB - Poplar Grove
BatzB - Rhenoster
BatzB - Sannahs Post
BatzB - Slingersfontn
BatzB - Stinkhoutbm
BatzB - Sunnyside
BatzB - Wilmansrust
BatzB - Wolvekuil
BatzB - Zand River
BatzG - Gallipoli
BatzG - Anzac
BatzG - Aug 1915
BatzG - Baby 700
BatzG - Evacuation
BatzG - Hill 60
BatzG - Hill 971
BatzG - Krithia
BatzG - Lone Pine
BatzG - Nek
BatzJ - Jordan Valley
BatzJ - 1st Amman
BatzJ - 2nd Amman
BatzJ - Abu Tellul
BatzJ - Es Salt
BatzJ - JV Maps
BatzJ - Ziza
BatzM - Mespot
BatzM - Baghdad
BatzM - Ctesiphon
BatzM - Daur
BatzM - Kurna
BatzM - Kut el Amara
BatzM - Ramadi
BatzN - Naval
BatzN - AE1
BatzN - Cocos Is
BatzN - Heligoland
BatzN - Marmara
BatzN - Zeebrugge
BatzN - Zeppelin L43
BatzNG - Bitapaka
BatzO - Other
BatzO - Baku
BatzO - Egypt 1919
BatzO - Emptsa
BatzO - Karawaran
BatzO - Peitang
BatzO - Wassa
BatzP - Palestine
BatzP - 1st Gaza
BatzP - 2nd Gaza
BatzP - 3rd Gaza
BatzP - Aleppo
BatzP - Amwas
BatzP - Ayun Kara
BatzP - Bald Hill
BatzP - Balin
BatzP - Beersheba
BatzP - Berkusieh
BatzP - Damascus
BatzP - El Auja
BatzP - El Buggar
BatzP - El Burj
BatzP - Haifa
BatzP - Huj
BatzP - JB Yakub
BatzP - Kaukab
BatzP - Khan Kusseir
BatzP - Khuweilfe
BatzP - Kuneitra
BatzP - Megiddo
BatzP - Nablus
BatzP - Rafa
BatzP - Sasa
BatzP - Semakh
BatzP - Sheria
BatzP - Surafend
BatzP - Wadi Fara
BatzS - Sinai
BatzS - Bir el Abd
BatzS - El Arish
BatzS - El Mazar
BatzS - El Qatiya
BatzS - Jifjafa
BatzS - Magdhaba
BatzS - Maghara
BatzS - Romani
BatzS - Suez 1915
BatzSe - Senussi
BatzWF - Westn Front
BW - Boer War
BW - NSW
BW - NSW - 1ACH
BW - NSW - 1NSWMR
BW - NSW - 2NSWMR
BW - NSW - 3ACH
BW - NSW - 3NSWIB
BW - NSW - 3NSWMR
BW - NSW - 5ACH
BW - NSW - A Bty RAA
BW - NSW - AAMC
BW - NSW - Aust H
BW - NSW - Lancers
BW - NSW - NSW Inf
BW - NSW - NSWCBC
BW - NSW - NSWIB
BW - NSW - NSWMR_A
BW - NZ
BW - Qld
BW - Qld - 1ACH
BW - Qld - 1QMI
BW - Qld - 2QMI
BW - Qld - 3ACH
BW - Qld - 3QMI
BW - Qld - 4QIB
BW - Qld - 5QIB
BW - Qld - 6QIB
BW - Qld - 7ACH
BW - QLD - AAMC
BW - SA
BW - SA - 1SAMR
BW - SA - 2ACH
BW - SA - 2SAMR
BW - SA - 3SACB
BW - SA - 4ACH
BW - SA - 4SAIB
BW - SA - 5SAIB
BW - SA - 6SAIB
BW - SA - 8ACH
BW - SA - AAMC
BW - Tas
BW - Tas - 1ACH
BW - Tas - 1TIB
BW - Tas - 1TMI
BW - Tas - 2TB
BW - Tas - 2TIB
BW - Tas - 3ACH
BW - Tas - 8ACH
BW - Vic
BW - Vic - 1VMI
BW - Vic - 2ACH
BW - Vic - 2VMR
BW - Vic - 3VB
BW - Vic - 4ACH
BW - Vic - 4VIB
BW - Vic - 5VMR
BW - Vic - 6ACH
BW - Vic - AAMC
BW - Vic - Scot H
BW - WA
BW - WA - 1WAMI
BW - WA - 2ACH
BW - WA - 2WAMI
BW - WA - 3WAB
BW - WA - 4ACH
BW - WA - 4WAMI
BW - WA - 5WAMI
BW - WA - 6WAMI
BW - WA - 8ACH
BW Gen - Campaign
BW Gen - Soldiers
BW General
Cavalry - General
Diary - Schramm
Egypt - Heliopolis
Egypt - Mena
Gen - Ataturk Pk, CNB
Gen - Australia
Gen - Legends
Gen - Query Club
Gen - St - NSW
Gen - St - Qld
Gen - St - SA
Gen - St - Tas
Gen - St - Vic
Gen - St - WA
Gm - German Items
Gm - Bk - 605 MGC
GW - 11 Nov 1918
GW - Atrocities
GW - August 1914
GW - Biographies
GW - Propaganda
GW - Spies
GW - We forgot
Militia 1899-1920
Militia - Area Officers
Militia - Inf - Infantry
Militia - Inf - 1IB
Militia - Inf - 2IB
Militia - Inf - 3IB
Militia - Inf - NSW
Militia - Inf - Qld
Militia - Inf - SA
Militia - Inf - Tas
Militia - Inf - Vic
Militia - Inf - WA
Militia - K.E.Horse
Militia - LH
Militia - LH - Regts
Militia - LH - 1LHB
Militia - LH - 2LHB
Militia - LH - 3LHB
Militia - LH - 4LHB
Militia - LH - 5LHB
Militia - LH - 6LHB
Militia - LHN - NSW
Militia - LHN - 1/7/1
Militia - LHN - 2/9/6
Militia - LHN - 3/11/7
Militia - LHN - 4/6/16
Militia - LHN - 5/4/15
Militia - LHN - 6/5/12
Militia - LHN - 28
Militia - LHQ - Qld
Militia - LHQ - 13/2
Militia - LHQ - 14/3/11
Militia - LHQ - 15/1/5
Militia - LHQ - 27/14
Militia - LHS - SA
Militia - LHS - 16/22/3
Militia - LHS - 17/23/18
Militia - LHS - 24/9
Militia - LHT - Tas
Militia - LHT - 12/26
Militia - LHV - Vic
Militia - LHV - 7/15/20
Militia - LHV - 8/16/8
Militia - LHV - 9/19
Militia - LHV - 10/13
Militia - LHV - 11/20/4
Militia - LHV - 19/17
Militia - LHV - 29
Militia - LHW - WA
Militia - LHW-18/25/10
Militia - Military Orders
Militia - Misc
MilitiaRC - Rifle Clubs
MilitiaRC - NSW
MilitiaRC - NT
MilitiaRC - Qld
MilitiaRC - SA
MilitiaRC - Tas
MilitiaRC - Vic
MilitiaRC - WA
Militiaz - New Zealand
Tk - Turkish Items
Tk - Army
Tk - Bks - Books
Tk - Bks - 1/33IR
Tk - Bks - 27th IR
Tk - Bks - Air Force
Tk - Bks - Yildirim
Tk - POWs
Wp - Weapons
Wp - Hotchkiss Cav
Wp - Hotchkiss PMG
Blog Tools
Edit your Blog
Build a Blog
RSS Feed
View Profile
Open Community
Post to this Blog
Site Index
Education Centre
LH Militia
Boer War
Transport Ships
LH Battles
ALH - Units
ALH - General
Aboriginal Light H
Weapons
Ottoman Sources

"At a mile distant their thousand hooves were stuttering thunder, coming at a rate that frightened a man - they were an awe inspiring sight, galloping through the red haze - knee to knee and horse to horse - the dying sun glinting on bayonet points..." Trooper Ion Idriess

The Australian Light Horse Studies Centre aims to present an accurate history as chroniclers of early Australian military developments from 1899 to 1920.

The Australian Light Horse Studies Centre site holds over 12,000 entries and is growing daily.

Contact: Australian Light Horse Studies Centre

Let us hear your story: You can tell your story, make a comment or ask for help on our Australian Light Horse Studies Centre Forum called:

Desert Column Forum

WARNING: This site contains: names, information and images of deceased people; and, language which may be considered inappropriate today.

Thursday, 2 April 2009
Graspan, South Africa, November 25, 1899, Times Account, 29 Nov 1899
Topic: BatzB - Graspan

Graspan

South Africa, 25 November 1899

Times Account, 29 November 1899


The Times, 29 November 1899 


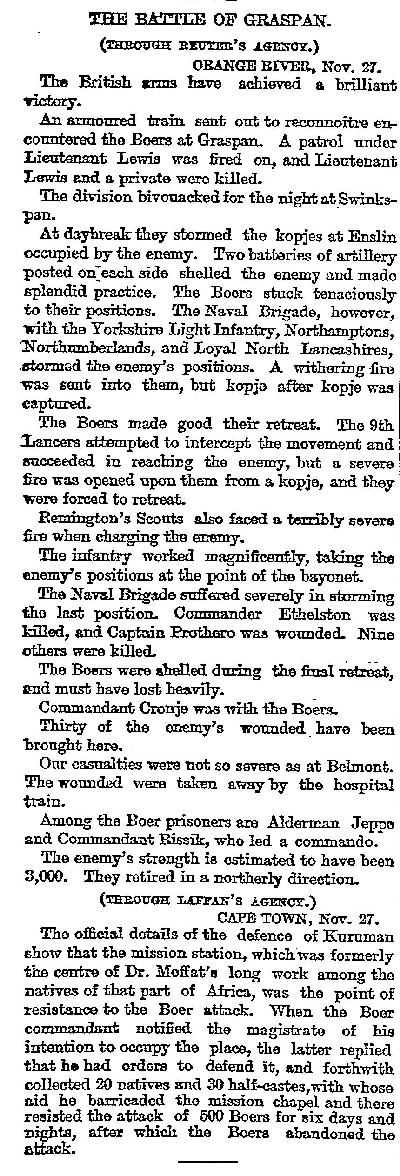
THE BATTLE OF GRASPAN.

(THROUGH REUTER'S AGENCY.)

ORANGE RIVER, Nov. 27.

The British arms have achieved a brilliant victory.

An armoured train sent out to reconnoitre encountered the Boars at Graspan. A patrol under Lieutenant Lewis was fired on, and Lieutenant Lewis and a private were killed.

The division bivouacked for the night at Swinkspan.

At daybreak they stormed the kopjes at Enslin occupied by the enemy. Two batteries of artillery posted on each side shelled the enemy and made splendid practice. The Doers stuck tenaciously to their positions. The Naval Brigade, however, with the Yorkshire Light Infantry, Northamptons, Northumberlands, and Loyal North Lancashires, stormed the enemy's positions. A withering fire was sent into them, but kopje after kopje was captured.

The Boers made good their retreat. The 9th Lancers attempted to intercept the movement and succeeded in reaching the enemy, but a severe fire was opened upon them from a kopje, and they were forced to retreat.

Remington's Scouts also faced a terribly severe fire when charging the enemy.

The infantry worked magnificently, taking the enemy's positions at the point of the bayonet.

The Naval Brigade suffered severely in storming the last position.

Commander Ethelston was killed, and Captain Prothero was wounded. Nine others were killed.

The Boers were shelled during the final retreat, end must have lost heavily.
Commandant Cronje was with the Boers.

Thirty of the enemy's wounded. have been brought here.

Our casualties were not so severe as at Belmont. The wounded were taken away by the hospital train.

Among the Boer prisoners are Alderman Jeppo and Commandant Rissik, who led a commando.

The enemy's strength is estimated to have been 3,000. They retired in a northerly direction.


(THROUGH LAFFAN'S AGENCY.)

CAPE TOWN, Nov. 27.

The official details of the defence of Kuruman show that the mission station, which was formerly the centre of Dr. Moffat'e long work among the natives of that part of Africa, was the point of resistance to the Boer attack. When the Boer commandant notified the magistrate of his intention to occupy the place, the latter replied that he had orders to defend it, and forthwith collected 20 natives and 30 half-castes, with whose aid he barricaded the mission chapel and there resisted the attack of 500 Boers for sin days and nights, after which the Boers abandoned the attack.


Further Reading:

Graspan, South Africa, November 25, 1899

Battles where Australians fought, 1899-1920


Citation: Graspan, South Africa, November 25, 1899, Times Account, 29 Nov 1899

Posted by Project Leader at 12:01 AM EADT
Updated: Monday, 6 April 2009 10:09 PM EADT
1st LHMGS, AIF, Thomas Aloysius O'Brien
Topic: AIF - 1B - 1 LHMGS

1st LHMGS, AIF

1st Light Horse Machine Gun Squadron

Thomas Aloysius O'Brien


Thomas Aloysius O'Brien


Biography

44 Private Thomas Aloysius O'Brien, originally enlisted with the 3rd Light Horse Regiment, Machine Gun Section, then transferred to the 1st Light Horse Machine Gun Squadron.


A brief military biography of Thomas Aloysius O'Brien  from The AIF Project:


Regimental number44
ReligionRoman Catholic
OccupationPorter
AddressFrances, South Australia
Marital statusSingle
Age at embarkation23
Next of kinFather, Thomas James O'Brien, Frances, South Australia
Enlistment date4 September 1914
Rank on enlistmentPrivate
Unit name3rd Light Horse Regiment, Machine Gun Section
AWM Embarkation Roll number10/8/1
Embarkation detailsUnit embarked from Adelaide, South Australia, on board HMAT A17 Port Lincoln on 20 October 1914
Rank from Nominal RollPrivate
Unit from Nominal Roll1st Light Horse Brigade Machine Gun Squadron
FateReturned to Australia 7 January 1919


Further Reading:

1st Australian Light Horse Machine Gun Squadron, AIF

1st Australian Light Horse Machine Gun Squadron, Roll of Honour

3rd Light Horse Regiment, AIF

Battles where Australians fought, 1899-1920

 
Citation: 1st LHMGS, AIF, Thomas Aloysius O'Brien

Posted by Project Leader at 12:01 AM EADT
Updated: Thursday, 17 September 2009 4:39 PM EADT
1st Australian Signal Troop, Page 5
Topic: AIF - 1B - 1 Sig Trp

1st Australian Signal Troop, AIF

History


Below is a transcription from a manuscript submitted by by Major R. Smith called 1st Australian Signal Troop. This is Page 5.


History of the Wireless Sections after being detached from 1st Signal Troop.


April 28th 1915

No. 2 Det. moved to Gully Beach, about 3 miles from X Beach and worked between forward O.P and the Fleet.

No. 1 Det. moved to De Totts Battery on the south shore east of Sad-el-Bahr.

There was a good deal of sniping on to Gully Beach from the snipers hidden in front, also at De Totts Battery and there the N.C.O i.e. No. 1 "Det". Sgt. Metcher was wounded through the leg.

So far No. 2 "Det." had no causalities and remained at Gully Beach about 4 days, quite as comfortable as circumstances would permit, rations and water were plentiful.

May 2nd.

At dusk No. 2 "Det". dismantled station and eventually arrived at our new destination which was about 1 mile E of the lighthouse on Helles, here the station was re-erected and spotting work for the Fleet was carried on.

No. 1 "Det". took over the position vacated by No. 2 "Det." at Gully Beach and both Dets. remained in this position until ordered to rejoin the 1st Signal Troop which they did at Anzac on the 31/5/15.

The strength of the sections and the equipment at their disposal was inadequate to cope with the amount of work which had to be done so another set of receiving; instruments was given each section for special use with the aeroplanes in addition to this ground signals for use with the planes had to be operated for calling planes back to their aerodromes etc.

From this time on until the 9th May things ran fairly smoothly there being just the different shoots to work on but on the 9th at 16.45 an exceptionally heavy bombardment was opened and the sections were kept busy right up till dusk. There was a good deal of hostile fire onto our positions, the area in which the wireless (No. 2) stood fell in for its share and one of the Operators was wounded.

For the next 3 weeks there was just the daily work between aeroplane and navy and both 'sections went on board a trawler and landed at Anzac on 31/5/13.

COMMISSIONS.

Of the original members of the 1st Signal Troop the following obtained commissions during the war.

Hoddinott    Farnes Latham   
Masters    Shaw    Matthews
Metcher    Fitton    Larkin
Sutherland    Cash    Ward
Mustard    Westerman    Bate
Turnbull    Fahey    Dugan
Letch    Stinson    Wills


The following decorations were awarded to members of the Troop during the war.

Mentions in Despatch. 5.
M.C. 7
D.C.M. 3
D.F.C. 1
M. M. 2
C. de G. 2
Order of the Nile 1


Further Reading:

1st Signal Troop

1st Australian Light Horse Brigade  

Anzac Mounted Division


Citation: 1st Australian Signal Troop, Page 5


Posted by Project Leader at 12:01 AM EADT
Updated: Sunday, 12 April 2009 6:46 PM EADT
Bert Schramm's Diary, 2 April 1919
Topic: Diary - Schramm

Diaries of AIF Servicemen

Bert Schramm


During part of the course of his military service with the AIF, 2823 Private Herbert Leslie Schramm, a farmer from White's River, near Tumby Bay on the Eyre Peninsular, kept a diary of his life. Bert was not a man of letters so this diary was produced with great effort on his behalf. Bert made a promise to his sweetheart, Lucy Solley, that he would do so after he received the blank pocket notebook wherein these entries are found. As a Brigade Scout since September 1918, he took a lead part in the September 1918 breakout by the Allied forces in Palestine. Bert's diary entries are placed alongside those of the 9th Light Horse Regiment to which he belonged and to the 3rd Light Horse Brigade to which the 9th LHR was attached. On this basis we can follow Bert in the context of his formation.

 Bert Schramm's Diary, 2 April 1919


Bert Schramm's Handwritten Diary, 31 March - 3 April 1919

[Click on page for a larger print version.]

Diaries

Bert Schramm

Wednesday, April 2, 1919

Bert Schramm's Location - Zagazig, Egypt.

Bert Schramm's Diary - Nothing worth recording just the usual thing.


9th Light Horse Regiment War Diary

9th Light Horse Regiment Location - Zagazig, Egypt.

9th Light Horse Regiment War Diary - 2400, today dismounted portion of Regiment passed to command of General Officer in Command Belbeis sector.

One troop patrolled streets of Zagazig 0530 - 0630.


Darley

Darley, TH, With the Ninth Light Horse in the Great War, Adelaide, Hassell Press, 1924.

No Entry


Previous: Bert Schramm's Diary, 1 April 1919

Next: Bert Schramm's Diary, 3 April 1919


Further Reading:

9th Light Horse Regiment AIF War Diary - Complete day by day list

Bert Schramm Diary 

Bert Schramm Diary - Complete day by day list


Additional Reading:

Darley, TH, With the Ninth Light Horse in the Great War, Adelaide, Hassell Press, 1924.


Citation: Bert Schramm's Diary, 2 April 1919


Posted by Project Leader at 12:01 AM EADT
Updated: Saturday, 9 May 2009 9:40 PM EADT
Wednesday, 1 April 2009
Second Amman, Palestine, September 25, 1918
Topic: BatzJ - 2nd Amman

Second Amman

Palestine, 25 September 1918


Second Amman, an action which resulted in this town's occupation by British forces on 25 September 1918, as a direct consequence of the Turkish disaster at Sharon (q.v.) six days earlier. For the first days after the British breakthrough on the coast plain, the Turkish Fourth Army centred on Amman had continued to strongly defend its positions east of the Jordan River. By the morning of 22 September, however, elements of the Anzac Mounted Division (under Major General Edward Chaytor) began to detect signs of a withdrawal underway opposite them, the Turks moving back into the hills away from the river and east towards Amman with the apparent intention of thence making off north to Damascus. Chaytor quickly began pressing onto the enemy's heels, but determined resistance by the Turkish rearguard enabled the main body to get away so that the prisoner haul when Amman was finally taken was only 2,360 and six guns.

Chaytor next turned his attention to a body of 5,000-6,000 Turks at that moment retreating towards him from the positions they formerly occupied at Maan in Arabia, about 200 kilometres south. With its rail lines of supply severed by the British advance, this column faced being destroyed by the army of Hejaz Arabs under Emir Feisal, elements of which were already engaged in constant harassment. Having reached Ziza less than 30 kilometres from Amman but finding their escape route cut off, the enemy column surrendered on 29 September-but only after Anzac mounted troops arrived to provide protection from the 10,000 Arab tribesmen who were waiting to swoop on them. With this, the haul amassed by the division over nine days of operations amounted to 10,300 prisoners and 57 guns, along with much other equipment, all for a cost of 139 casualties (only 27 of whom were killed).


Extracted from the book produced by Chris Coulthard-Clark, Where Australians Fought - The Encyclopaedia of Australia's Battles, Allen and Unwin, Sydney, 1998, pp. 161-162.


Additional References cited by Chris Coulthard-Clark:

H.S. Gullett (1944) The Australian Imperial Force in Sinai and Palestine, Sydney: Angus & Robertson.


Further Reading:

Battles where Australians fought, 1899-1920


Citation: Second Amman, Palestine, September 25, 1918

Posted by Project Leader at 11:01 PM EADT
Updated: Sunday, 5 April 2009 4:35 PM EADT

Newer | Latest | Older

Full Site Index


powered by FreeFind
Let us hear your story: You can tell your story, make a comment or ask for help on our forum.

Desert Column Forum

A note on copyright

The Australian Light Horse Studies Centre is a not for profit and non profit group whose sole aim is to write the early history of the Australian Light Horse from 1900 - 1920. It is privately funded and the information is provided by the individuals within the group and while permission for the use of the material has been given for this site for these items by various donors, the residual and actual copyright for these items, should there be any, resides exclusively with the donors. The information on this site is freely available for private research use only and if used as such, should be appropriately acknowledged. To assist in this process, each item has a citation attached at the bottom for referencing purposes.

Please Note: No express or implied permission is given for commercial use of the information contained within this site.

A note to copyright holders

The Australian Light Horse Studies Centre has made every endeavour to contact copyright holders of material digitised for this blog and website and where appropriate, permission is still being sought for these items. Where replies were not received, or where the copyright owner has not been able to be traced, or where the permission is still being sought, the Australian Light Horse Studies Centre has decided, in good faith, to proceed with digitisation and publication. Australian Light Horse Studies Centre would be happy to hear from copyright owners at any time to discuss usage of this item.

Contact

Australian Light Horse Studies Centre

eXTReMe Tracker