« October 2008 »
S M T W T F S
1 2 3 4
5 6 7 8 9 10 11
12 13 14 15 16 17 18
19 20 21 22 23 24 25
26 27 28 29 30 31
You are not logged in. Log in


Search the site:


powered by FreeFind
Volunteer with us.

Entries by Topic All topics  
A Latest Site News
A - Using the Site
AAA Volunteers
AAB-Education Centre
AAC-Film Clips
AAC-Photo Albums
AIF & MEF & EEF
AIF - Lighthorse
AIF - ALH - A to Z
AIF - DMC
AIF - DMC - Or Bat
AIF - DMC - Anzac MD
AIF - DMC - Aus MD
AIF - DMC - British
AIF - DMC - BWI
AIF - DMC - French
AIF - DMC - Indian
AIF - DMC - Italian
AIF - DMC - Medical
AIF - DMC - Remounts
AIF - DMC - Scouts
AIF - DMC - Sigs
AIF - DMC - Sigs AirlnS
AIF - DMC - 1 Sig Sqn
AIF - DMC - 2 Sig Sqn
AIF - DMC - Eng
AIF - DMC - Eng 1FSE
AIF - DMC - Eng 2FSE
AIF - DMC - GSR
AIF - 1B - 1 LHB
AIF - 1B - 6 MVS
AIF - 1B - 1 LHMGS
AIF - 1B - 1 Sig Trp
AIF - 1B - 1 LHFA
AIF - 1B - 1 LHR
AIF - 1B - 2 LHR
AIF - 1B - 3 LHR
AIF - 2B - 2 LHB
AIF - 2B - 7 MVS
AIF - 2B - 2 LHFA
AIF - 2B - 2 LHMGS
AIF - 2B - 2 Sig Trp
AIF - 2B - 5 LHR
AIF - 2B - 6 LHR
AIF - 2B - 7 LHR
AIF - 3B - 3 LHB
AIF - 3B - 8 MVS
AIF - 3B - 3 LHB Sigs
AIF - 3B - 3 LHFA
AIF - 3B - 3 LHMGS
AIF - 3B - 3 Sig Trp
AIF - 3B - 8 LHR
AIF - 3B - 9 LHR
AIF - 3B - 10 LHR
AIF - 4B - 4 LHB
AIF - 4B - 4 Sig Trp
AIF - 4B - 9 MVS
AIF - 4B - 4 LHFA
AIF - 4B - 4 LHMGS
AIF - 4B - 4 LHR
AIF - 4B - 11 LHR
AIF - 4B - 12 LHR
AIF - 5B - 5 LHB
AIF - 5B - 10 MVS
AIF - 5B - 5 LHFA
AIF - 5B - 5 Sig Trp
AIF - 5B - ICC
AIF - 5B - 14 LHR
AIF - 5B - 15 LHR
AIF - 5B - 1er Regt
AIF - 5B - 2 NZMGS
AIF - AASC
AIF - Aboriginal LH
AIF - Badges
AIF - Cars
AIF - Chinese LH
AIF - Double Sqns
AIF - Engineers
AIF - Fr - 22 Corps
AIF - Fr - 13 LHR
AIF - Honour Roll
AIF - HQ - 3rd Echelon
AIF - Marching Songs
AIF - Misc Topics
AIF - NZMRB
AIF - NZMRB - AMR
AIF - NZMRB - CMR
AIF - NZMRB - EFT
AIF - NZMRB - NZMFA
AIF - NZMRB - NZMGS
AIF - NZMRB - OMR
AIF - NZMRB - Sig-Trp
AIF - NZMRB - WMR
AIF - Ships
AIF - Ships - Encountr
AIF - Ships - Una
AIF - WFF
AIF - Wireless Sqn
Battles
BatzA - Australia
BatzA - Broken Hill
BatzA - Liverpool
BatzA - Merivale
BatzB - Boer War
BatzB - Bakenlaagte
BatzB - Belmont
BatzB - Bothaville
BatzB - Buffels Hoek
BatzB - Coetzees Drift
BatzB - Diamond Hill
BatzB - Driefontein
BatzB - Elands
BatzB - Graspan
BatzB - Grobelaar
BatzB - Grootvallier
BatzB - Hartebestfontn
BatzB - Houtnek
BatzB - Karee Siding
BatzB - Kimberley
BatzB - Koster River
BatzB - Leeuw Kop
BatzB - Mafeking
BatzB - Magersfontein
BatzB - Modder River
BatzB - Onverwacht
BatzB - Paardeberg
BatzB - Palmietfontein
BatzB - Pink Hill
BatzB - Poplar Grove
BatzB - Rhenoster
BatzB - Sannahs Post
BatzB - Slingersfontn
BatzB - Stinkhoutbm
BatzB - Sunnyside
BatzB - Wilmansrust
BatzB - Wolvekuil
BatzB - Zand River
BatzG - Gallipoli
BatzG - Anzac
BatzG - Aug 1915
BatzG - Baby 700
BatzG - Evacuation
BatzG - Hill 60
BatzG - Hill 971
BatzG - Krithia
BatzG - Lone Pine
BatzG - Nek
BatzJ - Jordan Valley
BatzJ - 1st Amman
BatzJ - 2nd Amman
BatzJ - Abu Tellul
BatzJ - Es Salt
BatzJ - JV Maps
BatzJ - Ziza
BatzM - Mespot
BatzM - Baghdad
BatzM - Ctesiphon
BatzM - Daur
BatzM - Kurna
BatzM - Kut el Amara
BatzM - Ramadi
BatzN - Naval
BatzN - AE1
BatzN - Cocos Is
BatzN - Heligoland
BatzN - Marmara
BatzN - Zeebrugge
BatzN - Zeppelin L43
BatzNG - Bitapaka
BatzO - Other
BatzO - Baku
BatzO - Egypt 1919
BatzO - Emptsa
BatzO - Karawaran
BatzO - Peitang
BatzO - Wassa
BatzP - Palestine
BatzP - 1st Gaza
BatzP - 2nd Gaza
BatzP - 3rd Gaza
BatzP - Aleppo
BatzP - Amwas
BatzP - Ayun Kara
BatzP - Bald Hill
BatzP - Balin
BatzP - Beersheba
BatzP - Berkusieh
BatzP - Damascus
BatzP - El Auja
BatzP - El Buggar
BatzP - El Burj
BatzP - Haifa
BatzP - Huj
BatzP - JB Yakub
BatzP - Kaukab
BatzP - Khan Kusseir
BatzP - Khuweilfe
BatzP - Kuneitra
BatzP - Megiddo
BatzP - Nablus
BatzP - Rafa
BatzP - Sasa
BatzP - Semakh
BatzP - Sheria
BatzP - Surafend
BatzP - Wadi Fara
BatzS - Sinai
BatzS - Bir el Abd
BatzS - El Arish
BatzS - El Mazar
BatzS - El Qatiya
BatzS - Jifjafa
BatzS - Magdhaba
BatzS - Maghara
BatzS - Romani
BatzS - Suez 1915
BatzSe - Senussi
BatzWF - Westn Front
BW - Boer War
BW - NSW
BW - NSW - 1ACH
BW - NSW - 1NSWMR
BW - NSW - 2NSWMR
BW - NSW - 3ACH
BW - NSW - 3NSWIB
BW - NSW - 3NSWMR
BW - NSW - 5ACH
BW - NSW - A Bty RAA
BW - NSW - AAMC
BW - NSW - Aust H
BW - NSW - Lancers
BW - NSW - NSW Inf
BW - NSW - NSWCBC
BW - NSW - NSWIB
BW - NSW - NSWMR_A
BW - NZ
BW - Qld
BW - Qld - 1ACH
BW - Qld - 1QMI
BW - Qld - 2QMI
BW - Qld - 3ACH
BW - Qld - 3QMI
BW - Qld - 4QIB
BW - Qld - 5QIB
BW - Qld - 6QIB
BW - Qld - 7ACH
BW - QLD - AAMC
BW - SA
BW - SA - 1SAMR
BW - SA - 2ACH
BW - SA - 2SAMR
BW - SA - 3SACB
BW - SA - 4ACH
BW - SA - 4SAIB
BW - SA - 5SAIB
BW - SA - 6SAIB
BW - SA - 8ACH
BW - SA - AAMC
BW - Tas
BW - Tas - 1ACH
BW - Tas - 1TIB
BW - Tas - 1TMI
BW - Tas - 2TB
BW - Tas - 2TIB
BW - Tas - 3ACH
BW - Tas - 8ACH
BW - Vic
BW - Vic - 1VMI
BW - Vic - 2ACH
BW - Vic - 2VMR
BW - Vic - 3VB
BW - Vic - 4ACH
BW - Vic - 4VIB
BW - Vic - 5VMR
BW - Vic - 6ACH
BW - Vic - AAMC
BW - Vic - Scot H
BW - WA
BW - WA - 1WAMI
BW - WA - 2ACH
BW - WA - 2WAMI
BW - WA - 3WAB
BW - WA - 4ACH
BW - WA - 4WAMI
BW - WA - 5WAMI
BW - WA - 6WAMI
BW - WA - 8ACH
BW Gen - Campaign
BW Gen - Soldiers
BW General
Cavalry - General
Diary - Schramm
Egypt - Heliopolis
Egypt - Mena
Gen - Ataturk Pk, CNB
Gen - Australia
Gen - Legends
Gen - Query Club
Gen - St - NSW
Gen - St - Qld
Gen - St - SA
Gen - St - Tas
Gen - St - Vic
Gen - St - WA
Gm - German Items
Gm - Bk - 605 MGC
GW - 11 Nov 1918
GW - Atrocities
GW - August 1914
GW - Biographies
GW - Propaganda
GW - Spies
GW - We forgot
Militia 1899-1920
Militia - Area Officers
Militia - Inf - Infantry
Militia - Inf - 1IB
Militia - Inf - 2IB
Militia - Inf - 3IB
Militia - Inf - NSW
Militia - Inf - Qld
Militia - Inf - SA
Militia - Inf - Tas
Militia - Inf - Vic
Militia - Inf - WA
Militia - K.E.Horse
Militia - LH
Militia - LH - Regts
Militia - LH - 1LHB
Militia - LH - 2LHB
Militia - LH - 3LHB
Militia - LH - 4LHB
Militia - LH - 5LHB
Militia - LH - 6LHB
Militia - LHN - NSW
Militia - LHN - 1/7/1
Militia - LHN - 2/9/6
Militia - LHN - 3/11/7
Militia - LHN - 4/6/16
Militia - LHN - 5/4/15
Militia - LHN - 6/5/12
Militia - LHN - 28
Militia - LHQ - Qld
Militia - LHQ - 13/2
Militia - LHQ - 14/3/11
Militia - LHQ - 15/1/5
Militia - LHQ - 27/14
Militia - LHS - SA
Militia - LHS - 16/22/3
Militia - LHS - 17/23/18
Militia - LHS - 24/9
Militia - LHT - Tas
Militia - LHT - 12/26
Militia - LHV - Vic
Militia - LHV - 7/15/20
Militia - LHV - 8/16/8
Militia - LHV - 9/19
Militia - LHV - 10/13
Militia - LHV - 11/20/4
Militia - LHV - 19/17
Militia - LHV - 29
Militia - LHW - WA
Militia - LHW-18/25/10
Militia - Military Orders
Militia - Misc
MilitiaRC - Rifle Clubs
MilitiaRC - NSW
MilitiaRC - NT
MilitiaRC - Qld
MilitiaRC - SA
MilitiaRC - Tas
MilitiaRC - Vic
MilitiaRC - WA
Militiaz - New Zealand
Tk - Turkish Items
Tk - Army
Tk - Bks - Books
Tk - Bks - 1/33IR
Tk - Bks - 27th IR
Tk - Bks - Air Force
Tk - Bks - Yildirim
Tk - POWs
Wp - Weapons
Wp - Hotchkiss Cav
Wp - Hotchkiss PMG
Blog Tools
Edit your Blog
Build a Blog
RSS Feed
View Profile
Open Community
Post to this Blog
Site Index
Education Centre
LH Militia
Boer War
Transport Ships
LH Battles
ALH - Units
ALH - General
Aboriginal Light H
Weapons
Ottoman Sources

"At a mile distant their thousand hooves were stuttering thunder, coming at a rate that frightened a man - they were an awe inspiring sight, galloping through the red haze - knee to knee and horse to horse - the dying sun glinting on bayonet points..." Trooper Ion Idriess

The Australian Light Horse Studies Centre aims to present an accurate history as chroniclers of early Australian military developments from 1899 to 1920.

The Australian Light Horse Studies Centre site holds over 12,000 entries and is growing daily.

Contact: Australian Light Horse Studies Centre

Let us hear your story: You can tell your story, make a comment or ask for help on our Australian Light Horse Studies Centre Forum called:

Desert Column Forum

WARNING: This site contains: names, information and images of deceased people; and, language which may be considered inappropriate today.

Friday, 31 October 2008
The Battle of Beersheba, Palestine, 31 October 1917, 7th ALHR, AIF, Unit History Account
Topic: AIF - 2B - 7 LHR

The Battle of Beersheba

Palestine, 31 October 1917

7th LHR, AIF, Unit History Account


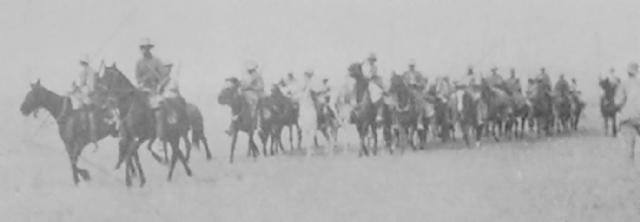
7th LHR "A" Sqn men marching with Turks captured at Beersheba

[From: Richardson, photograph plate facing p. 68.]


Lieutenant Colonel John Dalzell Richardson produced a unit history published in 1919 called The History of the 7th Light Horse Regiment AIF which included a section specifically related to the battle of Beersheba and is extracted below.

Richardson, JD, The History of the 7th Light Horse Regiment AIF, Sydney, 1919, pp. 56 - 7:


CHAPTER VII. BATTLE OF BEERSHEBA.

The moment long waited for was now at hand, and the value of our careful preparations and patient training under trying conditions was to be tested. The morale of the army was of the highest; it had completely recovered from the two set-backs at Gaza. Complete confidence was felt in the new Commander-in-Chief.

At 5 p.m on October 31st, 1917 the regiment left its bivouac at Asluj and moving as advance guard to the Brigade, passed Asluj Station at 6 pm. The track led between barren, stony hills, and a thunderstorm had made a number of small watercourses boggy. The cross-roads, four miles south-west of Bir Arara, was the point where the 2nd L.H. Brigade severed connection with the remainder of the Division, which moved on Kashim Zanna. The Regiment from these cross-roads proceeded temporarily alone, the objective being Bir Arara, which was to be taken silently with the bayonet, if held.

Bir Arara was reached at 2 a.m., on November 1 st. It was not held, and apparently never had been during the night, though Turkish mounted patrols were there in the daytime in some strength. A halt was made to allow the remainder of the Brigade to join up, and then the whole column moved on in the grand, wide encircling movement against Beersheba. The second objective was Bir El Hamam, a deep well, about six miles due east of the town; a mere watering-place for Bedouin flocks. This place was reached at 8 a.m., without opposition, though the N.Z.M.R. Brigade, on the high ridges about Kashim Zanna, could be seen driving in some outposts. From Bir El Hammam the dome and minaret of the great mosque in Beersheba were plainly visible, and also many troops, mostly cavalry, moving to the north of the town. A short halt was made for breakfast.

The going since we left Arara had been good, though shallow ravines caused some congestion at times. Although the altitude had greatly increased, the country was gently undulating, and gave the Brigade the utmost scope for wide movements. Not until the true foothills of the Judean Range, which lie west of the Hebron Road, and in the vicinity of Towal Abu Jerwal, are reached, does it become really difficult for mounted troops. These hills then gradually converge on the Hebron Road, and the boundary of hills and plain is there abruptly defined at Kurnet Ghazaleh. From this spot one may be said to enter the mountain country of Judea, which extends like a great rugged backbone through to Galilee, and almost to the foot of Mount Hermon and Damascus. It is true that the plain of Esdraelon interposes a barrier between the hill systems of Judea and Galilee, but for this they are one, and the geological formation is the same. These hills, at which we had so often gazed in the far distance, were now close at hand, and were to give us a taste of their rugged quality in a few days' time.

Hurried orders directed us to move with all speed to seize the third objective, Tel Es Sakaty, and get astride the Hebron Road. The Regiment moved off at a sharp canter, and almost immediately captured six transport wagons loaded with forage, and later a fatigue party of 49 men, who were at work on a culvert. These surrendered to a section of four men, in charge of Corporal Picton, who afterwards received the D.C.M. The gallop across a wide flat, which opens on to the Hebron Road, will long be remembered by those who took part in it. Turkish Cavalry and a battery had been seen moving to the west of the road, evidently with the intention of covering that highway as a possible means of retreat. The 7th Regiment, galloping forward with the Brigade in rear, menaced this force, which hurriedly withdrew to the high ground about half a mile west of the [57] road, dragging their guns up the steep slopes. These guns were at length brought into action, and a hail of shells fell among the troops of the Regiment, but such is the immunity against shell-fire, of "shell, or artillery formation," especially in fast-moving bodies, that not a man was hit, though a number of the Bedouins, whose camp was in the line of fire, were knocked over. The gunners possibly were somewhat rattled by the quick work. As the road was approached, the Turkish machine guns opened fire, and Lieutenant-Colonel Onslow realised that the position was too strong and too steep to be galloped; he therefore smartly swung the whole Regiment at the gallop to the right, and crossing the road, found good corer for the horses in Wadi Aujan. Beyond this, however, it was impossible to advance, as the enemy possessed many machine guns, and any movement at once drew severe fire.

Our position was consolidated, and we linked up with the 5th A.L.H. Regiment, which came in from the right shortly afterwards. Intermittent sniping continued during the day, but as the objective had been gained, no further attempt to advance was made. Our role was to hold these positions against any enemy retirement from Beersheba.

It was a fine sight to see the Australian Mounted Division moving forward to close in on the town of Beersheba. Regiment after regiment, troop after troop, they moved forward until the whole wide plain east of the town seemed to be covered with mounted men. This movement was to culminate in the gallant charge of the 4th Light Horse Brigade, which, disregarding trenches, galloped with bayonets fixed right into Beersheba, and captured a number of guns and enemy who would otherwise have escaped, besides preventing the blowing in of an all-important well.

On our left, the N.Z.M.R. Brigade was having a hard fight for Tel el Saba, a high mound strongly trenched. at the junction of two deep wadis. With the support of the 1st L.H. Brigade in dealing with machine guns flanking this position, Tel el Saba was taken at about 4 p.m. The Horse Artillery Battery (Ayrshire) attached to our Brigade, had now come into action against the guns which had attempted to check our advance; very soon the enemy guns were silenced and were withdrawn out of action. An effort was made to dislodge the machine guns in front of us by shell fire, but without success. The wadi in which the Regiment, horses and all, was hidden afforded excellent protection, but any movement above these at once drew a hail of bullets, and any advance must have caused the heaviest casualties.

At night, the line was drawn back somewhat, so as to link up better with the Brigade. The explosions and fires in Beersheba indicated that the town had fallen. At 4.30 a.m., on November 1st, the Regiment moved forward again to re-occupy the line of the previous day. Troops were pushed forward to feel for the enemy, but he had retired during the night, and the ridges hitherto held were occupied without opposition. The Regiment was relieved at noon by the 6th A.L.H. Regiment, and withdrew to a bivouac close to D.H.Q., where a water supply, in pools caused by the thunderstorm on October 31st, had been found. Most of the horses had been without water for nearly 36 hours. Thus ended the Battle of Beersheba, the first blow of a series which quickly followed, and from which the enemy dragged the remnants of his army right back beyond Jaffa, where they were only able to re-form with the assistance of fresh troops. The Infantry, in attacking Beersheba from the west, had done their part well; quickly the barb-wire in front of redoubts was destroyed by concentrated Artillery fire, and the redoubts were themselves then stormed. It needed only the encircling Cavalry to batter at the back-door to cause its speedy downfall. The Turk had, however, made all arrangements for quickly evacuating the place and blowing in the wells; the dashing charge of the 4th L.H. Brigade alone prevented him from making a good withdrawal; even so, the greater part of his Garrison and guns did get away, retiring to reserve positions at Tel el Sharia before our Infantry, advancing through Bir Abu Irgeig, could cut their line.


Further Reading:

7th Australian Light Horse Regiment, AIF

7th Australian Light Horse Regiment, Roll of Honour 

The Battle of Beersheba, Palestine, 31 October 1917

Australian and New Zealand Roll of Honour

Battles where Australians fought, 1899-1920


Citation: The Battle of Beersheba, Palestine, 31 October 1917, 7th ALHR, AIF, Unit History Account

Posted by Project Leader at 12:01 AM EADT
Updated: Monday, 26 October 2009 6:06 PM EADT

View Latest Entries

Full Site Index


powered by FreeFind
Let us hear your story: You can tell your story, make a comment or ask for help on our forum.

Desert Column Forum

A note on copyright

The Australian Light Horse Studies Centre is a not for profit and non profit group whose sole aim is to write the early history of the Australian Light Horse from 1900 - 1920. It is privately funded and the information is provided by the individuals within the group and while permission for the use of the material has been given for this site for these items by various donors, the residual and actual copyright for these items, should there be any, resides exclusively with the donors. The information on this site is freely available for private research use only and if used as such, should be appropriately acknowledged. To assist in this process, each item has a citation attached at the bottom for referencing purposes.

Please Note: No express or implied permission is given for commercial use of the information contained within this site.

A note to copyright holders

The Australian Light Horse Studies Centre has made every endeavour to contact copyright holders of material digitised for this blog and website and where appropriate, permission is still being sought for these items. Where replies were not received, or where the copyright owner has not been able to be traced, or where the permission is still being sought, the Australian Light Horse Studies Centre has decided, in good faith, to proceed with digitisation and publication. Australian Light Horse Studies Centre would be happy to hear from copyright owners at any time to discuss usage of this item.

Contact

Australian Light Horse Studies Centre

eXTReMe Tracker