« October 2009 »
S M T W T F S
1 2 3
4 5 6 7 8 9 10
11 12 13 14 15 16 17
18 19 20 21 22 23 24
25 26 27 28 29 30 31
You are not logged in. Log in


Search the site:


powered by FreeFind
Volunteer with us.

Entries by Topic All topics  
A Latest Site News
A - Using the Site
AAA Volunteers
AAB-Education Centre
AAC-Film Clips
AAC-Photo Albums
AIF & MEF & EEF
AIF - Lighthorse
AIF - ALH - A to Z
AIF - DMC
AIF - DMC - Or Bat
AIF - DMC - Anzac MD
AIF - DMC - Aus MD
AIF - DMC - British
AIF - DMC - BWI
AIF - DMC - French
AIF - DMC - Indian
AIF - DMC - Italian
AIF - DMC - Medical
AIF - DMC - Remounts
AIF - DMC - Scouts
AIF - DMC - Sigs
AIF - DMC - Sigs AirlnS
AIF - DMC - 1 Sig Sqn
AIF - DMC - 2 Sig Sqn
AIF - DMC - Eng
AIF - DMC - Eng 1FSE
AIF - DMC - Eng 2FSE
AIF - DMC - GSR
AIF - 1B - 1 LHB
AIF - 1B - 6 MVS
AIF - 1B - 1 LHMGS
AIF - 1B - 1 Sig Trp
AIF - 1B - 1 LHFA
AIF - 1B - 1 LHR
AIF - 1B - 2 LHR
AIF - 1B - 3 LHR
AIF - 2B - 2 LHB
AIF - 2B - 7 MVS
AIF - 2B - 2 LHFA
AIF - 2B - 2 LHMGS
AIF - 2B - 2 Sig Trp
AIF - 2B - 5 LHR
AIF - 2B - 6 LHR
AIF - 2B - 7 LHR
AIF - 3B - 3 LHB
AIF - 3B - 8 MVS
AIF - 3B - 3 LHB Sigs
AIF - 3B - 3 LHFA
AIF - 3B - 3 LHMGS
AIF - 3B - 3 Sig Trp
AIF - 3B - 8 LHR
AIF - 3B - 9 LHR
AIF - 3B - 10 LHR
AIF - 4B - 4 LHB
AIF - 4B - 4 Sig Trp
AIF - 4B - 9 MVS
AIF - 4B - 4 LHFA
AIF - 4B - 4 LHMGS
AIF - 4B - 4 LHR
AIF - 4B - 11 LHR
AIF - 4B - 12 LHR
AIF - 5B - 5 LHB
AIF - 5B - 10 MVS
AIF - 5B - 5 LHFA
AIF - 5B - 5 Sig Trp
AIF - 5B - ICC
AIF - 5B - 14 LHR
AIF - 5B - 15 LHR
AIF - 5B - 1er Regt
AIF - 5B - 2 NZMGS
AIF - AASC
AIF - Aboriginal LH
AIF - Badges
AIF - Cars
AIF - Chinese LH
AIF - Double Sqns
AIF - Engineers
AIF - Fr - 22 Corps
AIF - Fr - 13 LHR
AIF - Honour Roll
AIF - HQ - 3rd Echelon
AIF - Marching Songs
AIF - Misc Topics
AIF - NZMRB
AIF - NZMRB - AMR
AIF - NZMRB - CMR
AIF - NZMRB - EFT
AIF - NZMRB - NZMFA
AIF - NZMRB - NZMGS
AIF - NZMRB - OMR
AIF - NZMRB - Sig-Trp
AIF - NZMRB - WMR
AIF - Ships
AIF - Ships - Encountr
AIF - Ships - Una
AIF - WFF
AIF - Wireless Sqn
Battles
BatzA - Australia
BatzA - Broken Hill
BatzA - Liverpool
BatzA - Merivale
BatzB - Boer War
BatzB - Bakenlaagte
BatzB - Belmont
BatzB - Bothaville
BatzB - Buffels Hoek
BatzB - Coetzees Drift
BatzB - Diamond Hill
BatzB - Driefontein
BatzB - Elands
BatzB - Graspan
BatzB - Grobelaar
BatzB - Grootvallier
BatzB - Hartebestfontn
BatzB - Houtnek
BatzB - Karee Siding
BatzB - Kimberley
BatzB - Koster River
BatzB - Leeuw Kop
BatzB - Mafeking
BatzB - Magersfontein
BatzB - Modder River
BatzB - Onverwacht
BatzB - Paardeberg
BatzB - Palmietfontein
BatzB - Pink Hill
BatzB - Poplar Grove
BatzB - Rhenoster
BatzB - Sannahs Post
BatzB - Slingersfontn
BatzB - Stinkhoutbm
BatzB - Sunnyside
BatzB - Wilmansrust
BatzB - Wolvekuil
BatzB - Zand River
BatzG - Gallipoli
BatzG - Anzac
BatzG - Aug 1915
BatzG - Baby 700
BatzG - Evacuation
BatzG - Hill 60
BatzG - Hill 971
BatzG - Krithia
BatzG - Lone Pine
BatzG - Nek
BatzJ - Jordan Valley
BatzJ - 1st Amman
BatzJ - 2nd Amman
BatzJ - Abu Tellul
BatzJ - Es Salt
BatzJ - JV Maps
BatzJ - Ziza
BatzM - Mespot
BatzM - Baghdad
BatzM - Ctesiphon
BatzM - Daur
BatzM - Kurna
BatzM - Kut el Amara
BatzM - Ramadi
BatzN - Naval
BatzN - AE1
BatzN - Cocos Is
BatzN - Heligoland
BatzN - Marmara
BatzN - Zeebrugge
BatzN - Zeppelin L43
BatzNG - Bitapaka
BatzO - Other
BatzO - Baku
BatzO - Egypt 1919
BatzO - Emptsa
BatzO - Karawaran
BatzO - Peitang
BatzO - Wassa
BatzP - Palestine
BatzP - 1st Gaza
BatzP - 2nd Gaza
BatzP - 3rd Gaza
BatzP - Aleppo
BatzP - Amwas
BatzP - Ayun Kara
BatzP - Bald Hill
BatzP - Balin
BatzP - Beersheba
BatzP - Berkusieh
BatzP - Damascus
BatzP - El Auja
BatzP - El Buggar
BatzP - El Burj
BatzP - Haifa
BatzP - Huj
BatzP - JB Yakub
BatzP - Kaukab
BatzP - Khan Kusseir
BatzP - Khuweilfe
BatzP - Kuneitra
BatzP - Megiddo
BatzP - Nablus
BatzP - Rafa
BatzP - Sasa
BatzP - Semakh
BatzP - Sheria
BatzP - Surafend
BatzP - Wadi Fara
BatzS - Sinai
BatzS - Bir el Abd
BatzS - El Arish
BatzS - El Mazar
BatzS - El Qatiya
BatzS - Jifjafa
BatzS - Magdhaba
BatzS - Maghara
BatzS - Romani
BatzS - Suez 1915
BatzSe - Senussi
BatzWF - Westn Front
BW - Boer War
BW - NSW
BW - NSW - 1ACH
BW - NSW - 1NSWMR
BW - NSW - 2NSWMR
BW - NSW - 3ACH
BW - NSW - 3NSWIB
BW - NSW - 3NSWMR
BW - NSW - 5ACH
BW - NSW - A Bty RAA
BW - NSW - AAMC
BW - NSW - Aust H
BW - NSW - Lancers
BW - NSW - NSW Inf
BW - NSW - NSWCBC
BW - NSW - NSWIB
BW - NSW - NSWMR_A
BW - NZ
BW - Qld
BW - Qld - 1ACH
BW - Qld - 1QMI
BW - Qld - 2QMI
BW - Qld - 3ACH
BW - Qld - 3QMI
BW - Qld - 4QIB
BW - Qld - 5QIB
BW - Qld - 6QIB
BW - Qld - 7ACH
BW - QLD - AAMC
BW - SA
BW - SA - 1SAMR
BW - SA - 2ACH
BW - SA - 2SAMR
BW - SA - 3SACB
BW - SA - 4ACH
BW - SA - 4SAIB
BW - SA - 5SAIB
BW - SA - 6SAIB
BW - SA - 8ACH
BW - SA - AAMC
BW - Tas
BW - Tas - 1ACH
BW - Tas - 1TIB
BW - Tas - 1TMI
BW - Tas - 2TB
BW - Tas - 2TIB
BW - Tas - 3ACH
BW - Tas - 8ACH
BW - Vic
BW - Vic - 1VMI
BW - Vic - 2ACH
BW - Vic - 2VMR
BW - Vic - 3VB
BW - Vic - 4ACH
BW - Vic - 4VIB
BW - Vic - 5VMR
BW - Vic - 6ACH
BW - Vic - AAMC
BW - Vic - Scot H
BW - WA
BW - WA - 1WAMI
BW - WA - 2ACH
BW - WA - 2WAMI
BW - WA - 3WAB
BW - WA - 4ACH
BW - WA - 4WAMI
BW - WA - 5WAMI
BW - WA - 6WAMI
BW - WA - 8ACH
BW Gen - Campaign
BW Gen - Soldiers
BW General
Cavalry - General
Diary - Schramm
Egypt - Heliopolis
Egypt - Mena
Gen - Ataturk Pk, CNB
Gen - Australia
Gen - Legends
Gen - Query Club
Gen - St - NSW
Gen - St - Qld
Gen - St - SA
Gen - St - Tas
Gen - St - Vic
Gen - St - WA
Gm - German Items
Gm - Bk - 605 MGC
GW - 11 Nov 1918
GW - Atrocities
GW - August 1914
GW - Biographies
GW - Propaganda
GW - Spies
GW - We forgot
Militia 1899-1920
Militia - Area Officers
Militia - Inf - Infantry
Militia - Inf - 1IB
Militia - Inf - 2IB
Militia - Inf - 3IB
Militia - Inf - NSW
Militia - Inf - Qld
Militia - Inf - SA
Militia - Inf - Tas
Militia - Inf - Vic
Militia - Inf - WA
Militia - K.E.Horse
Militia - LH
Militia - LH - Regts
Militia - LH - 1LHB
Militia - LH - 2LHB
Militia - LH - 3LHB
Militia - LH - 4LHB
Militia - LH - 5LHB
Militia - LH - 6LHB
Militia - LHN - NSW
Militia - LHN - 1/7/1
Militia - LHN - 2/9/6
Militia - LHN - 3/11/7
Militia - LHN - 4/6/16
Militia - LHN - 5/4/15
Militia - LHN - 6/5/12
Militia - LHN - 28
Militia - LHQ - Qld
Militia - LHQ - 13/2
Militia - LHQ - 14/3/11
Militia - LHQ - 15/1/5
Militia - LHQ - 27/14
Militia - LHS - SA
Militia - LHS - 16/22/3
Militia - LHS - 17/23/18
Militia - LHS - 24/9
Militia - LHT - Tas
Militia - LHT - 12/26
Militia - LHV - Vic
Militia - LHV - 7/15/20
Militia - LHV - 8/16/8
Militia - LHV - 9/19
Militia - LHV - 10/13
Militia - LHV - 11/20/4
Militia - LHV - 19/17
Militia - LHV - 29
Militia - LHW - WA
Militia - LHW-18/25/10
Militia - Military Orders
Militia - Misc
MilitiaRC - Rifle Clubs
MilitiaRC - NSW
MilitiaRC - NT
MilitiaRC - Qld
MilitiaRC - SA
MilitiaRC - Tas
MilitiaRC - Vic
MilitiaRC - WA
Militiaz - New Zealand
Tk - Turkish Items
Tk - Army
Tk - Bks - Books
Tk - Bks - 1/33IR
Tk - Bks - 27th IR
Tk - Bks - Air Force
Tk - Bks - Yildirim
Tk - POWs
Wp - Weapons
Wp - Hotchkiss Cav
Wp - Hotchkiss PMG
Blog Tools
Edit your Blog
Build a Blog
RSS Feed
View Profile
Open Community
Post to this Blog
Site Index
Education Centre
LH Militia
Boer War
Transport Ships
LH Battles
ALH - Units
ALH - General
Aboriginal Light H
Weapons
Ottoman Sources

"At a mile distant their thousand hooves were stuttering thunder, coming at a rate that frightened a man - they were an awe inspiring sight, galloping through the red haze - knee to knee and horse to horse - the dying sun glinting on bayonet points..." Trooper Ion Idriess

The Australian Light Horse Studies Centre aims to present an accurate history as chroniclers of early Australian military developments from 1899 to 1920.

The Australian Light Horse Studies Centre site holds over 12,000 entries and is growing daily.

Contact: Australian Light Horse Studies Centre

Let us hear your story: You can tell your story, make a comment or ask for help on our Australian Light Horse Studies Centre Forum called:

Desert Column Forum

WARNING: This site contains: names, information and images of deceased people; and, language which may be considered inappropriate today.

Sunday, 18 October 2009
Bir el Abd, Sinai, 9 August 1916, Outline
Topic: BatzS - Bir el Abd

Bir el Abd

Sinai, 9 August 1916

Outline


A view from the crest of Mount Meredith looking eastwards towards Qatiya.

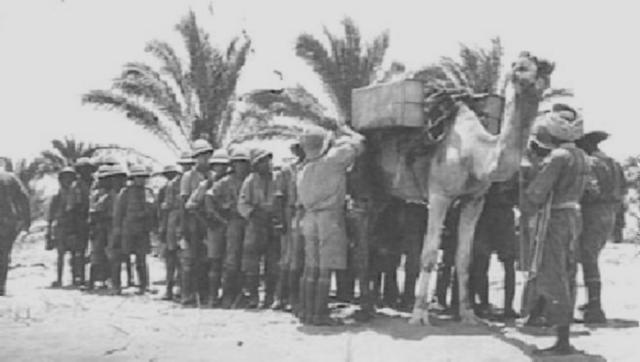
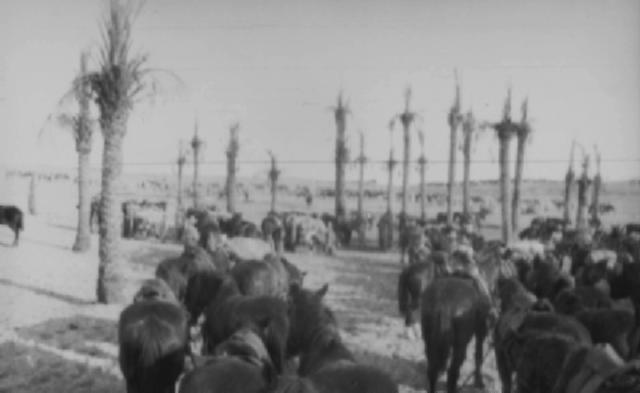
[Photo by Terry Kinlock, author of Devils on Horses: in the Words of the Anzacs in the Middle East 1916-19.]


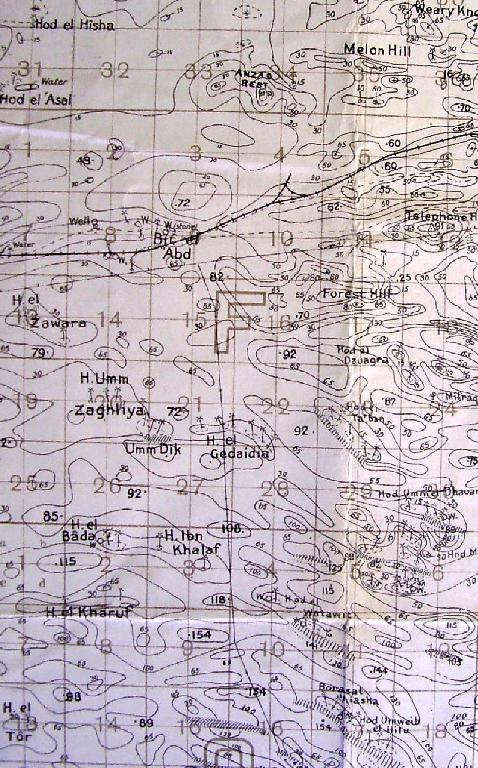
Keeping constant pressure on the Turks resulted in one engagement tending to merge into the next, as was the case with Katia and Bir el Abd. This was an oasis 22 miles east of Romani, on the track to El Arish.

El Arish was on the south-east corner of the Mediterranean and came to be considered by the Anzacs as some far-off Holy Grail. If the enemy could be dislodged from Bir el Abd, he must retreat the 50 miles further on to El Arish because there was almost no water between the two places. El Arish was close to the Palestine border, where the Sinai desert ended. Elopes and dreams began to form and tantalise. They could get off the sand! Mirages, milk-and-honey visions of plains and trees, cities, grass feed, roads, water, flowers beckoned.

First things first: attack the enemy rearguard, capture his guns, destroy the remainder of his force. Reconnaissance early on 8 August showed that the Turks had abandoned Oghratina. Patrols probed forward and found him at Bir el Abd.

Chauvel shifted his HQ forward to Oghratina, with the New Zealand and Yeomanry brigades. Royston, temporarily in command of both the 1st and 2nd Light Horse Brigades, was to march from Katia overnight and at daylight on the 9th take up a position just north-east of Abd. The New Zealanders and the 3rd Light Horse Brigade were to start the advance, the first directly on the Turks centre, the second to swing round behind them from the south, blocking their retreat. The Yeomanry were in reserve.

The whole ANZAC Mounted Division would be engaged, though it was reduced by sickness and exhaustion of both horses and men to 3000 dismounted rifles. Two regiments of Royston's were down to 180 rifles and the 7th Regiment mustered 214. But the Turks were said to be weak and the operation looked to be relatively easy. Because of the distances, no infantry were to be used and the job fell to the mounted troops again.

The Turks proved to be decidedly strong: 6000 men deployed on commanding sandhills, well supported by artillery.


Bir el Abd and surrounding area topography.
 
[Click on map for larger version.]


The overnight ride by the 1st and 2nd Brigades was marked by precipitous sand cliffs, up or down which no horse would have gone, had it seen them. With daylight, the troopers were awed to see what they had come through.

At 4 am, the New Zealanders attacked the Turkish centre and the 3rd Light Horse Brigade started its encircling movement from the south. They encountered strong resistance. Royston's brigades, coming in from the north, were also checked. The dispositions left large gaps between the ANZAC units: 800 yards between Chaytor's New Zealanders and the 2nd Brigade on the left, a mile between Chaytor and the 3rd Brigade on the right.

Suddenly, things started to look grim. There were fire fights all along the line. The scattered Anzacs, after galloping in until the machine-gun and artillery fire became too heavy to risk the horses, dismounted and sent them back. For some hours, it was a near stalemate of no advance and no retreat, though marked by particular strokes of brilliance such as a bayonet charge by the Wellingtons, before which the Turks refused the steel and bolted, and the 'admirable tenacity and reckless courage' of the out-gunned batteries of Royal Horse Artillery, which from close behind the dismounted men waged an unequal contest with the Turkish guns.


British soldiers filling their canteens with water near Romani.


About midday, the Turks counterattacked from one end of the line to the other and threw Chauvel's troops on the defensive. There were seesawing attacks and counterattacks for two hours, and while the ANZAC front was unbroken, they suffered a net loss of ground. Sniffing victory, the Turks' fire reached a pitch of concentration never experienced before, even at Gallipoli.

By 4.30 Royston's left had been almost completely turned and the Turks threw between 2000 and 3000 men against his centre. The ensuing crescendo of fire was most destructive to both sides. The New Zealanders gave no ground in their forward position, even as a retirement of the 3rd Brigade on their right and another by Royston's brigades on their left exposed them to enfilade fire on both sides. Still they hung on.

At 5.30, Chauvel ordered a general withdrawal. It was then a matter of getting away unscathed in a fighting retreat, another searching test of steadiness under fire, with troop deliberately laying back on troop and squadron laying back on squadron, while keeping the enemy at bay with their own shooting.

That accomplished, the Anzacs were once more exhausted. They had ridden all night and fought from daylight to sunset on a quart of water in the heat of a ship's stokehold. Their elbows were blistered from constant contact with the scalding sand as they fired their weapons. Chauvel's choice was between bivouacking that night nearby and resuming the assault next day, or retiring to Oghratina. After consulting his brigade commanders, he opted for the latter, posting the 3rd Brigade out on the flank.

Two hundred and ten wounded were carried out of Abd and greatly hampered the withdrawal, but with the exception of a few New Zealanders their countrymen could not possibly reach, all were borne back safely. The standard 'ambulance' was a camel cacolets, or litter - a narrow, swaying pannier atop the beast that so tormented wounded men they came to be feared by the Anzacs, and led to the Australian innovation of sand carts. However, these could not be deployed to the front line and the men were taken out on horses; and their preference then was to ride them home. Two men of the 5th Regiment with broken thighs rode home from Abd and one survived.

This 'law' about saving wounded men was dangerous and frowned on by anonymous high command mandarins, but the men went into action knowing that if it was humanly possible to be carried out, they would not be allowed to fall into the Turks' hands, or left to the murderous Bedouins who prowled around the edges of battlefields. As vindication, after two and a half years of constant fighting, only 73 Light Horsemen had been taken prisoner, most of them wounded, and not a single officer was captured. But they themselves captured between 40,000 and 50,000 Turks.

Casualties for Bir el Abd were 73 dead and 243 wounded.


Bir el Abd after its capture.


Extracted from the book produced by Lindsay Baly, Horseman, Pass By, East Roseville, N.S.W. : Simon & Schuster, 2003, Ch. 5.


Further Reading:

Battle of Romani, Sinai, August 4 to 5, 1916

Bir el Abd, Sinai, 9 August 1916

Battles where Australians fought, 1899-1919


Citation: Bir el Abd, Sinai, 9 August 1916, Outline

Posted by Project Leader at 12:01 AM EADT
Updated: Thursday, 22 October 2009 8:33 AM EADT

View Latest Entries

Full Site Index


powered by FreeFind
Let us hear your story: You can tell your story, make a comment or ask for help on our forum.

Desert Column Forum

A note on copyright

The Australian Light Horse Studies Centre is a not for profit and non profit group whose sole aim is to write the early history of the Australian Light Horse from 1900 - 1920. It is privately funded and the information is provided by the individuals within the group and while permission for the use of the material has been given for this site for these items by various donors, the residual and actual copyright for these items, should there be any, resides exclusively with the donors. The information on this site is freely available for private research use only and if used as such, should be appropriately acknowledged. To assist in this process, each item has a citation attached at the bottom for referencing purposes.

Please Note: No express or implied permission is given for commercial use of the information contained within this site.

A note to copyright holders

The Australian Light Horse Studies Centre has made every endeavour to contact copyright holders of material digitised for this blog and website and where appropriate, permission is still being sought for these items. Where replies were not received, or where the copyright owner has not been able to be traced, or where the permission is still being sought, the Australian Light Horse Studies Centre has decided, in good faith, to proceed with digitisation and publication. Australian Light Horse Studies Centre would be happy to hear from copyright owners at any time to discuss usage of this item.

Contact

Australian Light Horse Studies Centre

eXTReMe Tracker