« August 2009 »
S M T W T F S
1
2 3 4 5 6 7 8
9 10 11 12 13 14 15
16 17 18 19 20 21 22
23 24 25 26 27 28 29
30 31
You are not logged in. Log in


Search the site:


powered by FreeFind
Volunteer with us.

Entries by Topic All topics  
A Latest Site News
A - Using the Site
AAA Volunteers
AAB-Education Centre
AAC-Film Clips
AAC-Photo Albums
AIF & MEF & EEF
AIF - Lighthorse
AIF - ALH - A to Z
AIF - DMC
AIF - DMC - Or Bat
AIF - DMC - Anzac MD
AIF - DMC - Aus MD
AIF - DMC - British
AIF - DMC - BWI
AIF - DMC - French
AIF - DMC - Indian
AIF - DMC - Italian
AIF - DMC - Medical
AIF - DMC - Remounts
AIF - DMC - Scouts
AIF - DMC - Sigs
AIF - DMC - Sigs AirlnS
AIF - DMC - 1 Sig Sqn
AIF - DMC - 2 Sig Sqn
AIF - DMC - Eng
AIF - DMC - Eng 1FSE
AIF - DMC - Eng 2FSE
AIF - DMC - GSR
AIF - 1B - 1 LHB
AIF - 1B - 6 MVS
AIF - 1B - 1 LHMGS
AIF - 1B - 1 Sig Trp
AIF - 1B - 1 LHFA
AIF - 1B - 1 LHR
AIF - 1B - 2 LHR
AIF - 1B - 3 LHR
AIF - 2B - 2 LHB
AIF - 2B - 7 MVS
AIF - 2B - 2 LHFA
AIF - 2B - 2 LHMGS
AIF - 2B - 2 Sig Trp
AIF - 2B - 5 LHR
AIF - 2B - 6 LHR
AIF - 2B - 7 LHR
AIF - 3B - 3 LHB
AIF - 3B - 8 MVS
AIF - 3B - 3 LHB Sigs
AIF - 3B - 3 LHFA
AIF - 3B - 3 LHMGS
AIF - 3B - 3 Sig Trp
AIF - 3B - 8 LHR
AIF - 3B - 9 LHR
AIF - 3B - 10 LHR
AIF - 4B - 4 LHB
AIF - 4B - 4 Sig Trp
AIF - 4B - 9 MVS
AIF - 4B - 4 LHFA
AIF - 4B - 4 LHMGS
AIF - 4B - 4 LHR
AIF - 4B - 11 LHR
AIF - 4B - 12 LHR
AIF - 5B - 5 LHB
AIF - 5B - 10 MVS
AIF - 5B - 5 LHFA
AIF - 5B - 5 Sig Trp
AIF - 5B - ICC
AIF - 5B - 14 LHR
AIF - 5B - 15 LHR
AIF - 5B - 1er Regt
AIF - 5B - 2 NZMGS
AIF - AASC
AIF - Aboriginal LH
AIF - Badges
AIF - Cars
AIF - Chinese LH
AIF - Double Sqns
AIF - Engineers
AIF - Fr - 22 Corps
AIF - Fr - 13 LHR
AIF - Honour Roll
AIF - HQ - 3rd Echelon
AIF - Marching Songs
AIF - Misc Topics
AIF - NZMRB
AIF - NZMRB - AMR
AIF - NZMRB - CMR
AIF - NZMRB - EFT
AIF - NZMRB - NZMFA
AIF - NZMRB - NZMGS
AIF - NZMRB - OMR
AIF - NZMRB - Sig-Trp
AIF - NZMRB - WMR
AIF - Ships
AIF - Ships - Encountr
AIF - Ships - Una
AIF - WFF
AIF - Wireless Sqn
Battles
BatzA - Australia
BatzA - Broken Hill
BatzA - Liverpool
BatzA - Merivale
BatzB - Boer War
BatzB - Bakenlaagte
BatzB - Belmont
BatzB - Bothaville
BatzB - Buffels Hoek
BatzB - Coetzees Drift
BatzB - Diamond Hill
BatzB - Driefontein
BatzB - Elands
BatzB - Graspan
BatzB - Grobelaar
BatzB - Grootvallier
BatzB - Hartebestfontn
BatzB - Houtnek
BatzB - Karee Siding
BatzB - Kimberley
BatzB - Koster River
BatzB - Leeuw Kop
BatzB - Mafeking
BatzB - Magersfontein
BatzB - Modder River
BatzB - Onverwacht
BatzB - Paardeberg
BatzB - Palmietfontein
BatzB - Pink Hill
BatzB - Poplar Grove
BatzB - Rhenoster
BatzB - Sannahs Post
BatzB - Slingersfontn
BatzB - Stinkhoutbm
BatzB - Sunnyside
BatzB - Wilmansrust
BatzB - Wolvekuil
BatzB - Zand River
BatzG - Gallipoli
BatzG - Anzac
BatzG - Aug 1915
BatzG - Baby 700
BatzG - Evacuation
BatzG - Hill 60
BatzG - Hill 971
BatzG - Krithia
BatzG - Lone Pine
BatzG - Nek
BatzJ - Jordan Valley
BatzJ - 1st Amman
BatzJ - 2nd Amman
BatzJ - Abu Tellul
BatzJ - Es Salt
BatzJ - JV Maps
BatzJ - Ziza
BatzM - Mespot
BatzM - Baghdad
BatzM - Ctesiphon
BatzM - Daur
BatzM - Kurna
BatzM - Kut el Amara
BatzM - Ramadi
BatzN - Naval
BatzN - AE1
BatzN - Cocos Is
BatzN - Heligoland
BatzN - Marmara
BatzN - Zeebrugge
BatzN - Zeppelin L43
BatzNG - Bitapaka
BatzO - Other
BatzO - Baku
BatzO - Egypt 1919
BatzO - Emptsa
BatzO - Karawaran
BatzO - Peitang
BatzO - Wassa
BatzP - Palestine
BatzP - 1st Gaza
BatzP - 2nd Gaza
BatzP - 3rd Gaza
BatzP - Aleppo
BatzP - Amwas
BatzP - Ayun Kara
BatzP - Bald Hill
BatzP - Balin
BatzP - Beersheba
BatzP - Berkusieh
BatzP - Damascus
BatzP - El Auja
BatzP - El Buggar
BatzP - El Burj
BatzP - Haifa
BatzP - Huj
BatzP - JB Yakub
BatzP - Kaukab
BatzP - Khan Kusseir
BatzP - Khuweilfe
BatzP - Kuneitra
BatzP - Megiddo
BatzP - Nablus
BatzP - Rafa
BatzP - Sasa
BatzP - Semakh
BatzP - Sheria
BatzP - Surafend
BatzP - Wadi Fara
BatzS - Sinai
BatzS - Bir el Abd
BatzS - El Arish
BatzS - El Mazar
BatzS - El Qatiya
BatzS - Jifjafa
BatzS - Magdhaba
BatzS - Maghara
BatzS - Romani
BatzS - Suez 1915
BatzSe - Senussi
BatzWF - Westn Front
BW - Boer War
BW - NSW
BW - NSW - 1ACH
BW - NSW - 1NSWMR
BW - NSW - 2NSWMR
BW - NSW - 3ACH
BW - NSW - 3NSWIB
BW - NSW - 3NSWMR
BW - NSW - 5ACH
BW - NSW - A Bty RAA
BW - NSW - AAMC
BW - NSW - Aust H
BW - NSW - Lancers
BW - NSW - NSW Inf
BW - NSW - NSWCBC
BW - NSW - NSWIB
BW - NSW - NSWMR_A
BW - NZ
BW - Qld
BW - Qld - 1ACH
BW - Qld - 1QMI
BW - Qld - 2QMI
BW - Qld - 3ACH
BW - Qld - 3QMI
BW - Qld - 4QIB
BW - Qld - 5QIB
BW - Qld - 6QIB
BW - Qld - 7ACH
BW - QLD - AAMC
BW - SA
BW - SA - 1SAMR
BW - SA - 2ACH
BW - SA - 2SAMR
BW - SA - 3SACB
BW - SA - 4ACH
BW - SA - 4SAIB
BW - SA - 5SAIB
BW - SA - 6SAIB
BW - SA - 8ACH
BW - SA - AAMC
BW - Tas
BW - Tas - 1ACH
BW - Tas - 1TIB
BW - Tas - 1TMI
BW - Tas - 2TB
BW - Tas - 2TIB
BW - Tas - 3ACH
BW - Tas - 8ACH
BW - Vic
BW - Vic - 1VMI
BW - Vic - 2ACH
BW - Vic - 2VMR
BW - Vic - 3VB
BW - Vic - 4ACH
BW - Vic - 4VIB
BW - Vic - 5VMR
BW - Vic - 6ACH
BW - Vic - AAMC
BW - Vic - Scot H
BW - WA
BW - WA - 1WAMI
BW - WA - 2ACH
BW - WA - 2WAMI
BW - WA - 3WAB
BW - WA - 4ACH
BW - WA - 4WAMI
BW - WA - 5WAMI
BW - WA - 6WAMI
BW - WA - 8ACH
BW Gen - Campaign
BW Gen - Soldiers
BW General
Cavalry - General
Diary - Schramm
Egypt - Heliopolis
Egypt - Mena
Gen - Ataturk Pk, CNB
Gen - Australia
Gen - Legends
Gen - Query Club
Gen - St - NSW
Gen - St - Qld
Gen - St - SA
Gen - St - Tas
Gen - St - Vic
Gen - St - WA
Gm - German Items
Gm - Bk - 605 MGC
GW - 11 Nov 1918
GW - Atrocities
GW - August 1914
GW - Biographies
GW - Propaganda
GW - Spies
GW - We forgot
Militia 1899-1920
Militia - Area Officers
Militia - Inf - Infantry
Militia - Inf - 1IB
Militia - Inf - 2IB
Militia - Inf - 3IB
Militia - Inf - NSW
Militia - Inf - Qld
Militia - Inf - SA
Militia - Inf - Tas
Militia - Inf - Vic
Militia - Inf - WA
Militia - K.E.Horse
Militia - LH
Militia - LH - Regts
Militia - LH - 1LHB
Militia - LH - 2LHB
Militia - LH - 3LHB
Militia - LH - 4LHB
Militia - LH - 5LHB
Militia - LH - 6LHB
Militia - LHN - NSW
Militia - LHN - 1/7/1
Militia - LHN - 2/9/6
Militia - LHN - 3/11/7
Militia - LHN - 4/6/16
Militia - LHN - 5/4/15
Militia - LHN - 6/5/12
Militia - LHN - 28
Militia - LHQ - Qld
Militia - LHQ - 13/2
Militia - LHQ - 14/3/11
Militia - LHQ - 15/1/5
Militia - LHQ - 27/14
Militia - LHS - SA
Militia - LHS - 16/22/3
Militia - LHS - 17/23/18
Militia - LHS - 24/9
Militia - LHT - Tas
Militia - LHT - 12/26
Militia - LHV - Vic
Militia - LHV - 7/15/20
Militia - LHV - 8/16/8
Militia - LHV - 9/19
Militia - LHV - 10/13
Militia - LHV - 11/20/4
Militia - LHV - 19/17
Militia - LHV - 29
Militia - LHW - WA
Militia - LHW-18/25/10
Militia - Military Orders
Militia - Misc
MilitiaRC - Rifle Clubs
MilitiaRC - NSW
MilitiaRC - NT
MilitiaRC - Qld
MilitiaRC - SA
MilitiaRC - Tas
MilitiaRC - Vic
MilitiaRC - WA
Militiaz - New Zealand
Tk - Turkish Items
Tk - Army
Tk - Bks - Books
Tk - Bks - 1/33IR
Tk - Bks - 27th IR
Tk - Bks - Air Force
Tk - Bks - Yildirim
Tk - POWs
Wp - Weapons
Wp - Hotchkiss Cav
Wp - Hotchkiss PMG
Blog Tools
Edit your Blog
Build a Blog
RSS Feed
View Profile
Open Community
Post to this Blog
Site Index
Education Centre
LH Militia
Boer War
Transport Ships
LH Battles
ALH - Units
ALH - General
Aboriginal Light H
Weapons
Ottoman Sources

"At a mile distant their thousand hooves were stuttering thunder, coming at a rate that frightened a man - they were an awe inspiring sight, galloping through the red haze - knee to knee and horse to horse - the dying sun glinting on bayonet points..." Trooper Ion Idriess

The Australian Light Horse Studies Centre aims to present an accurate history as chroniclers of early Australian military developments from 1899 to 1920.

The Australian Light Horse Studies Centre site holds over 12,000 entries and is growing daily.

Contact: Australian Light Horse Studies Centre

Let us hear your story: You can tell your story, make a comment or ask for help on our Australian Light Horse Studies Centre Forum called:

Desert Column Forum

WARNING: This site contains: names, information and images of deceased people; and, language which may be considered inappropriate today.

Sunday, 2 August 2009
Surafend, the massacre, Palestine, 10 December 1918, Kinlock Account
Topic: BatzP - Surafend

Surafend, the massacre

Palestine, 10 December 1918

Kinlock Account


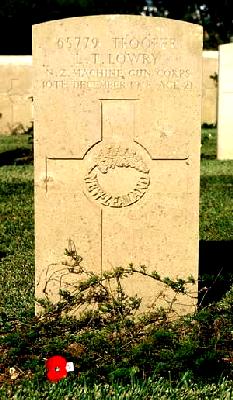
The headstone of Leslie Lowry at Ramleh
 
[Terry Kinlock photograph.]


The following is extracted from an outline provided by Terry Kinlock posted on the Great War Forum, 18 September 2005.


My research to date reveals the following sequence of events.

During the evening of 9 December 1918, Trooper Leslie Lowry was sleeping in his tent in the New Zealand Machine Gun Squadron lines near the Ayun Kara battlefield. He awoke to find someone trying to pull his kit bag, which he was using as a pillow, out of the tent. Lowry leapt to his feet and chased the thief through the camp and into the sand hills, calling for help as he ran. As he caught up with the thief, the man turned and shot him. Lowry was found lying in the sand, bleeding from a bullet wound to the chest. He died just as a doctor arrived, having said nothing. No witness actually saw the fatal shot fired, or saw the murderer run into the nearby village of Surafend. However, tracks were reportedly found from the murder scene to Surafend.

The men of Lowry’s unit, probably assisted by other New Zealanders and Australians, immediately threw a cordon around the village to prevent anyone from entering or leaving. They did not enter the village that night – they simply stabilised the situation and waited for ‘the heads’ to launch an immediate criminal investigation. But nothing happened: no military policemen arrived to conduct a crime scene investigation, no witnesses were interviewed, and no senior officer arrived to take charge.

The next morning, Chaytor sent an officer to GHQ to register his growing concern, and another to take command of the cordon. The men there were angry and frustrated, but they continued to wait for something to be done. The only response to Chaytor’s plea was a peremptory order from GHQ to remove the cordon around Surafend immediately. Chaytor tried to overturn this decision, but failed. When the cordon was removed in the afternoon, a steady stream of Arabs immediately left the village.

That evening, the men took matters into their own hands. A soldier of a neighbouring Australian Light Horse Regiment stated afterwards that New Zealanders appeared in their tent lines looking for support. Another source describes a secret meeting in the sand dunes at 7 p.m., where an anonymous Australian light horseman quietly presented the action plan to the men present.

Two hundred men, armed with pick handles, bayonets or iron strips wrapped in puttees or sacks, quietly encircled the village at 8 p.m. One New Zealand witness claimed that British artillerymen from the Ayrshire Battery carrying horse traces (heavy harness chains encased in leather) also took part.

Most accounts state that the village headman was then given one last chance to hand over the murderer. When the murderer failed to appear, the next part of the plan was carried out. The old men, women and children in the village were woken and taken out of harm’s way, and the village was ransacked, probably in an attempt to find Lowry's stolen kit bag. Any Arab men remaining in the huts were subjected to ‘a sound thrashing’. A Bedouin camp next door to the village received the same treatment. Within 45 minutes, the village and the camp were burning to the ground, and between 30 and 40 Arab men had been beaten to death or badly injured. There is no evidence to suggest that anything more than a severe beating of the adult men was intended. Most sources attribute the high death toll to the resistance put up by the inhabitants of the village. Suggestions that some of the men were castrated and thrown down a well are unsubstantiated.

The fires were seen by men in the 2nd LH Brigade, whose camp site overlooked the village, and reported to NZMR Brigade Headquarters. The Auckland and Wellington regiments were both ordered to send a squadron, and the Machine Gun Squadron to send a troop, ‘to preserve order in the village.’ They found Australian MPs and the Richon le Zion picquet already there. Lieutenant Lord gave evidence that, when he arrived at the village soon after 8.45 p.m., he encountered ‘a large body of troops coming away from the village. There was no rifle shooting at that time and I saw Bedouin women, children and old men sitting together near a hedge. They were quiet and nobody was interfering with them.’ Lord did not enter the village, as it was ‘burning furiously’, and, as there were no more troops in the vicinity, he returned to camp. The other New Zealanders cordoned the village and patrolled the perimeter, but no attempt was made to put out the fire. They withdrew at 10 p.m., ‘all being quiet.’ The old men, women and children moved back into the ruins of their homes and began to mourn their dead.

The next morning, GHQ at last took action – but against the raiders, not the Arabs who had allegedly harboured Lowry’s killer. Each brigade in the Anzac Mounted Division immediately convened a Court of Inquiry, but the men closed ranks and professed ignorance of the whole thing. No offenders could be identified by Arab survivors or by anyone else.

Chaytor was furious, although his anger must have been tempered by the knowledge that, had his pleas for action during the daylight hours before the raid been answered, the attack would not have happened. With no offenders to blame, Chaytor turned his anger on the officers of the New Zealand brigade. It was clear to Chaytor that the regimental officers had failed in their duty for not stopping the attack once it had begun. ‘The singular inaction of almost all officers can only be due to a very grave lack of knowledge of their duties and responsibilities, or to a deliberate neglect of their duty.’ Strangely, the only punishment that he imposed was to ban leave for all officers. No one was ever court-martialled for Surafend.

Many of the accounts written after Surafend blame others for the attack. Harry Porter, a New Zealand veteran, stated that the Australians attacked Surafend. Only a few New Zealanders – ‘the harder cases, say half a dozen’ – took part. Gullett lays the blame squarely on the New Zealanders, who he says were the ‘chief actors’, supported by the Australians. The Report of the Court of Inquiry conducted in the 2nd LH Brigade amounts to little more than a denial of any involvement by the men of that brigade. One New Zealander thought that the ‘skilled organising suggested that some of the old hands were involved. But I know in my mind that the tried veterans who had battled so far for so long, would not have gone to this length. The killing was the work of some unblooded gang that had never been under fire. I feel as certain of this as if I’d seen the whole affair.’ The British Army rebuilt the village, and, in 1922, the governments of New Zealand and Australia reimbursed the British Army the sums of £858.11.5 and £515.2.9 respectively.


Further Reading:

Surafend

Battles where Australians fought, 1899-1920


Citation: Surafend, the massacre, Palestine, 10 December 1918, Kinlock Account 

Posted by Project Leader at 12:01 AM EADT
Updated: Monday, 3 August 2009 8:16 PM EADT

View Latest Entries

Full Site Index


powered by FreeFind
Let us hear your story: You can tell your story, make a comment or ask for help on our forum.

Desert Column Forum

A note on copyright

The Australian Light Horse Studies Centre is a not for profit and non profit group whose sole aim is to write the early history of the Australian Light Horse from 1900 - 1920. It is privately funded and the information is provided by the individuals within the group and while permission for the use of the material has been given for this site for these items by various donors, the residual and actual copyright for these items, should there be any, resides exclusively with the donors. The information on this site is freely available for private research use only and if used as such, should be appropriately acknowledged. To assist in this process, each item has a citation attached at the bottom for referencing purposes.

Please Note: No express or implied permission is given for commercial use of the information contained within this site.

A note to copyright holders

The Australian Light Horse Studies Centre has made every endeavour to contact copyright holders of material digitised for this blog and website and where appropriate, permission is still being sought for these items. Where replies were not received, or where the copyright owner has not been able to be traced, or where the permission is still being sought, the Australian Light Horse Studies Centre has decided, in good faith, to proceed with digitisation and publication. Australian Light Horse Studies Centre would be happy to hear from copyright owners at any time to discuss usage of this item.

Contact

Australian Light Horse Studies Centre

eXTReMe Tracker