


Topic: AIF - DMC - Anzac MD
Bir el Abd
Sinai, 9 August 1916
General Staff HQ, Anzac MD, AIF, War Diary Account
War Diary account of the General Staff Headquarters, Anzac Mounted Division, AIF.
The transcription:
9 August
0218
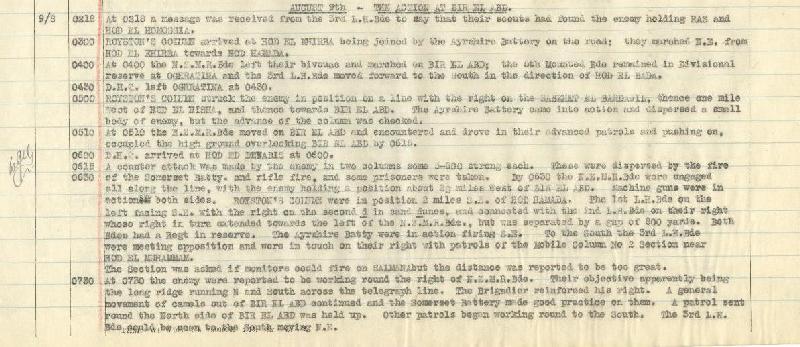
At 0218 a message was received from the 3rd Light Horse Brigade to say that their scouts had found the enemy holding Ras and Hod el Homossia.
0300
Royston’s Column arrived at Hod el Khirba being joined by the Ayrshire Battery on the road; they marched north east form Hod el Khirba towards Hod Hamada.
0400
At 0400 the New Zealand Mounted Rifles Brigade left their bivouac and marched on Bir el Abd; the 5th Mounted Brigade remained in Divisional Reserve at Oghratina and the 3rd Light Horse Brigade moved forward to the south in the direction of Ho el Bada.
0430
Divisional Headquarters left Oghratina at 0430.
0500
Royston’s Column struck the enemy in position on a line with the right on the Sabkhet el Bardawil, thence one mile west of Hod el Hisha, and thence towards Bir el Abd. The Ayrshire Battery came into action and dispersed a small body of enemy, but the advance of the column was checked.
0510
At 0510 the New Zealand Mounted Rifles Brigade moved on Bir el Abd and encountered and drove in their advanced patrols and pushing on, occupied the high ground overlooking Bir el Abd by 0615.
0600
Division Headquarters arrived at Hod ed Debabis at 0600.
0615 - 0630
A counter attack was made by the enemy in two columns some 5-600 strong each. These were dispersed by the fire of the Somerset Battery and rifle fire, and some prisoners were taken. By 0630 the New Zealand Mounted Rifles Brigade were engaged all along the line, with the enemy holding a position 2 miles south east of Hod Hamada. The 1st Light Horse Brigade on the left facing south east with the right on the second “d” in “sand dunes” and connected with the 2nd Light Horse Brigade on their right whose right in turn extended towards the left of the New Zealand Mounted Rifles Brigade, but was separated by a gap of 800 yards. Both Brigades had a Regiment in reserve. The Ayrshire Battery were in action firing south east. To the south the 3rd Light Horse Brigade were meeting opposition and were in touch on their right with patrols of the Mobile Column No. 2 Section near Hod el Muhammam.
0730
At 0730 the enemy were reported to be working round the right of the New Zealand Mounted Rifles Brigade. Their objective apparently being the long ridge running north and south across the telegraph line. The Brigadier reinforced his right. A general movement of camels out of Bir el Abd continued and the Somerset Battery made good practice on them. A patrol sent round the north side of Bir el Abd was held up. Other patrols began working round to the south. The 3rd Light Horse Brigade could be seen to the south moving north east.
0825
At 0825 the Leicester Battery and the remaining gun of the Somerset Battery were ordered forward to the New Zealand Mounted Rifles Brigade Headquarters.
0830
At 0830 the 3rd Light Horse Brigade were ordered to get close touch with the New Zealand Mounted Rifles Brigade and make Bir el Abd their objective instead of Salmana.
0850
By 0850 it seemed probable that the New Zealand Mounted Rifles Brigade would get into Bir el Abd as they were able to advance and were immediately west of it and the enemy seemed to be retreating. They were ordered to report directly they occupied the high ground immediately east of the place.
0855
Meantime the 3rd Light Horse Brigade had reached a point slightly west of Likbirdeh, where they were strongly opposed. The 8th and 9th Light Horse Regiments were attacking, supported by the fire of the Inverness Battery. They reported a redoubt in their immediate front. Colonel Royston on the left also reported strong enemy opposition and that several guns were in action against him.
1035
By 1035 the enemy’s guns ere showing great activity. As the artillery were unable to locate them a request was made for an aeroplane to try and locate them by dropping smoke balls. The request was granted.
1130
At 1130 the New Zealand Mounted Rifles Brigade asked for reinforcements and the Warwickshire Yeomanry were sent up. They were put in between, Royston’s Column and New Zealand Mounted Rifles Brigade left.
1140
By 1140 our advance had been completely checked. Our line was in a semicircle facing south east, east and north east, and from 2 to 3 miles distant from Bir el Abd. The enemy had brought a large number of guns into action. Parties could be seen removing stores, and these were shelled by our batteries.
1147
From 1147 onwards the enemy made several counter attacks against the Canterbury Mounted Rifles, which was in advance on the left of the New Zealand Mounted Rifles Brigade. At mid day he opened high explosive shells from one of his heavy pieces on the wagon teams of the Ayrshire Battery. 4 men and 37 horses were killed and 7 men and 7 horses wounded before they could get to other positions.
1257
At 1257 the enemy were made out moving north east in large bodies; the dump of stores were seen on fire and lit up by the enemy.
1255
At 1255 very heavy shell fire both high explosive and shrapnel was opened on Royston’s Column. Casualties took place particularly among the led horses and the enemy began to advance on the centre of his line.
1258
At 1258 the enemy made a determined counter attack on the centre of the New Zealand Mounted Rifles Brigade. Heavy firing was going on all along the line. Our guns were turned on the enemy columns and the counter attack broke, the enemy retreating hurriedly. The enemy’s heavy guns were firing on our line the whole time.
1310
At 1310 Colonel Royston reported that he had joined with the New Zealand Mounted Rifles Brigade and was moving forward south east. He was being heavily shelled. The enemy begun to press his left.
1330
At 1330 the enemy delivered an attack on the New Zealand Mounted Rifles Brigade left with 5 Battalions. The gap which had existed here had been filled by the Warwick Yeomanry which met the attack, the Leicester Battery being also turned on to it and the pressure was relieved. One Squadron Composite Regiment was sent to report to the New Zealand Mounted Rifles Brigade.
1350
At 1350 the 3rd Light Horse Brigade reported that all troops except the reserve were in the firing line. A slight advance had been made on the right; but this had been opposed by rifle and machine gun fire. The enemy were very strong along the whole line, and the pressure obliged the Brigadier to draw back to the right a little. He reported that he did not think he could shift the enemy from where he was.
1400
Royston’s right was now forced back and at 1400 a determined counter attack on his column began, supported by heavy artillery fire. The Ayrshire Battery was ordered back, but owing to casualties in horses could not move.
1405
All reserves were called up and put in the fight so that the guns could be withdrawn. The 3rd Light Horse Brigade received orders from Division Headquarters to hold on where they were unless otherwise ordered.
1427
By 1427 the left flank of Royston’s Column began a gradual retreat. At the same time the enemy pressure forced back the 3rd Light Horse Brigade for nearly a mile, and the enemy concentrated about Umm Dirk making apparently for the ridge which runs from the “H” of Hod umm Zaghliya to Hod ed Darabis.
1448
The attacks on Royston’s left were also pushed on and he reported at 1448 that he was just holding on but would have to probably retire. All men were now in the firing line.
1650
By 1650 his left was forced right back, the enemy to the number of 2-3,000 strong were pressing on the centre, and about 1,000 strong against his left. The shell fire all along the line was very heavy, and the whole line was gradually going back. He succeeded however in getting all the wounded away.
1700
At 1700 a counter attack was made on the 3rd Light Horse Brigade but was repulsed by the 8th Light Horse Regiment. By forcing back of both forces on their flanks the New Zealand Mounted Rifles Brigade became very exposed.
1750
Preparations were made to withdraw, the Leicester Battery being sent to a position 1,000 yards in rear. Orders were then sent to the Regiments in front to begin a gradual withdrawal.
1850
At 1850 as the withdrawal was taking place the enemy delivered an attack on a front of about 2½ miles. The rifle and machine gun fire was intense and continued up till dark; but the enemy was held off and the withdrawal was completed. During the day the Leicester and Somerset Batteries fired 1,000 rounds between them, and the Inverness 455.
Orders for bivouac had already been issued. New Zealand Mounted Rifles Brigade was to bivouac at Hod ed Dababis, one Brigade of Royston’s Column at Bir Abu el Afein, 3rd Light Horse Brigade at Hod Abu Dhahab, and the remaining Brigade of Royston’s Column, 5th Mounted Brigade less 1 Regiment, and Division Headquarters at Oghratina.
In view however of the large number of fresh enemy troops which had appeared, the General Officer Commanding Division after a consultation with Brigadier General Chaytor decided it was inadvisable to bivouac at either Hod ed Debabis or Bir Abu el Afein and after rations had been distributed and horses watered orders were issued for the whole of the Anzac Mounted Division, less 3rd Light Horse Brigade, to be concentrated at Oghratina for the night, having an outpost line covering the north east, east and south east sides of the camp. The 3rd Light Horse Brigade to bivouac at Hod Abu Dhahab, also with an outpost line. Officers patrols kept a watch on the enemy during the night.
Arrangements for next day were:-
New Zealand Mounted Rifles Brigade to move to Hod ed Dababis at 0650, send out reconnoitring parties, water and await orders.
2nd Light Horse Brigade to move to Hod el Khirba at 0650, send out reconnoitring parties, water, and await orders.
The other Brigades to water at Oghratina wells;
wells at Hod Minshla should be left to the Field Ambulances.
Royston’s Column to cease from now on, and the 1st and 2nd Light Horse Brigades to come under their own Brigadiers.
2330
All moves to Oghratina were made and outpost line posted by 2330.
Further Reading:
Bir el Abd, Sinai, 9 August 1916, Roll of Honour
Battle of Romani, Sinai, August 4 to 5, 1916
Bir el Abd, Sinai, 9 August 1916
Battles where Australians fought, 1899-1920
Citation: Bir el Abd, Sinai, 9 August 1916, General Staff Headquarters, Anzac Mounted Division, AIF, War Diary Account
Posted by Project Leader
at 12:01 AM EADT
Updated: Monday, 21 September 2009 11:41 PM EADT
