


Topic: AIF - DMC - British
Battle of Romani
Sinai, August 4 to 5, 1916
157th Infantry Brigade War Diary Account
The transcription:
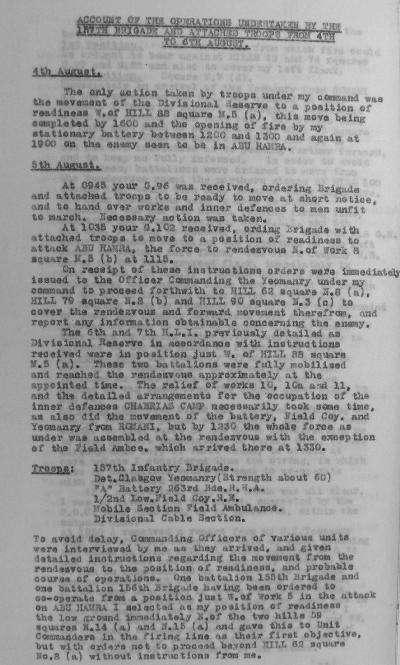
4th August
The only action taken by troops under my command was the movement of the Divisional reserve to a position of readiness west of Hill 88 square M.5(a), this move being completed by 1600 and the opening of fire by my stationary battery between 1200 and 1300 and again at 1900 on the enemy soon to be in Abu Hamra.
5th August.
At 0945 your G.96 was received, ordering Brigade and attached troops to be ready to move at short notice, and to hand over works and inner defences to men unfit to march. Necessary action was taken.
At 1035 your G.103 received, ordering Brigade with attached troops to move to a position of readiness to attack Abu Hamra, the force to rendezvous north of Work 8 square M.5 (b) at 1115.
On receipt of these Instructions orders were immediately issued to the Officer Commanding the Yeomanry under my command to proceed forthwith to Hill 62 square N.8(a), Hill 79 square N.8(b) and Hill 90 square N.3 (c) to cover the rendezvous and forward movement there from, and report any information obtainable concerning the enemy.
The 6th and 7th Highland Light Infantry previously detailed as Divisional Reserve in accordance with instructions received were in position just west of Hill 88 square M.5(a). These two battalions were fully mobilised and reached the rendezvous approximately at the appointed time. The relief of works 10, 10a and 11, and the detailed arrangements for the occupation of the inner defences Chabrias Camp necessarily took some time as also did the movement of the battery, Field Company and Yeomanry from Romani, but by 1230 the whole force as
under was assembled at the rendezvous with the exception of the Field Ambulance which arrived there at 1330.
Troops:
157th Infantry Brigade.
Detachment Glasgow Yeomanry (Strength about 60)
"A" Battery 263rd Brigade, Royal Horse Artillery
1/2nd Lowlands Field Company, Royal Engineers
Mobile Section Field Ambulance
Divisional Cable Section
To avoid delay, Commanding Officers of various units were interviewed by me as they arrived, and given detailed instructions regarding the movement from the rendezvous to the position of readiness, and probable course of operations. One battalion 155th Infantry Brigade and one battalion 156th Infantry Brigade having been ordered to co-operate from a position just west of Work 5 in the attack on Abu Hamra I selected as my position of readiness the low ground immediately north of the two hills 59 squares N.14 (a) and N.15 (a) and gave this to Unit Commanders in the firing line as their first objective, but with orders not to proceed beyond Hill 62 square No.8 (a) without instructions from me.
Two alternative positions were selected for the battery:
1st Position - Near Work 7.a. from which fire could be brought to bear against Hills 72 and 74 squares N.27 and N.22 and also to cover my left flank,
2nd Position - Square N.7(d).
Immediately on arrival of the Yeomanry from Romani at the rendezvous the Officer Commanding was ordered to send forward 1 Troop to support my original detachment which had already been sent out. His orders were to make good Hill 69 square N.9(b) Hill 72 square N.10(a) and Hill 46 square N.15 (a and b), to use his own initiative as to pushing further forward, and to keep me fully informed. In order to avoid being seen, battalions were ordered to move from the rendezvous round the northern slopes of Hill 100 whence they would turn south east towards their objectives. All four battalions were to move in attack formation 6th raid 7th Highland Light Infantry forming firing line, supports and local reserves, 1/5th Highland Light Infantry and 1/5th Argyll and Sutherland Highlanders forming my general reserve. The 1/5th Argyll and Sutherland Highlanders as my strongest battalion was echeloned on the left flank to protect this flank. The Field Company, Royal Engineers, moved on the less exposed flank, immediately in rear of the 1/5th Highland Light Infantry. Mobile Section Field Ambulance, and baggage train were ordered to remain in the first instance under cover of Hill 100.
Hearing from my Yeomanry that Hill 90 was occupied by them, the leading battalions were ordered to proceed at once to Hill 62 square N.8(a) where they were to remain under cover pending orders to advance to the two Hills 59 referred to above.
At about 1500 the Yeomanry Officer who had been ordered to report to me in person came in and informed so that rifle and Machine Gun fire had been opened by the enemy from the ridges about Hills 72 and 74.
At about 1520 your G.108 was received informing me that a Yeomanry patrol and armoured train hard been unable to find Turks in Abu Hamra and directing me to send patrols immediately to verify this. (I had already done so), it Turks found, to attack at once unless I considered them too strong, in which case 2½ battalions would be sent to co-operate with me from Work 5.
If I ascertained that Abu Hamra was all clear, I was to bivouac for the night, suggested by the General Officer Commanding near Hill 100, or if preferred, within the outpost line.
At 1530, I received a report from my Officer Commanding Yeomanry that his Officers Patrol was held up while crossing Abu Hamra at point Kilo 46, enemy holding Hill 74 and ridges east and west, apparently about 40 or 50 men on ridges and 60 or 70 were seen in small groups behind Hill 74. Patrol forced to retire. A few enemy also seen its trees at Bir abu Hamra. Having fully satisfied myself that the enemy was in some strength on the ridges south east of Abu Hamra, I ordered my battery to open fire on Hills 72 and 74, my Yeomanry to again press forward under cover of this fire, and my leading battalions to search to the two hills 59 preparatory to the attack.
It was now clear to me that to fulfil my original object namely the attack on Abu Hamra, I must, instead of attacking that place attack Hills 42 and 74, and the ridge between them, the capture of which would automatically mean the capture of Abu Hamra, whereas the capture at Abu Hamra would merely have placed me under the command of the enemy on the above Hills and ridges. I at once called up the General Officer Commanding Division on the telephone, informed him of the situation, telling him I was preparing to attack Hills 72 sad 74 but that if I did so, I must bivouac there for the night and not where suggested by him. At approximately the same time I received reports regarding our own cavalry moving in the direct urn of KATIA and being shelled by the enemy.
Shortly after this I received a report that our cavalry were being driven back. At this time I personally observed the enemy shelling Abu Hamra and the country to the south east of Hills 72 and 74 they were lengthening their range, which tended to prove the report just previously received that our cavalry were being driven back. This shelling, without being excessive was fairly severe. It was very difficult to ascertain what really was happening as I could obtain no connection with the 5th Mounted Brigade or Anzacs. I was then informed on the telephone that our own mounted troops complained that they wore being shelled by our own guns. I replied that they were not being shelled by me, and that enemy were undoubtedly on Hills 72 and 74 and I asked the General Officer Commanding if he could give me any information as to what was happening to our own cavalry. He instructed me to wait a few minutes before launching the attack, while he communicated with No.3 Section.
At 1710 I received a message cancelling move of 1½ battalions 156th Infantry Brigade and 7th Royal Scots to position of readiness just west of work 5 (9 111) to co-operate with me. Ten minutes later I received a message that above 2½ battalions would move at 1800 to a position of readiness west of Work 5 (9 114).
At about 1700, I received in confirmation of telephone conversation GB 302 instructing me to advance to the attack and to endeavour to get in touch with the 5th Mounted Brigade. I immediately advanced to the attack and during the advance received a message from my Yeomanry saying that the enemy had apparently evacuated Hills 72 and 74, and that they had been seen retiring from these Hills.
I may mention here that the shooting of my battery on Hills 72 and 74 was very good indeed, and this I think undoubtedly accounted for the retirement of the Turks.
The advance was continued towards the ridges south east of Abu Hamra. By this time it was dark, and night formation was adopted. The ridges about Hills 72 and 74 were occupied without opposition, and an outpost line was taken up with three battalions on these ridges, and one battalion north of the railway protecting my left flank, and the men set to work to dig themselves in.
6 August
Having satisfied myself regarding the outposts, I established my Brigade Headquarters at 0200 between Kilo 46 and Kilo 47 and the moment communication was complete reported the situation to the General Officer Commanding delay is obtaining communication was caused by shortage of cable.
At 0330 I received a message G.127 ordering me to move with troops attached at 0415 and occupy the line from ruins of Katia exclusive to Er Rabah. About the same time a warning message handed in at Division Headquarters 2535 was received by my signal office warning me to be ready to move at 0400. Previous to receipt of this, I had sent a message to my battery to proceed to their second position or to a more favourable position as agreed between me and Officer Commanding Battery. (To be in position by 0430). The Officer Commanding Battery reported to me that this order was perfectly clear and definite, but I believe he received contrary instructions from some other source.
Immediately on receipt of G.127 I ordered the Yeomanry to proceed at once in the direction of the advance, and I rode to battalions with my Brigade Major and ordered them to get ready to move immediately. With the very short notice given, it was quite impossible to get them off to time, and as it was they had to start without any tea or breakfast.
The advance on the new objective was carried out with two battalions in the front line, and two in reserve as before, and the objective was reached without opposition, and a line of local protection taken up in accordance with instructions received from Divisional Headquarters. The Brigade remained on outpost duty until relieved by the 155th Brigade about 2000.
Roll of Honour
N MATHESON, 1st/6th Battalion, Highland Light Infantry, Killed in Action 4 August 1916.
Lest We Forget
Further Reading:
Battle of Romani, Sinai, August 4 to 5, 1916, Roll of Honour, British Forces
Battle of Romani, Sinai, August 4 to 5, 1916
Bir el Abd, Sinai, 9 August 1916
Battles where Australians fought, 1899-1920
Citation: Battle of Romani, Sinai, August 4 to 5, 157th Infantry Brigade War Diary Account
