« January 2008 »
S M T W T F S
1 2 3 4 5
6 7 8 9 10 11 12
13 14 15 16 17 18 19
20 21 22 23 24 25 26
27 28 29 30 31
You are not logged in. Log in


Search the site:


powered by FreeFind
Volunteer with us.

Entries by Topic All topics  
A Latest Site News
A - Using the Site
AAA Volunteers
AAB-Education Centre
AAC-Film Clips
AAC-Photo Albums
AIF & MEF & EEF
AIF - Lighthorse
AIF - ALH - A to Z
AIF - DMC
AIF - DMC - Or Bat
AIF - DMC - Anzac MD
AIF - DMC - Aus MD
AIF - DMC - British
AIF - DMC - BWI
AIF - DMC - French
AIF - DMC - Indian
AIF - DMC - Italian
AIF - DMC - Medical
AIF - DMC - Remounts
AIF - DMC - Scouts
AIF - DMC - Sigs
AIF - DMC - Sigs AirlnS
AIF - DMC - 1 Sig Sqn
AIF - DMC - 2 Sig Sqn
AIF - DMC - Eng
AIF - DMC - Eng 1FSE
AIF - DMC - Eng 2FSE
AIF - DMC - GSR
AIF - 1B - 1 LHB
AIF - 1B - 6 MVS
AIF - 1B - 1 LHMGS
AIF - 1B - 1 Sig Trp
AIF - 1B - 1 LHFA
AIF - 1B - 1 LHR
AIF - 1B - 2 LHR
AIF - 1B - 3 LHR
AIF - 2B - 2 LHB
AIF - 2B - 7 MVS
AIF - 2B - 2 LHFA
AIF - 2B - 2 LHMGS
AIF - 2B - 2 Sig Trp
AIF - 2B - 5 LHR
AIF - 2B - 6 LHR
AIF - 2B - 7 LHR
AIF - 3B - 3 LHB
AIF - 3B - 8 MVS
AIF - 3B - 3 LHB Sigs
AIF - 3B - 3 LHFA
AIF - 3B - 3 LHMGS
AIF - 3B - 3 Sig Trp
AIF - 3B - 8 LHR
AIF - 3B - 9 LHR
AIF - 3B - 10 LHR
AIF - 4B - 4 LHB
AIF - 4B - 4 Sig Trp
AIF - 4B - 9 MVS
AIF - 4B - 4 LHFA
AIF - 4B - 4 LHMGS
AIF - 4B - 4 LHR
AIF - 4B - 11 LHR
AIF - 4B - 12 LHR
AIF - 5B - 5 LHB
AIF - 5B - 10 MVS
AIF - 5B - 5 LHFA
AIF - 5B - 5 Sig Trp
AIF - 5B - ICC
AIF - 5B - 14 LHR
AIF - 5B - 15 LHR
AIF - 5B - 1er Regt
AIF - 5B - 2 NZMGS
AIF - AASC
AIF - Aboriginal LH
AIF - Badges
AIF - Cars
AIF - Chinese LH
AIF - Double Sqns
AIF - Engineers
AIF - Fr - 22 Corps
AIF - Fr - 13 LHR
AIF - Honour Roll
AIF - HQ - 3rd Echelon
AIF - Marching Songs
AIF - Misc Topics
AIF - NZMRB
AIF - NZMRB - AMR
AIF - NZMRB - CMR
AIF - NZMRB - EFT
AIF - NZMRB - NZMFA
AIF - NZMRB - NZMGS
AIF - NZMRB - OMR
AIF - NZMRB - Sig-Trp
AIF - NZMRB - WMR
AIF - Ships
AIF - Ships - Encountr
AIF - Ships - Una
AIF - WFF
AIF - Wireless Sqn
Battles
BatzA - Australia
BatzA - Broken Hill
BatzA - Liverpool
BatzA - Merivale
BatzB - Boer War
BatzB - Bakenlaagte
BatzB - Belmont
BatzB - Bothaville
BatzB - Buffels Hoek
BatzB - Coetzees Drift
BatzB - Diamond Hill
BatzB - Driefontein
BatzB - Elands
BatzB - Graspan
BatzB - Grobelaar
BatzB - Grootvallier
BatzB - Hartebestfontn
BatzB - Houtnek
BatzB - Karee Siding
BatzB - Kimberley
BatzB - Koster River
BatzB - Leeuw Kop
BatzB - Mafeking
BatzB - Magersfontein
BatzB - Modder River
BatzB - Onverwacht
BatzB - Paardeberg
BatzB - Palmietfontein
BatzB - Pink Hill
BatzB - Poplar Grove
BatzB - Rhenoster
BatzB - Sannahs Post
BatzB - Slingersfontn
BatzB - Stinkhoutbm
BatzB - Sunnyside
BatzB - Wilmansrust
BatzB - Wolvekuil
BatzB - Zand River
BatzG - Gallipoli
BatzG - Anzac
BatzG - Aug 1915
BatzG - Baby 700
BatzG - Evacuation
BatzG - Hill 60
BatzG - Hill 971
BatzG - Krithia
BatzG - Lone Pine
BatzG - Nek
BatzJ - Jordan Valley
BatzJ - 1st Amman
BatzJ - 2nd Amman
BatzJ - Abu Tellul
BatzJ - Es Salt
BatzJ - JV Maps
BatzJ - Ziza
BatzM - Mespot
BatzM - Baghdad
BatzM - Ctesiphon
BatzM - Daur
BatzM - Kurna
BatzM - Kut el Amara
BatzM - Ramadi
BatzN - Naval
BatzN - AE1
BatzN - Cocos Is
BatzN - Heligoland
BatzN - Marmara
BatzN - Zeebrugge
BatzN - Zeppelin L43
BatzNG - Bitapaka
BatzO - Other
BatzO - Baku
BatzO - Egypt 1919
BatzO - Emptsa
BatzO - Karawaran
BatzO - Peitang
BatzO - Wassa
BatzP - Palestine
BatzP - 1st Gaza
BatzP - 2nd Gaza
BatzP - 3rd Gaza
BatzP - Aleppo
BatzP - Amwas
BatzP - Ayun Kara
BatzP - Bald Hill
BatzP - Balin
BatzP - Beersheba
BatzP - Berkusieh
BatzP - Damascus
BatzP - El Auja
BatzP - El Buggar
BatzP - El Burj
BatzP - Haifa
BatzP - Huj
BatzP - JB Yakub
BatzP - Kaukab
BatzP - Khan Kusseir
BatzP - Khuweilfe
BatzP - Kuneitra
BatzP - Megiddo
BatzP - Nablus
BatzP - Rafa
BatzP - Sasa
BatzP - Semakh
BatzP - Sheria
BatzP - Surafend
BatzP - Wadi Fara
BatzS - Sinai
BatzS - Bir el Abd
BatzS - El Arish
BatzS - El Mazar
BatzS - El Qatiya
BatzS - Jifjafa
BatzS - Magdhaba
BatzS - Maghara
BatzS - Romani
BatzS - Suez 1915
BatzSe - Senussi
BatzWF - Westn Front
BW - Boer War
BW - NSW
BW - NSW - 1ACH
BW - NSW - 1NSWMR
BW - NSW - 2NSWMR
BW - NSW - 3ACH
BW - NSW - 3NSWIB
BW - NSW - 3NSWMR
BW - NSW - 5ACH
BW - NSW - A Bty RAA
BW - NSW - AAMC
BW - NSW - Aust H
BW - NSW - Lancers
BW - NSW - NSW Inf
BW - NSW - NSWCBC
BW - NSW - NSWIB
BW - NSW - NSWMR_A
BW - NZ
BW - Qld
BW - Qld - 1ACH
BW - Qld - 1QMI
BW - Qld - 2QMI
BW - Qld - 3ACH
BW - Qld - 3QMI
BW - Qld - 4QIB
BW - Qld - 5QIB
BW - Qld - 6QIB
BW - Qld - 7ACH
BW - QLD - AAMC
BW - SA
BW - SA - 1SAMR
BW - SA - 2ACH
BW - SA - 2SAMR
BW - SA - 3SACB
BW - SA - 4ACH
BW - SA - 4SAIB
BW - SA - 5SAIB
BW - SA - 6SAIB
BW - SA - 8ACH
BW - SA - AAMC
BW - Tas
BW - Tas - 1ACH
BW - Tas - 1TIB
BW - Tas - 1TMI
BW - Tas - 2TB
BW - Tas - 2TIB
BW - Tas - 3ACH
BW - Tas - 8ACH
BW - Vic
BW - Vic - 1VMI
BW - Vic - 2ACH
BW - Vic - 2VMR
BW - Vic - 3VB
BW - Vic - 4ACH
BW - Vic - 4VIB
BW - Vic - 5VMR
BW - Vic - 6ACH
BW - Vic - AAMC
BW - Vic - Scot H
BW - WA
BW - WA - 1WAMI
BW - WA - 2ACH
BW - WA - 2WAMI
BW - WA - 3WAB
BW - WA - 4ACH
BW - WA - 4WAMI
BW - WA - 5WAMI
BW - WA - 6WAMI
BW - WA - 8ACH
BW Gen - Campaign
BW Gen - Soldiers
BW General
Cavalry - General
Diary - Schramm
Egypt - Heliopolis
Egypt - Mena
Gen - Ataturk Pk, CNB
Gen - Australia
Gen - Legends
Gen - Query Club
Gen - St - NSW
Gen - St - Qld
Gen - St - SA
Gen - St - Tas
Gen - St - Vic
Gen - St - WA
Gm - German Items
Gm - Bk - 605 MGC
GW - 11 Nov 1918
GW - Atrocities
GW - August 1914
GW - Biographies
GW - Propaganda
GW - Spies
GW - We forgot
Militia 1899-1920
Militia - Area Officers
Militia - Inf - Infantry
Militia - Inf - 1IB
Militia - Inf - 2IB
Militia - Inf - 3IB
Militia - Inf - NSW
Militia - Inf - Qld
Militia - Inf - SA
Militia - Inf - Tas
Militia - Inf - Vic
Militia - Inf - WA
Militia - K.E.Horse
Militia - LH
Militia - LH - Regts
Militia - LH - 1LHB
Militia - LH - 2LHB
Militia - LH - 3LHB
Militia - LH - 4LHB
Militia - LH - 5LHB
Militia - LH - 6LHB
Militia - LHN - NSW
Militia - LHN - 1/7/1
Militia - LHN - 2/9/6
Militia - LHN - 3/11/7
Militia - LHN - 4/6/16
Militia - LHN - 5/4/15
Militia - LHN - 6/5/12
Militia - LHN - 28
Militia - LHQ - Qld
Militia - LHQ - 13/2
Militia - LHQ - 14/3/11
Militia - LHQ - 15/1/5
Militia - LHQ - 27/14
Militia - LHS - SA
Militia - LHS - 16/22/3
Militia - LHS - 17/23/18
Militia - LHS - 24/9
Militia - LHT - Tas
Militia - LHT - 12/26
Militia - LHV - Vic
Militia - LHV - 7/15/20
Militia - LHV - 8/16/8
Militia - LHV - 9/19
Militia - LHV - 10/13
Militia - LHV - 11/20/4
Militia - LHV - 19/17
Militia - LHV - 29
Militia - LHW - WA
Militia - LHW-18/25/10
Militia - Military Orders
Militia - Misc
MilitiaRC - Rifle Clubs
MilitiaRC - NSW
MilitiaRC - NT
MilitiaRC - Qld
MilitiaRC - SA
MilitiaRC - Tas
MilitiaRC - Vic
MilitiaRC - WA
Militiaz - New Zealand
Tk - Turkish Items
Tk - Army
Tk - Bks - Books
Tk - Bks - 1/33IR
Tk - Bks - 27th IR
Tk - Bks - Air Force
Tk - Bks - Yildirim
Tk - POWs
Wp - Weapons
Wp - Hotchkiss Cav
Wp - Hotchkiss PMG
Blog Tools
Edit your Blog
Build a Blog
RSS Feed
View Profile
Open Community
Post to this Blog
Site Index
Education Centre
LH Militia
Boer War
Transport Ships
LH Battles
ALH - Units
ALH - General
Aboriginal Light H
Weapons
Ottoman Sources

"At a mile distant their thousand hooves were stuttering thunder, coming at a rate that frightened a man - they were an awe inspiring sight, galloping through the red haze - knee to knee and horse to horse - the dying sun glinting on bayonet points..." Trooper Ion Idriess

The Australian Light Horse Studies Centre aims to present an accurate history as chroniclers of early Australian military developments from 1899 to 1920.

The Australian Light Horse Studies Centre site holds over 12,000 entries and is growing daily.

Contact: Australian Light Horse Studies Centre

Let us hear your story: You can tell your story, make a comment or ask for help on our Australian Light Horse Studies Centre Forum called:

Desert Column Forum

WARNING: This site contains: names, information and images of deceased people; and, language which may be considered inappropriate today.

Wednesday, 9 January 2008
The Battle of Rafa, Sinai, 9 January 1917, Blackwell, 3rd LHR, Unit History, Account
Topic: AIF - 1B - 3 LHR

The Battle of Rafa

Sinai, 9 January 1917

Blackwell, 3rd LHR, AIF, Unit History, Account


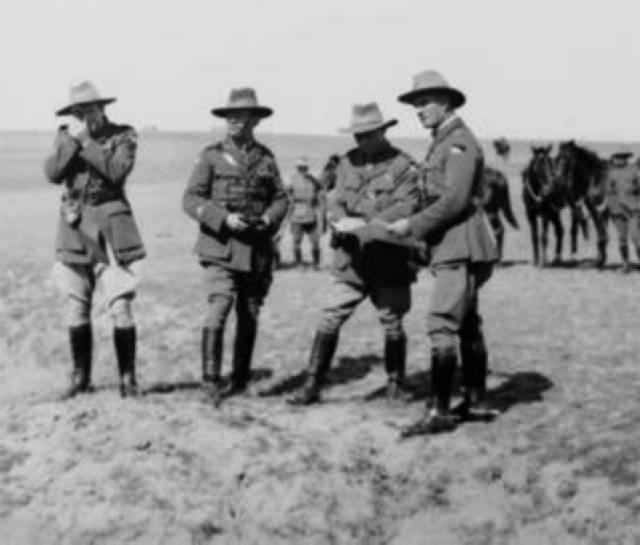
3rd LHR Officers inspecting the site at Rafa, February 1919


In 1950, F. M. Blackwell and D. R. Douglas, published a history of the 3rd Light Horse Regiment, AIF during the Great War called: The Story of the 3rd Australian Light Horse Regiment. The book included a chapter on the work performed by the 3rd Light Horse Regiment, AIF during the Battle of Rafa, Sinai, 9 January 1917 which are extracted below.


Blackwell, FM. & Douglas D. R., The Story of the 3rd Australian Light Horse Regiment, (Adelaide 1950), Rafa 1917, pp. 80 - 82:


On the morning of January 8th the Regiment received instructions to proceed with the Division to Rafa, and marched at 1700 with the Division. Major L.A. Lewis was temporarily detached from his Squadron to act as guide to the 5th Mounted Brigade. The Regiment arrived at Sheikh Zowaid at 2100, where the horses were fed, and about 0100 moved off en route for Ibn Musleh, which they reached at 0500, and here the men had breakfast and the horses were again fed. At 1030 the Regiment received orders to advance to the attack on the left of the 1st Regiment, and support them in the assault on the enemy's trenches.

Prior to making this attack a personal reconnaissance was made by all Officers at 1100, and the Regiment then formed up in Squadron lines of troop column in the following order: A Squadron under Major Lewis on the left, B Squadron under Major Brooks in centre, and C Squadron under Major Mills on the right. The Regiment moved in this formation at a smart trot to within 2000 yards of the enemy's entrenched position, where they dismounted behind a low bank, and formed up in lines of 1/2 Squadron column, with a distance of 120 yards between the lines. The horses were sent back and concentrated in a position offering cover from shell fire, but came under enemy aircraft, who attacked them with bombs and machine gun fire, but caused practically no causalities. The squadron leaders were then called up, each allotted a section, and the objective was explained.

An advance was then made to a low ridge within 860 yards of the enemy trenches, down a gradual slope, with no cover, in full view of the enemy, and early in the advance the enemy opened up with rifle and machine gun fire, but though the fire was heavy it was scattered and the range faulty. No check was made, and few casualties resulted.

On reaching the position the 2nd line immediately joined the first, and the machine guns and Lewis guns, which had been covering the advance, came up. The enemy's fire was very heavy, and it was some time before superiority of fire on our part was gained. Telephone communication by wire was immediately established along the whole line, enabling each Squadron to get touch with Regimental Headquarters throughout the whole action. Perfect communication was also established between Regimental Headquarters and the Brigade. Only three breakages of the wire from HE occurred during the action, during which time a hello was used until the wire was run and mended, which was done so expeditiously that in every case the reply message to the hello came by wire. The Squadron connections were interfered with more frequently, but were soon repaired. One signaller during these operations was killed and two wounded. This was the first time telephone connection had been used in the open battlefield and it proved entirely satisfactory.

Some trenches partly completed by the enemy were found on this ridge, and though only 12 inches deep, were the only cover available, though they could not accommodate men, were made use of Machine Gun and Lewis Gun positions. The enemy's positions were considerably higher than our own, and consequently they commanded a great field of view and fire between their trenches and the Regimental position, the ground between them being perfectly level and devoid of cover. It was consequently impossible to advance, and so heavy fire was kept continuously on the enemy's position to afford cover to the right flank, who were steadily pressing forward.

At 1300 the Regiment was reinforced by the 10th Regiment. Ammunition was brought up and quickly distributed, and orders were received to advance. This was done by short rushes, with a few men at a time, the movement a starting from the centre, and continuing until sufficient men were in position to afford in covering fire for the flanks, by which means they advanced within 400 yards of the enemy's position. Here the Regiment came under heavy enfilade fire. A Squadron on the left receiving the heaviest casualties, owing to the fact that there was no one on this left flank to support them. It was found necessary to dig in, but the ground being hard, and the only implement available a bayonet, it was some time before any protection was afforded. The Regiment remained in this position until 1600, during whichtime two Squadron Leaders were wounded (Majors Mills and Lewis, the latter seriously), and the Regiment generally suffered heavy casualties.

Great praise is due to the Regimental Stretcher Bearers for the fearless manner in which they carried out their duties under the heavy fire. Though the shell fire was heavy, it was inaccurate and caused comparatively few casualties.
At 1515 a message was received from A Squadron asking for permission to withdraw to their original position, and at the same time orders were received that a general attack had been ordered, but at 1530 no movement was visible on the left, except at very long range, and permission was granted for the Regiment to withdraw to the original position, which was done. Orders were then received to work to the right, and support the 2nd Regiment, one Squadron was left behind and the other two squadrons moved to the right, but before a proper junction could be made the redoubt at Hill 225 fell and another frontal advance was ordered, and the ground made good up to the trenches.

The led horses were brought up to this position, and orders were received to concentrate at once, as enemy reinforcements were expected. This was done, the wounded collected, and a party detailed to bury the dead and mark the graves. The Regiment's casualties were 10 killed and 49 wounded. At 0600 the Regiment moved for El-Arish, which was reached at midday, where the cooks, who had been left behind, had a meal ready for the men.

During the period of the Magdhaba and Rafa actions there were nine complete nights during which the Regiment was either fighting or advancing, which, in addition to the strenuous work during the actual fights, led to great exhaustion amongst the troops by the time the whole operations were completed. On 13th January the GOC Anzac Mounted Division addressed the troops. From this date until 10 February 1917 the Regiment, with the Brigade, remained at El-Arish, holding outpost line at night, the weather being very wet and cold at the time.


Further Reading:

3rd Light Horse Regiment, AIF

3rd Australian Light Horse Regiment, Roll of Honour

The Battle of Rafa, Sinai, 9 January 1917

The Battle of Rafa, Sinai, 9 January 1917, Roll of Honour

The Palestine Campaign, 1917 - 1918

Battles where Australians fought, 1899-1920


Citation: The Battle of Rafa, Sinai, 9 January 1917, Blackwell, 3rd LHR, Unit History, Account


Posted by Project Leader at 12:01 AM EAST
Updated: Monday, 31 January 2011 6:52 AM EAST

View Latest Entries

Full Site Index


powered by FreeFind
Let us hear your story: You can tell your story, make a comment or ask for help on our forum.

Desert Column Forum

A note on copyright

The Australian Light Horse Studies Centre is a not for profit and non profit group whose sole aim is to write the early history of the Australian Light Horse from 1900 - 1920. It is privately funded and the information is provided by the individuals within the group and while permission for the use of the material has been given for this site for these items by various donors, the residual and actual copyright for these items, should there be any, resides exclusively with the donors. The information on this site is freely available for private research use only and if used as such, should be appropriately acknowledged. To assist in this process, each item has a citation attached at the bottom for referencing purposes.

Please Note: No express or implied permission is given for commercial use of the information contained within this site.

A note to copyright holders

The Australian Light Horse Studies Centre has made every endeavour to contact copyright holders of material digitised for this blog and website and where appropriate, permission is still being sought for these items. Where replies were not received, or where the copyright owner has not been able to be traced, or where the permission is still being sought, the Australian Light Horse Studies Centre has decided, in good faith, to proceed with digitisation and publication. Australian Light Horse Studies Centre would be happy to hear from copyright owners at any time to discuss usage of this item.

Contact

Australian Light Horse Studies Centre

eXTReMe Tracker