« December 2008 »
S M T W T F S
1 2 3 4 5 6
7 8 9 10 11 12 13
14 15 16 17 18 19 20
21 22 23 24 25 26 27
28 29 30 31
You are not logged in. Log in


Search the site:


powered by FreeFind
Volunteer with us.

Entries by Topic All topics  
A Latest Site News
A - Using the Site
AAA Volunteers
AAB-Education Centre
AAC-Film Clips
AAC-Photo Albums
AIF & MEF & EEF
AIF - Lighthorse
AIF - ALH - A to Z
AIF - DMC
AIF - DMC - Or Bat
AIF - DMC - Anzac MD
AIF - DMC - Aus MD
AIF - DMC - British
AIF - DMC - BWI
AIF - DMC - French
AIF - DMC - Indian
AIF - DMC - Italian
AIF - DMC - Medical
AIF - DMC - Remounts
AIF - DMC - Scouts
AIF - DMC - Sigs
AIF - DMC - Sigs AirlnS
AIF - DMC - 1 Sig Sqn
AIF - DMC - 2 Sig Sqn
AIF - DMC - Eng
AIF - DMC - Eng 1FSE
AIF - DMC - Eng 2FSE
AIF - DMC - GSR
AIF - 1B - 1 LHB
AIF - 1B - 6 MVS
AIF - 1B - 1 LHMGS
AIF - 1B - 1 Sig Trp
AIF - 1B - 1 LHFA
AIF - 1B - 1 LHR
AIF - 1B - 2 LHR
AIF - 1B - 3 LHR
AIF - 2B - 2 LHB
AIF - 2B - 7 MVS
AIF - 2B - 2 LHFA
AIF - 2B - 2 LHMGS
AIF - 2B - 2 Sig Trp
AIF - 2B - 5 LHR
AIF - 2B - 6 LHR
AIF - 2B - 7 LHR
AIF - 3B - 3 LHB
AIF - 3B - 8 MVS
AIF - 3B - 3 LHB Sigs
AIF - 3B - 3 LHFA
AIF - 3B - 3 LHMGS
AIF - 3B - 3 Sig Trp
AIF - 3B - 8 LHR
AIF - 3B - 9 LHR
AIF - 3B - 10 LHR
AIF - 4B - 4 LHB
AIF - 4B - 4 Sig Trp
AIF - 4B - 9 MVS
AIF - 4B - 4 LHFA
AIF - 4B - 4 LHMGS
AIF - 4B - 4 LHR
AIF - 4B - 11 LHR
AIF - 4B - 12 LHR
AIF - 5B - 5 LHB
AIF - 5B - 10 MVS
AIF - 5B - 5 LHFA
AIF - 5B - 5 Sig Trp
AIF - 5B - ICC
AIF - 5B - 14 LHR
AIF - 5B - 15 LHR
AIF - 5B - 1er Regt
AIF - 5B - 2 NZMGS
AIF - AASC
AIF - Aboriginal LH
AIF - Badges
AIF - Cars
AIF - Chinese LH
AIF - Double Sqns
AIF - Engineers
AIF - Fr - 22 Corps
AIF - Fr - 13 LHR
AIF - Honour Roll
AIF - HQ - 3rd Echelon
AIF - Marching Songs
AIF - Misc Topics
AIF - NZMRB
AIF - NZMRB - AMR
AIF - NZMRB - CMR
AIF - NZMRB - EFT
AIF - NZMRB - NZMFA
AIF - NZMRB - NZMGS
AIF - NZMRB - OMR
AIF - NZMRB - Sig-Trp
AIF - NZMRB - WMR
AIF - Ships
AIF - Ships - Encountr
AIF - Ships - Una
AIF - WFF
AIF - Wireless Sqn
Battles
BatzA - Australia
BatzA - Broken Hill
BatzA - Liverpool
BatzA - Merivale
BatzB - Boer War
BatzB - Bakenlaagte
BatzB - Belmont
BatzB - Bothaville
BatzB - Buffels Hoek
BatzB - Coetzees Drift
BatzB - Diamond Hill
BatzB - Driefontein
BatzB - Elands
BatzB - Graspan
BatzB - Grobelaar
BatzB - Grootvallier
BatzB - Hartebestfontn
BatzB - Houtnek
BatzB - Karee Siding
BatzB - Kimberley
BatzB - Koster River
BatzB - Leeuw Kop
BatzB - Mafeking
BatzB - Magersfontein
BatzB - Modder River
BatzB - Onverwacht
BatzB - Paardeberg
BatzB - Palmietfontein
BatzB - Pink Hill
BatzB - Poplar Grove
BatzB - Rhenoster
BatzB - Sannahs Post
BatzB - Slingersfontn
BatzB - Stinkhoutbm
BatzB - Sunnyside
BatzB - Wilmansrust
BatzB - Wolvekuil
BatzB - Zand River
BatzG - Gallipoli
BatzG - Anzac
BatzG - Aug 1915
BatzG - Baby 700
BatzG - Evacuation
BatzG - Hill 60
BatzG - Hill 971
BatzG - Krithia
BatzG - Lone Pine
BatzG - Nek
BatzJ - Jordan Valley
BatzJ - 1st Amman
BatzJ - 2nd Amman
BatzJ - Abu Tellul
BatzJ - Es Salt
BatzJ - JV Maps
BatzJ - Ziza
BatzM - Mespot
BatzM - Baghdad
BatzM - Ctesiphon
BatzM - Daur
BatzM - Kurna
BatzM - Kut el Amara
BatzM - Ramadi
BatzN - Naval
BatzN - AE1
BatzN - Cocos Is
BatzN - Heligoland
BatzN - Marmara
BatzN - Zeebrugge
BatzN - Zeppelin L43
BatzNG - Bitapaka
BatzO - Other
BatzO - Baku
BatzO - Egypt 1919
BatzO - Emptsa
BatzO - Karawaran
BatzO - Peitang
BatzO - Wassa
BatzP - Palestine
BatzP - 1st Gaza
BatzP - 2nd Gaza
BatzP - 3rd Gaza
BatzP - Aleppo
BatzP - Amwas
BatzP - Ayun Kara
BatzP - Bald Hill
BatzP - Balin
BatzP - Beersheba
BatzP - Berkusieh
BatzP - Damascus
BatzP - El Auja
BatzP - El Buggar
BatzP - El Burj
BatzP - Haifa
BatzP - Huj
BatzP - JB Yakub
BatzP - Kaukab
BatzP - Khan Kusseir
BatzP - Khuweilfe
BatzP - Kuneitra
BatzP - Megiddo
BatzP - Nablus
BatzP - Rafa
BatzP - Sasa
BatzP - Semakh
BatzP - Sheria
BatzP - Surafend
BatzP - Wadi Fara
BatzS - Sinai
BatzS - Bir el Abd
BatzS - El Arish
BatzS - El Mazar
BatzS - El Qatiya
BatzS - Jifjafa
BatzS - Magdhaba
BatzS - Maghara
BatzS - Romani
BatzS - Suez 1915
BatzSe - Senussi
BatzWF - Westn Front
BW - Boer War
BW - NSW
BW - NSW - 1ACH
BW - NSW - 1NSWMR
BW - NSW - 2NSWMR
BW - NSW - 3ACH
BW - NSW - 3NSWIB
BW - NSW - 3NSWMR
BW - NSW - 5ACH
BW - NSW - A Bty RAA
BW - NSW - AAMC
BW - NSW - Aust H
BW - NSW - Lancers
BW - NSW - NSW Inf
BW - NSW - NSWCBC
BW - NSW - NSWIB
BW - NSW - NSWMR_A
BW - NZ
BW - Qld
BW - Qld - 1ACH
BW - Qld - 1QMI
BW - Qld - 2QMI
BW - Qld - 3ACH
BW - Qld - 3QMI
BW - Qld - 4QIB
BW - Qld - 5QIB
BW - Qld - 6QIB
BW - Qld - 7ACH
BW - QLD - AAMC
BW - SA
BW - SA - 1SAMR
BW - SA - 2ACH
BW - SA - 2SAMR
BW - SA - 3SACB
BW - SA - 4ACH
BW - SA - 4SAIB
BW - SA - 5SAIB
BW - SA - 6SAIB
BW - SA - 8ACH
BW - SA - AAMC
BW - Tas
BW - Tas - 1ACH
BW - Tas - 1TIB
BW - Tas - 1TMI
BW - Tas - 2TB
BW - Tas - 2TIB
BW - Tas - 3ACH
BW - Tas - 8ACH
BW - Vic
BW - Vic - 1VMI
BW - Vic - 2ACH
BW - Vic - 2VMR
BW - Vic - 3VB
BW - Vic - 4ACH
BW - Vic - 4VIB
BW - Vic - 5VMR
BW - Vic - 6ACH
BW - Vic - AAMC
BW - Vic - Scot H
BW - WA
BW - WA - 1WAMI
BW - WA - 2ACH
BW - WA - 2WAMI
BW - WA - 3WAB
BW - WA - 4ACH
BW - WA - 4WAMI
BW - WA - 5WAMI
BW - WA - 6WAMI
BW - WA - 8ACH
BW Gen - Campaign
BW Gen - Soldiers
BW General
Cavalry - General
Diary - Schramm
Egypt - Heliopolis
Egypt - Mena
Gen - Ataturk Pk, CNB
Gen - Australia
Gen - Legends
Gen - Query Club
Gen - St - NSW
Gen - St - Qld
Gen - St - SA
Gen - St - Tas
Gen - St - Vic
Gen - St - WA
Gm - German Items
Gm - Bk - 605 MGC
GW - 11 Nov 1918
GW - Atrocities
GW - August 1914
GW - Biographies
GW - Propaganda
GW - Spies
GW - We forgot
Militia 1899-1920
Militia - Area Officers
Militia - Inf - Infantry
Militia - Inf - 1IB
Militia - Inf - 2IB
Militia - Inf - 3IB
Militia - Inf - NSW
Militia - Inf - Qld
Militia - Inf - SA
Militia - Inf - Tas
Militia - Inf - Vic
Militia - Inf - WA
Militia - K.E.Horse
Militia - LH
Militia - LH - Regts
Militia - LH - 1LHB
Militia - LH - 2LHB
Militia - LH - 3LHB
Militia - LH - 4LHB
Militia - LH - 5LHB
Militia - LH - 6LHB
Militia - LHN - NSW
Militia - LHN - 1/7/1
Militia - LHN - 2/9/6
Militia - LHN - 3/11/7
Militia - LHN - 4/6/16
Militia - LHN - 5/4/15
Militia - LHN - 6/5/12
Militia - LHN - 28
Militia - LHQ - Qld
Militia - LHQ - 13/2
Militia - LHQ - 14/3/11
Militia - LHQ - 15/1/5
Militia - LHQ - 27/14
Militia - LHS - SA
Militia - LHS - 16/22/3
Militia - LHS - 17/23/18
Militia - LHS - 24/9
Militia - LHT - Tas
Militia - LHT - 12/26
Militia - LHV - Vic
Militia - LHV - 7/15/20
Militia - LHV - 8/16/8
Militia - LHV - 9/19
Militia - LHV - 10/13
Militia - LHV - 11/20/4
Militia - LHV - 19/17
Militia - LHV - 29
Militia - LHW - WA
Militia - LHW-18/25/10
Militia - Military Orders
Militia - Misc
MilitiaRC - Rifle Clubs
MilitiaRC - NSW
MilitiaRC - NT
MilitiaRC - Qld
MilitiaRC - SA
MilitiaRC - Tas
MilitiaRC - Vic
MilitiaRC - WA
Militiaz - New Zealand
Tk - Turkish Items
Tk - Army
Tk - Bks - Books
Tk - Bks - 1/33IR
Tk - Bks - 27th IR
Tk - Bks - Air Force
Tk - Bks - Yildirim
Tk - POWs
Wp - Weapons
Wp - Hotchkiss Cav
Wp - Hotchkiss PMG
Blog Tools
Edit your Blog
Build a Blog
RSS Feed
View Profile
Open Community
Post to this Blog
Site Index
Education Centre
LH Militia
Boer War
Transport Ships
LH Battles
ALH - Units
ALH - General
Aboriginal Light H
Weapons
Ottoman Sources

"At a mile distant their thousand hooves were stuttering thunder, coming at a rate that frightened a man - they were an awe inspiring sight, galloping through the red haze - knee to knee and horse to horse - the dying sun glinting on bayonet points..." Trooper Ion Idriess

The Australian Light Horse Studies Centre aims to present an accurate history as chroniclers of early Australian military developments from 1899 to 1920.

The Australian Light Horse Studies Centre site holds over 12,000 entries and is growing daily.

Contact: Australian Light Horse Studies Centre

Let us hear your story: You can tell your story, make a comment or ask for help on our Australian Light Horse Studies Centre Forum called:

Desert Column Forum

WARNING: This site contains: names, information and images of deceased people; and, language which may be considered inappropriate today.

Tuesday, 2 December 2008
Canterbury Mounted Rifles Regiment, Roll of Honour, John Cameron
Topic: AIF - NZMRB - CMR

CMR, NZEF

Canterbury Mounted Rifles Regiment

Roll of Honour

John Cameron


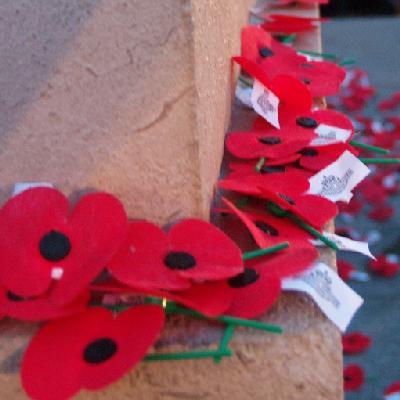
Poppies on the Auckland Cenotaph plinth
 

A brief biography of John Cameron extracted from the Cenotaph Database hosted by the Auckland Museum.


Full Name: Trooper John Cameron
Rank Last Held: Trooper
Forename(s): John
Surname: Cameron
War: World War I, 1914-1918
Serial No.: 7/1705
First Known Rank: Trooper
Next of Kin: W.A. Cameron (brother), Marangai, Wanganui, New Zealand
Marital Status: Single
Enlistment Address: Marangai, Wanganui, New Zealand
Military District: Wellington
Body on Embarkation: 7th Reinforcements
Embarkation Unit: Canterbury Mounted Rifles
Embarkation Date: 9 October 1915
Place of Embarkation: Wellington, New Zealand
Transport:
Vessel: Aparima or Navua or Warrimoo
Destination: Suez, Egypt
Page on Nominal Roll: 105
Last Unit Served: Canterbury Mounted Rifles
Place of Death: Egypt
Date of Death: 2 December 1916
Year of Death: 1916
Cause of Death: Died of disease
Further References: Search http://www.archway.archives.govt.nz for information about this person's Military Personnel File. Use the Simple Search option.
Sources Used: Nominal Rolls of New Zealand Expeditionary Force Volume I. Wellington: Govt. Printer, 1914-1919


Lest we forget


Further Reading:

Canterbury Mounted Rifles Regiment

Canterbury Mounted Rifles Regiment, Roll of Honour

Battles where Australians fought, 1899-1920


Citation: Canterbury Mounted Rifles Regiment, Roll of Honour, John Cameron

Posted by Project Leader at 12:01 AM EAST
Updated: Sunday, 13 September 2009 12:15 AM EADT
Monday, 1 December 2008
Bert Schramm's Diary, 2 December 1918
Topic: Diary - Schramm

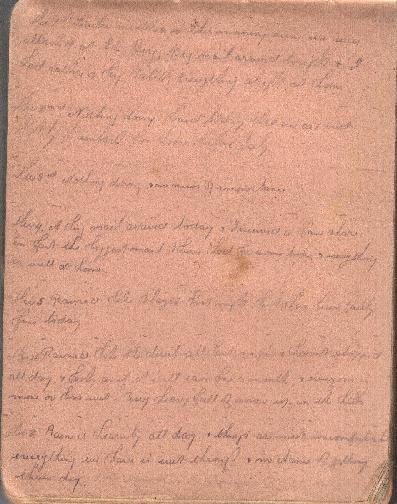
During part of the course of his military service with the AIF, 2823 Private Herbert Leslie Schramm, a farmer from White's River, near Tumby Bay on the Eyre Peninsular, kept a diary of his life. Bert was not a man of letters so this diary was produced with great effort on his behalf. Bert made a promise to his sweetheart, Lucy Solley, that he would do so after he received the blank pocket notebook wherein these entries are found. As a Brigade Scout since September 1918, he took a lead part in the September 1918 breakout by the Allied forces in Palestine. Bert's diary entries are placed alongside those of the 9th Light Horse Regiment to which he belonged and to the 3rd Light Horse Brigade to which the 9th LHR was attached. On this basis we can follow Bert in the context of his formation.

 Bert Schramm's Diary, 2 December 1918


Bert Schramm's Handwritten Diary, 1 - 7 December 1918

[Click on page for a larger print version.]

Diaries

Bert Schramm

Monday, December 2, 1918

Bert Schramm's Location - Mejdelaya, Tripoli

Bert Schramm's Diary -  Nothing doing. Heard today that we are not likely to embark for home before July.


9th Light Horse Regiment War Diary

9th Light Horse Regiment Location - Mejdelaya, Tripoli

9th Light Horse Regiment War Diary - Commanding Officer Lectured to each Squadron in succession for 3/4 hour on the AIF Educational, Entertainment and Demobilisation Scheme. The object of this scheme was to provide useful instruction and entertainment for all ranks prior to Demobilisation. It was realised early that the troops here in Syria were at a great disadvantage in comparison with the troops in France in carrying out the scheme in its entirety. Never the less it was decided to carry out a vigorous policy towards making the best use of material and facilities available. Charley, Major WT; Ragless, Captain BB; and, Shelley, Captain JE, were elected Regimental Representatives of this scheme. Ayliffe, Lieutenant SH, proceeded "OB Command" to 2nd Field Squadron AE.


Darley

Darley, TH, With the Ninth Light Horse in the Great War, Adelaide, Hassell Press, 1924.

No Entry


Further Reading:

9th Light Horse Regiment AIF War Diary - Complete day by day list

Bert Schramm Diary 

Bert Schramm Diary - Complete day by day list


Additional Reading:

Darley, TH, With the Ninth Light Horse in the Great War, Adelaide, Hassell Press, 1924.


Citation: Bert Schramm's Diary, 2 December 1918


Posted by Project Leader at 11:01 PM EAST
Updated: Thursday, 18 December 2008 3:28 PM EAST
Use of poison gas at Gallipoli
Topic: GW - Atrocities

Realities of employing Poison Gas at Gallipoli

During the campaign at Gallipoli, the Allied forces were always fearful of a chlorine gas attack by the Turks. It never occurred. One of the best researched essays on this subject is called "THE INTRODUCTION OF CHEMICAL WEAPONS TO THE MIDDLE EAST" by Yigal SHEFFY details the reasons.

It is a short essay contained in the seminar booklet called: "The First World War: Middle Eastern perspective: proceedings of the Israeli-Turkish International Colloquy, 3-6 April 2000", Tel-Aviv, Israel with the editors being Yigal Sheffy and Shaul Shai, at pp. 75-78:

On the evening of 22 April 1915 and for the first time in human history, the Germany Army launched a poisonous gas attack against Algerian troops of the French Army near the village of Ypres. Belgium. Five months later, the British retaliated by a gas attack of their own in Loos. A new layer thus was added to the murderous static warfare of the Western Front and to the dreadful image of WW1 in the memory of the 20th century.

For reasons beyond the scope of this paper, the image of the Great War in the Middle East remains romantic ensconced in the collective memory. The fact that chemical weapons were introduced in that theatre, too, was suppressed in our memory and literature. (1) This paper aims to fill the gap by reconstructing the events that led to the use of gas precisely during the Palestine Campaign, while abstaining from using it in the Middle Eastern arenas.

THE GALLIPOLI CAMPAIGN 1915: APPREHENSION AND PRECAUTION

The issue of chemical warfare was first added to the Middle Eastern agenda several weeks after the British landing in Gallipoli on 25 April 1915. The failure of the Mediterranean Expeditionary Force (MEF) to widen its bridgeheads, combined with reports on the arrival of German-manufactured chemical substances in Turkey and with the painful shock of the appearance of gas in the Western Front only few weeks earlier, generated British estimate that the Ottomans. too, might use asphyxiating gas to drive the invaders back to sea. (2) General Ian Hamilton, Commander in Chief (C-in-C) of MEF, asked for protective devices to be sent urgently, as well as retaliatory means, to be used if gas would be deployed against his troops. The War Office immediately sent 50,000 respirators, but ignored the request for offensive weapons, Perhaps because they were still unavailable, or perhaps because it was hoped to leave the Mediterranean theatre out of the scope of chemical warfare. (3)

In the Admiralty, however, the notion of using gas in Gallipoli was gaining support. Winston Churchill, then First Lord of the Admiralty and the most enthusiastic advocate of the Dardanelles operation, was also the most outspoken preacher for offensive use of gas in the peninsula Sensing his political future to be in jeopardy because of the unsuccessful operation, he desperately searched for military solution to break the stalemate in Gallipoli. He ceaselessly urged the commanders on the spot to use the deadly new weapon against the Ottomans and pressed Lord Kitchener, the Secretary of State for War for the transfer of the best chemical unit the army had to the peninsula. (4) The Dardanelles Committee (which functioned as a war cabinet for the entire government) discussed the issue in mid June 1915, but due to conflicting opinions failed to reach any decision. (5)

Yet, British concern increased when they received more alarming reports, however groundless, and learned about gas cylinders and facilities for gas-manufacturing that reached Turkey, accompanied by German experts. Moreover, a Turkish spokesman on behalf of the. Ottoman General Staff publicly accused MEF of using poison gas in Gallipoli. General Hamilton took that false accusation to indicate Turkish plans to use their own chemical ammunition shortly. (6) The combination of this assessment and British improvement in gas-stocking finally convinced Kitchener to provide MEF with a small amount of chlorine, to be used at the discretion of the local commander. Hamilton, however. remained adamant in his objection to introduce the new weapon, probably to avert any Ottoman reaction which might jeopardize the impending landing in Suvla Bay and the attack in ANZAC sector. (7)

Diminished interest in using gas followed the Suvla failure in August, while the British government firmly denied Isatanbul's accusation, endeavoring to convey a placating message:

The Council are anxious that the rules of International Law should he observed strictly in the hostilities against the Turks, which view is apparently reciprocated by them, as they have hitherto shown little desire to follow the method employed by the Germans. (8)

It was Churchill who again urged the government to reconsider its decision to refrain from employing gas in Gallipoli. In an effort to regain his lost standing by achieving some success there, he did not hesitate to touch emotional and practical chords:

I trust that the unreasonable prejudice against the use by us of gas upon the Turks will now cease. The massacres by the Turks of Armenians and the fact that practically no British prisoner have been taken on the peninsula... should surely remove all false sentiment on this point. (9)

Whether it was Churchill's note or the increasing intelligence reports about Turco-German offensive intentions that made the difference is unclear, but in early November 6,000 cylinders (190 tons of gas) accompanied by a group of operators sailed to Gallipoli.(10) However, General Monro, the new MEF C-in-C, followed in Hamilton's footsteps and flatly rejected the idea, particularly when the notion of evacuation was gaining momentum. In hindsight, his decision seems entirely logical as the Turkish positions along the high ground dominated topographically the battlefield and the wind flow could easily blow the gas clouds back to the inferior and crowded British trenches.

The debate was terminated by the peninsula evacuation in December 1915. without the use of poisonous gas in Gallipoli even once.

Footnotes

(1) For general textbook on chemical warfare in WW1: L.F. Haber, The Poisonous Cloud: Chemical Warfare in the First World War, Oxford, 1986: William Moore: Gas Attack: Chemical Warfare 1915-18 and afterwards, London, 1987; Donald Richter, Chemical Soldiers: British Gas Warfare in World War One, Kansas, 1992, London. 1994.

(2) Lieut. General John Maxwell, GOC British Forces in Egypt, to FM Lord Kitchener, Secretary of State for War, tel(egram) 1061E, PRO, WO 33/371.

(3) War Office (WO) to Hamilton, tel 4764, 19 May 1915, ibid.; WO to Admiralty, let(ter). 30, Mediterranean. 121, 26 May 1915, WO 32/5117.

(4) Martin Gilbert, The Challenge of War: Winston S. Churchill, London, 1990 org. 1972, p. 470.

(5) Precis of meeting of the Dardanelles Committee, 12 June 1915, PRO, CAB 42/3/2.

(6) Hamilton to Kitchener, tel MF 433, 8 July 1915; tel MF 434, 9 July 1915, WO 33/731.

(7) Précis of meeting of the Dardanelles Committee, 24 July 1915, CAB 37/13/34; Hamilton to Kitchener, tel 4 August 1915, WO 33731.

(8) WO, MO5a to Under Secretary of the Foreign Office, let 121 Mediterranean/416, 26 Oct. 1915, PRO, FO 372/726/158691.

(9) Churchill, 'War Committee Notes', 20 Oct. 1915, CAB 42/4/14

(10) Richter, op. cite., p. 99.


Citation: Use of poison gas at Gallipoli

Posted by Project Leader at 9:48 AM EAST
Updated: Wednesday, 18 February 2009 4:12 PM EAST
Colonel Husnu, Yildirim, Page 147
Topic: Tk - Bks - Yildirim

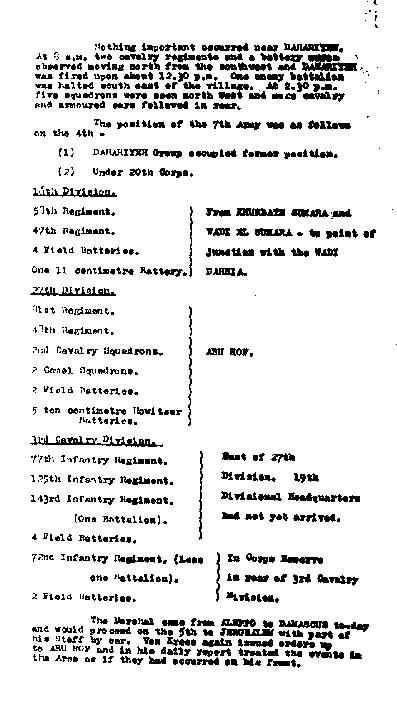
Another entry from the book written by Lieutenant Colonel Hüseyin Hüsnü Emir, called Yildirim. Every day, one page of the book will be posted. This is Page 147.


Colonel Hüsnü, Yildirim, Page 147.

[Click on page for a larger print version.]


This chapter deals with Hüsnü observations of the Turkish response to Beersheba on other parts of the battlefield.


Further Reading:

List of all Yildirim pages


Citation: Colonel Hüsnü, Yildirim, Page 147

Posted by Project Leader at 1:01 AM EAST
Updated: Sunday, 30 November 2008 6:18 PM EAST
9th LHR AIF War Diary, 1 December
Topic: AIF - 3B - 9 LHR

9th LHR, AIF

9th Light Horse Regiment

War Diary, 1 December

Pro Gloria et Honore - For Glory and Honour

Regimental March -  Marching Through Georgia


The following entries are extracted and transcribed from the 9th Light Horse Regiment War Diary, the originals of which are held by the Australian War Memorial. There are 366 entries on this site. Each day has entries as they occurred from 1914 to 1919. In addition to the 9th Light Horse Regiment War Diary, when appropriate, entries from the 3rd Light Horse Brigade War Diary and other regiments with the Brigade will also appear. Entries from the unit history, Darley, TH, With the Ninth Light Horse in the Great War, Adelaide, Hassell Press, 1924 will also appear from time to time. The aim is to give the broadest context to the story and allow the reader to follow the day to day activities of the regiment. If a relative happened to have served in the regiment during the Great War, then this provides a general framework in which the individual story may be told.


The Diary


1914

Tuesday, December 1, 1914

9th Light Horse Regiment Location -  Broadmeadows Camp, Victoria. 

9th Light Horse Regiment War Diary - Organising, training and equipping of troops.

See: Broadmeadows 1909


1915

Wednesday, December 1, 1915

9th Light Horse Regiment Location - Rhododendron Spur

9th Light Horse Regiment War Diary -  The Brigadier informed Commanding Officers of the Regiments that it was intended to hold the line with a smaller number of men during the winter and to rest the remainder at Imbros. The difficulty of landing supplies has increased as most of the barges have been washed up on the shore at Imbros and there were very few boats left for landing supplies and personnel. The situation is to increase the patrols and reduce the numbers.


1916

Friday, December 1, 1916

9th Light Horse Regiment Location - Bir el Malha

9th Light Horse Regiment War Diary - Party of officers from Brigade including Scott, Lieutenant Colonel WH; Parsons, Major HM; McKenzie, Major KA; Wilkinson, Lieutenant R; and Phelan, Lieutenant E, from the 9th Light Horse Regiment, left at 0730 and proceeded to Hill 1061 and thence to wells at 12 to reconnoitre country. A number of rifle shots heard in hills presumably fired at a patrol of the 1st Light Horse Brigade but no enemy seen. Several fresh camel pads and barefoot tracks observed near wells. Party returned to camp at 1900.


1917

Saturday, December 1, 1917

9th Light Horse Regiment Location - El Burj.

9th Light Horse Regiment War Diary - 0120, the enemy, 1,000 strong, made a determined attack on sector held by 8th Light Horse Regiment which regiment was immediately on right of 9th Light Horse Regiment. The right flank post of 8th Light Horse Regiment was forced to withdraw about 300 yards south west whilst the enemy occupied the position from which the 8th Light Horse Regiment had withdrawn. The enemy brought heavy bomb, rifle and machine gun fire to bear on 8th Light Horse Regimental posts. A Squadron 9th Light Horse Regiment, who were in position 800 yards on left front of 8th Light Horse Regiment, brought a heavy machine gun and rifle fire to bear on flank and rear of attacking force inflicting many casualties and prevented enemy retiring towards Shilta.

At dawn 0500 it was seen that the remaining enemy were in a precarious position, faced in front at a few hundred yards range by 8th Light Horse Regiment and a strong detachment of 4th Royal Scots who had hurried up in support. This detachment did fine bombing work at dawn.

About 0530 the 8th Light Horse Regiment moved forward and the remaining Turks about 100 strong surrendered including a German Lieutenant Colonel Commanding Officer of the attacking battalion. Many rifles and automatic rifles and bombs were captured from enemy. Estimated enemy dead 200 whilst 300 enemy wounded had passed previously through the Turkish dressing station. Heavy enemy shell fire continued all morning in and around El Burj. 9th Light Horse Regiment casualties four Other Ranks wounded.

3rd Light Horse Brigade War Diary -

At 0100 from the post of the 8th Light Horse Regiment on the extreme right of the Brigade sector considerable movement in its immediate front was observed and reported.

At 0110 the enemy, estimated 500 in strength, attacked the above mentioned post with hand and rifle grenades. On the 8th Light Horse Regiment calling artillery support by means of flares at 0130, the 268th Brigade, Royal Horse Artillery and the Hong Kong and Singapore Battery opened up intense artillery fire on all enemy approaches. Part of the Gloucester Yeomanry, 48 all ranks in strength under command of Palmer, Lieutenant Colonel, DSO, moved from the position at el Burj support the 8th Light Horse Regiment and at 0150 reinforced the 8th Light Horse Regiment in the fighting line where the fighting had now developed.
At 0200 the 8th Light Horse Regiment post on the right was forced to withdraw 200 to 300 yards toward the main line of defence. The enemy was now attacking heavily and pressed on toward the main line of defence, using bombs of both cricket ball and stick type, rifle grenades and automatic rifles. Their advance was covered by an enemy battery firing from Suffa, and one trench mortar bring from neighbourhood of Shilta. At this time Richardson, Lieutenant Colonel S, commanding 1/4th Royal Scots Fusiliers came to Brigade Headquarters and offered the assistance of his infantry, [who were not now under the command of the Brigade]; this offer was gladly accepted, and two companies, 130 all ranks, were sent to the support of the 8th Light Horse Regiment. An exceptionally fine feeling of comradeship had existed between the Scotch arid Australian troops but this would be the first occasion in the campaign when they had fought together.

At 0230 one of the above companies of the 1/4th Royal Scots Fusiliers reinforced the 8th Light Horse Regiment and at once operated with Mills grenades with great effect, and assisted materially in holding up the enemy attack.

At 0300 the enemy was held up within 30 yards of our main position, throughout the attack the 9th Light Horse Regiment was bringing enfilade fire with rifles machine guns, and Hotchkiss rifles, to bear on the enemy.
At 0315 the enemy appeared to be held. At this time the second company 1/4th Royal Scots Fusiliers reached 8th Light Horse Regimental Headquarters. The bombers were at once detached and immediately put into the firing line.

At 0400 the enemy fire and bombing had considerably decreased. The attack had failed.

At 0520 a large party of enemy were observed under cover in front of our positions. Their retirement had been prevented by the enfilade fire of the 9th Light Horse Regiment and the machine guns attached.

On movement towards this party by 8th Light Horse Regiment a machine gun and Hotchkiss Rifle barrage was put down by 9th Light Horse Regiment from a position on the left front. Our two batteries put down a barrage behind the enemy also. This party surrendered and 105 unwounded prisoners were captured and with them being the Commanding Officer of the Battalion.

Our total casualties were 56, of which 39 were in the 8th Light Horse Regiment. Seventeen wounded Turkish prisoners were brought in during the day.

A captured Medical Officer stated that the attacking forces consisted of an assault battalion of the 19th Division and that exclusive of the wounded that had been evacuated by him early in the fight, there was none of the Battalion left. A few days later, three men, who said they belonged to this battalion, came in and surrendered saying that their comrades were either killed or with us as prisoners and that they were lonely and wanted to join the latter.

This assault battalion consisted of specially picked troops; their physique was the best we had ever seen amongst Turkish prisoners. The battalion had only arrived a few days before from the Galician front. They were all armed with bombs and most of them wore German type of steel helmet. One man had thrown 92 bombs [as was evident by the number of metal clips], before he was shot through the head.

Included in the captured material were eight automatic rifles, similar in pattern to our own Hotchkiss Rifles.

For service in this action the following decorations were awarded: - MacPherson, Captain LAW; and, Peppercorn, Lieutenant TR, Military Crosses. Carrington, 353 Staff Sergeant Major AH; and, Keeble, 1010 Trooper HW, DCMs.

At 0600, 1st December, the original line held by the Brigade, was reoccupied. The situation became quiet with intermittent enemy shelling and machine gunning.

Congratulations on the good fight put up were received from the 20th Corps and Desert Mounted Corps Commanders during the day. Parties burying, own and enemy dead were kept busy throughout the day. Enemy dead in front of our position had to remain unburied for several days. On attempting to reach the bodies, our troops came under very heavy enemy machine gun and rifle fire.

At 1700 on 1st December, 1/4th Royal Scots Fusiliers moved from the 3rd Light Horse Brigade area at El Burj, and marched to Latron. Cheers were exchanged between the Scotchmen and the Australians as the former moved off. One Scott was heard by his Commanding Officer to say to another - "Those are the sort of men I like to support, you will find them in the firing line when you get up there to support them - you won't have to bring them back with you."

The disposition of the Brigade remained - 8th Light Horse Regiment holding right sector, 9th Light Horse Regiment left sector, and Gloucester Yeomanry in support 400 yards north of El Burj. A state of trench warfare now existed, but in place of trenches, stone sangars were erected. The Turks occupied Shilta - Balin and Suffa, but gradually fell back on to the line Kuddis - Kurbeth Ibn Harith - Kefr Namah. Until 27th December, Australian Mounted Division held the sector of the line opposite these places, gradually pushing the line forward and consolidating. Two of the 3rd, 4th and 5th Brigades were relieved in turns for a few days from the line by the third one during' this period. The Headquarters of the 3rd Light Horse Brigade were established at several different places in the area. Heavy rains fell and much discomfort and cold were experienced by all ranks. Life in the rocky and high hills was now the extreme of that spent for so long in the sands of the Sinai desert. Supplies were received regularly but often there was an unavoidable short issue. Supply columns between rail head and Latron often failed to get through on account of the boggy nature of the only available tracks. The enemy showed very little activity; close observation was being kept.

The enemy's positions at Kefr Namah - Kurbeth Ibn Harith - Jurdeh and Kuddis were daily shelled by our artillery. Any appearance of enemy in his defence works would immediately be followed by the opening of our guns on to him, and he now always aimed for concealment. Any additional work to his defences was carried out during the night. The situation all along the Divisional line became exceptionally quiet, only an occasional machine gun burst could be heard. Sniping and rifle fire had practically ceased.

Although wet and wintry conditions prevailed, all ranks were gradually bivouacking under more comfort. Many were forced to remain wet for several days, but all were now becoming more or less used to these conditions. Strong defences, [chiefly sangars], were built all along the line. Enemy aeroplanes became active and two or three times daily flew over our lines, sometimes at a low altitude.

8th Light Horse Regiment War Diary -  Line was all quiet until 0030 on 1 December 1917 when Captain Walker, MC, "B" Squadron, reported enemy concentration on his immediate front. Brigade Headquarters were wired immediately, priority, for reinforcements.

The enemy attacked about 250 strong with many bombs at 0045 and after half an hour's heavy fighting at very close quarters, "B" Squadron were compelled to fall back to (Major Crawford's) "C" Squadron's position. Here a fresh line was made, every available man being in the firing line.

48 men of the Gloucester Yeomanry, under Lieutenant Colonel Palmer, arrived at 0200 and the enemy just then made a fresh assault. One company of the 4th Royal Scottish Fusiliers under Captain Henry arrived at 0230 and all were immediately sent into the line.

The enemy made two distinct rushes with about 500 men, and were each time held off with a very heavy close range fire.

The fighting gradually diminished and the enemy position was rendered absolutely safe by the arrival at 0430 of another Royal Scottish Fusiliers company who were kept in supports. "B" Squadron took possession of their original position and touch was again made with 4th Light Horse Brigade on right flank.

Throughout the hours of fighting there was much heavy bombing, especially on the part of the enemy who were evidently well supplied. Our Mills Grenades were very superior and effective. The 9th Light Horse Regiment had managed to get a rearguard machine gun fire and this partly had the effect of cutting the enemy off from Shilta Village.

At daybreak the survivors surrendered amounting approximately to:-

6 Officers (including the Battalion Commander), and 112 Other Ranks, and about 20 wounded.

The enemy dead amounted to approximately 100. (20 on "B" Squadron's ridge and 80 on "C" Squadron's ridge.) 

The Royal Scottish Fusiliers and Yeomanry did splendid work and had it not been for their very quick arrival after the alarm, the Regiment would have received a very severe handling.

Our casualties were (approximately) 2 Officers - Captain Fay and Lieutenant SK Moore killed and 5 Other Ranks and 2 Officers and 35 Other Ranks wounded (one of them since died). All ranks displayed great intrepidity and dash throughout.

Major General Hodgson visited the Regiment next morning and personally expressed his pleasure and congratulations. The two attached telegrams are copies of those received from Desert Corps and 20th Army Corps.

During the morning the Royal Scottish Fusiliers were withdrawn and the Regiment continued to hold the line with the Gloucester Yeomanry in supports. Much booty was collected throughout the day included in which were 8 new type automatic rifles.

The 6th Nottinghamshire Battalion (2 Companies) reported to Regimental Headquarters as reserves at 2030 and retired at 0500 on 2 December 1917.

During the day a wire was received containing the following awards:

405 Lance Corporal J Kerr, Military Medal

1176 Trooper ES Ackland, Military Medal

3103 Trooper L Taylor, Military Medal

Regiment held firing line as taken over on night of 30 November / 1 December, with Gloucester Yeomanry in supports. At 0230, 1 Company South Nottinghamshires reported at Reserve Troops and remained in vicinity of Regimental Headquarters until 0500, 2 December 1917.

10th Light Horse Regiment War Diary - Reference map 1\63360, Palestine map Sheet XVII.

On 1st December the 10th Light Horse Regiment continued reconnoitring, most of which had to be done on foot, it was impossible to get horses over the country. Reconnaissance to Erras disclosed abundant supply of water at that place and at 0600 one squadron, 10th Light Horse Regiment moved from Artuf to establish itself at Erras, and carry out reconnaissance to Bittir - Welejeh - Khudr - Hausan and towards Beit Jala and the Hebron Road. Natives were very friendly towards our troops and much information of the enemy was gained.

See: El Burj
 

1918

Sunday, December 1, 1918

9th Light Horse Regiment Location - Mejdelaya, Tripoli

9th Light Horse Regiment War Diary - Information received that 200 Arabs attempted a raid on Rayak at 2200 on 30th November 1918. The Garrison [portion of 5th Light Horse Brigade] drove the raiders off, killing six and capturing twenty. Syllabus of Training issued.


1919

Monday, December 1, 1919

9th Light Horse Regiment Location - Adelaide

9th Light Horse Regiment War Diary - Regiment disbanded.


Previous: 9th LHR AIF War Diary, 30 November

Next: 9th LHR AIF War Diary, 2 December


Sources:

See: 9th Australian Light Horse Regiment, Contents
Australian Light Horse Studies Centre, AIF War Diaries of the Great War, Site Transcription Policy


Further Reading:

9th Light Horse Regiment AIF

Bert Schramm Diary

9th Australian Light Horse Regiment, Roll of Honour 

Battles where Australians fought, 1899-1920


Citation: 9th LHR AIF War Diary, 1 December

Posted by Project Leader at 1:01 AM EAST
Updated: Monday, 20 September 2010 12:02 PM EADT

Newer | Latest | Older

Full Site Index


powered by FreeFind
Let us hear your story: You can tell your story, make a comment or ask for help on our forum.

Desert Column Forum

A note on copyright

The Australian Light Horse Studies Centre is a not for profit and non profit group whose sole aim is to write the early history of the Australian Light Horse from 1900 - 1920. It is privately funded and the information is provided by the individuals within the group and while permission for the use of the material has been given for this site for these items by various donors, the residual and actual copyright for these items, should there be any, resides exclusively with the donors. The information on this site is freely available for private research use only and if used as such, should be appropriately acknowledged. To assist in this process, each item has a citation attached at the bottom for referencing purposes.

Please Note: No express or implied permission is given for commercial use of the information contained within this site.

A note to copyright holders

The Australian Light Horse Studies Centre has made every endeavour to contact copyright holders of material digitised for this blog and website and where appropriate, permission is still being sought for these items. Where replies were not received, or where the copyright owner has not been able to be traced, or where the permission is still being sought, the Australian Light Horse Studies Centre has decided, in good faith, to proceed with digitisation and publication. Australian Light Horse Studies Centre would be happy to hear from copyright owners at any time to discuss usage of this item.

Contact

Australian Light Horse Studies Centre

eXTReMe Tracker