« December 2008 »
S M T W T F S
1 2 3 4 5 6
7 8 9 10 11 12 13
14 15 16 17 18 19 20
21 22 23 24 25 26 27
28 29 30 31
You are not logged in. Log in


Search the site:


powered by FreeFind
Volunteer with us.

Entries by Topic All topics
A Latest Site News
A - Using the Site
AAA Volunteers
AAB-Education Centre
AAC-Film Clips
AAC-Photo Albums
AIF & MEF & EEF
AIF - Lighthorse
AIF - ALH - A to Z
AIF - DMC
AIF - DMC - Or Bat
AIF - DMC - Anzac MD
AIF - DMC - Aus MD
AIF - DMC - British
AIF - DMC - BWI
AIF - DMC - French
AIF - DMC - Indian
AIF - DMC - Italian
AIF - DMC - Medical
AIF - DMC - Remounts
AIF - DMC - Scouts
AIF - DMC - Sigs
AIF - DMC - Sigs AirlnS
AIF - DMC - 1 Sig Sqn
AIF - DMC - 2 Sig Sqn
AIF - DMC - Eng
AIF - DMC - Eng 1FSE
AIF - DMC - Eng 2FSE
AIF - DMC - GSR
AIF - 1B - 1 LHB
AIF - 1B - 6 MVS
AIF - 1B - 1 LHMGS
AIF - 1B - 1 Sig Trp
AIF - 1B - 1 LHFA
AIF - 1B - 1 LHR
AIF - 1B - 2 LHR
AIF - 1B - 3 LHR
AIF - 2B - 2 LHB
AIF - 2B - 7 MVS
AIF - 2B - 2 LHFA
AIF - 2B - 2 LHMGS
AIF - 2B - 2 Sig Trp
AIF - 2B - 5 LHR
AIF - 2B - 6 LHR
AIF - 2B - 7 LHR
AIF - 3B - 3 LHB  
AIF - 3B - 8 MVS
AIF - 3B - 3 LHB Sigs
AIF - 3B - 3 LHFA
AIF - 3B - 3 LHMGS
AIF - 3B - 3 Sig Trp
AIF - 3B - 8 LHR
AIF - 3B - 9 LHR
AIF - 3B - 10 LHR
AIF - 4B - 4 LHB
AIF - 4B - 4 Sig Trp
AIF - 4B - 9 MVS
AIF - 4B - 4 LHFA
AIF - 4B - 4 LHMGS
AIF - 4B - 4 LHR
AIF - 4B - 11 LHR
AIF - 4B - 12 LHR
AIF - 5B - 5 LHB
AIF - 5B - 10 MVS
AIF - 5B - 5 LHFA
AIF - 5B - 5 Sig Trp
AIF - 5B - ICC
AIF - 5B - 14 LHR
AIF - 5B - 15 LHR
AIF - 5B - 1er Regt
AIF - 5B - 2 NZMGS
AIF - AASC
AIF - Aboriginal LH
AIF - Badges
AIF - Cars
AIF - Chinese LH
AIF - Double Sqns
AIF - Engineers
AIF - Fr - 22 Corps
AIF - Fr - 13 LHR
AIF - Honour Roll
AIF - HQ - 3rd Echelon
AIF - Marching Songs
AIF - Misc Topics
AIF - NZMRB
AIF - NZMRB - AMR
AIF - NZMRB - CMR
AIF - NZMRB - EFT
AIF - NZMRB - NZMFA
AIF - NZMRB - NZMGS
AIF - NZMRB - OMR
AIF - NZMRB - Sig-Trp
AIF - NZMRB - WMR
AIF - Ships
AIF - Ships - Encountr
AIF - Ships - Una
AIF - WFF
AIF - Wireless Sqn
Battles
BatzA - Australia
BatzA - Broken Hill
BatzA - Liverpool
BatzA - Merivale
BatzB - Boer War
BatzB - Bakenlaagte
BatzB - Belmont
BatzB - Bothaville
BatzB - Buffels Hoek
BatzB - Coetzees Drift
BatzB - Diamond Hill
BatzB - Driefontein
BatzB - Elands
BatzB - Graspan
BatzB - Grobelaar
BatzB - Grootvallier
BatzB - Hartebestfontn
BatzB - Houtnek
BatzB - Karee Siding
BatzB - Kimberley
BatzB - Koster River
BatzB - Leeuw Kop
BatzB - Mafeking
BatzB - Magersfontein
BatzB - Modder River
BatzB - Onverwacht
BatzB - Paardeberg
BatzB - Palmietfontein
BatzB - Pink Hill
BatzB - Poplar Grove
BatzB - Rhenoster
BatzB - Sannahs Post
BatzB - Slingersfontn
BatzB - Stinkhoutbm
BatzB - Sunnyside
BatzB - Wilmansrust
BatzB - Wolvekuil
BatzB - Zand River
BatzG - Gallipoli
BatzG - Anzac
BatzG - Aug 1915
BatzG - Baby 700
BatzG - Evacuation
BatzG - Hill 60
BatzG - Hill 971
BatzG - Krithia
BatzG - Lone Pine
BatzG - Nek
BatzJ - Jordan Valley
BatzJ - 1st Amman
BatzJ - 2nd Amman
BatzJ - Abu Tellul
BatzJ - Es Salt
BatzJ - JV Maps
BatzJ - Ziza
BatzM - Mespot
BatzM - Baghdad
BatzM - Ctesiphon
BatzM - Daur
BatzM - Kurna
BatzM - Kut el Amara
BatzM - Ramadi
BatzN - Naval
BatzN - AE1
BatzN - Cocos Is
BatzN - Heligoland
BatzN - Marmara
BatzN - Zeebrugge
BatzN - Zeppelin L43
BatzNG - Bitapaka
BatzO - Other
BatzO - Baku
BatzO - Egypt 1919
BatzO - Emptsa
BatzO - Karawaran
BatzO - Peitang
BatzO - Wassa
BatzP - Palestine
BatzP - 1st Gaza
BatzP - 2nd Gaza
BatzP - 3rd Gaza
BatzP - Aleppo
BatzP - Amwas
BatzP - Ayun Kara
BatzP - Bald Hill
BatzP - Balin
BatzP - Beersheba
BatzP - Berkusieh
BatzP - Damascus
BatzP - El Auja
BatzP - El Buggar
BatzP - El Burj
BatzP - Haifa
BatzP - Huj
BatzP - JB Yakub
BatzP - Kaukab
BatzP - Khan Kusseir
BatzP - Khuweilfe
BatzP - Kuneitra
BatzP - Megiddo
BatzP - Nablus
BatzP - Rafa
BatzP - Sasa
BatzP - Semakh
BatzP - Sheria
BatzP - Surafend
BatzP - Wadi Fara
BatzS - Sinai
BatzS - Bir el Abd
BatzS - El Arish
BatzS - El Mazar
BatzS - El Qatiya
BatzS - Jifjafa
BatzS - Magdhaba
BatzS - Maghara
BatzS - Romani
BatzS - Suez 1915
BatzSe - Senussi
BatzWF - Westn Front
BW - Boer War
BW - NSW
BW - NSW - 1ACH
BW - NSW - 1NSWMR
BW - NSW - 2NSWMR
BW - NSW - 3ACH
BW - NSW - 3NSWIB
BW - NSW - 3NSWMR
BW - NSW - 5ACH
BW - NSW - A Bty RAA
BW - NSW - AAMC
BW - NSW - Aust H
BW - NSW - Lancers
BW - NSW - NSW Inf
BW - NSW - NSWCBC
BW - NSW - NSWIB
BW - NSW - NSWMR_A
BW - NZ
BW - Qld
BW - Qld - 1ACH
BW - Qld - 1QMI
BW - Qld - 2QMI
BW - Qld - 3ACH
BW - Qld - 3QMI
BW - Qld - 4QIB
BW - Qld - 5QIB
BW - Qld - 6QIB
BW - Qld - 7ACH
BW - QLD - AAMC
BW - SA
BW - SA - 1SAMR
BW - SA - 2ACH
BW - SA - 2SAMR
BW - SA - 3SACB
BW - SA - 4ACH
BW - SA - 4SAIB
BW - SA - 5SAIB
BW - SA - 6SAIB
BW - SA - 8ACH
BW - SA - AAMC
BW - Tas
BW - Tas - 1ACH
BW - Tas - 1TIB
BW - Tas - 1TMI
BW - Tas - 2TB
BW - Tas - 2TIB
BW - Tas - 3ACH
BW - Tas - 8ACH
BW - Vic
BW - Vic - 1VMI
BW - Vic - 2ACH
BW - Vic - 2VMR
BW - Vic - 3VB
BW - Vic - 4ACH
BW - Vic - 4VIB
BW - Vic - 5VMR
BW - Vic - 6ACH
BW - Vic - AAMC
BW - Vic - Scot H
BW - WA
BW - WA - 1WAMI
BW - WA - 2ACH
BW - WA - 2WAMI
BW - WA - 3WAB
BW - WA - 4ACH
BW - WA - 4WAMI
BW - WA - 5WAMI
BW - WA - 6WAMI
BW - WA - 8ACH
BW Gen - Campaign
BW Gen - Soldiers
BW General
Cavalry - General
Diary - Schramm
Egypt - Heliopolis
Egypt - Mena
Gen - Ataturk Pk, CNB
Gen - Australia
Gen - Legends
Gen - Query Club
Gen - St - NSW
Gen - St - Qld
Gen - St - SA
Gen - St - Tas
Gen - St - Vic
Gen - St - WA
Gm - German Items
Gm - Bk - 605 MGC
GW - 11 Nov 1918
GW - Atrocities
GW - August 1914
GW - Biographies
GW - Propaganda
GW - Spies
GW - We forgot
Militia 1899-1920
Militia - Area Officers
Militia - Inf - Infantry
Militia - Inf - 1IB
Militia - Inf - 2IB
Militia - Inf - 3IB
Militia - Inf - NSW
Militia - Inf - Qld
Militia - Inf - SA
Militia - Inf - Tas
Militia - Inf - Vic
Militia - Inf - WA
Militia - K.E.Horse
Militia - LH
Militia - LH - Regts
Militia - LH - 1LHB
Militia - LH - 2LHB
Militia - LH - 3LHB
Militia - LH - 4LHB
Militia - LH - 5LHB
Militia - LH - 6LHB
Militia - LHN - NSW
Militia - LHN - 1/7/1
Militia - LHN - 2/9/6
Militia - LHN - 3/11/7
Militia - LHN - 4/6/16
Militia - LHN - 5/4/15
Militia - LHN - 6/5/12
Militia - LHN - 28
Militia - LHQ - Qld
Militia - LHQ - 13/2
Militia - LHQ - 14/3/11
Militia - LHQ - 15/1/5
Militia - LHQ - 27/14
Militia - LHS - SA
Militia - LHS - 16/22/3
Militia - LHS - 17/23/18
Militia - LHS - 24/9
Militia - LHT - Tas
Militia - LHT - 12/26
Militia - LHV - Vic
Militia - LHV - 7/15/20
Militia - LHV - 8/16/8
Militia - LHV - 9/19
Militia - LHV - 10/13
Militia - LHV - 11/20/4
Militia - LHV - 19/17
Militia - LHV - 29
Militia - LHW - WA
Militia - LHW-18/25/10
Militia - Military Orders
Militia - Misc
MilitiaRC - Rifle Clubs
MilitiaRC - NSW
MilitiaRC - NT
MilitiaRC - Qld
MilitiaRC - SA
MilitiaRC - Tas
MilitiaRC - Vic
MilitiaRC - WA
Militiaz - New Zealand
Tk - Turkish Items
Tk - Army
Tk - Bks - Books
Tk - Bks - 1/33IR
Tk - Bks - 27th IR
Tk - Bks - Air Force
Tk - Bks - Yildirim
Tk - POWs
Wp - Weapons
Wp - Hotchkiss Cav
Wp - Hotchkiss PMG
Blog Tools
Edit your Blog
Build a Blog
RSS Feed
View Profile
Open Community
Post to this Blog
Site Index
Education Centre
LH Militia
Boer War
Transport Ships
LH Battles
ALH - Units
ALH - General
Aboriginal Light H
Weapons
Ottoman Sources

"At a mile distant their thousand hooves were stuttering thunder, coming at a rate that frightened a man - they were an awe inspiring sight, galloping through the red haze - knee to knee and horse to horse - the dying sun glinting on bayonet points..." Trooper Ion Idriess

The Australian Light Horse Studies Centre aims to present an accurate history as chroniclers of early Australian military developments from 1899 to 1920.

The Australian Light Horse Studies Centre site holds over 12,000 entries and is growing daily.

Contact: Australian Light Horse Studies Centre

Let us hear your story: You can tell your story, make a comment or ask for help on our Australian Light Horse Studies Centre Forum called:

Desert Column Forum

WARNING: This site contains: names, information and images of deceased people; and, language which may be considered inappropriate today.

Tuesday, 23 December 2008
The Battle of Magdhaba, Sinai, December 23, 1916, 3rd Australian Light Horse Brigade
Topic: AIF - 3B - 3 LHB

The Battle of Magdhaba

Sinai, 23 December 1916

Roll of Honour

3rd Australian Light Horse Brigade


Poppies on the Roll of Honour, Australian War Memorial, Canberra


The Roll of Honour contains the names of all the men from the 3rd Australian Light Horse Brigade known to have served and lost their lives during the Battle of Magdhaba.


Roll of Honour

Edgar Gordon DOWN, 8th Light Horse Regiment.


William Ewen Robert ELLIOTT, 8th Light Horse Regiment.


Mervyn Bournes HIGGINS, 8th Light Horse Regiment.


Charles David Frederick JONES, 10th Light Horse Regiment.


Ernest Harold MACK, 8th Light Horse Regiment.


Alexander NAIRN, 8th Light Horse Regiment.


William PERKINS, 8th Light Horse Regiment. 

Henry Richard Alfred PIX, 9th Light Horse Regiment. 

Benjamin POUNTNEY, 10th Light Horse Regiment. 


Victor Sewell TAYLOR, 10th Light Horse Regiment


Richard WATSON, 8th Light Horse Regiment. 

Lest We Forget


Acknowledgement: Many thanks to Steve Becker who provided much of the raw material that appears in this item.


Further Reading:

3rd Light Horse Brigade, AIF

The Battle of Magdhaba

Battles where Australians fought, 1899-1920


Citation: The Battle of Magdhaba, Sinai, December 23, 1916, 3rd Australian Light Horse Brigade

Posted by Project Leader at 12:01 AM EAST
Updated: Sunday, 22 November 2009 6:45 AM EAST
Saturday, 11 October 2008
The Battle of Beersheba, Palestine, 31 October 1917, 3rd LH Bde, AIF, Unit History Account
Topic: AIF - 3B - 3 LHB

 The Battle of Beersheba

Palestine, 31 October 1917

3rd LH Bde, AIF, Unit History Account


Major Lachlan Chisholm Wilson, later Brigadier General and Commander of the 3rd LH Brigade

[From:  Likeman, R, From Law to War, p. 3.]


Brigadier General Lachlan Chisholm Wilson wrote his Narrative of Third Light Horse Brigade from 27th October 1917 to 4th March 1919, in which included a section specifically related to the battle of Beersheba and is extracted below.

Wilson, LC, Narrative of Third Light Horse Brigade from 27th October 1917 to 4th March 1919, p. 3:

Shortly after 0530 our advanced troops gained touch with the Anzac Mounted Division in the vicinity of Iswaiwin. Here water in shallow pools was discovered and many of the horses were given a short drink, although time would not permit all horses being watered.

The Australian Mounted Division shortly afterwards concentrated. Final orders for the Division were to be received at the point of concentration. The Division would be called upon for either one or two tasks by the Desert Mounted Corps, whose double mission was,

[a]. To attack Beersheba, from the east, and envelope the enemy's left rear; and,
[b]. To seize as much water supply as possible in order to form a base for field operations. The 20th Corps would cooperate with Desert Mounted Corps by attacking Beersheba defences from the west and south west.

The capture of Beersheba being primary object of the army.

The Australian Mounted Division was to be prepared at Iswaiwin for a quick move either north westward on Beersheba or northwards to assist Anzac Mounted Division, who were moving to attack Tel el Saba.

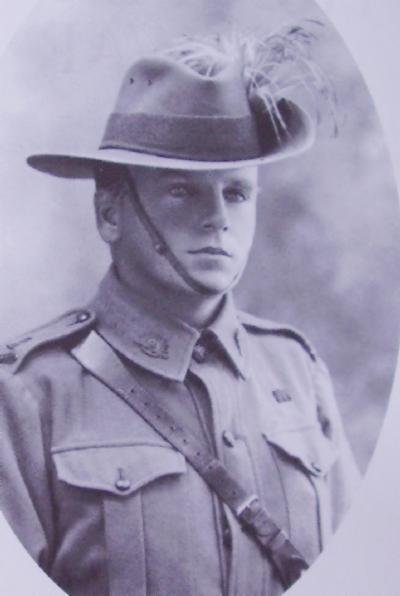
From the rear of the Anzac Mounted Division, 8th Light Horse Regiment, under Maygar, Lieutenant Colonel LC, VC DSO, was detached at 0630 to take up the line 1280 - 1180 - 1210, and get signalling communication with 7th Mounted Brigade [operating on right of 20th Corps], on the left, and New Zealand Mounted Rifle Brigade [operating on the left of Anzac Mounted Division], on the right.

8th Light Horse Regiment was linked up with right and left by 1800. Enemy positions and works at Ras Ghannam were reconnoitred vigorously and discovered to be very strongly held.

After receipt of reports of the patrols, who had been reconnoitring enemy positions east south east, south and south west of Beersheba, during the morning, orders were received that the main attack would be launched against the enemy's position at Tel el Saba.

The Anzac Mounted Division were pushing the attack now on the right, and at 1400 the Brigade [less the 8th Light Horse Regiment] received orders to move to assist the Anzac Mounted Division at Tel el Saba, being temporarily attached to the Division for this purpose.

On moving across open country immediately towards Bir Salim Abu Irgeig, the Brigade came under heavy shell fire. The formation of the Brigade in this movement was Squadron column in line of troop column, with double interval and distance.

On the arrival of the Brigade at the point of deployment Bir Salim Abu Irgeig at 1500, the 9th Light Horse Regiment under Scott, Lieutenant Colonel WH, DSO was ordered into the attack on the right of the New Zealand Mounted Rifle Brigade, supported by the rest of the Brigade, less the 8th Light Horse Regiment. The 9th Light Horse Regiment moved forward across the open ground to the north of the main wadi where it came under intense enemy shelling, but suffered very few casualties. The movement was carried out with the Regiment in column of squadrons, each squadron in line of troop column, with 100 yards interval and distance between troops. The determination with which the movement was executed undoubtedly had a moral effect on the enemy which was now being closed in on. The balance of the Brigade moved in support along the bed of the main wadi.

The enemy's position at Tel el Saba was at 1530 captured with the garrison by the New Zealand Mounted Rifle Brigade before the 9th Light Horse Regiment dismounted for action.

The 10th Light Horse Regiment at 1630 was ordered to seize the positions 1020 and 970, and cut off any enemy retreat along the Beersheba - Hebron Road.

The 9th Light Horse Regiment was now ordered to move from 1080 to Tel el Saba, and take up a second line 1040 - 960, to cooperate with the 10th Light Horse Regiment holding the line 1020 - 970, in cutting off an enemy's retreat [from Beersheba towards] Hebron.

When nearing Tel el Saba the 9th Light Horse Regiment was bombed by two enemy aeroplanes flying at the extremely low altitudes of 800 feet, and suffered very heavy casualties in both men and horses. Including the sub - section Machine Gun Squadron attached to 9th Light Horse Regiment, casualties sustained were: - 13 other ranks killed, and three Officers and 17 other ranks wounded, 20 horses wounded and 32 horses killed.

The 8th Light Horse Regiment had received orders from Headquarters, Anzac Mounted Division to rejoin 3rd Light Horse Brigade Headquarters. When so doing they were also bombed by enemy aircraft flying at a very low altitude. The CO, Maygar, Lieutenant Colonel LC, VC DSO, was here mortally wounded, and died the following day.

At about 1900 news was received that Beersheba had been captured. The enemy had been taken by surprise; they had not expected a serious attack on this flank. Information of the movement in force of the mounted troops towards Asluj was not gained by the enemy. The enemy aeroplane which did detect the movement of troops to the south failed to return.
The 10th Light Horse Regiment was meeting strong opposition from an enemy rear guard, who advanced against one squadron and entrenched themselves in front of the 10th Light Horse Regiment position. The opening up of machine gun and rifle fire at about 2130 drove the enemy back. 10th Light Horse Regiment advanced troops had now entered Beersheba from the north east. All Regiments and the machine gun squadron of the Brigade had during the day taken part in the attack. The casualties in the Brigade incurred for the day's operations were: 13 killed and 33 wounded, with 36 horses wounded and 32 killed.

There were captured by the mounted troops nearly 2,000 prisoners, 14 guns and huge quantities of booty of all descriptions.

During the night the Brigade was continually sniped at from a ridge north of Beersheba. 25 prisoners, chiefly snipers, were taken by the 9th and 10th Light Horse Regiments during the night.


Further Reading:

3rd Light Horse Brigade, AIF

The Battle of Beersheba, Palestine, 31 October 1917

Australian and New Zealand Roll of Honour

Battles where Australians fought, 1899-1920


Citation: The Battle of Beersheba, Palestine, 31 October 1917, 3rd LH Bde, AIF, Unit History Account 

Posted by Project Leader at 10:48 PM EADT
Updated: Sunday, 4 October 2009 9:01 AM EADT
Wednesday, 17 September 2008
Bir el Mazar, Sinai, 17 September 1916, 3rd LH Bde, AIF, War Diary Account
Topic: AIF - 3B - 3 LHB

Bir el Mazar

Sinai, 17 September 1916

3rd LH Bde, AIF, War Diary Account


War Diary account of the 3rd LH Bde, AIF.


The transcription:

3rd Light Horse Brigade report on Mazar Operations 16 to 18th September 1916.

According to orders contained in Operation Order No. 41 dated 10 September 1916, and subsequent instructions, the Brigade proceeded to Salmana and thence to a point 7 miles east of Mazar. At this point the Brigade was detached to take up its allotted position for the attack on Mazar from south and south east - the route taken being along the northern edge of the sand dunes so as to avoid any chance of detection travelling being very heavy in parts.

Great credit is due to the Advance Regiment (9th Light Horse Regiment) for directing the Brigade to its point of attack.

Before turning north, one Troop was detached with a view of making touch with the Imperial Camel Corps at Malha, but failed to do sol

On turning north the Brigade was brought directly opposite Mazar from the south.

At 0500, 3 Squadrons were lining the second ridge running east and west and south of Mazar. This line was immediately pushed forward with little opposition, to the ridge directly overlooking Mazar. It was then realised that the line was not sufficiently extended to the east so it was added to by 2 Squadrons of the 9th Light Horse Regiment.

At 0530 3 Squadrons of the 10th Light Horse Regiment on the left, and 9th Light Horse Regiment on the right, with one Squadron of 8th Light Horse Regiment in the centre were drawing fire on a front of 2 miles with a view of ascertaining the strength of the position. These Squadrons were supported by Machine Gun fire - 2 Squadrons and 2 Sections of Machine Guns being in support.

Taking into consideration the country to be traversed, and the length of the march, the time allotted (1½ hours) to sum up the situation was hardly long enough. The enemy were content to keep up a continuous sniping fire with occasional heavy bursts, accompanied by anti-aircraft gun fire.

It was soon realised by observation and the amount of fire drawn, that the enemy was in strength, and as a general action was not to be commenced if such conditions existed, the Brigade proceeded to withdraw.

Up to that time only one casualty had occurred.

On the enemy realising a retirement was taking place a brisk fire was opened resulting in the below mentioned casualties.

During the time allowed to ascertain the strength of the position (0500 - 0615) little or no activity was shown from the west and on account of the guns not coming into action this was one of the main factors in arriving at the decision to retire.

The Imperial Camel Corps and Hong Kong and Singapore Camel Battery were unable to arrive at their allotted position in the time, and only came in sight 3 miles to the south when the retirement was ordered. This delayed the movement which could not continue until they were safely away, their retirement being covered by the 8th Light Horse Regiment.

During the final retirement of the Brigade the 7th Light Horse Regiment rendered considerable assistance, particularly in covering the last 2 Troops of the 10th Light Horse Regiment which were forced to remain to assist 3 men with 4 camels who suddenly appeared on our right flank going towards the enemy and who were subsequently found, had gone astray.

As soon as the position was evacuated the enemy brought a very accurate searching fire to bear on the valleys previously occupied.

On the Brigade concentrating the return march was commenced, the Column arriving at the point of selected for watering at 1300. This was not carried out in the most expeditious and workable manner when the much needed water could not be fully appreciated.
From thence the Brigade proceeded to bivouac at Salmana, and the following morning the present Front Line was re-occupied, the remainder of the Brigade going into camp at Amara.

The following are the casualties:-

 OfficersOther Ranks
Killed12
Wounded08
Injured02


Additional Reading:

3rd Light Horse Brigade, AIF

Bir el Mazar, Sinai, 17 September 1916

Bir el Mazar, Sinai, 17 September 1916, Roll of Honour 

Battles where Australians fought, 1899-1919


Citation: Bir el Mazar, Sinai, 17 September 1916, 3rd LH Bde, AIF, War Diary Account

Posted by Project Leader at 12:01 AM EADT
Updated: Tuesday, 24 November 2009 6:19 AM EAST
Saturday, 9 August 2008
Bir el Abd, Sinai, 9 August 1916, 3rd LH Bde, AIF, War Diary Account
Topic: AIF - 3B - 3 LHB

Bir el Abd

Sinai, 9 August 1916

3rd LH Bde, AIF, War Diary Account


War Diary account of the 3rd LH Bde, AIF.


The transcription:

8th August

In the early morning patrols reports enemy had retired. Brigade moved in pursuit at 0800 and advanced as far as the line running north and south through Bir el Abd where the enemy were found to be holding an exceedingly strong entrenched position. A strong redoubt domineering the right centre of the line apportioned off to the Brigade for attack - no further advance was made, one Regiment retiring to Hassaniya, another to Hammam, the remainder of the Brigade to Hillali.

9th August

A general attack having been ordered on the Bir el Abd line this Brigade was instructed to devote its energies in turning the enemy's left with a view of making Salmana. Later in the day these instructions were cancelled and Bir el Abd given as the objective.

The 8th Light Horse Regiment in advance attacked the enemy's line but could make little or no progress. The line was then extended both to the right and left by the 9th Light Horse Regiment being sent forward, but this met with no further success, it being found impossible to turn the enemy's left. Seven machine guns were in action during the day doing excellent work. Also the Inverness Battery. The Battery had excellent targets which were taken full advantage of. From about 1000 onwards it was realised no forward movement could take place as the Brigade held on to the front gained, being continually under a heavy and accurate sniping fire. At 1700 a determined attack supported by heavy gun fire was mad to break our centre, the 8th Light Horse Regiment coming in for the brunt of the attack. With the support of the Machine Guns and with great tenacity they held on and saved the position receiving great assistance by the timely arrival of a Squadron 10th Light Horse Regiment which relieved the pressure, the enemy eventually drawing off. The Brigade withdrew at dark to Hassaniya-Hassanein and Hillali, leaving out one Regiment in observation. During the day great difficulty was experienced in communicating with Division, but a cable was run out but not connected until next morning owing to the cable being 2 miles short.


Roll of Honour

Bir el Abd, Sinai, 9 August 1916, Roll of Honour, 3rd Australian Light Horse Brigade
Lest We Forget


Further Reading:

3rd Light Horse Brigade, AIF

Battle of Romani, Sinai, August 4 to 5, 1916, Roll of Honour, Australia and New Zealand 

Battle of Romani, Sinai, August 4 to 5, 1916 

Bir el Abd, Sinai, 9 August 1916

Battles where Australians fought, 1899-1920


Citation: Bir el Abd, Sinai, 9 August 1916, 3rd LH Bde, AIF, War Diary Account

Posted by Project Leader at 12:01 AM EADT
Updated: Friday, 18 December 2009 4:58 PM EAST
Sunday, 29 June 2008
3rd LHB Signals about Ammunition, 1 November 1915
Topic: AIF - 3B - 3 LHB

It may have been war and there may have been men dying in all manner of hideous deaths, but the accountants required their indents to be properly balanced. When a Regiment took over part of a trench line, all items employed by the men were usually removed by them and maintained on the Regimental asset register. Ammunition was slightly different. It was not wise to remove ammunition from the reserves while there was a change in trench deployment. Even the flinty hearted government accountants could see the danger involved. In a compromise to ensure safety as well as keeping the books balanced, ammunition was counted prior to hand over. The regimental adjutant would give a summary down to the last bullet and bomb of the ammunition holding at the trench. Once this was ascertained, then the incoming adjutant would sign a declaration that the reconciliation was accurate and take control of the ammunition.

The first signal, sent from Colonel Antill, the action GOC of 3rd LHB to General Godley, the GOC of the New Zealand and Australian Division. Antill is detailling the Brigade ammunition stocks as at 1 November 1915.

Since there were new models of the humble .303 bullet, the aim was to expend stocks of the older Mark VI ammunition while holding onto stocks of the newer Mark VII ammunition.

If the adjutant of the 3rd LHB thought his work was done,  he was mistaken. An error in the summary was detected at Divisional Headquarters leading to a signal being sent to the adjutant of 3rd LHB with a "please explain" request. While the incoming signal is lost, the reply still exists. The frustration oozes from the words. 


There was a spare 2,000 bullets which could not be accounted for from the Divisional Headquarters figures and the answer was urgently required. The missing 2,000 rounds had not been added to the Regimental reserve. The accountant at Divisional Headquarters could breath easy knowing that the bullets had not disappeared through theft nor had been frivolously wasted by firing at the Turks.

Many examples exist of Commanders receiving rude and urgent queries about their expenditure of ammunition. If the ammunition consumption spikes upwards, the GOC could always rely upon a demand for an ammunition audit. An army may have travelled on its stomach but it survived on paper.


Citation: 3rd LHB Signals about Ammunition, 1 November 1915


Posted by Project Leader at 2:52 PM EADT
Updated: Sunday, 29 June 2008 2:55 PM EADT

Newer | Latest | Older

Full Site Index


powered by FreeFind
Let us hear your story: You can tell your story, make a comment or ask for help on our forum.

Desert Column Forum

A note on copyright

The Australian Light Horse Studies Centre is a not for profit and non profit group whose sole aim is to write the early history of the Australian Light Horse from 1900 - 1920. It is privately funded and the information is provided by the individuals within the group and while permission for the use of the material has been given for this site for these items by various donors, the residual and actual copyright for these items, should there be any, resides exclusively with the donors. The information on this site is freely available for private research use only and if used as such, should be appropriately acknowledged. To assist in this process, each item has a citation attached at the bottom for referencing purposes.

Please Note: No express or implied permission is given for commercial use of the information contained within this site.

A note to copyright holders

The Australian Light Horse Studies Centre has made every endeavour to contact copyright holders of material digitised for this blog and website and where appropriate, permission is still being sought for these items. Where replies were not received, or where the copyright owner has not been able to be traced, or where the permission is still being sought, the Australian Light Horse Studies Centre has decided, in good faith, to proceed with digitisation and publication. Australian Light Horse Studies Centre would be happy to hear from copyright owners at any time to discuss usage of this item.

Contact

Australian Light Horse Studies Centre

eXTReMe Tracker