"At a mile distant their thousand hooves were stuttering thunder, coming at a rate that frightened a man - they were an awe inspiring sight, galloping through the red haze - knee to knee and horse to horse - the dying sun glinting on bayonet points..." Trooper Ion Idriess
The Australian Light Horse Studies Centre aims to present an accurate history as chroniclers of early Australian military developments from 1899 to 1920.
The Australian Light Horse Studies Centre site holds over 12,000 entries and is growing daily.
Contact:Australian Light Horse Studies CentreLet us hear your story:
You can tell your story, make a comment or ask for help on our Australian Light Horse Studies Centre Forum called:
The Battle of Coetzee Drift, South Africa, 5 May 1900, Outline Topic: BatzB - Coetzees Drift
South African (Second Boer) War
The Battle of Coetzee Drift, South Africa, 5 May 1900
Outline
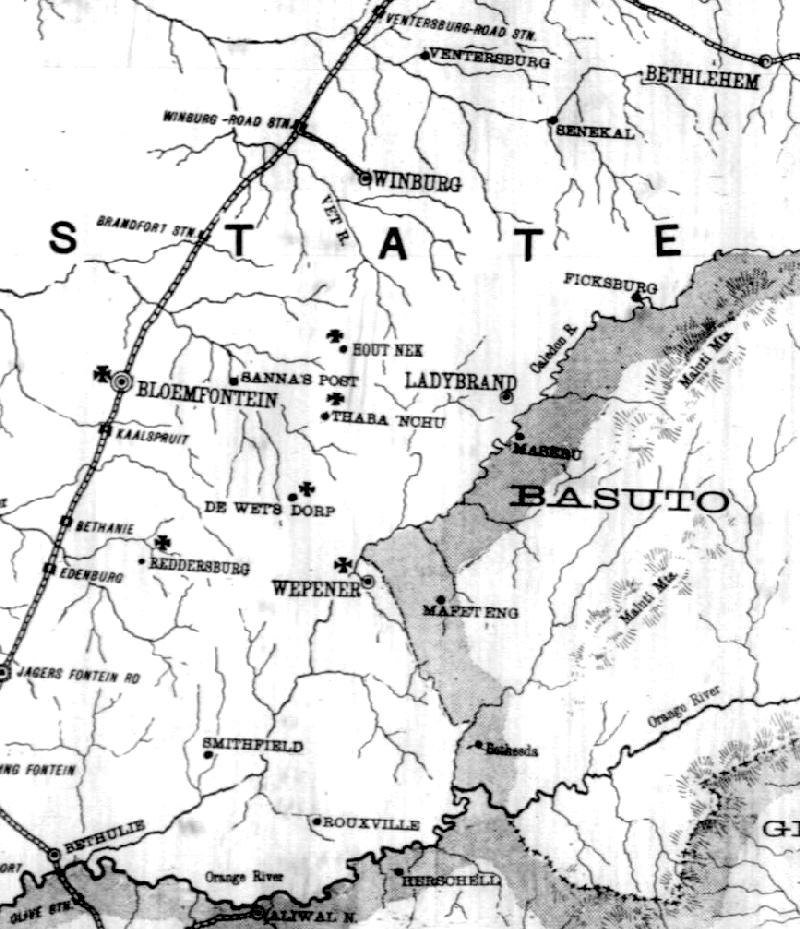
Map of area of engagements.
[From: The Australasian, 12 May 1900, p. 1039.]
Coetzee's Drift, an action during the Second South African War, fought on 5 May 1900 along the Vet River in Orange Free State. After seizing the town of Brandfort two days earlier, the British commander, Field Marshal Lord Roberts, sent forward mounted forces to meet Boer forces under General J.H. De la Rey who were preparing a new line of resistance at the Vet River. The advance was conducted with Major-General Edward Hutton's brigade (which included several Australian units) on the left of the northern railway, and the mounted infantry division commanded by Lieut.-General Ian Hamilton on the right. The latter had secured Welkom Drift (ford) on 4 May and camped there overnight in readiness for Roberts' general push across the river the next day.
When the advance began on 5 May Hamilton had an easy march to Winburg, which he occupied that afternoon. Hutton, meanwhile, faced a more difficult task on the western flank, where the bulk of De la Rey's 1,500 burghers were posted in widely dispersed positions at the main crossing points. Arriving at noon at Coetzee's (or Misgunsfontein) Drift, ten kilometres west of the railway, Hutton found this so strongly defended that he was deterred from making a frontal attack. Learning from a local farmer of the existence of another disused ford four kilometres further west, he sent a British battalion supported by two companies of Canadians across in a flanking movement at this point. Once he saw that these troops were in a position to bear in against the right flank of the Boers occupying the high ground overlooking the main drift, he ordered the New South Wales Mounted Rifles, supported by the Queensland Mounted Infantry and New Zealand Mounted Rifles, to cross the river and attack.
The task given to the men of the NSWMR was a difficult one, for once on the other side they found themselves within a sort of basin formed by steep mimosa-covered banks which the Boers occupied in increasing strength. The pressure on the attacking Australians was relieved by the action of a flanking British battalion, which-having discovered another ford further east-took the initiative of crossing without waiting for orders and began driving in against the enemy's left. At this, the Boer defenders yielded the high ground and began withdrawing. An impetuous assault by the New South Wales men surprised the enemy party covering the retirement of several guns, and inflicted 23 casualties on this rearguard. By 4.45 p.m. Hutton himself crossed over the river to take possession of the Boer positions. The action had cost his force only four men wounded, due to the effective way in which it was managed rather than being indicative of the severity of the fighting involved.
Although Roberts now had both his flanks across the Vet, he was still held up in the centre where De la Rey had posted commandos on two kopjes (low hills) south of the river. When a body of the 2nd West Australian Mounted Infantry operating in advance of the 11th Division came within range of the Boer guns mounted on these hills, they were unable to make much headway until these weapons were subjected to counter-fire from three field batteries and other heavy guns. The kopjes were not occupied until just on dusk, after the WAMI made a spirited bayonet charge which prompted the Boers to withdraw before the attack's full weight could be delivered. The hour was now too late for the British to take effective follow-up action, so that the Boers were able to maintain their pattern of avoiding significant defeat and simply falling back in front of the British advance while imposing delay.
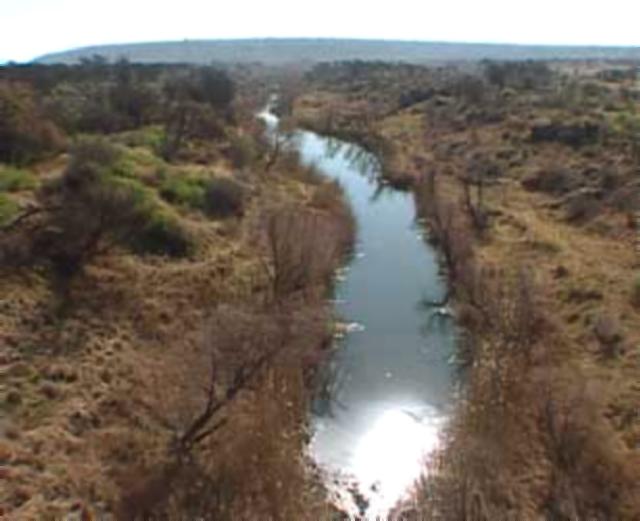
Vet River viewed from Coetzee's Drift (Misgunsfontein).
Extracted from the book produced by Chris Coulthard-Clark, Where Australians Fought - The Encyclopaedia of Australia's Battles, Allen and Unwin, Sydney, 1998, pp. 75-76.
Additional References cited by Chris Coulthard-Clark:
L.S. Amery, (ed.) The Times History of the War in South Africa 1899-1902, Vol. 3 (1906), London: Sampson Low, Marston & Co.
History of the War in South Africa 1899- 1902, Vol. 3 (1908), London: Hurst & Blackett.
R.L. Wallace (1976) The Australians at the Boer War, Canberra: Australian War Memorial & Australian Government Publishing Service.
The Battle of Coetzee Drift, South Africa, 5 May 1900, The Times Account, 7 May 1900 Topic: BatzB - Coetzees Drift
South African (Second Boer) War
The Battle of Coetzee Drift, South Africa, 5 May 1900
The Times Account, 7 May 1900
The Times, 7 May 1900, p. 7.
The account is transcribed below.
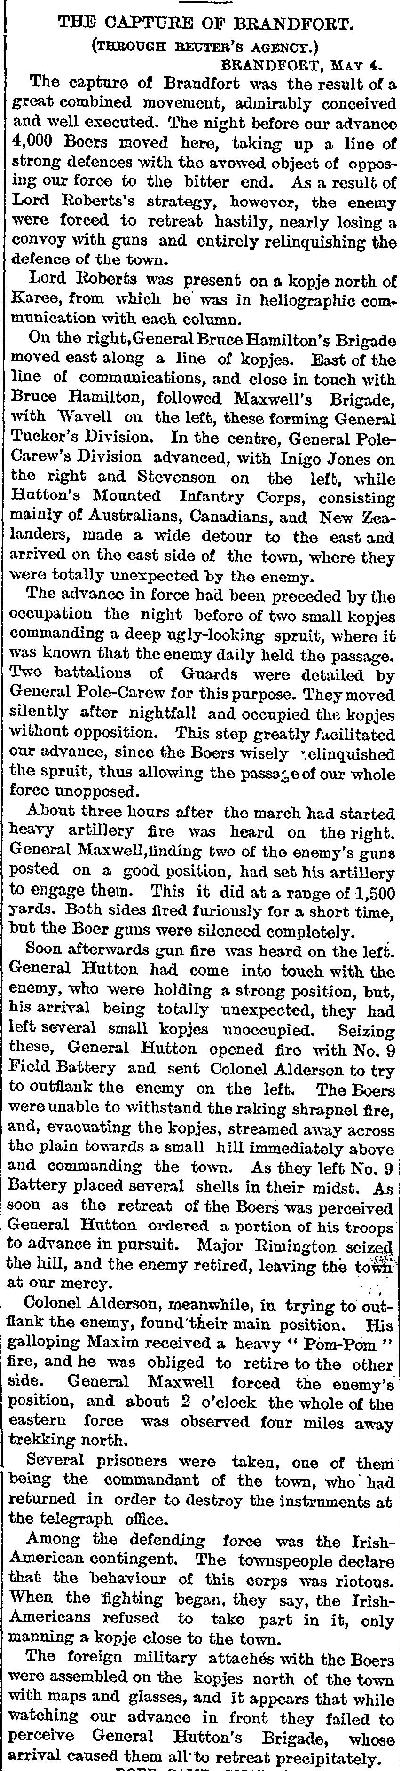
The Times, 7 May 1900, p. 7.
THE CAPTURE OF BRANDFORT.
(THROUGH REUTER'S AGENCY.)
BRANDFORT, May 4.
The capture of Brandfort was the result of a great combined movement, admirably conceived and well executed. The night before our advance 4,000 Boors moved here, taking up a line of strong defences with the avowed object of opposing our force to the bitter end. As a result of Lord Roberts's strategy, however, the enemy were forced to retreat hastily, nearly losing a convoy with guns and entirely relinquishing the defence of the town.
Lord Roberts was present on a kopje north of Karee, from which he was in heliographic communication with each column.
On the right, General Bruce Hamilton's Brigade moved east along a line of kopjes. East of the line of communications, and close in touch with Bruce Hamilton, followed Maxwell's Brigade, with Wavell on the left, these forming General Tucker's Division. In the centre, General PoleCarew's Division advanced, with Inigo Jones on the right and Stevenson on the left, while Hutton's Mounted Infantry Corps, consisting mainly of Australians, Canadians, and New Zealanders, made a wide detour to the east and arrived on the east side of the town, where they were totally unexpected by the enemy.
The advance in force had been preceded by the occupation the night before of two small kopjes commanding a deep ugly-looking spruit, where it was known that the enemy daily held the passage. Two battalions of Guards were detailed by General Pole-Carew for this purpose. They moved silently after nightfall and occupied the kopjes without opposition. This step greatly facilitated our advance, since the Boers wisely relinquished the spruit, thus allowing the passage of our whole force unopposed.
About three hours after the march had started heavy artillery fire was heard on the right. General Maxwell, finding two of the enemy's guns posted on a good position, had set his artillery to engage them. This it did at a range of 1,500 yards. Both sides fired furiously for a short time, but the Boer guns were silenced completely.
Soon afterwards gun fire was heard on the left. General Hutton had come into touch with the enemy, who were holding a strong position, but, his arrival being totally unexpected, they had left several small kopjes unoccupied. Seizing these, General Hutton opened fire with No. 9 Field Battery and sent Colonel Alderson to try to outflank the enemy on the left. The Boers were unable to withstand the raking shrapnel fire, and, evacuating the kopjes, streamed away across the plain towards a small hill immediately above and commanding the town. As they left No. 9 Battery placed several shells in their midst. As soon as the retreat of the Boers was perceived General Hutton ordered a portion of his troops to advance in pursuit. Major Riming ton seized the hill, and the enemy retired, leaving the town at our mercy.
Colonel Alderson, meanwhile, in trying to outflank the enemy, found their main position. His galloping Maxim received a heavy "Pom-Pom" fire, and he was obliged to retire to the other side. General Maxwell forced the enemy's position, and about 2 o'clock the whole of the eastern force was observed four miles away trekking north.
Several prisoners were taken, one of them being the commandant of the town, who had returned in order to destroy the instruments at the telegraph office.
Among the defending force was the IrishAmerican contingent. The townspeople declare that the behaviour of this corps was riotous. When the 'fighting began, they say, the Irish-Americans refused to take part in it, only manning a kopje close to the town.
The foreign military attaches with the Boer: were assembled on the kopjes north of the town 'with maps and glasses, and it appears that while watching our advance in front they failed to perceive General Hutton's Brigade, whose arrival caused them all to retreat precipitately.
The Battle of Coetzee Drift, South Africa, 5 May 1900, The Times Account, 8 May 1900 Topic: BatzB - Coetzees Drift
South African (Second Boer) War
The Battle of Coetzee Drift, South Africa, 5 May 1900
The Times Account, 8 May 1900
The Times, 8 May 1900, p. 5.
The account is transcribed below.
The Times, 8 May 1900, p. 5.
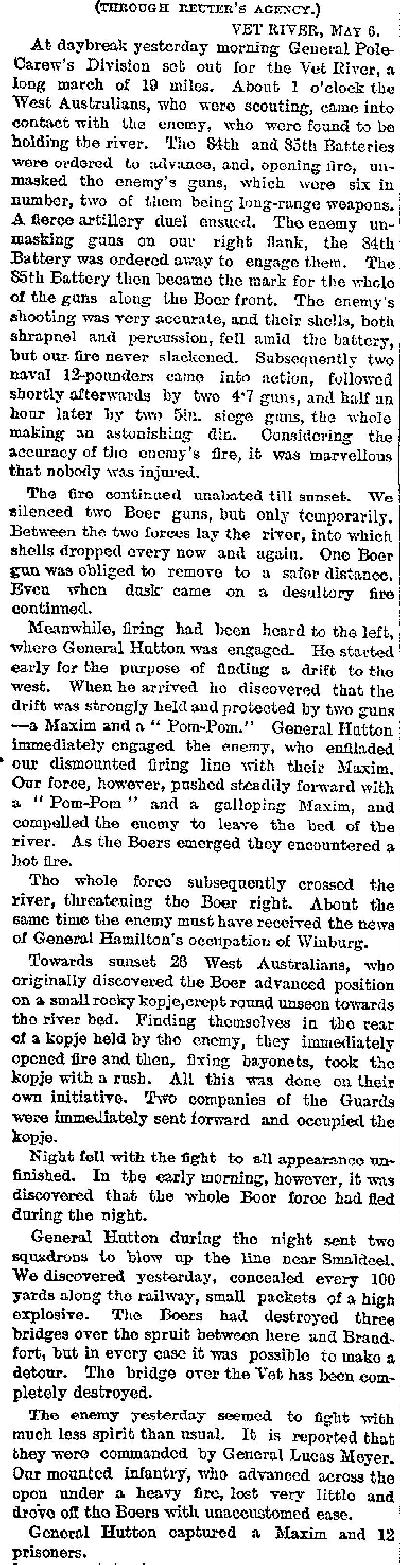
(THROUGH REUTER'S AGENCY.)
VET RIVER, May 6.
At daybreak yesterday morning General Pole-Carew's Division set out for the Vet River, a long march of 10 miles. About 1 o'clock the West Australians, who were scouting, came into contact with the enemy, who were found to be holding the river. The 34th and 85th Batteries were ordered to advance, and, opening fire, unmasked the enemy's guns, which were six in number, two of them being long-range weapons. A fierce artillery duel ensued. The enemy unmasking guns on our right flank, the 84th Battery was ordered away to engage them. The 85th Battery then became the mark for the whole of the guns along the Boer front. The enemy's shooting was very accurate, and their shells, both shrapnel and percussion, fell amid the battery, but our. fire never slackened.
Subsequently two naval 13-pounders came into action, followed shortly afterwards by two 4.7 guns, and half an hour later by two 5in. siege guns, the whole making an astonishing din. Considering the accuracy of the enemy's fire, it was marvellous that nobody was injured.
The fire continued unabated till sunset. We silenced two Boer guns, but only temporarily. Between the two forces lay the river, into which shells dropped every now and again. One Boer gun was obliged to remove to a safer distance. Even when dusk came on a desultory fire continued.
Meanwhile, firing had been heard to the left, where General Hutton was engaged. He started early for the purpose of finding a drift to the west. When he arrived ho discovered that the drift was strongly held and protected by two guns - a Maxim and a "Pom-Pom." General Hutton immediately engaged the enemy, who enfiladed our dismounted firing line with their Maxim. Our force, however, pushed steadily forward with a "Pom-Pom" and a galloping Maxim, and compelled the enemy to leave the bed of the river. As the Boers emerged they encountered a hot fire.
The whole force subsequently crossed the river, threatening the Boer right. About the same time the enemy must have received the news of General Hamilton's occupation of Winburg.
Towards sunset 26 West Australians, who originally discovered the Boer advanced position on a small rocky kopje, crept round unseen towards the river bed. Finding themselves in the rear of a kopje held by the enemy, they immediately opened fire and then, fixing bayonets, took the kopje with a rush. All this was done on their own initiative. Two companies of the Guards were immediately sent forward and occupied the kopje.
Night fell with the fight to all appearance unfinished. In the early morning, however, it was discovered that the whole Boor force had fled during the night.
General Hutton during the night sent two squadrons to blow up the line near Smaldeel. We discovered yesterday, concealed every 100 yards along the railway, small packets of a high explosive. The Boers had destroyed three bridges over the spruit between here and Brandfort, but in every case it was possible to make a detour. The bridge over the Vet has been completely destroyed.
The enemy yesterday seemed to fight with I much less spirit than usual. It is reported that they were commanded by General Lucas Meyer. Our mounted infantry, who advanced across the open under a heavy fire, lost very little and drove off the Boors with unaccustomed case.
The Battle of Coetzee Drift, South Africa, 5 May 1900, The Town and Country Journal, 12 May 1900 Topic: BatzB - Coetzees Drift
South African (Second Boer) War
The Battle of Coetzee Drift, South Africa, 5 May 1900
The Town and Country Journal, 12 May 1900
The Town and Country Journal, 12 May 1900, p. 13.
The account is transcribed below.
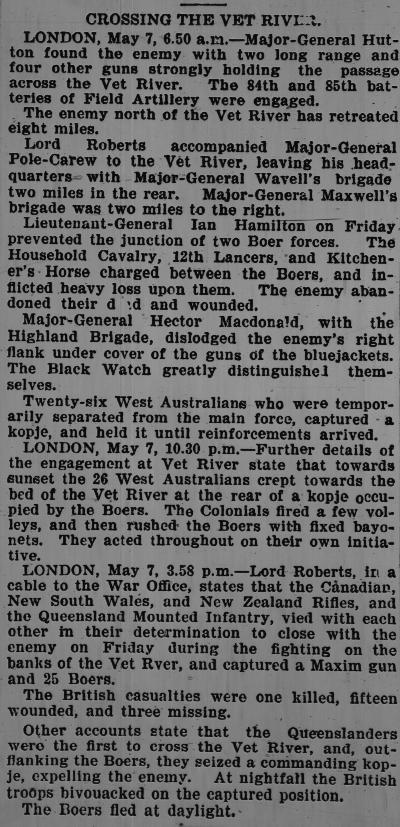
CROSSING THE VET RIVER
LONDON, May 7, 6.50 a.m. -
Major-General Hutton found the enemy with two long range and four other guns strongly holding the passage across the Vet River. The 84th and 85th batteries of Field Artillery were engaged.
The enemy north of the Vet River has retreated eight miles.
Lord Roberts accompanied Major-General Pole-Carew to the Vet River, leaving his .headquarters- with Major-General Wavell's brigade two miles in the rear. Major-General Maxwell's brigade was two miles to the right.
Lieutenant-General Ian Hamilton on Friday prevented the junction of two Boer forces. The Household Cavalry, 12th Lancers, and Kitchener's Horse charged between the Boers, and inflicted heavy loss upon them. The enemy abandoned their dead and wounded.
Major-General Hector Macdonald, with the Highland Brigade, dislodged the enemy's right flank under cover of the guns of the bluejackets. The Black Watch greatly distinguished themselves.
Twenty-six West Australians who were temporarily separated from the main force, captured - a kopje, and held it until reinforcements arrived.
LONDON, May 7, 10.30 p.m.
Further details of the engagement at Vet River state that towards sunset the 26 West Australians crept towards the bed of the Vet River at the rear of a kopje occupied by the Boers. The Colonials fired a few volleys, and then rushed the Boers with fixed bayonets. They acted throughout on their own initiative.
LONDON, May 7, 3.58 p.m.
Lord Roberts, in a cable to the War Office, states that the Canadian New South Wales, and New Zealand Rifles, and the Queensland Mounted Infantry, vied with each other in their determination to close with the enemy on Friday during the fighting on the banks of the Vet River, and captured a Maxim gun and 25 Boers.
The British casualties were one killed, fifteen wounded, and three missing.
Other accounts state that the Queenslanders were the first to cross the Vet River, and, outflanking the Boers, they seized a commanding kop expelling the enemy. At nightfall the British troops bivouacked on the captured position. The Boers fled at daylight.
The Australian Light Horse Studies Centre is a not for profit and non profit group whose sole aim is to write the early history of the Australian Light Horse from 1900
- 1920. It is privately funded and the information is provided by the individuals within the group and while permission for the use of the material has been given for this
site for these items by various donors, the residual and actual copyright for these items, should there be any, resides exclusively with the donors. The information on
this site is freely available for private research use only and if used as such, should be appropriately acknowledged. To assist in this process, each item has a citation
attached at the bottom for referencing purposes.
Please Note: No express or implied permission is given for commercial use of the information contained within this site.
A note to copyright holders
The Australian Light Horse Studies Centre has made every endeavour to contact copyright holders of material digitised for this blog and website and where
appropriate, permission is still being sought for these items. Where replies were not received, or where the copyright owner has not been able to be traced, or where
the permission is still being sought, the Australian Light Horse Studies Centre has decided, in good faith, to proceed with digitisation and publication. Australian Light
Horse Studies Centre would be happy to hear from copyright owners at any time to discuss usage of this item.