"At a mile distant their thousand hooves were stuttering thunder, coming at a rate that frightened a man - they were an awe inspiring sight, galloping through the red haze - knee to knee and horse to horse - the dying sun glinting on bayonet points..." Trooper Ion Idriess
The Australian Light Horse Studies Centre aims to present an accurate history as chroniclers of early Australian military developments from 1899 to 1920.
The Australian Light Horse Studies Centre site holds over 12,000 entries and is growing daily.
Contact:Australian Light Horse Studies CentreLet us hear your story:
You can tell your story, make a comment or ask for help on our Australian Light Horse Studies Centre Forum called:
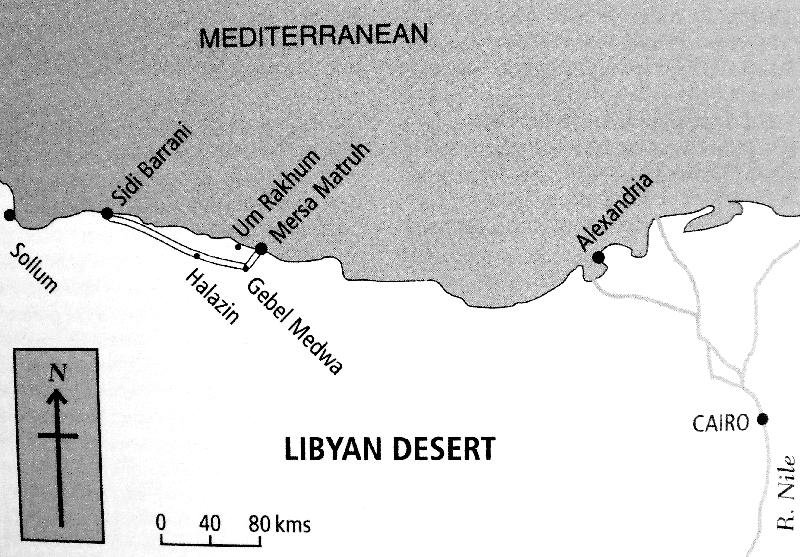
Um Rakhum, Egypt, December 13, 1915 Topic: BatzSe - Senussi
Um Rakhum
Egypt, 13 December 1915
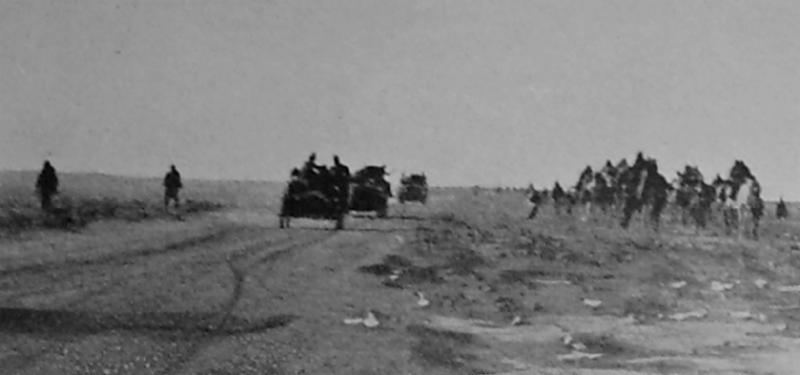
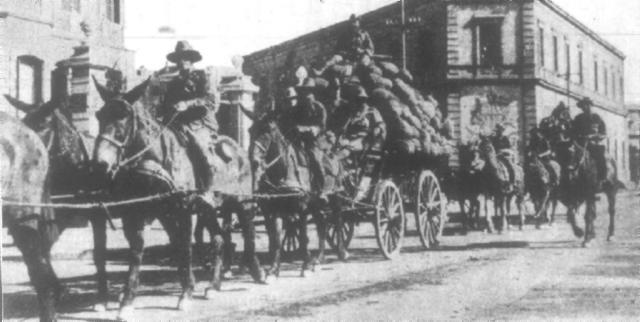
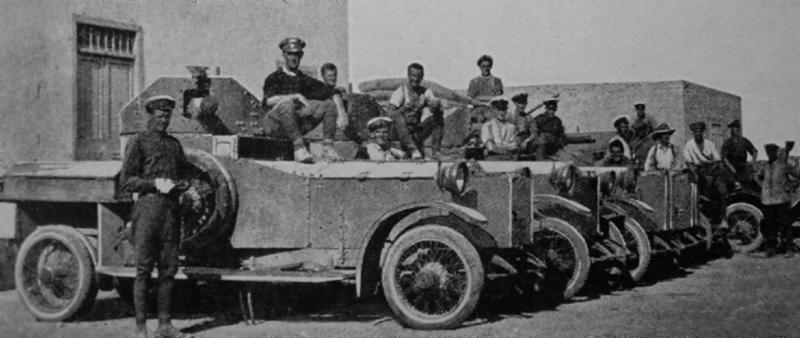
A British armoured car column passing an Egyptian Camel Corps column
Um Rakhum, an action fought in Egypt's western desert adjoining Cyrenaica on 13 December 1915, between pro-Turkish Arabs of a primitive Islamic sect called the Senussi and troops of an improvised British force specially raised to defend the western approaches to the Nile Valley from the Senussi threat. Known as 'Western Frontier Force' and under command of an Indian Army officer, Major-General Alexander Wallace, the British column comprised a brigade of infantry and a cavalry brigade. The latter was drawn from the rear details of units fighting on Gallipoli in a dismounted role, and among its four composite regiments s one comprising Australian light horse squadrons commanded by a British regular officer, Major Hon. Dudley Pelham. Artillery support was provided by the Notts Battery, Royal Horse Artillery, equipped with 13 pounder guns.
After bringing his troops up to the small fishing village of Mersa Matruh on 9 December, Wallace decided to strike an immediate blow against the enemy. On 11 December a half - battalion was sent out on a fighting reconnaissance towards Duwair Hussein, 26 kilometres to the west, where aerial reconnaissance reports indicated about 1,000 Senussi were assembled. Providing support for this move was a British yeomanry regiment, two guns and four armoured cars.
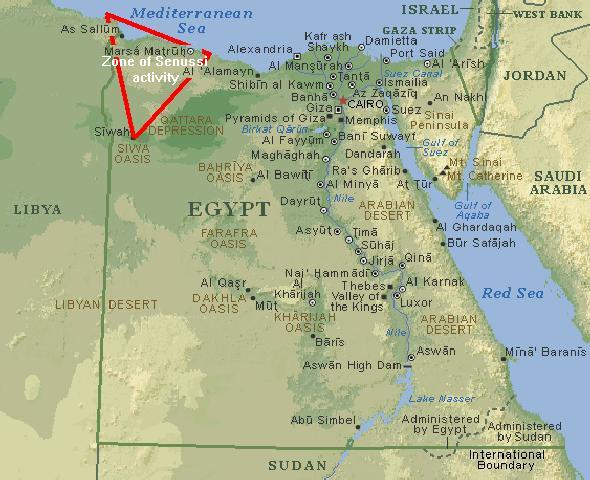
Map illustrating the zone of Senussi activity in relation to Egypt.
While the infantry marched along the coastal track, the cavalry and guns followed a route further inland grandly called the Khedival Motor Road, initially heading in a South-westerly direction from Mersa Matruh. The latter force had covered about fourteen kilometres when a heavy rifle-fire was suddenly opened at close range from the column's right flank by Arabs occupying a position known as Wadi Senab.
One squadron of the cavalry attempted a charge, with disastrous results, and a flanking movement tried by the armoured cars was stopped when the heavy vehicles became bugged in soft ground. When word of the situation reached the camp at Mersa Matruh, a squadron of Australian light horse was sent to the scene. Supported by the 13-pounders, the augmented force cleared the wadi of opposition at a cost to the enemy of 80 dead and seven prisoners; losses on the British side amounted to one officer and fifteen other ranks killed.
The infantry, meanwhile, pressed on to a point near the coast called Um Rakhum, where camp was made. They were joined here by the exhausted yeomanry, and the next day by additional troops. The latter included No.4 Company of the Australian Service Corps, from the 1st Australian Divisional Train (forming Western Frontier Force's supply component). On 13 December the cavalry and infantry again set off towards the objective, the transport elements remaining in the bivouac camp. Only a short distance had been covered when the column was again ambushed by a force of Senussi, 1,500 strong, which lay concealed in another wadi to the left of the axis of advance. The enemy troops were ably directed and supported by two medium field pieces and three machine-guns. As the action developed one of the leading British companies was in peril of being encircled, and attempts to relieve the pressure quickly encountered severe difficulties.
The column commander sent an urgent message by heliograph back to Rakhum calling for all reinforcements which could be spared to be sent forward. Among those despatched were 75 Australian Service Corps (ASC) personnel armed with rifles. On arrival, the ASC men performed good service in driving off Arabs who were occupying several gullies, although they were generally untrained for infantry work. During this fighting the Australians lost one man killed, and an officer and five other ranks wounded; the officer subsequently died. Two squadrons of the light horse also arrived on the scene of the action as escort to the Notts Battery crews, the appearance of which on the enemy flank again proved critical to the outcome of the contest. Although forced to come into action at extreme range, one of the 13-pounders succeeded in landing a shell at a point where the Senussi were at their thickest. At this the enemy decided to bring to an end the fight, which had lasted six hours, and withdrew.
While the British were left in possession of the field, and had lost only half as many men as the 125 dead suffered by the Senussi, they were in no condition to press on with the original mission. The next day the column returned to Mersa Matruh, thereby allowing the enemy to re-occupy the high ground.
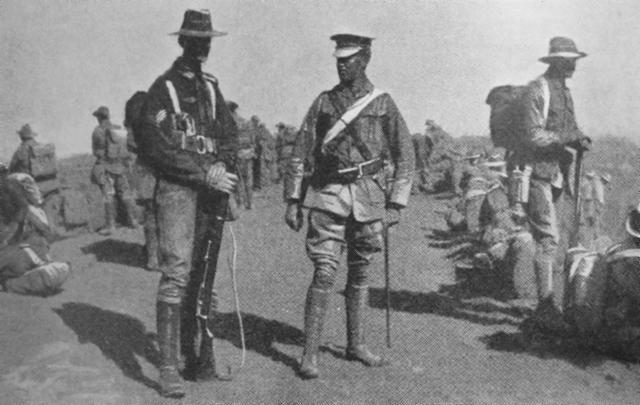
Australian troops at Mersa Matruh
Extracted from the book produced by Chris Coulthard-Clark, Where Australians Fought - The Encyclopaedia of Australia's Battles, Allen and Unwin, Sydney, 1998, pp. 112-113.
Additional References cited by Chris Coulthard-Clark:
C.E.W. Bean, (1929), The Australian Imperial Force in France 1916, Sydney: Angus & Robertson.
Gebel Medwa, Egypt, December 25, 1915 Topic: BatzSe - Senussi
Gebel Medwa
Egypt, 13 December 1915
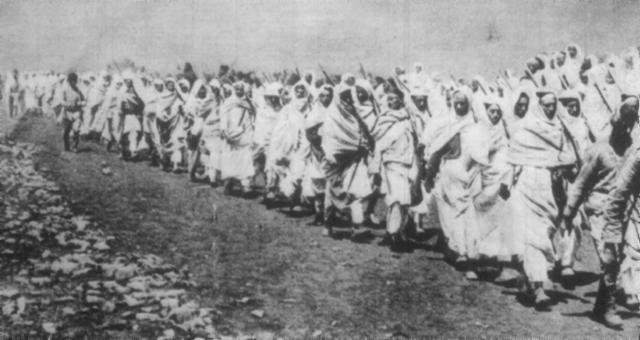
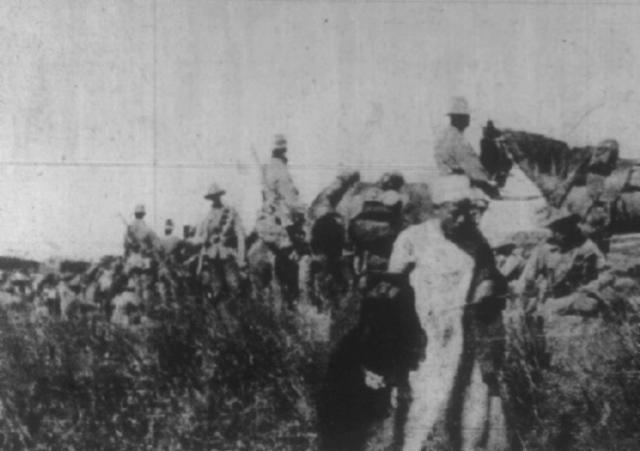
The Senussi on the march at Siwa.
[From: Sydney Mail, 19 November 1915, p. 24.]
Gebel Medwa, an action fought on 2.5 December 1915 in the Libyan Desert oil Egypt's western frontier ten kilometres south-west of Mersa Matruh, between pro-Turkish Arabs of the Senussi sect and a British expeditionary force under Major-General Alexander Wallace. Following an indecisive action fought at Um Rakhum (q.v.), Wallace's force was confined to Mersa Matruh by bad weather. The Senussi, however, were not so deterred, using the opportunity to occupy positions close to the British base and threatening to bypass it entirely and embark on a march across the desert towards the Nile - the contingency which Wallace was expressly charged with preventing.
The affair at Gebel Medwa.
Determined to strike first as soon as conditions allowed, Wallace sent a column 2,500 strong up the Khedival Road early on Christmas morning. The first, predominant hill-the Gebel Medwa--was taken by the infantry without resistance soon after dawn. By 7 a.m., however, a large Senussi force was encountered in the Wadi Medwa and a fierce contest ensued in which the newly arrived 1st Battalion of the New Zealand Rifle Brigade played a notable supporting role. Meanwhile, the cavalry assigned to cover the advance--including a composite regiment of Australian light horse squadrons under Major Hon. Dudley Pelham (a British regular) - had embarked on a wide circling movement to the south aimed at turning the enemy's right flank. The leading squadron of this force, led by Major John Bisdee, VC, encountered some Arab cavalry at sunrise and, deploying at the gallop, easily dispersed them before going on to dislodge the occupants of further Senussi positions.
By noon, the centre of the enemy's position had been driven in and the Senussi main force was retreating along the coast. This development was observed by Pelham, who realised that the opportunity now presented to strike a decisive blow. He sought permission to unleash his light horsemen to sever the line of retreat, but-despite repeated pleas - permission to seize the moment was refused by his superiors The chance to add immensely to the Arab losses (estimated at about 300 dead) was therefore passed up, and the outcome of the action was again inconclusive. The British force returned to Mersa Matruh, despite having sustained only thirteen personnel killed and 51 wounded: Australian casualties numbered about seven, including one light horseman killed.
Australian AASC leaving Mersa Matruh.
[From: Sydney Mail, 24 May 1916, p. 9.]
Extracted from the book produced by Chris Coulthard-Clark, Where Australians Fought - The Encyclopaedia of Australia's Battles, Allen and Unwin, Sydney, 1998, pp. 113-115.
Additional References cited by Chris Coulthard-Clark:
C.E.W. Bean, (1929), The Australian Imperial Force in France 1916, Sydney: Angus & Robertson.
Halazin, an action fought on 23 January 1916 in the Libyan Desert on Egypt's western frontier 35 kilometres south-west of Mersa Matruh, between pro-Turkish Arabs of the Senussi sect and a British expeditionary force under Major-General Alexander Wallace. Following an indecisive action at Gebel Medwa (q.v.), there was little action on this front until the main Senussi camp was located at Halazin on 19 January by the crew of a British aircraft who reported the presence of 300 tents, including that of Sheikh Saved Ahmed (the Grand Senussi) himself.
Wallace decided to mount an attack, buoyed by the fact that many of the improvised units initially scratched together from rear details to form his force had since been replaced by properly formed battalions and regiments. In addition to a newly arrived battalion of South African infantry, he also now had several complete yeomanry units which had become available following the end of the Gallipoli campaign. Although he still had light horsemen in his mounted brigade, the Australian presence was reduced on 15 January to just a half-regiment after two squadrons left to return to Egypt.
Official History Map of the Affair of Halazin
Marching out from Mersa Matruh with both his infantry and cavalry brigades, Wallace formed camp on the evening of 22 January only sixteen kilometres from the Senussi encampment. That night there was a torrential rainstorm, which meant the advance was resumed next morning in a quagmire of mud. Conditions were so difficult that armoured cars with the force had to he sent to the rear in case they became bogged in the face of the enemy. Once combat was joined that day, Wallace also found himself confronted by a spirited enemy who put heavy pressure on both his flanks. On the left flank in particular, covered by the mounted column, the Senussi attack was so determined that at one point several companies of New Zealand infantry had to be turned about to render assistance to the cavalry. The situation on this front continued to become pressing until the infantry forming the British centre, reinforced by some light horse, broke through the enemy's main defence line. The Arabs made a general withdrawal through and beyond their tented camp, leaving behind some 200 dead and 500 wounded.
Exhaustion, and the sodden ground, again prevented success being exploited with a vigorous pursuit. The action had been hard and costly; with casualties on the British side totalling 312 (though only 21 were killed). Most of the wounded were not retrieved until the following day, being forced to spend an agonising and cold night on the battlefield. The force as a whole had a wretched night, being without food or shelter and forced to drink only muddy rainwater. The troops were withdrawn soon after the fighting ended, so enjoyed little warmth from the blaze made by the Senussi tents. The next day the 1st Australian Divisional Train, which had been stuck fast in mud during 23 January, succeeded in reaching the returning force and was able to relieve many of the shortages while helping to alleviate the sufferings of the wounded, for which it earnt special thanks from Wallace.
Although there was a return to Mersa Matruh on this occasion, as after previous engagements, the way was finally clear for the British to advance and re-occupy the Egyptian border post at Sollum (Salem). This was accomplished on 14 March 1916, though not before one final large-scale clash at Agagiya, 24 kilometres south-east of Sidi Barrani, on 26 February. The 1st Australian Divisional Train was still serving in support of the advance at the, time of this final action, but on 7 March was withdrawn back to Egypt to join in the expansion and general reorganisation of the Australian Imperial Force which was then taking place.
Australian Light Horsemen on patrol on the Western Frontier
[From: Sydney Mail, 10 May 1916, p. 11.]
Extracted from the book produced by Chris Coulthard-Clark, Where Australians Fought - The Encyclopaedia of Australia's Battles, Allen and Unwin, Sydney, 1998, pp. 115-116.
Additional References cited by Chris Coulthard-Clark:
C.E.W. Bean, (1929), The Australian Imperial Force in France 1916, Sydney: Angus & Robertson.
The Australian Light Horse Studies Centre is a not for profit and non profit group whose sole aim is to write the early history of the Australian Light Horse from 1900
- 1920. It is privately funded and the information is provided by the individuals within the group and while permission for the use of the material has been given for this
site for these items by various donors, the residual and actual copyright for these items, should there be any, resides exclusively with the donors. The information on
this site is freely available for private research use only and if used as such, should be appropriately acknowledged. To assist in this process, each item has a citation
attached at the bottom for referencing purposes.
Please Note: No express or implied permission is given for commercial use of the information contained within this site.
A note to copyright holders
The Australian Light Horse Studies Centre has made every endeavour to contact copyright holders of material digitised for this blog and website and where
appropriate, permission is still being sought for these items. Where replies were not received, or where the copyright owner has not been able to be traced, or where
the permission is still being sought, the Australian Light Horse Studies Centre has decided, in good faith, to proceed with digitisation and publication. Australian Light
Horse Studies Centre would be happy to hear from copyright owners at any time to discuss usage of this item.