Topic: BatzP - Beersheba
The Battle of Beersheba
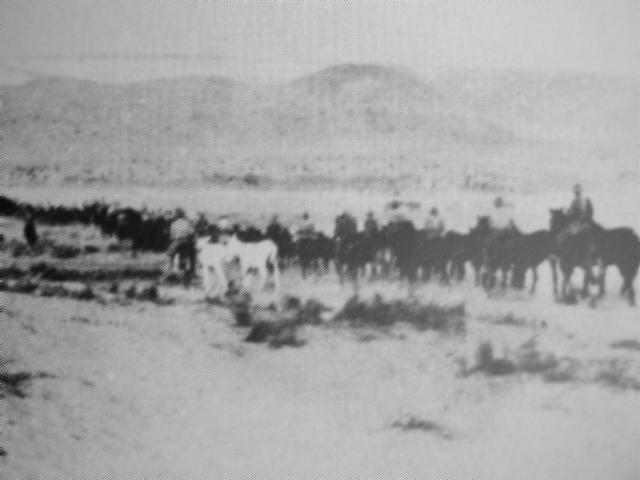
Palestine, 31 October 1917
Foster Account

Beersheba at 4.30pm, 31 October 1917
[From: Foster, Operations of the Egyptian Expeditionary Force in Palestine from 28th October 1917 to 31st December 1917, facing p. 62.]
[Click on map for larger version.]
Five years after the conclusion of the Great War, the Australian Army commissioned Brevet Colonel WJ Foster to produce an account of the Third Battle of Gaza for military training purposes. The resulting book was published in Melbourne, 1924 called: Operations of the Egyptian Expeditionary Force in Palestine from 28th October 1917 to 31st December 1917: together with a precis of events prior to the 3rd Battle of Gaza, which included a section specifically related to the battle of Beersheba and is extracted below.
Foster, WJ, Operations of the Egyptian Expeditionary Force in Palestine from 28th October 1917 to 31st December 1917, (Melbourne 1924) pp. 56 - 72:
CHAPTER VII - THE BATTLE OF BEERSHEBA
[56] In the assault on Beersheba the XX Corps was to strike north-east between the Khalasa-Beersheba road on their right and the railway on their left. The Wadi Saba, after clearing the town on its way east to the Ghuzze, ran through this sector on the railway side. The attack was intended to draw the main strength of the Turks to oppose the infantry and so let the cavalry enter the town practically unopposed from the east. The Turk held Beersheba with his 27th Division, reinforced by a few battalions from the 16th and 24th Divisions. His defences extended from Tel el Saba through a series of detached groups of trenches round the south and south-west. These earthworks were placed on commanding positions with good zones of fire, but on the east and south-east they were not protected by wire and, as trenches, they were inferior to those farther west.
The village of Beersheba in itself offered no facilities for a prolonged defence. It lies in a shallow saucer at the foot of the Judean Hills, which rise abruptly from its outskirts to the north, with high ground also to the east and south-east.
The Turks had clearly reckoned on the safety which the absence of water on the British side apparently gave to the town; they were prepared for a raid by one cavalry and one infantry division, but they certainly had not prepared for such a force as was speeding forward on the night of October 30th/31st.
The conditions governing that night march were extremely difficult. A brilliant moon lit up the whole country. The day had been extremely hot, and at sunset an entire absence of wind promised that the night march of nearly 40,000 troops of all arms would be attended by all the discomfort of heat and dust. The thermometer fell, but there was not a breath of wind to shift the pall of dust which hung above the long columns of horse, foot, and guns. Men's faces became caked with the yellow dust, their nostrils were hot and burning, and parched [57] throats could not be relieved because of the necessity of conserving the water allowance, and, as yet, the uncertainty of water on the morrow.
ACTION OF THE XX CORPS.
The infantry were ordered to be on their line of deployment by 0400 hours on October 31st, and in every case they were before time. There had been many reconnaissances by officers, who were to act as guides to columns, and they were quite familiar with the ground; guns and ammunition columns were taken by routes which had been carefully selected and marked. In places the banks of the wadis had been cut into and ramps made to enable the rough stony water-courses to be practicable for wheels, and, broken as the country was, and though all previous preparations had to be made without arousing the suspicions of the enemy and wandering Bedouins, there was no incident to check the progress of the infantry or guns. Occasional rifle-fire and some shelling occurred during the early hours, but a little after 0300 hours on October 31st the XX Corps advanced headquarters were able to report that all its columns had reached their allotted positions.
The XX Corps plan was to attack the enemy's works between the Khalasa road and the Wadi Saba, with the 60th and 74th Divisions, while the defences north of the Wadi Saba were to be masked by the Imperial Camel Brigade and two battalions of the 53rd Division, the remainder of the latter division protecting the left flank of the corps from any attack by enemy troops who might move from the Sheria area.
The first objective was the Hill 1070, an advanced enemy post about 6,000 yards south-west of Beersheba, and held in some strength by the Turks. It was a prominent feature. 500 yards from a portion of the enemy's main line. The height was of importance, as it gave good observation of the enemy's main line of works, and it had to be gained in order to allow of the advance of the field artillery within wire-cutting range of an elaborate system of works protecting Beersheba from an advance from the west.
At 0555 hours on the morning of October 31st the artillery of the 60th and 74th Divisions commenced to bombard the enemy's positions on a front of some 4, 500 yards. In all there [58] were in action seventy-six 18-pdrs., twenty 4.5 -inch howitzers, while eight 60-pdrs., eight 6-inch howitzers, and four 4.5-inch howitzers were employed in counter-battery work. The concern of the garrison was quickly evident. The quiet township started suddenly into activity, and troops and transport were rushed to the threatened points. The absence of wind placed the gunners at a heavy disadvantage. The high-explosive shells bursting about the crest of Hill 1070 raised enormous clouds of dust which obscured everything, and after a short while even the flames of exploding shells were entirely hidden from view. The gunners had to stop firing for three-quarters of an hour to allow the dust to settle. They then re-opened, and at 0830 hours the wire-cutting was reported completed. Immediately an intense bombardment opened up, and under cover of which, and with the assistance of machine-gun fire from aeroplanes, the 181st Infantry Brigade went forward to the assault. The brigade captured the hill in ten minutes, only sustaining about one hundred casualties, and taking nearly as many prisoners. It was found that every enemy machine-gun had been knocked out by the artillery. The first phase of the operations having thus ended successfully quite early in the day, the second stage was entered upon. The guns were rushed forward over the broken ground to bring them within range of the Turkish main defences. Although the teams were exposed to heavy shrapnel fire during the advance, the guns were swung into action at pre-arranged points and set about wire-cutting with excellent effect. The first part of the second phase consisted in reducing the enemy's main line from the Khalasa road to the Wadi Saba, though the artillery bombarded the whole line. The 60th Division on the right had two brigades attacking and one in divisional reserve, and the 74th Division attacking on the left of the 60th had likewise a brigade in reserve. As a rule the enemy works were cut into rocky rising ground, and the trenches were well enclosed with wire. They were strongly made, and there were possibilities of prolonged opposition, but at 1215 hours, when the main assault was launched, the Desert Mounted Corps was attacking from the east and south-east, the enemy command must have become anxious about a line of retreat. The attacking troops from right to left were the 179th, 181st, 231st, and 230th Brigades. By 1330 hours all [59] objectives had been gained, and about 5,000 yards of works south of the Wadi Saba were in the hands of the XX Corps. The enemy had 3,000 yards of trenches north of the wadi, where he was still holding out. While a brigade of the 53rd Division threatened these from the west, the 230th Brigade, 74th Division, under cover of a bombardment, attacked from the south. The brigade found no difficulty in occupying the works by 1900 hours, as the enemy had evacuated them during the preliminary bombardment. The work of the infantry had been brilliantly and successfully carried out.
ACTION OF THE DESERT MOUNTED CORPS.
The orders to the Corps were twofold. It had first to straddle the Beersheba road-which leads up through Judaea to Hebron and Jerusalem - at Sakati, some six miles northeast of the town, and so prevent reinforcements from coming in from that direction, and also cut off escape from the town. That road closed, the corps was to storm Beersheba. The safety of Beersheba against attack from the east and south-east hinged mainly on a strong redoubt on Tel el Saba. The tel lies on the northern bank of the Wadi Saba, three miles due east of the town, and is made up of a, great mound, with a cliff-face abutting on the rough wide water-course. A few acres in extent, it rises steeply to a height of a few hundred feet from the bare surrounding country. Its top is fairly flat, but is covered with large stones, which, with very little digging, gave sound cover to infantry and provided perfect pockets for machine-guns. Two lines of trenches commanded the plain across the wadi to the south and swept the floor of the waterway to the east. The steep sides of the mound were inaccessible to men on horses, and the naked plain held out unpromising prospects to a dismounted advance. Across the wadi south of the town the enemy had barred the way with a chain of redoubts, and on the north up to Sakati their extreme left flank was safe in the rugged intricacies of the rising hills of Judea.
The approach march of the corps lay over barren, strong hills. The tracks off the main road between Asluj and Beersheba were but faintly marked and troublesome to follow. The leading of the troops, never an easy matter at night, was rendered more troublesome lay the fact that the country beyond [60] Asluj was quite unknown, and was of a most difficult and intricate nature. Maps, though accurate in the main, were lacking in detail, and the employment of native guides was too risky an experiment to be contemplated.
The plan of the corps was as follows:
The Anzac Mounted Division, in the lead, was to send one brigade via Bir el Arara against Tel el Sakati, the remainder of the division marching via the Wadi el Shreikiye, Gebel el Shegeib, and Iswaiwin to attack Bir el Hamman and Bir Salem Abu Irgeig as its first objectives, then Tel el Saba, and finally to a position astride and cross the Hebron road facing north-west, with left flank on north side of Beersheba. The Australian Mounted Division, following the Anzac Mounted Division along the Wadi el Shreikiye, was to halt at a point a little north of Iswaiwin, and be prepared to act either northwards, in support of the Anzac Mounted Division, or westwards towards Beersheba, as might be required. The 7th Mounted brigade was ordered to march at 2130 hours on October 30th from Esani via Itweil el Semin against Ras Ghannam, and also to act as a connecting link between the two corps.
The 7th Light Horse Regiment as advanced guard to the corps cleared Asluj at 1800 hours on October 30th, and led the long column north-east along the track to Bir Arara, which was reached at 0200 hours on October 31st. The Australian Mounted Division moved from Khalasa, and marching by Asluj had some miles farther to march than the Anzac Mounted Division.
At Thaffha the track split. The 2nd Australian Light Horse Brigade, which was aiming for Sakati, pressed on to Bir Arara, and the main column with the Wellington .Mounted Rifles (New Zealand Mounted Rifles Brigade) leading, turned along the road to the north by El Shegeib and Iswaiwin towards Bir Salem Abu Irgeig immediately to the South of the Wadi Saba. Some opposition was met with on the road leading over Gebel el Shegeib, but this was quickly brushed aside by the Wellington Mounted Rifles, and by 0800 hours on October 31st the Anzac Mounted. Division was disposed as follows:
2nd A.L.H. Brigade - Bir el Hammam.
N.Z.M.R. Brigade - Bir Salem Abu Irgeig.
[61] The 1st Australian Light Morse Brigade was in reserve behind the New Zealanders.
Meanwhile the Australian Mounted Division swung towards Beersheba, and after marching a few miles halted at 1000 hours and remained in reserve near Khashim Zanna.
Corps Headquarters was established on a commanding hill about four miles to the south-east of Beersheba.
By 0900 hours the two leading brigades of the Anzac Mounted Division were ready for the second phase of the advance, which aimed at seizing the Beersheba-Hebron road at Sakati and capturing Tel el Saba. About this time enemy mounted troops were seen moving forward to reinforce the garrison of the Tel el Saba redoubt; meanwhile enemy cavalry, guns, and transport were moving out of Beersheba by the Hebron road either to escape capture or to guard against a raid on that line of communications.
The 2nd Australian Light Horse Brigade, moving rapidly, soon came under a heavy artillery fire from the hills north of the Hebron road, and the advance slowed down. The plains were found also to be much cut up by narrow and deep wadi beds which made rapid movement impossible. Resistance was now stiffening considerably along the whole front, but after sharp fighting Tel el Sakati was captured by 1300 hours, and by 1350 hours this brigade was astride the Hebron road.
The New Zealand Mounted Rifles Brigade began the attack on Tel el Saba at 0910 hours. The brigade moved against the position partly along the Wadi Saba and partly north of it. There was no cover except in the wadi, and the place was defended by well-concealed machine-guns, both on the Tel el Saba and to the north of it. The enemy artillery was now bringing a heavy fire against the attacking troops. The brigade was reinforced on its left by the 3rd Light Horse Regiment, and later by the 2nd Light Horse Regiment. Finally the 3rd Australian Light Horse Brigade, with two 13-pdr batteries from the Australian Mounted Division, was sent to reinforce the right of the Anzac line. The attack on Tel el Saba was making way slowly, the machine-guns north of the hill giving most trouble. A section of guns (13-pdrs.) was pushed to within 800 yards of the hill, and opened up on the machine-gulls at a range of 1,900 yards, and a battery was also brought forward [62] to 2,300 yards from the hill. By 1440 hours the New Zealand Mounted Rifles Brigade had got within assaulting distance, and at 1500 hours rushed the position, taking some 132 prisoners, while the remainder of the garrison fled towards Beersheba and the north-west.
With the capture of Tel el Saba the second phase had been completed. At 1530 hours orders were issued for the final phase - the capture of the line Point 1020 (two miles north-west of Tel el Saba) - Point 970 (immediately north of Beersheba.) - Mosque.
The 3rd Australian Light Horse Brigade was to strike for a line between the Hills 970 and 1020 north of the town, while the 1st Australian Light Horse Brigade, moving on the left of the 3rd Australian Light Horse Brigade, was to take as its objective a line from the mosque in the town to Hill 970, both inclusive. But nevertheless the situation was becoming grave. The enemy, although driven off Tel el Saba, was strong south of the town and still stronger in the hills immediately north of it. The Desert Mounted Corps had been fighting for nine hours, and while its operations had undoubtedly weakened the enemy's hold on his defences, and although the defences to the west and south-west of Beersheba were in the hands of the XX Corps, yet the main objective, Beersheba and the wells, was still in the hands of the enemy. The country ahead of the 1st and 3rd Australian Light Horse Brigades was rough and difficult, and progress must be slow. Only a few hours of daylight remained. The divisions of the XX Corps could not be moved against the town because of the absence of water supplies, and because a farther advance would disorganise the next stage in the operations, when they were to march north-west on Sheria and Hareira. The Australian Mounted Division in reserve had two brigades (4th Australian Light Horse Brigade and 5th Mounted Brigade) available.
The moment had arrived for the employment of the Australian Mounted Division and the 7th Mounted Brigade. Had Tel el Saba fallen earlier, no doubt a dismounted attack would have taken place. Only two hours remained before dusk, and whatever could be done must be done quickly. With the day on the wane, it was now neck or nothing. The plan of the Corps Commander had been to keep the Australian Mounted [63] Division in reserve until the Anzac Mounted Division had taken Tel el Saba, and then to launch it in a main assault on the town; but the reduction of Tel el Saba lead taken longer than it was anticipated, and time did not permit of staging a deliberate dismounted attack. The G.O.C. Australian Mounted Division at about 1515 hours was ordered to take Beersheba before dark. The G.O.C. 4th Australian Light Horse Brigade, who at the time was at the Corps Headquarters with the Divisional Commander, was ordered to move on Beersheba at once, whilst the 7th Mounted Brigade was ordered to turn the defences of Ras Ghannam and co-operate with the attack of the 4th Australian Light Horse Brigade, and the 5th Mounted Brigade was ordered to assemble and move in support. The G.O.C. 4th Australian Light Horse Brigade immediately galloped off to assemble his brigade. At 1615 hours, when the confirming order was received at the Brigade Headquarters, the brigade was six miles south-east of Beersheba, and it would be dusk in one hour. The open plain stretched before the brigade, magnificent galloping ground; the enemy had been attacked from front and rear, and was weakening; success must come now, and quickly or never. All the conditions suitable for a mounted attack were present, and no other kind of attack could promise equal results. The 11th Light Horse Regiment was spread over a line of outposts extending towards the 7th Mounted Brigade, but the 4th and 12th. Light Horse Regiments were available.
It was a purely cavalry adventure, but the regiments bore neither sword nor lance, and in order to give the charge as much effect as possible the men rode with their bayonets in hand.
The action forms a notable land-mark in the history of cavalry, in that it initiated that spirit of dash which thereafter dominated the whole campaign. The action taken by the G.O.C. 4th Australian Light Horse Brigade is described below in his official report:-
“At 1600 hours on 31st October, 1917, Anzac, Division was operating to the east and north-east of Beersheba, and was pushing back the enemy clown the Wadi el Saba. This division was operating dismounted, but, owing to the stiff opposition, the progress was slow, and it appeared as if the town would not be taken from that direction before dark. It was essential that the place, be taken quickly as the, horses had not been [64] watered since the previous day and had made a night march of over thirty miles.
"At 1615 hours orders were received from the Australian Mounted Division, and also direct instructions from the Corps Commander, for the 4th Australian Light Horse Brigade to attack direct on Beersheba, moving on the left of the Anzac Mounted Division, and to take the place before dark.
“The brigade way then in reserve in a valley about six miles east of Beersheba, and the horses were being fed. It was realised by the Brigadier that he would have to act quickly, as only a little over an hour of daylight remained in which to carry out the operation.
“The brigade was assembled in a valley near Hill 1280, with the exception of the 11th Light Horse Regiment, which was on detached duty about two miles south-west of that position.
"Orders were sent to the 11th Australian Light Horse Regiment to concentrate and follow the brigade, and the brigade was ordered to saddle up and move when ready, under the seconds in command of regiments, the senior to command. The Brigadier and Brigade Major, accompanied by the CO’s 4th and 12th Regiments, galloped forward to reconnoitre a covered way of approach for the brigade to the point of deployment, and for the direction of the attack. This was necessary, as the 3rd Australian Light Horse Brigade had just previously been heavily shelled in attempting to cross exposed ground.
"The brigade started about 1630 hours, and moved at the trot. Shortly afterwards two enemy planes passed over and dropped bombs, and, on return, one flew low and machine-gunned Brigade Headquarters' personnel and Signal Troop, which were moving in rear of the brigade. No material damage was done beyond one horse wounded, but it somewhat delayed the establishment of communications.
"The route taken was along the wadi about a quarter of a mile south of “W” road, and the brigade deployed where the road crossed the 1100 contour.
"The 4th Light Horse Regiment was ordered to advance on the sector from the left of A. and N.Z. Mounted Division to “W” road. The 12th Australian Light Horse Regiment was [65] ordered to advance on the left of the 4th Light Horse Regiment; these two regiments were ordered to attack mounted, each in three successive lines, of a squadron each line. The files were at about four yards interval and 300 yards distance between squadrons. They were ordered to charge with drawn bayonets held in the hand, as no swords were issued to these troops.
“The 11th Australian Light Horse Regiment was ordered to follow on in rear and act as a reserve.
.
"One, sub-section of the 4th A.M.G. Squadron was sent with each of the 4th and 12th Australian Light horse Regiment, and the machine-gun squadron, less one section, was ordered to move down the wadi and co-operate with the reserve squadron .of the 12th Australian Light Horse Regiment in protecting the left rear of the line from attack by the enemy, who were seen in trenches on hill 1180.
"Both the 4th and 12th Light Horse Regiments went forward at a gallop, and took successive lines of trenches until reaching the wadi at Beersheba. The left flank of the 12th Regiment came under heavy machine-gun fire from trenches on Hill 1180. The machine-gun squadron immediately opened fire on this redoubt, and the Brigadier ordered Major Harrison, OC Notts Battery, R.H.A., which had then come up to the point of deployment, to open fire on these trenches. It was then practically dark, and impossible to take distances with the range-finder, but Major Harrison opened fire and found the range with his second shot, and quickly drove the Turks off the ridge.
“On it being reported that the trenches in front of the town had been taken, the 4th and 12th Light Horse Regiments were ordered to push right through the town and capture as many prisoners as possible.
"This movement was carried out in a very able manner and resulted in the capture of 9 field-guns, 7 ammunition limbers, 4 machine-guns, and about 700 prisoners.
"The 11th Australian Light Horse Regiment, which had arrived at the point of deployment after the battery had come into action, was moved forward together with the Notts Battery and battery to Beersheba. On reaching that place the CO's 4th and 12th Regiments reported that they had captured the place. The 11th Regiment was accordingly [66] ordered to push through the town and hold it against any counter-attack from the north-west and south-west. This was carried out, and the 11th Regiment captured about 400 prisoners who were retreating from the south-west.
"The 4th and 12th Regiments were ordered to withdraw front their line and re-organise. When this was done, the 4th Light Horse Regiment took up an outpost line from the Wadi el Saba to the mosque, and the 11th Regiment from the mosque to the Khalasa road, the 12th Regiment being held in reserve near the railway viaduct.
"The two batteries were placed in position on the bank of the wadi, south of the town, so as to co-operate in driving back any counter-attack by the Turks.
"The brigade remained disposed as above until relieved by the 5th Mounted and the infantry- the following morning.
"The rapidity of the mounted attack seemed to demoralise the enemy, as they mostly fired high, and it was afterwards found that the sights of their rifles were never lowered below 800 metres. The enemy artillery was also unable to estimate the pace, and the shells all went over the heads of the advancing troops.
"From the location of the enemy's trenches as shown on Map 1A it would appear that they were prepared for any advance down the Wadi Shaai, which would have offered a certain amount of cover while in the wadi bed, but they did not anticipate a mounted attack across the plain.
"If a dismounted attack had been made from the Wadi Shaai, it is certain that we would have suffered heavy casualties, as the trenches were very strong, and in the bends machine-guns were placed to enfilade the wadi bed.
"On 19th April, 1917, at the Second Battle of Gaza, this brigade made a long advance on foot, with two regiments (11th and 12th) and the machine-gun squadron, and had 187 casuals without any satisfactory result being obtained. Here the casualties were 32 killed and 32 wounded, total 64, which about one-third of the number sustained in the Second Gaza Battle, and resulted in the capture of 59 officers and 1,090 other ranks, besides 10 field-guns, 5 machine-guns, and a large number of vehicles, stores, and animals. In [67] addition, the enemy did not have time to destroy the water supply, which was the most important factor in the situation.
"The high percentage of killed to wounded was due to the hand-to-hand fighting against superior numbers at the trenches. The majority of the wounded fell before the trenches were reached."
Meanwhile the attack of the 1st and 3rd Light Horse Brigades and New Zealand Mounted Rifles Brigade was being vigorously pressed from the east, but as it approached the town in the dusk, opposition suddenly failed - consequent on the lightning stroke of the 4th and 12th Light Horse Regiments.
Already Beersheba had the appearance of a deserted town; the native population had fled some hours earlier, and the few remaining Turks were quickly captured. The enemy still held a line in the hills close to the town, but after the outposts were established the night passed quietly.
The remainder of the Australian Mounted Division moved into Beersheba during the night, leaving the 3rd Australian Light Horse Brigade to assist the Anzac Mounted Division iii holding an outpost line north and north-east of the town. The 7th Mounted Brigade, which had had a day of desultory fighting, entered the town about 1830 hours.
CASUALTIES.
The XX Corps losses were 7 officers killed and 42 Wounded, 129 other ranks killed, 988 wounded and missing, a light total, considering the nature of the works carried during the day. The corps captures included 25 officers, 394 other ranks, 6 guns, and numerous machine-guns.
The total number of Turks captured by the Desert Mounted Corps during the day was 70 officers and 1,458 other ranks. About 500 Turkish dead were buried on the battlefield.
ADMINISTRATIVE ARRANGEMENTS FOR THE MARCH OF THE DESERT MOUNTED CORPS FROM ASLUJ.
The only wheels taken with the brigades were the guns and first-line transport (ammunition limbers and limbered waggons containing watering gear and tools). "B" echelon (i.e., all other waggons), loaded with rations, was left at Asluj with the ammunition column, with orders to await directions. But the ammunition column was to follow on after the division at daylight on the 31st.
[68] Camel water convoys, with a small reserve of drinking water for the men, were, left also at Asluj, in readiness to be sent up.
No. 1 Light Car Patrol (Ford cars) and No. 11 Light Armoured Motor Battery (No. 11 L. A. M .B ) were attached to the Anzac Mounted Division, with. orders to follow on, leaving Asluj at 0500 hours on the morning of the 31st.
Supplies were organised as follows:-- Each man carried two days' himself and one day's forage for his horse. In addition he carried, in a sand-bag strapped across the pommel of the saddle, a small emergency ration of grain for his horse. "B" echelon (an improvised train of all baggage waggons) carried two days' emergency rations for the men and one day's forage for the horse.
The medical arrangements made provision for the mobile sections of the field ambulances to march from Asluj with their respective brigades, and for all cacolet camels to march together in rear of the Australian Mounted Division.
Divisional collecting stations were ordered to be formed of tent subdivisions of field ambulances, at points to be decided upon by the A.D.M.S., and evacuations were to be made by sand-carts and camels to the farthest point to which light motor ambulances could be brought; thence to the Australian Mounted Division receiving station at Asluj; thence to the Anzac Mounted Division receiving station at Rashid Bek by light motor ambulance; and thence to railhead near Shellal by heavy motor ambulance.
CLEARING THE TOWN.
In the interval between the capture of the trenches and the charge into the town, the enemy had begun to blow up the wells and ammunition depots. He had evidently intended, in the event of his having to abandon Beersheba, to leave nothing but ruins behind, for the whole place was a nest of explosive charges, “booby traps," and trip wires. By a fortunate chance the German engineer who was responsible for the destruction of the town was away on leave in Jerusalem at the time of its capture, and consequently most of these trip wires were not yet attached to their detonators. Throughout the night and next day the engineers laboured incessantly clearing the explosives and repairing the wells, five of which had been partially destroyed.
[69] GENERAL.
During the day the guns of the XXI Corps opposite Gaza kept pounding away at the enemy defences, aided by the Navy, whose fire was directed at the town of Gaza.
On the left of the 74th Division, the Imperial. Camel Brigade and two battalions of the 53rd Division held the ground to the north of the Wadi Saba to a point where the remainder of the 53rd Division watched for the approach of any force from the north, while the 10th Division about Shellal protected the lines of communication east of the Wadi Ghuzze and the Yeomanry Mounted Division was on the west side of the Wadi Ghuzze in G.H.Q. reserve.
The Turk was completely surprised, and did not attempt anything in the nature of a counter-attack by the Beersheba garrison, nor did he make any move from Hareira against the 53rd Division. Had he done so, the 10th Division and the Yeomanry Mounted Division would have seized the opportunity of falling on him from Shellal, but he chose the safer course of allowing the Beersheba garrison to stand unaided in its own defences.
The defences of Beersheba had been entrusted to the III Corps, whose commander was Ismet Bey. On the morning, of October 31st, it is reported that he was at his battle headquarters west of the town watching the attack of our infantry, which he still believed to consist of only one division. But at about 1100 hours he was surprised when he found that the plain east of the town was covered with cavalry. He appears to have lost his head completely, for he proceeded to fling all reserves, into the fight on the west before the battle was well begun. The following criticism by a German staff officer on the tactical handling of the corps is of interest:
"The battle control of the III Corps appeared deplorable; even before the commencement of the decisive infantry attack all reserves had been thrown in."
The charge of the 4th Australian Light Horse Brigade was dramatic in its suddenness anal decisiveness. When this attack was launched, the enemy had been crushed by the XX Corps on the south-west, and had lost Tel el Saba on the east. But the infantry, having reached its appointed object, had stopped [70] according to orders. The garrison was still able to offer a stout resistance to the Anzac Mounted Division and 3rd Australian Light Horse Brigade on the east. If their redoubts to the south and south-east survived, they still had hopes of holding on until darkness fell, when possibly reinforcements might be sent - at most, they could make an orderly withdrawal after destroying their supplies and the wells. The effect of the charge was quickly appreciated by the enemy. Between the time when the trenches were taken and the appearance of the light horse on the outskirts of the town, the Turkish force, hitherto in a state of comparative order, had been thrown into chaos. The one thought was of escape anal personal safety. There was a wild rush towards the hills north and north-west. The pursuit was carried on through Beersheba and out on to the hills during the night, until the light horsemen were checked by fire from enemy troops in position.
It will be seen that one and a quarter hours had elapsed between the time the corps order had been issued and the time when the brigade moved to the attack. The delay is partly accounted for by the fact that the brigade had perforce to be spread over a large area owing to enemy bombing, and partly owing to the time taken in assembling the brigade and making the necessary reconnaissances. Further delay was caused owing to the brigade having off-saddled, an order which could hardly be justified, even though the brigade was part of the reserve.
In considering the order to the 4th Australian Light Horse Brigade to take the town at the gallop, it should be remembered that the 5th Mounted Brigade was also available. This brigade was trained as cavalry, and armed with the sword, whereas the 4th Australian Light Horse Brigade had no arme blanche weapons, but had had certain training in using the bayonet as such. Beyond question, it was a purely cavalry operation, and if all factors had been equal at the moment, the choice would probably have fallen on the yeomanry. In making his decision, the Corps Commander was probably influenced by the following factors:(a) As far as it was humanly possible to ascertain from air photos and reconnaissance, there was no wire in front of the trenches.
[71] (b) The two brigades (4th Australian Light Horse Brigade and 5th Mounted Brigade) in reserve were spread over a considerable distance owing to the incessant bombing by the German airmen.
(c) The 4th Australian, Light Horse Brigade was closer to Beersheba, and could be more easily concentrated, and consequently set in motion more quickly.
(d) Time was the pressing factor - two hours of light only remained, and Beersheba had to be taken whatever the cost, otherwise, with the town still in the hands of the enemy, the effect on the campaign was fraught with the gravest consequences.
The capture of Beersheba had a far-reaching effect on the, whole campaign, the success of which rested on the capture of the town on the first day. Without that success, the vast and careful arrangements of the summer months might easily have ended in another stalemate engagement.
The effect on the enemy had results beyond anticipation. The Turkish intelligence had made light of the flank attack even while it was developing, and had reported "six British infantry divisions deeply echeloned" before Gaza in the closing days of October.
After Beersheba, the failure on the part of the Turkish command to sense the British scheme became still more marked. On the night of October 31st, General von Kressenstein, undoubtedly mystified and misled, apparently concluded that the British intended to strike for Jerusalem up the Hebron road along the saddle of the Judaean Hills, and immediately swung three divisions of infantry from Gaza to the east. In committing this disastrous error he was probably influenced by the 2nd Australian Light Horse Brigade's seizure of the road at Sakati, but still more so by the activities of an Arab detachment under some British officers, which had marched some days previously from Asluj, and making a wide detour by Yutta had taken up a position on the high ground overlooking the road between Dhaheriye and Hebron. The force was small, and carried only three days' rations, but was stiffened by a few British machine and Lewis gunners, and was well supplied with ammunition.
[72] Its mission was merely to harass the Turks retiring from Beersheba; as the 2nd Australian Light Horse Brigade had already cut the road at Sakati it remained in idleness for some time. The enemy, however, took it for a strong advanced guard of the Desert Mounted Corps, and marched a force of six battalions against It - three from Hebron and three from Sheria. Surrounded by overwhelming numbers, the force, after suffering severe losses, was finally captured about three days after the fall of Beersheba.
The Battle of Beersheba, Palestine, 31 October 1917
Citation: The Battle of Beersheba, Palestine, 31 October 1917, Foster Account