« December 2008 »
S M T W T F S
1 2 3 4 5 6
7 8 9 10 11 12 13
14 15 16 17 18 19 20
21 22 23 24 25 26 27
28 29 30 31
You are not logged in. Log in


Search the site:


powered by FreeFind
Volunteer with us.

Entries by Topic All topics  
A Latest Site News
A - Using the Site
AAA Volunteers
AAB-Education Centre
AAC-Film Clips
AAC-Photo Albums
AIF & MEF & EEF
AIF - Lighthorse
AIF - ALH - A to Z
AIF - DMC
AIF - DMC - Or Bat
AIF - DMC - Anzac MD
AIF - DMC - Aus MD
AIF - DMC - British
AIF - DMC - BWI
AIF - DMC - French
AIF - DMC - Indian
AIF - DMC - Italian
AIF - DMC - Medical
AIF - DMC - Remounts
AIF - DMC - Scouts
AIF - DMC - Sigs
AIF - DMC - Sigs AirlnS
AIF - DMC - 1 Sig Sqn
AIF - DMC - 2 Sig Sqn
AIF - DMC - Eng
AIF - DMC - Eng 1FSE
AIF - DMC - Eng 2FSE
AIF - DMC - GSR
AIF - 1B - 1 LHB
AIF - 1B - 6 MVS
AIF - 1B - 1 LHMGS
AIF - 1B - 1 Sig Trp
AIF - 1B - 1 LHFA
AIF - 1B - 1 LHR
AIF - 1B - 2 LHR
AIF - 1B - 3 LHR
AIF - 2B - 2 LHB
AIF - 2B - 7 MVS
AIF - 2B - 2 LHFA
AIF - 2B - 2 LHMGS
AIF - 2B - 2 Sig Trp
AIF - 2B - 5 LHR
AIF - 2B - 6 LHR
AIF - 2B - 7 LHR
AIF - 3B - 3 LHB
AIF - 3B - 8 MVS
AIF - 3B - 3 LHB Sigs
AIF - 3B - 3 LHFA
AIF - 3B - 3 LHMGS
AIF - 3B - 3 Sig Trp
AIF - 3B - 8 LHR
AIF - 3B - 9 LHR
AIF - 3B - 10 LHR
AIF - 4B - 4 LHB
AIF - 4B - 4 Sig Trp
AIF - 4B - 9 MVS
AIF - 4B - 4 LHFA
AIF - 4B - 4 LHMGS
AIF - 4B - 4 LHR
AIF - 4B - 11 LHR
AIF - 4B - 12 LHR
AIF - 5B - 5 LHB
AIF - 5B - 10 MVS
AIF - 5B - 5 LHFA
AIF - 5B - 5 Sig Trp
AIF - 5B - ICC
AIF - 5B - 14 LHR
AIF - 5B - 15 LHR
AIF - 5B - 1er Regt
AIF - 5B - 2 NZMGS
AIF - AASC
AIF - Aboriginal LH
AIF - Badges
AIF - Cars
AIF - Chinese LH
AIF - Double Sqns
AIF - Engineers
AIF - Fr - 22 Corps
AIF - Fr - 13 LHR
AIF - Honour Roll
AIF - HQ - 3rd Echelon
AIF - Marching Songs
AIF - Misc Topics
AIF - NZMRB
AIF - NZMRB - AMR
AIF - NZMRB - CMR
AIF - NZMRB - EFT
AIF - NZMRB - NZMFA
AIF - NZMRB - NZMGS
AIF - NZMRB - OMR
AIF - NZMRB - Sig-Trp
AIF - NZMRB - WMR
AIF - Ships
AIF - Ships - Encountr
AIF - Ships - Una
AIF - WFF
AIF - Wireless Sqn
Battles
BatzA - Australia
BatzA - Broken Hill
BatzA - Liverpool
BatzA - Merivale
BatzB - Boer War
BatzB - Bakenlaagte
BatzB - Belmont
BatzB - Bothaville
BatzB - Buffels Hoek
BatzB - Coetzees Drift
BatzB - Diamond Hill
BatzB - Driefontein
BatzB - Elands
BatzB - Graspan
BatzB - Grobelaar
BatzB - Grootvallier
BatzB - Hartebestfontn
BatzB - Houtnek
BatzB - Karee Siding
BatzB - Kimberley
BatzB - Koster River
BatzB - Leeuw Kop
BatzB - Mafeking
BatzB - Magersfontein
BatzB - Modder River
BatzB - Onverwacht
BatzB - Paardeberg
BatzB - Palmietfontein
BatzB - Pink Hill
BatzB - Poplar Grove
BatzB - Rhenoster
BatzB - Sannahs Post
BatzB - Slingersfontn
BatzB - Stinkhoutbm
BatzB - Sunnyside
BatzB - Wilmansrust
BatzB - Wolvekuil
BatzB - Zand River
BatzG - Gallipoli
BatzG - Anzac
BatzG - Aug 1915
BatzG - Baby 700
BatzG - Evacuation
BatzG - Hill 60
BatzG - Hill 971
BatzG - Krithia
BatzG - Lone Pine
BatzG - Nek
BatzJ - Jordan Valley
BatzJ - 1st Amman
BatzJ - 2nd Amman
BatzJ - Abu Tellul
BatzJ - Es Salt
BatzJ - JV Maps
BatzJ - Ziza
BatzM - Mespot
BatzM - Baghdad
BatzM - Ctesiphon
BatzM - Daur
BatzM - Kurna
BatzM - Kut el Amara
BatzM - Ramadi
BatzN - Naval
BatzN - AE1
BatzN - Cocos Is
BatzN - Heligoland
BatzN - Marmara
BatzN - Zeebrugge
BatzN - Zeppelin L43
BatzNG - Bitapaka
BatzO - Other
BatzO - Baku
BatzO - Egypt 1919
BatzO - Emptsa
BatzO - Karawaran
BatzO - Peitang
BatzO - Wassa
BatzP - Palestine
BatzP - 1st Gaza
BatzP - 2nd Gaza
BatzP - 3rd Gaza
BatzP - Aleppo
BatzP - Amwas
BatzP - Ayun Kara
BatzP - Bald Hill
BatzP - Balin
BatzP - Beersheba
BatzP - Berkusieh
BatzP - Damascus
BatzP - El Auja
BatzP - El Buggar
BatzP - El Burj
BatzP - Haifa
BatzP - Huj
BatzP - JB Yakub
BatzP - Kaukab
BatzP - Khan Kusseir
BatzP - Khuweilfe
BatzP - Kuneitra
BatzP - Megiddo
BatzP - Nablus
BatzP - Rafa
BatzP - Sasa
BatzP - Semakh
BatzP - Sheria
BatzP - Surafend
BatzP - Wadi Fara
BatzS - Sinai
BatzS - Bir el Abd
BatzS - El Arish
BatzS - El Mazar
BatzS - El Qatiya
BatzS - Jifjafa
BatzS - Magdhaba
BatzS - Maghara
BatzS - Romani
BatzS - Suez 1915
BatzSe - Senussi
BatzWF - Westn Front
BW - Boer War
BW - NSW
BW - NSW - 1ACH
BW - NSW - 1NSWMR
BW - NSW - 2NSWMR
BW - NSW - 3ACH
BW - NSW - 3NSWIB
BW - NSW - 3NSWMR
BW - NSW - 5ACH
BW - NSW - A Bty RAA
BW - NSW - AAMC
BW - NSW - Aust H
BW - NSW - Lancers
BW - NSW - NSW Inf
BW - NSW - NSWCBC
BW - NSW - NSWIB
BW - NSW - NSWMR_A
BW - NZ
BW - Qld
BW - Qld - 1ACH
BW - Qld - 1QMI
BW - Qld - 2QMI
BW - Qld - 3ACH
BW - Qld - 3QMI
BW - Qld - 4QIB
BW - Qld - 5QIB
BW - Qld - 6QIB
BW - Qld - 7ACH
BW - QLD - AAMC
BW - SA
BW - SA - 1SAMR
BW - SA - 2ACH
BW - SA - 2SAMR
BW - SA - 3SACB
BW - SA - 4ACH
BW - SA - 4SAIB
BW - SA - 5SAIB
BW - SA - 6SAIB
BW - SA - 8ACH
BW - SA - AAMC
BW - Tas
BW - Tas - 1ACH
BW - Tas - 1TIB
BW - Tas - 1TMI
BW - Tas - 2TB
BW - Tas - 2TIB
BW - Tas - 3ACH
BW - Tas - 8ACH
BW - Vic
BW - Vic - 1VMI
BW - Vic - 2ACH
BW - Vic - 2VMR
BW - Vic - 3VB
BW - Vic - 4ACH
BW - Vic - 4VIB
BW - Vic - 5VMR
BW - Vic - 6ACH
BW - Vic - AAMC
BW - Vic - Scot H
BW - WA
BW - WA - 1WAMI
BW - WA - 2ACH
BW - WA - 2WAMI
BW - WA - 3WAB
BW - WA - 4ACH
BW - WA - 4WAMI
BW - WA - 5WAMI
BW - WA - 6WAMI
BW - WA - 8ACH
BW Gen - Campaign
BW Gen - Soldiers
BW General
Cavalry - General
Diary - Schramm
Egypt - Heliopolis
Egypt - Mena
Gen - Ataturk Pk, CNB
Gen - Australia
Gen - Legends
Gen - Query Club
Gen - St - NSW
Gen - St - Qld
Gen - St - SA
Gen - St - Tas
Gen - St - Vic
Gen - St - WA
Gm - German Items
Gm - Bk - 605 MGC
GW - 11 Nov 1918
GW - Atrocities
GW - August 1914
GW - Biographies
GW - Propaganda
GW - Spies
GW - We forgot
Militia 1899-1920
Militia - Area Officers
Militia - Inf - Infantry
Militia - Inf - 1IB
Militia - Inf - 2IB
Militia - Inf - 3IB
Militia - Inf - NSW
Militia - Inf - Qld
Militia - Inf - SA
Militia - Inf - Tas
Militia - Inf - Vic
Militia - Inf - WA
Militia - K.E.Horse
Militia - LH
Militia - LH - Regts
Militia - LH - 1LHB
Militia - LH - 2LHB
Militia - LH - 3LHB
Militia - LH - 4LHB
Militia - LH - 5LHB
Militia - LH - 6LHB
Militia - LHN - NSW
Militia - LHN - 1/7/1
Militia - LHN - 2/9/6
Militia - LHN - 3/11/7
Militia - LHN - 4/6/16
Militia - LHN - 5/4/15
Militia - LHN - 6/5/12
Militia - LHN - 28
Militia - LHQ - Qld
Militia - LHQ - 13/2
Militia - LHQ - 14/3/11
Militia - LHQ - 15/1/5
Militia - LHQ - 27/14
Militia - LHS - SA
Militia - LHS - 16/22/3
Militia - LHS - 17/23/18
Militia - LHS - 24/9
Militia - LHT - Tas
Militia - LHT - 12/26
Militia - LHV - Vic
Militia - LHV - 7/15/20
Militia - LHV - 8/16/8
Militia - LHV - 9/19
Militia - LHV - 10/13
Militia - LHV - 11/20/4
Militia - LHV - 19/17
Militia - LHV - 29
Militia - LHW - WA
Militia - LHW-18/25/10
Militia - Military Orders
Militia - Misc
MilitiaRC - Rifle Clubs
MilitiaRC - NSW
MilitiaRC - NT
MilitiaRC - Qld
MilitiaRC - SA
MilitiaRC - Tas
MilitiaRC - Vic
MilitiaRC - WA
Militiaz - New Zealand
Tk - Turkish Items
Tk - Army
Tk - Bks - Books
Tk - Bks - 1/33IR
Tk - Bks - 27th IR
Tk - Bks - Air Force
Tk - Bks - Yildirim
Tk - POWs
Wp - Weapons
Wp - Hotchkiss Cav
Wp - Hotchkiss PMG
Blog Tools
Edit your Blog
Build a Blog
RSS Feed
View Profile
Open Community
Post to this Blog
Site Index
Education Centre
LH Militia
Boer War
Transport Ships
LH Battles
ALH - Units
ALH - General
Aboriginal Light H
Weapons
Ottoman Sources

"At a mile distant their thousand hooves were stuttering thunder, coming at a rate that frightened a man - they were an awe inspiring sight, galloping through the red haze - knee to knee and horse to horse - the dying sun glinting on bayonet points..." Trooper Ion Idriess

The Australian Light Horse Studies Centre aims to present an accurate history as chroniclers of early Australian military developments from 1899 to 1920.

The Australian Light Horse Studies Centre site holds over 12,000 entries and is growing daily.

Contact: Australian Light Horse Studies Centre

Let us hear your story: You can tell your story, make a comment or ask for help on our Australian Light Horse Studies Centre Forum called:

Desert Column Forum

WARNING: This site contains: names, information and images of deceased people; and, language which may be considered inappropriate today.

Wednesday, 24 December 2008
Bert Schramm's Diary, 24 December 1918
Topic: Diary - Schramm

During part of the course of his military service with the AIF, 2823 Private Herbert Leslie Schramm, a farmer from White's River, near Tumby Bay on the Eyre Peninsular, kept a diary of his life. Bert was not a man of letters so this diary was produced with great effort on his behalf. Bert made a promise to his sweetheart, Lucy Solley, that he would do so after he received the blank pocket notebook wherein these entries are found. As a Brigade Scout since September 1918, he took a lead part in the September 1918 breakout by the Allied forces in Palestine. Bert's diary entries are placed alongside those of the 9th Light Horse Regiment to which he belonged and to the 3rd Light Horse Brigade to which the 9th LHR was attached. On this basis we can follow Bert in the context of his formation.

 Bert Schramm's Diary, 24 December 1918


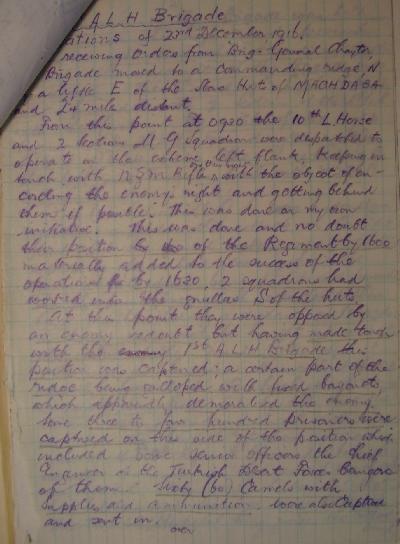
Bert Schramm's Handwritten Diary, 21 - 27 December 1918

[Click on page for a larger print version.]

Diaries

Bert Schramm

Tuesday, December 24, 1918

Bert Schramm's Location - Tripoli

Bert Schramm's Diary -  Very well again today. Went into Tripoli this afternoon. A fair amount of liquor about and some of the lads are going to have a merry Xmas.


9th Light Horse Regiment War Diary

9th Light Horse Regiment Location - Tripoli

9th Light Horse Regiment War Diary - One hundred Other Ranks proceeded to El Mina for delousing and hot baths. Extra rations, local vegetables etc purchased for Christmas Day.


Darley

Darley, TH, With the Ninth Light Horse in the Great War, Adelaide, Hassell Press, 1924.

No Entry


Further Reading:

9th Light Horse Regiment AIF War Diary - Complete day by day list

Bert Schramm Diary 

Bert Schramm Diary - Complete day by day list


Additional Reading:

Darley, TH, With the Ninth Light Horse in the Great War, Adelaide, Hassell Press, 1924.


Citation: Bert Schramm's Diary, 24 December 1918


Posted by Project Leader at 1:37 PM EAST
Updated: Wednesday, 24 December 2008 1:52 PM EAST
9th LHR AIF War Diary, 24 December
Topic: AIF - 3B - 9 LHR

9th LHR, AIF

9th Light Horse Regiment

War Diary, 24 December

Pro Gloria et Honore - For Glory and Honour

Regimental March -  Marching Through Georgia


The following entries are extracted and transcribed from the 9th Light Horse Regiment War Diary, the originals of which are held by the Australian War Memorial. There are 366 entries on this site. Each day has entries as they occurred from 1914 to 1919. In addition to the 9th Light Horse Regiment War Diary, when appropriate, entries from the 3rd Light Horse Brigade War Diary and other regiments with the Brigade will also appear. Entries from the unit history, Darley, TH, With the Ninth Light Horse in the Great War, Adelaide, Hassell Press, 1924 will also appear from time to time. The aim is to give the broadest context to the story and allow the reader to follow the day to day activities of the regiment. If a relative happened to have served in the regiment during the Great War, then this provides a general framework in which the individual story may be told.


The Diary


1914

Thursday, December 24, 1914

9th Light Horse Regiment Location -  Broadmeadows Camp, Victoria. 

9th Light Horse Regiment War Diary - Organising, training and equipping of troops.

See: Broadmeadows 1909


1915

Friday, December 24, 1915

9th Light Horse Regiment Location - At sea.

9th Light Horse Regiment War Diary -   No entry.


1916

Sunday, December 24, 1916

9th Light Horse Regiment Location - Hod Masaid, Sinai

9th Light Horse Regiment War Diary - Arrived at 1000 from El Magdhaba and night bivouac in hod.


1917

Monday, December 24, 1917

9th Light Horse Regiment Location - Suffa.

9th Light Horse Regiment War Diary - 20 Other Ranks marched in from led horses.


1918

Tuesday, December 24, 1918

9th Light Horse Regiment Location - Tripoli

9th Light Horse Regiment War Diary - One hundred Other Ranks proceeded to El Mina for delousing and hot baths. Extra rations, local vegetables etc purchased for Christmas Day.


1919

Wednesday, December 24, 1919

9th Light Horse Regiment Location - Adelaide

9th Light Horse Regiment War Diary - Regiment disbanded.


Previous: 9th LHR AIF War Diary, 23 December

Next: 9th LHR AIF War Diary, 25 December


Sources:

See: 9th Australian Light Horse Regiment, Contents
Australian Light Horse Studies Centre, AIF War Diaries of the Great War, Site Transcription Policy


Further Reading:

9th Light Horse Regiment AIF

Bert Schramm Diary

9th Australian Light Horse Regiment, Roll of Honour 

Battles where Australians fought, 1899-1920

 
Citation: 9th LHR AIF War Diary, 24 December

Posted by Project Leader at 12:51 PM EAST
Updated: Thursday, 23 September 2010 9:21 AM EADT
Colonel Husnu, Yildirim, Page 170
Topic: Tk - Bks - Yildirim

Another entry from the book written by Lieutenant Colonel Hüseyin Hüsnü Emir, called Yildirim. Every day, one page of the book will be posted. This is Page 170.


Colonel Hüsnü, Yildirim, Page 170.

[Click on page for a larger print version.]


This chapter deals with Hüsnü observations of the Turkish response to Beersheba on other parts of the battlefield.


Further Reading:

List of all Yildirim pages


Citation: Colonel Hüsnü, Yildirim, Page 170

Posted by Project Leader at 11:01 AM EAST
Updated: Wednesday, 24 December 2008 2:13 PM EAST
Tuesday, 23 December 2008
The Battle of Magdhaba, Sinai, 23 December 1916, 3rd LH Bde, AIF, War Diary Account
Topic: AIF - 1B - 1 LHB

The Battle of Magdhaba

Sinai, 23 December 1916

3rd LH Bde, AIF, War Diary Account


War Diary account of the 3rd LH Bde, AIF.


The transcription:

3rd Australian Light Horse Brigade

Operations of 23rd December 1916.

Upon receiving orders from Brigadier General Chaytor, the Brigade moved to a commanding ridge north and a little east of the Stone Huts of Magdhaba and about 4 miles distant.

From this point at 0930 the 10th Light Horse Regiment and two Sections of the Machine Gun Squadron were despatched to operate on the extreme left flank, keeping in touch with the New Zealand Mounted Rifles Brigade on their right with the object of encircling the enemy right and getting behind them if possible. This was done on my own initiative. This was done and no doubt their position of the Regiment by 1600 materially added to the success of the operation by 1630. Two Squadrons had worked into the nullas south of the huts.

At this point they were opposed by an enemy redoubt but having made touch with the 1st Australian Light Horse Brigade this position was captured; a certain part of the ridge being galloped with fixed bayonets which apparently demoralised the enemy.

Some three to four hundred prisoners were captured on this side of the position which included some senior officers the chief ???? of the Turkish Desert Force, ???? of them. Sixty (60) camels with supplies and ammunition were also captured and sent in.

The remainder of the Brigade was held in reserve on the high ground previously gained until 1300 when orders were received to push the remainder of the Brigade into the attack. The 8th and 9th Light Horse Regiments went forward with two Sections of the Machine Gun Squadron with the former. The right of the right Regiment (the 9th Light Horse Regiment) was directed on the guts of Magdhaba. The 8th Light Horse Regiment extending to the left and being in touch with the New Zealand Mounted Rifles Brigade.


Two Sections of the Machine Gun Squadron under Major Nicholas supported the attack on the right flank but the ground worked over gave little assistance for overhead covering fire; the guns at all time being pushed well forward into the firing line, which necessitated their being manhandled for a distance of 1,000 yards as horses could not be brought up owing to the nature of the ground.

As soon as launched this attack pushed steadily forward to the final stage when bayonets were fixed, but by this time the enemy were surrendering on all sides. In one case the bayonet got home and one man of the 9th Light Horse Regiment received a bayonet wound. As soon as the general surrender was evident steps were take to collect the killed and wounded and prisoners; the Turkish Hospital being made the collecting point. At this point between 700 and 750 prisoners were sent to the rendezvous, having been collected by the Brigade together with the number sent in by the New Zealand Mounted Rifles Brigade and the 1st Australian Light Horse. The casualties in the Brigade were as follows:

Killed in Action - 3 Officers; 8 Other Ranks
Wounded in Action - 2 Officers; 30 Other Ranks

During the operations the bearing of all ranks was excellent.

In conclusion I wish to state that from the time the two Regiments were put into the attack on the trenches, no time was lost and I cannot do otherwise than compliment the three Commanding Officers for the prompt way they got their Regiments into action.

Mention must be made of the excellent work done generally by the Lewis Gun Detachments. They proved splendid weapons for covering the bounds.

John R Royston
Brigadier General
Commanding 3rd Australian Light Horse Brigade
Masa'id, 25th December 1916.


Additional Reading:

1st Australian Light Horse Brigade

The Battle of Magdhaba, Sinai, December 23, 1916, Roll of Honour, 3rd Australian Light Horse Brigade

The Battle of Magdhaba

The Battle of Magdhaba, Sinai, December 23, 1916, Roll of Honour, Australia and New Zealand

Battles where Australians fought, 1899-1919


Citation: The Battle of Magdhaba, Sinai, 23 December 1916, 3rd LH Bde, AIF, War Diary Account

Posted by Project Leader at 12:01 AM EAST
Updated: Sunday, 22 November 2009 7:52 AM EAST
The Battle of Magdhaba, Sinai, December 23, 1916, 2nd LHR, AIF, Unit History Account
Topic: AIF - 1B - 2 LHR

The Battle of Magdhaba

Sinai, 23 December 1916

2nd LHR, AIF, Unit History Account


Lieutenant Colonel George Herbert Bourne's unit history of the 2nd Light Horse Regiment, AIF, included a section specifically related to the Battle of Magdhaba which is extracted below.

Bourne, Lieut-Colonel GH, "NULLI SECUNDUS" - The History - of the 2nd Light Horse Regiment Australian Imperial Force - August 1914 - April 1919, (Tamworth 1926), pp. 37-39:


Information having reached the Turks that these two patrols had penetrated their lines, however, they became nervous as to the safety of Mazar. They therefore evacuated that place and concentrated their force at El Arish. The instant this became known to General Chetwode, he ordered the advance on El Arish. This was accomplished by the Anzac Division (less 2nd Brigade) and Camel Corps marching round it during the night - the infantry of the Column moving on the place by direct road. By daylight it was surrounded; but the birds had flown. Having found that our horses were equal to such performances as that of Captain Brown's patrol, the Turks knew they were not safe at El Arish, and consequently sought the security of Magdhaba, evacuating the former place just before our arrival. Magdhaba was distant, 27 miles, along a practically unknown and waterless track, but in spite of that, and the fact that the Column had just had one night march General Chetwode decided to surprise the Turks there at dawn on December 23 with the mounted troops of his command, viz: - 1st, 3rd and NZMR Brigades, and Imperial Camel Corps, 18th Brigade, RHA and Hong Kong and Singapore Mountain Battery.

After a long and tiresome wait for rations to come up we accordingly started on the night of December 22 for Magdhaba - "C" Squadron, 2nd Regiment being Advance Guard. The enemy position was very difficult to locate; his trenches were beautifully sited. The attack was opened by the Camel Brigade. The 1st Brigade went in on their right - the 3rd Brigade and NZMR Brigade on their left, practically enveloping the position. The situation was that the Turks were sitting on the only water within miles; and the position had either to be taken or we would go thirsty for at least 24 hours.

The Turk ever proved himself a splendid and stubborn fighter from behind cover. So, in this case we found the job much more difficult than had been anticipated. This Regiment was not engaged as a unit; having been detailed as Brigade Reserve and split up in different jobs. The final result however, was largely contributed to by the energy of Major Markwell, who gathered up some details of 3rd Regiment in addition to three troops of "B" Squadron, 2nd Regiment under Major Chambers, and successfully led them against the chief remaining enemy redoubt. Major Birkbeck skilfully led two troops right round the position and threatened a mounted attack from the enemy's only line of retreat. This manoeuvre decided the Turkish Commander to hoist the white flag; the entire force surrendering.

Lieutenant Guiren, of this Regiment, and his troop, just beat the 3rd Brigade into Magdhaba itself.                                

The enemy force of about 2,500 was captured or killed. We also got a battery of mountain guns, about 2,000 rifles; machine guns, s.a.a. etc., a many horses and mules.

The 1st Regiment was detailed to clear up the battlefield, and bivouacked for the night; and 2nd Regiment was detailed to escort the prisoners to El Arish - another night march thus being necessary. During the previous 84 hours we had practically no sleep, so that the journey back was by no means a pleasant one; men went fast asleep on their horses or camels, some falling off. Most of us experienced optical delusions, induced by want of sleep. We halted to rations at Lafan, half-way to El Arish. Our bivouacs at El Arish were reached at dawn on Christmas Eve. The weather was wet and of course there were no tents owing to want of transport - indeed it was proving a difficult matter to even feed us as we had got so far beyond Railhead  the trackless sand rendering wheeled vehicles of little use. Much heavy work was therefore thrown on the excellent Camel Transport Corps.

The prisoners were handed over y Major Stodart before noon on 24th. In order to ration them, our friends of the 52nd Division had to go short for a day or two. The "Scotties" were amusingly indignant, and repeatedly told our fellows that they had taken too ___ many prisoners, and should have used the ___ bayonet more.


Further Reading:

2nd Australian Light Horse Regiment, AIF

2nd Australian Light Horse Regiment, Roll of Honour

The Battle of Magdhaba

The Battle of Magdhaba, Sinai, December 23, 1916, Roll of Honour, Australia and New Zealand

Battles where Australians fought, 1899-1920


Citation: The Battle of Magdhaba, Sinai, December 23, 1916, 2nd LHR, AIF, Unit History Account

Posted by Project Leader at 12:01 AM EAST
Updated: Sunday, 22 November 2009 12:41 PM EAST

Newer | Latest | Older

Full Site Index


powered by FreeFind
Let us hear your story: You can tell your story, make a comment or ask for help on our forum.

Desert Column Forum

A note on copyright

The Australian Light Horse Studies Centre is a not for profit and non profit group whose sole aim is to write the early history of the Australian Light Horse from 1900 - 1920. It is privately funded and the information is provided by the individuals within the group and while permission for the use of the material has been given for this site for these items by various donors, the residual and actual copyright for these items, should there be any, resides exclusively with the donors. The information on this site is freely available for private research use only and if used as such, should be appropriately acknowledged. To assist in this process, each item has a citation attached at the bottom for referencing purposes.

Please Note: No express or implied permission is given for commercial use of the information contained within this site.

A note to copyright holders

The Australian Light Horse Studies Centre has made every endeavour to contact copyright holders of material digitised for this blog and website and where appropriate, permission is still being sought for these items. Where replies were not received, or where the copyright owner has not been able to be traced, or where the permission is still being sought, the Australian Light Horse Studies Centre has decided, in good faith, to proceed with digitisation and publication. Australian Light Horse Studies Centre would be happy to hear from copyright owners at any time to discuss usage of this item.

Contact

Australian Light Horse Studies Centre

eXTReMe Tracker