« August 2009 »
S M T W T F S
1
2 3 4 5 6 7 8
9 10 11 12 13 14 15
16 17 18 19 20 21 22
23 24 25 26 27 28 29
30 31
You are not logged in. Log in


Search the site:


powered by FreeFind
Volunteer with us.

Entries by Topic All topics  
A Latest Site News
A - Using the Site
AAA Volunteers
AAB-Education Centre
AAC-Film Clips
AAC-Photo Albums
AIF & MEF & EEF
AIF - Lighthorse
AIF - ALH - A to Z
AIF - DMC
AIF - DMC - Or Bat
AIF - DMC - Anzac MD
AIF - DMC - Aus MD
AIF - DMC - British
AIF - DMC - BWI
AIF - DMC - French
AIF - DMC - Indian
AIF - DMC - Italian
AIF - DMC - Medical
AIF - DMC - Remounts
AIF - DMC - Scouts
AIF - DMC - Sigs
AIF - DMC - Sigs AirlnS
AIF - DMC - 1 Sig Sqn
AIF - DMC - 2 Sig Sqn
AIF - DMC - Eng
AIF - DMC - Eng 1FSE
AIF - DMC - Eng 2FSE
AIF - DMC - GSR
AIF - 1B - 1 LHB
AIF - 1B - 6 MVS
AIF - 1B - 1 LHMGS
AIF - 1B - 1 Sig Trp
AIF - 1B - 1 LHFA
AIF - 1B - 1 LHR
AIF - 1B - 2 LHR
AIF - 1B - 3 LHR
AIF - 2B - 2 LHB
AIF - 2B - 7 MVS
AIF - 2B - 2 LHFA
AIF - 2B - 2 LHMGS
AIF - 2B - 2 Sig Trp
AIF - 2B - 5 LHR
AIF - 2B - 6 LHR
AIF - 2B - 7 LHR
AIF - 3B - 3 LHB
AIF - 3B - 8 MVS
AIF - 3B - 3 LHB Sigs
AIF - 3B - 3 LHFA
AIF - 3B - 3 LHMGS
AIF - 3B - 3 Sig Trp
AIF - 3B - 8 LHR
AIF - 3B - 9 LHR
AIF - 3B - 10 LHR
AIF - 4B - 4 LHB
AIF - 4B - 4 Sig Trp
AIF - 4B - 9 MVS
AIF - 4B - 4 LHFA
AIF - 4B - 4 LHMGS
AIF - 4B - 4 LHR
AIF - 4B - 11 LHR
AIF - 4B - 12 LHR
AIF - 5B - 5 LHB
AIF - 5B - 10 MVS
AIF - 5B - 5 LHFA
AIF - 5B - 5 Sig Trp
AIF - 5B - ICC
AIF - 5B - 14 LHR
AIF - 5B - 15 LHR
AIF - 5B - 1er Regt
AIF - 5B - 2 NZMGS
AIF - AASC
AIF - Aboriginal LH
AIF - Badges
AIF - Cars
AIF - Chinese LH
AIF - Double Sqns
AIF - Engineers
AIF - Fr - 22 Corps
AIF - Fr - 13 LHR
AIF - Honour Roll
AIF - HQ - 3rd Echelon
AIF - Marching Songs
AIF - Misc Topics
AIF - NZMRB
AIF - NZMRB - AMR
AIF - NZMRB - CMR
AIF - NZMRB - EFT
AIF - NZMRB - NZMFA
AIF - NZMRB - NZMGS
AIF - NZMRB - OMR
AIF - NZMRB - Sig-Trp
AIF - NZMRB - WMR
AIF - Ships
AIF - Ships - Encountr
AIF - Ships - Una
AIF - WFF
AIF - Wireless Sqn
Battles
BatzA - Australia
BatzA - Broken Hill
BatzA - Liverpool
BatzA - Merivale
BatzB - Boer War
BatzB - Bakenlaagte
BatzB - Belmont
BatzB - Bothaville
BatzB - Buffels Hoek
BatzB - Coetzees Drift
BatzB - Diamond Hill
BatzB - Driefontein
BatzB - Elands
BatzB - Graspan
BatzB - Grobelaar
BatzB - Grootvallier
BatzB - Hartebestfontn
BatzB - Houtnek
BatzB - Karee Siding
BatzB - Kimberley
BatzB - Koster River
BatzB - Leeuw Kop
BatzB - Mafeking
BatzB - Magersfontein
BatzB - Modder River
BatzB - Onverwacht
BatzB - Paardeberg
BatzB - Palmietfontein
BatzB - Pink Hill
BatzB - Poplar Grove
BatzB - Rhenoster
BatzB - Sannahs Post
BatzB - Slingersfontn
BatzB - Stinkhoutbm
BatzB - Sunnyside
BatzB - Wilmansrust
BatzB - Wolvekuil
BatzB - Zand River
BatzG - Gallipoli
BatzG - Anzac
BatzG - Aug 1915
BatzG - Baby 700
BatzG - Evacuation
BatzG - Hill 60
BatzG - Hill 971
BatzG - Krithia
BatzG - Lone Pine
BatzG - Nek
BatzJ - Jordan Valley
BatzJ - 1st Amman
BatzJ - 2nd Amman
BatzJ - Abu Tellul
BatzJ - Es Salt
BatzJ - JV Maps
BatzJ - Ziza
BatzM - Mespot
BatzM - Baghdad
BatzM - Ctesiphon
BatzM - Daur
BatzM - Kurna
BatzM - Kut el Amara
BatzM - Ramadi
BatzN - Naval
BatzN - AE1
BatzN - Cocos Is
BatzN - Heligoland
BatzN - Marmara
BatzN - Zeebrugge
BatzN - Zeppelin L43
BatzNG - Bitapaka
BatzO - Other
BatzO - Baku
BatzO - Egypt 1919
BatzO - Emptsa
BatzO - Karawaran
BatzO - Peitang
BatzO - Wassa
BatzP - Palestine
BatzP - 1st Gaza
BatzP - 2nd Gaza
BatzP - 3rd Gaza
BatzP - Aleppo
BatzP - Amwas
BatzP - Ayun Kara
BatzP - Bald Hill
BatzP - Balin
BatzP - Beersheba
BatzP - Berkusieh
BatzP - Damascus
BatzP - El Auja
BatzP - El Buggar
BatzP - El Burj
BatzP - Haifa
BatzP - Huj
BatzP - JB Yakub
BatzP - Kaukab
BatzP - Khan Kusseir
BatzP - Khuweilfe
BatzP - Kuneitra
BatzP - Megiddo
BatzP - Nablus
BatzP - Rafa
BatzP - Sasa
BatzP - Semakh
BatzP - Sheria
BatzP - Surafend
BatzP - Wadi Fara
BatzS - Sinai
BatzS - Bir el Abd
BatzS - El Arish
BatzS - El Mazar
BatzS - El Qatiya
BatzS - Jifjafa
BatzS - Magdhaba
BatzS - Maghara
BatzS - Romani
BatzS - Suez 1915
BatzSe - Senussi
BatzWF - Westn Front
BW - Boer War
BW - NSW
BW - NSW - 1ACH
BW - NSW - 1NSWMR
BW - NSW - 2NSWMR
BW - NSW - 3ACH
BW - NSW - 3NSWIB
BW - NSW - 3NSWMR
BW - NSW - 5ACH
BW - NSW - A Bty RAA
BW - NSW - AAMC
BW - NSW - Aust H
BW - NSW - Lancers
BW - NSW - NSW Inf
BW - NSW - NSWCBC
BW - NSW - NSWIB
BW - NSW - NSWMR_A
BW - NZ
BW - Qld
BW - Qld - 1ACH
BW - Qld - 1QMI
BW - Qld - 2QMI
BW - Qld - 3ACH
BW - Qld - 3QMI
BW - Qld - 4QIB
BW - Qld - 5QIB
BW - Qld - 6QIB
BW - Qld - 7ACH
BW - QLD - AAMC
BW - SA
BW - SA - 1SAMR
BW - SA - 2ACH
BW - SA - 2SAMR
BW - SA - 3SACB
BW - SA - 4ACH
BW - SA - 4SAIB
BW - SA - 5SAIB
BW - SA - 6SAIB
BW - SA - 8ACH
BW - SA - AAMC
BW - Tas
BW - Tas - 1ACH
BW - Tas - 1TIB
BW - Tas - 1TMI
BW - Tas - 2TB
BW - Tas - 2TIB
BW - Tas - 3ACH
BW - Tas - 8ACH
BW - Vic
BW - Vic - 1VMI
BW - Vic - 2ACH
BW - Vic - 2VMR
BW - Vic - 3VB
BW - Vic - 4ACH
BW - Vic - 4VIB
BW - Vic - 5VMR
BW - Vic - 6ACH
BW - Vic - AAMC
BW - Vic - Scot H
BW - WA
BW - WA - 1WAMI
BW - WA - 2ACH
BW - WA - 2WAMI
BW - WA - 3WAB
BW - WA - 4ACH
BW - WA - 4WAMI
BW - WA - 5WAMI
BW - WA - 6WAMI
BW - WA - 8ACH
BW Gen - Campaign
BW Gen - Soldiers
BW General
Cavalry - General
Diary - Schramm
Egypt - Heliopolis
Egypt - Mena
Gen - Ataturk Pk, CNB
Gen - Australia
Gen - Legends
Gen - Query Club
Gen - St - NSW
Gen - St - Qld
Gen - St - SA
Gen - St - Tas
Gen - St - Vic
Gen - St - WA
Gm - German Items
Gm - Bk - 605 MGC
GW - 11 Nov 1918
GW - Atrocities
GW - August 1914
GW - Biographies
GW - Propaganda
GW - Spies
GW - We forgot
Militia 1899-1920
Militia - Area Officers
Militia - Inf - Infantry
Militia - Inf - 1IB
Militia - Inf - 2IB
Militia - Inf - 3IB
Militia - Inf - NSW
Militia - Inf - Qld
Militia - Inf - SA
Militia - Inf - Tas
Militia - Inf - Vic
Militia - Inf - WA
Militia - K.E.Horse
Militia - LH
Militia - LH - Regts
Militia - LH - 1LHB
Militia - LH - 2LHB
Militia - LH - 3LHB
Militia - LH - 4LHB
Militia - LH - 5LHB
Militia - LH - 6LHB
Militia - LHN - NSW
Militia - LHN - 1/7/1
Militia - LHN - 2/9/6
Militia - LHN - 3/11/7
Militia - LHN - 4/6/16
Militia - LHN - 5/4/15
Militia - LHN - 6/5/12
Militia - LHN - 28
Militia - LHQ - Qld
Militia - LHQ - 13/2
Militia - LHQ - 14/3/11
Militia - LHQ - 15/1/5
Militia - LHQ - 27/14
Militia - LHS - SA
Militia - LHS - 16/22/3
Militia - LHS - 17/23/18
Militia - LHS - 24/9
Militia - LHT - Tas
Militia - LHT - 12/26
Militia - LHV - Vic
Militia - LHV - 7/15/20
Militia - LHV - 8/16/8
Militia - LHV - 9/19
Militia - LHV - 10/13
Militia - LHV - 11/20/4
Militia - LHV - 19/17
Militia - LHV - 29
Militia - LHW - WA
Militia - LHW-18/25/10
Militia - Military Orders
Militia - Misc
MilitiaRC - Rifle Clubs
MilitiaRC - NSW
MilitiaRC - NT
MilitiaRC - Qld
MilitiaRC - SA
MilitiaRC - Tas
MilitiaRC - Vic
MilitiaRC - WA
Militiaz - New Zealand
Tk - Turkish Items
Tk - Army
Tk - Bks - Books
Tk - Bks - 1/33IR
Tk - Bks - 27th IR
Tk - Bks - Air Force
Tk - Bks - Yildirim
Tk - POWs
Wp - Weapons
Wp - Hotchkiss Cav
Wp - Hotchkiss PMG
Blog Tools
Edit your Blog
Build a Blog
RSS Feed
View Profile
Open Community
Post to this Blog
Site Index
Education Centre
LH Militia
Boer War
Transport Ships
LH Battles
ALH - Units
ALH - General
Aboriginal Light H
Weapons
Ottoman Sources

"At a mile distant their thousand hooves were stuttering thunder, coming at a rate that frightened a man - they were an awe inspiring sight, galloping through the red haze - knee to knee and horse to horse - the dying sun glinting on bayonet points..." Trooper Ion Idriess

The Australian Light Horse Studies Centre aims to present an accurate history as chroniclers of early Australian military developments from 1899 to 1920.

The Australian Light Horse Studies Centre site holds over 12,000 entries and is growing daily.

Contact: Australian Light Horse Studies Centre

Let us hear your story: You can tell your story, make a comment or ask for help on our Australian Light Horse Studies Centre Forum called:

Desert Column Forum

WARNING: This site contains: names, information and images of deceased people; and, language which may be considered inappropriate today.

Wednesday, 5 August 2009
Bir el Abd, Sinai, 9 August 1916, Falls Account, The end of the pursuit
Topic: BatzS - Bir el Abd

Bir el Abd

Sinai, 9 August 1916

Falls Account, The end of the pursuit


The Battle of Romani, 4-6 August  and Bir el Abd, 9 August 1916

[Click on map for larger version]

[From: Military operations: Egypt and Palestine, Sketch 10 facing p. 178.]


As part of the Official British War History of the Great War, Captain Cyril Falls and Lieutenant General George MacMunn were commissioned to produce a commentary on the Sinai, Palestine and Syrian operations that took place. In 1928, their finished work, Military Operations, Egypt and Palestine - From the outbreak of war with Germany to June 1917,  was published in London. Their book included a section specifically related to the battle of Romani and is extracted below.

MacMunn, G. & Falls, C., Military operations: Egypt and Palestine, (London 1930), pp. 194 - 199:


Part 5. The end of the pursuit.

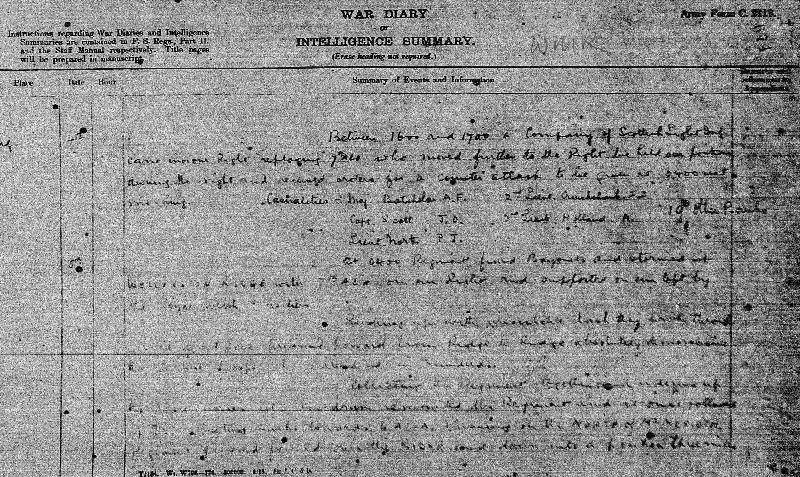
The foresight of Kress in preparing successive lines of defence with each step forward was rewarded after his defeat at Romani. He had lost between three and four thousand prisoners, but he had saved all his artillery except one battery and had kept his tired troops in hand. He had fought one successful rear-guard action at Qatiya and was now prepared to meet an assault at Oghratina.

General Lawrence's orders for the 6th August directed the mounted troops (less the 1st and 2nd L.H. Brigades, whose horses were unfit to move) to press forward vigorously against the enemy, who was believed to have left a rearguard of one regiment on the Qatiya line, and to attempt to cut off the retreat of men and material. The 42nd Division was to advance eastwards at 4 a.m. and occupy the line from Bir el Mamaluk to Bir Qatiya, supporting the mounted troops as required. The 52nd Division was to advance from Abu. Hamra at the same hour and prolong the line of the 42nd to the north-east. It was stated that Section headquarters would moue to Romani at noon.

At dawn the N.Z.M.R. Brigade, followed by the 5th Mounted Brigade, advanced on Oghratina, but found the enemy as well placed as on the previous day. The 3rd L.H. Brigade on the right advanced in the direction of Badieh, but the Turkish left was well secured and little progress could be made.

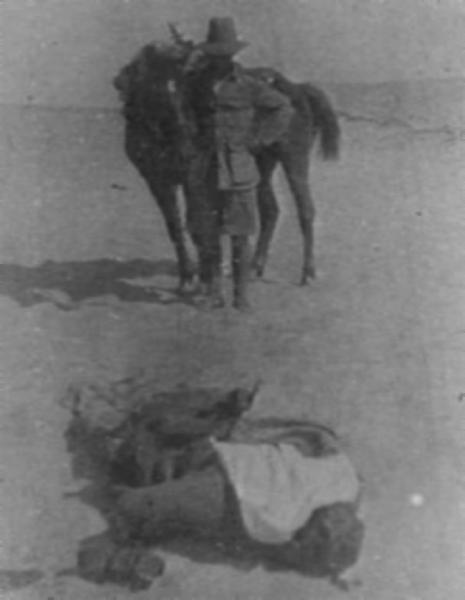
Meanwhile, the 42nd and 52nd Divisions had carried out their orders, but there was never the remotest chance that they would be able to support the mounted troops against the Oghratina position. The heat was again terrific, and the heavily burdened infantry - especially that of the 42nd Division, not yet hardened to desert conditions or trained in the conservation of water - suffered tortures on its march. The 127th Brigade did not reach Qatiya till evening was drawing on, and from it alone 800 men had fallen out by the way. The 125th, 155th and 157th Brigades also had many casualties from the sun. The medical services worked their hardest, but their efforts did not suffice. Next day it was necessary to employ the Bikanir Camel Corps, a detachment of Yeomanry and even aeroplanes to search the desert for the unfortunates who had fallen out on the march and now lay upon the sand, often in a state of delirium. The four brigades struggled on to the line upon which they had been directed, but that was the end of the pursuit so far as the infantry was concerned. It was now, indeed, obvious that its employment was useless in the present conditions, and, if persisted in, would cause many deaths. In the course of the day the Mobile Column had been in touch with the enemy between Bayud and Mageibra, but could make no impression on his flank.
On the 7th August the same three mounted brigades again probed the enemy's position at Oghratina, but once again found it too strong. Next morning it was discovered that the position had been evacuated, and patrols found the enemy back upon the old position at Bir el Abd, where he had first appeared three weeks earlier. On this day the Mobile Column did succeed in getting round the enemy's flank but was too weak to embarrass him seriously, and fell back at night to Bir Bayud.

To General Chauvel it appeared that there was still a possibility that a bold attack on the enemy's position would be successful, if all the mounted troops were put at his disposal. His plan, to which General Lawrence gave his approval, was as follows:-

The 1st and 2nd L.H. Brigades, now restored by their rest, were to march out to Qatiya under the command of Colonel Royston, water there, march through the night to the Hod Hamada, 4 miles north-west of Bir el Abd, timing their movement so as to arrive at 3 a.m. on the 9th August. There they were to bivouac for an hour and a half, and then advance to a point 2 miles north-east of Bir el Abd, to co-operate with the N.Z.M.R. Brigade in an attack on the enemy's position at 6.30 a.m.

The 3rd L.H. Brigade was to attempt to work round the enemy's left flank and cut off his retreat;

the 5th Mounted Brigade was to be in reserve.

The scheme was in the nature of a gamble. If the enemy were demoralized, it had a chance of success; if not, very little, since it involved an attack supported by four horse artillery batteries on a prepared position held in superior strength and covered by double the number of guns, including heavy howitzers, and strong in machine guns. [The five brigades of General Chauvel's force, exclusive of horseholders, did not number more than 3,000 rifles. The enemy had probably double that number at Bir el Abd.] Yet it appeared a legitimate gamble, because the attacking troops were more mobile than the defence and could be drawn off if the task was found to be beyond their capacity.

The four attacking brigades began their advance before daylight, the 3rd L.H. Brigade leading on the right with the object of finding and turning the Turkish left. The New Zealanders in the centre advanced at 4 a.m., with a gap of a mile between them and the 3rd Brigade. The remaining two Australian brigades moved off at 5 a.m., with intention of enveloping the Turkish right while the New Zealanders gripped the centre. As these brigades came up into line, their left on the Bardawil Lagoon, there was a further gap of half a mile between their right and the New Zealanders. The four brigades covered a front of 5 miles, which, counting the 5th Mounted Brigade in reserve, gave them less than a rifle to three yards of frontage.

By 5 a.m. the New Zealanders, advancing astride the caravan route, had driven in the enemy outposts and reached some rising ground which overlooked Bir el Abd and the Turkish centre. But the enemy quickly realized how thin was the line opposed to him and at 9 a.m. issued from his trenches to counter-attack. The fire of the Somerset Battery and of the brigade machine guns checked his advance, but a hot fight for fire supremacy followed and the New Zealanders found it extremely difficult to maintain their position. The Australian brigades on right and left were likewise held up.

At 7.30 the Turks again attacked, making for the gap between the New Zealanders and the 2nd L.H. Brigade, but the breach was partially closed by a squadron of the 5th A.L.H. from reserve, and the Turkish advance came to a standstill. A little later General Chauvel, seeing that the 3rd L.H. Brigade on the right was unable to fulfil its mission of turning the Turkish flank, ordered it to close in towards the New Zealanders.

Turkish transport could be seen moving eastward from Bir el Abd; columns of smoke were pouring up from burning stores. It was therefore clear that the enemy was uneasy regarding his power of resistance. The New Zealanders redoubled their efforts, but only succeeded in advancing sufficiently to expose their line to flanking attacks, as the Australian brigades were unable to conform to the movement. By 10.30 all progress was over. Moreover, Br. General Chaytor, in view of renewed pressure on the gap on his left, was compelled to ask for assistance, whereupon the Warwick yeomanry was sent to him, one squadron dashing up at a gallop to a position on his left.

The enemy, realizing now that he could hold his position, returned to the offensive at midday, launching another heavy attack upon the Canterbury and Auckland Regiments and the squadron of the Warwicks. Again he was beaten back, but by 2 p.m. the attack had extended to the British left flank. The Ayrshire Battery, supporting Colonel Royston's force, came under very heavy shell fire and lost so many horses that for a short time it was immobilized and ran some risk of capture, the riflemen in front of it having been compelled to give ground. Eventually the guns were withdrawn, but only just in time, as Colonel Royston's troops were now retiring. A further withdrawal of the 3rd L.H. Brigade on the right made the situation of the New Zealanders critical.

At 5.30 p.m. General Chauvel gave orders for a general retirement. It has been remarked that he had decided upon the attack only because the mobility of his troops gave them an opportunity to disengage themselves if necessary. But it was now proved that for dismounted cavalry in action at comparatively short range against superior numbers to break off the fight is no easy matter. It was only their tenacity and the welcome fall of darkness that saved the New Zealanders. The Machine-Gun Squadron, under Captain R. Harper, had at the end of the action all its guns in line, some of them firing at a range of one hundred yards. Under cover of these machine guns and of squadrons of the 5th Mounted Brigade the brigade was finally able to withdraw. The British losses in the action were just over three hundred, including 8 officers and 65 other ranks killed.

General Lawrence was anxious that the force should bivouac as near as possible to Bir el Abd, in case another attack should be practicable next day. But General Chauvel, in view of the strength of the Turkish position and the exhaustion of his troops, felt compelled to withdraw to Oghratina, where the force bivouacked, leaving the 3rd L.H. Brigade out to watch Bir el Abd.

The Mobile Column had not been placed under General Chauvel's orders and co-ordination had had to be arranged through Section headquarters. Owing to failure of communications it did not directly co-operate in the action at Bir el Abd. It had, however, a sharp brush with an enemy at Hod el Bayud in the morning, the Turks leaving 21 dead on the field.

There was no further serious fighting. Bir el Abd was found evacuated on the 12th August and the enemy back upon a new position at Salmana, 5 miles to the cast, where he was engaged by the horse artillery batteries. He then drew off to his starting point, El Arish, leaving an outpost at Bir el Mazar.


Previous: The Pursuit on The 5th August 

Next: The Results of the Battle 


Further Reading:

Battle of Romani, Sinai, August 4 to 5, 1916

Bir el Abd, Sinai, 9 August 1916

Battles where Australians fought, 1899-1920


Citation: Bir el Abd, Sinai, 9 August 1916, Falls Account, The end of the pursuit

Posted by Project Leader at 12:01 AM EADT
Updated: Monday, 7 September 2009 6:19 PM EADT
Battle of Romani, Sinai, August 4 to 5, 1916, Wellington Mounted Rifles Regiment, War Diary Account
Topic: AIF - NZMRB - WMR

Battle of Romani

Sinai, August 4 to 5, 1916

WMR, War Diary Account


 War Diary account of the WMR.


The transcription:

4 August

Between 1600 and 1700 a company of Scottish Light Infantry came in on our right replacing 7th Australian Light Horse Regiment who moved further to the right. We held our position during the night and received orders for a counter attack to be given at 0400 inst.

5 August

At 0400 Regiment fixed bayonets and stormed up Wellington Ridge with 7th Light Horse Regiment on the right and supported on our left by the Royal Welsh Fusiliers.

Rushing up with unmatched dash they broke through Turkish front line pressing forward from ridge to ridge absolutely demoralising the Turkish troops who surrendered in hundreds.

Collecting the Regiment together and ordering up the lead horses, Colonel Meldrum remounted the Regiment and at once followed up the retreating Turks towards Qatia. Pressing on the north of Mount Meredith, the Regiment pressed forward over the ridge and down into a position three miles east south east of Mount Meredith and six hundred yards north west of Bir Maraieh where we were held up by a Mountain Battery and heavy machine Gun and rifle fire.

As the Turkish read guard appeared to be in trenches at Bir Maraieh and to the south east of Qatia Oasis, we took up at 0400 a position for defence commanding Bir Maraieh positioned six machine guns and in position with the intention of watching the Turkish rear until sufficient supports came up for us to risk an attack. Here we remained until 0900 closely observing Turkish movements and communicating them back to Brigade Headquarters. In the meantime Patrols were sent out to our right to observe Turkish movements and pick up prisoners etc. One of these Patrols under Lieutenant Allison captured a Turkish Ambulance and eighty camels and their drivers, also an ammunition supply which was close by Ambulance. A quarter of an hour after capture had been affected a Troop of 7th Light Horse Regiment arrived on the scene and assisted in the round up of some camels which had broken away.

At 0900 I issued an urgent appeal for assistance from the Commander, Royal Artillery who reported that he was two miles east of Katib Gannit and was being attacked from the north east by Turks. Two squadrons at once moved to the assistance of the artillery.

At 1000 Colonel Meldrum assumed command of the Brigade in place of Colonel Royston wounded, and Major Spragg took over command of the Regiment.

Until 1400 the two squadrons were in position defending artillery. Remainder of Regiment remained support.

At 1330 orders were issued that the Brigade, in conjunction with remainder of Anzac Mounted Division were to attack Qatia.

Wellington Mounted Rifles Regiment during the advance on Qatia on the left of the advance with 6th Light Horse Regiment on their right and 7th Light Horse Regiment in support.

At 1415 advance began, the Wellington Mounted Rifles Regiment being allotted the northern end of Qatia Oasis as its objective. The whole line moved forward until the Regiment on the extreme left was within seven or eight hundred yards of the Oasis and on the right of the line lacking in cover that to west of southern end advance was hung up owing to machine gun and rifle fire of the Turks who had extended along the western edge of Oasis. A uniform fire was kept up by machine guns Lewis guns and rifles and much damage reported on Turks who could be seen moving about the Oasis.

The enemy was well supported by artillery at east, ten guns being used, ten shells often bursting simultaneously, but owning to skilful use made by men of cover for themselves and their horses, casualties were not serious.

A constant pressure was kept on the Turks until dusk when a withdrawal was affected, the wounded were all evacuated and the Regiment returned to camp for water and supplies.


Roll of Honour

Battle of Romani, Sinai, August 4 to 5, 1916, Roll of Honour, New Zealand Mounted Rifles Brigade

Lest We Forget


Further Reading:

Wellington Mounted Rifles Regiment

Wellington Mounted Rifles Regiment, Roll of Honour

New Zealand Mounted Rifles Brigade

Battle of Romani, Sinai, August 4 to 5, 1916 

Bir el Abd, Sinai, 9 August 1916

Battles where Australians fought, 1899-1920


Citation: Battle of Romani, Sinai, August 4 to 5, 1916, Wellington Mounted Rifles Regiment, War Diary Account

Posted by Project Leader at 12:01 AM EADT
Updated: Monday, 26 October 2009 11:41 AM EADT
Battle of Romani, Sinai, August 4 to 5, 1916, 8th LHR, AIF, Unit History Account
Topic: AIF - 3B - 8 LHR

Battle of Romani

Sinai, August 4 to 5, 1916

8th LHR, AIF, Unit History Account


3rd Light Horse Brigade assembled after Romani Operations.


Captain Thomas Sidney Austin produced a unit history called The history of the 8th Light Horse Regiment A.I.F. which included a section specifically related to the Battle of Romani and is extracted below.


Austin, TS, The history of the 8th Light Horse Regiment A.I.F. :   


ROMANI

On the 4th of August, the whole camp was hurriedly roused just before the usual reveille time by hurried orders to saddle-up at once proceed to Hill 70 near Kantara, there to obtain our disposition orders to meet the Turks who were advancing through Katia on Romani. No one was allowed to carry anything on the saddle except rations and forage. Blankets, overcoats, and even tunics had to be left behind, all ranks appearing in shirt sleeves. The idea was to travel light.

We left Ballagh Bunyon [Note: Bally Bunion -
ed.] in brigade column at 0730 and reached Hill 70 at 1130, and received more rations. After some delay we started off Duiedar and about 8 p.m. took aver an outpost line for the night in the sand hills about 3 miles out to the North East of the hod. A couple of strays evidently lost from their column were captured here, but no other enemy were seen.

At dawn next morning the column started off due East to pick up touch with the enemy. The route went straight out into the glaring desert and a sigh of relief went up when Bir en Nuss was reached and water obtained for the horses. After a brief halt we were off again, heading for Nagid. Here the enemy were encountered and the 9th and 10th. Regiments sailed straight in and after a rapid fight succeeded in capturing about 600 prisoners. We were in reserve during this fight and had a Panoramic view of the whole show. At Nagid Hod the horses were again watered and the men had a couple of hours spell for tea. After dark a move was made back for Hod El Enna but the column losing touch with the advance guard got 'bushed' and bivouaced among the sand-hills for the night. No time was lost in getting off the mark next morning and Hamisah was reached about 9 a.m. and a halt called until mid-day. A good deal of abandoned material we found here including machine guns and ammunition, also a few wounded abandoned by the enemy ware brought in and tended. At noon still going East we were making for Daren and reaching that place without much opposition camped there for the night of the 6th./7th. 


Further Reading:

8th Light Horse Regiment, AIF

8th Australian Light Horse Regiment, Roll of Honour

Battle of Romani, Sinai, August 4 to 5, 1916 

Bir el Abd, Sinai, 9 August 1916

Battles where Australians fought, 1899-1919


Citation: Battle of Romani, Sinai, August 4 to 5, 1916, 8th LHR, AIF, Unit History Account

Posted by Project Leader at 12:01 AM EADT
Updated: Tuesday, 27 October 2009 9:59 PM EADT
Battle of Romani, Sinai, August 4 to 5, 1916, Roll of Honour, New Zealand Mounted Rifles Brigade
Topic: AIF - NZMRB

Battle of Romani

Sinai, August 4 to 5, 1916

Roll of Honour

New Zealand Mounted Rifles Brigade


Poppies on the Auckland Cenotaph plinth


The Roll of Honour contains the names of all the men from the New Zealand Mounted Rifles Brigade known to have served and lost their lives during the Battle of Romani.


Roll of Honour


Alexander Harold GOOD, Canterbury Mounted Rifles Regiment, Died of Wounds, 7 August 1916.


Lewis MANSON, Canterbury Mounted Rifles Regiment, Killed in Action, 5 August 1916.

Thomas McCAHON, New Zealand Machine Gun Squadron, Died of Wounds, 4 August 1916.

Edward Charles MORTON, Canterbury Mounted Rifles Regiment, Died of Wounds, 7 August 1916.

 
Joseph George Alfred PICKENS, Canterbury Mounted Rifles Regiment, Killed in Action, 4 August 1916.


Frederick Ormsby REES, Canterbury Mounted Rifles Regiment, Killed in Action, 5 August 1916.


Ralph SUTTON, Canterbury Mounted Rifles Regiment, Died of Wounds, 5 August 1916.


John WALKER Canterbury Mounted Rifles Regiment, Died of Wounds, 6 August 1916.

Leslie WALLACE, Auckland Mounted Rifles Regiment, Died of Wounds, 7 August 1916.

Mervyn Leigh WATERS, Auckland Mounted Rifles Regiment, Killed in Action, 4 August 1916.


Lest We Forget


Further Reading:

New Zealand Mounted Rifles Brigade

Battle of Romani, Sinai, August 4 to 5, 1916 

Bir el Abd, Sinai, 9 August 1916

Battles where Australians fought, 1899-1920


Citation: Battle of Romani, Sinai, August 4 to 5, 1916, Roll of Honour, New Zealand Mounted Rifles Brigade

Posted by Project Leader at 12:01 AM EADT
Updated: Wednesday, 21 October 2009 4:38 PM EADT
Romani, Sinai, 4-5 August 1916, 3rd LHR, AIF, Unit History Account
Topic: AIF - 1B - 3 LHR

Battle of Romani

Sinai, 4 - 5 August 1916

3rd LHR, AIF, Unit History Account


A poignant moment as a 3rd LHR man pays his respects to a fallen Turk.
 

Frank M Blackwell and DR Douglas produced a unit history in 1950 called The Story of the 3rd Australian Light Horse Regiment. This story has subsequently been reprinted by Lieutenant Colonel Neil C. Smith AM with upgraded information in which included a section specifically related to the battle of Beersheba and extracted below.

Blackwell, FM, The Story of the 3rd Australian Light Horse Regiment, (Adelaide 1950), pp. 70-2:


BATTLE OF ROMANI

[70] The northern flank was protected by a large salt lagoon, the Sabket Bardawil, and the southern flank rested on a high sandhill called Katib Gannit. This line was held by the 52nd Division in a number of strongly built redoubts.

South of Romani a broad ridge ran westward from Katib-Gannit, and outside this was a number of isolated sandhills, the most prominent being Mount Meredith, about four miles south of Romani, and Mount Royston, a similar distance to the south-rest. No defensive works had been prepared on these desert features.

BATTLE OF ROMANI

On the eventful night of 3/4th August the Regiment took up a line at 6 p.m. holding from Mount Meredith to No. 1 Post near .Katib-Gannit. "A" Squadron held the right sector, being in touch with the 2nd Light Horse Regiment. "B" Squadron had the left sector, connecting up with the British Infantry on the left. "C" Squadron was held in reserve behind the centre of our position.

Listening posts, in charge of N.C.Os., were dosed out in front of each squadron, their duty being to report the earliest enemy movements.

At 10.30 p.m. the 2nd Light Horse Brigade, returning from Katia, passed through our lines, and at 11.40 p.m. a listening post reported that the scouts of the advancing Turks had appeared and shots exchanged.

At 12.20 a.m. the enemy infantry made a bayonet charge on the Cossack Post line, situated at the base of Mount Meredith, and the reserve squadron ("C") was brought tip to reinforce the firing line.

[71] ''A" Squadron of the, 1st Light Horse Regiment also reinforced the line south 4 Mount Meredith.

The picquet lines poured a heavy fire on the enemy and held them up for some considerable time, but the 2nd Regiment, on the right, was forced back by vastly superior numbers and had to be reinforced by the remain. two squadrons of the 1st Light Horse.

The 3rd Light Horse Regiment held the ground above Hod Abu Abi until 4 a.m., but the Turks were now swarming up Mount Meredith from the south-west and dominated the position by sheer force of numbers of about 5 to l.

The 1st and 2nd Light Horse Regiments had been forced to withdraw, and the right flank was enfiladed by machine gun and rifle fire, also some shrapnel. The pressure from the enemy, and also the difficulties of obtaining ammunition, caused "A" and "C" Squadrons to fall back at 5.30 a.m.

A withdrawal was made to Wellington Ridge, where they were reinforced by the 2nd Light Horse Brigade and a company of King's Own Scottish Borderers, and here the Regiment re-formed less "B" Squadron. "B" Squadron, on the left, had been only lightly engaged and were able to hold on, but communications with R.H.Q. having been severed, the O.C. reported to Divisional Headquarters and was ordered by General Chauvel to withdraw and act as Divisional Troops.

Moving to the right flank junction was made with the 6th Light Horse Regiment, and in consequence the 3rd (less "B" Squadron) came under command of Col. Royston, of the 2nd Light horse Brigade.

The right flank was all the time being turned by the rapid extension of the enemy infantry, and this movement only stopped when the high ground covering the railway had been occupied by our forces. It was from this high ground, later in the afternoon, we observed our fresh attacking forces advancing from Dueidar in the south-west.

The enemy infantry, which had put up a splendid performance in the heat, were now squeezed between two forces and had to retire, leaving some 600 prisoners behind. Our whole line then swung to the left and advanced to Mount Meredith and Hod el Ana, where a halt was called and an outpost line held for the night.

[72] It had been an exhausting time for the men and horses as the heat was fierce and drinking water was totally absent. The transport services had been completely cut off by an aerial attack on the camp area at railhead.

Next morning a general advance way ordered and the Regiment acted as Brigade reserve. The enemy was retiring on Katia and our advance to Bir Sagid was made without opposition. The area was passed which the Regiment defended on the previous day, and the number of enemy dead lying about supplied ample evidence of the effectiveness of our fire on that occasion. Numbers of prisoners and captured stores were passed through our lines, and there was every indication that the enemy was in a disorganised condition.

At 3 p.m. a general advance by the five mounted Brigades was ordered against Katia. The enemy rearguard was well posted and armed and met the attackers with heavy machine gun and artillery fire.

The 3rd Regiment was in the centre and was unable to cross the samphire swamp between it and the enemy, for it was quite bare of any sort of cover. The flank attacks were no more successful, and at 7 p.m. the Brigades withdrew, arriving back at Romani one hour before midnight.

During these operations the Regiment was absent from camp for 59 hours, and the majority of the horses were without water for the whole period. The men were in little better state, for the small, and only, water bottle had been soon exhausted, and no replenishments had been furnished. Rations also had been in short supply, and it is doubtful if the bully and biscuit could have been consumed without something to wash it down.

Despite many trials and hardships ahead it is doubtful if any ether 59 hours of the campaign packed so much excitement or exhaustion for the men.

The Regiment's casualties for the two days were 14 killed, 36 wounded, 4 missing, and 95 horses killed and missing.

On the 6th and 7th the Regiment enjoyed a well earned rest.


Further Reading:

3rd Light Horse Regiment, AIF

3rd Australian Light Horse Regiment, Roll of Honour

Battle of Romani, Sinai, August 4 to 5, 1916 

Bir el Abd, Sinai, 9 August 1916

Battles where Australians fought, 1899-1920


Citation: Romani, Sinai, 4-5 August 1916, 3rd LHR, AIF, Unit History Account

Posted by Project Leader at 12:01 AM EADT
Updated: Monday, 26 October 2009 4:38 PM EADT

Newer | Latest | Older

Full Site Index


powered by FreeFind
Let us hear your story: You can tell your story, make a comment or ask for help on our forum.

Desert Column Forum

A note on copyright

The Australian Light Horse Studies Centre is a not for profit and non profit group whose sole aim is to write the early history of the Australian Light Horse from 1900 - 1920. It is privately funded and the information is provided by the individuals within the group and while permission for the use of the material has been given for this site for these items by various donors, the residual and actual copyright for these items, should there be any, resides exclusively with the donors. The information on this site is freely available for private research use only and if used as such, should be appropriately acknowledged. To assist in this process, each item has a citation attached at the bottom for referencing purposes.

Please Note: No express or implied permission is given for commercial use of the information contained within this site.

A note to copyright holders

The Australian Light Horse Studies Centre has made every endeavour to contact copyright holders of material digitised for this blog and website and where appropriate, permission is still being sought for these items. Where replies were not received, or where the copyright owner has not been able to be traced, or where the permission is still being sought, the Australian Light Horse Studies Centre has decided, in good faith, to proceed with digitisation and publication. Australian Light Horse Studies Centre would be happy to hear from copyright owners at any time to discuss usage of this item.

Contact

Australian Light Horse Studies Centre

eXTReMe Tracker