Topic: Gen - Legends
The results from careless work - a case study
One major problem confronting any researcher is the quality of primary research conducted by popular historians. Poor quality research and published conclusions are then picked up by the public and soon the error becomes the reality. This is readily seen with the use of the emu plume as a symbol of the Australian Light Horse during the Great War.
One thing that becomes apparent is the confusion between the 3rd LHR (Light Horse Regiment) and the 3rd (LHB) Light Horse Brigade. This confusion rears its head in many captions of pix held at the AWM (Australian War Memorial) and because of the role played by the AWM as an authoritative institution, is picked up by many people as being accurate.
Case #1.
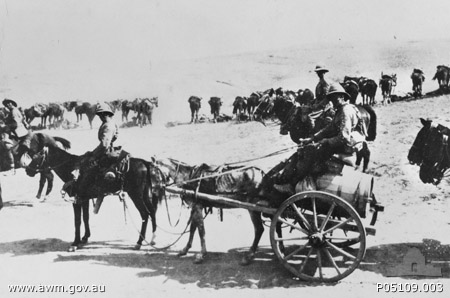
Caption Reads - "A captured turkish water cart at the camp of the 3rd Australian Light Horse near Beersheba. The cart is pulled by an emaciated grey Turkish horse while a ridden Waler in improvised breast plate and traces, is hitched in front of the Turkish horse. Horse lines can be seen in the background. "
[From: AWM P05109.003]
There are a number of overt problems with the description provided by the AWM regarding this specific picture. Desptie the caption describing the men as belonging to the 3rd Australian Light Horse, nothing could be further from the truth. A quick look by someone with a bit of knowledge would ascertain that the men in this picture are clearly British Yeomanry, and in this case, at a guess, possibly from the 5th Mounted Brigade.
The distinguishing uniform features of the men in the tell the story in this circumstance. They are wearing the pith helmet, rifle buckets and more importantly, they have puttees on their legs, items only worn by the Yeomanry. The Australians had discarded the pith helmet very early during the Sinai campaign and they never wore puttees, always leather leggings.
Just as an aside, all water casks captured from the Turks were ordered to be burnt. This was a great necessity as the containers were usually disease ridden. A couple cases of cholera ended any desire to retain Turkish water holders. The destruction was to ensure they did not end up in Turkish hands again either by accident or capture nor would they be available to carry cholera to the Allied troops.
Case #2
The poor ol' 3rd LHR get going over. They are attributed as taking part in many photograph captions regardless if they were no where near to be found. Such poor captioning brings up the realisation that there is a certain lack of quality control where the culture is more "near enough is good enough" and "say anything because the average person reading the site really wouldn't know". This is indicative of a culture that aims to gets quantity rather than quality from the dollar. It seems to work like this - if you employ professionals, they cost money, so basic wage staff will do the same for less money. This may seem like good economics within the organisation but the knock on effects to the broader community are dreadful. It is instrumental in passing on poor and corrupted information from one source to another, each compounding the error and feeding that error back as a confirmation.
To illustrate, I looked at the Hurley Collection and sure enough, an error made by a less than thorough historian or caption writer created an error which is then recycled in the public as well as scholarly works, thus adding to the apparent authenticity of the original mistake. We will use one of the famous pics take by the Official War Photographer, Captain Frank Hurley during his tour of Palestine at the end of December, 1917.
Here is the picture:
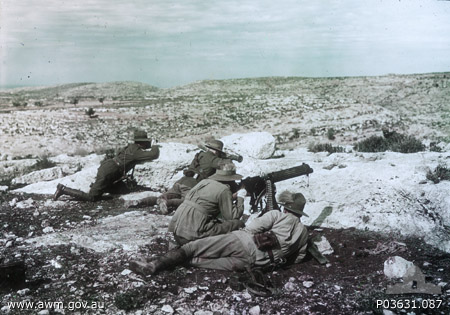
Four unidentified members of the 3rd Australian Light Horse Regiment machine gun in action at Khurbetha-Ibn.
[From: AWM P03631.087]
Picture details displayed by the AWM at the time of writing, 15 May 2008:
ID Number: P03631.087
Maker: Hurley, James Francis (Frank)
Place made: Palestine
Date made: 31 December 1917
Physical description: Colour
Summary: Four unidentified members of the 3rd Australian Light Horse Regiment machine gun in action at Khurbetha-Ibn. This image is a colour Paget Plate. The same image is available in black and white and is held at B01697.
Now let's test out the veracity of this caption. It should be easy.
The 3rd Australian Light Horse Regiment War Diary is online and kindly provided by the AWM, a service which can only be described as of the highest order and most commendable as it is the life blood of most researchers - the December 1917 War Diary pages are found at this address:
http://www.awm.gov.au/cms_images/AWM4/10/AWM4-10-8-37.pdf
Let's see what it says:
"Jisr Esdud, 31/12/17, Detailed working party of 1 NCO & 15 men to report to Lt Jones Field Troop, at watering area at 0900 to deepen troughs. Details party of 1 NCO & 6 men as Guards on the drinking water."
This is the simple part. A quick check of a map will reveal that Khurbetha-Ibn and Jisr Esdud are no where near each other. Indeed, the former is in the Judaean Hills while the latter is on the coast, two very different locations. Added to this, there is no mention of deployment of any machine gunners from the 3rd LHR in their War Diary.
So who was at Khurbetha-Ibn?
Well, one will find that at a place named Khurbetha Ibn Harith were elements of the 3rd Light Horse Brigade and indeed the 3rd Light Horse Machine Gun Squadron deployed near the Beit Sira area, nearby the headquarters at Khurbetha Ibn Harith. Here is what the 3rd LHB War Diary says for that very day:
"The relief of the Brigade by the 29th Infantry Brigade commenced at 0900 but owing to the steep and rocky nature of the country was not completed until 1600.
"At 2000 the Brigade was concentrated in the vicinity of Kefr Rut. Instructions were received that the withdrawal of the Brigade to Katra would commence at 1100 on 2nd January, 1918, and that the Brigade led horses would reach Brigade Headquarters at 1000 that day."
This entry gives a hint as to the formation that actually was at Khurbetha Ibn Harith, the 3rd Light Horse Brigade. There is a substantial difference between a "Regiment" and a "Brigade", the most significant difference being at that time being was a Brigade was composed of three Regiments, thus making the Brigade a larger formation and thus quite different in nature. The structure of the Light Horse in Egypt and Palestine may be seen discussed in general terms at The Australian Light Horse - Structure while the complete structure of the Australian Light Horse forces deployed is found here at Australian Light Horse Order of Battle.
Let us go one step further and meet Trooper Henry Bostock of the 10th LHR. Fortunately for us, he left a diary.
Trooper Henry Bostock's Diary Entry of 30 December 1917
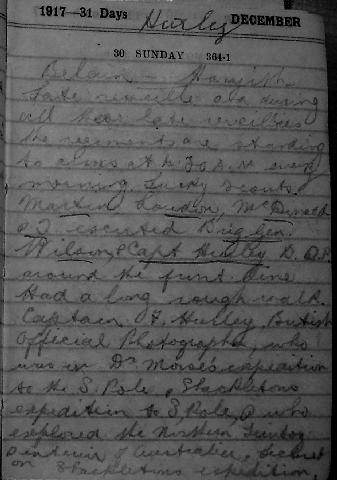
And now we go to the personal diary of Henry Bostock of the 10th LHR. He was a 3rd LHB Scout and was delegated to provide an escort for Hurley on 30 December 1917 to the front lines to take his pictures. Here is what Bostock says:
"I escorted Brig Gen Wilson & Capt Hurley OWP around the front line."
Finally we look at the diary of Frank Hurley himself. During these days he talks only of being escorted around by General Wilson of the 3rd Light Horse Brigade. Not one mention of the 3rd Light Horse Regiment.
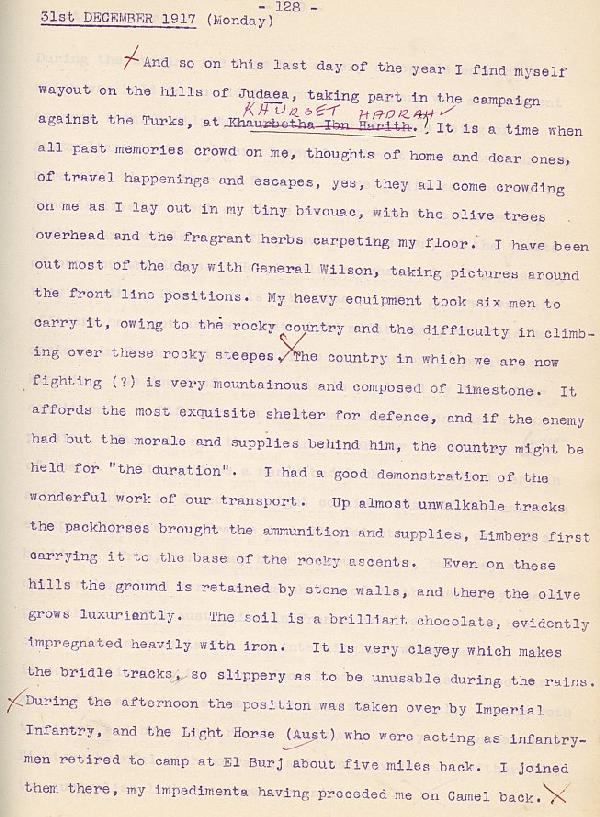
[From: Manuscript No. 883 - Frank Hurley Diary, p. 128]
The relevant pages of the Hurley diary are available on the National Library of Australia site.
So now we know - the men in the photograph are members of the 3rd Light Horse Machine Gun Squdron [3rd LHMGS] at Beit Sira.
One final piece of the puzzle. Hurley's team filmed this particular event.
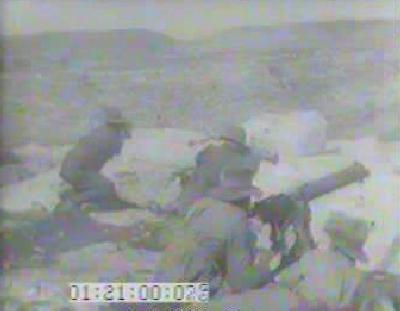
[To view the film clip, click on this link or on the above picture. Note: the clip is 5 mb in length.]
One look at the movie produced of the event and the still photograph indicates that it is one and the same event. Hurley was filming and photographing the 3rd Light Horse Machine Gun Squadron in action in the Judaean near Beit Sira, not the machine gunners from the 3rd Light Horse Regiment.
"Regiment" or "Brigade" - who cares and what is the difference anyway?
The 3rd LHR was part of the 1st LHB NOT the 3rd LHB. Two totally different formations. This is clearly seen when reading the Australian Light Horse Order of Battle.
Now the impact on external research and publications.
We now go to the book by Benjamin Z Kedar, The Changing Land - Between Jordan and the Sea - Aerial photographs from 1917 to the present, and then open at p. 102. where we see the Hurley picture published in this excellent volume.
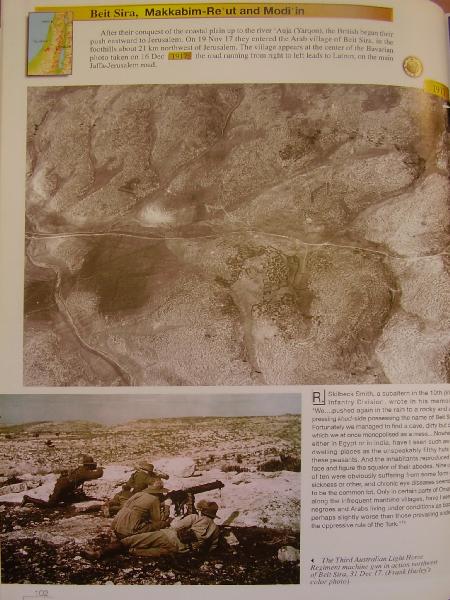
Benjamin Z Kedar, The Changing Land - Between Jordan and the Sea - Aerial photographs from 1917 to the present, p. 102.
The caption to the picture on this page reads:
"The Third Australian Light Horse Regiment machine gun in action northwest of Beit Sira, 31 Dec 17. (Frank Hurley's color photo)"
Now we have the same error initiated by the AWM being perpetuated by Kedar. These are fleas on fleas. Goodness only knows where this corruption will head to but if publications such as these rely upon the AWM caption, which they have, then the editors relied upon poor information. But this mistake has now become reality.
And so it goes on.
This is not meant to pick on the AWM since there are other institutions who present this information in a flawed format. The list is long and the mistakes almost endemic. It presents the question: "If only the experts can determine the accuracy of a statement, what chance has the ordinary punter got?"
It is through producing a quality product that we honour our ancestors and the work and sacrifices they endured and in so doing, we honour ourselves.
The culture is clearly - "near enough is good enough" which is clearly not good enough.
Further Reading:
The Australian Light Horse - Structure
Australian Light Horse Order of Battle
Fleas on fleas - The results from careless work - another case study
Citation: Fleas on fleas - The results from careless work - a case study