


Topic: BatzP - Ayun Kara
The Battle of Ayun Kara
Palestine, 14 November 1918
Auckland Mounted Rifles Unit History Account
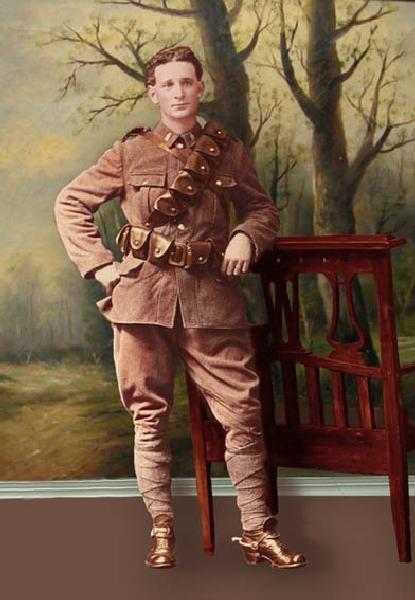
13/3161 Trooper Hugh Gordon Haswell, killed in action.
The following account is extracted from Nicol, CG, The Story of Two Campains - Official war history of the Auckland Mounted Rifles Regiment, 1914 - 1919 in the Battlefields of Gallipoli, Sinai and Palestine during WWI., Wilson and Horton, Auckland, 1921.
CHAPTER XXVI. North to Ayun Kara.
The Canterbury Mounted Rifles who were the advanced guard, got into touch with Turkish outposts at 11 a.m. They pushed on, but by midday were definitely checked. Orders were immediately issued to attack the enemy, whose main positions were on a series of hills, with long slopes between them and the sand hills of the coast. The Canterbury Mounted Rifles was on the right of the line, the Wellington Mounted Rifles in the centre, and the Auckland Mounted Rifles on the left. The regiments advanced in line of troop column, and soon were under long range machine-gun fire. There being some high ground on the right front of the Auckland Mounteds, the 3rd squadron, under Major Twistleton, was sent forward to secure it, the other two squadrons taking cover from direct fire in depressions. As the Wellington Mounteds pressed on towards the main position, some cavalry appeared on the left front of the Aucklanders, and Colonel McCarroll, who had been viewing the position from the 3rd squadron’s hill, ordered the 11th squadron [North Auckland Mounted Rifles] to advance as rapidly as possible to ascertain the strength and position of the threatening force. Heavy rifle and machine-gun fire prevented the ˇsquadron getting to the required position, so two troops of the 4th squadron [Waikato Mounted Rifles] under Lieutenants M. E. Johnson and Ryan were detailed to gallop straight at it. This sudden and vigorous move evidently upset the enemy, for they reached the spot with very few casualtiescasualties, the enemy retiring quickly. Under cover of the fire from the 3rd squadron the other two troops of the 4th squadron pushed on to secure some high ground to the left of the W.M.R., who continued to advance steadily. As soon as the 4th squadron had gained a their objective, the 3rd squadron was drawn into support, and the 11th was sent forward on the left of the 4th. Covered by the 4th, the 11th advanced steadily, but for some time they did not reach any point where they could get a view of the enemy, although heavy rifle fire was coming down all the valleys from the higher positions of the Turks. At 2.15 the patrols of the 11th located some of the enemy concentrating in the orange groves nearby, and Lieutenant Jackson’s troop pushed well forward and found that the enemy was advancing rapidly.
Colonel McCarroll galloped forward, and, seeing that the troop was being attacked, sent in every available man, including signallers, gallopers, and batmen to reinforce, and signalled to the 3rd squadron to come up.
Major Twistleton brought his men up at the gallop in fine style, losing only two horses, although two or three bullet-swept zones were traversed, and dismounted his men within a few yards of the line. Lieutenant S. Reid’s troop was sent in on the right, but heavy enfilade fire gave them a severe time, and the few men who were not killed or wounded had to be called back. At 2.45 the enemy, under cover of heavy artillery fire, started a strong attack. Several of the Turkish machine-guns now began to make their presence felt, and the commander brought up his machine-gun section, which opened a counter fire. The action in this part of the battle now became a machine-gun duel, it being impossible for Colonel McCarroll to move his men until the opposite machine-guns were silenced.
After a furious fusillade the Auckland machine-gun sergeant, in worried tones, reported his gun out of action. “That’s all right,” replied the Colonel, “so is the Turk’s,” for at the moment the enemy guns were abandoned.
Meanwhile, the W.M.R. had pushed up the hill on the right, and there came under a very heavy fire. Two troops of the 3rd squadron were sent further to the right, to a spot where they could bring enfilade fire against the Turks assembled in a valley. The Hotchkiss guns and machine-guns, under Lieutenant Kelly, were also sent in, and did great execution.
Afterwards they described this chance as “the machine-gunner’s dream.” While this drama was being enacted, the counterattack was rapidly developing. It was estimated that fully 600 fresh infantry were flung against the Regiment, which by now had suffered very severe casualties. In many places the attackers got within bombing distance of the thin line. The A.M.R. men on one small hill having been all killed or wounded, theTurks established themselves on it and brought an oblique fire against the main position. The situation was now veryserious, and two orderlies were sent with orders for the fourth squadron to come up, but both were wounded. Eventually a message was got through, and the Waikato stalwarts, led by Major Munro and Lieutenant Johnson, raced across the fire-swept area—a sight worth living to see.
They regained the hill, and in spite of heavy opposition worked round the enemy’s left, and were able to enfilade the main line. This move nonplussed the Turks, who then fled in disorder towardsthe orange grove, under the heaviest fire that could be put across.
Colonel McCarroll had just collected his squadronleaders to organise pursuit when he was wounded in the neck and then in the shoulder. Major Whitehorn then took command, but the colonel before receiving medical aid, rode to brigade headquarters and arranged for support in the event of a night attack. The Turks kept up a heavy artillery fire until dark, after which the victorious troopers consolidated their position and removed the wounded.
The A.M.R. lost heavily, 15 being killed, including the gallant Lieutenant J. D. Stewart, of the 3rd squadron; 74 wounded, including Lieutenant-Colonel McCarroll, Captain Twistleton, M.C., and Lieutenants K. J. Tait, M.C., S. C. Reid, G. L. King, C. G. R. Jackson, and E. A.H. Bisley.
Captain Twistleton and Lieutenant King died of wounds. The W.M.R. lost 8 killed and 44 wounded; the C.M.R., one killed and six wounded; and the machine-gun squadron, eight killed and 18 wounded. The Turks, who retired during the night, lost 160 killed and 250 (estimated) wounded. The Turks who made the counter attack were part of a fresh force that had just arrived from its victories in Romania, and they apparently were unprepared to meet troops of the quality of the desert horsemen. One wounded prisoner remarked to an Aucklander, “Inglizee no run,” and he seemed to be rather perplexed over the fact that a thin and out numbered line had refused to budge in the face of what seemed inevitable disaster. The secret of the victory was the simple fact that the mounted riflemen were actuated by a spirit which did not permit of retreat being considered when committed to a definite action. It was the same attitude of mind which defied set principles of war on Gallipoli. It had its foundations in an extraordinary confidence, resolute and highly capable leadership, and the sense of personal responsibility which possessed the men of the Regiment.

13/1087 Trooper Arthur Robins, wounded in action.
The following morning the village of Ayun Kara was reported clear of the enemy, and, with a company of “Camels” on the left and the 1st Light Horse on the right, the brigade moved forward towards Jaffa, meeting with no resistance.
On the way they passed through the village of Richon le Zion, where for the first time they met Jews. One member of the community was a brother of Rabbi Goldstein, of Auckland. The joy of these people at being freed from the tyranny of the Turks was unbounded. They treated the New Zealanders most hospitably—an exceedingly pleasant experience after the tremendous effort they had just made, and the harsh hungry times spent in the south with its hostile Bedouins.
Acknowledgement: The photographs on this page were colourised by Steve Butler and are used with his permission along with that of the New Zealand Mounted Rifles Association. See: http://www.nzmr.org/phpBB3/
Further Reading:
The Battle of Ayun Kara, Palestine, 14 November 1917
The Battle of Ayun Kara, Palestine, 14 November 1917, Roll of Honour
New Zealand Mounted Rifles Brigade
Battles where Australians fought, 1899-1920
Citation: The Battle of Ayun Kara, Palestine, 14 November 1917, Auckland Mounted Rifles Unit History Account
