« November 2009 »
S M T W T F S
1 2 3 4 5 6 7
8 9 10 11 12 13 14
15 16 17 18 19 20 21
22 23 24 25 26 27 28
29 30
You are not logged in. Log in


Search the site:


powered by FreeFind
Volunteer with us.

Entries by Topic All topics  
A Latest Site News
A - Using the Site
AAA Volunteers
AAB-Education Centre
AAC-Film Clips
AAC-Photo Albums
AIF & MEF & EEF
AIF - Lighthorse
AIF - ALH - A to Z
AIF - DMC
AIF - DMC - Or Bat
AIF - DMC - Anzac MD
AIF - DMC - Aus MD
AIF - DMC - British
AIF - DMC - BWI
AIF - DMC - French
AIF - DMC - Indian
AIF - DMC - Italian
AIF - DMC - Medical
AIF - DMC - Remounts
AIF - DMC - Scouts
AIF - DMC - Sigs
AIF - DMC - Sigs AirlnS
AIF - DMC - 1 Sig Sqn
AIF - DMC - 2 Sig Sqn
AIF - DMC - Eng
AIF - DMC - Eng 1FSE
AIF - DMC - Eng 2FSE
AIF - DMC - GSR
AIF - 1B - 1 LHB
AIF - 1B - 6 MVS
AIF - 1B - 1 LHMGS
AIF - 1B - 1 Sig Trp
AIF - 1B - 1 LHFA
AIF - 1B - 1 LHR
AIF - 1B - 2 LHR
AIF - 1B - 3 LHR
AIF - 2B - 2 LHB
AIF - 2B - 7 MVS
AIF - 2B - 2 LHFA
AIF - 2B - 2 LHMGS
AIF - 2B - 2 Sig Trp
AIF - 2B - 5 LHR
AIF - 2B - 6 LHR
AIF - 2B - 7 LHR
AIF - 3B - 3 LHB
AIF - 3B - 8 MVS
AIF - 3B - 3 LHB Sigs
AIF - 3B - 3 LHFA
AIF - 3B - 3 LHMGS
AIF - 3B - 3 Sig Trp
AIF - 3B - 8 LHR
AIF - 3B - 9 LHR
AIF - 3B - 10 LHR
AIF - 4B - 4 LHB
AIF - 4B - 4 Sig Trp
AIF - 4B - 9 MVS
AIF - 4B - 4 LHFA
AIF - 4B - 4 LHMGS
AIF - 4B - 4 LHR
AIF - 4B - 11 LHR
AIF - 4B - 12 LHR
AIF - 5B - 5 LHB
AIF - 5B - 10 MVS
AIF - 5B - 5 LHFA
AIF - 5B - 5 Sig Trp
AIF - 5B - ICC
AIF - 5B - 14 LHR
AIF - 5B - 15 LHR
AIF - 5B - 1er Regt
AIF - 5B - 2 NZMGS
AIF - AASC
AIF - Aboriginal LH
AIF - Badges
AIF - Cars
AIF - Chinese LH
AIF - Double Sqns
AIF - Engineers
AIF - Fr - 22 Corps
AIF - Fr - 13 LHR
AIF - Honour Roll
AIF - HQ - 3rd Echelon
AIF - Marching Songs
AIF - Misc Topics
AIF - NZMRB
AIF - NZMRB - AMR
AIF - NZMRB - CMR
AIF - NZMRB - EFT
AIF - NZMRB - NZMFA
AIF - NZMRB - NZMGS
AIF - NZMRB - OMR
AIF - NZMRB - Sig-Trp
AIF - NZMRB - WMR
AIF - Ships
AIF - Ships - Encountr
AIF - Ships - Una
AIF - WFF
AIF - Wireless Sqn
Battles
BatzA - Australia
BatzA - Broken Hill
BatzA - Liverpool
BatzA - Merivale
BatzB - Boer War
BatzB - Bakenlaagte
BatzB - Belmont
BatzB - Bothaville
BatzB - Buffels Hoek
BatzB - Coetzees Drift
BatzB - Diamond Hill
BatzB - Driefontein
BatzB - Elands
BatzB - Graspan
BatzB - Grobelaar
BatzB - Grootvallier
BatzB - Hartebestfontn
BatzB - Houtnek
BatzB - Karee Siding
BatzB - Kimberley
BatzB - Koster River
BatzB - Leeuw Kop
BatzB - Mafeking
BatzB - Magersfontein
BatzB - Modder River
BatzB - Onverwacht
BatzB - Paardeberg
BatzB - Palmietfontein
BatzB - Pink Hill
BatzB - Poplar Grove
BatzB - Rhenoster
BatzB - Sannahs Post
BatzB - Slingersfontn
BatzB - Stinkhoutbm
BatzB - Sunnyside
BatzB - Wilmansrust
BatzB - Wolvekuil
BatzB - Zand River
BatzG - Gallipoli
BatzG - Anzac
BatzG - Aug 1915
BatzG - Baby 700
BatzG - Evacuation
BatzG - Hill 60
BatzG - Hill 971
BatzG - Krithia
BatzG - Lone Pine
BatzG - Nek
BatzJ - Jordan Valley
BatzJ - 1st Amman
BatzJ - 2nd Amman
BatzJ - Abu Tellul
BatzJ - Es Salt
BatzJ - JV Maps
BatzJ - Ziza
BatzM - Mespot
BatzM - Baghdad
BatzM - Ctesiphon
BatzM - Daur
BatzM - Kurna
BatzM - Kut el Amara
BatzM - Ramadi
BatzN - Naval
BatzN - AE1
BatzN - Cocos Is
BatzN - Heligoland
BatzN - Marmara
BatzN - Zeebrugge
BatzN - Zeppelin L43
BatzNG - Bitapaka
BatzO - Other
BatzO - Baku
BatzO - Egypt 1919
BatzO - Emptsa
BatzO - Karawaran
BatzO - Peitang
BatzO - Wassa
BatzP - Palestine
BatzP - 1st Gaza
BatzP - 2nd Gaza
BatzP - 3rd Gaza
BatzP - Aleppo
BatzP - Amwas
BatzP - Ayun Kara
BatzP - Bald Hill
BatzP - Balin
BatzP - Beersheba
BatzP - Berkusieh
BatzP - Damascus
BatzP - El Auja
BatzP - El Buggar
BatzP - El Burj
BatzP - Haifa
BatzP - Huj
BatzP - JB Yakub
BatzP - Kaukab
BatzP - Khan Kusseir
BatzP - Khuweilfe
BatzP - Kuneitra
BatzP - Megiddo
BatzP - Nablus
BatzP - Rafa
BatzP - Sasa
BatzP - Semakh
BatzP - Sheria
BatzP - Surafend
BatzP - Wadi Fara
BatzS - Sinai
BatzS - Bir el Abd
BatzS - El Arish
BatzS - El Mazar
BatzS - El Qatiya
BatzS - Jifjafa
BatzS - Magdhaba
BatzS - Maghara
BatzS - Romani
BatzS - Suez 1915
BatzSe - Senussi
BatzWF - Westn Front
BW - Boer War
BW - NSW
BW - NSW - 1ACH
BW - NSW - 1NSWMR
BW - NSW - 2NSWMR
BW - NSW - 3ACH
BW - NSW - 3NSWIB
BW - NSW - 3NSWMR
BW - NSW - 5ACH
BW - NSW - A Bty RAA
BW - NSW - AAMC
BW - NSW - Aust H
BW - NSW - Lancers
BW - NSW - NSW Inf
BW - NSW - NSWCBC
BW - NSW - NSWIB
BW - NSW - NSWMR_A
BW - NZ
BW - Qld
BW - Qld - 1ACH
BW - Qld - 1QMI
BW - Qld - 2QMI
BW - Qld - 3ACH
BW - Qld - 3QMI
BW - Qld - 4QIB
BW - Qld - 5QIB
BW - Qld - 6QIB
BW - Qld - 7ACH
BW - QLD - AAMC
BW - SA
BW - SA - 1SAMR
BW - SA - 2ACH
BW - SA - 2SAMR
BW - SA - 3SACB
BW - SA - 4ACH
BW - SA - 4SAIB
BW - SA - 5SAIB
BW - SA - 6SAIB
BW - SA - 8ACH
BW - SA - AAMC
BW - Tas
BW - Tas - 1ACH
BW - Tas - 1TIB
BW - Tas - 1TMI
BW - Tas - 2TB
BW - Tas - 2TIB
BW - Tas - 3ACH
BW - Tas - 8ACH
BW - Vic
BW - Vic - 1VMI
BW - Vic - 2ACH
BW - Vic - 2VMR
BW - Vic - 3VB
BW - Vic - 4ACH
BW - Vic - 4VIB
BW - Vic - 5VMR
BW - Vic - 6ACH
BW - Vic - AAMC
BW - Vic - Scot H
BW - WA
BW - WA - 1WAMI
BW - WA - 2ACH
BW - WA - 2WAMI
BW - WA - 3WAB
BW - WA - 4ACH
BW - WA - 4WAMI
BW - WA - 5WAMI
BW - WA - 6WAMI
BW - WA - 8ACH
BW Gen - Campaign
BW Gen - Soldiers
BW General
Cavalry - General
Diary - Schramm
Egypt - Heliopolis
Egypt - Mena
Gen - Ataturk Pk, CNB
Gen - Australia
Gen - Legends
Gen - Query Club
Gen - St - NSW
Gen - St - Qld
Gen - St - SA
Gen - St - Tas
Gen - St - Vic
Gen - St - WA
Gm - German Items
Gm - Bk - 605 MGC
GW - 11 Nov 1918
GW - Atrocities
GW - August 1914
GW - Biographies
GW - Propaganda
GW - Spies
GW - We forgot
Militia 1899-1920
Militia - Area Officers
Militia - Inf - Infantry
Militia - Inf - 1IB
Militia - Inf - 2IB
Militia - Inf - 3IB
Militia - Inf - NSW
Militia - Inf - Qld
Militia - Inf - SA
Militia - Inf - Tas
Militia - Inf - Vic
Militia - Inf - WA
Militia - K.E.Horse
Militia - LH
Militia - LH - Regts
Militia - LH - 1LHB
Militia - LH - 2LHB
Militia - LH - 3LHB
Militia - LH - 4LHB
Militia - LH - 5LHB
Militia - LH - 6LHB
Militia - LHN - NSW
Militia - LHN - 1/7/1
Militia - LHN - 2/9/6
Militia - LHN - 3/11/7
Militia - LHN - 4/6/16
Militia - LHN - 5/4/15
Militia - LHN - 6/5/12
Militia - LHN - 28
Militia - LHQ - Qld
Militia - LHQ - 13/2
Militia - LHQ - 14/3/11
Militia - LHQ - 15/1/5
Militia - LHQ - 27/14
Militia - LHS - SA
Militia - LHS - 16/22/3
Militia - LHS - 17/23/18
Militia - LHS - 24/9
Militia - LHT - Tas
Militia - LHT - 12/26
Militia - LHV - Vic
Militia - LHV - 7/15/20
Militia - LHV - 8/16/8
Militia - LHV - 9/19
Militia - LHV - 10/13
Militia - LHV - 11/20/4
Militia - LHV - 19/17
Militia - LHV - 29
Militia - LHW - WA
Militia - LHW-18/25/10
Militia - Military Orders
Militia - Misc
MilitiaRC - Rifle Clubs
MilitiaRC - NSW
MilitiaRC - NT
MilitiaRC - Qld
MilitiaRC - SA
MilitiaRC - Tas
MilitiaRC - Vic
MilitiaRC - WA
Militiaz - New Zealand
Tk - Turkish Items
Tk - Army
Tk - Bks - Books
Tk - Bks - 1/33IR
Tk - Bks - 27th IR
Tk - Bks - Air Force
Tk - Bks - Yildirim
Tk - POWs
Wp - Weapons
Wp - Hotchkiss Cav
Wp - Hotchkiss PMG
Blog Tools
Edit your Blog
Build a Blog
RSS Feed
View Profile
Open Community
Post to this Blog
Site Index
Education Centre
LH Militia
Boer War
Transport Ships
LH Battles
ALH - Units
ALH - General
Aboriginal Light H
Weapons
Ottoman Sources

"At a mile distant their thousand hooves were stuttering thunder, coming at a rate that frightened a man - they were an awe inspiring sight, galloping through the red haze - knee to knee and horse to horse - the dying sun glinting on bayonet points..." Trooper Ion Idriess

The Australian Light Horse Studies Centre aims to present an accurate history as chroniclers of early Australian military developments from 1899 to 1920.

The Australian Light Horse Studies Centre site holds over 12,000 entries and is growing daily.

Contact: Australian Light Horse Studies Centre

Let us hear your story: You can tell your story, make a comment or ask for help on our Australian Light Horse Studies Centre Forum called:

Desert Column Forum

WARNING: This site contains: names, information and images of deceased people; and, language which may be considered inappropriate today.

Friday, 13 November 2009
The Battle of Anzac Cove, Gallipoli, 25 April 1915, Canterbury Infantry Battalion Roll of Honour
Topic: BatzG - Anzac

The Battle of Anzac Cove

Gallipoli, 25 April 1915

Roll of Honour

Canterbury Infantry Battalion


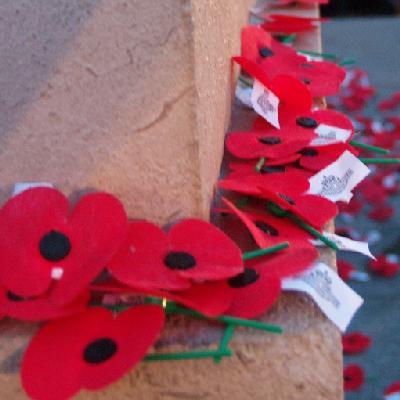
Poppies on the Auckland Cenotaph plinth


The Roll of Honour contains the names of all the men from the Canterbury Infantry Battalion who are known to have served and lost their lives during the Battle of Anzac, 25 April 1915.


Roll of Honour


Henry Thomas BARNETT, Canterbury Infantry Battalion.

Arthur Clifford BOWEN, Canterbury Infantry Battalion.

Thomas Leslie BURNS, Canterbury Infantry Battalion.


Lewis Tom CHAPMAN, Canterbury Infantry Battalion.

Robert Hunt CURRIE, Canterbury Infantry Battalion.


Wilfred Ellis DOVE, Canterbury Infantry Battalion.


Ralph FELDWICK, Canterbury Infantry Battalion.

Arthur Ross FELLOWES, Canterbury Infantry Battalion.


William GARFORTH, Canterbury Infantry Battalion.

Allan Gordon GARLAND, Canterbury Infantry Battalion.


Albert Bert HIGHSTED, Canterbury Infantry Battalion.


Robert Charles MACKIE, Canterbury Infantry Battalion.

John Thomas MILBURN, Canterbury Infantry Battalion.


Oswald Mark NORRIS, Canterbury Infantry Battalion.


Hubert Fair PINK, Canterbury Infantry Battalion.


Harold John RADCLIFFE, Canterbury Infantry Battalion.


Francis Leslie SAPSFORD, Canterbury Infantry Battalion.

John Atkinson SCOTT, Canterbury Infantry Battalion.


Lest We Forget


Further Reading:

The Battle of Anzac Cove, Gallipoli, 25 April 1915

The Battle of Anzac Cove, Gallipoli, 25 April 1915, NZEF Roll of Honour 

Battles where Australians fought, 1899-1920


Citation: The Battle of Anzac Cove, Gallipoli, 25 April 1915, Canterbury Infantry Battalion Roll of Honour

Posted by Project Leader at 12:01 AM EAST
Updated: Tuesday, 13 April 2010 10:06 AM EADT
The Jifjafa Raid, Sinai, April 10 to 14, 1916, Falls Account
Topic: BatzS - Jifjafa

The Jifjafa Raid

Sinai, 10 - 14 April 1916

Falls Account


As part of the Official British War History of the Great War, Captain Cyril Falls and Lieutenant General George MacMunn were commissioned to produce a commentary on the Sinai, Palestine and Syrian operations that took place. In 1928, their finished work, Military Operations, Egypt and Palestine - From the outbreak of war with Germany to June 1917,  was published in London. Their book included a section specifically related to the Jifjafa Raid and is extracted below.

MacMunn, G. & Falls, C., Military operations: Egypt and Palestine, (London 1930), p. 160:


From Tor, at the southern end of Sinai, which was garrisoned by the 2nd Battalion Egyptian Army and had come under General Murray's control by arrangement with General Maxwell, a reconnaissance was carried out, and a small force of the enemy - chiefly Bedouin with a few Turkish officers - ejected from a camp established several miles inland. In No. 2 (the Central) Section a force about a squadron strong of the 8th and 9th Australian Light Horse and a detachment of Bikanir Camel Corps carried out between the 11th and 15th April a raid to Jifjafa, a distance of 52 miles, captured an Austrian engineer officer and 33 men, and destroyed a well-boring plant which had been at work for five months. At the same time the IX Corps in the Southern Section reconnoitred 30 miles to Bir el Giddi and the tracks leading east there from.


Further Reading:

The Jifjafa Raid, Sinai, April 10 to 14 

Battles where Australians fought, 1899-1920


Citation: The Jifjafa Raid, Sinai, April 10 to 14, 1916, Falls Account

Posted by Project Leader at 12:01 AM EAST
Updated: Monday, 30 November 2009 8:11 AM EAST
Thursday, 12 November 2009
The Australian Light Horse, Notes on Cavalry Principles, Spanish Cavalry Training. Vol. IV, 1910
Topic: AIF - Lighthorse

The Australian Light Horse

Notes on Cavalry Principles

Spanish Cavalry Training. Vol. IV, 1910


The big news in the study of Light Horse methods and theory in 1910 was the new edition of Volume IV, Spanish Cavalry Training called Reglamento provisional para la Instruction tactics de las Tropas de Caballeria. It was published by the Spanish General Staff, Madrid, 1910. The nub of its message was quickly adapted for Australian conditions. The salient points were then made available to the Light Horse.

This summary was published in the Military Journal, April, 1911, p. 97


Volume IV of the Spanish Cavalry Training deals with " Combats and Manoeuvres"; it superseded the 1901 edition.

The strategic handling of cavalry does not come within the scope of the book, which deals exclusively with the tactical handling of the arm.

The dominant feature is insistence on the value of the spirit of the offensive as exemplified in phrases such as "inaction is the only unpardonable sin." About 20 pages out of 131 are devoted to dismounted action, it being stated that mounted action is the rule, dismounted action the exception.

The following are some of the points dealt with:-


Cavalry v. Cavalry.

The approach march is to be conducted in successive "bounds" covered by protective bodies, composed of sections or squadrons. The actual conduct of the fight must depend on the attendant circumstances, but the following principles should be adhered to:-

(a) A definite plan of attack should be formed best suited to the ground, the forces available and the enemy's dispositions.

(b) The force should be divided into different groups of combat, each with a distinct mission.

(c) Unanimity of action must exist between the various groups. It may be necessary to keep connexion between them for this purpose, but such connexion is not to interfere with the carrying out of the mission assigned to each group.

(d) The troops should be disposed in depth.


Cavalry v. Infantry.

The elements of a successful attack on infantry are as follows:

(1) Surprise;

(2) The enemy's physical exhaustion;

(3) Weakness of the enemy's fighting power owing to a weak firing line, shortage of ammunition, change of position, &c.

It would be most foolish to launch cavalry against unshaken infantry without fire preparation. But cavalry, with its attendant horse artillery and machine guns, now possesses such increased fire power that it is by no means impossible that it may defeat hostile infantry without assistance.


Dismounted action.

This increased fire power must not, however, be abused; it has not altered the fundamental principle of cavalry employment which is offensive action. Fire should be used to develop that principle, not as a substitute for it.

In the attack the employment of dismounted cavalry is not altogether dissimilar to that of infantry. They should advance in skirmishing order and will occupy successive fire positions. The method of advance should usually be by section rushes. Supports should not usually be employed, but a mounted reserve should be kept in hand to be used either mounted or dismounted, as circumstances may direct.

In the defence the firing line should usually occupy the crept line, unless there is much dead ground, when it should be advanced along the forward slope.


Pitched battle.

The efficiency of cavalry action depends on the position of the cavalry during the different phases of action. During the preliminary reconnaissance cavalry take a leading part in the reconnaissance work, after which they should be withdrawn to the line of the reserve. During the decisive attack cavalry must be energetically employed in co-operating with the other army to force a decision.


Further Reading:

The Light Horse

Australian Light Horse Militia

Militia 1899 - 1920

Battles where Australians fought, 1899-1920


Citation: The Australian Light Horse, Notes on Cavalry Principles, Spanish Cavalry Training. Vol. IV, 1910

Posted by Project Leader at 12:01 AM EAST
Updated: Saturday, 12 December 2009 12:08 PM EAST
Wednesday, 11 November 2009
1st Australian Light Horse Brigade, Contents
Topic: AIF - 1B - 1 LHB

1st LH Bde, AIF

1st Australian Light Horse Brigade

Contents


1st Light Horse Brigade Colour Patch


Formed in August 1914 as part of the 1st Contingent and attached to the Australian Division, the 1st Light Horse Brigade was made up of Light Horsemen from four different states.


Structure

The Australian Light Horse – Structural outline

Australian Light Horse Order of Battle


Corps

Desert Mounted Corps (DMC)


Division

Anzac Mounted Division


Brigade

1st Australian Light Horse Brigade 


Regiments

1st Australian Light Horse Regiment, AIF, History

2nd Australian Light Horse Regiment, AIF, History

3rd Australian Light Horse Regiment, AIF, History


Support Units

1st Australian Light Horse Machine Gun Squadron, AIF

1st Australian Light Horse Signals Troop, AIF

1st Australian Light Horse Field Ambulance, AIF


History

Romani

1st Light Horse Brigade Account

1st LH Bde, AIF, War Diary Appendix Account 

Battle of Romani, Sinai, August 4 to 5, 1916, Roll of Honour, 1st Australian Light Horse Brigade

Bir el Abd

Bir el Abd, Sinai, 9 August 1916, 1st LH Bde, AIF, War Diary Account 

Bir el Abd, Sinai, 9 August 1916, Roll of Honour, 1st Australian Light Horse Brigade  

Bir el Mazar

Bir el Mazar, Sinai, 17 September 1916, 1st LH Bde, AIF, War Diary Account

Magdhaba

The Battle of Magdhaba, Sinai, December 23, 1916, 1st Australian Light Horse Brigade

The Battle of Magdhaba, Sinai, December 23, 1916, Roll of Honour, 1st Australian Light Horse Brigade


Embarkation

Full Roll

1st Australian Light Horse Brigade, AIF, Embarkation Roll, Roll: A - Z


Individual Rolls 

Brigade Headquarters Section

5th Company Army Service Corps

1st Reinforcement

2nd Reinforcement

3rd Reinforcement

4th Reinforcement

5th Reinforcement

6th Reinforcement

7th Reinforcement

8th Reinforcement

9th Reinforcement

10th Reinforcement

11th Reinforcement

12th Reinforcement

13th Reinforcement

14th Reinforcement

15th Reinforcement

16th Reinforcement

17th Reinforcement


Roll of Honour

Brigade

1st Australian Light Horse Brigade, AIF, Roll of Honour

Units within the Brigade

1st Australian Light Horse Brigade Headquarters, Roll of Honour

1st Australian Light Horse Regiment, Roll of Honour

2nd Australian Light Horse Regiment, Roll of Honour

3rd Australian Light Horse Regiment, Roll of Honour

Lest we forget


Further Reading:

1st Australian Light Horse Brigade

1st Australian Light Horse Brigade, AIF, Roll of Honour 

Battles where Australians fought, 1899-1919


Citation: 1st Australian Light Horse Brigade, Contents

Posted by Project Leader at 12:01 AM EAST
Updated: Friday, 26 February 2010 4:31 PM EAST
Tuesday, 10 November 2009
9th Australian Light Horse Regiment, Contents
Topic: AIF - 3B - 9 LHR

9th LHR, AIF

9th Australian Light Horse Regiment

Contents


9th Light Horse Regiment Colour Patch


The 9th Light Horse Regiment was formed as part of the 3rd Australian Light Horse Brigade, 3rd Contingent and attached to the Australian Division. The 9th Light Horse Regiment was a composite regiment with two squadrons made up by recruits from the 4th Military District [South Australia and the Broken Hill region of New South Wales] while the last squadron, "C" Squadron was composed of men from the 3rd Military District [Victoria].


Structure

The Australian Light Horse – Structural outline

Australian Light Horse Order of Battle


Corps

Desert Mounted Corps (DMC)


Division

Anzac Mounted Division

Australian Mounted Division 


Brigade

3rd Australian Light Horse Brigade


Regiment

9th Australian Light Horse Regiment, AIF, History


Newspaper Stories

Return of the 9th LHR, AIF, Advertiser, 12 August 1919 


Battles

Hill 60, Gallipoli

9th LHR personnel at Hill 60, 27 August 1915

The Nek and Hill 60 - The massacre of the Australians

 Romani

9th LHR, AIF account about the Battle of Romani

9th ALHR, AIF, War Diary, account about the Battle of Romani


Bir el Abd

Bir el Abd, Sinai, 9 August 1916, 9th LHR, AIF, War Diary Account 

Bir el Abd, Sinai, 9 August 1916, 9th LHR, AIF, Unit History Account 


Bir el Mazar

Bir el Mazar, Sinai, 17 September 1916, 9th LHR, AIF, War Diary Account 

Bir el Mazar, Sinai, 17 September 1916, 9th LHR, AIF, Unit History Account


Bir el Magdhaba

The Battle of Magdhaba, Sinai, December 23, 1916, 9th LHR, AIF, War Diary Account

The Battle of Magdhaba, Sinai, December 23, 1916, 9th LHR, AIF, Unit History Account

The Battle of Magdhaba, Sinai, 23 December 1916, El Arish and El Magdhaba, 9th LHR, AIF, Commentary 


Beersheba

9th ALHR AIF account about the fall of Beersheba

9th ALHR, AIF, War Diary, account about the fall of Beersheba


El Burj

El Burj, Palestine, 1 December 1917, 9th Light Horse Regiment War Diary Account

El Burj, Palestine, 1 December 1917, Darley, 9th Light Horse Account 


Routine Orders


Embarkation

Full Roll

Roll: A - C

Roll: D - F

Roll: G - J

Roll: K - L

Roll: M - Q

Roll: R - S

Roll: T - Z


Individual Rolls

Regimental Headquarters Section

"A" Squadron

"B" Squadron

"C" Squadron

Machine Gun Section

1st Reinforcement

2nd Reinforcement

3rd Reinforcement Mashobra Group

3rd Reinforcement Pera Group

4th Reinforcement Port Lincoln Group

4th Reinforcement Wiltshire Group

5th Reinforcement Kabinga Group

5th Reinforcement Botanist Group

6th Reinforcement Afric Group Melbourne

6th Reinforcement Afric Group Adelaide

7th Reinforcement Kanowna Group

7th Reinforcement Marere Group

8th Reinforcement Kyarra Group

8th Reinforcement Morea Group

9th Reinforcement Star Of England Group

9th Reinforcement Hororata Group

10th Reinforcement Ballarat Group Melbourne

10th Reinforcement Ballarat Group Adelaide

11th Reinforcement Hawkes Bay Group

11th Reinforcement Ulysses Group

11th Reinforcement Benalla Group

12th Reinforcement Geelong Group

12th Reinforcement Ceramic Group

13th Reinforcement Afric Group

13th Reinforcement Borda Group

14th Reinforcement

15th Reinforcement

16th Reinforcement

17th Reinforcement

18th Reinforcement

19th Reinforcement

20th Reinforcement

21st Reinforcement

22nd Reinforcement

23rd Reinforcement

24th Reinforcement

25th Reinforcement

26th Reinforcement Morea Group Adelaide

26th Reinforcement Morea Group Perth

27th Reinforcement

28th Reinforcement Port Lincoln Group

28th Reinforcement Kyarra Group

28th Reinforcement Commonwealth Group

29th Reinforcement Kyarra Group

29th Reinforcement Commonwealth Group

30th Reinforcement

31st Reinforcement

32nd Reinforcement

33rd Reinforcement

34th Reinforcement


Personnel

Military biographies of men who served with the 9th Light Horse Regiment.

The peculiar case of Arthur Carrington Smedley

3 Sergeant Albert John Kilsby

Merrill, Betteridge and Paxton

3052 Trooper Arthur Arnold Herde

345 Sergeant Linton Hall Swann

3051 Trooper George Hodby

3050 Trooper Hubert Mead Gowling

3049 Trooper Stanley Alexander Ferguson

3048 Trooper Montague Eli Frederick Forth

3047 Trooper Richard Percy Dunstan

9th LHR, AIF, Thomas Joseph Canny 


Roll of Honour

9th Australian Light Horse Regiment, Roll of Honour 

Lest we forget


War Diary Day by Day Account

9th Australian Light Horse Regiment, War Diary, Day by Day Account


Bert Schramm’s Diary

Bert Schramm Diary


Unit History

Darley, TH, With the Ninth Light Horse in the Great War, Adelaide, Hassell Press, 1924. 


Further Reading:

9th Light Horse Regiment, AIF

9th Australian Light Horse Regiment, Roll of Honour 

Battles where Australians fought, 1899-1920


Citation: 9th Australian Light Horse Regiment, Contents

Posted by Project Leader at 12:01 AM EAST
Updated: Wednesday, 24 February 2010 10:03 PM EAST

Newer | Latest | Older

Full Site Index


powered by FreeFind
Let us hear your story: You can tell your story, make a comment or ask for help on our forum.

Desert Column Forum

A note on copyright

The Australian Light Horse Studies Centre is a not for profit and non profit group whose sole aim is to write the early history of the Australian Light Horse from 1900 - 1920. It is privately funded and the information is provided by the individuals within the group and while permission for the use of the material has been given for this site for these items by various donors, the residual and actual copyright for these items, should there be any, resides exclusively with the donors. The information on this site is freely available for private research use only and if used as such, should be appropriately acknowledged. To assist in this process, each item has a citation attached at the bottom for referencing purposes.

Please Note: No express or implied permission is given for commercial use of the information contained within this site.

A note to copyright holders

The Australian Light Horse Studies Centre has made every endeavour to contact copyright holders of material digitised for this blog and website and where appropriate, permission is still being sought for these items. Where replies were not received, or where the copyright owner has not been able to be traced, or where the permission is still being sought, the Australian Light Horse Studies Centre has decided, in good faith, to proceed with digitisation and publication. Australian Light Horse Studies Centre would be happy to hear from copyright owners at any time to discuss usage of this item.

Contact

Australian Light Horse Studies Centre

eXTReMe Tracker