« November 2009 »
S M T W T F S
1 2 3 4 5 6 7
8 9 10 11 12 13 14
15 16 17 18 19 20 21
22 23 24 25 26 27 28
29 30
You are not logged in. Log in


Search the site:


powered by FreeFind
Volunteer with us.

Entries by Topic All topics  
A Latest Site News
A - Using the Site
AAA Volunteers
AAB-Education Centre
AAC-Film Clips
AAC-Photo Albums
AIF & MEF & EEF
AIF - Lighthorse
AIF - ALH - A to Z
AIF - DMC
AIF - DMC - Or Bat
AIF - DMC - Anzac MD
AIF - DMC - Aus MD
AIF - DMC - British
AIF - DMC - BWI
AIF - DMC - French
AIF - DMC - Indian
AIF - DMC - Italian
AIF - DMC - Medical
AIF - DMC - Remounts
AIF - DMC - Scouts
AIF - DMC - Sigs
AIF - DMC - Sigs AirlnS
AIF - DMC - 1 Sig Sqn
AIF - DMC - 2 Sig Sqn
AIF - DMC - Eng
AIF - DMC - Eng 1FSE
AIF - DMC - Eng 2FSE
AIF - DMC - GSR
AIF - 1B - 1 LHB
AIF - 1B - 6 MVS
AIF - 1B - 1 LHMGS
AIF - 1B - 1 Sig Trp
AIF - 1B - 1 LHFA
AIF - 1B - 1 LHR
AIF - 1B - 2 LHR
AIF - 1B - 3 LHR
AIF - 2B - 2 LHB
AIF - 2B - 7 MVS
AIF - 2B - 2 LHFA
AIF - 2B - 2 LHMGS
AIF - 2B - 2 Sig Trp
AIF - 2B - 5 LHR
AIF - 2B - 6 LHR
AIF - 2B - 7 LHR
AIF - 3B - 3 LHB
AIF - 3B - 8 MVS
AIF - 3B - 3 LHB Sigs
AIF - 3B - 3 LHFA
AIF - 3B - 3 LHMGS
AIF - 3B - 3 Sig Trp
AIF - 3B - 8 LHR
AIF - 3B - 9 LHR
AIF - 3B - 10 LHR
AIF - 4B - 4 LHB
AIF - 4B - 4 Sig Trp
AIF - 4B - 9 MVS
AIF - 4B - 4 LHFA
AIF - 4B - 4 LHMGS
AIF - 4B - 4 LHR
AIF - 4B - 11 LHR
AIF - 4B - 12 LHR
AIF - 5B - 5 LHB
AIF - 5B - 10 MVS
AIF - 5B - 5 LHFA
AIF - 5B - 5 Sig Trp
AIF - 5B - ICC
AIF - 5B - 14 LHR
AIF - 5B - 15 LHR
AIF - 5B - 1er Regt
AIF - 5B - 2 NZMGS
AIF - AASC
AIF - Aboriginal LH
AIF - Badges
AIF - Cars
AIF - Chinese LH
AIF - Double Sqns
AIF - Engineers
AIF - Fr - 22 Corps
AIF - Fr - 13 LHR
AIF - Honour Roll
AIF - HQ - 3rd Echelon
AIF - Marching Songs
AIF - Misc Topics
AIF - NZMRB
AIF - NZMRB - AMR
AIF - NZMRB - CMR
AIF - NZMRB - EFT
AIF - NZMRB - NZMFA
AIF - NZMRB - NZMGS
AIF - NZMRB - OMR
AIF - NZMRB - Sig-Trp
AIF - NZMRB - WMR
AIF - Ships
AIF - Ships - Encountr
AIF - Ships - Una
AIF - WFF
AIF - Wireless Sqn
Battles
BatzA - Australia
BatzA - Broken Hill
BatzA - Liverpool
BatzA - Merivale
BatzB - Boer War
BatzB - Bakenlaagte
BatzB - Belmont
BatzB - Bothaville
BatzB - Buffels Hoek
BatzB - Coetzees Drift
BatzB - Diamond Hill
BatzB - Driefontein
BatzB - Elands
BatzB - Graspan
BatzB - Grobelaar
BatzB - Grootvallier
BatzB - Hartebestfontn
BatzB - Houtnek
BatzB - Karee Siding
BatzB - Kimberley
BatzB - Koster River
BatzB - Leeuw Kop
BatzB - Mafeking
BatzB - Magersfontein
BatzB - Modder River
BatzB - Onverwacht
BatzB - Paardeberg
BatzB - Palmietfontein
BatzB - Pink Hill
BatzB - Poplar Grove
BatzB - Rhenoster
BatzB - Sannahs Post
BatzB - Slingersfontn
BatzB - Stinkhoutbm
BatzB - Sunnyside
BatzB - Wilmansrust
BatzB - Wolvekuil
BatzB - Zand River
BatzG - Gallipoli
BatzG - Anzac
BatzG - Aug 1915
BatzG - Baby 700
BatzG - Evacuation
BatzG - Hill 60
BatzG - Hill 971
BatzG - Krithia
BatzG - Lone Pine
BatzG - Nek
BatzJ - Jordan Valley
BatzJ - 1st Amman
BatzJ - 2nd Amman
BatzJ - Abu Tellul
BatzJ - Es Salt
BatzJ - JV Maps
BatzJ - Ziza
BatzM - Mespot
BatzM - Baghdad
BatzM - Ctesiphon
BatzM - Daur
BatzM - Kurna
BatzM - Kut el Amara
BatzM - Ramadi
BatzN - Naval
BatzN - AE1
BatzN - Cocos Is
BatzN - Heligoland
BatzN - Marmara
BatzN - Zeebrugge
BatzN - Zeppelin L43
BatzNG - Bitapaka
BatzO - Other
BatzO - Baku
BatzO - Egypt 1919
BatzO - Emptsa
BatzO - Karawaran
BatzO - Peitang
BatzO - Wassa
BatzP - Palestine
BatzP - 1st Gaza
BatzP - 2nd Gaza
BatzP - 3rd Gaza
BatzP - Aleppo
BatzP - Amwas
BatzP - Ayun Kara
BatzP - Bald Hill
BatzP - Balin
BatzP - Beersheba
BatzP - Berkusieh
BatzP - Damascus
BatzP - El Auja
BatzP - El Buggar
BatzP - El Burj
BatzP - Haifa
BatzP - Huj
BatzP - JB Yakub
BatzP - Kaukab
BatzP - Khan Kusseir
BatzP - Khuweilfe
BatzP - Kuneitra
BatzP - Megiddo
BatzP - Nablus
BatzP - Rafa
BatzP - Sasa
BatzP - Semakh
BatzP - Sheria
BatzP - Surafend
BatzP - Wadi Fara
BatzS - Sinai
BatzS - Bir el Abd
BatzS - El Arish
BatzS - El Mazar
BatzS - El Qatiya
BatzS - Jifjafa
BatzS - Magdhaba
BatzS - Maghara
BatzS - Romani
BatzS - Suez 1915
BatzSe - Senussi
BatzWF - Westn Front
BW - Boer War
BW - NSW
BW - NSW - 1ACH
BW - NSW - 1NSWMR
BW - NSW - 2NSWMR
BW - NSW - 3ACH
BW - NSW - 3NSWIB
BW - NSW - 3NSWMR
BW - NSW - 5ACH
BW - NSW - A Bty RAA
BW - NSW - AAMC
BW - NSW - Aust H
BW - NSW - Lancers
BW - NSW - NSW Inf
BW - NSW - NSWCBC
BW - NSW - NSWIB
BW - NSW - NSWMR_A
BW - NZ
BW - Qld
BW - Qld - 1ACH
BW - Qld - 1QMI
BW - Qld - 2QMI
BW - Qld - 3ACH
BW - Qld - 3QMI
BW - Qld - 4QIB
BW - Qld - 5QIB
BW - Qld - 6QIB
BW - Qld - 7ACH
BW - QLD - AAMC
BW - SA
BW - SA - 1SAMR
BW - SA - 2ACH
BW - SA - 2SAMR
BW - SA - 3SACB
BW - SA - 4ACH
BW - SA - 4SAIB
BW - SA - 5SAIB
BW - SA - 6SAIB
BW - SA - 8ACH
BW - SA - AAMC
BW - Tas
BW - Tas - 1ACH
BW - Tas - 1TIB
BW - Tas - 1TMI
BW - Tas - 2TB
BW - Tas - 2TIB
BW - Tas - 3ACH
BW - Tas - 8ACH
BW - Vic
BW - Vic - 1VMI
BW - Vic - 2ACH
BW - Vic - 2VMR
BW - Vic - 3VB
BW - Vic - 4ACH
BW - Vic - 4VIB
BW - Vic - 5VMR
BW - Vic - 6ACH
BW - Vic - AAMC
BW - Vic - Scot H
BW - WA
BW - WA - 1WAMI
BW - WA - 2ACH
BW - WA - 2WAMI
BW - WA - 3WAB
BW - WA - 4ACH
BW - WA - 4WAMI
BW - WA - 5WAMI
BW - WA - 6WAMI
BW - WA - 8ACH
BW Gen - Campaign
BW Gen - Soldiers
BW General
Cavalry - General
Diary - Schramm
Egypt - Heliopolis
Egypt - Mena
Gen - Ataturk Pk, CNB
Gen - Australia
Gen - Legends
Gen - Query Club
Gen - St - NSW
Gen - St - Qld
Gen - St - SA
Gen - St - Tas
Gen - St - Vic
Gen - St - WA
Gm - German Items
Gm - Bk - 605 MGC
GW - 11 Nov 1918
GW - Atrocities
GW - August 1914
GW - Biographies
GW - Propaganda
GW - Spies
GW - We forgot
Militia 1899-1920
Militia - Area Officers
Militia - Inf - Infantry
Militia - Inf - 1IB
Militia - Inf - 2IB
Militia - Inf - 3IB
Militia - Inf - NSW
Militia - Inf - Qld
Militia - Inf - SA
Militia - Inf - Tas
Militia - Inf - Vic
Militia - Inf - WA
Militia - K.E.Horse
Militia - LH
Militia - LH - Regts
Militia - LH - 1LHB
Militia - LH - 2LHB
Militia - LH - 3LHB
Militia - LH - 4LHB
Militia - LH - 5LHB
Militia - LH - 6LHB
Militia - LHN - NSW
Militia - LHN - 1/7/1
Militia - LHN - 2/9/6
Militia - LHN - 3/11/7
Militia - LHN - 4/6/16
Militia - LHN - 5/4/15
Militia - LHN - 6/5/12
Militia - LHN - 28
Militia - LHQ - Qld
Militia - LHQ - 13/2
Militia - LHQ - 14/3/11
Militia - LHQ - 15/1/5
Militia - LHQ - 27/14
Militia - LHS - SA
Militia - LHS - 16/22/3
Militia - LHS - 17/23/18
Militia - LHS - 24/9
Militia - LHT - Tas
Militia - LHT - 12/26
Militia - LHV - Vic
Militia - LHV - 7/15/20
Militia - LHV - 8/16/8
Militia - LHV - 9/19
Militia - LHV - 10/13
Militia - LHV - 11/20/4
Militia - LHV - 19/17
Militia - LHV - 29
Militia - LHW - WA
Militia - LHW-18/25/10
Militia - Military Orders
Militia - Misc
MilitiaRC - Rifle Clubs
MilitiaRC - NSW
MilitiaRC - NT
MilitiaRC - Qld
MilitiaRC - SA
MilitiaRC - Tas
MilitiaRC - Vic
MilitiaRC - WA
Militiaz - New Zealand
Tk - Turkish Items
Tk - Army
Tk - Bks - Books
Tk - Bks - 1/33IR
Tk - Bks - 27th IR
Tk - Bks - Air Force
Tk - Bks - Yildirim
Tk - POWs
Wp - Weapons
Wp - Hotchkiss Cav
Wp - Hotchkiss PMG
Blog Tools
Edit your Blog
Build a Blog
RSS Feed
View Profile
Open Community
Post to this Blog
Site Index
Education Centre
LH Militia
Boer War
Transport Ships
LH Battles
ALH - Units
ALH - General
Aboriginal Light H
Weapons
Ottoman Sources

"At a mile distant their thousand hooves were stuttering thunder, coming at a rate that frightened a man - they were an awe inspiring sight, galloping through the red haze - knee to knee and horse to horse - the dying sun glinting on bayonet points..." Trooper Ion Idriess

The Australian Light Horse Studies Centre aims to present an accurate history as chroniclers of early Australian military developments from 1899 to 1920.

The Australian Light Horse Studies Centre site holds over 12,000 entries and is growing daily.

Contact: Australian Light Horse Studies Centre

Let us hear your story: You can tell your story, make a comment or ask for help on our Australian Light Horse Studies Centre Forum called:

Desert Column Forum

WARNING: This site contains: names, information and images of deceased people; and, language which may be considered inappropriate today.

Saturday, 28 November 2009
The Australian Light Horse, Militia and AIF, Mounted Rifle Tactics, Part 1, Preface
Topic: AIF - Lighthorse

The Australian Light Horse,

Militia and AIF

Mounted Rifle Tactics, Part 1, Preface


Cape Mounted Rifleman

[Drawing from 1904 by Richard Caton Woodville, 1856 - 1927.]


The following series is from an article called Mounted Rifle Tactics written in 1914 by a former regimental commander of the Cape Mounted Riflemen, Lieutenant-Colonel J. J. Collyer. His practical experience of active service within a mounted rifles formation gives strength to the theoretical work on this subject. It was the operation of the Cape Mounted Riflemen within South Africa that formed the inspiration for the theoretical foundations of the Australian Light Horse, and was especially influential in Victoria where it formed the cornerstone of mounted doctrine. 

Collyer, JJ, Mounted Rifle Tactics, Military Journal, April, 1915, pp. 265 - 305:


Preface

[by Colonel Sir George Aston, K.C.B., late Brigadier General, General Staff, South Africa.]

South Africa has been called the home of the mounted rifleman.

Whilst it would obviously be inexpedient to apply purely local experiences to the conduct of the mounted arm under different conditions, and in countries not of a similar nature, it would be foolish entirely to ignore the lessons learned in South Africa. This, as we all know, is a country of vast expanses affording wide views, a country of rocky kopjes and krantzes, and of open veldt intersected by deep nullahs and sloots. M, any years of surface denudation have produced special conditions. The low ground affords good going for the horseman, while the kopjes, and even the tops of gentle undulations, are entirely denuded of soil, and consist of rocky outcrop, affording good cover for the rifleman, but uncommonly bad going for his horse. It is of fighting in such a country that this article treats.

Then, again, the course of lectures, upon which the chapters of this essay have been based, were delivered to South African officers destined to train mounted troops of a special nature; not regulars, but citizen soldiers who receive about four years' cadet training, followed by three weeks' recruit training and three subsequent annual trainings, each of about a fortnight. Under these conditions it was considered that arme blanche tactics, mounted, would be quite out of place in the course of instruction.

Colonel Collyer treats his subject under two headings. Chapters I. to V. deal with the tactics of mounted riflemen, and Chapter VI with reconnaissance. Chapter VII, on the bayonet for use by mounted riflemen [The chapter in question has already been published as a separate article in the Commonwealth Military Journal (see p. 135 of the issue for January, 1914), and is therefore omitted.] on foot, has been added in order to put before others the result of several very interesting discussions at Bloemfontein during the year 1912. These discussions were spread over several weeks, and amongst the speakers were numbered many officers who led troops successfully on both sides in the late war. British officers, Boor generals whose names figure frequently in the histories, Staats Artillerie officers, and others took part and made their points for and against the bayonet. At the close of the discussion a proposal to arm the Citizen Mounted Riflemen of South Africa with the bayonet was put to the vote, and was carried with hardly a dissentient voice.

Taken as a whole, these chapters show the lines upon which the training of the mounted branch is being conducted in South Africa, and they should be of interest in other parts of the world, as well as in South Africa itself.


Previous: The Light Horse

Next: Part 2, Contents


Further Reading:

The Light Horse

Australian Light Horse Militia

Militia 1899 - 1920

Battles where Australians fought, 1899-1920


Citation: The Australian Light Horse, Militia and AIF, Mounted Rifle Tactics, Part 1, Preface

Posted by Project Leader at 12:01 AM EAST
Updated: Thursday, 10 December 2009 9:17 AM EAST
4th Australian Light Horse Regiment, Contents
Topic: AIF - 4B - 4 LHR

4th LHR, AIF

4th Australian Light Horse Regiment

Contents


4th Light Horse Regiment Colour Patch after February 1917


The 4th Light Horse Regiment was formed as Divisional Cavalry for the Australian Division. The recruits were drawn in large part from the Melbourne metropolitan area although the balance of men came from all seven Militia Regiments within the 3rd Military District which incorporated all of Victoria and part of Southern New South Wales.


Structure

The Australian Light Horse – Structural outline

Australian Light Horse Order of Battle


Corps

Desert Mounted Corps (DMC)


Division

Australian Mounted Division


Brigade

Imperial Camel Corps - units

4th Light Horse Brigade


Regiment

4th Australian Light Horse Regiment


History

Beersheba

Men who possibly charged at Beersheba - 4th LHR

Bourchier, CO 4th ALHR, account about the fall of Beersheba

4th LHR, AIF account about the fall of Beersheba

2639 Tpr Arthur Wilson Beatty account of Beersheba


Routine Orders

One of the best sources of information available for understanding the immediate challenges facing a regiment is to be found in the Routine Orders. They are a wealth of detail. The Routine Orders provide an unvarnished history of the Regiment.

4th LHR Routine Order No 171, 17 June 1915


Embarkation

Full Roll

Roll: A - C

Roll: D - F

Roll: G - J

Roll: K - L

Roll: M - Q

Roll: R - S

Roll: T - Z


Individual Rolls

Headquarters Section Wiltshire Group
Headquarters Section Anglo Egyptian Group 

"A" Squadron Wiltshire Group

"A" Squadron Anglo Egyptian Group 

"B" Squadron Wiltshire Group

"B" Squadron Anglo Egyptian Group 

"C" Squadron Wiltshire Group

"C" Squadron Anglo Egyptian Group

Machine Gun Section

1st Reinforcement

2nd Reinforcement

3rd Reinforcement

4th Reinforcement

5th Reinforcement

6th Reinforcement

7th Reinforcement

8th Reinforcement

9th Reinforcement

10th Reinforcement

11th Reinforcement

12th Reinforcement

13th Reinforcement

14th Reinforcement

15th Reinforcement - Katuna Group

15th Reinforcement - Anchises Group

16th Reinforcement

17th Reinforcement

18th Reinforcement

19th Reinforcement - Mongolia Group

19th Reinforcement - Themistocles Group

20th Reinforcement - Malwa Group

20th Reinforcement - Port Sydney Group

21st Reinforcement - Clan Maccorquodale Group

21st Reinforcement - Nestor Group

21st Reinforcement - Hymettus Group

22nd Reinforcement - Clan Maccorquodale Group

22nd Reinforcement - Ulysses Group

23rd Reinforcement

24th Reinforcement

25th Reinforcement

26th Reinforcement

27th Reinforcement - Suevic Group

27th Reinforcement - Boorara Group

28th Reinforcement - Port Lincoln Group

28th Reinforcement - Themistocles Group

28th Reinforcement - Kyarra Group

29th Reinforcement - Anchises Group

29th Reinforcement - Kyarra Group

30th Reinforcement - Commonwealth Group

30th Reinforcement - Nestor Group

31st Reinforcement - Ormonde Group

31st Reinforcement - Ulysses Group

32nd Reinforcement


Roll of Honour

4th Australian Light Horse Regiment, Roll of Honour 

Lest We Forget


Further Reading:

4th Australian Light Horse Regiment, AIF

4th Australian Light Horse Regiment, Roll of Honour  

Battles where Australians fought, 1899-1920


Citation: 4th Australian Light Horse Regiment, Contents

Posted by Project Leader at 12:01 AM EAST
Updated: Monday, 18 January 2010 11:54 AM EAST
Friday, 27 November 2009
The Australian Light Horse, Militia and AIF, Mounted Rifle Tactics, Part 2, Contents
Topic: AIF - Lighthorse

The Australian Light Horse,

Militia and AIF

Mounted Rifle Tactics, Part 2, Contents


Cape Mounted Rifleman

[Drawing from 1904 by Richard Caton Woodville, 1856 - 1927.]


The following series is from an article called Mounted Rifle Tactics written in 1914 by a former regimental commander of the Cape Mounted Riflemen, Lieutenant-Colonel J. J. Collyer. His practical experience of active service within a mounted rifles formation gives strength to the theoretical work on this subject. It was the operation of the Cape Mounted Riflemen within South Africa that formed the inspiration for the theoretical foundations of the Australian Light Horse, and was especially influential in Victoria where it formed the cornerstone of mounted doctrine. 

Collyer, JJ, Mounted Rifle Tactics, Military Journal, April, 1915, pp. 265 - 305:


Mounted Rifle Tactics.

Contents.

I. General Considerations:

Definition

Principles underlying tactics

Definitions

Cavalry

Mounted infantry

Mounted riflemen

Mobility and fire effect

Subdivision of subject

The offensive spirit

The bayonet

Missions of mounted riflemen

General Langlois on the Boer War

Von der Goltz

Summary.


II. The Attack:

Definition

Mounted riflemen as advanced troops

In the attack generally

Special attacks

Fire from the saddle

Rooiwal

The "mounted rifle charge:

Vlakfontein

Blood River

Bakenlaagte

Yzer Spruit

Rooiwal again.


III - Defence:

Definition

Uses of mobility

Frontages occupied

Dead ground

Position of reserve

With other arms

Counter-attack

Advanced positions

Lateral communications

The moment to strike.


IV. Protection:

Definition

On the march

Advanced guards

Rear guards

In action

Halted

Reconnoitring patrols

Groenkop, 1901

Standing patrols

Moving protective patrols

Safety of patrols.


V. Night Operations:

Authorities as to importance

Reconnaissance

Training

Night movements (tactical)

Rests

Pace

Supervision

Information

Secrecy

Order of march

Night combats

Difficulties

Small raids

Important points

Encounter combats

Summary.


VI. Reconnaissance:

Importance

Information

Scouting

Specialization

Intelligence units

Instructions necessary

Reconnoitring patrols

Reports

Patrol leaders

Reconnaissance for attack

For defence

Roads


VII- Conclusion.


Previous: Part 1, Preface 

Next: Part 3, General Considerations 


Further Reading:

The Light Horse

Australian Light Horse Militia

Militia 1899 - 1920

Battles where Australians fought, 1899-1920


Citation: The Australian Light Horse, Militia and AIF, Mounted Rifle Tactics, Part 2, Contents

Posted by Project Leader at 12:01 AM EAST
Updated: Thursday, 10 December 2009 9:18 AM EAST
Thursday, 26 November 2009
4th Australian Light Horse Regiment, AIF, Outline
Topic: AIF - 4B - 4 LHR

4th LHR, AIF

4th Australian Light Horse Regiment

Outline


4th Light Horse taking the salute in Melbourne, September 1914

[From: The Australasian,  3 October 1914, p. 5.]


Formation

The 4th Light Horse Regiment was formed as Divisional Cavalry for the Australian Division. It was part of the 1st Contingent and raised at Broadmeadows Training Camp to the north of Melbourne, Victoria, on 11 August 1914. The recruits were drawn in large part from the Melbourne metropolitan area although the balance of men came from all seven Militia Regiments within the 3rd Military District which incorporated all of Victoria and part of Southern New South Wales. The men from New South Wales found themselves mainly in "C" Squadron. Many of the men went from the Light Horse Militia formation into the AIF Light Horse.


"A" Squadron recruited mainly from:

13th Light Horse Regiment (6 men).
20th Light Horse Regiment (13 men).
29th Light Horse Regiment (7 men).


"B" Squadron recruited mainly from:

15th Light Horse Regiment (5 men).
16th Light Horse Regiment (7 men).


"C" Squadron recruited mainly from:

17th Light Horse Regiment (10 men).
19th Light Horse Regiment (5 men).


Training 


4th Light Horse Regiment Routine Order No 45, 1 October 1914

[Note: This is the earliest surviving 4th LHR RO. Click on page for larger version.]


Training of the 4th Light Horse Regiment occurred at Broadmeadows Training Camp from August until October 1914. 


Embarkation

Embarkation of the 4th Light Horse Regiment occurred by both the HMAT A18 Wiltshire and the HMAT A25 Anglo Egyptian, departing from Melbourne, Victoria, 19 October 1914.


HMAT A18 Wiltshire

 [See: His Majesty's Australian Transports [HMAT] Ships, A18.]


The bulk of the 4th Light Horse Regiment embarked on the HMAT A18 Wiltshire.


HMAT A25 Anglo-Egyptian at Port Melbourne, 1916

 [See: His Majesty's Australian Transports [HMAT] Ships, A25.]


Twelve men selected from the Regiment were allotted to embark on the HMAT A25 Anglo Egyptian. On board the Anglo Egyptian was the Divisional Ammunition Column and the 2nd Light Horse Regiment which had embarked from Brisbane about a month before.

The 4th Light Horse Regiment sailed by convoy from Albany and passed by the action against the Emden at the Cocos Islands. The Wiltshire and Anglo Egyptian disembarked the 4th Light Horse Regiment in Egypt on 10 December 1914.


Colour Patch

Initially, the only colour separation of the various Australian mounted troops was by use of the pennant. The marker pennants were carried on poles to mark lines troop lines in camps in Egypt. They were not lance pennants as the Australian lancers had red over white pennants on their lances.


Pennant of the 4th Light Horse Regiment


While this pennant was useful in distinguishing horse and troop lines, it failed to identify the individual with a unit. The AIF 1st Australian Division Standing Orders issued in December 1914 ordered the Australian Light Horse Regiments to wear a 4 inch wide [10.2cm] blue armband with the regiment name marked on the band in black lettering.

The earlier systems proved to be ineffective so to assist with identification of the men in the various units within the AIF, Divisional Order No 81 (A) Administration was issued at Mena on 8 March 1915 detailing the Colour Patch for the 4th Light Horse Regiment as others received their colours. The colour patch was made of cloth 1¼ inches wide and 2¾ inches long and worn on the sleeve one inch below the shoulder seam. The 4th Light Horse Regiment wore two different colour patches during the Great War.

The first colour patch for the 4th Light Horse Regiment reflected their role as Divisional Cavalry which was white over red with the triangles obverse to the brigaded regiments.


4th Light Horse Regiment Shoulder Patch for Divisional Cavalry and 3rd Camel Regiment.


After Gallipoli, the 4th Light Horse Regiment was split with "B" and "D" Squadrons going to France. These two squadrons retained the colour patch and became known as the II Anzac Corps Mounted Regiment. The  4th Light Horse Regiment remained as Divisional Cavalry until it was renamed as the 3rd Camel Regiment on 24 December 1916. It retained the colour patch as it was first awarded until allotted to the 4th Light Horse Brigade in February 1917.


4th Light Horse Regiment Colour Patch after February 1917


The 4th Light Horse Regiment carried the dark blue Brigade colour as the lower triangle part of the colour patch, while the light blue unit colour was on the top. This is illustrated with the above presentation.


Gallipoli

As mounted troops, the Light Horse was considered to be unsuitable for work in Gallipoli. The mounted troops volunteered to operate as infantry and thus were sent to Gallipoli with the 4th Light Horse Regiment landing on 22 and 24 May. Initially the 4th Light Horse Regiment was broken up into its component squadrons which were distributed as reinforcements to the depleted infantry battalions. After 11 June 1915 the 4th Light Horse Regiment was reformed and was mainly deployed on defensive activities around Ryrie's Post. The 4th Light Horse Regiment  left the peninsula on 11 December 1915.


Defence of Egypt

After the return to Egypt, the 4th Light Horse Regiment was reformed to include a forth squadron known as "D" Squadron.

Two squadrons from the 4th Light Horse Regiment, "B" and "D" Squadrons, were detailed to act as Divisional Cavalry 1st and 3rd Australian Divisions respectively and to embark with the Divisions to serve in France on the Western Front. Added to these two squadrons was a squadron from the New Zealand Regiment, the Otago Mounted Rifles. These three squadrons formed the composite regiment known as the II Anzac Corps Mounted Regiment. [See: Aus Units - 22nd Corps]

The two remaining squadrons, "A" and "C" Squadrons formed the nucleus of the 4th Light Horse Regiment which rebuilt itself with a new "B" Squadron. The 4th Light Horse Regiment moved to take part in the defence of the Suez Canal. The work was hot and monotonous. The Regiment remained in the area until after the Battle of Romani where it was involved in work related to securing the lines of communication.

On 24 December 1916, the 4th Light Horse Regiment was brigaded with the Imperial Camel Corps and received the new name of the 3rd Camel Regiment. It served in this role until the break up of the Anzac Mounted Division in February 1917. A new division was created called the Imperial Mounted Division. Included in this Division were two Australian mounted brigades, the 3rd and 4th Light Horse Brigades. The latter Brigade, the 4th Light Horse Brigade was formed with the 3rd Camel Regiment, renamed the 4th Light Horse Regiment and the 11th and 12th Light Horse Regiments. The Imperial Mounted Division was renamed the Australian Mounted Division soon after.


Palestine

The 4th Light Horse Brigade was assigned to protect the rail line and lines of communications for the first months of 1917. They missed the First Battle of Gaza but were back at the front by 6 April 1917 and took part in the Second Battle of Gaza on 19 April 1917. The 4th Light Horse Regiment took no part in this battle as they were the Brigade reserve.

In its first major battle as the 4th Light Horse Regiment, the Regiment took part in the Battle of Beersheba. Fame for the Regiment was achieved when, in conjunction with the 12th Light Horse Regiment, charged and took Beersheba, thereby sealing victory on that day for the Allied forces. 


See: Men who possibly charged at Beersheba - 4th LHR


From this time onwards, for the next two months, the 4th Light Horse Regiment remained in continuous combat action until relieved for three months refit and training at Deir el Belah from early January 1918.

In early April 1918, the 4th Light Horse Regiment moved into the Jordan Valley and took part in the Es Salt Raid of 30 April – 4 May 1918 guarding the routes into Moab. This was a near disastrous situation where the Turkish forces almost cut off the Australian Mounted Division in the hills.


Megiddo

In a move that converted the Light Horse into full cavalry, the Australian Mounted Division was issued with swords during August and early September 1917. The Australian Mounted Division went to work training with swords and undertaking cavalry work.

On 19 September 1918 the Battle of Megiddo began. The infantry over ran the Turkish defensive trenches allowing the cavalry to debouch into the Turkish hinterland. The 4th Light Horse Regiment participated in the breakthrough which moved rapidly through the north of Palestine. At the end of the first week, it was obvious that the way to Damascus was open and so a second push occurred on the heels of the first assault. On 1 October 1918, Damascus was taken. There is contention as to whom was the first to reach inside the city. A 4th Light Horse Regiment patrol led by Sergeant Frank Organ claimed to be amongst the first allied troops to enter Damascus. However, while this patrol was entering, the 3rd Light Horse Brigade was receiving the surrender of the city at the Sarai.

After a rest in Damascus, the 4th Light Horse Regiment moved towards Homs when the Turks surrendered on 30 October 1918.


Return to Australia

After the conclusion of hostilities, the 4th Light Horse Regiment was awaited their return to Australia. During their wait, one of the saddest actions occurred for the Australian Lighthorsemen; they had to farewell their best friends, the horses. All the Light Horse unit horses' health was ascertained with the fit horses being transferred to the Indian Cavalry while those in poor condition were destroyed by the Veterinary units. On 8 March 1919 the 4th Light Horse Regiment embarked to Egypt. Here they remained to assist in suppressing the Egyptian Uprising. When the revolt collapsed, the 4th Light Horse Regiment embarked on the 15 June 1919 for the long voyage to Australia where the unit was disbanded. 


Commanding Officers

Lieutenant Colonel John Kealty Forsyth
Lieutenant Colonel Leonard Long
Lieutenant Colonel Murray William James Bourchier
Lieutenant Colonel George James Rankin


 Decorations earned by the 4th Light Horse Regiment

  • 4 DSO and 1 Bar - Distinguished Service Orders
  • 1 OBE - Order of the British Empire
  • 6 MC and 1 Bar - Military Crosses
  • 14 DCM - Distinguished Conduct Medals
  • 46 MM and 1 Bar - Military Medals
  • 1 MSM - Meritorious Service Medal
  • 31 MID - Mentioned in Despatches
  • 4 foreign awards 


Campaigns

Gallipoli

  • Anzac
  • Defence at Anzac
  • Suvla
  • Sari Bair
  • Gallipoli 1915-1916

Egypt

  • Defence of Egypt 1915-1917
Palestine
  • Third Battle of Gaza
  • Beersheba
  • El Mughar
  • Nebi Samwill
  • Jerusalem
  • Es Salt
  • Abu Tellul
  • Megiddo
  • Nablus
  • Palestine 1917-1918

France

  • Messines 1917
  • Ypres 1917
  • Broodseinde
  • Passchendaele
  • Lys
  • Kemmel
  • Marne 1918
  • Tardenois
  • France and Flanders 1916-1918


Casualties suffered by the 4th Light Horse Regiment

[Note: Gallipoli, Egypt, Sinai and Palestine only.]

  • 105 killed
  • 332 wounded


War Diary

The Australian War Memorial has put these on line and may be accessed here:

4th Light Horse Regiment War Diaries.


Embarkations:

The following list details all the embarkations in support of the 4th Light Horse Regiment, AIF, during the Great War. Each entry details the individual soldier's: rank on embarkation; full name; Declared age; last occupation held; last address as a civilian; enlistment Date; and, ultimate fate. Each man is linked to a brief military biography where ever possible. One interesting point is that many of the men listed in the embarkation roll for the 4th Light Horse Regiment ended up in a different unit altogether. This list details the men's starting point in the AIF.


Headquarters Section Wiltshire Group

Headquarters Section Anglo Egyptian Group 

Melbourne, Victoria on board HMAT A18 Wiltshire 19 October 1914

Melbourne, Victoria on board HMAT A25 Anglo Egyptian 19 October 1914

"A" Squadron Wiltshire Group

"A" Squadron Anglo Egyptian Group 

Melbourne, Victoria on board HMAT A18 Wiltshire 19 October 1914

Melbourne, Victoria on board HMAT A25 Anglo Egyptian 19 October 1914

"B" Squadron Wiltshire Group

"B" Squadron Anglo Egyptian Group 

Melbourne, Victoria on board HMAT A18 Wiltshire 19 October 1914

Melbourne, Victoria on board HMAT A25 Anglo Egyptian 19 October 1914

"C" Squadron Wiltshire Group

"C" Squadron Anglo Egyptian Group

Melbourne, Victoria on board HMAT A18 Wiltshire 19 October 1914

Melbourne, Victoria on board HMAT A25 Anglo Egyptian 19 October 1914

Machine Gun Section

Melbourne, Victoria on board HMAT A18 Wiltshire 19 October 1914

1st Reinforcement

Melbourne, Victoria on board HMAT A43 Barunga 22 December 1914

2nd Reinforcement

Melbourne, Victoria on board HMAT A13 Katuna 3 February 1915

3rd Reinforcement

Melbourne, Victoria on board HMAT A13 Katuna 3 February 1915

4th Reinforcement

Melbourne, Victoria on board HMAT A18 Wiltshire 13 April 1915

5th Reinforcement

Melbourne, Victoria on board HMAT A56 Palermo 7 May 1915

6th Reinforcement

Sydney, New South Wales on board HMAT A40 Ceramic 25 June 1915

7th Reinforcement

Melbourne, Victoria on board RMS Persia 10 August 1915

8th Reinforcement

Melbourne, Victoria on board HMAT A55 Kyarra 20 August 1915

9th Reinforcement

Melbourne, Victoria on board HMAT A20 Hororata 27 September 1915

10th Reinforcement

Melbourne, Victoria on board HMAT A70 Ballarat 9 September 1915

11th Reinforcement

Melbourne, Victoria on board HMAT A56 Palermo 29 October 1915

12th Reinforcement

Melbourne, Victoria on board HMAT A40 Ceramic 23 November 1915

13th Reinforcement

Sydney, New South Wales on board HMAT A54 Runic 20 January 1916

14th Reinforcement

Melbourne, Victoria on board HMAT A32 Themistocles 28 January 1916

15th Reinforcement - Katuna Group

15th Reinforcement - Anchises Group

Melbourne, Victoria on board HMAT A13 Katuna 9 March 1916

Melbourne, Victoria on board HMAT A68 Anchises 14 March 1916

16th Reinforcement

Melbourne, Victoria on board HMAT A53 Itria 18 April 1916

17th Reinforcement

Melbourne, Victoria on board HMAT A6 Clan Maccorquodale 6 May 1916

18th Reinforcement

Melbourne, Victoria on board RMS Mongolia 11 July 1916

19th Reinforcement - Mongolia Group

19th Reinforcement - Themistocles Group

Melbourne, Victoria on board RMS Mongolia 11 June 1916

Melbourne, Victoria on board HMAT A32 Themistocles 28 July 1916

20th Reinforcement - Malwa Group

20th Reinforcement - Port Sydney Group

Melbourne, Victoria on board RMS Malwa 25 July 1916

Melbourne, Victoria on board HMAT A15 Port Sydney 7 September 1916

21st Reinforcement - Clan Maccorquodale Group

21st Reinforcement - Nestor Group

21st Reinforcement - Hymettus Group

Melbourne, Victoria on board HMAT A6 Clan Maccorquodale 19 September 1916

Melbourne, Victoria on board HMAT A71 Nestor 29 September 1916

Melbourne, Victoria on board HMAT A1 Hymettus 12 September 1916

22nd Reinforcement - Clan Maccorquodale Group

22nd Reinforcement - Ulysses Group

Melbourne, Victoria on board HMAT A6 Clan Maccorquodale 19 September 1916

Melbourne, Victoria on board HMAT A38 Ulysses 25 October 1916

23rd Reinforcement

Melbourne, Victoria on board HMAT A34 Persic 22 December 1916

24th Reinforcement

Melbourne, Victoria on board HMAT A67 Orsova 6 December 1916

25th Reinforcement

Melbourne, Victoria on board RMS Omrah 17 January 1917

26th Reinforcement

Melbourne, Victoria on board HMAT A11 Ascanius 11 May 1917

27th Reinforcement - Suevic Group

27th Reinforcement - Boorara Group

Melbourne, Victoria on board HMAT A29 Suevic 21 June 1917

Melbourne, Victoria on board HMAT A42 Boorara 10 May 1917

28th Reinforcement - Port Lincoln Group

28th Reinforcement - Themistocles Group 

28th Reinforcement - Kyarra Group 

Melbourne, Victoria on board HMAT A17 Port Lincoln 22 June 1917

Melbourne, Victoria on board HMAT A32 Themistocles 4 August 1917

Melbourne, Victoria on board HMAT A55 Kyarra 7 September 1917

29th Reinforcement - Anchises Group

29th Reinforcement - Kyarra Group 

Sydney, New South Wales on board HMAT A68 Anchises 8 August 1917

Melbourne, Victoria on board HMAT A55 Kyarra 7 September 1917

30th Reinforcement - Commonwealth Group

30th Reinforcement - Nestor Group 

Melbourne, Victoria on board HMAT A73 Commonwealth 2 November 1917

Melbourne, Victoria on board HMAT A71 Nestor 21 November 1917

31st Reinforcement - Ormonde Group

31st Reinforcement - Ulysses Group 

Melbourne, Victoria on board RMS Ormonde 7 March 1918

Melbourne, Victoria on board HMAT A38 Ulysses 22 December 1917

32nd Reinforcement

Sydney, New South Wales on board HMAT A18 Wiltshire 2 February 1918

See: Troop transport ships for information and photographs about the various ships employed in transporting the troops to Egypt.


Acknowledgment: Many thanks to Steve Becker who has provided the raw material for the page Men who possibly charged at Beersheba - 4th LHR.


Further Reading:

4th Australian Light Horse Regiment, AIF

4th Australian Light Horse Regiment, Roll of Honour  

Battles where Australians fought, 1899-1920


Citation: 4th Australian Light Horse Regiment, AIF, Outline

Posted by Project Leader at 12:01 AM EAST
Updated: Monday, 18 January 2010 11:55 AM EAST
The Australian Light Horse, Militia and AIF, Mounted Rifle Tactics, Part 3, General Considerations
Topic: AIF - Lighthorse

The Australian Light Horse,

Militia and AIF

Mounted Rifle Tactics, Part 3, General Considerations


Cape Mounted Rifleman

[Drawing from 1904 by Richard Caton Woodville, 1856 - 1927.]


The following series is from an article called Mounted Rifle Tactics written in 1914 by a former regimental commander of the Cape Mounted Riflemen, Lieutenant-Colonel J. J. Collyer. His practical experience of active service within a mounted rifles formation gives strength to the theoretical work on this subject. It was the operation of the Cape Mounted Riflemen within South Africa that formed the inspiration for the theoretical foundations of the Australian Light Horse, and was especially influential in Victoria where it formed the cornerstone of mounted doctrine. 

Collyer, JJ, Mounted Rifle Tactics, Military Journal, April, 1915, pp. 265 - 305:


Mounted Rifle Tactics.

General Considerations

Definition - Principles underlying tactics - Definitions - Cavalry - Mounted infantry - Mounted riflemen - Mobility and fire effect - Subdivision of subject - The offensive spirit - The bayonet - Missions of mounted riflemen - General Langlois the Boer War - Von der Goltz - Summary.

Tactics, to use the definition contained in a former textbook and followed by the late Colonel Henderson, are "the methods by which a commander seeks to overwhelm an opponent when battle is joined," having previously endeavoured by his strategy to place his own forces, with the eventual combat in his mind, so that they may deal with the enemy with the best probability of defeating him.

Tactics, then, are battle methods, and may be grand tactics, or the art of generalship on a large scale as practised by independent commanders; minor tactics, or the detailed manoeuvring of all arras on the battlefield, which concern all officers of each arm; and, I would add, the special tactics of each arm, for, though the tactics of each arras must be based and developed on the understanding that close combination with other arms is the general mode of their application, they are decided and formed in view of advantages and limitations peculiar, either in degree or nature, to each branch of the combatant forces. Many principles are, of course, common to all tactics, and guide the tactical employment of all arms, but it is only with a constant attention to the advantages and limitations to which I have referred that each can be used with the greatest effect and on sound lines.

These chapters are not put forward with any idea of teaching those who are thoroughly competent judges of the tactics which we shall consider, but with the object of stating the principles which underlie those tactics and their application.

With the material at hand I think we may say that, properly handled, the mounted rifleman of South Africa should be the equal of any soldier of that arm in the world. We must, however, remember that many of the natural conditions which have been factors in the production of the practical frontier soldier of the past are vanishing, or at least diminishing, with a more general civilization, and that the South African citizen soldier of the immediate future will be far less versed in war conditions than his predecessors.

To teach him properly, it is not enough merely to say that such and such a line should be adopted, but he will ask the reason for each feature of the tactics he is called upon to employ, and why these have proved successful. It is therefore essential that those on whom the responsibility of training the citizen troops of South Africa is to rest in varying degree should be ready with arguments to force our points home, and convince the younger soldier that the methods which are recommended are universally admitted to be sound as the result of investigation and experience.

The tendency is to accept the result of successful tactics without taking the trouble to investigate the causes and circumstances which were contributory to the success. Climatic conditions - such as rain, mist, and wind - must be taken into consideration, and it must be decided to what extent such circumstances influenced the course of an action and its consequence. The temper of the troops on either side may have had great influence on the combat. Can we be sure that the troops will always display the same resolution or weakness? Stupidity on the part of an opponent may have had its effect on the good result of a venture. Would it have succeeded had the opposing commander met our attack with different and more effective counter-measures? In short, tactics must be critically analyzed, and then systematically taught on uniform principles, and this means care and thought and study. What follows represents an effort to analyze mounted rifle tactics, and to state the various principles which should govern them.

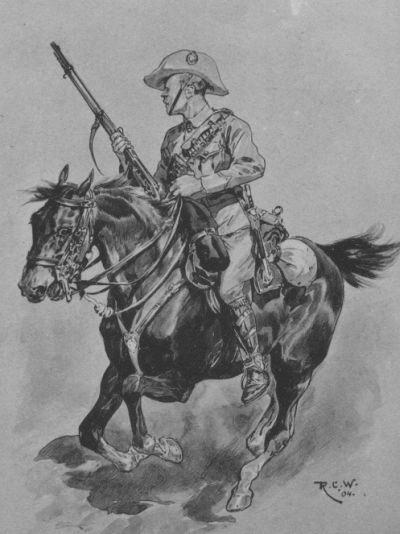
What is a mounted rifleman? He is not a cavalryman, and he is not a mounted infantryman.

Cavalry are mounted soldiers trained primarily for shock tactics-that is to say, for the charge with an arme blanche. They are also taught fire tactics, but the main tactical action of cavalry, for which the most careful preparation of men and horses alike is necessary, and to which by far the larger portion of their period of training is devoted, is the charge with the lance or sword.

Mounted infantry are foot soldiers mounted on horses to give them increased mobility, which is, and always will be, strictly limited by the fact that they are not thoroughly trained horsemen. The terms of mounted riflemen and mounted infantry are far too loosely applied by military writers, but a mounted rifleman should never allow any one to confuse his arm with mounted infantry. Civilly, but firmly, he should point out that he is the former, and not the latter, for to regard himself as a mounted infantryman is to lose sight of the sole reason of his arm being regarded as distinct from any other.

A mounted rifleman is a horse soldier, enlisted and trained as a mounted man, to whom expert horsemanship is as vital as it is to a cavalryman. His horse is not trained to the perfection of regulated and controlled pace, which is essential to the cavalry (being indispensable to the effective delivery of the charge), and creed only be a well-broken, active, strong animal, which can be led without any difficulty. His horsemanship and horsemastership, however, must be every whit as finished and sound as that of the cavalryman; his weapon is the rifle, and he fights on foot.

Broadly stated, his special advantage is the mobility conferred by expert horsemanship and an active, well-controlled mount. At the same time this may fairly be regarded as his main tactical limitation, for the safety of the horses, which supply his great advantage, and the necessity for always thinking of them in action with the object of maintaining mobility, are frequently serious problems, which govern the whole question of the tactical employment of the arm.

To gauge accurately the potentialities of mounted rifle tactics, the performance of good horsemen, such as the American mounted troops in the Civil. War, and the Republican forces in 1899-1902, should be studied and criticised. I say American mounted troops advisedly, and not cavalry, for, with the exception of a relatively small number, they were not cavalry as I am using the term, nor do they ever meet cavalry in action.

General De Wet says "a Boer without his horse is half a man"; the tactical value of mounted riflemen whenever they are in the same plight (that is to say, when their horses have been taken from them) bears exactly the same relation to their proper fighting value - it is at least halved.

Mobility and fire effect sum up the essence of mounted rifle tactics. I would always place the former before the latter, as the two are inseparable, and the fact that this is so is sometimes overlooked in the excitement and interest aroused by the fire fight. It will be found that if mobility is always insisted upon, many doubts as to the right course to pursue will vanish. The action of mounted riflemen, in whatever circumstances they may find themselves in war, must always take full advantage of their great mobility, either in actually using it or retaining the power of doing so, or fall short of what might be achieved.

I propose to consider in subsequent chapters:-  Attack, defence, protection, night work, and reconnaissance, when we will go into details more fully. Here it will suffice to say that having, by our training, assured mobility by producing confident horsemen; active, bold, and well-trained horses; and a good system of caring for them; we should never forget the fact that mobility is all that distinguishes a mounted rifleman from an infantryman, and that it should therefore be the constant endeavour of a mounted rifleman to make the best use of it.

There is one most important matter to which I should like to refer. Offensive action is essential to effective tactics, and a desire for the offensive must animate any force which is to be successful in war. We may all have our views as to the value of shock action by cavalry in these days, but we must all admit that the cavalry spirit is the expression of the spirit of war; "the first-born son of war," Clausewitz calls it. It does not matter whether two hostile armies face each other equipped with every modern warlike appliance that human ingenuity has devised, or whether two men propose to settle a quarrel with nature's weapons; let one general or adversary realize that his opponent is mainly concerned to save his troops from slaughter or his skin from damage, and the former will at once take liberties, and, ignoring chances of retaliation by the latter, will defeat him. The spirit of the offensive is necessary to every combatant arm.

The "march, fight, and pursue" of Napoleon, then "move quickly, strike vigorously, and secure the fruits of victory" of Stonewall Jackson, mean, if they mean anything, that it is the force which is inspired by the desire to strike its opponents, and not that which is chiefly concerned to avoid being struck, which wins battles. As Field Service Regulations say, "The action of a force which is content with warding off the enemy's blows is not considered as 'an aspect of the battle." The artillery of all armies has over and again manifested its offensive and self-sacrificing spirit; the cavalry lives for the charge; the infantry, after establishing a dominant fire, looks to the assault with the bayonet.

"What," ask critics, "is the equivalent of this offensive spirit in other arms, this desire to close with the enemy and do him harm, in the final object of tactical action by mounted riflemen? Is there not a danger that, in the absence of an understanding that close grips are aimed at, the offensive spirit, which we all admit to be indispensable to any efficient combatant arm, may be absent in the case of mounted riflemen?"

This question is put, and has been put to me, and I think that those of us who have experience of mounted rifle tactics will admit that the danger exists, and that the horse may become liable to be regarded more as a means of moving rapidly to another position, if that occupied becomes uncomfortable, than of quickly pushing forward and endeavouring to get to close range.

It has been suggested that stress laid on the use of the bayonet may supply an incentive to offensive action. I do not agree with this. We find an addition to the new South African Mounted Riflemen Training to the following effect -

"Though the use of the bayonet to the extent to which it is employed by infantry will probably be extremely rare in the case of mounted riflemen, the latter should be expert in its use on foot. For example, in such work as small expeditions by night, for which the mobility of the mounted rifleman specially suits him, the bayonet will be of the greatest value, and, as it is a weapon carried by mounted riflemen, they should be expert in handling it."

That the mounted rifleman should be expert in the use of his bayonet must be insisted upon, but that the weapon will be used, except very rarely, to the extent of delivering bayonet charges on foot on a large scale, is most unlikely. Its use in defence I will touch upon in its place. If the hostile force is composed of mounted riflemen, it will hardly wait to be charged, and if it is infantry, it can probably be better dealt with by fire at close range. Again, a force of mounted riflemen, which becomes committed to a bayonet charge dismounted, is engaged on work which will seriously impair its power of pursuit, which must be retained if the fruits of victory are to be assured. It will probably involve making the horses immobile (i.e., with less than one man to four horses), which should only be done very grudgingly, and in exceptional circumstances, as it means loss of mobility. Our own regulations say that the deliberate form of attack will seldom be undertaken by mounted riflemen, and even the British Yeomanry and Mounted Rifle Training, 1912 (which, it is well to remember, has to consider European conditions of warfare), says nothing of the bayonet in the deliberate attack. The bayonet, therefore, is not enough to produce the offensive spirit in mounted riflemen, though it may contribute to it.

What are the main tactical duties of mounted riflemen? South African Mounted Riflemen Training says that the chief duties of the arm are as follows:

To seize promptly for dismounted action successive important positions from which to deliver an effective fire.

To reinforce rapidly at a critical time other arms which may be overmatched, or assist them in making sure of success.

To carry out enveloping movements.

Reconnaissance and scouting.

To form rallying points for cavalry in the case of a reverse.

Pursuits.

To cover retreats of other arms during a retirement.

All these demand offensive action, so that the tactical employment of mounted riflemen will almost invariably be offensive.

Why, then, does this danger exist? I think it is because the vital importance of keeping the horses in a more or less constant position of handiness to their dismounted riders in action is insufficiently recognised. I have often seen horses of mounted riflemen engaged in dismounted fire action in war remain for hours in the same spot, without communication with the firing line, which had moved out of sight and out of the ken of those who were in charge of the horses. I have also constantly noticed on peace training with citizen forces that the horses are similarly left, and brought up hurriedly and in confusion, because the situation suddenly demanded their presence.

The following extract from the Memorandum on Training, 1911-12, of the Australian Military Forces is of interest here:

"The disposal of led horses was often faulty, and attempts were not made to keep the horses as close up to the dismounted men as possible, taking advantage of cover not necessarily immediately in rear of the dismounted troops; long advances were made on foot, resulting in a loss of mobility."

If the close and constant association of mobility and fire is rigidly insisted upon, the position of led horses will become variable as the fight develops, almost automatically, and the knowledge that the horses are, as a matter of course, as near as possible to their riders in action will go far to counteract the desire to get back to them, in the fear that they may have been left too far behind, which tends to destroy aggressive action.

Fire from the saddle, and the development of what is called, wrongly, as I believe, the “mounted rifleman charge," to both of which I shall refer later, will tend in the same beneficial direction, and, finally, as it is well put in the British Yeomanry and Mounted Rifle Training, 1912:

“Commanders must endeavour to foster in their men an aggressive spirit, and they must teach them that a determined enemy will not be beaten or driven off his ground merely by long range fire."

In Lessons from Two Recent Wars, a book translated into English by the General Staff in 1909, General H. Langlois says in his introduction:

“The false doctrines which sprang up after the Anglo-Boer War have deeply affected our (the French) officers. Our officers are beginning to lose the spirit of the offensive."

Here is the expression of the fear that the tactics of mounted riflemen may tend to the defensive and to the detriment of bold and vigorous action. General Langlois adds, however, in criticising the action of Nicholson's Nek, which was settled by the rifle fire of dismounted mounted riflemen, that success was achieved "because a continuous fire covered the advance of a rush, and, finally, and above all, because that fire was extremely accurate." He goes on to say, with reference to this attack, which was practically frontal, " an attack can be made, and successfully, given a superiority of fire. This superiority of fire can be gained not only by a superior number of rifles, but also by good shooting and by determination." This is the secret of offensive action - determination. Though the tactical action of the mounted rifleman and his weapon are not, when compared with the equivalents in the case of other arms, eloquent in themselves of offence, I see no reason why consistent teaching of the need of the offensive spirit should not produce it in the arm, and why the teaching should not be reflected in vigorous action on the battlefield.

As von der Goltz says, "The elements of the offensive are rapidity and vigour." The rapidity is in the power of the mounted rifleman, and surely his training can be such that he shall be vigorous.

In conclusion, we may state generally that the tactics of mounted riflemen depend for their successful application on mobility conferred by horsemanship, which enables them to make- up for their numerical inferiority of rifles in the firing line by surprising the enemy and by the rapid seizure of the positions; on accurate shooting; and, as in the case of every combatant arm, determination to adopt vigorous and offensive action.


Previous: Part 2, Contents

Next: Part 4, The Attack 


Further Reading:

The Light Horse

Australian Light Horse Militia

Militia 1899 - 1920

Battles where Australians fought, 1899-1920


Citation: The Australian Light Horse, Militia and AIF, Mounted Rifle Tactics, Part 3, General Considerations

Posted by Project Leader at 12:01 AM EAST
Updated: Thursday, 10 December 2009 9:02 AM EAST

Newer | Latest | Older

Full Site Index


powered by FreeFind
Let us hear your story: You can tell your story, make a comment or ask for help on our forum.

Desert Column Forum

A note on copyright

The Australian Light Horse Studies Centre is a not for profit and non profit group whose sole aim is to write the early history of the Australian Light Horse from 1900 - 1920. It is privately funded and the information is provided by the individuals within the group and while permission for the use of the material has been given for this site for these items by various donors, the residual and actual copyright for these items, should there be any, resides exclusively with the donors. The information on this site is freely available for private research use only and if used as such, should be appropriately acknowledged. To assist in this process, each item has a citation attached at the bottom for referencing purposes.

Please Note: No express or implied permission is given for commercial use of the information contained within this site.

A note to copyright holders

The Australian Light Horse Studies Centre has made every endeavour to contact copyright holders of material digitised for this blog and website and where appropriate, permission is still being sought for these items. Where replies were not received, or where the copyright owner has not been able to be traced, or where the permission is still being sought, the Australian Light Horse Studies Centre has decided, in good faith, to proceed with digitisation and publication. Australian Light Horse Studies Centre would be happy to hear from copyright owners at any time to discuss usage of this item.

Contact

Australian Light Horse Studies Centre

eXTReMe Tracker