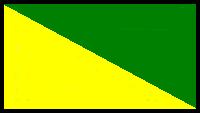
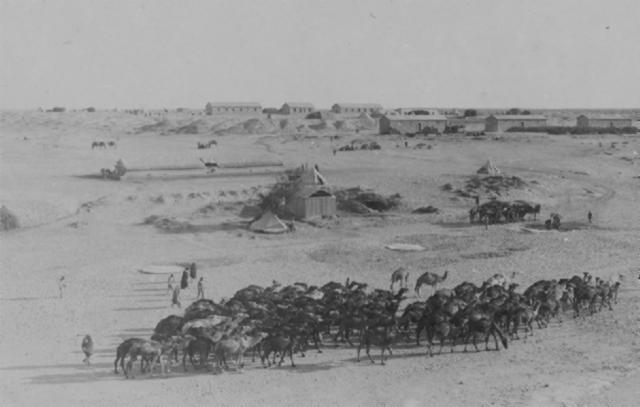
The Roll of Honour contains the names of all the men enrolled within the 1st Light Horse Brigade known to have served and lost their lives during the Great War.
Rupert Clarence ACKLAND, Died of Wounds, 10 January 1917, 2 Australian Light Horse.
William Henry ADAMS, Killed in Action, 14 May 1915, 2 Australian Light Horse.
Benjamin David ALEXANDER, Killed in Action, 9 August 1916, 2 Australian Light Horse.
Charles Beresford ALEXANDER, Died of Disease, 7 April 1915, 1 Australian Light Horse.
James Cyril ALEXANDER, Killed in Action, 14 May 1915, 2 Australian Light Horse.
Francis Ralph ALLDRITT, Killed in Action, 18 May 1915, 1 Australian Light Horse.
Frederick Charles ALLEN, Killed in Action, 11 November 1915, 2 Australian Light Horse.
Arthur Ernest ANDERSON, Killed in Action, 15 May 1915, 1 Australian Light Horse.
Alfred James ANGRAVE, Died of Wounds, 3 June 1916, 2 Australian Light Horse.
Matthew ANGUS, Killed in Action, 9 January 1917, 2 Australian Light Horse.
Frank ANSELL, Killed in Action, 31 October 1917, 2 Australian Light Horse.
Arthur Henry ANTHONY, Killed in Action, 9 January 1917, 1 Australian Light Horse.
Lindsay Lee ARCHIBALD, Killed in Action, 11 April 1918, 3 Australian Light Horse.
Robert ARCHIBALD, Died of Disease, 3 February 1916, 3 Australian Light Horse.
Leslie Raymond ARTHUR, Killed in Action, 7 August 1915, 3 Australian Light Horse.
James Hamilton AYLIFFE, Died of Wounds, 7 November 1917, 3 Australian Light Horse.
John Arthur Alexander BAILEY, Killed in Action, 28 May 1915, 3 Australian Light Horse.
Roy BAILEY, Killed in Action, 9 January 1917, 2 Australian Light Horse.
Vivian Murray BARBER, Died of Accident, 1 November 1916, 2 Australian Light Horse.
David J. BARCLAY, Killed in Action, 4 August 1916, 2 Australian Light Horse.
John Percy BARNES, Killed in Action, 9 January 1917, 2 Australian Light Horse.
Frank Launsley BARNS, Died of Disease, 22 October 1918, 2 Australian Light Horse.
Harold Joseph BARRY, Killed in Action, 7 August 1915, 2 Australian Light Horse.
Henry Dundas BASHFIELD, Died of Wounds, 24 April 1917, 2 Australian Light Horse.
Eric Charles BATTYE, Killed in Action, 16 July 1918, 2 Australian Light Horse.
Murray Charles BAX, Died of Wounds, 10 January 1917, 2 Australian Light Horse.
Carl BECK, Killed in Action, 31 October 1917, 2 Australian Light Horse.
Eric Chalcroft BELL, Killed in Action, 19 May 1915, 2 Australian Light Horse.
William John BELL, Died of Wounds, 25 May 1918, 2 Australian Light Horse.
Leonard Cornelius BEMOLD, Died of Accident, 9 February 1916, 2 Australian Light Horse.
Charles Pryor BENNETT, Killed in Action, 9 January 1917, 2 Australian Light Horse.
Henry Glansville BERNIE, Died of Disease, 21 October 1918, 2 Australian Light Horse.
Henry Granville BERNIE, Died of Disease, 21 October 1918, 2 Australian Light Horse.
James Albert BEYERS, Killed in Action, 14 May 1915, 2 Australian Light Horse.
Owen Ernest Hugh BINGHAM, Killed in Action, 4 August 1916, 2 Australian Light Horse.
Thomas Daniel BLAND, Died of Wounds, 9 May 1917, 2 Australian Light Horse.
William Belworthy BLUE, Died of Wounds, 13 October 1915, 2 Australian Light Horse.
Mervyn Stafford BLYTH, Killed in Action, 23 December 1916, 2 Australian Light Horse.
Allen Christopher BOLT, Killed in Action, 9 January 1917, 2 Australian Light Horse.
Charles Joseph BOND, Died of Wounds, 30 May 1915, 2 Australian Light Horse.
Frederick Anthony BONE, Killed in Action, 29 May 1915, 2 Australian Light Horse.
Errol Roland BOUGHTON, Killed in Action, 9 August 1916, 1 Australian Light Horse.
John Richard BOUNDEY, Killed in Action, 31 October 1917, 1 Australian Light Horse.
John Joseph BOURKE, Killed in Action, 7 August 1915, 1 Australian Light Horse Field Ambulance Australian Army Medical Corps.
Valentine Fenell BOWLER, Died of Wounds, 7 August 1915, 1 Australian Light Horse.
Stanley Ernest BOWYER, Killed in Action, 9 January 1917, 1 Australian Light Horse Field Ambulance Australian Army Medical Corps.
John James BOYLE, Died of Wounds, 12 January 1917, 1 Australian Light Horse.
Halcombe Ferrier BROCK, Killed in Action, 2 June 1915, 1 Australian Light Horse.
Louis Shannon BROOK, Killed in Action, 28 September 1918, 1 Australian Light Horse.
Joseph BROWN, Killed in Action, 4 June 1915, 1 Australian Light Horse.
Roy William BROWN, Killed in Action, 9 January 1917, 1 Australian Light Horse.
William Charles BROWN, Died of Disease, 4 November 1918, 1 Australian Light Horse.
Thomas McDonald BROWNE, Died of Wounds, 20 April 1917, 1 Australian Light Horse.
William Edward Harold BUNKUM, Killed in Action, 14 July 1918, 1 Australian Light Horse.
Alan Cecil BURBURY, Died of Disease, 30 April 1919, 1 Australian Light Horse.
Joseph BURGE, Killed in Action, 7 August 1915, 1 Australian Light Horse Field Ambulance Australian Army Medical Corps.
Frederick BURGESS, Died of Wounds, 20 April 1918, 1 Australian Light Horse.
Frederick George BURNS, Killed in Action, 3 November 1917, 1 Australian Light Horse.
Harold Alfred BURRILL, Killed in Action, 4 August 1916, 1 Australian Light Horse Field Ambulance Australian Army Medical Corps.
Albert Arthur BURTON, Killed in Action, 14 May 1915, 1 Australian Light Horse.
Henry Edward BUTLER, Died of Wounds, 9 January 1917, 1 Australian Light Horse Field Ambulance Australian Army Medical Corps.
Michael William CAIN, Died of Disease, 18 October 1918, 1 Australian Light Horse.
William Archibald CALDWELL, Killed in Action, 14 July 1918, 1 Australian Light Horse.
Thomas CALLAGHAN, Killed in Action, 19 April 1917, 1 Australian Light Horse.
Clifford CAMERON, Killed in Action, 9 January 1917, 3 Australian Light Horse.
Douglas Dunmore CAMPBELL, Killed in Action, 4 August 1916, 3 Australian Light Horse.
William McLellan CAMPBELL, Killed in Action, 3 November 1917, 3 Australian Light Horse.
Ernest William CAPP, Died of Disease, 28 April 1916, 3 Australian Light Horse.
William CARL, Killed in Action, 7 August 1915, 3 Australian Light Horse.
Frank CARNEY, Killed in Action, 7 August 1915, 3 Australian Light Horse.
Frank CARTWRIGHT, Died of Disease, 18 April 1915, 3 Australian Light Horse.
Arthur Frank CHAMBERS, Died of Wounds, 20 April 1917, 3 Australian Light Horse.
James Artemus CHAMBERS, Killed in Action, 16 July 1918, 3 Australian Light Horse.
Robert Laing CHAMBERS, Killed in Action, 18 May 1915, 3 Australian Light Horse.
Raymond William CHAPPELL, Killed in Action, 13 July 1918, 1 Light Horse Brigade Headquarters.
Alexander Caird CHEAPE, Killed in Action, 1 July 1915, 3 Australian Light Horse.
George CHENHALL, Died of Wounds, 10 June 1916, 3 Australian Light Horse.
Henry James CHIVERS, Died of Disease, 11 December 1918, 3 Australian Light Horse.
Hugh Dufaur CLARK, Killed in Action, 18 May 1915, 3 Australian Light Horse.
Frank Railton CLINCH, Killed in Action, 4 August 1916, 3 Australian Light Horse.
William Crellin CLOVER, Died of Disease, 23 June 1917, 3 Australian Light Horse.
Percy Phillip COLLETT, Killed in Action, 11 April 1918, 3 Australian Light Horse.
Joseph COLMO, Killed in Action, 26 March 1917, 3 Australian Light Horse.
John Joseph CONDELL, Killed in Action, 7 August 1915, 3 Australian Light Horse.
William CONEY, Killed in Action, 14 July 1918, 3 Australian Light Horse.
William James COOK, Killed in Action, 13 August 1917, 3 Australian Light Horse.
Robert COOPER, Killed in Action, 27 March 1918, 3 Australian Light Horse.
Lloyd Alexander CORLISS, Died of Wounds, 17 November 1917, 3 Australian Light Horse.
George Frederick CORNICK, Killed in Action, 14 July 1918, 3 Australian Light Horse.
Leslie James CORRIGAN, Died of Disease, 24 October 1918, 3 Australian Light Horse.
Walter Herbert COURTMAN, Killed in Action, 3 August 1916, 3 Australian Light Horse.
John COWIE, Killed in Action, 14 July 1918, 1 Light Horse Brigade Headquarters.
Errol Claude COWLEY, Killed in Action, 9 January 1917, 3 Australian Light Horse.
George Cecil CRAKE, Killed in Action, 14 May 1915, 3 Australian Light Horse.
Henry Anthony CREED, Died of Wounds, 25 December 1915, 3 Australian Light Horse.
Samuel CROWTHER, Killed in Action, 14 May 1915, 3 Australian Light Horse.
John Francis CROZIER, Died of Wounds, 11 January 1917, 3 Australian Light Horse.
Robert James CROZIER, Killed in Action, 11 April 1918, 2 Australian Light Horse.
Peter George CRUSE, Died of Disease, 15 August 1915, 2 Australian Light Horse.
Thomas Andrew CUNNINGHAM, Killed in Action, 4 August 1916, 2 Australian Light Horse.
Roland CURLIS, Killed in Action, 19 May 1915, 2 Australian Light Horse.
Thomas DALE, Killed in Action, 4 August 1916, 2 Australian Light Horse.
Walter Edmund DANIEL, Killed in Action, 11 April 1918, 2 Australian Light Horse.
Clarence DAVIDSON, Died of Wounds, 26 June 1915, 2 Australian Light Horse.
Albert Alfred DAVIES, Died of Wounds, 25 April 1917, 2 Australian Light Horse.
William John DAVIES, Died of Wounds, 22 December 1917, 2 Australian Light Horse.
Albert Edward DAWSON, Died of Wounds, 4 November 1917, 2 Australian Light Horse.
John William DAWSON, Died of Wounds, 9 January 1917, 2 Australian Light Horse.
Robert Raymond DAWSON, Killed in Action, 31 October 1917, 2 Australian Light Horse.
Andrew DAY, as a Prisoner of War, Died in Captivity, 11 February 1917, 2 Australian Light Horse.
Roy Francis DE ALEVION, Died of Disease, 5 November 1918, 2 Australian Light Horse.
Philip Champion DE CRESPIGNY, Killed in Action, 14 July 1918, 2 Australian Light Horse.
Edgar Frederick DE LAUTOUR, Killed in Action, 23 May 1915, 2 Australian Light Horse.
Joan Maric Cornelius DE RAADT, Died of Disease, 17 October 1915, 2 Australian Light Horse.
Arthur Stewart DEAN, Killed in Action, 7 August 1915, 2 Australian Light Horse.
John Herbert DEARMAN, Died of Wounds, 31 October 1917, 2 Australian Light Horse.
Albert Hellmuth DeBERG, Killed in Action, 14 July 1918, 2 Australian Light Horse.
Victor DENTON, Died of Wounds, 31 May 1915, 2 Australian Light Horse.
Leonard DIMMICK, Died of Disease, 3 March 1916, 2 Australian Light Horse.
Thomas Stevenson DINSDALE, Died of Wounds, 1 November 1917, 2 Australian Light Horse.
William DONELLAN, Killed in Action, 9 January 1917, 2 Australian Light Horse.
Eric Sheen DOWLING, Died of Wounds, 18 November 1917, 2 Australian Light Horse.
Henry Cecil DRADER, Killed in Action, 3 November 1917, 2 Australian Light Horse.
George Russel DRYSDALE, Died of Disease, 8 April 1917, 2 Australian Light Horse.
John DUELL, Killed in Action, 6 August 1916, 2 Australian Light Horse.
Archibald Stewart DUNCAN, Died of Wounds, 11 December 1917, 2 Australian Light Horse.
Roy Herbert DUNHAM, Died of Wounds, 16 July 1918, 2 Australian Light Horse.
George Thomas DURHAM, Killed in Action, 31 October 1917, 2 Australian Light Horse.
John Francis DWYER, Killed in Action, 7 August 1915, 2 Australian Light Horse.
Leonard Ridgeway EASTHER, Killed in Action, 4 August 1916, 2 Australian Light Horse.
Francis Paul EASTON, Died of Disease, 19 November 1918, 2 Australian Light Horse.
Athol Bert EATHER, Killed in Action, 7 August 1915, 2 Australian Light Horse.
Francis William EDWARDS, Killed in Action, 29 May 1915, 2 Australian Light Horse.
George Peacock EDWARDS, Died of Disease, 20 November 1916, 2 Australian Light Horse.
William James Munro EDWARDS, Killed in Action, 3 November 1917, 1 Australian Light Horse.
John Luscombe ELLERTON, Killed in Action, 14 July 1918, 1 Australian Light Horse.
William ELLIOTT, Died of Wounds, 17 July 1918, 1 Australian Light Horse.
Herbert John ELLIS, Died of Disease, 7 August 1915, 1 Australian Light Horse.
Herbert Victor Valentine ELLIS, Died of Disease, 22 October 1918, 1 Australian Light Horse.
James Edmund Rowell EMERSON, Died of Wounds, 11 April 1918, 1 Australian Light Horse.
David EVANS, Killed in Action, 14 May 1915, 1 Australian Light Horse.
Arthur Clyde FAINT, Died of Wounds, 4 November 1917, 1 Australian Light Horse.
Bert FAIRCLOTH, Killed in Action, 14 July 1918, 1 Australian Light Horse.
John Tayler FARGHER, Died of Drowning, 13 February 1919, 1 Australian Light Horse.
Phillip Charles FARMER, Died of Wounds, 9 June 1917, 1 Australian Light Horse.
Gordon Silas FIDLER, Died of Wounds, 19 August 1916, 1 Australian Light Horse.
Percy Walter FINNIS, Killed in Action, 4 August 1916, 1 Australian Light Horse.
Ernest James FIRTH, Killed in Action, 3 November 1917, 1 Australian Light Horse Field Ambulance Australian Army Medical Corps.
Charles Henry FISHER, Died of Wounds, 9 January 1917, 1 Australian Light Horse.
John Byers FISHER, Killed in Action, 18 May 1915, 1 Australian Light Horse.
Francis Gerald FITZGERALD, Died of Disease, 31 October 1918, 1 Australian Light Horse.
William Wallace FLOOD, Died of Disease, 18 August 1918, 1 Australian Light Horse.
Jack FOGWELL, Died of Wounds, 3 November 1917, 1 Australian Light Horse.
Norman Victor FOOTE, Died of Disease, 7 April 1915, 1 Australian Light Horse.
George Samuel FOSKETT, Died of Wounds, 20 June 1918, 1 Australian Light Horse.
Lionel Rupert FOWLER, Died of Disease, 12 May 1915, 1 Australian Light Horse.
William George FOX, Killed in Action, 11 November 1917, 1 Australian Light Horse.
Roy FRANCIS, Died of Disease, 19 October 1918, 1 Australian Light Horse.
George FRANK, Died of Wounds, 10 June 1915, 1 Australian Light Horse.
Wilfred FRENCH, Killed in Action, 1 June 1916, 1 Australian Light Horse.
James GALL, Died of Disease, 31 July 1915, 1 Australian Light Horse.
William John GARDNER, Died of Wounds, 9 May 1917, 1 Australian Light Horse Field Ambulance Australian Army Medical Corps.
John Stephen GARRETT, Died of Wounds, 6 July 1915, 1 Australian Light Horse.
Lawrence Patrick GARVEY, Killed in Action, 14 May 1915, 1 Australian Light Horse.
James Robinson GEDDES, Killed in Action, 14 July 1918, 1 Australian Light Horse Field Ambulance Australian Army Medical Corps.
Cornelius GEILVOET, Died of Wounds, 24 May 1915, 1 Australian Light Horse.
Arthur Michael Creagh GEOGHEGAN, Killed in Action, 15 September 1915, 1 Australian Light Horse.
Samuel Gilbert GIBBS, Killed in Action, 21 July 1916, 1 Australian Light Horse.
Charles William GIBSON, Killed in Action, 7 August 1915, 1 Australian Light Horse.
Joseph George Lodwick GILBERT, Died of Wounds, 12 November 1917, 1 Australian Light Horse.
Thomas John GILLINGS, Died of Disease, 1 May 1918, 1 Australian Light Horse.
Bartholomew James GOGGINS, Died of Wounds, 9 August 1916, 1 Australian Light Horse.
Thomas Lowden GOODALL, Died of Wounds, 14 May 1915, 1 Australian Light Horse.
Gordon Powell GOODE, Died of Disease, 17 October 1915, 1 Australian Light Horse.
S. Edward GORDON, Died of Wounds, 20 July 1915, 1 Australian Light Horse.
Thomas Rankin GORDON, Died of Wounds, 16 November 1917, 1 Australian Light Horse.
Albert Chrisopher Julius GRAFFUNDER, Killed in Action, 14 May 1915, 1 Australian Light Horse.
Dugald Maxwell Lockwood GRAHAM, Killed in Action, 14 May 1915, 3 Australian Light Horse.
William James GRAHAM, Killed in Action, 4 August 1916, 3 Australian Light Horse.
Frederick Wallace GRAN, Killed in Action, 14 July 1918, 3 Australian Light Horse.
Cecil Gordon GRAY-BUCHANAN, Killed in Action, 29 May 1915, 3 Australian Light Horse.
Martin GREEN, Died of Disease, 20 October 1918, 3 Australian Light Horse.
Thaddeus Victor GREEN, Died of Wounds, 17 November 1917, 3 Australian Light Horse.
Charles James GRIEVE, Died of Wounds, 16 July 1918, 3 Australian Light Horse.
Frederick William Ernest GUILLE, Died of Accident, 25 April 1916, 3 Australian Light Horse.
Charles Edward GUPPY, Died of Wounds, 6 August 1916, 3 Australian Light Horse.
Frederick Alexander GUTHRIE, Killed in Action, 3 November 1917, 3 Australian Light Horse.
Claude GUYER, Died of Wounds, 4 November 1917, 3 Australian Light Horse.
Thomas Kenny GWYNNE, Died of Disease, 2 November 1918, 3 Australian Light Horse.
Thomas William HAGLEY, Died of Wounds, 20 April 1918, 3 Australian Light Horse.
Charles Wolseley HAIG, Died of Disease, 6 November 1918, 3 Australian Light Horse.
Arthur John HAILSTONE, Killed in Action, 7 August 1915, 3 Australian Light Horse.
Henry HAMMOND, Killed in Action, 7 August 1915, 3 Australian Light Horse.
Stuart Samson HAMP, Killed in Action, 7 August 1915, 3 Australian Light Horse.
William John HANDLEY, Died of Wounds, 16 July 1918, 3 Australian Light Horse.
Norman HANSLOW, Died of Wounds, 22 April 1917, 3 Australian Light Horse.
Karl Fletcher HARGRAVE, Killed in Action, 31 October 1917, 3 Australian Light Horse.
Maurice Atherton HARTE, Died of Disease, 3 January 1916, 3 Australian Light Horse.
Angus HASTINGS, Died of Disease, 21 November 1918, 3 Australian Light Horse.
Arthur HATELEY, Died of Disease, 28 April 1916, 3 Australian Light Horse.
Digby Hamilton HAY, Died of Disease, 4 February 1919, 3 Australian Light Horse.
James Alexander HAY, Died of Disease, 27 May 1915, 3 Australian Light Horse.
Monaughan Raymond HAYES, Killed in Action, 31 July 1915, 3 Australian Light Horse.
Henry HEATH, Killed in Action, 14 July 1918, 3 Australian Light Horse.
David Birrell HERD, Died of Accident, 22 August 1916, 3 Australian Light Horse.
Bernard HERRMANN, Died of Wounds, 26 August 1916, 3 Australian Light Horse.
Frederick Anthony Allan HICKS, Died of Wounds, 23 September 1915, 3 Australian Light Horse.
Thomas William HILDEBRAND, Killed in Action, 14 July 1918, 3 Australian Light Horse.
Oliver Ashover HIND, Killed in Action, 3 November 1917, 3 Australian Light Horse.
Herbert Gerald HINTON, Killed in Action, 7 August 1915, 1 Light Horse Brigade Headquarters.
Arthur Ernest HOBBS, Died of Disease, 24 October 1918, 3 Australian Light Horse.
Raymond Robert George HOBDEN, Killed in Action, 18 May 1915, 3 Australian Light Horse.
Thomas Roydon HOGARTH, Died of Wounds, 1 November 1917, 3 Australian Light Horse.
George HOLDEN, Died of Disease, 17 October 1918, 3 Australian Light Horse.
Arthur Ernest HOLT, Died of Disease, 27 September 1915, 3 Australian Light Horse.
Christopher Leslie HOUGH, Killed in Action, 18 August 1916, 2 Australian Light Horse.
Edmund John HOWARD, Killed in Action, 4 August 1916, 2 Australian Light Horse.
Patrick Ravenhill HULBERT, Killed in Action, 18 July 1915, 2 Australian Light Horse.
Frederick William HUNT, Killed in Action, 18 May 1915, 2 Australian Light Horse.
Thomas Arthur HUTCHINS, Killed in Action, 14 May 1915, 2 Australian Light Horse.
Allan Stokeham HUTHWAITE, Died of Wounds, 5 November 1917, 2 Australian Light Horse.
Fergus Stanley IBBOTT, Died of Wounds, 6 August 1916, 2 Australian Light Horse.
Fred INGLIS, Killed in Action, 4 August 1916, 2 Australian Light Horse.
Victor Carlton IRISH, Killed in Action, 14 July 1918, 2 Australian Light Horse.
William ISTED, Died of Wounds, 16 August 1915, 2 Australian Light Horse.
Clement Belmore JACKA, Died of Accident, 16 October 1918, 2 Australian Light Horse.
Harry Allan JACOB, Died of Accident, 9 November 1918, 2 Australian Light Horse.
Sydney Arthur JACOBS, Died of Wounds, 1 June 1916, 2 Australian Light Horse.
John JAMISON, Died of Disease, 18 August 1915, 2 Australian Light Horse.
Christian JEPSON, Killed in Action, 4 August 1916, 2 Australian Light Horse.
Sydney Ellis Clare JOHNSON, Killed in Action, 3 November 1917, 2 Australian Light Horse.
Arthur John JOHNSTON, Died of Disease, 7 June 1916, 2 Australian Light Horse.
George Richard Somerville JOHNSTON, Died of Wounds, 10 November 1915, 2 Australian Light Horse.
Osborne William JOHNSTON, Killed in Action, 3 November 1917, 2 Australian Light Horse.
Theophilus JONES, Died of Wounds, 6 December 1915, 2 Australian Light Horse.
Walter William Robert JONES, Killed in Action, 9 August 1916, 2 Australian Light Horse.
Marshall Vivian Henry JURY, Killed in Action, 25 August 1915, 2 Australian Light Horse.
Stanley Ivan KAISER, Killed in Action, 7 August 1915, 2 Australian Light Horse.
Austin KEANE, Killed in Action, 4 August 1916, 2 Australian Light Horse.
Francis KELLY, Killed in Action, 31 October 1917, 2 Australian Light Horse.
John Algar KELLY, Died of Disease, 17 May 1916, 2 Australian Light Horse.
William Charles KELLY, Killed in Action, 14 July 1918, 2 Australian Light Horse.
John KELSALL, Died of Wounds, 4 November 1917, 2 Australian Light Horse.
Albert Cheeseman KEMP, Died of Wounds, 14 April 1918, 2 Australian Light Horse.
William KEMP, Died of Wounds, 27 April 1917, 2 Australian Light Horse.
Victor Iredale Norman KENNETT, as a Prisoner of War, Died in Captivity, 9 February 1917, 2 Australian Light Horse.
James KERR, Killed in Action, 29 June 1915, 2 Australian Light Horse.
Basil KERSLAKE, Died of Wounds, 5 August 1916, 2 Australian Light Horse.
Ernest William KIDD, Killed in Action, 12 April 1918, 2 Australian Light Horse.
Edmund KILEY, Killed in Action, 7 August 1915, 2 Australian Light Horse.
Philip Darby KILLICOAT, Died of Wounds, 19 September 1915, 2 Australian Light Horse.
Phillip Darby KILLICOAT, Died of Wounds, 19 September 1915, 2 Australian Light Horse.
James Henry KIMBER, Killed in Action, 17 May 1915, 2 Australian Light Horse.
William John KING, Died of Accident, 9 December 1916, 2 Australian Light Horse.
William Keith KING, Killed in Action, 14 July 1918, 2 Australian Light Horse.
Martin Michael KINNANE, Died of Disease, 19 April 1916, 2 Australian Light Horse.
Alfred Charles KIRK, Killed in Action, 11 April 1918, 2 Australian Light Horse.
James KIRKWOOD, Killed in Action, 18 March 1917, 2 Australian Light Horse.
Leslie Matthew KIRLEY, Killed in Action, 3 November 1917, 2 Australian Light Horse.
Fred Johnston KNOWLING, Died of Wounds, 12 November 1917, 2 Australian Light Horse.
Cyrus Havelock LADE, Died of Wounds, 23 April 1917, 2 Australian Light Horse.
Marshall John LADNER, Died of Disease, 4 June 1918, 2 Australian Light Horse.
William Roy LANG, Died of Wounds, 31 October 1917, 2 Australian Light Horse.
Thomas Edward LANGRIDGE, Killed in Action, 18 May 1917, 2 Australian Light Horse.
Leslie Reed LANGTRY, Killed in Action, 4 December 1917, 2 Australian Light Horse.
Stanley Collin LARKIN, Died of Disease, 28 October 1918, 2 Australian Light Horse.
John LAUDER, Killed in Action, 7 August 1915, 2 Australian Light Horse.
Jack LAW, Killed in Action, 9 January 1917, 2 Australian Light Horse.
Oscar Michael LAWLER, Killed in Action, 22 December 1917, 2 Australian Light Horse.
Alfred Thomas LEATCH, Died of Accident, 3 March 1916, 2 Australian Light Horse.
Edwin Alexander LEESE, Killed in Action, 9 January 1917, 2 Australian Light Horse.
Patrick Joseph LENEHAN, Killed in Action, 31 October 1917, 2 Australian Light Horse.
Harry LEWRY, Killed in Action, 11 October 1918, 2 Australian Light Horse.
Cecil Reginald John LIDSTER, Killed in Action, 20 May 1915, 2 Australian Light Horse.
Frederick Thomas LINDBECK, Died of Disease, 23 October 1918, 2 Australian Light Horse.
Thomas Francis LINDSAY, Killed in Action, 14 July 1918, 2 Australian Light Horse.
Patrick Price LINNAN, Died of Disease, 4 November 1918, 2 Australian Light Horse.
Walter LITCHFIELD, Killed in Action, 31 October 1917, 2 Australian Light Horse.
Thomas James LOGAN, Killed in Action, 7 August 1915, 2 Australian Light Horse.
Thomas Andrew LOMAN, Killed in Action, 3 July 1918, 2 Australian Light Horse.
Everard Claude LONSDALE, Killed in Action, 18 May 1915, 2 Australian Light Horse.
Walter Bernard LORD, Killed in Action, 4 August 1916, 2 Australian Light Horse.
Edward Whitaker LOWNDES, Died of Wounds, 28 May 1915, 2 Australian Light Horse.
Donald Grantworth LUCAS, Died of Wounds, 15 July 1918, 2 Australian Light Horse.
Wilfred LUDBEY, Died of Wounds, 6 August 1916, 2 Australian Light Horse.
John Kenneth LUSH, Killed in Action, 7 August 1915, 2 Australian Light Horse.
Michael William Charles LYONS, Died of Accident, 9 March 1916, 2 Australian Light Horse.
Alfred MACDONALD, Died of Wounds, 3 June 1916, 2 Australian Light Horse.
Ronald Alexander Leslie MacDONALD, Killed in Action, 9 August 1916, 2 Australian Light Horse.
Thomas MacLEAN, Died of Wounds, 20 August 1915, 2 Australian Light Horse.
Lionel MacNAMARA, Killed in Action, 20 May 1915, 2 Australian Light Horse.
Sidney Alfred MADDISON, Killed in Action, 31 October 1917, 2 Australian Light Horse.
Percival MANN, Died of Wounds, 28 March 1918, 2 Australian Light Horse.
Edward Charles MANSON, Killed in Action, 18 May 1915, 2 Australian Light Horse.
Alfred Percy MARKS, Died of Disease, 23 November 1917, 2 Australian Light Horse.
William Lynn MARKS, Killed in Action, 11 April 1918, 2 Australian Light Horse.
William Ernest MARKWELL, Killed in Action, 31 October 1917, 2 Australian Light Horse.
Cecil James MARSON, Killed in Action, 7 August 1915, 2 Australian Light Horse.
George Bernard MARTIN, Died of Wounds, 1 November 1917, 2 Australian Light Horse.
John Thomas MARTIN, Killed in Action, 3 November 1917, 2 Australian Light Horse.
George Alexander Lewis MASTERS, Killed in Action, 5 July 1915, 2 Australian Light Horse.
Sydney George MASTERS, Killed in Action, 14 July 1918, 2 Australian Light Horse.
Alfred MATTHEWS, Killed in Action, 9 January 1917, 2 Australian Light Horse.
William James Alexander McALLISTER, Died of Wounds, 24 May 1915, 2 Australian Light Horse.
Allen Stuart McARTHUR, Killed in Action, 18 May 1915, 2 Australian Light Horse.
Norman Harold McBRIDE, Killed in Action, 22 December 1917, 2 Australian Light Horse.
William Edward McCANN, Died of Disease, 11 April 1916, 2 Australian Light Horse.
Robert James McCREEDY, Died of Disease, 16 November 1915, 2 Australian Light Horse.
Archibald McDONALD, Died of Wounds, 1 November 1917, 2 Australian Light Horse.
Murdock McDONALD, Died of Wounds, 7 July 1916, 2 Australian Light Horse.
Eugene McGOWAN, Killed in Action, 22 May 1915, 2 Australian Light Horse.
Frank Noel McGOWEN, Died of Wounds, 24 August 1915, 2 Australian Light Horse.
Ernest John McINDOE, Killed in Action, 4 June 1915, 1 Australian Light Horse.
Roy William McINDOE, Died of Disease, 16 December 1915, 1 Australian Light Horse.
William Joseph McINTOSH, Died of Disease, 18 October 1918, 1 Australian Light Horse.
Norman Alexander Peter McINTYRE, Died of Disease, 22 October 1918 at sea, 1 Australian Light Horse.
Arundel James Gwydir McKID, Killed in Action, 3 November 1917, 1 Australian Light Horse.
Alexander McKINNON, Died of Wounds, 1 September 1915, 1 Australian Light Horse.
Duncan McKINNON, Died of Disease, 15 December 1915, 1 Australian Light Horse.
Archibald Kendell McLACHLAN, Died of Disease, 4 June 1915, 1 Australian Light Horse.
Joseph Patrick McMAHON, Died of Accident, 15 March 1916, 1 Australian Light Horse.
Allan Gordon McMARTIN, Died of Wounds, 1 November 1917, 1 Australian Light Horse.
Edward McPHERSON, Died of Wounds, 11 November 1917, 1 Australian Light Horse.
William McQUIGGIN, Killed in Action, 4 August 1916, 1 Australian Light Horse.
John Hugh McRAE, Died of Wounds, 15 August 1915, 1 Australian Light Horse.
Alfred MELVILLE, Killed in Action, 9 August 1916, 1 Australian Light Horse.
Frederick Dudley MELVILLE, Died of Disease, 15 October 1918, 1 Australian Light Horse.
Joseph Charles MERRITT, Died of Disease, 12 October 1918, 1 Australian Light Horse.
Walter MILFORD, Killed in Action, 11 August 1915, 1 Australian Light Horse.
Ernest Cameron MOFFAT, Killed in Action, 18 May 1915, 1 Australian Light Horse.
William George MOREN, Killed in Action, 29 June 1915, 1 Australian Light Horse.
Joseph Andrew MORGAN, Died of Wounds, 14 August 1916, 1 Australian Light Horse.
Walter Tertius MORRICE, Died of Wounds, 28 September 1918, 1 Australian Light Horse.
George John MORRISON, Died of Wounds, 5 November 1917, 1 Australian Light Horse.
Vivian Roy MORROW, Killed in Action, 4 August 1916, 1 Australian Light Horse.
Ralph Graham MOTTERSHEAD, Killed in Action, 4 August 1916, 1 Australian Light Horse.
Thomas William MOUNTAIN, Killed in Action, 3 November 1917, 1 Australian Light Horse.
Patrick Joseph MOY, Killed in Action, 16 May 1915, 1 Australian Light Horse.
Malcolm MUDGE, Died of Disease, 11 October 1918, 1 Australian Light Horse.
Albert Stanley MUIR, Killed in Action, 5 November 1917, 1 Australian Light Horse.
Donald Stewart MUNRO, Killed in Action, 1 June 1916, 1 Australian Light Horse.
John Eric MUNRO, Died of Disease, 1 April 1919, 1 Australian Light Horse.
David MURRAY, Killed in Action, 17 June 1915, 1 Australian Light Horse.
John Robert MURRAY, Killed in Action, 10 July 1918, 1 Australian Light Horse.
Archibald John MYCHAEL, Killed in Action, 21 August 1915, 1 Australian Light Horse.
Allan William NASH, Killed in Action, 29 June 1915, 1 Australian Light Horse.
Isaac Thomas NASH, Died of Accident, 5 March 1916, 1 Australian Light Horse.
Sydney John NELSON, Died of Disease, 24 October 1918, 1 Australian Light Horse.
John NEWTON, Killed in Action, 9 October 1915, 1 Australian Light Horse.
Henrie Clarence NICHOLAS, Killed in Action, 4 August 1916, 1 Australian Light Horse.
Arthur Richard NICHOLL, Died of Wounds, 22 January 1917, 1 Australian Light Horse.
Donald NICHOLSON, Died of Disease, 11 October 1918, 1 Australian Light Horse.
George Rawdon Ffrench NOBBS, Died of Wounds, 8 March 1918, 1 Australian Light Horse.
George NOBLE, Killed in Action, 14 November 1917, 1 Australian Light Horse.
Thomas O'CALLAGHAN, Killed in Action, 4 August 1916, 1 Australian Light Horse.
Lawrence Raymond O'CONNOR, Died of Wounds, 16 July 1918, 1 Australian Light Horse.
Lawrence Patrick O'DONNELL, Died of Wounds, 5 April 1918, 1 Australian Light Horse.
Michael O'DONNELL, Died of Wounds, 17 July 1918, 1 Australian Light Horse.
Tom Alexander OGG, Killed in Action, 14 July 1918, 1 Australian Light Horse.
James OGILVY, Killed in Action, 2 August 1915, 1 Australian Light Horse.
John O'LEARY, Killed in Action, 11 November 1915, 1 Australian Light Horse.
John OSBORN, Died of Wounds, 1 November 1917, 1 Australian Light Horse.
Albert Edward OSWIN, Killed in Action, 14 May 1915, 1 Australian Light Horse.
Kenneth Alexander PARKER, Died of Disease, 20 April 1915, 1 Australian Light Horse.
William Joseph PARKES, Killed in Action, 9 August 1916, 1 Australian Light Horse.
Andrew Cameron PAUL, Killed in Action, 4 June 1915, 1 Australian Light Horse.
Frank Henderson PAUL, Killed in Action, 22 May 1915, 1 Australian Light Horse.
George Francis PAUL, Died of Disease, 18 April 1916, 1 Australian Light Horse.
William James PEACH, Killed in Action, 14 July 1918, 1 Australian Light Horse.
Gerald Fitzroy PEACOCK, Killed in Action, 7 August 1915, 1 Australian Light Horse.
Harold Edward PEAK, Killed in Action, 28 October 1916, 1 Australian Light Horse.
Edward Charles Henry PEARCE, Killed in Action, 7 August 1915, 1 Australian Light Horse.
Wilfred Morris PEARCE, Died of Disease, 5 July 1915, 1 Australian Light Horse.
Bertram Wellesley PEARSE, Died of Wounds, 25 May 1915, 1 Australian Light Horse.
James Elia Bertram PEISLEY, Died of Disease, 17 October 1918, 1 Australian Light Horse.
Henry James PELHAM, Died of Disease, 18 March 1919, 1 Australian Light Horse.
Thomas Albert PERKINS, Killed in Action, 11 April 1918, 1 Australian Light Horse.
Walter Delwyn PERKINS, Died of Disease, 27 March 1915, 1 Australian Light Horse.
Harry James PERROTT, Died of Disease, 12 October 1915, 1 Australian Light Horse.
Edward PETERSON, Died of Wounds, 3 November 1915, 1 Australian Light Horse.
Leslie Keith Gordon PETERSON, Killed in Action, 27 September 1917, 1 Australian Light Horse.
Aubrey PICKERING, Died of Wounds, 10 December 1917, 1 Australian Light Horse.
Charles Edward PLUMMER, Killed in Action, 7 August 1915, 1 Australian Light Horse.
Alfred Thomas POOLE, Died of Wounds, 20 August 1915, 1 Australian Light Horse.
John Gladstone POPE, Killed in Action, 26 May 1915, 1 Australian Light Horse.
John Daniel POTTER, Killed in Action, 1 June 1916, 1 Australian Light Horse.
William Lewis POWELL, Died of Disease, 26 October 1918, 1 Australian Light Horse.
Clarence Bertram POYSER, Died of Disease, 3 December 1916, 1 Australian Light Horse.
Leopold Clarence PRATT, Killed in Action, 11 November 1915, 1 Australian Light Horse.
Thomas PRICE, Died of Disease, 26 July 1915, 1 Australian Light Horse.
Philip Edward PRIME, Died of Disease, 28 October 1918, 1 Australian Light Horse.
Cecil Roy PURKIS, Died of Disease, 15 February 1919, 1 Australian Light Horse.
Arthur Richard QUARMBY, Killed in Action, 1 May 1918, 1 Australian Light Horse.
John William QUINN, Killed in Action, 22 May 1915, 1 Australian Light Horse.
Clarence William RADBURN, Killed in Action, 28 September 1918, 1 Australian Light Horse.
Joseph Charles RADNELL, Killed in Action, 4 August 1916, 1 Australian Light Horse.
John James RAFFERTY, Killed in Action, 5 November 1917, 1 Australian Light Horse.
Clem RANFORD, Killed in Action, 31 October 1917, 1 Australian Light Horse.
Joseph Marmion RANFORD, Killed in Action, 21 June 1916, 1 Australian Light Horse.
Oswald Lewis RAYMOND, Died of Accident, 13 September 1917, 1 Australian Light Horse.
Colin Morgan READE, Killed in Action, 30 May 1915, 3 Australian Light Horse.
Cuthbert Noel RICHARDSON, Killed in Action, 7 August 1915, 3 Australian Light Horse.
Cuthbert Noel RICHARDSON, Killed in Action, 7 August 1915, 3 Australian Light Horse.
Alan Serafino RIGHETTI, Killed in Action, 4 August 1916, 3 Australian Light Horse.
Bertie George RIXON, Killed in Action, 14 July 1918, 3 Australian Light Horse.
Alfred Charles ROBBINS, Died of Wounds, 13 June 1915, 3 Australian Light Horse.
Clive ROBERTS, Killed in Action, 9 January 1917, 3 Australian Light Horse.
Alexander ROBERTSON, Killed in Action, 27 June 1918, 3 Australian Light Horse.
Francis Kersey James ROBERTSON, Killed in Action, 9 January 1917, 3 Australian Light Horse.
Robert Hill ROBERTSON, Died of Wounds, 10 January 1917, 3 Australian Light Horse.
Allan David ROBINSON, Died of Wounds, 21 October 1915, 3 Australian Light Horse.
Frederick Charles ROBINSON, Died of Wounds, 4 November 1917, 3 Australian Light Horse.
Alan Chamberlin RODGERS, Died of Wounds, 2 November 1917, 3 Australian Light Horse.
Benjamin ROGERS, Died of Wounds, 1 June 1916, 3 Australian Light Horse.
Ernest Arthur ROGERS, Killed in Action, 9 January 1917, 3 Australian Light Horse.
Arthur Kingston ROSENTHALL, Died of Disease, 29 May 1915, 3 Australian Light Horse.
Sinclair Archibald ROSIE, Died of Disease, 15 October 1916, 3 Australian Light Horse.
John Roy ROSS, Died of Wounds, 8 September 1915, 3 Australian Light Horse.
Leslie ROSS, Died of Accident, 7 April 1915, 3 Australian Light Horse.
Leonard ROSSBACH, Died of Disease, 9 December 1918, 3 Australian Light Horse.
Werner Eric ROSSBACH, Killed in Action, 28 March 1918, 3 Australian Light Horse.
Clancy Vernon RUFFELS, Died of Disease, 12 October 1918, 3 Australian Light Horse.
Victor Francis RULE, Died of Disease, 13 October 1918, 3 Australian Light Horse.
Jack Clive SAMS, Died of Wounds, 13 May 1915, 3 Australian Light Horse.
Morton Reginald SANDLAND, Killed in Action, 31 October 1917, 3 Australian Light Horse.
George Edward SCHADEL, Killed in Action, 14 July 1918, 3 Australian Light Horse.
Thomas Moffatt SCOTT, Killed in Action, 14 July 1918, 3 Australian Light Horse.
Peter Patrick SEERY, Killed in Action, 7 November 1917, 3 Australian Light Horse.
Norman George SELFF, Died of Wounds, 11 August 1916, 3 Australian Light Horse.
Roy Stanley SEWELL, Killed in Action, 4 August 1916, 3 Australian Light Horse.
William SHARPE, Died of Wounds, 13 August 1915, 3 Australian Light Horse.
George Edmund SHEPHERD, Died of Accident, 21 December 1916, 3 Australian Light Horse.
Sidney George SHERRIN, Died of Accident, 4 April 1919, 3 Australian Light Horse.
Frederick Herbert SHERWOOD, Killed in Action, 7 August 1915, 3 Australian Light Horse.
Harold Samuel SHERWOOD, Killed in Action, 7 August 1915, 3 Australian Light Horse.
William Cecil SIBLEY, Died of Disease, 22 December 1918, 3 Australian Light Horse.
David Harold Maclean SINCLAIR, Killed in Action, 20 April 1917, 3 Australian Light Horse.
Harold SINCLAIR, Died of Disease, 15 October 1918, 3 Australian Light Horse.
Arnold Lealand SIVIOUR, Killed in Action, 14 July 1918, 3 Australian Light Horse.
Walter Edward SMALE, Killed in Action, 7 August 1915, 3 Australian Light Horse.
Hector SMALL, Died of Disease, 4 July 1915, 3 Australian Light Horse.
Luide Ross Edward SMITH, Died of Wounds, 18 June 1915, 1 Australian Light Horse Field Ambulance Australian Army Medical Corps.
Reginald Sydney SMITH, Died of Wounds, 19 June 1915, 3 Australian Light Horse.
Sydney Ernest George SMITH, Died of Accident, 12 February 1916, 3 Australian Light Horse.
Walter Stephen SMITH, Killed in Action, 3 November 1917, 3 Australian Light Horse.
Wilfred SMITH, Killed in Action, 4 August 1916, 3 Australian Light Horse.
James SOMMERVILLE, Died of Disease, 10 April 1917, 3 Australian Light Horse.
Mordaunt SPRY, Killed in Action, 16 November 1915, 3 Australian Light Horse.
John Albert Theodore STANDING, Killed in Action, 8 August 1915, 3 Australian Light Horse.
Edgar Roy STANFORD, Died of Wounds, 1 August 1915, 3 Australian Light Horse.
Francis Theodore STANTON, Died of Wounds, 11 January 1917, 3 Australian Light Horse.
Gordon John STAUDE, Died of Disease, 25 October 1918, 3 Australian Light Horse.
Thomas STEVENSON, Died of Disease, 26 September 1915, 1 Australian Light Horse.
Donald Edward STEWART, Died of Disease, 6 August 1915, 3rd Australian Light Horse.
Hugh John STEWART, Died of Disease, 3 September 1915, 3rd Australian Light Horse.
William Henry STRIBLEY, Killed in Action, 4 August 1916, 1 Australian Light Horse.
James Rylstone STRUTHERS, Died of Disease, 21 December 1916, 2nd Australian Light Horse.
Herbert Angus SULLINGS, Killed in Action, 31 October 1917, 1 Australian Light Horse.
George SULLIVAN, Killed in Action, 4 August 1916, 1 Australian Light Horse Machine Gun Squadron.
Jack SULLIVAN, Died of Disease, 1 November 1918, 2nd Australian Light Horse.
William John SULLIVAN, Killed in Action, 29 June 1915, 3rd Australian Light Horse.
Walter SWANSTON, Died of Wounds, 1 November 1917, 2nd Australian Light Horse.
Ernest Edward SWEEDMAN, Killed in Action, 15 July 1918, 1 Australian Light Horse.
Thomas John SYMES, Killed in Action, 1 June 1916, 2nd Australian Light Horse.
Albert William John TALLENTIRE, Killed in Action, 14 May 1915, 2nd Australian Light Horse.
Harold Hammond TAYLOR, Died of Disease, 13 June 1916, 1 Australian Light Horse Machine Gun Squadron.
James Raymond TAYLOR, Died of Disease, 8 June 1917, 2nd Australian Light Horse.
Tom Braithwaite TAYLOR, Killed in Action, 9 January 1917, 2nd Australian Light Horse.
William Frederick TAYLOR, Killed in Action, 7 August 1915, 2nd Australian Light Horse.
William Henry THOMAS, Died of Disease, 12 August 1915, 2nd Australian Light Horse.
John Charles THOMPSON, Killed in Action, 10 November 1915, 2nd Australian Light Horse.
Reginald Hope THRELFALL, Killed in Action, 8 August 1915, 3rd Australian Light Horse.
Stanley Stevenson THURLOW, Died of Wounds, 21 August 1915, 3rd Australian Light Horse.
Gordon TIMBRELL, Killed in Action, 1 July 1915, 1 Australian Light Horse.
Gladstone James TODD, Died of Wounds, 20 April 1917, 1 Australian Light Horse.
Thomas Alexander TOLAND, Died of Disease, 23 October 1918, 2nd Australian Light Horse.
Alfred Gibbs TOLMAN, Killed in Action, 4 August 1916, 2nd Australian Light Horse.
David TOMLINSON, Killed in Action, 11 July 1915, 1 Australian Light Horse.
Charles Albert TONQUEST, Died of Wounds, 1 June 1916, 2nd Australian Light Horse.
William TOOHEY, Killed in Action, 4 August 1916, 3rd Australian Light Horse.
Archibald Stuart TREGILGAS, Died of Wounds, 1 November 1917, 2nd Australian Light Horse.
Henry Charles TROWBRIDGE, Died of Wounds, 1 November 1917, 3rd Australian Light Horse.
Harold TUCK, Died of Wounds, 1 November 1917, 3rd Australian Light Horse.
Arthur Harold TUCKER, Died of Wounds, 22 December 1917, 1 Australian Light Horse.
Malcolm TUCKER, Died of Disease, 15 July 1916, 1 Australian Light Horse.
Michael TUCKEY, Killed in Action, 4 August 1916, 2nd Australian Light Horse.
Ernest Douglas TURNER, Died of Wounds, 21 April 1917, 2nd Australian Light Horse.
Richard Mallett UNDERHILL, Killed in Action, 14 May 1915, 1 Australian Light Horse.
Richard James UNDERWOOD, Died of Wounds, 20 January 1917, 2nd Australian Light Horse.
John Stanley WADE, Died of Wounds, 14 May 1915, 3rd Australian Light Horse.
Eric WALKER, Killed in Action, 12 August 1915, 3rd Australian Light Horse.
Albert Stuart WALLACE, Killed in Action, 31 October 1917, 2nd Australian Light Horse.
Herbert Alexander WARD, Killed in Action, 9 August 1916, 2nd Australian Light Horse.
John Edward Newman WARD, as a Prisoner of War, Died in Captivity, 6 March 1917, 3rd Australian Light Horse.
Vernon WARE, Died of Disease, 3 April 1916, 1 Australian Light Horse.
Douglas Linly Roy WATSON, Killed in Action, 19 May 1915, 1 Australian Light Horse Machine Gun Squadron.
Roderick Noel White WEAVER, Killed in Action, 4 August 1916, 1 Australian Light Horse Machine Gun Squadron.
Tasman Laurence WEBSTER, Killed in Action, 31 May 1915, 2nd Australian Light Horse.
William Horace WELLS, Killed in Action, 11 April 1918, 1 Australian Light Horse.
Jack Frederick James WENTFORD, Died of Wounds, 21 May 1915, 1 Australian Light Horse.
William Henry WEST, Died of Accident, 15 March 1915, 2nd Australian Light Horse.
John Vernon WHITE, Died of Wounds, 12 January 1917, 1 Australian Light Horse.
Robert Henry James WHITE, Died of Wounds, 14 August 1916, 2nd Australian Light Horse.
Wilfred Allan WHITE, Killed in Action, 3 September 1915, 1 Australian Light Horse.
Gordon Percy WHITFIELD, Died of Disease, 19 July 1915, 3rd Australian Light Horse.
William Arthur WHITTLE, Killed in Action, 18 May 1915, 1 Light Horse Field Ambulance Australian Army Medical Corps.
Wilfred WILKINSON, Killed in Action, 18 June 1918, 2nd Australian Light Horse.
George Charles WILLIAMS, Killed in Action, 26 May 1915, 3rd Australian Light Horse.
Joseph WILLIAMS, Killed in Action, 3 November 1917, 3rd Australian Light Horse.
Frank Lindsay WILLIS, Died of Wounds, 4 August 1916, 2nd Australian Light Horse.
Augustus George Maryon WILSON, Killed in Action, 14 May 1915, 1 Australian Light Horse.
Graeme Lang WILSON, Killed in Action, 19 May 1915, 3rd Australian Light Horse.
Wright Trevor WILSON, Killed in Action, 7 August 1915, 3rd Australian Light Horse.
George James Argent WING, Died of Disease, 6 February 1915, 1 Australian Light Horse.
Alfred Thomas WINTERTON, Killed in Action, 4 August 1916, 2nd Australian Light Horse.
Robert WISE, Killed in Action, 20 May 1915, 1 Australian Light Horse.
Harold Victor WOODS, Died of Wounds, 12 November 1917, 2nd Australian Light Horse.
Percy Severn Roy WOODYATT, Killed in Action, 4 August 1916, 2nd Australian Light Horse.
Stewart Chris WOOLNOUGH, Died of Disease, 22 December 1916, 2nd Australian Light Horse.
Alfred Clive WOOSTER, Died of Wounds, 2 November 1917, 3rd Australian Light Horse.
John Robert WRIGHT, Killed in Action, 3 November 1917, 1 Australian Light Horse Field Ambulance Australian Army Medical Corps.
Edward WYLIE, Killed in Action, 7 August 1915, 3rd Australian Light Horse.
Peter ZEISSER, Killed in Action, 7 August 1915, 2nd Australian Light Horse.
